Backing up your files is an important part of protecting and maintaining your computer. If you accidentally deleted a file or lose files due to a computer problem, you can recover them with a backup.
Time Machine is a Mac OS X application that allows you to back up everything on your computer on a regular basis without any additional work on your part after the initial set up. The first time you use Time Machine, it backs up everything on your computer, including system files, applications, accounts, preferences, music, photos, movies, and documents. As you work and make changes on your computer, Time Machine backs up only the things that have changed.
Time Machine works best when you dedicate and use the same disk for you backups. You can use an internal or external disk as the back up disk. When you attach an external disk to your Mac computer, Time Machine asks if you want to use the device for backups and automatically sets everything up for you.
Backups are organized and store by date. You can browse and recover individual files, folders, or your entire computer. You can also burn backup CDs and DVDs, copy files onto another disk, or use your iDisk if you have a MobileMe account.
Time Machine works best when you dedicate and use the same disk for your backups. You can use an internal (except for your startup disk) or external disk (such as a FireWire or USB disk) as the back up disk. If you have partitioned a disk, you can use the partition as a back up disk too. The disk you use must be in the Mac OS Extended (Journaled) format, and must have Access Control Lists (ACLs) enabled. When you attach an external disk to your Mac computer, Time Machine asks if you want to use the device for backups and automatically sets everything up for you. The first time you start Time Machine, the program backs up everything on your computer. This may take a while, so it would good to start the initial set up and use for a time when your computer is idle, such as a late evening or weekend, so it can work overnight. However, if you use Time Capsule (a wireless hard drive designed to work with Time Machine), it’s about 50 percent faster (New!). As you work and make changes on your computer, Time Machine backs up only the things that have changed.
 Click System Preferences icon in the Dock, and then click the Time Machine icon.
On first use, you can click the Time Machine icon in the Dock, and then click Start Preferences.
 To show a status menu, select the Show Time Machine status in the menu bar check box (New!).
 Slide the switch to ON.
 Click Select Backup Disk.
If you have Time Capsule, click Set Up Time Capsule to use the AirPort Utility to set it up.
 Click one of the available disks you can use for backups.
 Click Use for Backup.
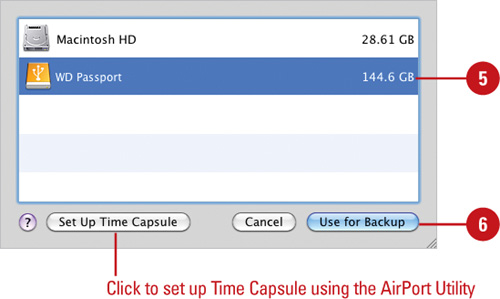
 If your disk needs to be erased before you can use it with Time Machine, click Erase or Choose Another Disk.
 Click the Close button.
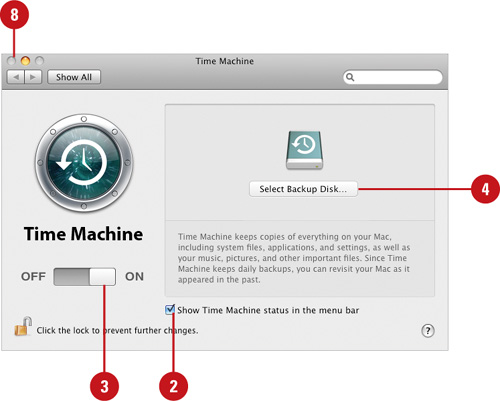
Time Machine keeps track of everything on your Mac computer. The first time you start Time Machine, the program backs up everything on your computer. As you work and make changes on your computer, Time Machine backs up only the things that have changed. If you want to manually perform a backup, you can Control-click the Time Machine icon in the Dock or click the Time Machine Status menu (New!) to access the Back Up Now command.
- Control-click the Time Machine icon in the Dock or click the Time Machine Status menu.
- Click Back Up Now.
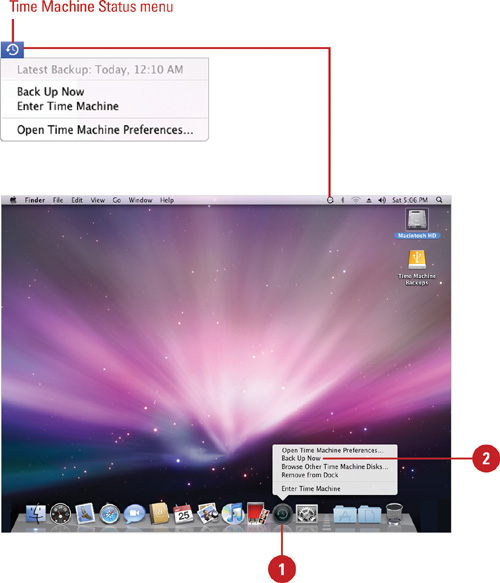
Time Machine status information appears in the Time Machine Status menu.
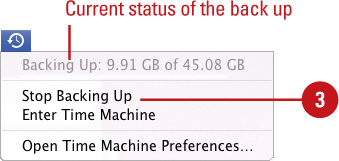
- To stop the backup, Control-click the Time Machine icon in the Dock or click the Time Machine Status menu, and then click Stop Backing Up.
You can also click the Stop button (X) in the Time Machine preferences window.
Did You Know?
You can backup files to your iDisk. If you have an iDisk, you can’t use it with Time Machine. Instead, you can use the Backup utility to copy files to your iDisk; check the MobileMe Web site at www.apple.com/mobileme/. In addition, Backup can also copy files to CDs or DVDs.
If you already have copies of files, such as third-party programs (Microsoft Office, Adobe Creative Suite, etc.), on CD, DVD, or in another location, you can exclude them from regular backups to save space on your backup disk. Time Machine assumes you want to back everything up unless you specifically add it to the nonbackup list, which you can modify using Time Machine preferences.
- Click System Preferences icon in the Dock, and then click the Time Machine icon.
- Click Options.

A list appears with the available disks you can use for backups with Time Machine.
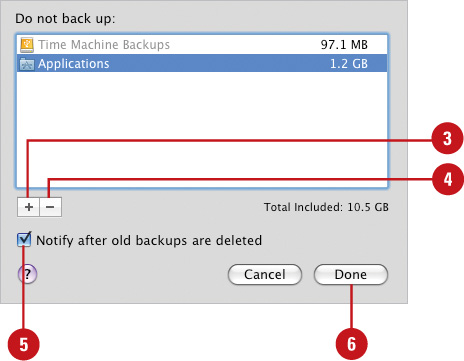
- Click Add (+), and then select the items you don’t want to be backed up, and then click Exclude.
If you select the System folder, an alert appears, asking you for confirmation.
The backup disk is automatically included in the list.
- To remove an item from the list, select the items you want to be backed up, and then click Remove (-).
- Select or clear the Notify after old backups are deleted check box.
- Click Done.
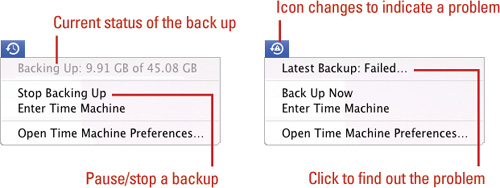
If a backup is interrupted for some reason, such as a network connection problem, detached external disk, or power outage, Time Machine tries to automatically resume the backup when the problem is corrected. If Time Machine doesn’t automatically resume, you can manually restart it. If you want to pause a backup, you can also manually stop it by Time Machine icon in the Dock or by using the Time Machine Status menu (New!). The Time Machine Status menu icon rotates as the takes place. If a problem occurs, the icons changes to an alert symbol. Also, the first item on the menu displays status information about the current or last back up.
Pause/stop a backup. Press the Control key while you click the Time Machine icon in the Dock or click the Time Machine Status menu, and then click Stop Backing Up.
Resume/start a backup. Press the Control key while you click the Time Machine icon in the Dock or click the Time Machine Status menu, and then click Back Up Now.

Run out of space. As the backup disk fills up, Time Machine deletes older backups to make room for new ones. If you run out of space, you can attach a new backup disk to complete the process.
Did You Know?
You can back up all the Macs in your wireless network. If you have a hard disk connected to your AirPort Extreme Base Station or Time Capsule, you can use Time Machine to back up all your Macs wirelessly. All you need to do is select your AirPort Disk or Time Capsule as the backup disk for each computer connected to the wireless network.
If you’ve been using Time Machine to back up your computer, and you lose or accidentally delete a file or folder, you can use Time Machine or Time Machine along with Spotlight to recover it. You can even recover older versions of files that you have changed. Spotlight makes it easy to perform a search for the backup file or folder you want to recover, and Time Machine allows you to recover it. The recovered item is restored to its original location on your computer. Time Machine may ask if you want to overwrite one or more folders so it can restore an item to its original location.
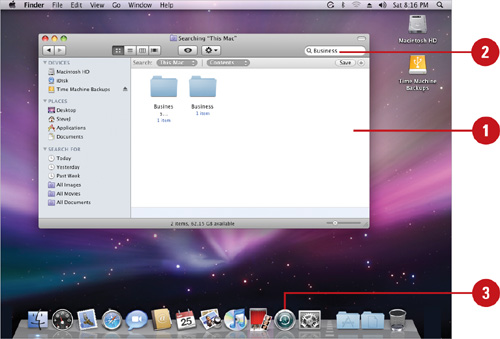
- Open a Finder window.
- Type a search word or phrase in the Search box from the item you want to recover.
- Click the Time Machine icon in the Dock.
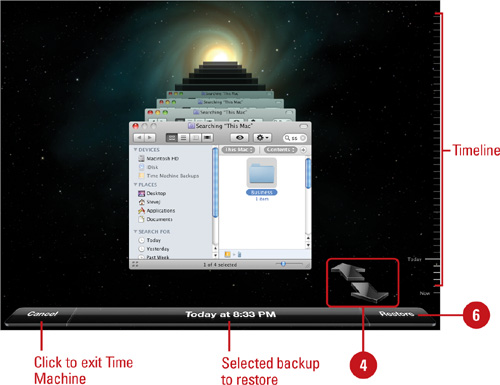
- Use the arrows and the timeline to browse through the Time Machine backups. Your search is performed in every window.
- Narrow down your search to find the item you want to restore, and then select it.
- Click Restore.
The window appears on the desktop along with a Copy dialog box.
- Click Keep Original to keep the original file instead of the backup, Keep Both to keep the original and the backup, or Replace to replace the original with the backup.
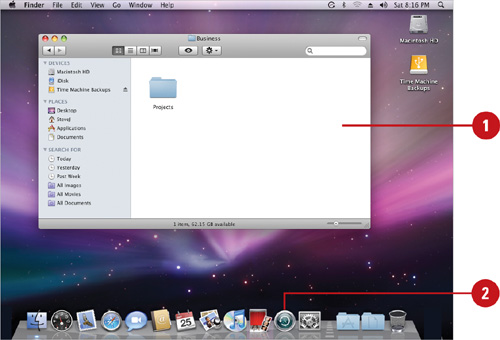
- Open the window or location (desktop or e-mail Inbox) where the recovered item will appear.
- Click the Time Machine icon in the Dock.
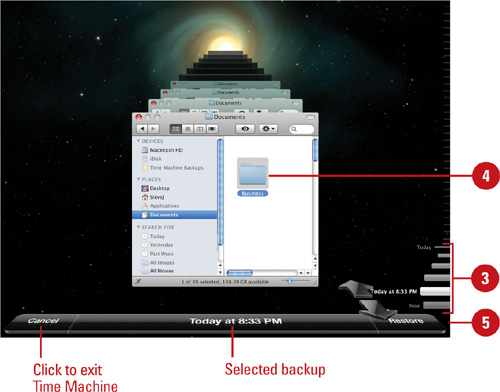
- Use the arrows and the timeline to browse through the Time Machine backups. Your search is performed in every window.
- When you find the item you want to restore, select it.
- Click Restore.
The window appears on the desktop along with a Copy dialog box.
- Click Keep Original to keep the original file instead of the backup, Keep Both to keep the original and the backup, or Replace to replace the original with the backup.

If your entire computer system or startup disk becomes corrupt or damaged, you can recover it using Time Machine. If you’re experiencing problems after you install a Mac OS X software update, you can use Time Machine to revert back to a previous version of the Mac OS to fix the problem. Remember, any additional changes you’ve made to your computer after installing the Mac OS X software update will be removed, so you need to make copies of those changes on another disk. To perform a recovery, you’ll need your Mac OS X Installation disc to start the process.
- Connect your Time Machine backup disk to your computer, if necessary.
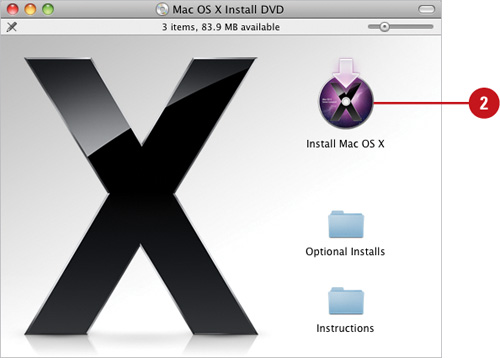
- Insert the Mac OS X Install disc, double-click the Install Mac OS X icon.
- Click Utilities, and then click Restart.
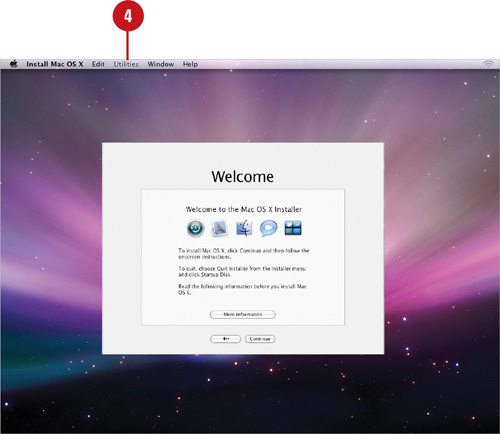
- In the installer, click the Utilities menu, and then click Restore System from Backup.

The Restore Your System dialog box appears.
- Click Continue.
- Select the Time Machine backup volume you want to use.
- Click Continue.
- Select the Time Machine backup you want to restore.
 Click Continue.
 Select the restore destination volume.
 Click Restore.
- Connect your Time Machine backup disk to your computer, if necessary.
- Insert the Mac OS X Install disc, double-click the Install Mac OS X icon, and then click Restart.
- Click Utilities, and then click Restart.
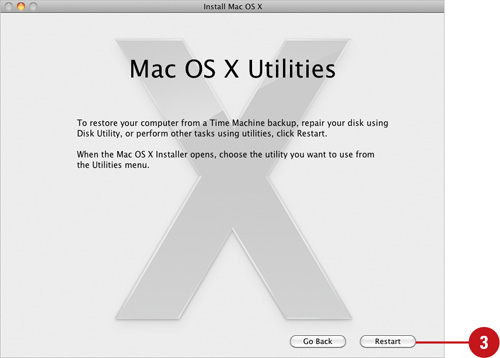
- In the installer, click the Utilities menu, and then click Restore System from Backup.
The Restore Your System dialog box appears.
- Click Continue.
- Select the Time Machine backup volume you want to use.
- Click Continue.
- Select the most recent Time Machine backup to restore your computer to the state it was before you installed an update.
- Click Continue.
- Select the restore destination volume.
- Click Restore.
If you can’t fit all the files and folders you want to backup onto a single CD or DVD, you can use the Disk Utility to create a compressed disk image of the files and folders. A disk image is a file that contains other files and folders you can mount on your desktop like a hard disk or CD or DVD disc. You can create a disk image with an existing disk, volume, CD or DVD, or folder, or create a blank one, and then drag files to it. After you create a disk image (.dmg extension), you can burn it on a CD or DVD, copy it to another Mac or network, or e-mail it to another Mac user. Creating a disk image of your Mac OS X installation disc is a useful way to make a backup copy of your Mac OS X installation for added protection.
- Click the Applications folder in the Dock, click the Utilities folder, and then click the Disk Utility icon.
- Click the File menu, point to New, and then click Disk Image from Folder or Disk Image from <disk name>.
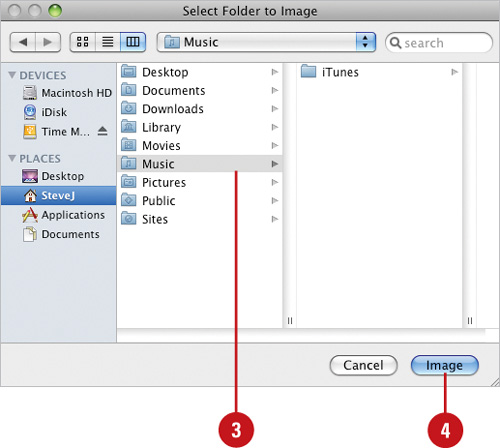
- If you want to create a disk image from a folder, select it.
- Click Image.
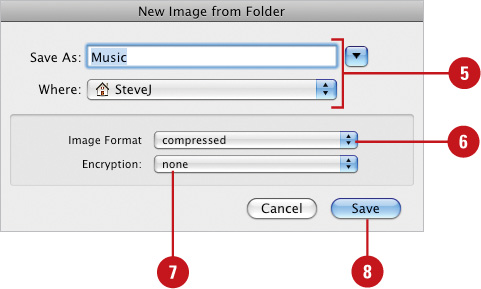
- Type the name you want for the disk image, and then specify the location where you want to save it.
- Click the Image Format pop-up, and then click compressed to create a smaller disk image or read-only to create a faster disk to create and open.
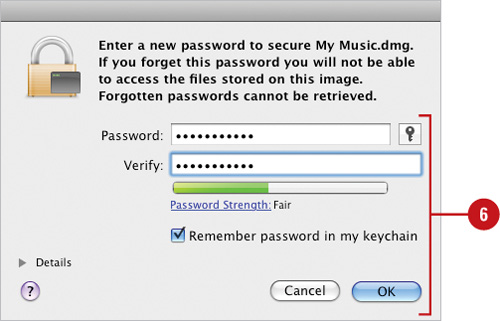
- To require a password to open the disk image, click the Encryption pop-up, and then select the option you want.
- Click Save. If you required a password, enter it twice, and then click OK.
- To restore a disk image, select the disk image, click the Images menu, and then click Scan Image for Restore.
- Click the Applications folder in the Dock, click the Utilities folder, and then click the Disk Utility icon.
- Click the File menu, point to New, and then click Blank Disk Image.
- Type a name for the disk image, and then specify the location where you want to save it.
- Select from the following options:
Enter a name or use the default.
Click the Size pop-up, and then select the size you want.
Select the Format pop-up, and then select Mac OS Extended (Journaled) for Mac computers or MS-DOS (FAT) for Windows or Mac computers.
To require a password to open the disk image, click the Encryption pop-up, and then select the option you want.
Click the Partitions pop-up, and then select the partition scheme that matches the type you want to create.
Click the Image Format pop-up, and then click read/write disk image.
- Click Create.

- If you required a password, enter it twice, and then click OK.
The blank new disk image mounts on your desktop.
- Drag the files and folders you want to include in the disk image onto the mounted disk on your desktop.
After you create a disk image, you can burn it on a CD or DVD, which makes it easy to make a backup copy of important files, move files to another computer, or share files with other Mac users. This is also a useful way to make a backup of your Mac OS X installation DVD from a disk image of the installation DVD disc. After you select the disk image you want to burn to a CD or DVD in Disk Utility, you can select the Burn options you want before the actual burn takes place.
- Click the Applications folder in the Dock, click the Utilities folder, and then click the Disk Utility icon.
- Click the Burn button on the toolbar.
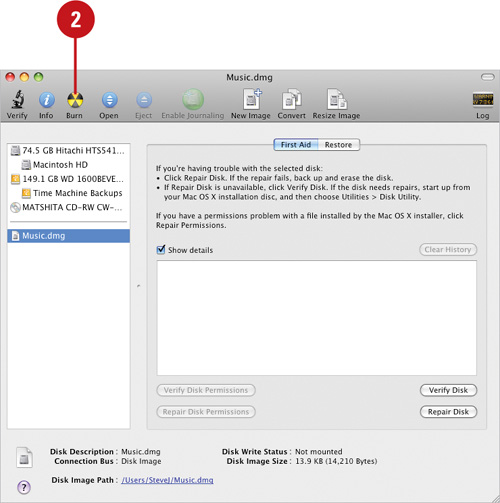
- Navigate to and select the disk image you want to burn.
- Click Burn.
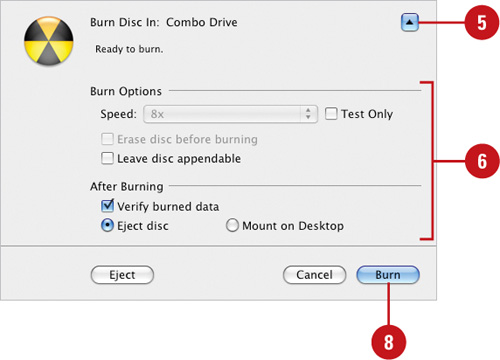
- Click the Down Arrow button to show advanced burn options.
- Select the Burn Options and After Burning settings you want.
- Insert a writable CD or DVD disc into your read/writable drive.
- Click Burn.
A status bar appears, indicating the current progress of the burn.
- Click OK.
After you create a disk image, you can use Disk Utility to restore it to a disk. This is useful when you want to re-create all the contents of the disk image to a disk. Disk Utility allows you to select the source and destination for the restored files. You can even erase the destination before the restoration occurs. If you only want to restore only a few files, you can access the content of the mounted disk image on your desktop like any other hard disk and copy it to another location.
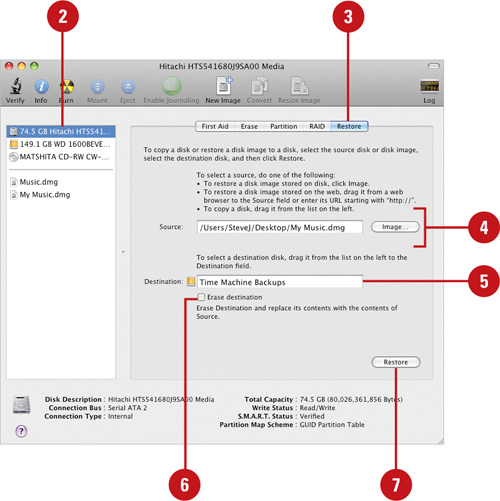
- Click the Applications folder in the Dock, click the Utilities folder, and then click the Disk Utility icon.
- Select the disk in the list at the left.
- Click the Restore tab.
- Drag the disk image to the Source field or click Image, and then select the disk image.
- Drag the destination disk you want to the Destination field.
- If you want to erase the disk before copying to it, select the Erase destination check box.
If you want to add the disk image’s content to the destination disk without erasing it, clear the Erase Destination check box.
- Click Restore, and then click Restore again to confirm the restoration.
If you can write (burn) files to a CD or DVD, you can create and use a burn folder to backup important files. Burn folders are useful for regularly backing up a set of files or for burning multiple copies of a folder. You can create a burn folder from the Finder. The files and folders you drag into the burn folder are ready to be written to a CD or DVD. The Finder creates aliases to the items in the burn folder. The original items are not moved. When you burn the files to a CD or DVD, the original files are burned to the disc.
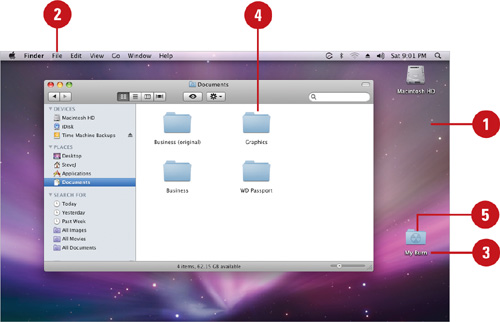
- Click the desktop background or open the window where you want to create and use a burn folder.
- Click the File menu, and then click New Burn Folder.
- Type a name for the burn folder.
- Drag the items you want to burn to a disc into the burn folder.
The Finder creates aliases to the items in the burn folder. The original items are not moved.
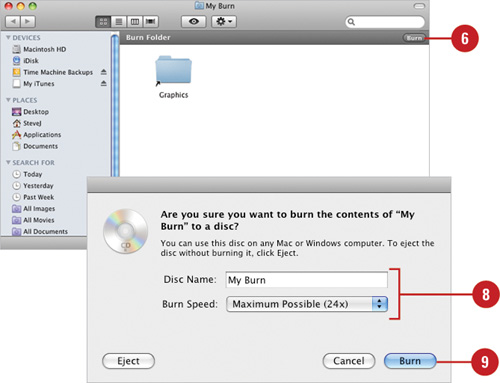
- Open the burn folder to burn a CD or DVD.
- Click Burn.
- Insert a writable CD or DVD disc into your read/writable drive.
The original files and any folders are burned to the disc.
If the Finder can’t find an original file, it asks you to cancel the burn or continue without the file.
- Type a name for the CD or DVD, and then select a burn speed.
- Click Burn.