
Chapter 2. Browsers
JavaScript doesn’t have a single, bespoke implementation like most other programming languages do. For example, with Python, you’re probably going to run the Python binary provided by the language maintainers. JavaScript, on the other hand, has many different implementations. This includes the JavaScript engine that ships with different web browsers, such as V8 in Chrome, SpiderMonkey in Firefox, and JavaScriptCore in Safari. The V8 engine is also used by Node.js on the server.
These separate implementations each start off by implementing some facsimile of the ECMAScript specification. As the compatibility charts that we so often need to consult suggest, not every engine implements JavaScript the same way. Certainly, browser vendors attempt to implement JavaScript features in the same manner, but bugs do happen. At the language level, there are some concurrency primitives that have been made available, which are covered in more detail in Chapter 4 and Chapter 5.
Other APIs are also added in each implementation to make the JavaScript that can be run even more powerful. This chapter focuses entirely on the multithreaded APIs that are provided by modern web browsers, the most approachable of which is the web worker.
Using these worker threads is beneficial for many reasons, but one that is particularly applicable to browsers that that by offloading CPU-intensive work to a separate thread, the main thread is then able to dedicate more resources to rendering the UI. This can help contribute to a smoother, more user-friendly experience than what might have been traditionally achievable.
Dedicated Workers
Web workers allow you to spawn a new environment for executing JavaScript in. JavaScript that is executed in this way is allowed to run in a separate thread from the JavaScript that spawned it. Communication occurs between these two environments by using a pattern called message passing. Recall that it’s JavaScript’s nature to be single threaded. Web workers play nicely with this nature and expose message passing by way of triggering functions to be run by the event loop.
It’s possible for a JavaScript environment to spawn more than one web worker, and a given web worker is free to spawn even more web workers. That said, if you find yourself spawning massive hierarchies of web workers, you might need to reevaluate your application.
There is more than one type of web worker, the simplest of which is the dedicated worker.
Dedicated Worker Hello World
The best way to learn a new technology is to actually work with it. The relationship between page and worker that you are building is displayed in Figure 2-1. In this case you’ll create just a single worker, but a hierarchy of workers is also achieveable.
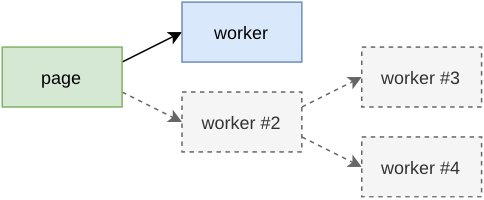
Figure 2-1. Dedicated worker relationship
First, create a directory named ch2-web-workers/. You’ll keep the three example files required for this project in there. Next, create an index.html file inside of the directory. JavaScript that runs in the browser needs to first be loaded by a web page, and this file represents the basis of that web page. Add the content from listing Example 2-1 to this file to kick things off.
Example 2-1. ch2-web-workers/index.html
<html><head><title>Web Workers Hello World</title><scriptsrc="main.js"></script></head></html>
As you can see, this file is super basic. All it is doing is setting a title and loading a single JavaScript file named main.js. The remaining sections in this chapter follow a similar pattern. The more interesting part is what’s inside of the main.js file.
In fact, create that main.js file now, and add the content from Example 2-2 to it.
Example 2-2. ch2-web-workers/main.js
console.log('hello from main.js');constworker=newWorker('worker.js');worker.onmessage=(msg)=>{console.log('message received from worker',msg.data);};worker.postMessage('message sent to worker');console.log('hello from end of main.js');

Instantiation of a new dedicated worker.

A
messagehandler is attached to the worker.
A message is passed into the worker.
The first thing that happens in this file is that a call to console.log() is made. This is to make it obvious the order in which files get executed. The next thing that happens is that a new dedicated worker gets instantiated. This is done by calling new Worker(filename). Once called, the JavaScript engine begins the download (or cache lookup) for the appropriate file in the background.
Next, a handler for the message event is attached to the worker. This is done by assigning a function to the .onmessage property of the dedicated worker. When a message is received, that function gets called. The argument provided to the function is an instance of MessageEvent. It comes with a bunch of properties but the one that’s most interesting is the .data property. This represents the object that was returned from the dedicated worker.
Finally, a call to the dedicated worker’s .postMessage() method is made. This is how the JavaScript environment that instantiates the dedicated worker is able to communicate with the dedicated worker. In this case a basic string has been passed into the dedicated worker. There are restrictions on what kind of data can be passed into this method; see Appendix for more details.
Now that your main JavaScript file is finished, you’re ready to create the file that will be executed within the dedicated worker. Create a new file named worker.js and add the contents of to Example 2-3 to it.
Example 2-3. ch2-web-workers/worker.js
console.log('hello from worker.js');self.onmessage=(msg)=>{console.log('message from main',msg.data);postMessage('message sent from worker');};
In this file a single global named onmessage is defined and a function is assigned to it. This onmessage function, inside of the dedicated worker, is called when the worker.postMessage() method is called from outside the dedicated worker. This assignment could also have been written as onmessage = or even var onmessage =, but using const onmessage = or let onmessage = or even declaring function onmessage won’t work. The self identifier is an alias for globalThis inside of a web worker where the otherwise familiar window isn’t available.
Inside of the onmessage function, the code first prints the message that was received from outside of the dedicated worker. After that, it calls the postMessage() global function. This method takes an argument, and the argument is then provided to the calling environment by triggering the dedicated worker’s onmessage() method. The same rules about message passing and object cloning also apply here. Again, the example is just using a simple string for now.
There are some additional rules when it comes to loading a dedicated worker script file. The file that is loaded must be in the same origin that the main JavaScript environment is running in. Also, browsers won’t allow you to run dedicated workers when JavaScript runs using the file:// protocol, which is a fancy way of saying you can’t simply double-click the index.html file and view the application running. Instead, you’ll need to run your application from a web server. Luckily, if you have a recent Node.js installed, you can run the following command to start a very basic web server locally:
$ npx serve .Once executed, this command spins up a server that hosts files from the local filesystem. It also displays the URL that the server is available as. Typically the command outputs the following URL, assuming the port is free:
http://localhost:5000
Copy whatever URL was provided to you and open it using a web browser. When the page first opens you’ll most likely see a plain, white screen. But, that’s not a problem, as all of the output is being displayed in the web developer console. Different browsers make the console available in different ways, but usually you can right-click somewhere in the background and click the Inspect menu option, or you can press Ctrl + Shift + I (or Cmd + Shift + I) to open up the inspector. Once in the inspector, click on the Console tab, and then refresh the page just in case any console messages weren’t captured. Once that’s done you should see the messages that are displayed in Table 2-1.
| Log | Location |
|---|---|
hello from main.js |
main.js:1:9 |
hello from end of main.js |
main.js:11:9 |
hello from worker.js |
worker.js:1:9 |
message from main, message sent to worker |
worker.js:4:11 |
message received from worker, message sent from worker |
main.js:6:11 |
This output confirms the order in which the messages have been executed, though it’s not entirely deterministic. First, the main.js file is loaded, and it’s output is printed. The worker is instantiated and configured, its postMessage() method is called, and then the last message gets printed as well. Next, the worker.js file is run, and its message handler is called, printing a message. It then calls postMessage() to send a message back to main.js. Finally, the onmessage handler for the dedicated worker is called in main.js, and the final message is printed.
Advanced Dedicated Worker Usage
Now that you’re familiar with the basics of dedicated workers, you’re ready to work with some of the more complex features.
When you work with JavaScript that doesn’t involve dedicated workers, all the code you end up loading is available in the same realm. Loading new JavaScript code is done either by loading a script with a <script> tag, or by making an XHR request and using the eval() function with a string representing the code. When it comes to dedicated workers, you can’t inject a <script> tag into the DOM since there’s no DOM associated with the worker.
Instead, you can make use of the importScripts() function, which is a global function only available within web workers. This function accepts one or more arguments that represent the paths to scripts to be loaded. These scripts will be loaded from the same origin as the web page. These scripts are loaded in a synchronous manner, so code that follows the function call will run after the scripts are loaded.
Instances of Worker inherit from EventTarget, and have some generic methods on it for dealing with events. However, the Worker class provides the most important methods on the instance. The following is a list of these methods, some of which you’ve already worked with, some of which are new:
worker.postMessage(msg)-
Sends a message to the worker that is handled by the event loop before invoking the
self.onmessagefunction, passing inmsg. worker.onmessage-
If assigned, is in turn invoked when the
self.postMessagefunction inside the worker is called. worker.onerror-
If assigned, is invoked when an error is thrown inside the Worker. A single
ErrorEventargument is provided, having a.colno,.lineno,.filename, and.messageproperty. This error will bubble up unless you callerr.preventDefault(). worker.onmessageerror-
If assigned, it is invoked when the worker receives a messaged that it cannot deserialize.
worker.terminate()-
If called, the worker terminates immediately. Future calls to
worker.postMessage()will silently fail.
Inside of the dedicated worker, the global self variable is an instance of WorkerGlobalScope. The most notable addition is the importScripts() function for injecting new JavaScript files. Some of the high-level communication APIs like XMLHttpRequest, WebSocket, and fetch() are available. Useful functions that aren’t necessarily part of JavaScript but are rebuilt by every major engine, like setTimeout(), setInterval(), atob() and btoa() are also available. The two data-storage APIs, localStorage and indexedDB are available.
When it comes to APIs that are missing, though, you’ll need to experiment and see what you have access to. Generally, APIs that modify the global state of the web page aren’t available. In the main JavaScript realm, the global location is available, and is an instance of Location. Inside of a dedicated worker, location is still available, but it’s an instance of WorkerLocation and is a little different, notably missing a .reload() method that can cause a page refresh. The document global is also missing, which is the API for accessing the page DOM.
When instantiating a dedicated worker, there is an optional second argument for specifying the options for the worker. The instantiation takes on the following signature:
constworker=newWorker(filename,options);
The options argument is an object which can contain the properties listed here:
type-
Either
classic(default), for a classic JavaScript file, ormodule, to specify an ESM Module. credentials-
This value determines if HTTP credentials are sent with the request to get the worker file. The value can be
omitto exclude the credentials,same-originto send credentials but only if the origin matches, orincludeto always send the credentials.
name-
This names a dedicated worker and is mostly used for debugging. The value is provided in the worker as a global named
name.
Shared Workers
A shared worker is another type of web worker, but what makes it special is that a shared worker can be accessed by different browser environments, such as different windows (tabs), across iframes, and even from different web workers. They also have a different self within the worker, being an instance of SharedWorkerGlobalScope. A shared worker can only be accessed by JavaScript running on the same origin. For example, a window running on http://localhost:5000 cannot access a shared worker running on http://google.com:80.
Warning
Shared workers are currently disabled in Safari, and this seems to have been true since at least 2013, which will undoubtedly harm adoption of the technology.
Before diving into code, it’s important to consider a few gotchas. One thing that makes shared workers a little hard to reason about is that they aren’t necessarily attached to a particular window (environment). Sure, they’re initially spawned by a particular window, but after that they can end up “belonging” to multiple windows. That means that when the first window is closed, the shared worker is kept around.
Tip
Since shared workers don’t belong to a particular window, one interesting question is where should console.log output go? As of Firefox v85, the output is associated with the first window that spawns the shared worker. Open another window and the first still gets the logs. Close the first window and the logs are now invisible. Open another window and the historical logs then appear in the newest window. Chrome v87, on the other hand, doesn’t display shared worker logs at all. Keep this in mind when debugging.
Shared workers can be used to hold semi-persistent state that is maintained when other windows connect to it. For example, if window 1 tells the shared worker to write a value, then window 2 can ask the shared worker to read that value back. Refresh window 1 and the value is still maintained. Refresh window 2 and it’s also retained. Close window 1 and it’s still retained. However, once you close or refresh the final window that is still using the shared worker, the state will be lost and the shared worker script will be evaluated again.
Warning
A shared worker JavaScript file is cached while multiple windows are using it; refreshing a page won’t necessarily reload your changes. Instead, you’ll need to close other open browser windows, then refresh the remaining window, to get the browser to run your new code.
With these caveats in mind you’re now ready to build a simple application that uses shared workers.
Shared Worker Hello World
A shared worker is “keyed” based on its location in the current origin. For example, the shared worker you’ll work with in this example is located somewhere like http://localhost:5000/shared-worker.js. Whether the worker is loaded from an HTML file located at /red.html, /blue.html, or even /foo/index.html, the shared worker instance will always remain the same. There is a way to create different shared worker instances using the same JavaScript file, and that’s covered in “Advanced Shared Worker Usage”.
The relationship between the page and the worker that you are building is displayed in Figure 2-2.

Figure 2-2. Shared worker relationship
Now, it’s time to create some files. For this example, create a directory named ch2-shared-workers/, and all the files necessary will live in this directory. Once that’s done, create an HTML file containing the content in Example 2-4.
Example 2-4. ch2-shared-workers/red.html
<html><head><title>Shared Workers Red</title><scriptsrc="red.js"></script></head></html>
Much like the HTML file you created in the previous section, this one just sets a title and loads a JavaScript file. Once that’s done, create another HTML file containing the content in Example 2-5.
Example 2-5. ch2-shared-workers/blue.html
<html><head><title>Shared Workers Blue</title><scriptsrc="blue.js"></script></head></html>
For this example you’re going to work with two separate HTML files, each representing a new JavaScript environment that will be available on the same origin. Technically, you could have reused the same HTML file in both windows, but we want to make it very explicit that none of the state is going to be associated with the HTML files or the main JavaScript files.
Next, you’re ready to create the first JavaScript file loaded directly by an HTML file. Create a file containing the content in Example 2-6.
Example 2-6. ch2-shared-workers/red.js
console.log('red.js');constworker=newSharedWorker('shared-worker.js');worker.port.onmessage=(event)=>{console.log('EVENT',event.data);};
Instantiate the shared worker
Note the
worker.portproperty for communications
This JavaScript file is rather basic. What it does is instantiate a shared worker instance by calling new SharedWorker(). After that it adds a handler for message events that are emitted from the shared worker. When a message is received it is simply printed to the console.
Unlike with Worker instances, where you called .onmessage directly, with SharedWorker instances you’ll make use of the .port property.
Next, copy and paste the red.js file that you created in Example 2-6 and name it blue.js. Update the console.log() call to print blue.js, otherwise the content will remain the same.
Finally, create a shared-worker.js file, containing the content in Example 2-7. This is where most of the magic will happen.
Example 2-7. ch2-shared-workers/shared-worker.js
constID=Math.floor(Math.random()*999999);console.log('shared-worker.js',ID);constports=newSet();self.onconnect=(event)=>{constport=event.ports[0];ports.add(port);console.log('CONN',ID,ports.size);port.onmessage=(event)=>{console.log('MESSAGE',ID,event.data);for(letpofports){p.postMessage([ID,event.data]);}};};
Random ID for debugging
Singleton list of ports
Connection event handler

Callback when a new message is received

Messages are dispatched to each window
The first thing that happens in this file is that a random ID value is generated. This value is printed in the console, and later passed to the calling JavaScript environments. It’s not particularly useful with a real application, but it does a great job proving that state is retained, and when state is lost, when dealing with this shared worker.
Next, a singleton Set named ports is created.1 This will contain a list of all of the ports that are made available to the worker. Both the worker.port available in the window and the port provided in a service worker are an instance of the MessagePort class.
The final thing that happens in the outer scope of this shared worker file is that a listener for the connect event is established. This function is called every time a JavaScript environment creates a SharedWorker instance that references this shared worker. When this listener is called, an instance of MessageEvent is provided as the argument.
There are several properties available on the connect event, but the most important one is the ports property. This property is an array that contains a single element which is a reference to the MessagePort instance that allows communication with the calling JavaScript environment. This particular port is then added to the ports set.
An event listener for the message event is also attached to the port. Much like the onmessage method you previously used with the Worker instance, this method is called when one of the external JavaScript environments calls the applicable .postMessage() method. When a message is received, the code prints the ID value and the data that was received.
The event listener also dispatches the message back to the calling environments. It does this by iterating the ports set, calling the .postMessage() method for each of the encountered ports. Since this method only takes a single argument, an array is passed in to sort of emulate multiple arguments. The first element of this array is the ID value again, and the second is the data that was passed in.
If you’ve worked with Web Sockets using Node.js before, then this code pattern might feel familiar. With most popular Web Sockets packages, an event is triggered when a connection is made, and the connection argument can then have a message listener attached to it.
At this point you’re ready to test your application again. First, run the following command inside of your ch2-shared-workers/ directory, and then copy and paste the URL that is displayed:
$ npx serve .Again, in our case, we’re given the URL http://localhost:5000. This time though, instead of opening the URL directly, you’ll want to first open the web inspector in your browser, and then open a modified version of the URL.
Switch to your browser and open a new tab. It’s fine if this opens your home page, a blank tab, or whatever your default page is. Then, open the web inspector again and navigate to the console tab. Once that’s done, paste the URL that was given to you, but modify it to open the /red.html page. The URL that you enter might look something like this:
http://localhost:5000/red.html
Press Enter to open the page. The serve package will probably redirect your browser from /red.html to /red, but that’s fine.
Once the page has loaded, you should see the messages listed in Table 2-2 displayed in your console. If you open the inspector after loading the page then you probably won’t see any logs, though doing so then refreshing the page should display the logs. Note that at the time of writing, only Firefox will display messages generated in shared-worker.js.
| Log | Location |
|---|---|
red.js |
red.js:1:9 |
shared-worker.js 278794 |
shared-worker.js:2:9 |
CONN 278794 1 |
shared-worker.js:9:11 |
In our case we can see that the red.js file was executed, that this particular shared-worker.js instance generated an ID of 278794, and that there is currently a single window connected to this shared worker.
Next, open another browser window. Again, open the web inspector first, switch to the console tab, and then paste the base URL that was provided by the serve command, and then add /blue.html to the end of the URL. In our case the URL looks like this:
http://localhost:5000/blue.html
Press Enter to open the URL. Once the page loads, you should only see a single message printed in the console output stating that the blue.js file was executed. At this point it’s not too interesting. But, switch back to the previous window you had opened for the red.html page. You should see that the new log listed in Table 2-3 has been added.
| Log | Location |
|---|---|
CONN 278794 2 |
shared-worker.js:9:11 |
Now things are getting a little exciting. The shared worker environment now has two references to a MessagePort instance pointing to two separate windows. At the same time, two windows have references to MessagePort instances for the same shared worker.
Now you’re ready to send a message to the shared worker from one of the windows. Switch focus to the console window and type in the following command:
worker.port.postMessage('hello, world');
Press Enter to execute that line of JavaScript. You should see a message in the first console that is generated in the shared worker, a message in the first console from red.js, and a message in the second window’s console from blue.js. In our case we see the outputs listed in Table 2-4.
| Log | Location | Console |
|---|---|---|
MESSAGE 278794 hello, world |
shared-worker.js:12:13 |
1 |
EVENT Array [ 278794, “hello, world” ] |
red.js:6:11 |
1 |
EVENT Array [ 278794, “hello, world” ] |
blue.js:6:11 |
2 |
At this point you’ve successfully sent a message from the JavaScript environment available in one window, to the JavaScript environment in a shared worker, and then passed a message from the worker to two separate windows.
Service Workers
A service worker functions as a sort of proxy that sits between one or more web pages running in the browser and the server. Since a service worker isn’t associated with just a single web page, but potentially multiple pages, it’s more similar to a shared worker than to a dedicated worker. They’re even “keyed” in the same manner as shared workers. But, a service worker can exist and run in the background even when a page isn’t necessarily still open. Because of this you can think of a dedicated worker as being associated with 1 page, a shared worker as being associated with 1 or more pages, but a service worker as being associated with 0 or more pages. But, a shared worker doesn’t magically spawn into existence. Instead, it does require a web page to be opened first to install the shared worker.
Service workers are primarily intended for performing cache management of a website or a single page application. They are most commonly invoked when network requests are sent to the server, wherein an event handler inside of the service worker intercepts the network request. The service worker’s claim to fame is that it can be used to return cached assets when a browser displays a web page but the computer it’s running on no longer has network access. When the service worker receives the request it may consult a cache to find a cached resource, make a request to the server to retrieve some semblance of the resource, or even perform a heavy computation and return the result. While this last option makes it similar to the other web workers you’ve looked at, you really shouldn’t use service workers just for the purpose of offloading CPU intensive work to another thread.
Service workers expose a larger API than that of the other web workers, though their primary use-case is not for offloading heavy computation from the main thread. Service workers are certainly complex enough to have entire books dedicated to them. That said, as the primary goal of this book is to teach you about the multithreaded capabilities of JavaScript, we won’t cover them in their entirety. For example, there’s an entire Push API available for receiving messages pushed to the browser from the server which won’t be covered at all.
Much like with the other web workers, a service worker can’t access the DOM. They also can’t make blocking requests. For example, setting the third argument of XMLHttpRequest#open() to false, which would block code execution until the request succeeds or times out, is not allowed. Browsers will only allow service workers to run on a web page that has been served using the HTTPS protocol. Luckily for us, there is one notable exception, where localhost may load service workers using HTTP. This is to make local development easier. Firefox doesn’t allow service workers when using its Private Browsing feature. Chrome, however, does allow service workers when using its Incognito feature. That said, a service worker instance can’t communicate between a normal and Incognito window.
Both Firefox and Chrome have an Applications panel in the inspector that contains a Service Workers section. You can use this to both view any service workers associated with the current page, and to also perform a very important development action: unregister them, which basically allows you to reset the browser state to before the worker was registered. Unfortunately, as of the current browser versions, these browser panels don’t provide a way to hop into the JavaScript inspectors for the service workers.
Now that you’re aware of some of the gotchas with service workers, you’re ready to build one out.
Service Worker Hello World
In this section you’re going to build a very basic service worker that intercepts all HTTP requests sent from a basic web page. Most of the requests will pass through to the server unaltered. However, requests made to a specific resource will instead return a value that is calculated by the service worker itself. Most service workers would instead do a lot of cache lookups, but again, the goal is to show off service workers from a multithreaded point of view.
The first file you’ll need is again an HTML file. Make a new directory named ch2-service-workers/. Then, inside of this directory, create a file with the content from Example 2-8.
Example 2-8. ch2-service-workers/index.html
<html><head><title>Service Workers Example</title><scriptsrc="main.js"></script></head></html>
This is a rather basic file that just loads your application’s JavaScript file, which comes next. Create a file named main.js, and add the content from Example 2-9 to it.
Example 2-9. ch2-service-workers/main.js
navigator.serviceWorker.register('/sw.js',{scope:'/'});navigator.serviceWorker.oncontrollerchange=()=>{console.log('controller change');};asyncfunctionmakeRequest(){constresult=awaitfetch('/data.json');constpayload=awaitresult.json();console.log(payload);}
Registers service worker and defines scope.
Listens for a
controllerchangeevent.Function to initiate request.
Now things are starting to get a little interesting. The first thing going on in this file is that the service worker is created. Unlike the other web workers you worked with, you aren’t using the new keyword with a constructor. Instead, this code depends on the navigator.serviceWorker object to create the worker. The first argument is the path to the JavaScript file that acts as the service worker. The second argument is an optional configuration object which supports a single scope property.
The scope represents the directory for the current origin wherein any HTML pages that are loaded in it will have their requests passed through the service worker. By default, the scope value is the same as the directory that the service worker is loaded from. In this case, the / value is relative to the index.html directory, and since sw.js is located in the same directory, we could have omitted the scope and it would behave exactly the same.
Once the service worker has been installed for the page, all outbound HTTP requests will get sent through the service worker. This includes requests made to different origins. Since the scope for this page is set to the uppermost directory of the origin, any HTML page that is opened in this origin will then have to make requests through the service worker for assets. If the scope had been set to /foo, then a page opened at /bar.html will be unaffected by the service worker, but a page at /foo/baz.html would be affected.
The next thing that happens is that a listener for the controllerchange event is added to the navigator.serviceWorker object. When this listener fires, a message is printed to the console. This message is just for debugging when a service worker takes control of a page that has been loaded and which is within the scope of the worker.
Finally, a function named makeRequest() is defined. This function makes a GET request to the /data.json path, decodes the response as JSON, and prints the result. As you might have noticed, there aren’t any references to that function. Instead, you’ll manually run it in the console later to test the functionality.
With that file out of the way, you’re now ready to create the service worker itself. Create a third file named sw.js, and add the content from Example 2-10 to it.
Example 2-10. ch2-service-workers/sw.js
letcounter=0;self.oninstall=(event)=>{console.log('service worker install');};self.onactivate=(event)=>{console.log('service worker activate');event.waitUntil(self.clients.claim());};self.onfetch=(event)=>{console.log('fetch',event.request.url);if(event.request.url.endsWith('/data.json')){counter++;event.respondWith(newResponse(JSON.stringify({counter}),{headers:{'Content-Type':'application/json'}}));return;}// fallback to normal HTTP requestevent.respondWith(fetch(event.request));};
Allows service worker to claim the opened index.html page.
Override for when /data.json is requested.
Other URLs will fall back to a normal network request.
The first thing that happens in this file is that a global variable counter is initialized to zero. Later, when certain types of requests are intercepted, that number will increment. This is just an example to prove that the service worker is running; in a real application you should never store state that’s meant to be persistent in this way. In fact, expect any service workers to start and stop fairly frequently, in a manner that’s hard to predict and that differs depending on browser implementation.
After that we create a handler for the install event by assigning a function to self.oninstall. This function runs when this version of the service worker is installed for the very first time in the browser. Most real-world applications will perform instantiation work at this stage. For example, there’s an object available at self.caches which can be used to configure caches that store the result of network requests. However, since this basic application doesn’t have much to do in the way of instantiation, it just prints a message and finishes.
Next up is a function for handling the activate event. This event is useful for performing cleanup work when new versions of the service worker are introduced. With a real-world application, its probably going to do work like tearing down old versions of caches.
In this case, the activate handler function is making a call to the self.clients.claim() method. Calling this allows the page instance which first created the service worker, i.e. the index.html page you’ll open for the first time, to then get controlled by the service worker. If you didn’t have this line, the page wouldn’t be controlled by the service worker when first loaded. However, refreshing the page or opening index.html in another tab would then allow that page to be controlled.
The call to self.clients.claim() returns a promise. Sadly, event handler functions used in service workers are not async functions able to await promises. However, the event argument is an object with a .waitUntil() method, which does work with a promise. Once the promise provided to that method resolves, it will allow the oninstall and onactivate (and later onfetch) handlers to finish. By not calling that method, like in the oninstall handler, the step is considered finished once the function exits.
The last event handler is the onfetch function. This one is the most complex, and also the one that will be called the most throughout the lifetime of the service worker. This handler is called every time a network request is made by a web page under control of the service worker. It’s called onfetch to signal that it correlates to the fetch() function in the browser, though it’s almost a misnomer, as any network request will be passed through it. For example, if an image tag is later added to the page, the request would also trigger onfetch.
This function first logs a message to confirm that it’s being run, and also printing the URL that is being requested. Other information about the requested resource is also available, such as headers and the HTTP method. In a real-world application this information can be used to consult with a cache to see if the resource already exists. For example, a GET request to a resource within the current origin could be served from the cache, but if it doesn’t exist, it could be requested using the fetch() function, then inserted into the cache, then returned to the browser.
This basic example just takes the URL, and checks to see if it’s for a URL that ends in /data.json. If it is not, the if statement body is skipped, and the final line of the function is called. This line just takes the request object (which is an instance of Request), passes it to the fetch() method, which returns a promise, and passes that promise to event.respondWith(). The fetch() method will resolve an object which will then be used to represent the response, which is then provided to the browser. This is essentially a very basic HTTP proxy.
However, circling back to the /data.json URL check, if it does pass, and then something more complicated happens. In that case the counter variable is incremented, and a new response is generated from scratch (which is an instance of Response). In this case, a JSON string is constructed that contains the counter value. This is provided as the first argument to Response, which represents the response body. The second argument contains meta information about the response. In this case the Content-Type header is set to application/json, which suggests to the browser that the response is a JSON payload.
Now that your files have been created, navigate to the directory where you created them using your console, and run the following command to start another web server:
$ npx serve .Again, copy the URL that was provided, open a new web browser window, open the inspector, then paste the URL to visit the page. You should see this message printed in your console (and possibly others):
controller change main.js:6:11
Next, browse to the list of service workers installed in your browser using the aforementioned technique. Within the inspector, you should see the previously logged messages; specifically you should see these two:
service worker install         sw.js:4:11
service worker activate        sw.js:8:11
Next, switch back to the browser window. While in the console tab of the inspector, run the following line of code:
makeRequest();
This runs the makeRequest() function, which triggers an HTTP GET request to /data.json of the current origin. Once it completes, you should see the message Object { counter: 1 } displayed in your console. That message was generated using the service worker, and the request was never sent to the web server. If you switch to the network tab of the inspector, you should see what looks like an otherwise normal request to get the resource. If you click the request you should see that it replied with a 200 status code, and the Content-Type header should be set to application/json as well. As far as the web page is concerned, it did make a normal HTTP request. But, you know better.
Switch back to the service worker inspector console. In here, you should see that a third message has been printed containing the details of the request. On our machine we get the following:
fetch http://localhost:5000/data.json sw.js:13:11
At this point you’ve successfully intercepted an HTTP request from one JavaScript environment, performed some computation in another environment, and returned the result back to the main environment. Much like with the other web workers, this calculation was done in a separate thread, running code in parallel. Had the service worker done some very heavy and slow calculations, the web page would have been free to perform other actions while it waited for the response.
Tip
In your first browser window, you might have noticed an error that an attempt to download the favicon.ico file was made but failed. You might also be wondering why the shared worker console doesn’t mention this file. That’s because, at the point when the window was first opened, it wasn’t yet under control of the service worker, so the request was made directly over the network, bypassing the worker. Debugging service workers can be confusing, and this is one of the caveats to keep in mind.
Now that you’ve built a working service worker, you’re ready to learn about some of the more advanced features they have to offer.
Advanced Service Worker Concepts
Service workers are intended to only be used for performing asynchronous operations. Because of that, the localStorage API, which technically blocks when reading and writing, isn’t available. However, the asynchronous indexedDB API is available. Top level await is disabled within service workers as well.
When it comes to keeping track of state, you’ll mostly be using self.caches and indexedDB. Again, keeping data in a global variable isn’t going to be reliable. In fact, while debugging your service workers, you might find that they occasionally end up stopped, at which point you’re not allowed to hop into the inspector. The browsers have a button that allow you to start the worker again, allowing you to hop back into the inspector. It’s this stopping and starting that flushes out global state.
Service worker scripts are cached rather aggressively by the browser. When reloading the page, the browser may make a request for the script, but unless the script has changed, it won’t be considered for being replaced. The Chrome browser does offer the ability to trigger an update to the script when reloading the page; to do this, navigate to the Application tab in the inspector, then click “Service Workers”, then click the “Update on reload” checkbox.
Every service worker goes through a state change from the time of it’s inception until the time it can be used. This state is available within the service worker by reading the self.serviceWorker.state property. Here’s a list of the stages it goes through:
- parsed
-
This is the very first state of the service worker. At this point the JavaScript contents of the file has been parsed. This is more of an internal state that you’ll probably never encounter in your application.
- installing
-
The installation has begun, but is not yet complete. This happens once per worker version. This state is active after
oninstallis called and before theevent.respondWith()promise has resolved. - installed
-
At this point the installation is complete. The
onactivatehandler is going to be called next. In my testing I find that the service workers jump frominstallingtoactivatingso fast that I never see theinstalledstate. - activating
-
This state happens when
onactivateis called but theevent.respondWith()promise hasn’t yet resolved. - activated
-
The activation is complete, and the worker is ready to do it’s thing. At this point
fetchevents will get intercepted. - redundant
-
At this point, a newer version of the script has been loaded, and the previous script is no longer necessary. This can also be triggered if the worker script download fails, contains a syntax error, or if an error is thrown.
Philosophically, service workers should be treated as a form of progressive enhancement. This means that any web pages using them should still behave as usual if the service worker isn’t used at all. This is important as you might encounter a browser that doesn’t support service workers, or the installation phase might fail, or privacy-conscientious users might disable them entirely. In other words, if you’re only looking to add multithreading capabilities to your application, then choose once of the other web workers instead.
The global self object used inside of service workers is an instance of ServiceWorkerGlobalScope. The importScripts() function available in other web workers is available in this environment as well. Like the other workers, it’s also possible to pass message into, and receive message from, a service worker. The same self.onmessage handler can be assigned. This can, perhaps, be used to signal to the service worker that it should perform some sort of cache invalidation. Again, messages passed in this way are subject to the same cloning algorithm discussed in Appendix.
While debugging your service workers, and the requests that are being made from your browser, you’ll need to keep caching in mind. Not only can the service worker implement caches that you control programmatically, but the browser itself also still has to deal with regular network caching. This can mean request sent from your service worker to the server might not always be received by the server. For this reason, keep the Cache-Control and Expires headers in mind, and be sure to set intentional values.
There are many more features available to service workers than what are covered in this section. Mozilla, the company behind Firefox, was nice enough to put together a cookbook website full of common strategies when building out service workers. This website is available at serviceworkers.rs and we recommend checking it out if you’re considering implementing service workers in your next web app.
Service workers, and the other web workers you’ve looked at, certainly come with a bit of complexity. Lucky for us, there are some convenient libraries available, and communication patterns that you can implement, to make managing them a little easier.
Message Passing Abstractions
Each of the web workers covered in this chapter expose an interface for passing messages into, and receiving messages from, a separate JavaScript environment. This allows you to build applications that are capable of running JavaScript simultaneously across multiple cores.
However, you’ve really only worked with simple contrived examples so far, passing along simple strings and calling simple functions. When it comes to building larger applications it’ll be important to pass messages along that can scale, run code in workers that can scale, and simplifying the interface when working with workers will also reduce potential errors.
The RPC Pattern
So far, you’ve only worked with passing basic strings along to workers. While this is fine for getting a feel for the capabilities of web workers, it’s something that isn’t going to scale well for a full application.
For example, let’s assume you have a web worker that does a single thing, like sum all the square root values from 1 to 1,000,000. Well, you could just call the postMessage() for the worker, without passing arguments, then run the slow logic in the onmessage handler, and send the message back using the worker’s postMessage() function. But, what if the worker also needs to calculate fibonacci? In that case you could pass in a string, one for square_sum, and one for fibonacci. But, what if you need arguments? Well, you could pass in square_sum|1000000. But, what if you need argument types? Maybe you get something like square_sum|num:1000000, etc. You can probably see what we’re getting at.
The RPC (Remote Procedure Call) pattern is a way to take a representation of a function and its arguments, serialize them, and pass them to a remote destination to have them get executed. The string square_sum|num:1000000 is actually a form of RPC that we accidentally recreated. Perhaps it could ultimately translate into a function call like squareNum(1000000) which is considered in “The Command Dispatcher Pattern”.
There’s another bit of complexity that an application needs to worry about as well. If the main thread only sends a single message to a web worker at a time, then when a message is returned from the web worker, you know it’s the response to the message. But, if you send multiple messages to a web worker at the same time, there’s no easy way to correlate the responses. For example, imagine an application that sends two messages to a web worker, and receives two response:
worker.postMessage('square_sum|num:4');worker.postMessage('fibonacci|num:33');worker.onmessage=(result)=>{// Which result belongs to which message?// '3524578'// 4.1462643};
Luckily, there does exist a standard for passing messages around and fulfilling the RPC pattern that can be draw inspiration from. This standard is called JSON-RPC, and it’s fairly trivial to implement. This standard defines JSON representations of request and response objects, “notification” objects, a way to define the method being called and arguments in the request, the result in the response, and a mechanism for associating requests and responses. It even supports error values and batching of requests. For this example you’ll only work with a request and response.
Taking the two function calls from our example, the JSON-RPC version of those requests and responses might look like this:
//worker.postMessage{"jsonrpc":"2.0","method":"square_sum","params":[4],"id":1}{"jsonrpc":"2.0","method":"fibonacci","params":[7],"id":2}//worker.onmessage{"jsonrpc":"2.0","result":"3524578","id":2}{"jsonrpc":"2.0","result":4.1462643,"id":1}
In this case there’s now a clear correlation between the response messages and their request.
JSON-RPC is intended to use JSON as the encoding when serializing messages, particularly when sending messages over the network. In fact, those jsonrpc fields define the version of JSON-RPC that the message is adhering to, which is very important in a network setting. However, since web workers use the structured clone algorithm (covered in Appendix) that allows passing JSON-compatible objects along, an app could just pass objects directly without paying the cost of JSON serialization and deserialization. Also, the jsonrpc fields might not be as important in the browser where you have tighter control of both ends of the communication channel.
With these id properties correlating request and response objects, it’s possible to then correlate which message relates to which. You’ll build a solution for correlating these two in “Putting it All Together”. But, for now, you need to first determine which function to call when a message is received.
The Command Dispatcher Pattern
While the RPC pattern is useful for defining protocols, it doesn’t necessarily provide a mechanism for determining what code path to execute on the receiving end. The Command Dispatcher pattern solves this, and is a way to take a serialized command, find the appropriate function, and then execute it, optionally passing in arguments.
This pattern is fairly straightforward to implement and doesn’t require a whole lot of magic. First, we can assume that there are two variables that contain relevant information about the method or “command” that the code needs to run. The first variable is called method and is a string. The second variable is called args and is an array of values to be passed into the method. Assume these have been pulled from the RPC layer of the application.
The code that ultimately needs to run might live in different parts of the application. For example, maybe the square sum code lives in a third-party library, and the fibonacci code is something that you’ve declared more locally. Regardless of where that code lives, you’ll want to make a single repository that maps these commands to the code that needs to be run. There are several ways to pull this off, for example by using a Map object, but since the commands are going to be fairly static a humble JavaScript object will suffice.
Another important concept is that only defined commands should be executed. If the caller wants to invoke a method that doesn’t exist, an error should be gracefully generated that can be returned to the caller, without crashing the web worker. And, while the arguments could be passed in to the method as an array, it would be a much nicer interface if the array of arguments were spread out into normal function arguments.
Example 2-11 shows an example implementation of a command dispatcher that you can use in your applications:
Example 2-11. Example Command Dispatcher
constcommands={square_sum(max){letsum=0;for(leti=0;i<max;i++)sum+=Math.sqrt(i);returnsum;},fibonacci(limit){letprev=1n,next=0n,swap;while(limit){swap=prev;prev=prev+next;next=swap;limit--;}returnString(next);}};functiondispatch(method,args){if(commands.hasOwnProperty(method)){returncommands[method](...args);}thrownewTypeError(`Command${method}not defined!`);}
The definition of all supported commands.
Check to see if command exists.
Arguments are spread and method is invoked.
This code defines an object named commands that contains the entire collection of commands that are supported by the command dispatcher. In this case the code is inlined but it’s absolutely fine, and even encouraged, to reach out to code that lives elsewhere.
The dispatch() function takes two arguments, the first being the name of the method and the second being the array of arguments. This function can be invoked when the web worker receives an RPC message representing the command. Within this function the first step is to check if the method exists. This is done using commands.hasOwnProperty(). This is much safer than calling method in commands or even commands[method] since you don’t want non-command properties like __proto__ being called.
If the command is determined to exist then the command arguments are spread out, with the first array element being the first argument, etc. The function is then called with the arguments, with the result of the call being returned. However, if the command doesn’t exist, then a TypeError is thrown.
This is about as basic of a command dispatcher that you can create. Other, more advanced dispatchers might do things like type checking, where the arguments are validated to adhere to a certain primitive type or that objects follow the appropriate shape, throwing errors generically so that the command method code doesn’t need to do it.
These two patterns will definitely help your applications out, but the interface can be streamlined even more.
Putting it All Together
With JavaScript applications, we often think about performing work with outside services. For example, maybe we make a call to a database or maybe we make an HTTP request. When this happens we need to wait for a response to happen. Ideally, we can either provide a callback or treat this lookup as a promise. While the web worker messaging interface doesn’t make this straightforward, we can definitely build it out by hand.
It would also be nice to have a more symmetrical interface within a web workers, perhaps by making use of an asynchronous function, one where the resolved value is automatically sent back to the calling environment, without the need to manually call postMessage() within the code.
In this section you’ll do just that. You’ll combine the RPC pattern and the Command Dispatcher pattern and end up with an interface that makes working with web workers much like working with other external libraries you may be more familiar with. This example uses a dedicated worker, but the same thing could be built with a shared worker or service worker.
First, create a new directory named ch2-patterns/ to house the files you’re going to create. In here first create another basic HTML file named index.html containing the contents of Example 2-12.
Example 2-12. ch2-patterns/index.html
<html><head><title>Worker Patterns</title><scriptsrc="rpc-worker.js"></script><scriptsrc="main.js"></script></head></html>
This time the file is loading two JavaScript files. The first is a new library, and the second is the main JavaScript file, which you’ll now create. Make a file named main.js, and add the contents of Example 2-13 to it.
Example 2-13. ch2-patterns/main.js
constworker=newRpcWorker('worker.js');Promise.allSettled([worker.exec('square_sum',1_000_000),worker.exec('fibonacci',1_000),worker.exec('fake_method'),worker.exec('bad'),]).then(([square_sum,fibonacci,fake,bad])=>{console.log('square sum',square_sum);console.log('fibonacci',fibonacci);console.log('fake',fake);console.log('bad',bad);});
This file represents application code using these new design patterns. First, a worker instance is created, but not by calling one of the web worker classes you’ve been working with so far. Instead, the code instantiates a new RpcWorker class. This class is going to be defined soon.
After that, four calls to different RPC methods are made by calling worker.exec. The first one is a call to the square_sum method, the second is to the fibonacci method, the third is to a method that doesn’t exist called fake_method, and the fourth is to a failing method named bad. The first argument is the name of the method, and all the following arguments end up being the arguments that are passed to the method.
The exec method returns a promise, one that will resolve if the operation succeeds and will reject if the operation fails. With this in mind, each of the promises has been wrapped into a single Promise.allSettled() call. This will run all of them and then continue the execution once each is complete—regardless of success or failure. After that the result of each operation is printed. allSettled() results an array of objects with a status string property, and either a value or reason property depending on success or failure.
Next, create a file named rpc-worker.js, and add the contents of Example 2-14 to it.
Example 2-14. ch2-patterns/rpc-worker.js (part 1)
classRpcWorker{constructor(path){this.next_command_id=0;this.in_flight_commands=newMap();this.worker=newWorker(path);this.worker.onmessage=this.onMessageHandler.bind(this);}
This first part of the file starts the RpcWorker class and defines the constructor. Within the constructor a few properties are initialized. First, the next_command_id is set to zero. This value is used as the JSON-RPC-style incrementing message identifier. This is used to correlate the request and response objects.
Next, a property named in_flight_commands is initialized to an empty Map. This contains entries keyed by the command ID, with a value that contains a promise’s resolve and reject functions. The size of this map grows with the number of parallel messages sent to the worker and shrinks as their correlating messages are returned.
After that, a dedicated worker is instantiated and assigned to the worker property. This class effectively encapsulates a Worker instance. After that the onmessage handler of the worker is configured to call the onMessageHandler for the class (defined in the next chunk of code). The RpcWorker class doesn’t extend Worker as it doesn’t really want to expose functionality of the underlying web worker, instead creating a completely new interface.
Continue modifying the file by adding the content from Example 2-15 to it.
Example 2-15. ch2-patterns/rpc-worker.js (part 2)
onMessageHandler(msg){const{result,error,id}=msg.data;const{resolve,reject}=this.in_flight_commands.get(id);this.in_flight_commands.delete(id);if(error)reject(error);elseresolve(result);}
This chunk of the file defines the onMessageHandler method, which runs when the dedicated worker posts a message. This code assumes that a JSON-RPC-like message is passed from the web worker to the calling environment, and so, it first extracts the result, error, and id values from the response.
Next, it consults the in_flight_commands map to find the matching ID value, retrieving the appropriate rejection and resolving functions, deleting the entry from the list in the process. If the error value was provided then the operation is considered a failure and the reject() function is called with the erroneous value. Otherwise, the resolve() function is called with the result of the operation. Note that this doesn’t support throwing falsy values.
For a production-ready version of this library you would also want to support a timeout value for these operations. Theoretically, it’s possible for an error to be thrown in such a way, or for a promise to never end up resolving in the worker, and the calling environment would want to reject the promise and also clear the data from the map. Otherwise the application might end up with a memory leak.
Finally, finish up this file by adding the remaining content from Example 2-16 to it.
Example 2-16. ch2-patterns/rpc-worker.js (part 3)
exec(method,...args){constid=++this.next_command_id;letresolve,reject;constpromise=newPromise((res,rej)=>{resolve=res;reject=rej;});this.in_flight_commands.set(id,{resolve,reject});this.worker.postMessage({method,params:args,id});returnpromise;}}
This last chunk of the file defines the exec() method, which is called when the application wants to execute a method in the web worker. The first thing that happens is that a new ID value is generated. Next, a promise is created, which will later be returned by the method. The reject and resolve functions for the promise are pulled out and are added to the in_flight_commands map, associated with the ID value.
After that, a message is posted to the worker. The object that is passed into the worker is an object roughly adhering to the JSON-RPC shape. It contains the method property, a params property which is the remaining arguments in an array, and the id value which was generated for this particular command execution.
This is a fairly common pattern, useful for associating outgoing asynchronous messages with incoming asynchronous messages. You might find yourself implementing a similar pattern if you needed to, say, put a message onto a network queue and later receive a message. But, again, it does have memory implications.
With the RPC worker file out of the way you’re ready to create the last file. Make a file named worker.js, and add the contents of Example 2-17 to it.
Example 2-17. ch2-patterns/worker.js
constsleep=(ms)=>newPromise((res)=>setTimeout(res,ms));functionasyncOnMessageWrap(fn){returnasyncfunction(msg){postMessage(awaitfn(msg.data));}}constcommands={asyncsquare_sum(max){awaitsleep(Math.random()*100);letsum=0;for(leti=0;i<max;i++)sum+=Math.sqrt(i);returnsum;},asyncfibonacci(limit){awaitsleep(Math.random()*100);letprev=1n,next=0n,swap;while(limit){swap=prev;prev=prev+next;next=swap;limit--;}returnString(next);},asyncbad(){awaitsleep(Math.random()*10);thrownewError('oh no');}};self.onmessage=asyncOnMessageWrap(async(rpc)=>{const{method,params,id}=rpc;if(commands.hasOwnProperty(method)){try{constresult=awaitcommands[method](...params);return{id,result};}catch(err){return{id,error:{code:-32000,message:err.message}};}}else{return{id,error:{code:-32601,message:`method${method}not found`}};}});
Adds artificial slowdown to methods.
A basic wrapper to convert
onmessageto an async function.Artificial random slowdowns are added to the commands.
The
BigIntresult is coerced into a JSON-friendly string value.The
onmessagewrapper is injected.
A successful JSON-RPC-like message is resolved on success.

An erroneous JSON-RPC-like message is rejected if method doesn’t exist.
This file has a lot going on. First, the sleep function is just a promise equivalent version of setTimeout(). The asyncOnMessageWrap() is a function that can wrap an async function, and be assigned the onmessage handler. This is a convenience to pull out the data property of the incoming message, pass it to the function, await the result, then pass the result to postMessage().
After that the commands object from before has made its return. This time, though, artificial timeouts have been added and the functions have been made into async functions. This lets the methods emulate an otherwise slow asynchronous process.
Finally, the onmessage handler is assigned using the wrapper function. The code inside of it takes the incoming JSON-RPC-like message and pulls out the method, params, and id properties. Much like before, the commands collection is consulted to see if it has the method. If it doesn’t, a JSON-RPC-like error is returned. The -32601 value is a magic number defined by JSON-RPC to represent a method that doesn’t exist. When the command does exist, the command method is executed, then the resolved value is coerced into a JSON-RPC-like successful message and returned. If the command throws then a different error is returned, using another JSON-RPC magic number of -32000.
Once you’ve got the file created, switch to your browser and open the inspector. Then, launch the web server again using the following command from within the ch2-patterns/ directory:
$ npx serve .Next, switch back to browser and paste in the URL from the output. You won’t see anything interesting on the page but in the console you should see the following messages:
square sum    { status: "fulfilled", value: 666666166.4588418 }
fibonacci     { status: "fulfilled", value: "4346655768..." }
fake          { status: "rejected", reason: { code: -32601,
                message: "method fake_method not found" } }
bad           { status: "rejected", reason: { code: -32000,
                message: "oh no" } }
In this case you can see that both the square_sum and fibonacci calls ended successfully, while the fake_method command resulted in failure. More importantly, under the hood, the calls to the methods are resolving in different orders, but thanks to the incrementing ID values the response are always properly correlated to their requests.
1 As of Firefox v85, regardless of how many entries are in the ports set, calling console.log(ports) will always display a single entry. For now, to debug the size, call console.log(ports.size) instead.