
2
Attack Targets on the Internet

You know what types of black hats exist, but a question still remains: how do they find you? Most people don’t expect to be targeted by an attacker. You might wonder what you have that a black hat wants.
You’d be surprised at what an attacker finds valuable. It’s true that many steal credit card and social security numbers, but others look for more than just personal data. Some might want information about other targets. Or they might want access to your equipment, such as computers or routers, to carry out other hacks. They might even be looking for insecure devices, just to have a little fun. In these cases, any device that is connected to the internet becomes a target for black hats.
We all have plenty of devices, some we might not even know about, that use the internet and need to be secured against black hat attacks. In this chapter, we’ll briefly look at how the internet works, including a history of the technology, to help you better understand how an adversary uses it. Next, I’ll break down how black hats prepare an attack with the information they gather from public resources. I’ll finish the chapter by explaining how to hide from attackers by implementing three essential rules of internet use.
How the Internet Works
To comprehend how a black hat finds and exploits you on the internet, you need to understand some fundamental concepts about how the internet works. The internet as you know it today began as a project in the Advance Research Projects Agency (ARPA), a United States government organization tasked with researching new technologies to maintain a lead over the Soviet Union.
In the 1960s, ARPA began working on a tool that would protect US communications during a nuclear attack. Because nuclear bombs could easily wipe out massive amounts of infrastructure, the US military needed a communications network that could reactively realign itself should part of the country be attacked. For example, if Washington, DC, was hit with a bomb, the military needed to be able to bypass the communication lines that went through the city so it could continue to share information with other parts of the country seamlessly.
One solution to this problem was the idea of packet switching. The premise was to put information into packets, or self-contained units, and then have a computer decide in real time where those packets should be sent based on information provided to it. For instance, if a computer received a packet destined for Atlanta (identified by an address attached to the packet) and knew that the intermediary Washington, DC, communication lines were down, it could automatically send that packet to, say, Cleveland, which could then pass it on to Atlanta. This allowed computers to create and maintain a network of communication even if part of the network was destroyed.
ARPA and many other researchers worked on implementing packet switching in large networks. Until that point, devices had communicated with each other directly via dedicated circuits set up between them. A circuit was typically a single physical line, and any break in the line would bring down the entire network. By the late 1960s and early 1970s, several smaller networks, created mostly to communicate between various universities and supercomputer sites, used packet switching to allow computers to communicate with each other over vast distances. Figure 2-1 shows a breakdown of the sites connected as part of NSFNET, one of the early networks that would later become the internet. This work continued into the 1980s, when commercial desktop computers become more readily available to the public.
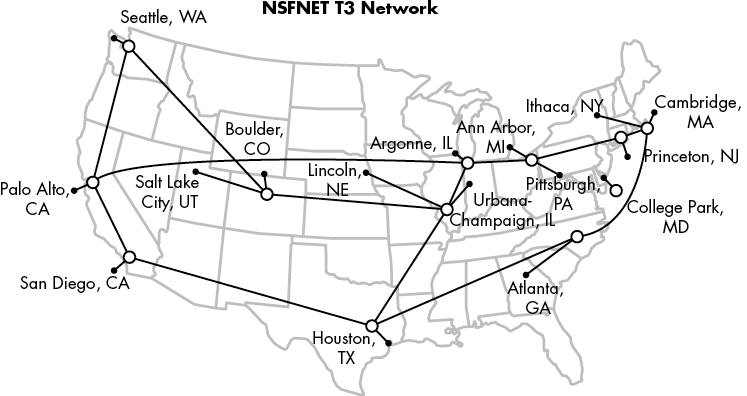
Figure 2-1: NSFNET in 1992, connecting various academic and other sites across the United States (image altered from the original created by Merit Network, Inc. under the Attribution-ShareAlike 3.0 Unported [CC BY-SA 3.0] license, https://creativecommons.org/licenses/by-sa/3.0/deed.en)
It was also at this time that Robert Kahn and Vinton Cerf first developed the communication protocols known as the Internet Protocol (IP) and Transmission Control Protocol (TCP).
TCP/IP: The Backbone of the Internet
TCP/IP (sometimes referred to as the IP suite) is the set of protocols that runs the modern internet. Protocols are special codes that define how a system should understand and process the data received over a network. For example, the HTTP protocol tells a system that the data sent is a website and should be processed by a web browser. The TCP/IP protocols tell systems how traffic (flows of data) should be passed from device to device to reach a destination. It’s part of the information that systems use to make adjustments in a packet-switching network.
The IP protocol provides a number, known as an IP address, that identifies the location of a computer on a given network. You can think of an IP address as your ZIP code. A ZIP code identifies a general region that the postal service uses to direct a package. There are two versions of IP addresses, version 4 (called IPv4) and version 6 (called IPv6). In this chapter I’ll only discuss IPv4, because it’s still the most common.
TCP is a set of rules that allows one system to communicate with another system while ensuring that both systems are available on the network. TCP is essentially the same as calling a friend to confirm they’ll be home to receive a package when it comes in the mail. We’ll talk more about these two protocols in Chapter 6.
With TCP/IP, packet-switching technology, and cheaper home computers, it didn’t take long before commercial companies became interested in setting up their own networks so businesses and homes could communicate. Eventually, these networks began mingling, connecting larger and larger numbers of systems until the internet evolved naturally to consist of internet service providers (ISPs). ISPs, such as AT&T, Comcast, and Verizon, began to provide internet access and sell the necessary infrastructure to businesses and eventually homes. Since the early 1990s the world has become more interconnected, with computer networks reaching nearly every corner of the planet.
Public vs. Private Networks
Today’s internet is made up of a large number of connected smaller networks. These networks can generally be categorized into two types: public and private. Essentially, anyone can use a public network, usually by paying a fee. For example, the network that your house connects to and that you pay an ISP to use is a public network. These form the backbone of the internet, because they allow any paying customer to connect. Often, public networks are run by ISPs.
Frequently, public networks are also connected to private networks, which only allow connections to a limited group of devices. For example, if you work in an office, you might be able to access files from a specific server through a connection from your desktop computer. The server and the desktop computer are on a private network, meaning they’re only allowed to communicate with each other or other devices on the private network. People on the public network (the internet) can’t directly see, connect, or access anything on the private network.
Many private networks have a connection to the public network through equipment provided by an ISP, and they pay to get access to the internet. For example, your home might have a Wi-Fi network. Only the people who live at your house or guests to whom you give access can use that Wi-Fi network, making it a private network. However, your house is connected to the internet, usually through a special device called a modem or router. These devices pass your traffic between your home Wi-Fi network and the ISP’s public internet. You, along with people in your neighborhood, pay the ISP to access the internet using special ISP equipment. Without you letting them have access, people can’t just access your private network from the public network.
Figure 2-2 shows how the internet with its public and private networks might look as a visual map.
Billions of nodes make up the internet. These nodes represent connections between IP addresses. The expanded section in the bottom-right corner of the figure reveals how individual addresses, such as 8.8.8.8, are connected to an ISP to form larger connections that create the internet.
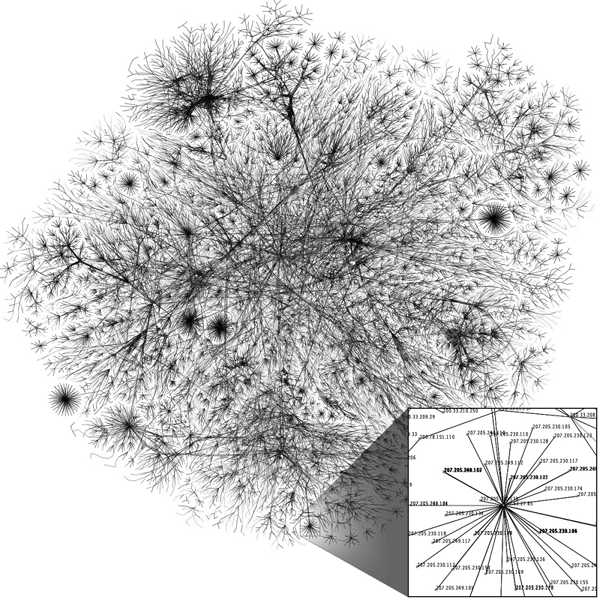
Figure 2-2: A map of the internet (image altered from the original created by the Opte Project under the Attribution 2.5 Generic [CC BY 2.5] license, https://creativecommons.org/licenses/by/2.5/deed.en)
Private and public networks are differentiated by the type of IP address they use. An IPv4 address is made up of four numbers, each ranging from 0 to 255, usually separated by periods: 192.168.15.1 and 10.10.10.255, for example. Certain ranges of those numbers are set aside for use by private networks only, whereas the rest are available for the public. Private addresses use certain addresses that never change, such as 10.0.0.0 or 192.168.27.0. Public addresses get translated to private addresses when you connect from a public network to a private network, and vice versa. For example, when you connect to google.com, you might connect to the address 8.8.8.8 (a public address). Once the connection to 8.8.8.8 is made, Google’s own network equipment might translate that connection into a private address, such as 192.168.1.1, so you can access resources on Google’s private network. This process is known as Network Address Translation (NAT).
How the Internet Looks to a Black Hat
When a black hat accesses the internet, they’re often trying to figure out how they can get past the public network and look into a private network. This can be exceedingly difficult, because many of the systems that make the internet what it is today are designed specifically to prevent people on a public network from seeing what’s going on in any private network. Consider the NAT process: the person connecting to the public address doesn’t see the translation or what is happening behind the scenes. When you connect to google.com, you connect through a web browser, and the Google website appears. You’re not informed of and normally can’t see all the mechanisms on Google’s private network that allow the web page to operate the way it’s supposed to.
So when an adversary focuses on a target, their first step is often to determine how they can move from the public side of a network to the private side. Once they’re in the private network, they can work on finding their specific target and executing the attack to get whatever they’re after, whether that’s disrupting business as usual or stealing data. To perform all these actions successfully, many black hats rely on a certain set of steps to maximize their attack’s potential.
The Black Hat Attack Methodology
Not every attack by a black hat follows a specific pattern or set of steps. But most attackers must accomplish certain objectives before they can fully realize their goals. Several models classify these objectives, but one of the most famous is the Lockheed Martin Cyber Kill Chain (CKC).
The CKC consists of seven steps that a black hat must accomplish for their attack to be effective. These steps involve activities undertaken before, during, and after many cyberattacks: they include reconnaissance, weaponization, delivery, exploitation, installation, command and control, and attack on objectives. Let’s look at each step in more detail.
Reconnaissance
During the reconnaissance phase of the CKC, the attacker learns everything they can about their target. They begin by collecting any data considered public information. In the case of an organization, this means data from their websites and social media, as well as data about their employees, their organizational structure, physical locations, groups they’ve partnered with, recent news stories, public IP addresses owned by the organization, and more. For an individual, this might include information about their family members, where they work, where they live, criminal and other government records, and of course, social media.
These adversaries also look for not-so-public information, much of which is still available on the internet if you know where to look. This includes websites that, although accessible by everyone, might not be meant for public consumption, such as an employee’s remote login page. Or it might include details collected about a public IP address, such as the services it’s running. The black hat might also begin listing relevant email addresses by mining social media or other places on the internet to use at a later time.
One of the ways that attackers can find information is by sniffing and scanning. Sniffing is intercepting and analyzing other users’ network traffic. Black hats can do this without interrupting the traffic flow, so the user remains unaware that their traffic is being monitored. For example, an attacker might look at all the data coming from an email server and copy any attachments before sending the original emails to their destinations. Scanning is sending specially crafted packets to a device and listening to how it responds to those packets. The responses can provide the black hat with information about what kind of system or software the node is running. For example, if an attacker wants to know whether a host is running a Windows operating system, they can send a packet made specifically for a Windows system. If the system responds with an error, they know it’s not a Windows system. We’ll talk more about scanning and sniffing in “Attacking Your Network” in Chapter 6; both can be lucrative sources of information for an adversary.
All of this reconnaissance work provides information that helps black hats narrow their field of focus until they know where to begin their initial attack. It also provides valuable information they can use in the next phase to craft attacks that are likely to work. For example, if an attacker scans a public IP address and finds it’s connected to a Windows server, they won’t waste time using Apple exploits on it. This is what makes reconnaissance such a key part of mounting a successful attack.
Weaponization
In the next step, weaponization, the black hat creates an actual attack to use against a target. With the information gathered from the reconnaissance phase, they plan and create the tools they’ll need. This phase also requires that the adversary have a good sense of what will get them to their mission objective the quickest. For example, if the attacker’s objective is to gather more personal information about a target and use it to blackmail them, they might try to exploit the target’s email. Creating a virus that destroys Word documents, although an effective attack, wouldn’t be a great way to meet this objective. Instead, it’s a much better idea to create a PDF that links to a fake email login page and try to trick the victim into using it. That way, the attacker may be able to gather the victim’s credentials from the fake page and use them to log in to the legitimate account.
Delivery
Once the black hat has a weaponized package, whether it’s malware, a phishing website (which we’ll discuss in more detail in Chapter 3), or some other form of attack, they’re ready to deliver. Again, this requires using the information gathered during the reconnaissance phase to decide what the best method of delivery will be. Many recent attacks have been delivered through email, but this might not always be the best method.
If the attacker knows that the target uses a device with a known flaw, they might craft a delivery method that takes advantage of this flaw. For example, if a company website was using a fillable form that included exploits, an adversary might be able to inject code directly onto the web server through the exploit. This would allow them to deliver their attack directly to the server instead of having to rely on an employee to install it for them.
Exploitation and Installation
The next two steps, exploitation and installation, rely on getting the exploit installed once it’s delivered. This means getting a person to click a malicious link or launch the malware created during the delivery phase. Once the exploitation is done, the black hat should be able to execute their attack or install malware on the device.
Keep in mind that many of the items attackers want, such as credit card numbers or other personal information, are usually stored on private networks, inaccessible to the public. This means that attackers must compromise the private network before they can fully access it.
This compromise usually involves the adversary establishing backdoors. Consider this analogy: if the front door is the way people are supposed to enter a house, then using the back door (or garage door) would be a way for someone to bypass the controls, such as the lock on the door. Black hat backdoors work in a similar fashion, allowing an adversary to access the system without having to go through the normal, trusted means of authentication.
Command and Control, and Attack on Objectives
During the command and control and attack on objectives phases, the black hat uses the backdoor to establish a foothold in the system. From there, they can use it as a base to identify further systems to exploit. This is known as pivoting. Attackers will continue to pivot until they can reach their objective directly (as discussed in Chapter 1, objectives will vary depending on the type of attacker). Once they find a way to their objective, the attacker will launch a full set of attacks to gain access and accomplish their mission.
The command and control phase involves creating a command and control server, which is a tool that allows the attacker to send the compromised device commands from a remote location and receive information. For example, if a black hat compromises a web server, they might instruct that server to reach out to other devices on the network to find additional systems they could compromise. Often, these commands use normal traffic patterns to hide, so it’s harder for white hats to detect them until it’s too late.
The attack on the objective is usually done in a similar stealthy manner to ensure that the black hat isn’t prevented from getting what they want and that the organization can’t mitigate the damage. If an attacker steals a number of credit card numbers, they’re only useful if the bank doesn’t know they’ve been stolen, at which point it would cancel them before they can be sold or used. With this final phase complete, the black hat sells their prize and moves on to the next target, again starting at the reconnaissance phase.
How Black Hats Find You
If you look closely at the phases of a black hat’s attack, you’ll notice that one of the most important steps is the first one: reconnaissance. If an adversary can’t find any useful information about their target, they’ll have an extremely difficult time delivering an effective attack. This, of course, makes it that much harder to get a foothold in the private network.
So, where do black hats find their reconnaissance information? They find it mostly from publicly available sources, which people often create without realizing what they’re exposing. Often, misconfigured systems openly communicate on the internet, exposing services that an organization might not want available to the public. You can see many of these open systems by using Shodan, a tool that scans the internet for open services and systems. After a scan, Shodan puts its findings in an easy-to-use database that is open to the public to search through. Using Shodan, you can find all sorts of detailed information on the types of devices that are publicly accessible from the internet. We’ll walk through using the tool in the exercise at the end of this chapter.
Using Shodan isn’t the only way to find useful information online. A ton of data on the internet might help a black hat craft an attack. Let’s look at a few scenarios to help you understand how an adversary can gather this type of information.
Example 1: The Merger
Say an attacker learns that Sparkle Kitten Inc. is buying Smelly Puppy Co. and merging the company directly into Sparkle Kitten. By reading the news, the black hat learns that the CEO of Smelly Puppy is unhappy about the merger. The attacker decides to target Smelly Puppy during this stressful time. They begin by scanning Smelly Puppy’s website to look for any listed email addresses. By using an automated tool to comb through all available web pages, even those that might not be available via a Google search, they locate a job ad for an administrator with knowledge of a specific type of web server.
Using public registration information, the black hat can find exactly which IP addresses the company bought and registered to use. The adversary then uses a scanning tool that targets those addresses, looking for that particular web server. They find the server, and what’s more, discover that it responds to the traffic sent to it. Now they can craft an effective attack using a known exploit and gain access to the server.
Example 2: Social Media Hunting
A black hat wants to gain access to Secure Co., one of the most secure companies in the world (it says so in its name). The attacker knows that Secure Co. uses the latest appliances, training, and best practices to remain secure, because Secure Co. advertises this information often. The black hat also realizes the organization uses a specific marketing company, Super Awesome Marketing, for all its advertising. The adversary decides that instead of attacking Secure Co. directly, they’ll attack Super Awesome Marketing.
To do so, the attacker looks through LinkedIn and Facebook to find employees who work at Super Awesome Marketing. They locate a particular employee who works for the IT department and track them on Twitter. Every morning, this employee takes a picture in the same gym. The black hat also notices they leave geolocation tags on their posts. Using those tags, the black hat finds the gym the employee uses. The attacker visits that gym one morning, listens to the employee’s conversations, and hears about a particular exploit in Super Awesome Marketing’s email server. The adversary uses that exploit to gain access to the email server, where they can then take over an employee’s email account. Now the black hat has a means of infecting the marketing material Super Awesome Marketing creates for Secure Co. Because this material is coming from a trusted vendor, it proceeds right past the normal security checks and stealthily sets up a backdoor inside Secure Co.’s private network. Not so secure now, huh?
How to Hide from Black Hats
The previous examples on how an adversary gathers information might seem far-fetched, but they describe real-life techniques that black hats have used. When people post information publicly, attackers can use it to find cracks in their security, allowing the attackers to craft the perfect attacks against a person or organization. The best way to defend against these attacks is to implement operational security (OPSEC).
OPSEC is the process of understanding and minimizing any information that could be used against you. The technique originated in the military, which worried about tipping off an enemy about an attack by revealing seemingly noncritical information. For example, if the military moved a unit to a new base, an opponent could correlate this action with other information to deduce that the military was planning an attack on a certain country, perhaps one that was closer to the new base.
For civilian organizations, OPSEC is about protecting information that a black hat could use to attack your organization. This means limiting the information you share on a public website, press release, or social media. OPSEC is tricky to get right, because it’s difficult to know what an attacker might find useful in the right context. The best way to ensure your OPSEC is to keep three rules about the internet in mind when posting information: the internet is open, public, and forever.
The Internet Is Open
When you’re using the internet, assume that anyone can see what you’re doing or sharing, including any data moving across the network. It’s up to you to protect that information by determining how you send it.
A good example is the ability to request web pages. When you access a web page, your browser has to figure out where that page is located on the internet. It does this by querying a Domain Name Service (DNS) server, which contains records of the public IP addresses to which websites are assigned. For example, a DNS server might tell you that the domain sparklekitten.net is at the IP address 1.1.1.1. When you tell your browser to go to sparklekitten.net, it sends out a request that eventually ends up at the DNS server, which provides the record of the IP address where you can find sparklekitten.net so your browser can access that website.
Usually, DNS requests travel through a series of DNS servers until they find the right one. Your browser starts by sending a request to a server, hosted by your ISP, which sends it to another DNS server, which sends it to another, until it finds the Sparkle Kitten DNS server with the correct record. Until recently, browsers sent these requests almost entirely unencrypted, meaning they remained in plain view for anyone to see. So not only could your ISP see every web page you requested—information it was more than willing to sell to marketing firms—but anyone with the ability to sniff your traffic could also see your DNS requests. Even if you were using a private browser or visiting websites using encrypted links, that DNS request used unencrypted protocols, so anyone could know which website you were trying to reach.
Fortunately, many browsers have since begun supporting DNS requests sent over encrypted links. Still, this is a prime example of how the internet is open. As you browse, send email, or download files, you’re relaying information that is being cataloged, stored, and often sold. This information can easily be exploited to learn about you or your organization to craft the perfect attack. This is why it’s important to be mindful of the kind of information you communicate on the internet. Although you don’t need to cut yourself off from the world entirely and live in a cave, it’s best to ensure you encrypt any sensitive information, especially if you send it through email, file sharing, or social media. It’s frequently a good idea to research the services you use and what data they might be collecting on the backend. Even though it might take additional time and effort to take these steps, the extra security and peace of mind they offer is more than worth it.
The Internet Is Public
The internet is completely public; anyone can get online as long as they have the right connection set up or pay a company, like an ISP, to use their equipment. In many ways, access isn’t even tied to a specific person. It’s possible, legal, and often best to hide who you are on the internet by using usernames or hiding your IP address (more on this later). This applies not just to usernames on a video game or social media site, but also to your IP address and your physical location in the world.
One way to track down an IP address’s location is to look up the registration information using a Whois search. Whois is a database of website registration information. Several websites provide Whois information, including Myip.ms, shown in Figure 2-3 displaying the Whois record for the IP address 1.1.1.1.
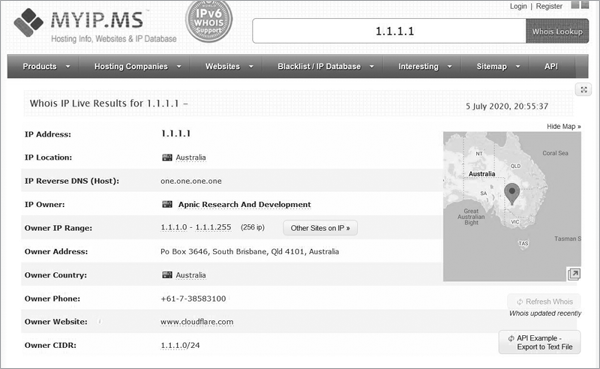
Figure 2-3: 1.1.1.1 Whois record
Although public IP addresses are tied to specific regions in the world, it’s very difficult to trust that the person using an IP address is actually present in that location. Just like you can translate public IPs to private IPs, you can translate a public IP address to a different one. This can make it difficult to track down where traffic is actually coming from, which allows a black hat to easily hide in plain sight.
This also means that people from other countries, your teachers, your grandmother, or even your postal worker can access what you post on the internet. More importantly, if you put something on the internet and make it public, it can be difficult to stop people from seeing it. Even if you think you’re only sharing something with your friends, it’s possible that your friends are sharing it with the public at large. The best rule to adhere to when posting any information to the internet is to assume that everyone will be able to see it, so craft what you say with that assumption in mind. If you think the post might hurt you or provide information that others can use against you, it’s best not to post it in the first place.
The Internet Is Forever
It’s nearly impossible to delete information from the internet. For instance, when you delete an email, is it actually gone? If you’re using a service like Gmail, deleted mail goes into a trash folder, which holds it for 30 days before it’s removed from sight. So the email you deleted isn’t really deleted; it’s just placed in a different place where an adversary could still access it.
In the case of social media, the situation is even worse. Companies like Facebook and Google make a lot of money from the data people create on their platforms, so it benefits them to hold on to it for as long as possible. Facebook and Twitter store posts for many years. Even when you remove yourself from the platform, posts you’ve made in groups that you were a part of remain publicly available. Try googling your full name and state; you might be surprised to find your posts in the search results.
Also, many people document online activity to keep a record of the internet as it changes. One of the main projects doing this work is the Internet Archive, at https://archive.org/. The Internet Archive attempts to catalog every web page created, so even if you’ve removed or edited web pages, it’s possible a record of them exists for people to find.
Just as it’s important to assume that everyone can see what you post on the internet, it’s just as important to assume that your internet posts will exist forever. Again, this doesn’t mean you should forgo using the internet entirely. Just be mindful of what you do when you’re online.
Understanding the three rules of the internet will help you practice OPSEC if someday you work for an organization that needs to prevent sensitive information from becoming public. By being mindful of how you post your personal information, you’ll notice information that black hats could potentially use to attack your organization. You could also teach others in your organization, especially new hires, about the importance of limiting the information they share with the public. This behavior will make your organization more secure overall. After all, the less information an attacker has, the harder it is for them to attack.
Exercise: Analyzing Your Network
As you learned in this chapter, it’s important to understand the information you’re posting to the internet. Otherwise, attackers might use a post you’ve unknowingly left visible to access your accounts or your private network. As mentioned earlier, you can use Shodan to find this information, which, as you’ll recall, is like a search engine for IP addresses.
Although you can use Shodan in your web browser, other useful tools require the command line, which allows you to enter commands on your system to perform tasks. In this exercise, you’ll learn how to use some of these simple commands to discover information about your network. Then you’ll use that information to search Shodan to see what sorts of services you’re leaving open on the internet.
Network Command Line Tools
Windows and macOS operating systems come with built-in tools that can help you learn about your network. Let’s look at four of these tools that are particularly useful for finding information that you can then use when searching with Shodan. Before you can begin using commands, you’ll need to access the command line on your system. Windows and macOS have different command line programs; each uses slightly different versions of the commands and has different outputs. Let’s look at them separately.
Windows
Locate the search bar in the lower-left corner of the screen and enter CMD. At the top of the results, you should see an app called Command Prompt. Select it, and a window like the one in Figure 2-4 should appear on your screen. If you’re not running as an admin, the text after C: will be your home directory and include your current username.
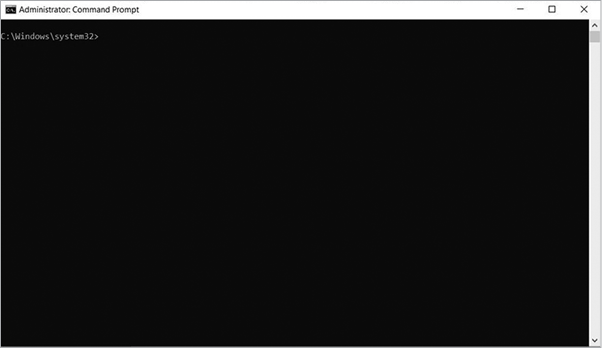
Figure 2-4: The Command Prompt window
First, we’ll use the ipconfig command. This command outputs your current networking configuration, including your computer’s assigned IP address, its default gateway, and information about your DNS server. The default gateway is the first router to which your computer connects to transmit traffic out of your network. Routers pass traffic from one to another to connect two endpoints together. A router creates a single network, which devices can join. So, the default gateway address is the address your computer needs to know to send traffic to the router that controls the flow of traffic into and out of your network. When you enter ipconfig in the Command Prompt window, you should see output similar to the following:
C:WindowsSystem32> ipconfig
Wireless LAN adapter Local Area Connection* 1:

   Media State . . . . . . . . . . . : Media disconnected
   Connection-specific DNS Suffix  . :

Wireless LAN adapter Local Area Connection* 10:

   Media State . . . . . . . . . . . : Media disconnected
   Connection-specific DNS Suffix  . :

Wireless LAN adapter Wi-Fi:

   Connection-specific DNS Suffix  . : lan
   Link-local IPv6 Address . . . . . : fe80::4d78:5074:4095:fe97%18
   IPv4 Address. . . . . . . . . . . : 192.168.86.36
   Subnet Mask . . . . . . . . . . . : 255.255.255.0
   Default Gateway . . . . . . . . . : 192.168.86.1

Ethernet adapter Bluetooth Network Connection:

   Media State . . . . . . . . . . . : Media disconnected
   Connection-specific DNS Suffix  . :
Notice the section labeled IPv4 Address below Wireless Lan adapter Wi-Fi. This is your computer’s private IP address. From this output, you can see that this system was assigned a private IP address. Also notice the section titled Default Gateway two rows below the IPv4 Address section. This identifies the router to which your system sends its traffic to leave the private network. In home networks, this is often the modem or router that the ISP provides. The default gateway also has a private IP address.
Although ipconfig gives you great information on what address your computer is using to communicate on your local network, it doesn’t help you if you want to use Shodan, because you’ll need to search for a public IP address, not a private one. You can use online tools to discover public IP addresses, but we’ll use the nslookup command because it’s another command line tool that is usually available. This tool looks up IP addresses assigned to website domain names. To use it, you’ll need a target. For this exercise, let’s use google.com. Run the command by entering nslookup in the Command Prompt window followed by google.com:
C:WindowsSystem32> nslookup google.com
Server:  testwifi.here
Address:  192.168.86.1

Non-authoritative answer:
Name:    google.com
Addresses:  2607:f8b0:4002:c09::8b
          2607:f8b0:4002:c09::65
          172.217.9.14
The output from nslookup shows the public IP addresses currently attached to google.com. This tool is useful when you’re trying to determine the IP address attached to a website to figure out where suspicious traffic in your network is coming from. Your output might look different depending on where you’re located and the current configurations Google uses.
Now that you have a public IP address, you can use another tool called ping. This tool sends a small packet of information to an IP address and then listens for the ping’s destination to respond back with its own packet of information. This tells you whether or not you can communicate with the system, because the system can’t respond if it can’t receive the ping in the first place. You can try using ping against the public IP addresses that you discovered using nslookup. Simply enter ping followed by the IP address you want to target:
C:WindowsSystem32> ping 172.217.9.14
Pinging 172.217.9.14 with 32 bytes of data:
Reply from 172.217.9.14: bytes=32 time=14ms TTL=116
Reply from 172.217.9.14: bytes=32 time=14ms TTL=116
Reply from 172.217.9.14: bytes=32 time=14ms TTL=116
Reply from 172.217.9.14: bytes=32 time=15ms TTL=116

Ping statistics for 172.217.9.14:
    Packets: Sent = 4, Received = 4, Lost = 0 (0% loss),
Approximate round trip times in milli-seconds:
    Minimum = 14ms, Maximum = 15ms, Average = 14ms
As you can see, ping sends out four packets. Each packet is tracked by how fast it goes out and returns to its point of origin. The speed is so fast, it’s recorded in milliseconds. In this example, each packet took approximately 14 ms. At the end of the command, the system provides a summary of how many packets were sent and received. If you’re unable to reach a system, ping will show the packets as lost.
Let’s use one last tool that will provide you with all the information you need to search with Shodan. You know you can reach Google’s IP address because of the results from ping, but they don’t tell you how your packets actually got to Google’s system. To learn that, you can use the tracert tool, which sends packets to each router along the path between your computer and the destination you want your traffic to reach. These packets provide information about the stops (or hops) your traffic makes on its way to its destination, using a feature called Time to Live (TTL). Essentially, each packet is designed to make only a certain number of hops based on its TTL number. A hop is counted when the packet is passed by a router. Each time a router passes the packet of traffic along, the TTL number is reduced by 1. Once its TTL reaches 0, the packet returns information about the last router to receive the packet. The packet dies, so the last router to hear it sends a message to the packet’s next of kin, or in this case, the device that initially sent the packet. The tracert tool summarizes all of these hops. Enter tracert in the Command Prompt window along with a destination IP:
C:WindowsSystem32> tracert 172.217.9.14
Tracing route to dfw28s02-in-f14.1e100.net [172.217.9.14]
over a maximum of 30 hops:

  1     2 ms     2 ms     2 ms  testwifi.here [192.168.86.1]
  2     3 ms     3 ms     3 ms  Address Removed by Author
  3    12 ms    14 ms    17 ms  Address Removed by Author
  4    10 ms     5 ms     5 ms  71.154.103.34
  5    29 ms    23 ms    15 ms  cr2.dlstx.ip.att.net [12.122.138.122]
  6    17 ms    14 ms    14 ms  12.123.240.25
  7    23 ms    22 ms    13 ms  12.255.10.100
  8    23 ms    23 ms    22 ms  209.85.243.95
  9    17 ms    22 ms    14 ms  108.170.231.69
 10    19 ms    22 ms    15 ms  dfw28s02-in-f14.1e100.net [172.217.9.14]

Trace complete.
The output shows that the first hop made is to your default gateway (in other words, your router). From there, it takes another nine hops before your packet gets to its destination. Each hop represents a router, either on your local network or on the internet. Each hop is sent three packets to show an average of how long it took to move to that point.
Using this tool is an ideal way to determine the parts of your network or the internet where your transmissions might encounter trouble reaching a destination. It also gives you a good idea of the public IP address assigned to your computer by your ISP; this should be the first public address you see, because your traffic has to make this hop to gain access to the internet. In the previous tracert output, I omitted the second and third results, because they link directly to my home network. But in a normal tracert execution, you’d be able to see these addresses.
macOS
On macOS, open the Terminal app to access the command line. To do this, use the search bar at the top-right corner of the screen. Enter Terminal and click the application that appears. Now you can learn some useful commands to help you find information about your network.
On macOS, you can use commands very similar to the Windows 10 commands, although some require slight variations. For example, instead of using ipconfig, you’ll use the ifconfig command on macOS. The ifconfig command provides the same information ipconfig does but with much more detail, as you can see in this output:
$ ifconfig
lo0: flags=8049<UP,LOOPBACK,RUNNING,MULTICAST> mtu 16384
options=1203<RXCSUM,TXCSUM,TXSTATUS,SW_TIMESTAMP>
inet 127.0.0.1 netmask 0xff000000
inet6 ::1 prefixlen 128
inet6 fe80::1%lo0 prefixlen 64 scopeid 0x1
nd6 options=201<PERFORMNUD,DAD>
gif0: flags=8010<POINTOPOINT,MULTICAST> mtu 1280
stf0: flags=0<> mtu 1280
XHC20: flags=0<> mtu 0
en0: flags=8863<UP,BROADCAST,SMART,RUNNING,SIMPLEX,MULTICAST> mtu 1500
ether b8:e8:56:16:38:10
inet6 fe80::8ec:dd2e:36cc:b962%en0 prefixlen 64 secured scopeid 0x5
inet 192.168.86.93 netmask 0xffffff00 broadcast 192.168.86.255
nd6 options=201<PERFORMNUD,DAD>
media: autoselect
status: active
p2p0: flags=8843<UP,BROADCAST,RUNNING,SIMPLEX,MULTICAST> mtu 2304
ether 0a:e8:56:16:38:10
media: autoselect
status: inactive
awdl0: flags=8943<UP,BROADCAST,RUNNING,PROMISC,SIMPLEX,MULTICAST> mtu 1484
ether ee:57:a6:16:74:96
inet6 fe80::ec57:a6ff:fe16:7496%awdl0 prefixlen 64 scopeid 0x7
nd6 options=201<PERFORMNUD,DAD>
media: autoselect
status: active
en1: flags=8963<UP,BROADCAST,SMART,RUNNING,PROMISC,SIMPLEX,MULTICAST> mtu 1500
options=60<TSO4,TSO6>
ether 32:00:1e:74:20:00
media: autoselect <full-duplex>
status: inactive
bridge0: flags=8863<UP,BROADCAST,SMART,RUNNING,SIMPLEX,MULTICAST> mtu 1500
options=63<RXCSUM,TXCSUM,TSO4,TSO6>
ether 32:00:1e:74:20:00
Configuration:
id 0:0:0:0:0:0 priority 0 hellotime 0 fwddelay 0
maxage 0 holdcnt 0 proto stp maxaddr 100 timeout 1200
root id 0:0:0:0:0:0 priority 0 ifcost 0 port 0
ipfilter disabled flags 0x2
member: en1 flags=3<LEARNING,DISCOVER>
        ifmaxaddr 0 port 8 priority 0 path cost 0
nd6 options=201<PERFORMNUD,DAD>
media: <unknown type>
status: inactive
utun0: flags=8051<UP,POINTOPOINT,RUNNING,MULTICAST> mtu 2000
inet6 fe80::b740:b05f:b952:2490%utun0 prefixlen 64 scopeid 0xa
nd6 options=201<PERFORMNUD,DAD>
utun1: flags=8051<UP,POINTOPOINT,RUNNING,MULTICAST> mtu 1380
inet6 fe80::508:28d2:8ad8:65a5%utun1 prefixlen 64 scopeid 0xb
nd6 options=201<PERFORMNUD,DAD>
utun2: flags=8051<UP,POINTOPOINT,RUNNING,MULTICAST> mtu 1380
inet6 fe80::e0b5:18ed:6a4c:a999%utun2 prefixlen 64 scopeid 0xc
nd6 options=201<PERFORMNUD,DAD>
The ifconfig command returns a huge amount of information. Within this output, it can be hard to find your device’s IP address. Look for en0 (ethernet 0), which usually identifies your main network adapter. By default, your main network adapter is assigned your IP address.
The traceroute command on macOS is similar to the Windows tracert command. It follows the same syntax, entering the command and then a target you want to trace to:
$ traceroute 31.13.93.35
traceroute to 31.13.93.35 (31.13.93.35), 64 hops max, 52 byte packets
 1  testwifi.here (192.168.86.1)  2.753 ms  2.391 ms  1.938 ms
 2   REDACTED 2.349 ms  2.619 ms  2.141 ms
 3  REDACTED 13.995 ms  4.940 ms  4.207 ms
 4  71.154.103.34 (71.154.103.34)  5.964 ms * *
 5  cr2.dlstx.ip.att.net (12.122.138.122)  16.537 ms  17.924 ms  20.084 ms
 6  dlstx410me9.ip.att.net (12.123.18.177)  14.537 ms  15.603 ms  14.522 ms
 7  12.245.171.14 (12.245.171.14)  15.592 ms  17.718 ms  31.346 ms
 8  po104.psw04.dfw5.tfbnw.net (157.240.49.143)  14.118 ms  13.705 ms
    po104.psw02.dfw5.tfbnw.net (157.240.41.125)  23.049 ms
 9  157.240.36.39 (157.240.36.39)  18.651 ms
    157.240.36.135 (157.240.36.135)  17.058 ms
    157.240.36.37 (157.240.36.37)  18.979 ms
10  edge-star-mini-shv-02-dfw5.facebook.com (31.13.93.35)  14.644 ms  20.972
    ms  20.617 ms
The nslookup and ping commands are nearly the same on macOS as on Windows. One key difference is that on macOS, ping doesn’t perform only four pings by default. Instead, it continuously pings a system until the user manually stops the command. This can be useful if you’re changing configurations on a system and want to make sure nothing you’re doing is obstructing network access. But in most cases, you’ll want to limit the number of pings you send to four or five to avoid sending too many pings at once. You can set the number of pings to send using the -c argument, which is short for count:
$ ping -c 4 192.168.86.1
PING 192.168.86.1 (192.168.86.1): 56 data bytes
64 bytes from 192.168.86.1: icmp_seq=0 ttl=64 time=1.891 ms
64 bytes from 192.168.86.1: icmp_seq=1 ttl=64 time=2.907 ms
64 bytes from 192.168.86.1: icmp_seq=2 ttl=64 time=5.073 ms
64 bytes from 192.168.86.1: icmp_seq=3 ttl=64 time=9.108 ms

--- 192.168.86.1 ping statistics ---
4 packets transmitted, 4 packets received, 0.0% packet loss
round-trip min/avg/max/stddev = 1.891/4.745/9.108/2.769 ms
Using Shodan
Shodan comes in two forms: a command line tool you can install and a website you can browse through. For the purposes of this chapter, we’ll look at the website only. You can access Shodan at https://www.shodan.io/. At the website, you’ll need to sign up for a free account. The free account allows you to use most of the tool’s functions, including searching through its databases, but it limits the amount of reports and other information you can download from the website. Figure 2-5 shows the home page.
Once you have a free account, browse through the website to become familiar with its layout. Start by clicking the Explore tab, which is just to the right of the search bar, near the top of the page. This page provides a breakdown of the various IP addresses Shodan has in its database and the services that are exposed on those addresses.
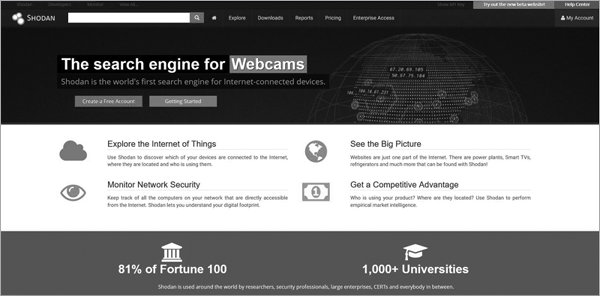
Figure 2-5: Shodan’s home page
On the left side, you should see a few interesting categories. Click the one labeled Video Games. You’ll see a list of various online games, including Counter Strike, Starbound, and Minecraft. If you click Minecraft, you’ll get a rundown of all the open Minecraft servers currently located by Shodan. Figure 2-6 gives you an example of the list.
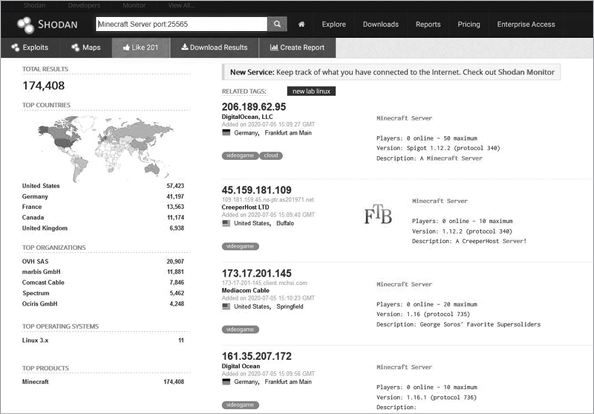
Figure 2-6: Minecraft servers located by Shodan
Shodan can also provide more serious information, such as information that attackers can use to exploit systems. Return to the Explore page, and this time, instead of selecting Video Games, click Default Password, which is about halfway down the page in a light gray box. A list of systems Shodan has verified that use default passwords for their authentication credentials appears, as shown in Figure 2-7.
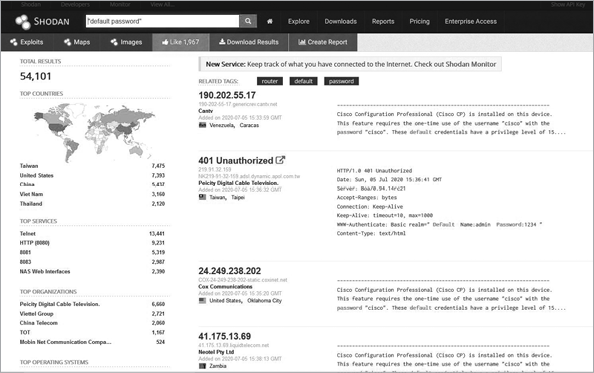
Figure 2-7: A list of systems using default passwords
Using a default password is a good way to invite a black hat into your system. Shodan allows you to check whether any of the IP addresses you’re using have default credentials. It can also tell you which services you’re leaving open to the internet. For example, on the left side, you’ll see a list called Top Services. Click Telnet to pull up a list of systems that allow Telnet connections, as shown in Figure 2-8.
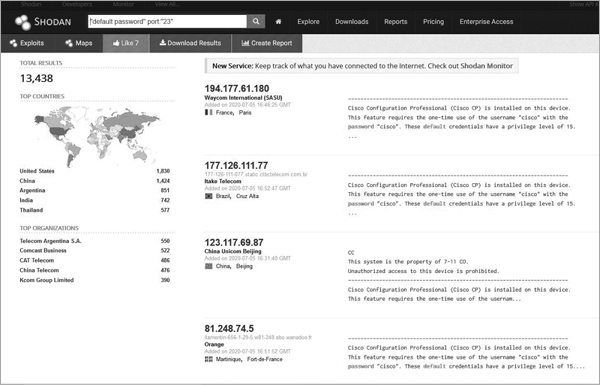
Figure 2-8: Systems with Telnet open
Telnet allows you to make a remote connection to a system and send it commands as if you were an administrator. It essentially lets you to control the system. Oh, and all Telnet traffic is sent unencrypted. This makes it rather dangerous. But as you can see, a ton of devices allow Telnet connections. Click the IP address in the list to see where these devices are located and other information about them. Figure 2-9 shows an example of a system in China with Telnet open.
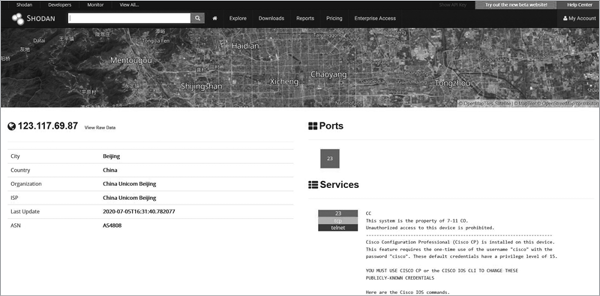
Figure 2-9: An IP record on Shodan for a system in China
Getting paranoid yet? Shodan gives you a massive amount of information about what the public can see about a network on the internet. You can also use it to search for specific addresses. In the search bar, try plugging in the intermediary addresses you discovered during your tracert trial to see what comes up. You might not like the results, but at least now you know what your network is putting out for black hats to see.
The key to hiding from an attacker is first knowing what they can see. Using the command line tools in this exercise and Shodan, you can gather that data. If you find that one of your devices is exposed on Shodan, you can take a few steps to close the exposure. First, you’ll need to identify which device is exposed. Shodan provides additional details about the connection that can be helpful to accomplish this. Second, you’ll need to control the exposure. You have some options here. You can remove the device from the network entirely, although this often isn’t viable, because it might not continue to function. You can also look up the manufacturer and find out whether it has recommendations for securing the device. If that doesn’t work, forums like Reddit and Spiceworks often provide advice on how to secure home networks. Once you know which device is open, it becomes that much easier to close it.
Conclusion
The internet is a complicated construction of devices and connections that span the globe. Although this can be difficult to conceptualize, you don’t need to understand every aspect of the internet to use it securely. By understanding how black hats find targets and how they create attacks against those targets, you can better defend your system when using the internet. The first step is knowing what information you’re making public. Once you know what is exposed to attackers on the internet, you can better deploy your own defenses.