
Chapter 6
Managing Glass Settings
In This Chapter
![]() Finding the settings cards
Finding the settings cards
![]() Looking under the hood
Looking under the hood
![]() Changing the volume
Changing the volume
![]() Working with Wi-Fi networks
Working with Wi-Fi networks
![]() Handling Bluetooth
Handling Bluetooth
![]() Using your head to turn on the device
Using your head to turn on the device
![]() Enabling guest mode on your Glass
Enabling guest mode on your Glass
![]() Performing a reset
Performing a reset
I love inventing worlds and characters and settings and scenarios.
— Jerry B. Jenkins
Glass is a remarkably flexible system that allows you to obtain and change information and connections to fit your needs. You may find yourself at a coffee shop that offers a free Wi-Fi connection (and what self-respecting coffee shop doesn’t?), but you need to set up a new connection on your Glass. What do you do?
It’s easy to access a list of Settings cards from the Home screen and then set up your Wi-Fi connection. But setting up Wi-Fi connections is just one of the things you can do on Glass. You can also
- Set up a connection with a Bluetooth device such as your smartphone
- Tell Glass how it should wake up when you tilt your head
- Get information about the device, such as how much memory is available for storing photos, videos, and timeline items
- Change the volume settings of the speaker so your ear and brain are comfortable
In case Glass is having trouble operating correctly and you suspect that an app is to blame, you don’t break Glass the way you break glass when you want to get a fire extinguisher or fire hose. Instead, you can reset your Glass to its original factory settings — the ones it had when you first took it out of the box. Then you can start running Glass again and see whether the trouble continues.
Finding the Settings Bundle
You can find the Settings bundle by swiping backward on the touchpad until you see the bundle, as shown in Figure 6-1.
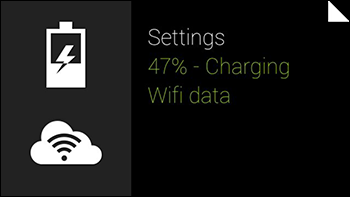
Figure 6-1: A Glass Settings card bundle.
 You can tell that you’re looking at a bundle because the top-right corner of the card contains a white right triangle and the card itself displays the battery status.
When you tap the Settings card bundle, you see several individual settings cards:
- Wifi: The Wifi Settings card shows the status of your Wi-Fi network connection. (See “Doing the Old Join and Switch” later in this chapter.)
- Bluetooth: The Bluetooth Settings card shows the status of the active connection with a Bluetooth device. (See “Pairing with Bluetooth Devices” later in this chapter.)
- Device Info: The Device Info Settings card gives you vital information about your Glass, including storage and operating system. (See “Seeing What’s Going On” later in this chapter.)
- Head Wake Up: The Head Wake Up Settings card allows you to set the angle at which you need to tilt your head to turn on the screen. (See “Using Settings That Use Your Head” later in this chapter.)
- On-Head Detection: The On-Head Detection Settings card turns Glass on as soon as you put it on your head. (See “Using Settings That Use Your Head” later in this chapter.)
- Screen Lock: The Screen Lock Settings card allows you to set a pattern-based password and lock the screen whenever you take Glass off your head or deactivate the device. When you put Glass back on your head or activate it, you need to enter the pattern on your touchpad to access screens and functions. (For details on setting Screen Lock, see this book’s Web Extras at www.dummies.com/extras/googleglass.)
- Wink: The Wink Settings card allows you to activate the Wink feature, which lets you take a photo by winking your right eye — even if the Glass display is off. (To find out more about setting up Wink, see Chapter 8.)
- Volume: The Volume card shows the current volume level of your speaker as a percentage. (See “Getting the Volume Just Right” later in this chapter.)
We cover battery charge in Chapter 2. For details about tweaking your Glass by using settings cards, read on.
Seeing What’s Going On
When you’re in the Glass Settings screen, you can get more information about the device by tapping the Settings card bundle and then tapping the Device Info card, shown in Figure 6-2.
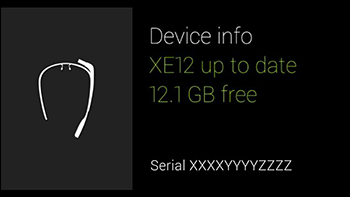
Figure 6-2: The Device Info card.
Storage
Glass contains 16GB of storage space, 12GB of which is allocated for pictures, video, and other timeline attachments. If you have a Google+ account, your photos and video are automatically synced with your Google+ Auto Backup folder (see Chapter 8).
 You can get more information about the Google+ Auto Backup folder, including how to turn the folder on and off and how many files you can back up to the folder, at https://support.google.com/plus/answer/1647509?hl=en.
Operating system
The bottom of the Device Info card shows the current version of the Glass operating system that’s running. It also indicates whether an operating-system update is available. The next time you plug Glass into the charger, it downloads and installs any operating-system update, even if you don’t check to see whether an update is available.
All Glass updates are downloaded through your Wi-Fi connection automatically, but the device has to be connected to the Internet for that to happen.
Getting the Volume Just Right
By default, speaker volume on your Glass is set to 100 percent. Because Glass makes sounds the first time you turn it on, you’ll know whether this speaker setting is too loud or just right.
Changing the default volume setting is easy. Just tap the Settings card bundle; tap the Volume Settings card, shown in Figure 6-3; and then slide your finger forward and backward on the touchpad to move the onscreen volume slider.
When you release your finger, the slider disappears, and the speaker chimes so that you can determine whether the new volume is right. If you need to adjust the volume more, tap the Volume Settings card again and reset the slider.
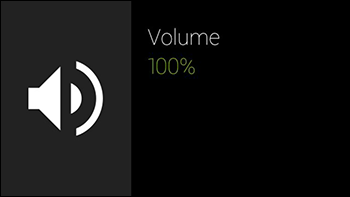
Figure 6-3: The Volume Settings card.
Doing the Old Join and Switch
Many coffee shops, restaurants, and other businesses have free Wi-Fi networks available to persuade customers to stay a while, perhaps buy more products or services, and attract other customers to meet you at that location (and, of course, buy things themselves).
Glass automatically detects Wi-Fi networks in your immediate area so that you can join one of them. Then you can browse the Internet, check your e-mail, and browse your social networking profiles without having to look at your smartphone screen or bring a laptop with you.
Joining a network
If you’re at a location that offers public Wi-Fi service, such as at a coffee shop or airport, your Glass finds all public Wi-Fi connections near you. These connections don’t require a password for you to access their networks.
Here’s how to join a public Wi-Fi connection that your Glass finds:
- Swipe backward on the touchpad until you see the Settings card bundle (refer to Figure 6-1).
- Tap the Settings card bundle.
The Wifi Settings card appears, as shown in Figure 6-4.
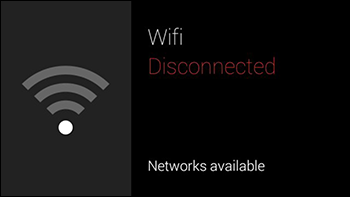
Figure 6-4: The Wifi Settings card.
- Tap the Wifi Settings card to view all available Wi-Fi network connections near you.
- Swipe forward on the touchpad until you see the network you want to join.
- Tap the touchpad and wait for Glass to connect you to the network.
Another way to join a Wi-Fi network is to use a QR code in MyGlass — a requirement if you want to join a secured Wi-Fi network that requires a password. See Chapter 5 for details.
Switching networks
When you leave your favorite Wi-Fi hotspot to go to another location, such as your home network, it’s easy to switch to that network on your Glass. Follow these steps:
- Tap the Settings card bundle.
- Tap the Wifi Settings card.
- Tap Switch Network in the resulting menu.
You see a list of the networks that Glass has detected.
- Tap the name of the network you want to join.
Glass automatically disconnects you from the active open network and switches you to your selected network.
If you’ve already added details about a Wi-Fi network on the MyGlass website or on the MyGlass app for smartphones, you can switch to that Wi-Fi network without having to set up any other information. If you don’t have information about the Wi-Fi network that Glass found, you need to set up the Wi-Fi connection.
Disconnecting from a network
What do you do if you don’t want to be connected to a wireless network anymore? Tell Glass to forget the network by tapping the network’s name in the Wi-Fi connection card and then tapping Forget on the resulting menu. When you forget a network, Glass disconnects you from the Wi-Fi connection. It also removes this connection from memory, so if you want to connect to the network again later, you have to join the network again.
Pairing with Bluetooth Devices
To check the current Bluetooth status of your Glass, tap the Settings bundle card and then tap the Bluetooth Settings card, shown in Figure 6-5.
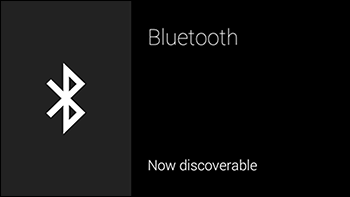
Figure 6-5: The Bluetooth Settings card.
Bluetooth connections require each device to be discoverable. In the case of Google Glass, you have to tell your smartphone that you want to pair it with your Glass. To see how this process works, connect (pair) your smartphone and your Glass via Bluetooth by following these steps:
- Open the Bluetooth Settings screen on your smartphone.
- On your Glass, tap the Settings card bundle and then tap the Bluetooth Settings card.
- On your smartphone, select Search for Devices.
- When the smartphone finds the device, tap Glass Device in the list of available devices.
On your smartphone’s screen, you see the Bluetooth Pairing Request window (see Figure 6-6), which includes a passkey. On the screen of your Glass, you see a card with the same passkey.
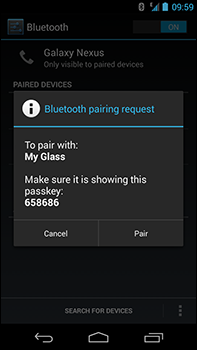
Figure 6-6: The Bluetooth Pairing Request window.
- Make sure that the passkeys on your Glass and your smartphone match.
If the passkeys don’t match, you should contact your smartphone manufacturer and/or a Glass Guide for more assistance. You can find out more about Glass Guides and getting help in Chapter 17.
- Pair the devices by tapping the Pair button on your smartphone and then tapping the touchpad on your Glass.
Glass displays a card stating that pairing was successful. After a few seconds, Glass returns you to the Bluetooth Settings card, which looks similar to Figure 6-7.
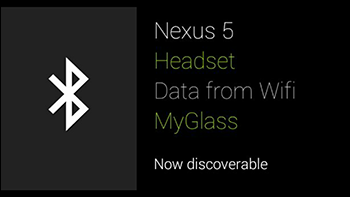
Figure 6-7: The Bluetooth Settings card displays a successful connection.
Using Settings That Use Your Head
You have three ways to turn on the display:
- Tap the touchpad.
- Use the Head Wake Up feature.
- Use On-Head Detection.
In this section, we discuss how to configure the ones that use your head.
Configuring Head Wake Up
Head Wake Up lets you turn on the display by tilting your head up instead of tapping the touchpad. To access this feature’s settings, tap the Settings card bundle and then tap the Head Wake Up Settings card (see Figure 6-8). This card shows whether the feature is enabled and also shows its wake angle — the angle at which you need to tilt your head to wake the device.

Figure 6-8: Head Wake Up Settings card.
By default, the wake angle is 30 degrees. Fortunately, Google recognizes that you may not find this setting comfortable, especially if you tilt your head often. You can change the default wake angle, as follows:
- Tap the Settings card bundle and then tap the Head Wake Up Settings card.
- When the menu appears, swipe forward to find and tap Set Wake Angle.
The screen shown in Figure 6-9 appears.
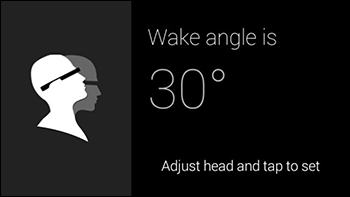
Figure 6-9: Change the wake angle in this screen.
- Tilt your head to the angle you’d like to use to wake the display.
The angle size appears in degrees onscreen as you move your head.
- When you feel comfortable with the angle, set it by tapping the touchpad.
Configuring On-Head Detection
Instead of having to remember to press the power button to turn Glass on or off, you can enable On-Head Detection instead. This feature activates Glass when it’s on your head and deactivates it when the device isn’t on your head. When Glass is off, the device is still powered on, but its touchpad, display, and audio are off, and it won’t pick up any incoming phone calls.
To configure the On-Head Detection feature, follow these steps:
- Tap the Settings card bundle and then tap the On-Head Detection Settings card (see Figure 6-10).
- Tap Calibrate on the resulting menu.
- When your Glass prompts you to do so, take it off for a few seconds.
As you take the device off, the speaker plays a descending chime.
- Put Glass back on your head and then tap the touchpad.
When you put the device on your head again, the speaker plays a rising chime, and you can interact with your Glass again.
If you find that On-Head Detection isn’t working as well as you’d like, tap the On-Head Detection Settings card to turn off this feature. Then recalibrate On-Head Detection by following the steps in this section.

Figure 6-10: On-Head Detection Settings card.
Resetting Glass
Glass is a computer, and like all computers, it may not always run as well as it should, or an app may not function properly. In such cases, you may want to reset your Glass. When you reset Glass, all data on it is deleted, and all the settings that came on it when it left the factory are restored, so the device is just like new.
 Be careful when you reset Glass, because when you do, you’ll lose that data forever — with the exception of any data that you downloaded to Glass from your Google+ Auto Backup folder (see “Storage” earlier in this chapter). As you do with any computer, make sure that the important data on your Glass is stored elsewhere (such as your Google+ Auto Backup folder) before you reset the device.
If you need to reset Glass to its original factory settings, tap the Settings card bundle, tap the Device Info Settings card, and then choose Factory Reset from the menu shown in Figure 6-11.

Figure 6-11: The Factory Reset option has a poison icon to underscore the fact that all data on your Glass will be deleted.
Glass asks you to confirm that you want to reset it, as shown in Figure 6-12. Begin the reset process by tapping the touchpad. If you want to abort the process and return to the Device Info Settings card, swipe down on the touchpad.
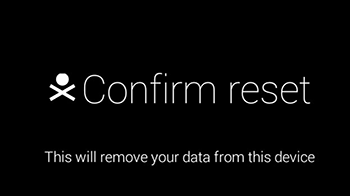
Figure 6-12: You have one last chance to abort the factory-reset process.
You’ll know that the reset process is complete when your Glass displays the setup screen. If you want more information about how to set up Glass, turn to Chapter 3.