
Chapter 8
Making Your Memories
In This Chapter
![]() Taking pictures with the touchscreen and your voice
Taking pictures with the touchscreen and your voice
![]() Recording and playing videos
Recording and playing videos
![]() Sharing and captioning your media
Sharing and captioning your media
![]() Backing up your media to other devices
Backing up your media to other devices
What I like about photographs is that they capture a moment that’s gone forever, impossible to reproduce.
— Karl Lagerfeld
Google Glass was made for taking pictures and videos. The device is equipped with a 5-megapixel camera and lots of operating-system bells and whistles designed to give you the best results from your pictures or videos. The camera, for example, uses high dynamic range (HDR) imaging technology to detect low-light environments and adjusts automatically to capture brighter, sharper pictures even when the subjects are moving.
Instead of fumbling for your smartphone and then launching a camera app, you can take pictures and videos with your Glass by speaking a few words or even blinking your eyes — especially convenient when you can’t use your hands, such as while riding your bike.
The real power of capturing media on your Glass, however, is in using the Google+ service to add captions to your pictures and videos, share them with friends, and back up your files from your Android or iOS smartphone. We show you how to do all that in this chapter.
Snapping Pictures
When Glass takes a picture, it captures an image based on what you’re currently looking at. Glass gives you three ways to take a picture:
- At the Home screen, say “OK Glass, take a picture.”
- Press the Camera button in the top-right corner of the Glass frame, above your right eye. (You can use this button to take a picture even when the Glass display is off.)
- When the Wink feature is on, you can take a picture by winking your right eye.
- At the Home screen, tap the touchpad and then choose Take Picture from the menu shown in Figure 8-1.

Figure 8-1: Choose Take Picture from this menu.
After your Glass takes the picture, you see a preview onscreen, as shown in Figure 8-2. You can share the picture from the screen by tapping the touchpad or by saying “OK Glass, share with…” followed by the name of the contact or Google+ circle you want to share the picture with. (You can also share it with a Facebook friend if you have the Facebook Glass app installed.) We discuss sharing in more detail later in this chapter.
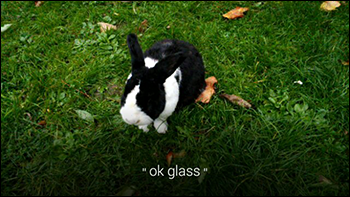
Figure 8-2: Glass is waiting for voice commands after taking a picture.
To view the picture in your timeline, swipe forward on the touchpad at the Home screen. Tap the touchpad again to share or delete the picture from your timeline. You can also find the picture in your Auto Backup album on Google+ after Glass has a chance to sync your pictures (see “Backing Up Your Media to Google+” later in this chapter).
Winking to take a picture
Your Glass detects a wink, and the Wink feature makes good use of this eye-blinking capability so you can take a picture just by winking your right eye.
 You should always let people know that you’re going to take a picture of them by winking before you do so. Otherwise, those who think you’re winking at them may let you know that they don’t appreciate it.
Before you can wink to take a picture, you need to activate the Wink feature, like so:
- On the timeline screen, tap the Settings card.
- Tap the Wink Settings card.
- When you’re prompted to do so, look at the screen and wink twice so that Glass can calibrate the feature correctly.
Now that you have the Wink feature enabled, you can use it whether the Glass screen is on or off. You can check whether Wink is on by looking at the Wink Settings card (see Figure 8-3). If you don’t want to use the Wink feature, deactivate it by following Steps 1 and 2 above and then choosing Disable on the Wink screen.
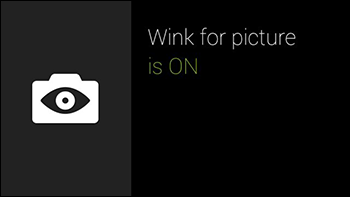
Figure 8-3: The Wink Settings card shows when the Wink feature is on.
Evoking a vignette
In Glass parlance, a vignette superimposes Glass features on your screen over the picture you’ve just taken. This feature is a neat little way to share your experience of taking pictures on Glass. Here’s how to make a vignette:
- Make sure that the screen displays the feature (such as the weather forecast) you want to use.
- Take the picture by pressing the Camera button.
- Tap the touchpad and then choose Make Vignette from the menu.
The vignette appears onscreen (see Figure 8-4). If you want to see more menu options (such as one that lets you share the vignette with someone else), say “OK Glass” or tap the touchpad and then choose the desired option from the menu.
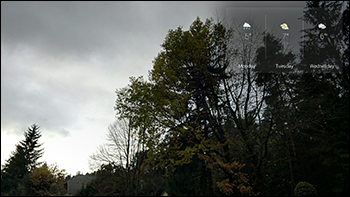
Figure 8-4: A Glass vignette.
Capturing Videos
Like the cameras on most smartphones sold today, the camera on your Glass allows you to take videos. Capturing videos with your Glass is similar to taking pictures. You have a choice of three ways to start recording:
- At the Home screen, say “OK Glass, record a video.”
- Press and hold the Camera button for 1 second. (This button is in the top- right corner of the Glass frame, above your right eye.)
- At the Home screen, tap the touchpad and then choose Record Video from the menu (see Figure 8-5).
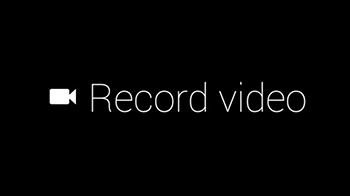
Figure 8-5: Choose this command to record a video.
While Glass is recording your video, you see that video on your display, as well as a time counter. By default, Glass records video clips for 10 seconds and then stops recording automatically, but you can extend recording time, as we discuss in the next section.
When you finish recording your video, it appears as a card on your timeline, and it also appears in your Auto Backup album on Google+. (For more on Auto Backup, see “Backing Up Your Media to Google+” later in this chapter.)
Extending a recording
The reason for the “10-second rule” for video recording on Glass is that Google thinks you’ll want to take brief videos and share them immediately. Recording videos longer than 10 seconds is both possible and easy, though.
 Recording requires a lot of processing power. As a result, the longer you record a video, the hotter the Glass device gets. If your Glass gets too hot, it may become too uncomfortable for you to wear and may also start to behave erratically. Keep a close eye (pun unintended) on the temperature of your Glass, and stop recording when it heats up (see “Stopping a recording” later in this chapter).
You have two ways to extend a recording:
- While the video is recording (see Figure 8-6), press the Camera button.
- Tap the touchpad and then choose Extend Video from the menu that appears.
The progress bar at the bottom of the display disappears, and Glass continues to record until you tell it to stop (see the next section) or until you run out of battery power or file storage.
Even if you used the “OK Glass” voice command to start recording, you have to use your hands to extend or stop the recording.
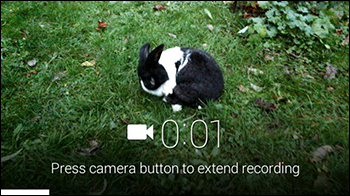
Figure 8-6: Just press Camera to extend the recording.
Stopping a recording
You can stop recording in either of two ways, depending on how you’re recording:
- If you’re making a default 10-second recording and want to stop recording before the time limit expires, tap the touchpad, swipe through the video menu, and then choose Stop Recording from the menu.
- If you’re making an extended recording (see the preceding section), press the Camera button once. You can also choose Stop Recording from the menu as you would with a 10-second video.
When you stop recording, the "ok glass" prompt appears at the bottom of the screen, as shown in Figure 8-7. If you want to share the video with or send the video to one of your contacts or people in a Google+ circle, say “OK Glass, share with…” followed by the name of your contact or circle. We talk about other ways to share later in this chapter.
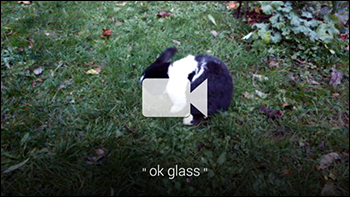
Figure 8-7: You can issue a voice command after recording a video.
Playing video
After you record a video, it appears on your Glass timeline as a card. Tapping the card opens a menu that offers the following choices:
- Play: Plays the video from the beginning (see Figure 8-8).
- Share: Opens another menu that allows you to share the video with one or more contacts, Google+ friends, or various social networks via Glassware apps.
- Delete: Removes the video from your timeline and from your Glass.
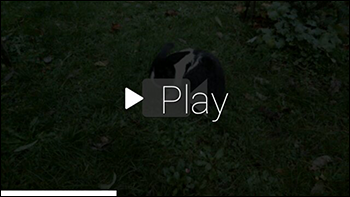
Figure 8-8: Start playing the video by choosing Play.
 You can always pause playback by tapping the touchpad and resume playback by tapping the touchpad again. Also, while the video is playing, you can swipe backward on the touchpad to rewind and swipe forward to skip boring parts.
Sharing Your Glass Media
Glass is built to share data. You can share pictures and videos from your Glass with your friends, your Google+ circles, and other social media sharing apps available for Glass (such as Facebook and YouTube). This section shows you how.
Google+ keeps an eye out for content in posts that isn’t eligible to be shared. You must not share pictures or videos that are owned by another person or by a company without express written permission, for example. If you don’t, your post will be removed, and you could be barred from the Google+ service. If you’re not certain how you should use your Glass to share information, see Chapter 7.
Sharing from your timeline
It’s easy to share a picture or video from your timeline. Just follow these steps:
- Find the picture’s or video’s card by swiping forward and backward on your timeline until the card appears onscreen.
- Tap the touchpad and then choose Share from the menu.
You see the Share icon, as shown in Figure 8-9.
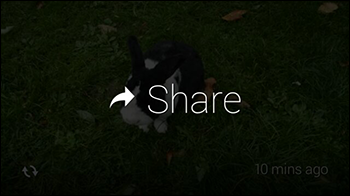
Figure 8-9: The Share icon allows you to share a picture or video by tapping the touchpad.
- Swipe through the available sharing options in the menu and then select the service with which you want to share your picture or video.
- If you want to add a caption, see the next section; otherwise, wait until Glass shares your picture or video.
When Glass finishes the sharing process, you see the picture or video onscreen.
Adding captions
Have you ever been frustrated when someone shares a picture with you but doesn’t add the filename or a brief description? Posting media without explaining who’s in the picture or video and what that person is doing can cause viewers to complain to you — or ignore your posts. Your Glass makes it easy for you to be nice to your viewers by adding captions.
At the bottom of the screen is the progress bar, which is a white line. This line moves from left to right and denotes the time it takes to share the picture or video. You can decide whether you want to add a caption while the progress bar is onscreen. When the progress bar reaches the right side of the screen, time runs out; the progress bar disappears; and you’re sharing without a caption.
You can add a caption in two ways:
- Tap the touchpad after you tell Glass the contact, Google+ circle, or social network (such as Facebook) with which you want to share your picture or video (refer to “Sharing from your timeline” earlier in this chapter).
- When you share a picture or video from your timeline, you see "ok glass" at the bottom of the screen, as shown in Figure 8-10. This text informs you that you can speak commands, so the other way you can add a caption is to say “OK Glass, add caption.”
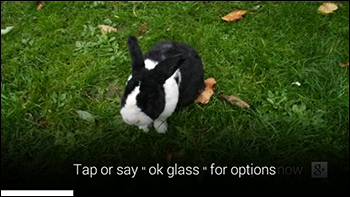
Figure 8-10: You can tell Glass to add a caption.
Whichever of the preceding two methods you choose, when the Caption screen appears, say what you want to include in the caption. As you speak, the words appear onscreen so that you can see what the caption will look like (see Figure 8-11). You can include hashtags, if you want; see the nearby sidebar “Cooking up caption #hashtags.”
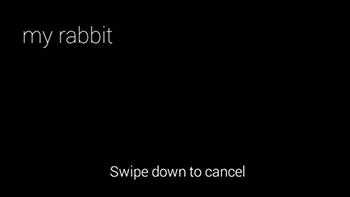
Figure 8-11: Speak your caption.
If you decide that you don’t want to add the caption, swipe down on the touchpad. If you do want to add it, tap the touchpad. Your caption appears in the bottom-left corner of the picture, and text below the picture informs you when the caption was added (see Figure 8-12).
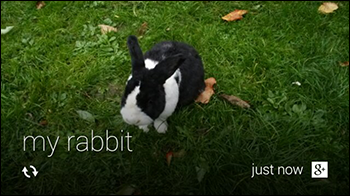
Figure 8-12: Your finished caption, complete with time stamp.
Sharing with your computer
Another way to share your media is to share it with your computer. Just connect your Glass to your computer with a micro USB cable. Your computer recognizes that Glass is a media device, just like a smartphone or camera. Then you can access the Glass files on your computer as you would any other picture and video files.
To view your pictures and videos in Windows Explorer, click the Glass device in the folder tree and then navigate to the DCIMCamera folder. On a Mac, use the Finder to navigate to the appropriate media folder. Then share, copy, and paste files from that folder as you would from any other folder on your computer.
Backing Up Your Media to Google+
Google automatically synchronizes all your pictures and videos to your Auto Backup album on Google+ when you plug your Glass into the charger and connect it to the Internet via Wi-Fi (see Chapter 3).
 The Auto Backup folder is part of the Google Drive account that’s part of your Google account. You can find out more about Google Drive at https://support.google.com/drive/answer/2424384?hl=en.
Pictures and videos upload at their original resolutions, up to a maximum 4,288 by 2,848 pixels. Google provides 15GB of free storage space in the Auto Backup folder, which should be enough for most needs.
If the pictures in the Auto Backup folder occupy more than 15GB, Google automatically resizes the pictures to standard size: a maximum 2,048 pixels on the longest edge. This resizing frees some room in the Auto Backup folder for more files.
Google allows you to back up an unlimited number of videos to the Auto Backup folder as long as each video is less than 15 minutes long and has a resolution of 1080p or lower. (1080p resolution is 1,920 by 1,080 pixels.) If you back up videos that are longer than 15 minutes, those files count against your 15GB space quota.
So what happens if you need more space? You can get it — at a price, starting at $4.99 per month for 100GB. You can view the full storage plan and pricing list at https://support.google.com/drive/answer/2375123.
If you don’t want to worry about maxing out your online storage space, you can also back up files to your computer (see “Sharing with your computer” earlier in this chapter). Just copy files from your Glass to a folder on your computer.
Accessing backed-up files
You can access synchronized files from the Google+ website on your browser or through the Google+ app on your Android or iOS device. When Glass is connected to the Internet through a Wi-Fi connection, you can also use these services to sync the pictures on your Glass to the Auto Backup album at any time. In addition, you can use the Google+ app to move files from the Auto Backup folder to a Google+ folder that you share with Google+ contacts and/or circles.
Backing up manually (Android and iOS)
After you enable Auto Backup, the Google+ app uploads any pictures or videos you take with your smartphone or tablet to the Auto Backup folder automatically. When you sign out of the Google+ app, any pictures and videos that you take don’t upload to the Auto Backup folder. You can upload those pictures and videos later by logging back in to Google+ and tapping Back Up All in the Google+ app screen, shown in Figure 8-13.
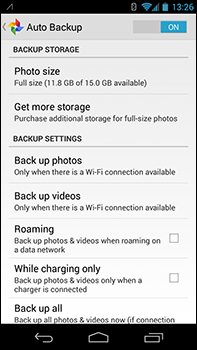
Figure 8-13: The Backup Storage and Backup Settings options on the Settings screen.