
Chapter 4
Getting Images into and out of Photoshop
IN THIS CHAPTER
![]() Mommy, where do pictures come from?
Mommy, where do pictures come from?
![]() Keeping track of your images
Keeping track of your images
![]() Putting pictures on paper
Putting pictures on paper
![]() Sharing your work
Sharing your work
In this chapter, I show you how to get images into Photoshop from your digital camera and your scanner and then how to keep those images organized on your hard drives and discs. I discuss the basics of printing your images on inkjet printers (and alternatives) and tell you some things you need to know to make sure that you get the prints you expect. I also explain how to prepare images for sending by e-mail.
Bringing Images into Photoshop
Artwork in Photoshop originates in one of three ways:
- You open an image using Photoshop’s File ⇒ Open dialog box (as shown in Figure 4-1) or through Bridge (discussed later in this chapter). In Figure 4-1, note that Windows does not provide previews or thumbnails of PSD files (or many Raw formats), which is one of the reasons you have Bridge CC available.
- You import an image (typically through a scanning device).
- You create an image from scratch by choosing File ⇒ New.

FIGURE 4-1: Windows on the right, Mac to the upper-left.
If you double-click a file and Photoshop doesn’t launch or the wrong program launches, you need to either launch Photoshop manually and use the File ⇒ Open command or associate the file format with Photoshop. (Check your operating system’s Help for info on associating file types with specific programs.) If you open images through Bridge:
- Open Bridge’s Preferences with the shortcut ⌘ +K/Ctrl+K.
- In the column to the left, click File Type Associations.
- In the lower-right corner, click the Reset to Default Associations button.
 If you double-click a file and Photoshop launches but the image doesn’t open, you’ve likely made a change to the operating system and should reinstall Photoshop (remembering to disable all spyware/antivirus software before installing and, of course, reactivating afterward).
Downloading from your digital camera
If you have the hardware, you can remove your camera’s memory card, memory stick, or other media from the camera and insert it into a slot right on your computer. You can also use a card reader, which is a small device designed to read camera storage media. Transferring via the Mac Finder or Windows is often faster than (and usually just as reliable as) transferring using the camera manufacturer’s software.
 Never open an image into Photoshop directly from a camera, Flash card, or CD/DVD. Doing so can slow down your work, and you also risk losing your work if Photoshop isn’t able to immediately and efficiently read the original file while you work. And, of course, you can’t save from Photoshop back to most removable media, so you need to create a new file (on a writable drive) anyway. Open images from a network drive only when working with Adobe Drive, the digital asset management (DAM) program that you can download (for free) from
 Adobe.com.
After the images are safely stored on your local hard drive (or a high-speed external hard drive), you can open them in Photoshop by using one of the methods that I describe earlier in the chapter. Depending on your color settings, you might see a warning that the image’s color profile and the profile that you selected as your RGB working space don’t match. You may see a simple OK/Cancel option or you’ll see the embedded profile and the working profile, and you’re given three options (as well as a Cancel button, which won’t open the document):
- Use the embedded profile (instead of the working space)
- Convert the document’s colors to the working space
- Discard the embedded profile (don’t color manage)
Generally speaking, you want to convert to your working space so that you see the most accurate color on your monitor. You might want to preserve the embedded profile if you’ll be returning the image to the originating computer after looking at or working on it. The third option disregards all color profiles and works with uncorrected color. This is a good choice when working with images that you’ll later use with a non-color-managed program, such as a web browser or presentation program. (Without color management, you see the image as it will appear in the other program.) You can disable the color mismatch warnings in Photoshop’s Edit ⇒ Color Settings dialog box.
When opening an image that includes text, you might also get a message warning you that the type layers need to be updated. Generally speaking, you want to update them unless the image contains fonts that aren’t available on your computer. And don’t forget about the Type ⇒ Add Fonts from Typekit command to get missing fonts.
Scanning prints
You place a photo (face down) on the glass of your scanner. You push a button. It automatically appears on your computer screen. That’s scanning at its most basic. You can save that file to your hard drive and use Photoshop’s File ⇒ Open command to bring it into Photoshop for editing.
On Macs, Photoshop’s File ⇒ Import ⇒ Images from Device command enables you to scan right from Photoshop, right into Photoshop. It can also be used to download images from cameras or card readers. (Windows users have WIA Support on the File ⇒ Import menu.) The scanned image can open in Photoshop as a separate file or as a layer in the currently active document. The Import Images from Device dialog box is shown in Figure 4-2.

FIGURE 4-2: Access your scanner directly from Photoshop on a Mac, scanning right into Photoshop.
To the right in Figure 4-2, you see a column of options available when working with a scanner. You can elect to scan as color or grayscale (the Black & White option), set the resolution and print dimensions, rotate the image, and elect to identify separate photos placed on the scanner’s glass. In addition to JPEG, available file formats include TIFF and PDF (as well as a number of other formats you’ll likely not use for scanning). Other available options include manual color correction (do it in Photoshop instead), three levels of sharpening (again, a task to be done in Photoshop), and descreening to remove moiré patterns (discussed later in this chapter).
When you’ve finished scanning, choose File ⇒ Close or use the shortcut ⌘ +W/Ctrl+W to close the window — no Quit or Cancel button is available.
 Using Photoshop’s Crop and Straighten Photos enables you to scan multiple photos in a single pass; then have Photoshop separate them into individual files. Read about using this command in Chapter 16.
Determining scan resolution
Before scanning an image, you need to make some decisions:
- How you want to use the image
- What its final size will be
- What resolution you need
If your scanner’s software doesn’t offer you the option to input final dimensions in inches, just pixels, you may need to calculate the size. By determining how many pixels you need beforehand, you eliminate the need to resize the image in Photoshop (and the possibility of image degradation). Many scanner interface windows let you input the final size and resolution you need right in the scan window. If you find the need to calculate scan resolution manually, here’s how:
- Determine the required pixel dimensions.
- For print: If you’ll be printing the image, determine the size at which you want to print (in inches) and the resolution at which you want to print (typically 300 ppi [pixels per inch] is a good choice). Multiply the print width and height by the resolution to determine pixel dimensions.
- For the web: If the image is destined for your website, determine how much of your page the image will occupy (in pixels).
-
Measure the original.
Before placing it on the scanner’s glass, measure the original image. If you’re using only part of the image, measure that part. (Be careful not to scratch the original with your ruler!)
-
Do the math.
Divide your required pixel dimensions (Step 1) by the physical dimensions of the original (Step 2). The result is your scan resolution. (If you get different numbers for the width and height, use the larger and expect to do some cropping in Photoshop.)
Many flatbed scanners (scanners designed for use with documents and photos) have transparency adapters that let you scan film and slides. However, if you have a lot of negatives or slides to scan or if the best possible quality is required, consider a dedicated film scanner from Nikon, Minolta, or Kodak.
You can also add image files to your hard drive using Bridge’s Get Photos from Camera. However, using Import Images from Device does offer one huge advantage — it’s “sticky.” In other words, the dialog box doesn’t go away after the first import. Say, for example, that you have images on a single Flash card from three different projects or locations and you want to download them into three different folders. When using Get Photos from Camera, you wait for Bridge’s Photos Downloader to examine the entire card, you select the first batch of photos, you download, and then Adobe Photo Downloader goes away. To download the second set, you start from scratch (including re-examining the entire card and waiting for thumbnails to generate). When importing directly from Photoshop, you select the first set of images, choose a location, download; select the second set, choose a different location, download; select the third set, choose a third location, download, close the window.
Preventing moiré patterns
Unless you spent thousands of dollars on your scanner, you probably want to forget about the scanner software’s color and tonal correction capabilities — Photoshop gives you more control. However, here is one thing that scanner software does much better than Photoshop, and it’s a capability that you should use when appropriate: moiré (pronounced, roughly, mwah-RAY) reduction. A moiré pattern is a visible rosette pattern created by the pattern of dots placed by the printing press to reproduce color.
When you need to scan a color image or artwork that comes from a book, magazine, or newspaper (or other material printed on an offset printing press, such as product packaging or signs), you want to use the scanner’s software to reduce moiré. When you let the scanner know the pattern is there, the scanner’s software compensates for the pattern and smoothes the scanned image (as you can see in Figure 4-3).

FIGURE 4-3: Scanning without (left) and with the scanner’s moiré reduction option.
The moiré reduction feature in your scanner’s software might not be immediately recognizable. It might be labeled Descreening, or it could be a choice between Color (Photo) and Color (Document). As always, refer to your hardware’s User Guide for specific guidance.
If rescanning is out of the question and you have a moiré pattern to reduce in Photoshop, blur the image enough to disguise the problem, and then paint with the History Brush to restore areas of critical detail in the image.
Here’s an important announcement from The Department of an Ounce of Prevention is Worth a Pound of Cure: A minute or two spent cleaning the scanner could save hours of touch-up in Photoshop. Before doing any scanning, use a can of compressed air to make sure that the scanner’s glass is clean and free of dust. Likewise, check the inside of the scanner’s lid. (What good does it do to clean the glass if dust from the lid is going to contaminate it again as soon as you close it?) If necessary, eliminate fingerprints or smears with appropriate glass cleaner. (Check the scanner’s User Guide for cleaning instructions and be careful when using liquid glass cleaner with an electrical device! I like to use the same premoistened wipes I use for my eyeglasses.)
You can use a burst of compressed air on the original image, too, before placing it on the glass. Just be careful — first spray a quick burst away from the photo to clear the nozzle, hold the can of air some distance away from the photo, and spray at an angle so that you don’t damage the surface of the print.
Keeping Your Images Organized
Because digital photography doesn’t have a significant per-shot cost (as did shooting film), people certainly have a tendency to shoot more. And more. And more. You find experimental shots, this-might-be-interesting shots, special effects shots, and (at least in my case) the same shot over and over and over again. They build up on your hard drive.
It’s pretty easy to stay organized after you choose a system. The hard part is actually deleting those digital photos that you really don’t need to keep — you know, out-of-focus, shot at a bad angle, Aunt Betsy’s eyes were closed and her mouth was open, the 400th shot of the dogs sleeping all curled up, the 401st shot of the dogs sleeping all curled up, and the like. It takes discipline! (Or an external drive, USB storage, and for older computers, an optical drive that can burn CDs and/or DVDs.)
Creating a folder structure
I generally recommend using a subject-based organization scheme, such as the one shown in Figure 4-4. For example, inside the main folder named AllVacationPhotos, you might have subfolders with names such as London-Feb2017, NHL_ 31CityTour, or perhaps BackyardCamping _Sept_2016. (Notice that none of the folder names use empty spaces or characters other than letters, numbers, a dash, and an underscore, which minimizes the possibility that Photoshop or another program won’t be able to find a file.)

FIGURE 4-4: Organize with subfolders.
Don’t overload your folders! If you find that your computer is slowing down when it tries to display the content of a folder, you have too many files in the folder. Create a second folder of the same name and add -01 and -02 to the folder names. Generally speaking, 500MB is probably as large as you want in a single folder.
You can use external drives or USB storage (or your computer’s CD/DVD drive if it has one) to create folders of images. This not only provides you with a reliable backup (assuming that you store the devices or disks correctly and handle them carefully), but it can also free up space on your hard drive. Your folder/subfolder structure can also be used when creating your discs.
Using Adobe Bridge
Adobe Bridge, the asset-management program for Photoshop and other Adobe programs, is a separate program in the Creative Cloud Manager. You can open Bridge independently, or you can choose File ⇒ Browse in Bridge from Photoshop’s main menu to launch Bridge — seen launched in Figure 4-5. If you choose Bridge’s Preferences ⇒ Advanced command, you can elect to have Bridge launch automatically whenever you log in to your computer.

FIGURE 4-5: Bridge’s color scheme is automatically matched to what you choose in Photoshop’s Preferences, but you can change that in Bridge’s Preferences ⇒ Interface.
 In Figure 4-5, note the Publish tab in the upper-right, nested with the Preview tab. That gives you direct access to Adobe Stock, enabling you to submit your images for sale as stock photos right from Bridge.
Here are a few tips for working with Adobe Bridge:
- Use keywords and categories. Using the Keywords tab (shown in Figure 4-6), to the lower right in Bridge’s default layout, you can assign keywords and categories to images. Keywords and categories are descriptive terms that you assign to individual images. Down the road, you can choose File ⇒ Find to find all images with a specific assigned keyword. A checkmark to the left of a keyword indicates that all the files currently selected in Bridge’s Thumbnails pane have that keyword assigned, a dash indicates that some, but not all, selected images have been assigned that keyword.
-
Select multiple images in Bridge. You can have multiple images active by clicking and Shift+clicking (or ⌘ +clicking/Ctrl+clicking) the image thumbnails. You might want to select multiple images and then assign the same keywords to all the selected images at once.
- Use labels, ratings, and filters. Under the Label menu, you can assign a star rating to each image and assign colors to organize by subject or project. Use the View ⇒ Sort menu to arrange images in the thumbnails area of Bridge according to either the label or the rating.
- Add folders to the Favorites. You invariably will visit some folders on a regular basis. Choose File ⇒ Add to Favorites to get back to that folder faster and more easily. In the upper-left corner of the Bridge window, click the Favorites tab for one-click access. Keep in mind, too, that you can add a folder to the Favorites while working on a specific project, and then choose File ⇒ Remove from Favorites when the project is finished.
- Change your view and workspace. Use the View menu to customize what the Bridge window shows, and use the Window ⇒ Workspace menu to determine how it is displayed. You might find that Compact Mode fits your needs better in some circumstances than does Full Mode. And don’t overlook Bridge’s Slideshow feature — it can be a great way to show off your work!
- Use stacks to organize images. Select similar images or variations on the same shot and use Bridge’s Stacks ⇒ Group as Stack command. All the selected images are piled into one spot as a single thumbnail, with a number in the upper-left corner to indicate how many images are stacked together. When you have ten or more images in a stack, you can scroll through the thumbnails with a slider that appears when you move the cursor over the stack.
- Zoom with the Loupe. Click in the Preview (in the upper-right corner of the default workspace) to zoom in. Drag the cursor to inspect the preview up close and personal. Use your mouse’s scroll wheel or your trackpad to zoom from 100% to as high as 800%.
- Access Photoshop scripts. In Bridge’s Tools menu, you’ll find a submenu named Photoshop (as well as menus for other installed programs that use Bridge). Through that menu, you can easily access Photoshop’s Batch, Image Processor, Photomerge, and a number of other features. Select the thumbnails in Bridge first, then select the feature you want to use. Perhaps my favorite command in the menu is Load Files into Photoshop Layers — all of the files selected in Bridge are opened into a single Photoshop document, each on its own layer. It’s a fabulous time saver when preparing a series of images for use with Photoshop’s stack modes. (For more on layers and stack modes, see Chapter 18.)
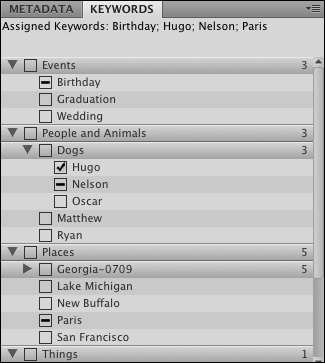
FIGURE 4-6: Assign keywords and categories to help organize (and locate) images.
If you enjoy macro photography — taking close up shots of little things — you can shoot a series of images with different focal points (using a tripod, of course), then use Bridge’s Load Files in Photoshop Layers command. After the files load, choose Select ⇒ All Layers from Photoshop’s menu bar (did you know about that command — very handy, eh?), choose Edit ⇒ Auto-Align Layers (even if you did use a tripod), then choose Edit ⇒ Auto-Blend Layers with the Stack Images option. Each of the in-focus areas is combined to a single all-in-focus image using layer masks. (See Figure 4-7.)

FIGURE 4-7: Auto-aligning and auto-blending layers.
Renaming image files easily
All right then, you’ve arranged a hierarchy of folders and subfolders. You’ve sorted your images into those folders. You’ve assigned ratings and labels to the images. However, you still have no idea which is which on the File ⇒ Open Recent menu. Filenames such as _MG_1907.CR2 and PB270091.jpg don’t tell you much about the image content, do they? Use Bridge’s Tools ⇒ Batch Rename command (as shown in Figure 4-8) to assign more meaningful (and informative) names to your files. Select content from each field from the pop-up menu or type in a field. Click the + button to the right to add more elements or variables to each name.

FIGURE 4-8: Use Batch Rename to assign informative names to files.
So that each of your original images gets a unique name, you must include a variable when using Batch Rename. (If you did try to rename all the images in a folder to say, picture.jpg, you would end up with only one image file in the destination folder — each would overwrite the previous.) Therefore, when using Batch Rename, you must choose one of the variables for one of the fields via the pop-up menu, be it the original document name or a sequence number/letter.
Also keep in mind that you shouldn’t type a period (.) into any field. That character should be used only before the file extension. And, as a wonderful keep-us-from-creating-problems-for-ourselves improvement, Batch Rename automatically adds the file extension for you.
Printing Your Images
In the very recent past, the subject of printing images from Photoshop required a huge number of pages. Thankfully, improvements in hardware and software make printing much easier. Monitors are well calibrated out of the box, printers reproduce color more accurately, and inks and papers last for decades. Yes, things have come a long way in a short time. But before you click the Print button, you should make sure that your image is ready to print. Will it fit properly on the page and in the frame? Are the pixels small enough that they blend evenly into the overall picture? Will the colors you envision be the colors that appear on paper?
Cropping to a specific aspect ratio
Aspect ratio is the relationship between the width and height of your image. An image in landscape aspect ratio is wider than it is tall, and an image in portrait aspect ratio is taller than it is wide. Although digital cameras capture in a variety of aspect ratios, including 3:4 and 4:5, DSLR (digital single lens reflex) cameras typically use a 3:2 aspect ratio: One side is 1.5 times the size of the adjoining sides. Typical print (and picture frame) sizes are 8x10 inches (a 4:5 aspect ratio), 5 x 7 inches (5:7), 4 x 6 inches (3:2), and 3 x 5 inches (3:5). In Figure 4-9, the 3:2 aspect ratio is outlined in green, 5:7 is shown in yellow, and 4:5 is red.

FIGURE 4-9: Different print sizes encompass different amounts of your image.
Although an 8 x 10 print is physically larger than a 4 x 6 print, it may print less of your original image because of cropping. The 4 x 6 print, with a 3:2 aspect ratio, includes all of the original image; the 8x10 print (with its 4:5 aspect ratio) is missing 2 full inches of the image’s longer dimension. To print 8 inches wide and retain the entire image, you’d be printing at 8 x 12. Of course, if your camera captures in a 4:5 aspect ratio, the problem is reversed — the original image fits perfectly into an 8x10 print, but won’t fill a 4 x 6 print without cropping.
In Photoshop, you can change the aspect ratio of your image with the Canvas Size command (if one dimension is already correctly sized), the Crop tool, or the Rectangular Marquee tool with the Image ⇒ Crop command. With the Crop tool selected and WxHxResolution selected in the menu to the left in the Options bar, you can enter specific dimensions and a target resolution in the three boxes to the right of the menu. Drag the tool, position and adjust the bounding box, and then press Return/Enter to execute the crop. Whatever is within the bounding box is resampled to the exact size that you specify on the Options bar. If you crop with Canvas Size or Crop commands, you may need to use Image ⇒ Image Size to specify the desired print resolution. (And see Chapter 2 for information on Photoshop’s Content-Aware Scale command.)
As soon as you activate the Crop tool (use the shortcut C or click the tool icon in the Toolbox), a bounding box appears around your image. You’ll also see a variety of options in the Options bar. (See Figure 4-10.) The top inset shows the various preset aspect rations available in the Options bar. Note the option WxHxResolution — select it to crop to a specific size and resolution. The left inset shows the variety of overlays available, including Grid, visible over the image in Figure 4-10. The lower-right inset, opened by clicking the gear-shaped button in the Options bar, provides options on basic Crop tool behavior.

FIGURE 4-10: The Crop tool overlays can help when composing an image.
Also notice that while the image is being slightly rotated during the crop process, the Crop tool’s bounding box doesn’t rotate; it’s the image behind the bounding box that rotates. To the right in the Options bar is the Delete Cropped Pixels option. When Delete Cropped Pixels is selected, the pixels outside the bounding box are deleted, but when deselected, those pixels are hidden and can be restored with the Image ⇒ Reveal All command.
Not all programs recognize “hidden” cropped pixels. If you’re going to place this image into another program or on a web page, make sure that you’re working on a copy of the original image and elect to delete the cropped pixels.
When creating a cropping selection with the Rectangular Marquee tool, you can change the tool’s Style pop-up menu (on the Options bar) from Normal to Fixed Ratio or Fixed Size. Generally speaking, use Fixed Ratio and drag the marquee to encompass that part of the image you want to retain. When the selection marquee is how and where you want it, choose Image ⇒ Crop.
Keep in mind that the Image ⇒ Crop command doesn’t resample the image — you’ve just changed the aspect ratio and pixel dimensions so far — you’ll need to also choose Image ⇒ Image Size (which is discussed in Chapter 2).
Remembering resolution
Chapter 2 presents you with an in-depth look at resolution as it pertains to digital imaging. As a quick refresher, keep these points in mind when thinking about printing your images:
- Images themselves have no resolution. Whether in your camera, on your hard drive, or open in Photoshop, your images consist only of tiny colored squares called pixels. The image looks and acts the same within Photoshop (except for adding type), regardless of resolution. An image of 3,000x2,000 pixels at 300 ppi is handled in Photoshop exactly as an image of 3,000x2,000 pixels at 72 ppi.
- Resolution is an instruction to a printing device. The resolution value that you assign to an image in your digital camera or in Photoshop’s Image Size dialog box is recorded with the image strictly as an instruction to the output device.
- Resolution measures the size of individual pixels. A resolution of 300 ppi really means that each pixel will print at a size exactly
 of an inch square. Likewise, 72 ppi equates to each pixel printing at
  of an inch square.
 - Web images use only pixel dimensions. Most web browsers aren’t capable of reading the resolution information embedded in your simple graphics by Photoshop. Each image is displayed in the web browser strictly according to the number of pixels in the image.
Controlling color using File ⇒ Print
In the past few years, reproducing accurate color from monitor to printer has become much easier. Although the process of color management still strikes fear into the hearts of many, the actual need for complex hardware and software to control color is greatly reduced. Why? Simply because computer manufacturers recognized that we, the consumers, wanted better color. Monitors ship from the factory calibrated and accurate. Printers use smaller droplets and better inks. Software does a better job of communicating color.
For most Photoshop users, accurate color is important. After spending hours tweaking an image’s appearance on-screen, surely you want the print to look exactly like the monitor. Here’s how to get that great color:
-
When you’re ready to output your image, choose Photoshop’s File ⇒ Print command.
A large, one-stop-shopping Print Settings dialog box opens (see Figure 4-11).
-
Select your printer and the number of copies you want to print.
In the Position and Size section, you can center the image within the printer’s margins or offset the print. You can also elect to scale the image to fit the paper rather than printing at the image’s actual size. (The Printing Marks, Functions, and PostScript Options sections of the Print Settings dialog box are used almost exclusively by print shops.)
- Set up color management.
- In the Color Handling pop-up menu, select Photoshop Manages Colors.
- In the Printer Profile pop-up menu, choose the printer’s profile for the paper on which you’re printing. If the Send 16-Bit Data option is available, and your image is in 16-bits/channel mode, you should take advantage of that feature.
- Select Normal Printing (rather than Hard Proofing) for Rendering Intent, choose Relative Colorimetric, and select the Black Point Compensation check box. (If your prints are too dark, deselect this last option.)
-
Click the Print button.
This takes you from the Photoshop Print Settings to the actual Print dialog box. If you want to print at a later time, click the Done button to record your settings in the image’s metadata.
-
Print.
Make sure the correct printer and paper size are selected and click the Print button to send the image to the printer and starts the actual process of putting ink on paper.

FIGURE 4-11: Photoshop’s Print Settings dialog box offers resizing and color management options.
Considering color management solutions
If your prints don’t match your monitor, first evaluate your monitor’s settings. Open an image with known color values (you know what the image should look like) in a non-color-managed program. You might, for example, open Microsoft Word and choose Insert ⇒ Picture ⇒ From File to add an image with known color values (or a downloaded color chart) to a blank document. Use the monitor’s controls to make that image look the best possible, and then print. If the image prints accurately, great — you’re all set.
If the monitor looks great but the print is strange, first try cleaning and calibrating the print head, and then print from Photoshop. And take another look at the Print dialog box to make sure that you’re selecting the proper paper and color settings. (Again, refer to the User Guide for your printer for specific instructions.)
If your work (or play) requires extreme color fidelity, a number of companies offer hardware and software that regulate color. You can create custom profiles for monitors, printers, and even scanners and digital cameras. Although not inexpensive, skillful handling of these tools (in accordance with the User Guides!) can not only results in better prints, but also reduces the amount of aw-shucks wasted paper and ink from bad output. If you fall into this category, explore the current offerings from X-Rite (www.xrite.com), PANTONE (www.pantone.com), and Datacolor (www.datacolor.com).
Keep in mind that all the color management hardware and software in the world doesn’t do you a bit of good if you’re not controlling your environment. If your work requires perfect color — not good, but perfect — you need to take some additional steps. In the office or studio, you need to regulate ambient light so that you have a consistent color-viewing situation, day in and day out, rain or shine, summer and winter. If you have windows, you need shades or drapes that you can close before doing color-critical work. The walls visible behind the monitor and the immediate work area should be neutral in color. (And that means no brightly colored sticky notes on the bezel of your monitor!) You probably need a hood for your monitor and perhaps a D50 (or D65) viewing station in which to evaluate your prints under optimal lighting conditions.
Printing alternatives
Many Photoshop folks use an inkjet printer to put their photos on paper. Although inkjet printers are the most popular and perhaps the most practical, you do have alternatives. If, for example, your work consists mainly of brochures and flyers rather than photos, a color laser printer might better fit your needs. The initial cost of a high-quality color laser printer is generally higher than all except wide-format inkjets, but the cost per page is much lower. Color laser printers generally don’t print photographs as well as a mid- to high-end inkjet, and the prints aren’t archival (they won’t last for a whole lot of years without fading), but such prints might be just fine for sharing snapshots among friends and family. Take a look at the User Guide for the specific printer you use to set up your job correctly.
Dye sublimation printers use rolls of film impregnated with dyes to reproduce prints. Prices for these printers range from less than $200 to several thousand dollars. The quality and longevity of the prints is generally tied to the price.
Here’s another output alternative available to virtually all Photoshop users. Burn your images in JPEG format (highest quality, 300 ppi) onto a CD or other removable media and take it to the local photo lab. Alternatively, use an online service with which you upload your JPEGs to the service’s web service to order prints. (Check with the lab or service to see whether you need to use the sRGB color profile for your images.) You’ll get back glossy or matte prints at the size(s) requested. And the cost per print can be substantially less than using your inkjet printer. The local photo lab is often a great alternative for stacks of vacation photos and family reunion shots that need to be sent to a whole passel of kin.
Unless your inkjet printer is specifically designed to handle grayscale images, you might want to use a photo lab for such prints. Inkjet printers designed with grayscale in mind output using black ink plus one or more supplemental gray (or “light black”) inks to increase the tonal range and ensure adequate detail in your shadows. Inkjets that aren’t designed to print grayscale can either print using only black ink (which severely limits the detail and tonal range) or they print with all of the installed inks (which invariably leads to some color tint or color cast in the supposedly neutral grayscale images). Check the printer’s User Guide.
Sharing Your Images
Photoshop offers a number of nifty ways to make it easy to share your images with others. (And, of course, you might simply send a CD of JPEG files to a friend or client with instructions to double-click each one to view the images.) However, there are certainly more elegant ways to showcase your talents. Images can also be uploaded to a variety of social media sites and you can e-mail links to those pages to anyone with whom you want to share your work. Photoshop’s File ⇒ Share command give you direct access to a number of ways to share images (see Figure 4-12).

FIGURE 4-12: You can share your images directly from Photoshop (assuming your computer is connected to the Internet, of course).
Before uploading images to a social media site, check that site’s image size and format requirements. And make sure that you make a copy of your original before preparing it for upload.
Creating PDFs and websites
Portable Document Format (PDF), the native file format of Adobe Acrobat, has become an incredibly useful and near-universal format. It’s hard to find a computer that doesn’t have Adobe Reader (free software to open and view PDF files) or another PDF-capable program (such as the Mac’s Preview), and that helps make PDF a wonderful format for sharing or distributing your images. Photoshop offers PDF Presentation in the File menu. Read about PDF Presentation and the very useful Contact Sheet II feature in Chapter 16.
While not officially supported by Adobe (despite the plug-in’s name), you can add the optional Adobe Output Manager to Bridge to create both PDF presentations and web galleries:
https://helpx.adobe.com/bridge/kb/install-output-module-bridge-cc.html
(Make sure that Bridge is up to date; choose Help ⇒ Updates.)
Emailing your images
Remember, too, that you can send images via email. Keep in mind, however, if you like these folks enough to send them your images, you probably want to keep their friendship. And to that end, you want to be a responsible emailer —you don’t want to send out an e-mail attachment so large that it disrupts service for the recipient. (“Hi Marge. You know those images from your vacation that you e-mailed me on Tuesday? They’re still trying to download. Yeah, today is Saturday. Anyway, why don’t I drive up to Maine and look at the snapshots — it’s probably faster than waiting for the email.”)
As a general rule, your attached images should rarely if ever total more than 2MB in size (unless you verify through direct communication that everyone on your To list can handle large attachments). Each image should be no more than 1200 pixels tall so that it can be viewed in a web browser on most monitors and the most popular tablets. (Keep in mind, too, that some older smartphones have screens that are only 720 pixels tall.) You can certainly use your computer’s compression utility to compress one or more images before sending. But if you do compress your attached images, make sure to include instructions to save the compressed file to the hard drive and double-click to expand.