Chapter 5
Encountering the Ethereum Blockchain
IN THIS CHAPTER
![]() Seeing how and why Ethereum started
Seeing how and why Ethereum started
![]() Discovering the Ethereum blockchain
Discovering the Ethereum blockchain
![]() Uncovering blockchain hacks
Uncovering blockchain hacks
![]() Getting started with Ethereum
Getting started with Ethereum
![]() Creating a decentralized autonomous organization
Creating a decentralized autonomous organization
![]() Creating your own token
Creating your own token
![]() Building smart contracts and decentralized corporations
Building smart contracts and decentralized corporations
The Ethereum project is one of the most developed and accessible blockchains in the ecosystem. It is also an industry leader in blockchain innovation and use cases. Understanding this technology is essential because it’s leading the charge in smart contracts, decentralized organizations, and token offerings.
In this chapter, I cover the makeup of Ethereum and explain the new way to build organizations and companies on the Ethereum blockchain. I also go into depth on safety and practical business applications of the Ethereum blockchain. I fill you in on how the project started and where it plans to go.
This chapter sets you up to create your own decentralized organization. I explain how to mine the cryptocurrency on the test net to fuel your projects. After reading this chapter, you’ll be able to set up your own Ethereum wallet and trade the token. You’ll also be able to generate your own custom token that can be traded globally.
Exploring the Brief History of Ethereum
Ethereum was first described in 2013 in a whitepaper written by Vitalik Buterin, who was very active in the Bitcoin community as a writer and programmer. Buterin saw that there was significantly more potential in Bitcoin than the ability to move value without a central authority. He had been contributing to the colored coin effort within Bitcoin to expand the utility of Bitcoin beyond the trade of its native token. Buterin believed that other business and government use cases that require a central authority to control them could also be built with blockchain structures.
At that time, there was a fierce debate about the Bitcoin network being “bloated” by lots of low-value transactions from applications securing themselves against Bitcoin. The main concerns were that additional applications, built on the Bitcoin protocol, would have problems scaling in volume. Also, at that time there was not the ability to do scripting to allow for things like Smart Contracts. Bitcoin was not built to handle the number of transactions needed by the applications. Vitalik and many others saw that in order for people to build decentralized applications in the Bitcoin blockchain, either the blockchain would need a massive code overhaul or they would need to build a new blockchain altogether.
Bitcoin had already been well established at that point. It was clear that the kinds of upgrades to core code that were needed were well beyond what was realistically possible. The politics of Bitcoin would stall any changes to the network. Vitalik and his team established the Ethereum foundation in early 2014 to raise funds to build a blockchain network with a programming language built within it. Vitalik hoped to create a network that would allow him to build blockchain-secured applications.
The initial development was funded by an online public crowd sale during July and August of 2014. The foundation initially raised a record $18 million through the sale of its cryptocurrency token called ether. People have passionately debated whether this sort of crowd sale is illegal because it may constitute an unlicensed security offering.
The regulatory gray zone has not hindered the project. If anything, the cutting-edge nature of the project has attracted more attention and talent to the foundation. Discontented and disenfranchised developers and entrepreneurs from around the world have flocked to the project. Decentralization is seen as the perfect solution to corrupt and oppressive central authorities.
The $18 million raised in the token sale gave the foundation the funds it needed to hire a large development team to build Ethereum. Ethereum Frontier, the first release of the Ethereum network, went live to the public in July 2015. It was a bare-bones software release that only the more technically savvy could use to build their applications.
Homestead, the current Ethereum software release, was made available in 2016. It’s much more user-friendly. Almost anyone can utilize the application template available on it. It has intuitive and user-friendly interfaces and a large, devoted development community.
Metropolis is the next planned Ethereum release. The main difference will be that applications will be fully developed and well tested. It will also feature even easier-to-use applications and have a larger market appeal where even nontechnical people will feel comfortable using it.
Serenity is the last planned phase of Ethereum development. It’s where Ethereum will move from a proof-of-work consensus (in which miners compete to create the next block) to a proof-of-stake model, in which nodes are chosen pseudo-randomly with the possibility of being selected increasing based on their stake in the network. Their stake is measured by the amount of cryptocurrency in their possession. The main benefit of the change will be the reduction in the cost of energy associated with proof of work. This may make it more attractive for individuals to run nodes in the network, which would increase decentralization and increase security.
Ethereum: The Open-Source World Wide Computer
Ethereum may be one of the most complex blockchains ever built. It has several of its own Turing-complete programming languages (full-functioning programing languages that allow developers to create any application). These new programming languages closely resemble popular programming languages such as JavaScript and Python. The Ethereum protocol can do just about anything that your regular programming languages can do. The exception is that the code is written to the Ethereum blockchain and has the added benefits and security that comes with that. If you can imagine a software project, it can be built on Ethereum.
The Ethereum ecosystem is currently the best place to build decentralized applications. It has lovely documentation and user-friendly interfaces that get you up and running quickly. Rapid development time, security for small applications, and the ability for applications to easily interact with one another are key characteristics of this system.
The Turing-complete programming languages are the main feature that makes the Ethereum blockchain vastly more potent than the Bitcoin blockchain for building new programs. Ethereum’s scripting language makes things like Twitter applications possible in few lines of code, and extremely secure.
Smart contracts, like the one you create in Chapter 3, can also be built on Ethereum. The Ethereum protocol has opened up a whole new genre of applications. You can take just about any business, government, or organization’s processes and build a digital representation of it inside of Ethereum. Currently, Ethereum’s platform is being used to manage digital assets (a new class of asset that lives online and may represent a whole digital asset such as a Bitcoin token or a digital representation of a real-world asset such as corn commodities), financial instruments (like mortgage-backed securities), recording ownership of assets such as land, and decentralized autonomous organizations (DAOs). Ethereum has also sparked a major fundraising effort by startups globally that used the ERC token standard to raise capital to build their innovations. Ethereum has opened a new way of organizing business, nonprofit, and government. It has made it possible to hold, share, and trade value without ever meeting the other party or using a third party to facilitate. The code does the work.
Decentralized applications: Welcome to the future
The most revolutionary and controversial manifestation of Ethereum is the self-governing and decentralized application (DAPP). DAPPs can manage things like digital assets and DAOs.
DAPPs were created to replace centralized management of assets and organizations. This structure has a lot of appeal because many people believe that absolute power corrupts absolutely. For those who are fearful of losing control, this type of structure has massive implications.
New DAPPs are popping up every day. You can explore and discover new ones built on Ethereum by going to https://dappradar.com. DappRadar updates a list of all the latest Ethereum Dapps and gives you a preview of what they do. One of the first ever created was Etheria (see Figure 5-1).

FIGURE 5-1: The world’s first immortal digital game, Etheria.
The power of decentralized autonomous organizations
DAOs are a type of Ethereum application that represents a virtual entity within Ethereum. When you create a DAO, you can invite others to participate in the governance of the organization. The participants can remain anonymous and never meet, which could trigger Know Your Customer (KYC) rules (the process a business must go through to verifying the identity of its clients) and anti-money laundering (AML; the laws and regulations designed to stop the practice of generating income through illegal means) compliance issues.
DAOs have been created for raising funds for investing, but they could also be designed for civic or nonprofit purposes. Ethereum gives you a basic framework for governance. It’s up to the organizers to determine what’s being governed. Ethereum has created templates for you to help in the creation of DAOs.
Figure 5-2 shows a depiction of the organization of an Ethereum application.

FIGURE 5-2: Ethereum.org blockchain application depiction.
Here’s how DAOs basically work:
- A group of people writes a smart contract to govern the organization.
-
People add funds to the DAO and are given tokens that represent ownership.
This structure works kind of like stock in a company, but the members have control of the funds from day one.
- When the funds have been raised, the DAO begins to operate by having members propose how to spend the money. Voting may be affected by how much Ether the member risks or stakes in the DOA.
- The members vote on these proposals.
- When the predetermined time has passed and the predetermined number of votes has accrued, the proposal passes or fails.
- Individuals act as contractors to service the DAO.
Unlike most traditional investment vehicles, where a central party makes decisions about investments, the members of a DAO control 100 percent of the assets. They vote on new investments and other decisions. This type of structure threatens to displace traditional financial managers.
DAOs are built with code that can’t be changed on the fly. The appeal of this is that malicious hackers can’t monkey with the funds in a traditional sense. Hackers can still find ways to execute the code in unexpected ways and withdraw funds. The immutable nature of a DAO’s code makes it nearly impossible to fix any bugs once the DAO is live in Ethereum.
Hacking a Blockchain
Ethereum has never been hacked. The hard fork in 2016 due to the DAO hack mentioned in the “With great power comes … great power” sidebar was not an actual hack of the system, but confusingly is often referred to as a hack. Ethereum worked perfectly. The problem was it was too perfect. It became necessary to restart the system when a large amount of money and a majority of its users were threatened.
The only way to correct an action on a blockchain like Ethereum is to do a hard fork, which allows for a fundamental change to the protocol. A hard fork makes previously valid blocks and transactions invalid. Ethereum did this to protect the funds that were being pulled out of the first DAO by a user. The DAO hack was conceptually, one of the largest bug bounties ever.
That said, many scams and hacking attempts occur in the cryptocurrency space. Most of these attacks target centralized exchanges and applications. Many hackers want to steal cryptocurrency. It has real value and isn’t protected in the same ways that regular money is protected by governments. The anonymous nature of cryptocurrency also makes it appealing to crooks. Catching and prosecuting these individuals is difficult. The cryptocurrency community is fight back, however, and creating new measures to protect themselves.
 Hacking one place is significantly easier and cheaper than trying to overcome a decentralized network. When you read about hacking in the blockchain world, it’s likely just a website or a cryptocurrency wallet that has been hacked, not the whole network.
Understanding smart contracts
Ethereum smart contracts are like contractual agreements, except there is no central party to enforce the contract. The Ethereum protocol “enforces” smart contracts by attaching economic pressure. They can also enforce implementation of a requirement if it lives within Ethereum, because Ethereum can prove certain conditions were or were not met. If it doesn’t live within Ethereum, it’s much harder to enforce.
 Ethereum smart contracts are not yet legally enforceable and may never be because the perception is that you don’t need outside authorities enforcing agreements. Legal systems are controlled by governments. As they stand now, governments are central authorities — some with more or less consent and democratic principles. Within an Ethereum smart contract, each participant has an inalienable vote.
Ethereum smart contracts do not include artificial intelligence. This is a cool possibility in the near future. But for now, Ethereum is just software code that runs on a blockchain.
Ethereum smart contracts are not safe. The DAO hack is a great example of the type of dangers that can occur. It is still early days, and putting a lot of money into an unproven system isn’t smart. Instead, experiment with small amounts until all the bugs have been worked out of new contracts.
Discovering the cryptocurrency Ether
Ether is the name of the cryptocurrency for the Ethereum blockchain. It was named after the substance that was believed to permeate all space and make the universe possible. In that sense, Ether is the substance that makes Ethereum possible. Ether incentivizes the network to secure itself through proof-of-work mining, like how the token Bitcoin incentivizes the Bitcoin network. Ether is needed to execute any code within the Ethereum network. When utilized to execute a contract in Ethereum, Ether is referred to as gas.
Executing the code within a smart contract also costs some amount of ether. This feature gives the token added utility. As long as individuals want to use Ethereum for applications and contracts, ether will hold a value beyond speculation.
The wild growth in the value of ether has made it a popular token to speculate on. It’s widely traded on exchanges around the world. Some new hedge funds are looking at it as an investment vehicle. However, the volatile nature and low market depth make ether a risky investment.
Getting Up and Running on Ethereum
In this section, I walk you through how to get started in the Ethereum blockchain ecosystem. Before you can build anything on Ethereum, you need an Ethereum wallet.
Your wallet will hold your Ethereum tokens call ether. Ether is the cryptocurrency that allows you to create smart contracts inside Ethereum. This is sometimes referred to as gas.
Downloading the Ethereum wallet can take some time, but the interface is very intuitive and the instructions provided throughout the process are easy to follow.
 Within the Ethereum wallet, you can win test ether to build your test contracts and organizations. You don’t need to mine ether to learn how it works.
Mining for ether
Ethereum is kept running by a network of computers all over the world that are processing the contracts and securing the network. These computers are sometimes referred to as nodes, and they’re mining crypto Ether.
In order to reward individuals for the time and cost involved in mining, there is a prize of five ethers about every 12 seconds. The prize is given to the node that was able to create the latest block in the Ethereum blockchain.
All new blocks have a list of the latest transactions. The proof-of-work consensus algorithm guarantees that prizes are won most often by nodes with the most computational power. Computers that aren’t as powerful can win, too — it just takes longer. If you want to try your hand at mining ether, you can do it with your home computer, but it will take a very long time to successfully mine a block and win ether.
Mining ether is not for the technical novice. You need to be familiar with command line. If you don’t have a clue what command line is, you probably want to skip this process. Also, be sure to follow the most up-to-date instructions on the Ethereum GitHub (http://github.com/ethereum).
Setting up your Ethereum wallet
To set up your Ethereum wallet, follow these steps:
- Go to
www.ethereum.org. -
Click the Download button.
You have to scroll down the page a bit to find the button.
Be sure to save the Ethereum wallet download someplace you can find it later. -
Open the Ethereum wallet.
You may need to check for updates to the software under Help.
- Choose Develop in the drop-down menu.
-
Select One of the Test Networks such as Robsten or Rinkeby.
Here you get set up to mine test ether. This process is much less time-consuming then real ether mining, but it still takes some time — currently, it’s about two hours.
-
Create a strong password.
Don’t forget to save your password someplace safe.
-
Click through the startup menu.
The Ethereum team has a few tutorials that are interesting to review while you’re waiting on your test net to download. The download may take ten minutes or so.
-
Choose Develop ⇒ Start Mining.
Don’t skip this step. You need the ether for later projects.
You’ve just set up your wallet, and you’re earning test ether for your future smart contract projects.
Building Your First Decentralized Autonomous Organization
DAOs will change how the world does business in the future. They allow anyone in the world to create a new type of company online that is governed by pre-agreed-upon rules that are then enforced through the blockchain network. Creating a DAO is easier than you might think. In this section, you build your first test DAO. I break this project into three sections: build, congress, and governance.
In order to successfully complete your test DAO, you need to have set up your Ethereum wallet and done some mining on the Ethereum test net (see the preceding section).
Follow these steps to create your first test DAO:
- Go to
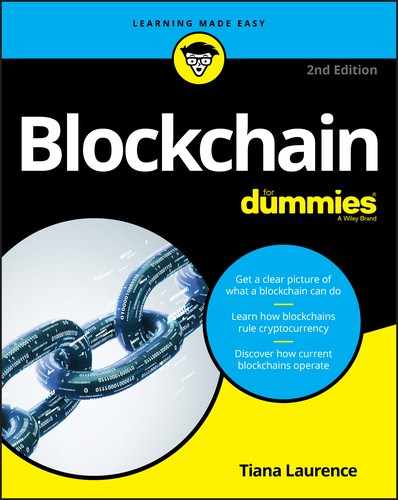
www.ethereum.org/dao. - Scroll down the page to the Code box (shown in Figure 5-3) and copy the code.
-
Open the Ethereum wallet you made earlier.
You’ll develop your DAO in your Ethereum wallet.
FIGURE 5-3: The Code box.
Test net and congress
The next phase of your DAO project is setting up the framework for your DAO. Follow these steps:
- In your Ethereum wallet, choose Develop ⇒ Network ⇒ Test Net.
-
Click the Contracts tab and then click New Contract.
The Ethereum team has set up a few test templates for DAOs.
- Paste the code you copied in the preceding section into the Solidity code box.
Make sure you’re selecting Solidity Contract Source Code on the tab and not Contract Byte Code.
- From the Contract Picker, choose Congress.
-
Pick some variables when prompted to do so.
Here are your options:
- The minimum quorum for proposals is the fewest votes a proposal needs to have before it can be executed.
- The minutes for debate is the shortest amount of time, in minutes, that needs to pass before it can be executed.
- The margin of votes for a majority. Proposals pass if there are more than 50 percent of the votes plus the margin. Leave it at 0 for a simple majority.
Governance and voting
Now you’re going to name and set up the governance of your DAO. You need to set up a minimum quorum for proposals (how many votes a new proposal needs to have before it is passed). You also set up the margin of votes for a majority (how many votes a plan needs to pass) and the time allotted for discussing new plans.
-
Name your new DAO.
This is kind of like naming a company.
-
For Debate Times, select 5 minutes.
This is how long new proposals are open for conversation.
-
Leave Margin of Votes for Majority set to 0.
This sets up how the democracy of your contract works.
-
Confirm the price of the DAO.
You’ve mined some Ether in the test net via your wallet when you first set up it up. If you skipped that step, go back and do it now. You need a little of the test net Ether to build your DAO.
-
Click Deploy and type your password.
The DAO may take some time to deploy. When you arrive at your new dashboard, scroll down, and you’ll be able to see your DAO being produced.
-
Click the New icon.
A new unique icon will generate that represents your DAO.
Congratulations! You’ve created your first DAO.
Uncovering the Future of DAOs
Smart contracts and decentralized organizations hold a lot of promise. The pure democratic and hyper-rational nature of them is very appealing. However, at this point, there are more possibilities then knowns, and each contract that is created could be groundbreaking or a massive flop.
If you approach Ethereum as the new frontier that it is, you’ll have more success. The Ethereum network has more benefits than drawbacks if you’re careful. But expecting everything to work flawlessly and all the participants to act with integrity will open you up to greater losses. Ethereum has its share of bandits, not to mention those friendly enthusiasts who would like you to succeed.
The smart contract hacks of 2016 have highlighted the importance of security and properly reviewing contracts. It also illustrated that there are people with integrity that who fight to fix issues.
Reading this book is only the beginning. It will give you a sound bases to build your knowledge of Ethereum, but as with all new technologies, Ethereum is quickly evolving. Keep reviewing best practices and security measures.
In the following sections, I mention some things to keep in mind as you build your first few DAOs, build smart contracts, and debug your new blockchain systems.
Putting money in a DAO
Don’t trust large sums of money to untested and contracts and contracts that haven’t been fully vetted. Large contracts are more often targeted by hackers. The DAO hack described earlier in this chapter (see the sidebar “With great power comes … great power”) showed that even well thought-out contracts have unexpected weaknesses.
Although, smart contracts and blockchains let you conduct business with anyone around the world, it’s still the early days. You can mitigate your risk by working only with known and trusted parties.
The security landscape will constantly be evolving with new bugs. Reviewing all new best practices is imperative. Manage the amount of money you’re putting at risk and roll out contracts slowly and in phases. Ethereum is a new technology, and mature solutions are not yet built.
Building smarter smart contracts
Smart contract programming requires a different mind-set than standard contract writing. There is no third party to make things right if the contract executes in a way that you didn’t expect or intend. The immutable and distributed nature of blockchains makes it tough to change an unwanted outcome.
Your contract will have flaws and may fail. Build safety valves into your contracts so you can respond to bugs and vulnerabilities as they come up. Smart contracts also need an off switch that let you pull the plug and pause your contract when things are going wrong.
If your contract is big enough, offer bug-hunting bounties that incentivizes the community to find vulnerabilities and flaws in your contract.
As with many things, the complexity of your contract also increases the likelihood of errors and attack vectors. Keep your contract logic simple. Build out small modules that hold each section of the contract. Creating a contract in this manner will help you compartmentalize any issues.
Finding bugs in the system
Don’t reinvent the wheel by building your own tools such as random number generators. Instead, leverage the work that the community has already done and that has been well tested.
You can only control for things within your own contract. Be cautious of external contract calls. They can execute malicious code and take away your control.
The Ethereum community has an excellent known bug list and even more helpful tips on how to build secure smart contracts on its GitHub page at https://github.com/ethereum/wiki/wiki/safety.
Creating Your Own ERC20 Tokens
In this section, I show you how to create your own token using Polymath. Polymath is a security token service that is built on the Ethereum blockchain. It has taken the hard work out of programming your own token on Ethereum. Polymath offers a point-and-click interface that anyone can use.
Before you read through this section, make sure that you’ve set up Meta Mask. If you haven’t, refer back to Chapter 3, where you find detailed instructions for setting up your computer and downloading MetaMask.
You also need to get your hands on some Kovan Test Ether (KETH) in order to set up the smart contracts for your new token. KETH is the test Ether from the Kovan test network, a test network for developers working on Ethereum applications. KETH has no market value. You can obtain it for free if you have a GitHub account.
In this section, I walk you through how to set up your GitHub account, how to request KETH, and how to create your tokens.
Seeing up your GitHub account
GitHub is a development platform for storing code you develop. GitHub offers free accounts for open-source projects. So, if you’re comfortable sharing the code you’ve developed, GitHub is a fantastic source for managing your projects and building software. GitHub also offers a paid version if you want to keep your code private. For the purposes of this section, a free account will work great.
To open a GitHub account, follow these steps:
-
Open the Brave web browser.
If you don’t yet have the Brave browser, go to Chapter 3.
- Navigate to
https://github.com. - Enter your desired credentials.
- Click Sign Up for GitHub.
You’re all set.
Requesting KETH on the Gitter Faucet
To request KETH, follow these steps:
- Open the Brave web browser.
- Navigate to
https://gitter.im/kovan-testnet/faucet. - Click Sign In to Start Talking.
- Select Sign In with GitHub.
Next, you’ll grab your MetaMask account address so you can paste it into the social chat window and allow one of the community members to send you some KETH. Follow these steps:
-
Open your MetaMask account.
To open your MetaMask account, click the fox icon in the upper-right corner of your Brave browser window. - From your MetaMask account, click the pull-down tab.
- Select Kovan Test Network.
- Copy your MetaMask address by clicking Account 1.
Now you’re ready to request some test Ether called KETH form the Kovan community. You’ll take your Kovan Ethereum address from your MetaMask account and post it in the chat window. Make sure to only post your address. Follow these steps:
- Navigate back to
https://gitter.im/kovan-testnet/faucet. - Paste your copied address into the chat window.
Now you’ll need to wait because one of the community members will check out your GitHub account and make sure you aren’t spamming the network. This may take some time because the process of sending you KETH is done manually. You’ll see the KETH in your MetaMask account after the transaction is complete. This process took me three days, but I worked on it over a holiday weekend.
To set up your Polymath account, follow these steps:
- Open the Brave web browser.
- Navigate to
https://tokenstudio.polymath.network. - Click Create Your Security Token.
- Navigate to the fox icon for your MetaMask wallet.
- Click Sign from within MetaMask.
Creating your tokens
Now that you have the prerequisite KETH needed to create your own token, you can finally get started. In this section, you use the Polymath smart contract to build a custom Ethereum ERC20 token.
Reserving your token symbol
Polymath allows you to reserve your token symbol for 60 days. This reservation process is essential for setting up your token. You can check what names have already been taken by going to Etherscan (https://etherscan.io/token) and searching for the name you’re thinking about using.
Reserving your name with Polymath only protects you within the Polymath system. It will not prevent someone else from issuing a token of the same name on Ethereum.
Go into your Jaxx wallet and use the Shapeshift service to exchange some of your BTC or Ether for POLY. After you’ve done this, move your new POLY tokens from your Jaxx wallet to your MetaMask account. (Chapter 3 gives instructions on how to move tokens from one address to another.)
To name your token, follow these steps:
-
Enter your desired Token ticker name.
This needs to be five characters or less.
- Enter the name of your token.
-
Click Reserve Token Symbol.
This is a few letters that will represent your token on the network.
- Click Confirm.
- Navigate to the fox icon for your MetaMask wallet.
- Click Approve on Contract.
- Click Approve on Fee.
If your transaction will not approve, check to make sure you have enough Ether in your wallet to pay the Ethereum mining fee. It will take some time for your contract to be approved. This is because of the latency inherent in blockchains.
Creating your tokens
Now that you’ve reserved the name that you want to use for your token, you can create your new token. Polymath will have sent you an email with a link to your token creation dashboard.
Your dashboard is integrated with several service providers that provide advisory, legal, KYC/AML, marketing, and custody service that you may need if you plan on making your token available to the public. KYC (Know Your Customer) is an anti-money laundering procedure used to identify customers that would like to move money. It’s part of a global effort to fight money laundering and terrorism called AML (Anti-Money Laundering) and Combating Financing Terrorism (CFT). Always do your due diligence and seek your own legal counsel. If you choose to work with these integrated providers, the information you enter in each form will be sent automatically to the firms you selected. The firms will reach out to you to help you through the next steps.
In the following steps, I’m assuming that you are not going to offer your token to the public.
- Navigate to the Polymath email you received.
- Click the link Click Here to Continue with your Token Creation.
- Open your MetaMask wallet.
- Click Sign.
- Click I Have My Own for each of the service providers.
Now that you’ve confirmed that you have your own service providers, you can start specifying your token. The left side of the page several icons that let you know where in the process you are.
- Click Token on the left side of the page.
- Under My Security Token Must Be, click Divisible.
- Click Create My Security Token.
- Open your MetaMask wallet and click Confirm.
- Click Confirm.
- Wait a minute, and open your MetaMask wallet again and click Confirm for the mining fee.
If the page is stuck on approving your contract for more than five minutes, refresh the page and use MetaMask to sign on again. Also, from inside your MetaMask wallet, you can see the status of your contract. You can increase the mining fee and have it processed faster. This can skyrocket the cost of the transaction, though, so be thoughtful if you choose this option.
Polymath has built-in distribution for tokens for those who are using them as a means of raising capital. On your Polymath dashboard, this is referred to as STO, shot for Security Token Offering. In the instructions I’ve provided, I made the assumption that the token you’re creating will not be used for raising capital, so you can click Skip Minting and then click Confirm.
Polymath has created templates for the creation of security tokens. In these instructions, you use the smart contract that creates a hard cap of the number of tokens generated by the smart contract. You set a time and number of tokens that you would like to create. Because these tokens will be going to your own address, use minimum numbers so as not to waste your Ether.
Now you’ll create a capped custom security token. The cap refers to the fact that the total number of tokens created is a fixed number that you choose at the time of its creation. Follow these steps to get started:
-
Select the time current time.
Give yourself a few hours to input the transaction just in case something happens that stalls you.
- Under Raise In, select ETH.
- Under Hard Cap, enter the number of tokens you would like.
-
Under Rate, enter 1000.
Think of this as the fee for generating your new tokens. You’ll be “buying” them from the smart contract. If you enter 1000 under Rate, then the cost to produce your new tokens will be 1 ETH for 1,000 new tokens. - Under ETH Address to Receive the Funds Raised during the STO, enter your MetaMask address.
- Click Deploy and Schedule STO.
- Click Confirm.
- Navigate to your MetaMask wallet.
- Click Confirm.
Getting your hands on your tokens
You’ll receive an email from Polymath letting you know that you have successfully set up your token. When you get this email, follow these steps:
- Navigate to
https://tokenstudio.polymath.network. - Sign on via MetaMask.
- Click Token on the right side.
- Under Mint Your Token, download the sample CSV file.
- Open the CSV file.
- Remove the dummy data.
- Input your own Kovan Test Network address in its place.
- Save your new CSV file.
Now that you’ve inputted your address to receive your token, you can upload it to the same page that you downloaded the sample from:
- Navigate back to
https://tokenstudio.polymath.network. - Sign on via MetaMask.
- Click Token on the right side.
- Click Upload File.
- Click Confirm.
- Open MetaMask.
- Click Confirm.
Congratulations! You’ve created your own test security token. Ethereum is a powerful tool, and with tools like Polymath, it’s easier and faster to create the blockchain applications you want.