
Chapter 5
Creating Documents
IN THIS CHAPTER
![]() Adding text and graphics to a document
Adding text and graphics to a document
![]() Selecting text to modify
Selecting text to modify
![]() Changing the font type, size, and more
Changing the font type, size, and more
![]() Formatting paragraphs
Formatting paragraphs
![]() Resizing images
Resizing images
![]() Moving text and images from another app to Word
Moving text and images from another app to Word
![]() Adding other elements to your document
Adding other elements to your document
Chapter 4 introduces you to Word and tells you a bit about what the program is and what it does. In this chapter, you see how to use it. What do we mean by it? We're glad you asked. In this chapter, you find out the basics of creating documents and how to select text, change the appearance of text and images, and add text and graphics from other sources, such as web pages or documents created in other apps. We also show you how to use the ribbon’s References tab to add elements such as footnotes, citations, and tables of contents, quickly and easily.
Adding Text and Graphics to Your Document
In this section you learn how to process words, but first you need a blank document to work with. To create one, choose File ⇒ New Document or use the keyboard shortcut ⌘ +N.
Now put some stuff — namely, text and graphics — in your document so that it’s not blank any more.
 Because draft view displays only text, you have to switch to print layout view to work with images or graphical objects.
 If pictures, charts, shapes, or other objects don’t appear in your document where you expect them, the document is probably in draft view. Switch to print layout view by choosing View ⇒ Print Layout or by clicking the Print Layout icon in the lower-right corner of the document window.
Entering text in your document
When you first stare into a blank Word document screen, you should see the insertion point cursor blinking on and off in the upper-left corner. This cursor indicates that whatever you type will appear right there.
To add text, merely start typing. When you’re finished with a paragraph, press the Return or Enter key to start a new one and repeat this process until you’ve had your say.
Inserting an image in your document
Inserting an image into a document is almost as easy as typing text. Office for Mac comes with an extensive collection of clip art images that you can use in Word, Excel, and PowerPoint documents. In fact, the collection of art is so extensive that it’s found in two different places in each app — some in the Stock Images gallery and the rest in the Online Images browser. And, if none of the included art suits your needs, you can just as easily insert your own images.
Stock Images gallery
To insert art from the Stock Images gallery, click where you want the image to appear in your document and then choose Insert ⇒ Pictures ⇒ Stock Images on the menu at the top of the screen.
The Stock Images pane opens on the right side of the document window, as shown in Figure 5-1.
You can browse the Stock Images gallery by clicking different categories and subcategories at the top of the pane on the right. Or to search the Stock Images gallery, type one or more words in the search field near the top.
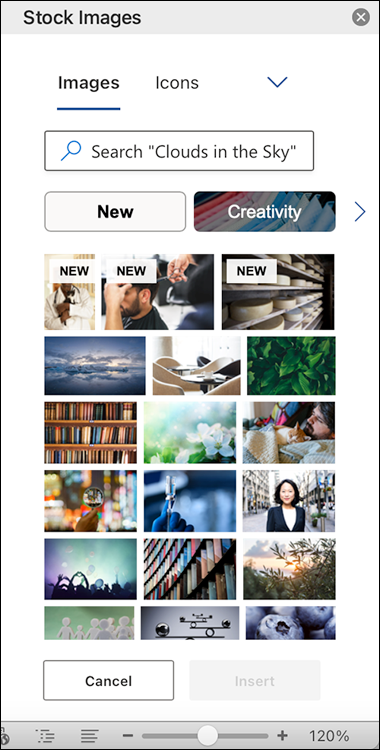
FIGURE 5-1: The Stock Images gallery contains hundreds of images.
To place an image from the Stock Images gallery into your document:
- Make sure that the insertion point (the blinking cursor) is exactly where you want the image to appear.
- At the top of the Stock Images pane, click Images.
-
Click the images you want to add.
Each image displays a check mark to denote that it's selected.
-
Click the Insert button.
In Figure 5-2, we've inserted two images in the document.
The Stock Images gallery also provides access to four other categories, each with their own set of subcategories: Icons, Stickers, Illustrations, and Cutout People. If you don’t see some of these subcategories, click the arrow to the right of Icons. In Figure 5-3, we’ve inserted three examples from Education Subcategory of the Icons category.
If you forget to put the insertion point where you want the image to appear, have no fear. Simply drag the image where you’d like it to appear in the document.
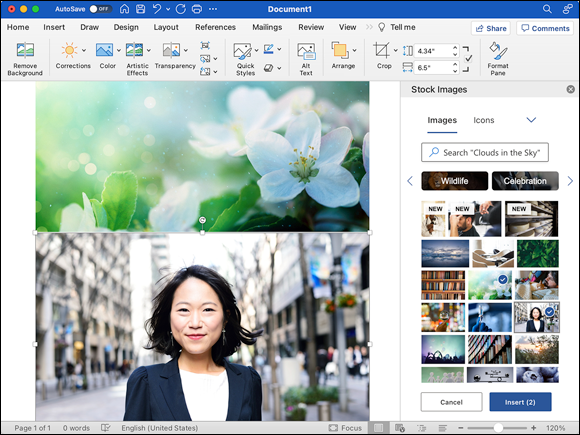
FIGURE 5-2: We've selected and inserted two images from the Stock Images gallery.
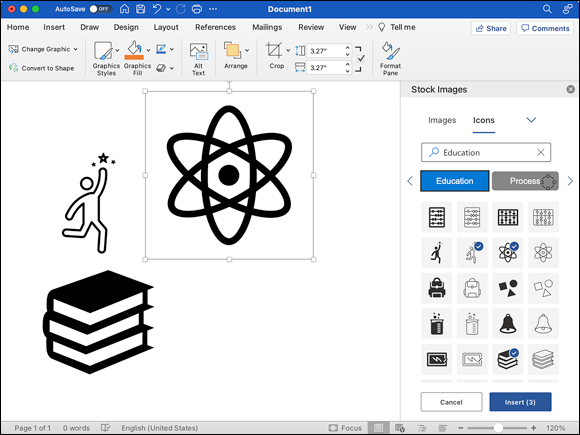
FIGURE 5-3: A document with icons from the Education subcategory.
Online Pictures browser
The Stock Images gallery contains the majority of artwork that comes with Office, but you’ll find a veritable cornucopia of additional art and images in the Online Pictures browser. As its name indicates, this browser allows you to search for images stored on the web.
To insert art from Online Pictures, click where you want the image to appear in your document and then choose Insert ⇒ Pictures ⇒ Online Pictures.
The Online Pictures pane, shown in Figure 5-4, opens on the right side of the document window, just like the Stock Images pane before.
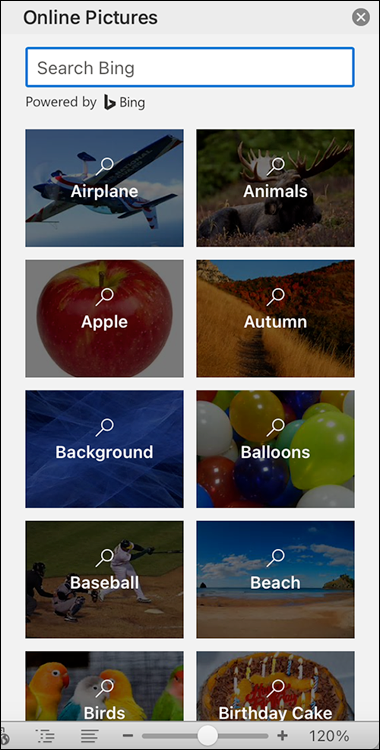
FIGURE 5-4: Search Online Pictures for images to add to your document.
You can browse the Online Pictures offerings by clicking one of the predefined search topics. Or search for an image by typing one or more words in the search field near the top. To place an image from the Online Pictures browser into your document:
- Make sure that the insertion point (the blinking cursor) is exactly where you want the image to appear.
-
Click a predefined search topic from the list or enter a search term in the search field.
The Online Pictures pane appears.
-
Click the images you want to add.
Each selected image sports a check mark.
Click the filter icon to the left of the Creative Commons Only option to narrow your search based on criteria such as image size or layout. -
Click the Insert button in the lower-right corner.
Figure 5-5 shows an online image we’ve inserted into the document.
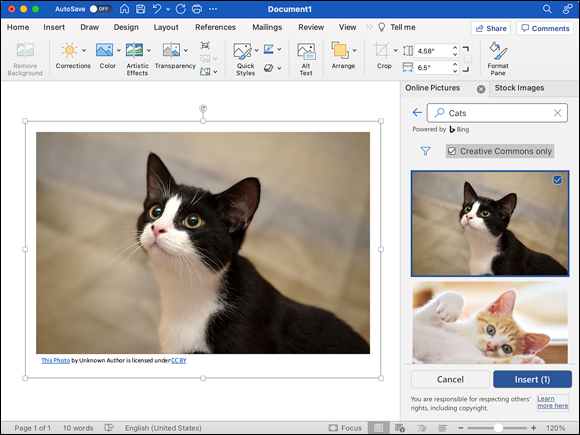
FIGURE 5-5: An image from the Online Pictures browser inserted into the document. Cute, huh?
Your own images
Another way to move images to your document is to drag them from another location or app. In Figure 5-6, we're dragging a file from the desktop to the document.
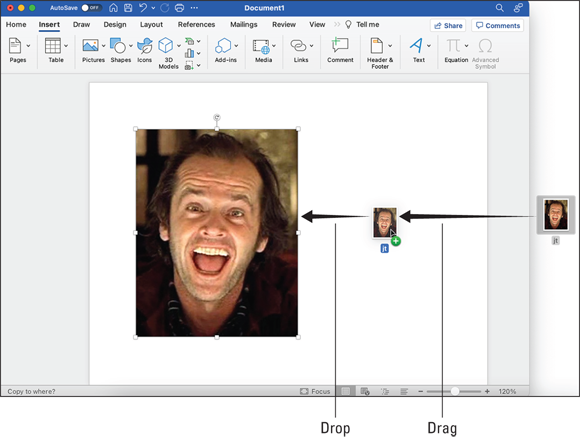
FIGURE 5-6: Dragging an image file from the desktop to a document.
This technique works also in other apps such as iPhotos or Safari — just click a photo in Photos or Safari, drag the photo to your document, and drop it where you want it.
We talk more about images later in this chapter, in the “Changing the look of images” section.
Selecting Text for Editing and Formatting
Much of what you do in Word can happen only after you’ve selected the text you want to do it to. In other words, when you choose a command from a menu or click a button or an icon, what you choose or click usually affects only whatever text you’ve selected in your document.
Selected text is highlighted in a contrasting color, as shown in Figure 5-7.
To select text, use the cursor, which you can move by using the mouse or your laptop’s trackpad. Although you can use the keyboard to move the cursor around (described in a moment), the easiest way to move it is with the mouse or trackpad.
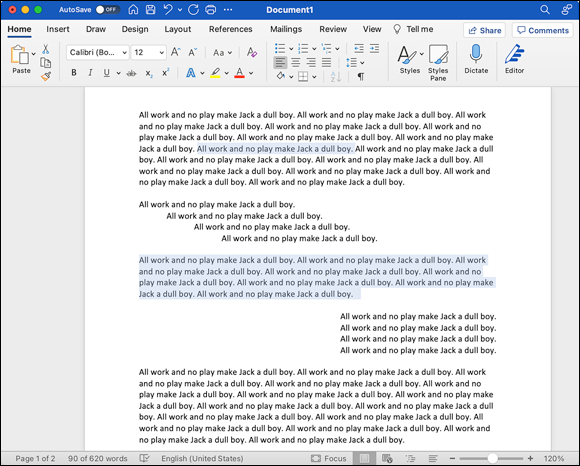
FIGURE 5-7: A sentence in the middle of the first paragraph and another entire paragraph are selected.
Word has a number of different cursors, but the two cursors used to select text are the I-beam (or text) cursor and the arrow cursor.
When you move the cursor over text in a document, the I-beam cursor is displayed. When you click somewhere within text, the insertion point cursor appears, as shown in Figure 5-8. Note that Figure 5-8 shows examples of three types of cursors, but only one will appear during actual use.
Click and drag across some text in a document. As you drag, the text under the I-beam cursor is highlighted. When you release the mouse button, all text between that point and the insertion point (where you first clicked) is selected.
Another way to select text is by moving the cursor into the left margin of your document. When you do that, the cursor turns into an arrow that faces up and to the right. This arrow cursor indicates that you can now select an entire line of text with a single click. Just point at the line of text you want to select, and click. Presto! That line of text is selected.
When you click in the left margin and drag down or up without releasing the mouse button, additional lines below or above where you clicked are selected. And if you press the ⌘ key before you click, you select all text in the document.

FIGURE 5-8: The arrow, insertion point, and I-beam cursors.
You can get a little fancy with this selection technique and select a larger chunk of text. Follow these steps:
- Click where you want the selection to start.
- Press and hold down on the Shift key.
-
Click again somewhere else. Release the Shift key.
Everything between the two clicks is selected. If you click in a block of text, all text between the insertion point and your second click is selected. If you click in the left margin, every line of text between your first and second click is selected.
The selection methods we’ve discussed in this section select only contiguous blocks of text. What if you want to select a sentence in the middle of the first paragraph and then the entire second paragraph?
The secret here is the ⌘ key. Here’s how it works:
- Select the first piece of text.
- Release the mouse button.
- Press and hold down on the ⌘ key.
- Click and drag across the second piece of text you want to select. Release the ⌘ key.
Voilà! You’ve just selected two noncontiguous pieces of text. To add pieces of text to the selection, just press the ⌘ key and do it again.
 Holding down the Shift key extends the selection contiguously; holding down the ⌘ key creates noncontiguous selections. You can even use both to create a contiguous selection and then add some noncontiguous text to it or vice versa.
Formatting Text, Paragraphs, and Images
Word gives you a wide array of ways to put your personal stamp on the appearance of your documents. You can change the font, font size, and style of text; change its color; and even apply special effects, such as giving your text a shadow effect. You can format paragraphs to make them centered or justified, for example. Word also gives you some basic tools for changing the size and appearance of images you insert into your documents.
Changing the look of the font
As mentioned, you usually have to select text or images before you can modify their attributes. To change the font your text appears in, select the text and then follow these steps:
-
Choose Format ⇒ Font (or press ⌘ +D).
The Font dialog appears.
- Click the Font pop-up menu, scroll down the list, and click a font of your choice.
- In the Font Style menu, choose bold, italic, or any other attributes you want.
- To make the text bigger or smaller, click the Size menu and select a size.
- Click OK.
In Figure 5-9, we chose these attributes: Chiller for the font, Bold for the font style, and 36 for the size.
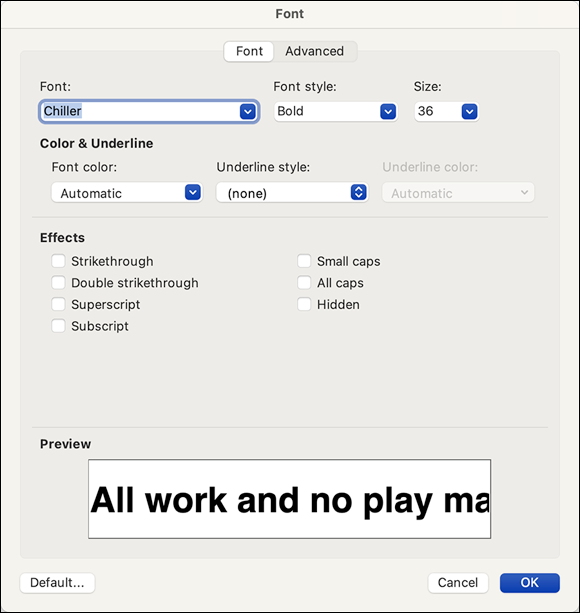
FIGURE 5-9: Choose a font, style, and size in the Font dialog.
Figure 5-10 shows the results of clicking OK to accept these modifications.
Changing other attributes of text in the Font dialog is just as easy. In addition to choosing the font color and underline style and color, you can apply the following variety of effects to selected text:
- Strikethrough places a single line through the middle of selected text, like so:
strikethrough. - Double Strikethrough places two lines through the middle of selected text so that it looks like this: double strikethrough.
- Superscript changes the characters you select to superscript, like so: superscript.
- Subscript changes the characters you select to subscript: subscript.
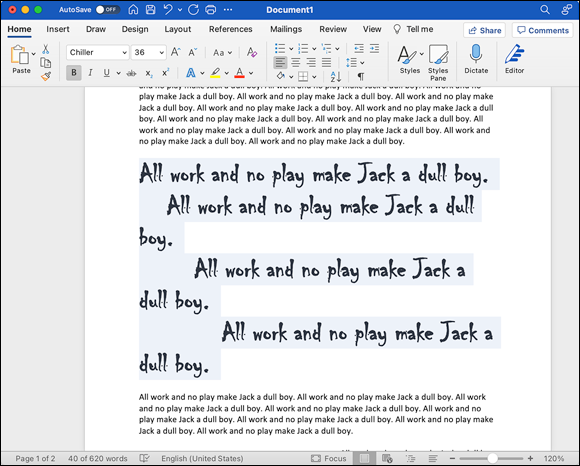
FIGURE 5-10: A paragraph reflecting the choices made in the Font dialog in Figure 5-9.
- Small Caps look like this: Small caps.
- All Caps capitalizes all selected text. Use this option sparingly, especially within paragraph text. Words that appear in all caps implies that the text is SHOUTING AT PEOPLE, which no one finds pleasant.
- Hidden hides the selected text onscreen and when printing. Deselect the box to make the text reappear.
Look at the Preview area near the bottom of the Font dialog (refer to Figure 5-9) to see the effect of your choices before you click the OK button.
For even more font-formatting fun, try applying text effects and experiment with shadow, outline, emboss, and engrave. Also, the Advanced tab in the Font window offers several other options (such as character spacing) to fancify your text.
Changing the look of paragraphs
Changing font attributes is just one way you can change the way text looks. Another way is to change the text’s paragraph attributes. In this case, rather than changing words and letters, you change the way entire paragraphs appear.
The rules for selecting paragraphs to modify are slightly different than the rules for selecting text. To format a single paragraph, just click anywhere within that paragraph. To format multiple paragraphs, however, select them in the usual way.
Try performing the following steps both ways. In other words, first click somewhere in the first paragraph and follow the steps to format just the first paragraph. Then select the second and third paragraphs and follow the steps again to format those two paragraphs:
- Click anywhere in the first paragraph.
-
Choose Format ⇒ Paragraph (or press ⌘ +Option+M).
The Paragraph dialog opens. If the Indents and Spacing tab isn’t highlighted, click it.
- In the Alignment pop-up menu, choose an option, such as Centered.
-
Change the Left and Right Indentation values to whatever you want, such as 1″.
You can either type the new value or use the little arrows to the right of each value to change them. - Change the Spacing After value to whatever you want, such as 24 pt (points).
-
In the Line Spacing pop-up menu, choose a line spacing, such as Double.
Based on the suggested choices in these steps, the Paragraph dialog looks like Figure 5-11. (Yours, of course, reflects your own choices.)
- Click OK.
Because the insertion point is in the middle of the first paragraph of the document in Figure 5-12, it’s the only paragraph that reflects the choices made in the preceding steps.
The ribbon’s Home tab and its formatting options also let you change font and paragraph attributes.
If the ribbon is collapsed so that only its tabs appear, click the Home tab to display its contents.
So, unlike the dialog approach, when you use the ribbon’s Home tab, you avoid that big, ugly dialog in front of your document and you don’t have to click the OK button to see the results of your changes. Frankly, we use the Font and Paragraph dialogs only when the ribbon’s Home tab doesn’t offer a feature we need.

FIGURE 5-11: The Paragraph dialog should look something like this before you click OK.
FIGURE 5-12: Your document reflects the choices you made in the Paragraph dialog.
In Chapter 3, you discover how to put any command on the Quick Access toolbar. You can, at least in theory, put every font- or paragraph-related feature you’ll ever need on the Quick Access toolbar and avoid using the dialogs.
The tabs on the ribbon are context-sensitive, so if you select an object such as a photo, shape, table, or chart in your document, new tabs such as Picture Format, Table Design, Layout, or others may appear among the default tabs.
We also like how the Font menu on the ribbon’s Home tab, unlike the Font dialog, shows you previews of what fonts look like (see Figure 5-13).
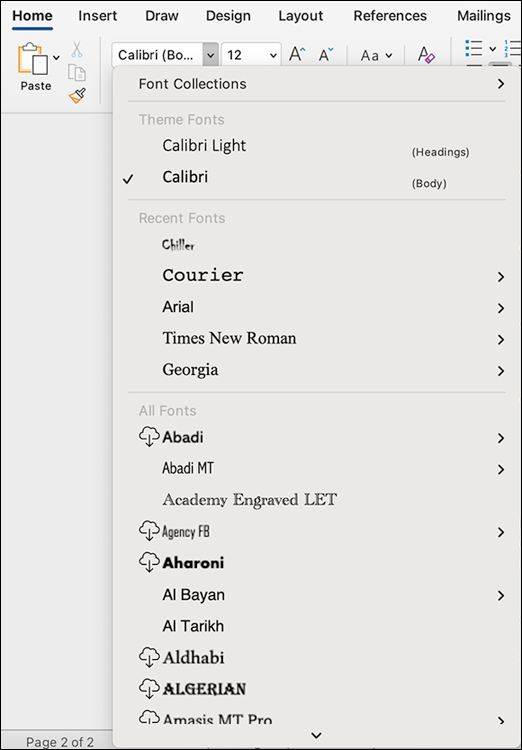
FIGURE 5-13: The Home tab’s Font menu offers previews of fonts before you apply them to your text.
If you can’t find the tab or tool you need on the ribbon, ask yourself, “What is selected” or “Where is my cursor?”
Changing the look of images
Microsoft Word is, of course, a word processor, but it offers a surprising amount of control over the look of images in your documents as well.
To modify an image — clip art or photo — in your document, click the image to select it. When an image is selected, it displays handles on each corner and in the middle of each side. It also displays a rotation handle that extends from the middle handle on the top side, as shown in Figure 5-14.
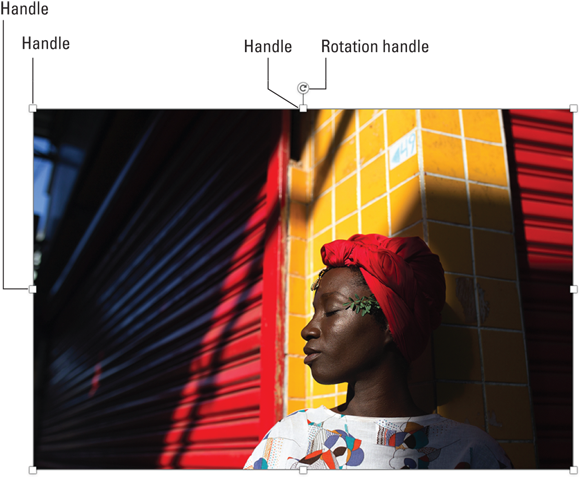
FIGURE 5-14: A selected image (or another object) has eight handles and one rotation handle.
If you click and drag any of the eight regular handles, the image stretches or shrinks in that direction. If you drag a corner handle, the aspect ratio remains the same and the height and width change simultaneously. If you drag a handle in the middle of a side, the image stretches or shrinks in only that direction. Give it a try.
You can make additional image modifications in a couple of ways:
- Our favorite is to use the ribbon’s Picture Format tab. To display it, click the image you want to modify; the Picture Format tab appears on the ribbon, with several great tools to help you jazz up your images. For example, you can use the Artistic Effects Options to add an icon to your image, as shown in Figure 5-15. Choose from filters such as Watercolor Sponge, Paintbrush, Blur, or Pencil Sketch.
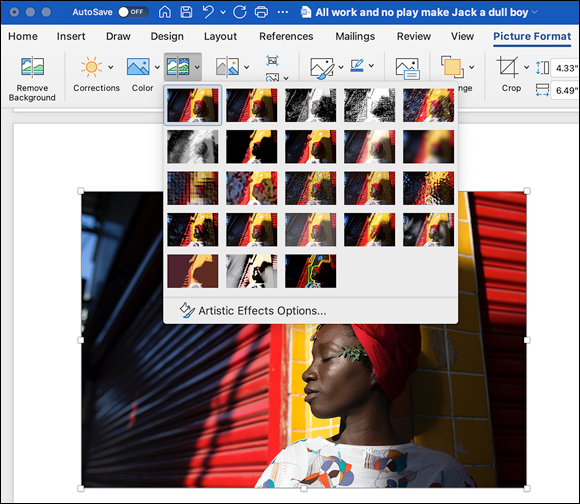
FIGURE 5-15: Spice up your images using Artistic Effects in the Picture Format tab of the ribbon.
- The second way is to use the Format Picture pane by either double-clicking the image you want to modify to open the pane on the right side of the window, or by clicking the image once to select it and then clicking the Format Picture pane icon on the ribbon’s Picture Format tab. The Format Picture pane offers a whopping 14 different options in the Fill & Line, Effects, Layout & Properties, and Picture tabs — Fill, Line, Shadow, Reflection, Glow, Soft Edges, 3-D Format, 3-D Rotation, Artistic Effects, Text Box, Picture Corrections, Picture Color, Picture Transparency, and Crop.
The following steps shows you an example of choosing settings in the Format Picture pane. With an image selected and the Format Picture pane open, do this:
- On the Effects tab, click the Shadow item.
- Click the Presets pop-up menu and select one of the options in the Outer section.
- Set the Angle value to 45°.
- Set the Size value to 103%.
- Set the Blur value to 16 pt.
- Set the Distance value to 8 pt.
-
Set the Transparency value to 70%.
The Format Picture pane and image now look like Figure 5-16.

FIGURE 5-16: These settings produce a subtle drop shadow effect that makes the image appear to be floating.
Unlike in the Font and Paragraph dialogs, where you make changes and click OK before seeing their effects, changes you make in the Format Picture pane and on the ribbon's Picture Format tab are displayed and updated immediately.
We suggest that you check out some of the settings in the other Format Picture pane tabs. (Try Reflection in the Effects tab or Picture Transparency in the Picture tab, for starters.)
Not all these screens are appropriate for all pictures, so don’t be alarmed if some of them don’t appear to do anything to your image. For example, if you choose Text Box in the Layout & Properties tab of the Format Picture pane with an image selected, all options appear dimmed and are unavailable because they work only on text in text box objects and don’t make sense for a graphical image.
When you’re satisfied with your handiwork, click the gray X in the upper-right corner of the Format Picture pane to close it.
Copying Words and Images from Other Sources
You have a couple of techniques available for moving text and graphics out of another program and into a Word document: drag and drop and copy and paste. Sometimes, one works when the other one doesn’t. Read on for details on both.
Dragging and dropping
Drag and drop is the simplest way to move text or images to your Word document from another app. To do so, follow these steps:
- Launch Word and create or open a document.
- Launch your browser and surf to a website of your choosing.
- On the web page, select the text, image, or text and image you want to copy to your Word document.
-
Click in the selected (highlighted) area and drag it to your Word document.
The cursor turns into the copy cursor (green circle with a plus sign), as soon as you start dragging the items, as shown in Figure 5-17.
- To drop the text into the Word document at the insertion point, release the mouse button.
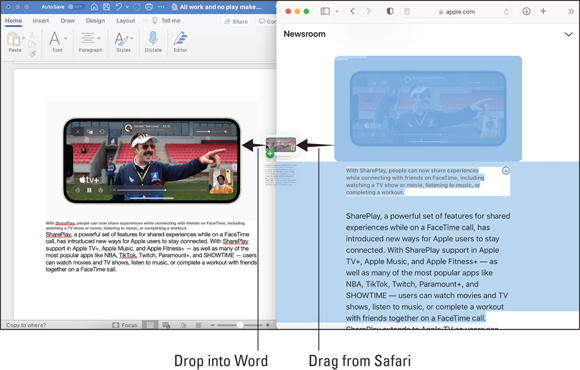
FIGURE 5-17: Dragging text from your browser (Safari, in this case) to a Word document.
Dragging and dropping only an image works almost the same way. To copy an image to your Word document, merely click the image on the web page, drag it to your Word document, and then release the mouse button. Like magic, the image appears in your Word document at the insertion point.
One last thing about drag-and-drop: You can also drag image files from Finder to your Word documents (refer to Figure 5-6).
Copying and pasting
Some programs don’t support drag and drop. If you try it and it doesn’t work, here’s an alternative way of moving text and graphics from another program to a Word document:
- Launch Word and create or open a document.
- Launch your browser and surf to a website of your choosing.
- On the web page, select the text you want to copy to your Word document.
- Choose Edit ⇒ Copy (or press ⌘ +C) in your browser to copy the text to your Mac’s clipboard.
- Click where you want the text to appear in your Word document.
-
Choose Edit ⇒ Paste (or press ⌘ +V).
The text appears in the Word document at the insertion point.
To copy just an image from a web page to a Word document, follow these steps:
- Launch Word and create or open a document.
- Launch your browser and surf to a website of your choosing.
- On the web page, right-click the image you want to copy and choose Copy Image from the contextual menu, as shown in Figure 5-18.
- Click where you want the image to appear in your Word document.
-
Choose Edit ⇒ Paste.
The image appears in the Word document at the insertion point.

FIGURE 5-18: Right-click the image and choose Copy Image from the contextual menu.
Working with Other Document Elements
Earlier in the chapter, we show you how to add text and graphics to a document. And by knowing how to do that, you also know how to add other elements on the Insert menu, such as movies, symbols, shapes, and text boxes. However, by using the ribbon, you can add and modify even more elements, such as headers and footers, page numbers, charts, and tables.
You can find extensive support for adding and modifying document elements on several of the ribbon tabs. The following list describes what you can do with them:
- References tab: Add to your document preformatted and professionally designed elements, such as citations, tables of contents, and bibliographies.
- Insert tab: Add to your documents preformatted and professionally designed tables (grids), shapes, SmartArt, icons, and 3D models.
- Draw tab: Create drawings and add them to your documents.
- Design tab: Apply preformatted themes, watermarks, page borders, and more to your documents.
- Layout tab: Create columns, add page breaks, format indentations and spacing, align various elements on the page, and more.
Want to try out something cool? Check out the SmartArt icon on the Insert tab: Add or turn selected text into preformatted and professionally designed illustrations, such as organization or pyramid charts.
Adding elements by using the ribbon
To add an element to your document from the ribbon, follow these steps:
- Move the cursor to wherever you want the element to appear in your document.
- Click one of the little arrows on the ribbon to select the element you want to insert.
In Figure 5-19, we clicked the Cover Page icon and inserted the Feathered cover page in the document.
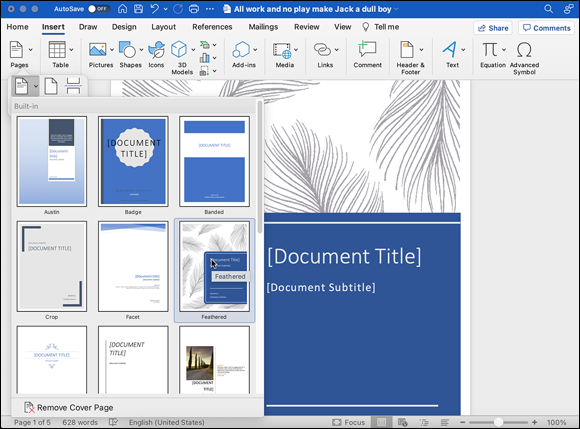
FIGURE 5-19: The Insert tab on the ribbon, with the Cover Page option selected.
Modifying elements by using the ribbon
To format or modify an element in your document, follow these steps:
- Single-click an element to select it.
- Select the effect (color, line thickness, glow, bevel, line color, or whatever) that you want to apply to the element.
For example, in Figure 5-20, we’re applying a reflection to the selected object (the 3D starry-eyed emoji).
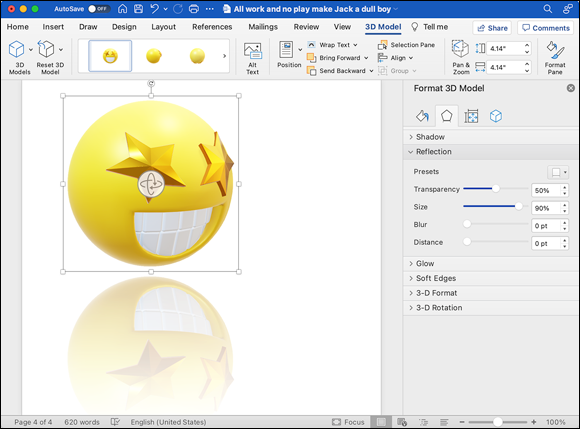
FIGURE 5-20: Applying a reflection effect to a 3D emoji.
Removing elements
We want to tell you something about elements that you probably ought to know, and that’s how to remove one from your document.
To remove elements that aren’t full-page elements — such as charts, tables, and SmartArt Graphics — just select the element you want to remove and press the Delete key on your keyboard.
To remove a full-page element, such as cover pages, use its shortcut menu, which you should see near the upper-left corner of any cover page when you hover your mouse pointer over it. Click it and choose (in this case) Remove Cover Page, as shown in Figure 5-21.
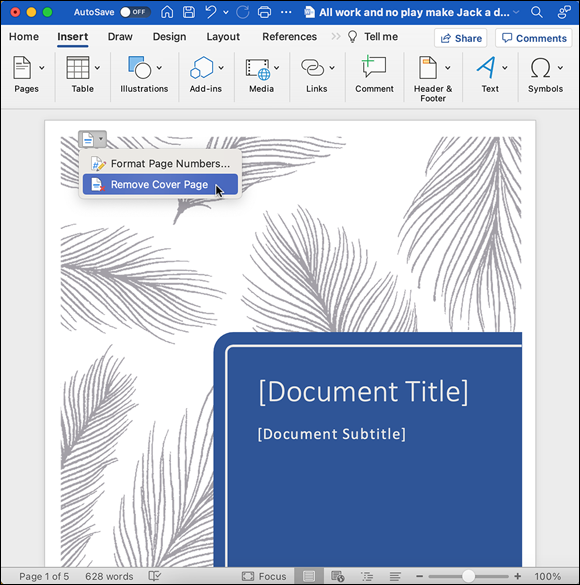
FIGURE 5-21: Using the shortcut menu to remove the cover page.