
Chapter 1
Being Social on Facebook and Twitter
IN THIS CHAPTER
![]() Establishing a Facebook account and nailing down your settings
Establishing a Facebook account and nailing down your settings
![]() Building your Timeline
Building your Timeline
![]() Locking down your Facebook info
Locking down your Facebook info
![]() Setting up your Twitter account
Setting up your Twitter account
![]() Beginning to tweet
Beginning to tweet
Everyone knows about Facebook and Twitter these days, and many people use them, all over the world. Facebook has been especially famous in the news, and not for positive reasons. If you haven’t heard about it, look for The Facebook Papers on Google or Bing. It was quite an eye-opening investigation into Facebook’s internal affairs.
In this chapter, I’m not going to debate about what’s wrong with Facebook or Twitter. Instead, I’ll show you the basics about using these social networks. My objective is to help you create a Facebook account, improve your privacy settings, and understand the basics about how it works. The same with Twitter.
Without further ado, let’s get started. I’ll cover Facebook first, and then Twitter.
Getting Started with Facebook
If you don’t yet have a Facebook account, more than 2.5 billion people are ahead of you. I have friends who figure Facebook is some sort of fad that’s going away soon. They’d rather be offline for most of the day than put anything on Facebook. “You lose your privacy,” they say. “I don’t see any need for it.” Even so, Facebook has become an important part of the daily routine of 1.8 billion people, and it claims that more than 2.5 billion registered users go online every month. It’s been credited with starting revolutions. It’s certainly a good source of news — almost as good as Twitter (described later in this chapter) — if you choose what and who you follow carefully.
 Facebook has fundamentally changed the way hundreds of millions of families interact, more so than any other invention since the telephone. It’s altered the way people work. Businesses. Schools. Hospitals. Governments. Charities.
Facebook has even eaten into email and instant messaging, for heaven’s sake. Email usage has gone down the past decade because Facebook’s one-to-many nature reduces the need for email messages, and its embedded chat features are growing fast. To me, that’s incredible. I’m tempted to stand up and bellow a chorus from Bob Dylan’s “The Times They Are A-Changin’.”
In this chapter, I only brush the surface of the capabilities available to Facebook users. You find a bit of depth about the Timeline, and I hit the privacy/security part because that’s where you should concentrate your efforts when you’re just starting out.
Choosing the Facebook App or Facebook.com
Chances are that as soon as you log into Windows 11 for the first time and open the Start menu, you'll see the Facebook app shortcut in the middle of the Pinned section. It’s right there, next to TikTok (one of its most important competitors) and Instagram, as shown in Figure 1-1.
When you click or tap the Facebook icon, Windows downloads the app from the Microsoft Store and then opens it for you. Unfortunately, this isn’t a dedicated app for Windows but a progressive web app (PWA). This means that instead of having a Facebook app optimized for Windows like you do for Android and iOS, you have the Facebook website running inside a wrapper: something that appears to be an individual app but is actually Microsoft Edge running facebook.com in an app window named Facebook.
The Facebook company (now renamed Meta) ignored Windows for many years, so I don't find this approach surprising. The Facebook “app” for Windows works reasonably well, but many users don’t appreciate it and prefer the mobile alternatives. I do too. And while I’m on Windows 11, I prefer to open facebook.com inside my favorite browser. It works better that way, and it's easier to deal with it inside a browser tab instead of as a separate app. To prove my point that the Facebook app for Windows is nothing but the facebook.com website in a wrapper, I’ve run them side by side, as shown in Figure 1-2. You can’t tell them apart, right?
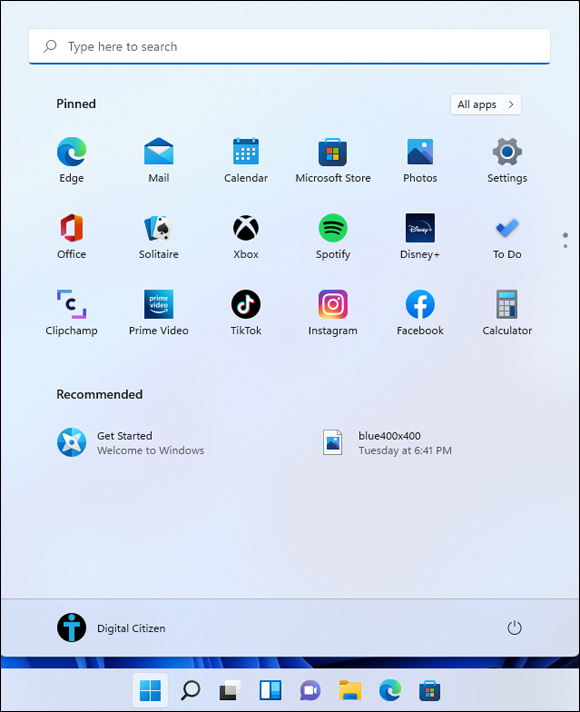
FIGURE 1-1: Windows 11 often promotes the Facebook app.
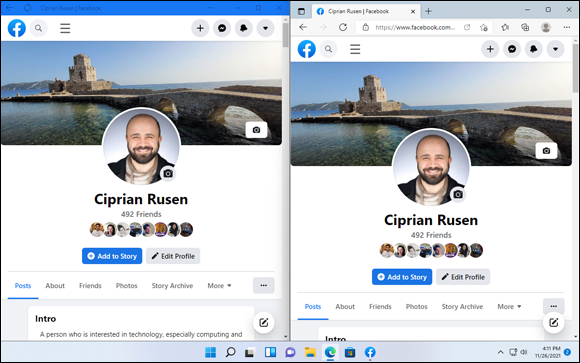
FIGURE 1-2: Facebook.com on the right vs the Facebook app on the left.
And the funny thing is, if you log out from facebook.com inside Microsoft Edge, you’ll also get logged out from the Facebook “app.” Technically it makes sense, though, because all you’re doing is using Edge in both situations, with the same cookies. Logging in one place logs you in on the other, and the other way around.
Signing up for a Facebook account
If you don’t yet have a Facebook account, I suggest you sign up. Don’t worry — no one is going to steal your identity or mine your personal data. Facebook’s free — and will be free to use forever, we’re assured, although some features may cost something someday, and a few business-oriented features like promoting posts or other kinds of advertising do cost real money.
 There's one cardinal rule about Facebook, which I call the prime directive: Don’t put anything on or in Facebook — anything — that you don’t want to appear in tomorrow morning’s news. Or your boss’s inbox. Or your kid’s school class. Privacy begins at home, doesn’t it?
Now that you have the right attitude, all you need is a working email address, and if you state that you’re at least 13 years old, you can have a Facebook account in minutes. Here’s how:
Use your favorite browser to go to
www.facebook.com.The Log In or Sign Up page appears, as shown in Figure 1-3.
- Click or tap Create New Account.
Fill in your name and email address, give your new account a password, and make sure your birthday indicates that you’re at least 13.
The email address must be a valid one that you can get to because a confirmation email goes to that address.
This is not the way to set up an account for a celebrity, band, business, charitable organization, or knitting group. In all those cases, you need to set up an individual account first — follow the instructions here — and then after your individual account is ready, you add a page (sometimes known as a business page) to your individual account. I know it’s complicated, but Facebook works that way. Even Coca-Cola’s page is attached to an individual — presumably an employee from their Marketing department signed up and then created a page for Coca-Cola.
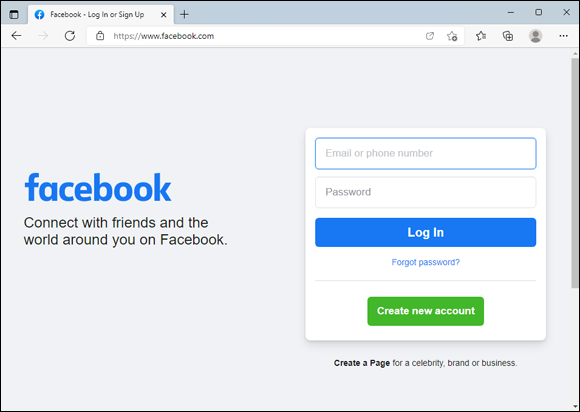
FIGURE 1-3: The facebook.com Log In or Sign Up page.
 There’s no reason to give personally identifiable information in this sign-up sheet. Facebook may balk if you try to sign up as Mark Zuckerberg, but it (probably) won’t have any problem with Marcus Zuckerbergus (although, now that I’ve mentioned it, the name may be added to Facebook’s blacklist). Some people have had trouble using their stage names, even when their stage names are, legally, their real names. Facebook has a policy that you must use your real name, so if you don't want to provide yours, make sure whatever name you use looks real enough. (Apparently you can make up a silly middle name, though, and it’s likely to be accepted.)
And if you figure your birthday is your business, the internet police aren’t going to come knocking. The one item that must be valid, though, is the email address — which can come from a free site, such as Outlook.com or Gmail.
Click or tap Sign Up.
Facebook sends a confirmation email to the address you specified.
Copy and paste the confirmation code. Click or tap Continue and then OK.
If you live in Europe, Facebook asks about allowing it to use cookies.
Click or tap Allow All Cookies if you see this prompt.
You then see the facebook.com home page, which will look similar to Figure 1-4. At this point, your profile is empty: no picture, no friends, no content published on Facebook.
Next, you set up some basic settings and get your security locked down.
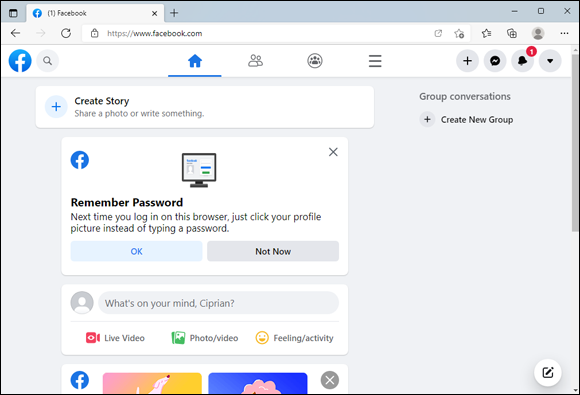
FIGURE 1-4: Your Facebook profile is ready and also empty.
Improving basic Facebook privacy settings
Before you try to figure out what you’re doing — a process that will take several days — go through setting up the rest of your Facebook account. One of the first things you should look at is your privacy settings. Here’s how you can improve your privacy on Facebook:
Log into Facebook and click or tap the down arrow, in the upper-right corner, and then choose Settings & Privacy, followed by Settings.
You see the General Account Settings page.
On the left, choose Security and Login. Scroll down on the right until you see Use Two-Factor Authentication, and click or tap its Edit button.
The two-factor authorization (2FA) signup offer appears.
2FA is an important adjunct to any account — and I find text message 2FA is the easiest option. When you use the text message 2FA, the first time you log on to Facebook from a new device, Facebook automatically sends a text message to your smartphone with a confirmation code. You must enter the confirmation code before you can proceed.Click or tap Text Message (SMS). If you're asked to enter your Facebook password, do so.
The dialog box shown in Figure 1-5 appears.
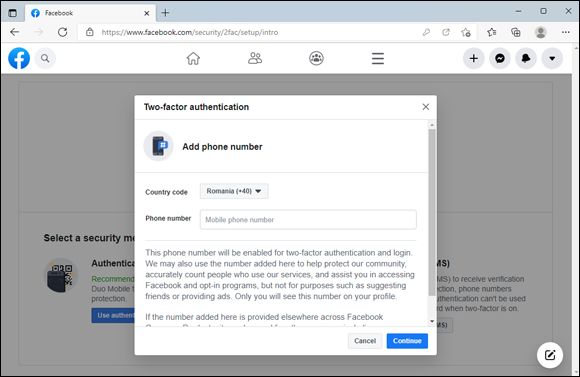
FIGURE 1-5: The most important security setting is two-factor authentication.
Type your phone number, and click or tap Continue. When the confirmation message appears on your phone, type the code in the confirmation box, and then click or tap Continue followed by Done.
A pesky notification box asks you if it’s okay to use your phone number to help you make connections and see ads that are more “relevant.”
Unless your friends are a whole lot friendlier than my friends, click or tap Not Now.
You're informed that two-factor authentication is on.
Click or tap the down arrow in the upper right, and then choose Settings & Privacy again, followed by Settings.
You go back to the General Account Settings page.
On the left, click or tap Privacy. Then, next to Who Can See Your Future Posts? choose Edit.
The default sharing pane appears, as shown in Figure 1-6.
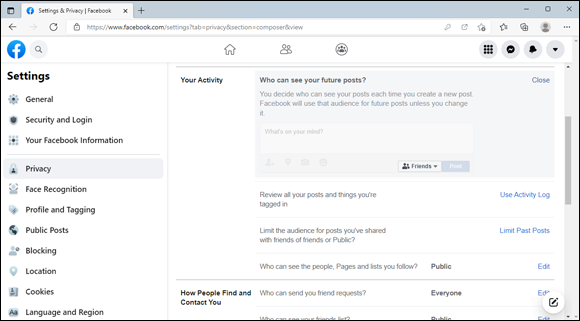
FIGURE 1-6: The default is for all future posts to be visible only by friends.
Make sure the drop-down box lists Friends and not Public, and then click or tap Close.
You're back to the Privacy Settings and Tools page.
One final check: On the left, click or tap Apps and Websites.
A list of all apps that have permission to connect to your Facebook account appears, as shown in Figure 1-7. Don’t be overly alarmed. Somehow, sometime, you gave those apps permission to hook into your Facebook account.
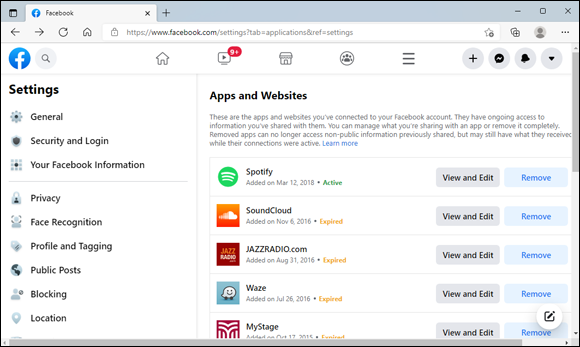
FIGURE 1-7: Don’t be too surprised if you see some bizarre apps and websites that have access to your Facebook data.
- Delete any unwanted obtrusive app or website by clicking or tapping Remove next to its name, and confirming your choice.
- Click or tap Home, up at the top, and go back to using Facebook.
Interpreting the Facebook interface lingo
Now that you’ve taken the whirlwind tour, permit me to throw some terminology at you. Facebook used to be simple; it isn’t anymore. To work with Facebook, you need to figure out the names of things and what the different pieces are supposed to do. The complicated part? Names have changed over the years, and you’re bound to run into old names for new things — and vice versa.
Here’s my handy translator:
Home page (also called the News Feed) is primarily about your friends. The important stuff is in the middle — navigation aids are on the left, and uninteresting things (including ads) are on the right. When you type something in the What’s on Your Mind box, it’s added to the top of the list, as well as at the top of your Timeline. When you add photos or videos, thumbnails of the photos go at the top of the list in the middle of the home page. Ditto for your friends’ photos.
When you click or tap Home at the top, you go to the home page or the News Feed. When you sign on to Facebook, you go to the home page.Facebook has a secret algorithm that it uses to figure out which items appear on your News Feed and in what sequence. If you’re mystified why something’s on the top of the page but the important stuff is down farther, well, I’m frequently mystified, too.
At this moment, your home page also includes Top Stories and Facebook-generated Rooms just above the news feed. Rooms are a relatively new feature that allow up to 50 people to video chat at a time. There’s no limit to how long you can talk.
Timeline is all about you. There’s a big picture at the top, dubbed a cover, with your profile picture appearing to the left. Then there are all the settings you’ve made visible, followed by almost all the posts you’ve made over the years, in reverse-chronological order. I talk about the Timeline in the next section.
When you type something in the What’s on Your Mind box, it’s added to the top of the Timeline list, as well as at the top of your home page. Your friends can also post on your Timeline — in effect, leaving you a note.
The Timeline appears when you click or tap your name at the top of the Facebook page. It also appears when someone clicks or taps your profile picture in something you posted.
Building a great Timeline
The Timeline — the place you go when you click or tap your name — is where people usually go when they want to learn about you. If somebody clicks or taps your picture in a post elsewhere in Facebook, that person is sent to an abbreviated version of your Timeline.
When you bring up your own Timeline, you get to see a great deal more than what the world sees, as in Figure 1-8.
Keep in mind the prime directive: Don’t put anything on or in Facebook — anything — that you don’t want to appear in tomorrow morning’s news. Fill in the details sparingly.
Follow these steps to personalize your Timeline:
After you log in to Facebook, bring up your Timeline by clicking or tapping your name at the top right.
Depending on how much you’ve done to your Timeline, it might look like the one in Figure 1-8.
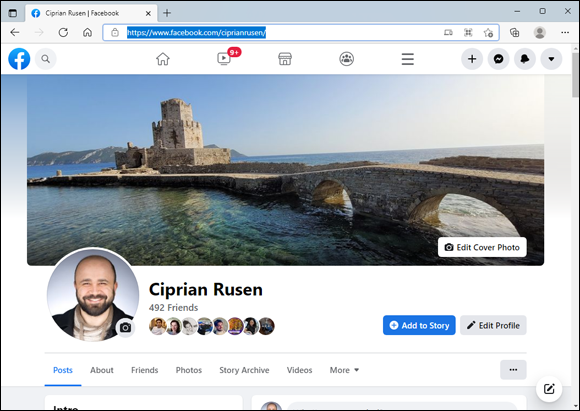
FIGURE 1-8: Your Timeline is your resume in the Facebook world.
Click or tap the camera icon and follow the instructions that appear.
Facebook takes you through the steps of either uploading a new photo or choosing from one that you’ve already uploaded. The Facebook cover photo is 850 pixels wide x 315 pixels tall. Facebook will accept any picture as long as it’s at least 720 pixels wide. When you drag the uploaded picture to fit it into the fixed-sized frame (in the next step), you’re telling Facebook how to crop the picture to make it fit into the 850 x 315-pixel box. For best results, use a photo-manipulation program — or even Paint— to get the photo just right before you upload it.
If you don’t have a suitable photo already, pre-fab Facebook cover photos are all over the internet. Just be careful when you go out looking: Any website that has you click (or tap) and log in to Facebook to deliver the photo may be gathering your Facebook login ID in the process. It’s much safer to simply download the photo to your hard drive and then upload it yourself to Facebook.- Drag the photo to the fixed-size frame. Then click or tap Save Changes.
To change your profile picture — the little picture on the left that also appears on anything that you post, click or tap it and choose Update Profile Picture.
Remember that your profile picture gets squeezed down most of the time, so a highly detailed photo usually doesn’t work well.
When you’re finished editing your profile information, click or tap your name at the top of the screen to go back to the Timeline.
Now it’s time to change the contents of the Timeline itself.
- Scroll down the Timeline and find an item that you don’t want other people to see. Then do the following:
- Click or tap the ellipsis in the top-right corner of that item. Facebook gives you the options shown in Figure 1-9.
- To remove that item from your Timeline, click or tap Move to Trash, and confirm your choice. The item disappears immediately and is moved to Facebook’s Trash. After 30 days, all items in Trash are automatically deleted for good.
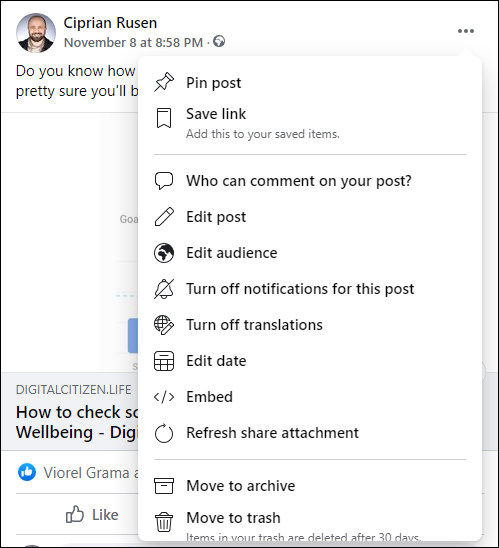
FIGURE 1-9: The options available for every item in your Timeline.
On the left, where it says Intro, consider clicking (or tapping) Edit Details, and providing data such as your school’s name or current city, and clicking Save. Or click or tap Cancel and don't fill in anything.
Either way, Facebook hits you with a barrage of questions that help flesh out your profile. Be careful to choose who can see all the information you add. By default, Facebook sets your school as public information, which is shared with everyone, not just your friends.
Fill in the rest of your profile data. Or don’t. Your choice.
As you get more adept at Facebook and figure out how to lock down your account, you may want to add more information to your profile. That’s okay, as long as you understand the implications. For now, put in the minimum you feel comfortable about disclosing to the world at large. Remember, someday your boss or your son might read it.Each line you can enter — from your schools and marital status to your religious views — has a choice to limit access to that information.
Access limitations are based on your lists. For example, if you identify Snidely Whiplash as a member of your family, Snidely can look at any items you’ve set to be visible to Family. Any friends who aren’t on your Family list can’t see the item.
For now, while you’re still getting your feet wet, be very circumspect in what information you provide, even if you limit access to the information to specific lists. Give yourself awhile to get more friends. You can always update your profile.
If you’ve been using Facebook for a long time, your Timeline may go on and on and on. But I bet there’s no chance you have your baby picture on it.
To add something to your Timeline that goes way back (I’m talking years or decades, not centuries):
- Click or tap the Life Event link in the What’s on Your Mind box. Facebook lets you identify the event, as shown in Figure 1-10.
- Choose a category for your life event.
- Follow the instructions to give a date, choose or upload a picture, and provide more details about the event.
- Click or tap Post.
The item attaches itself to the appropriate place on your Timeline — even if it predates your joining Facebook.
It’s your account. Take control of it.
As you get more adept at Facebook, you’ll figure out how to tag photos; share things that have been posted to your home page or your Timeline; subscribe; set up groups; chat and make video calls; set up your own fan, business, group, or charity pages; post events; search; use GPS location-based features; set up your own lists — and much more. If Facebook intrigues you, I suggest you pick up a copy of Facebook For Dummies, by Carolyn Abram and Amy Karasavas. For a deeper look at the side of Facebook tailored for businesses, charities, and groups, look at Social Media Marketing All-in-One For Dummies, by Michelle Krasniak, Jan Zimmerman, and Deborah Ng.
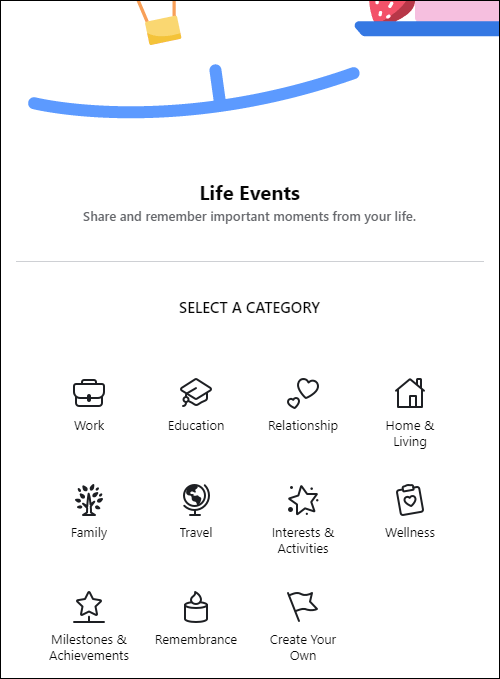
FIGURE 1-10: You can add items to the Timeline and mark them as a specific life event. Previous lives don’t count.
Downloading your Facebook data
Apps aren’t allowed to download all your Facebook data. But you can. And doing that is a good idea, especially if you want to quit using Facebook or just want to see how much stuff they have about you. To do that, follow these steps:
Log into Facebook. Click or tap the down arrow, in the upper right, and then choose Settings & Privacy, followed by Settings.
You see the General Account Settings page.
On the left, choose Your Facebook Information.
You see all the options in Figure 1-11.
Click or tap the View button next to Download Your Information.
The Download Your Information page appears, as shown in Figure 1-12.
- Select the Format, Media Quality and Date Range for the data you’re interested in.
Choose all the types of information to download, and then click or tap Request a Download.
You receive an email from Facebook telling you that they’ll send you another email when your data is ready for download. This process can take hours, so be patient.
When that second email arrives, follow its instructions.
The file with the information you requested will be in the same Download Your Information page, under Available Files.
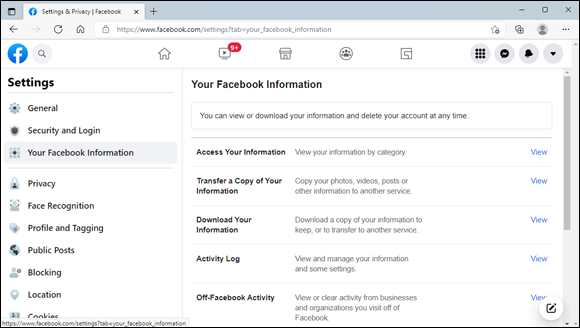
FIGURE 1-11: This is where you access all Your Facebook Information.
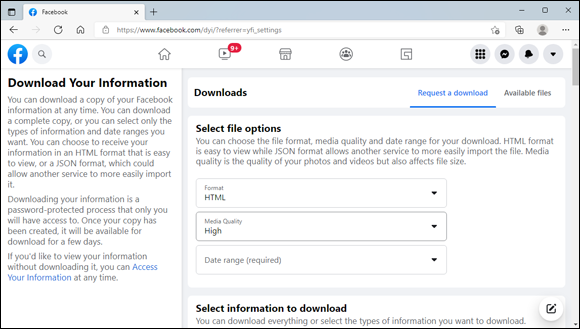
FIGURE 1-12: You can download a surprisingly large amount of information.
Using the other Facebook apps for Windows
I find it much easier to set up a Facebook account — and particularly keep on top of privacy settings — by using a web browser. For day-to-day use, though, most people rely on the Facebook mobile app. It’s just simpler and faster to keep track of Facebook comings and goings with your smartphone or tablet. However, for chatting directly with people, you may want to try the Messenger app for Windows 11, available in the Microsoft Store. It's simple to use, and it works well. See it in action in Figure 1-13.
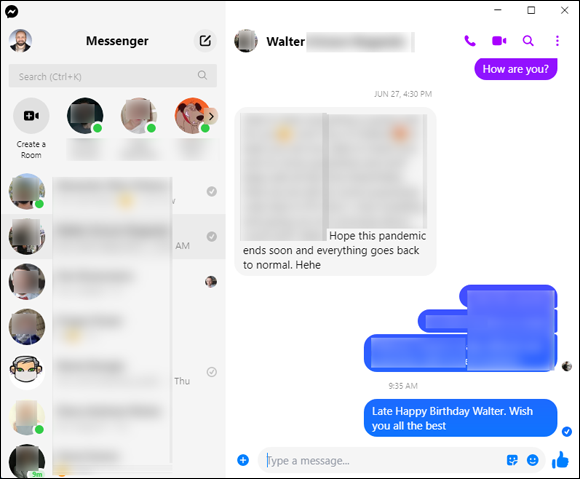
FIGURE 1-13: The Messenger app for Windows 11.
To chat with someone, select the person in the left pane or use the search field to search for the person. Type your message on the right, and press Enter or click or tap Send.
Another app that you might want to try is Facebook Watch for Windows 11 (see Figure 1-14), which is available in the Microsoft Store. Facebook Watch helps you discover videos from popular pages, friends, and other sources. Think of it as an inferior YouTube or TikTok competitor that's a great time waster. An upside of Facebook Watch is that you can use it without logging in with your Facebook account.
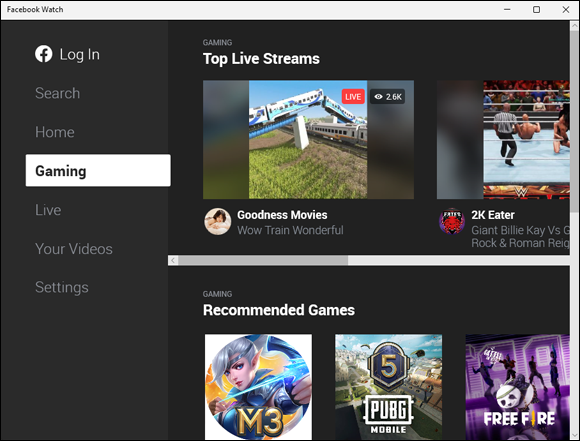
FIGURE 1-14: The Facebook Watch app for Windows 11.
To watch a video, just click or tap it. To discover interesting videos, scroll through the available categories, or use the Search option and enter the subject, page, or person you're interested in.
Getting Started with Twitter
The revolution will not be televised. It will be tweeted.
In March 2006, an amazing array of developers and entrepreneurs — originally intent on building a podcasting platform called Odeo — unleashed Twitter on an unsuspecting world. More than a decade and a half later, Twitter has been credited with helping to overthrow totalitarian governments, spread fear and mayhem, aid and abet leaks of embarrassing government documents, shed light on official dirty dealings, establish a rallying point for the Occupy disenfranchised, and let everyone know what Lady Gaga had for breakfast.
That’s quite an accomplishment. In 2021, Twitter had more than 187 million daily active users, out of a total of 322 million users, with 19.4 percent of them based in the US. While Facebook dominates the social networking space in North America, Twitter takes the number 1 place in Japan, and it has an ever-increasing presence in Asia-Pacific and Europe. Those numbers are all industry estimates because Twitter doesn’t divulge much, even though it’s listed on the New York Stock Exchange.
I use Twitter regularly. I’ve used it to keep on top of important fast-breaking news, notify people around the world, talk with other writers in the computer business, keep tabs on political organizations important to me, track down details of obscure pieces of Windows 11, and point people to funny videos.
Just about every tech writer you can name is on Twitter. Every major news outlet is on Twitter — and breaking news spills out over Twitter much sooner than even the newspaper wire services. The Royal Society. The Wellcome Trust. Lots of people who are on the ground, relaying news as it happens, use Twitter. And did I mention Justin Bieber?
In short, Twitter’s a mixed bag — but an interesting one.
Twitter’s fast, easy, and free. It works with every web browser. It works with almost every smartphone and tablet. There’s a Windows 11 app — an official one — that’s not very inspiring, but it works. Tweets are short, concise, sometimes vapid, but frequently illuminating and witty. And every single piece of Twitter is limited to 280 characters.
In this section, I walk you through the basics of using Twitter: how to create a Twitter ID, how to communicate with others through Twitter, and what you need to know about hashtags. :)
Understanding Twitter
When I explain Twitter to people who’ve never used it, I usually start by talking about mobile phone messaging — texting. A message on Twitter — a tweet (see Figure 1-15) — is much like a text message.
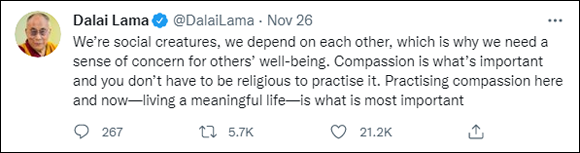
FIGURE 1-15: A typical tweet from an atypical source.
Twitter is a simple one-to-many form of communication, kind of like texting all the people who have agreed, in advance, to receive your texts.
You usually send a text message to one person. If you have a business, you may send the same text message to many people all at once. Now imagine a world in which these are true:
- You have an ID, not unlike a phone number, and you can send any messages (tweets) that you like, any time you want. The messages are limited to 280 characters (spaces included) — short and sweet.
- You get to choose whose texts you want to see on Twitter. In Twitter parlance, you can follow anybody. If you get tired of reading their tweets, it’s easy to unfollow them as well.
You have some leeway in what counts toward the 280-character limit. For example, when you
- Reply to a tweet, @names don’t count toward the 280-character limit
- Add attachments, such as photos, GIFs, videos, polls, or quote tweets, that media isn't counted as characters in your tweet
Twitter has lots of bells and whistles — location tracking, if you turn it on, for example — but at its heart, Twitter is all about sending messages and wisely choosing whose messages you receive.
Spam texts and harassing phone calls may dog your days on the smartphone. On Twitter, while all is not happiness and light, such problems are less frequent and less severe.
If you follow someone who posts a tweet, you see the tweet when you log on to Twitter. If you keep Twitter running on your PC, smartphone, or tablet, the tweet appears in your Twitter window. When you tweet, the people who follow you can see it.
In fact, anybody can see every tweet — a fact that’s proved highly embarrassing to an amazingly substantial number of people. (Twitter has a Protected Tweets feature that lets you manually approve every person who’s permitted to receive your tweets. But, in general, when you let it all hang out on Twitter, it's there for anyone to see.)
When you send a tweet, you can identify keywords in the tweet by using the # character in front of the keyword, creating a hashtag. See Figure 1-16.
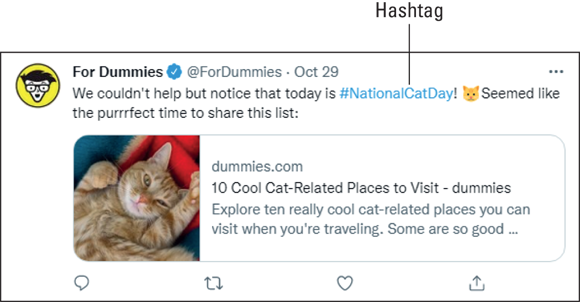
FIGURE 1-16: Tweet with a hashtag.
You can tell Twitter that, in addition to the tweets from people you follow, you also want to see all tweets that contain specific hashtags. For example, if you ask to see all the tweets with the hashtag #ForDummies, Twitter delivers to your web page or Twitter reader every tweet where the author of the tweet typed the characters #ForDummies.
Twitter (together with other sites, such as www.trendsmap.com) keeps track of all the hashtags in all the tweets. It posts lists of the most popular hashtags, so you can watch what’s popular. Thus, hashtags not only make it easier for people to find your tweets but also publicize your cause — and many good causes have risen to the top of the hashtag heaps.
In fact, Twitter now keeps track of every phrase that’s tweeted and compiles its trending lists from the raw tweets, with or without hashtags. You really don’t need to use hashtags anymore. But you see them all the time in tweets, #knowwhatImean?
Google and Twitter have entered a partnership whereby Google scans tweets so that they show up in Google searches.
The power of Twitter — outside of gossip and teenage angst — lies in carefully choosing those you follow. If they, in turn, receive information from reliable sources and then retweet the results, you’ll have a steady stream of useful information, each in 280-character capsules.
For example, during the Egyptian political crisis in January 2011, which saw the downfall of President Hosni Mubarak, Twitter played a pivotal (if controversial) role in aiding communication among protestors. One of the government’s first acts was to shut down access to Twitter and Facebook. The protestors found ways around the government’s shutdown.
There’s a fascinating re-creation of the tweeting and retweeting that followed the January 25 start of demonstrations in Cairo. Data about tweets with the hashtag #jan25 was assembled by the University of Turin, the ISI Foundation, and a research institute at Indiana University, to come up with the graph you see in Figure 1-17.

Photo courtesy of http://youtu.be/2guKJfvq4uI
FIGURE 1-17: The interconnections among Twitter users during the Egyptian uprising.
In the graph, the points represent individuals, and the lines are tweets that go from one individual to another. It’s downright explosive.
That’s how a one-to-many social network like Twitter works. An important tweet (or even an unimportant but popular one) jumps from person to person.
My Twitter ID for tech articles and tutorials is @ciprianrusen, and you’re welcome to follow me anytime you like.
Setting up a Twitter account
Twitter has apps for all sorts of smartphones and tablets. You can use it on the iPhone, the iPad, and Android smartphones and tablets. There’s also a Twitter app for Windows 11 in the Microsoft Store. I mention the Twitter app for Windows 11 only occasionally in this chapter because it’s woefully underpowered, and just like the Facebook app, it’s a progressive web app with limited functionality. If you want to get going with Twitter, it’s much easier to start with a web browser, which is the primary emphasis here.
Starting a new account at Twitter couldn’t be easier. Here’s what you do:
Fire up your favorite web browser, go to
www.twitter.com, and click or tap Sign Up with Phone or Email.You see the Create Your Account dialog, as shown in Figure 1-18.
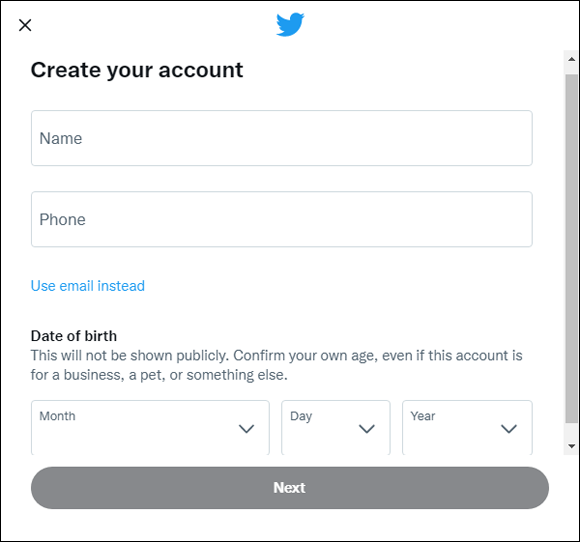
FIGURE 1-18: All you need to sign up for Twitter is a valid phone number or email address.
- Enter the name you want to use, your phone (or email), and your date of birth. Then click or tap Next.
- Select how you want your Twitter experience to be (connect to others using your phone or email address, or see personalized ads), and click or tap Next.
Confirm that you want to create your account by clicking or tapping Sign Up.
Twitter sends a confirmation code to your phone or email address, depending on what you chose in Step 2.
Type the confirmation code and then click or tap Next.
You're asked to set a password that has eight or more characters, as shown in Figure 1-19.
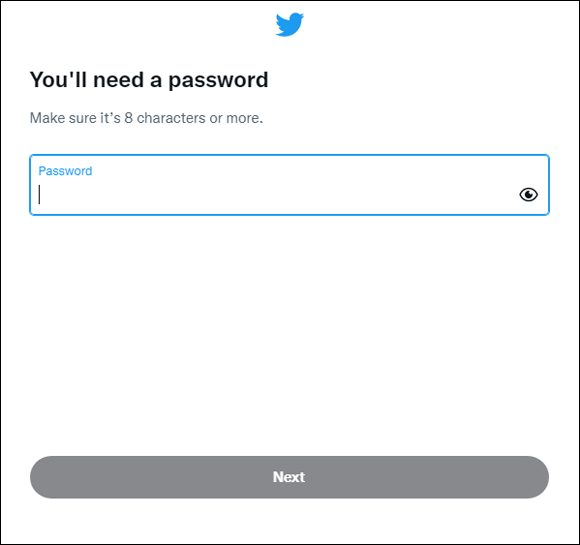
FIGURE 1-19: Use a strong password for your Twitter account.
Type the password and click or tap Next.
You're asked to choose a profile picture for your Twitter account, as shown in Figure 1-20.
Click or tap the profile icon, choose the picture you want, and click or tap Next. Or click or tap Skip for Now.
You're asked to describe yourself.
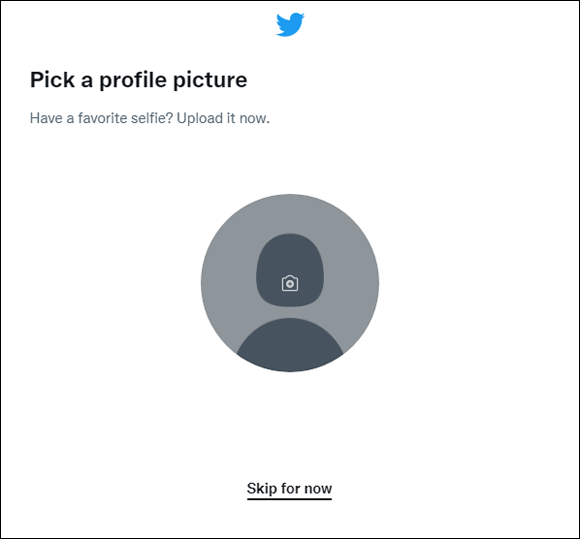
FIGURE 1-20: Choose a picture for your account.
Type a short bio (up to 160 characters) and click or tap Next. Or click or tap Skip for Now.
You're asked to confirm your Twitter username.
Although you may be tempted to bypass typing your bio, give that choice some thought. If something about you is unique and you want the world to know — maybe you’re an expert on 18th-century Tibetan bronzes — adding that to your bio may help someone else who shares the same interest find you. Your bio is accessible to anyone, so don’t put anything in there that you don’t want to be widely known.Type the username you want and click or tap Next. Or click or tap Skip to leave the one provided by Twitter.
You're asked if you want to turn on notifications.
Choose Skip for Now, so that Twitter doesn’t bother you with many notifications.
You're asked to choose your interests from a lengthy list that includes things such as sports, news, gaming, and music.
Select the subjects that interest you and click or tap Next.
The things you choose are going to help Twitter recommend interesting accounts, as shown in Figure 1-21.
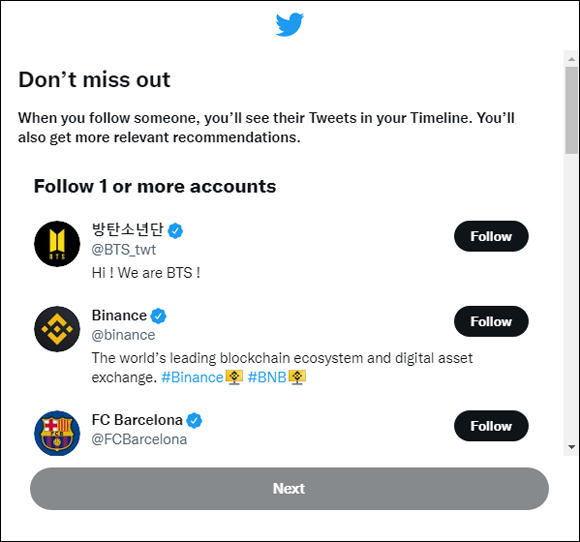
FIGURE 1-21: Choose who you want to follow on Twitter.
In the list of suggestions for you to follow, click or tap Follow for the accounts that interest you.
If you don’t know who to follow, consider the following:
- @ciprianrusen, @ForDummies, @AndyRathbone, who wrote the original Windows For Dummies, @windowsblog to keep up on the Microsoft party line, and some of the major news services — @BBCWorld perhaps and @BreakingNews.
- Try a few of the most-followed people on Twitter, @justinbieber at 114 million followers and @katyperry at 108 million and counting. You could even vote for @taylorswift13 by adding to her trove of 89 million followers.
You're finished and can finally use Twitter. :)
Celebrities and politicians don’t have it so easy — many need to go through an independent confirmation step. But for normal dummies like you and me, the process is that easy.
At first, you probably just want to watch and see what others are tweeting to get a sense of how tweeting is done. Create a practice tweet or two and see how the whole thing hangs together.
On the Twitter home page, type your first tweet in the What’s Happening field and then click or tap Tweet, as shown in Figure 1-22.
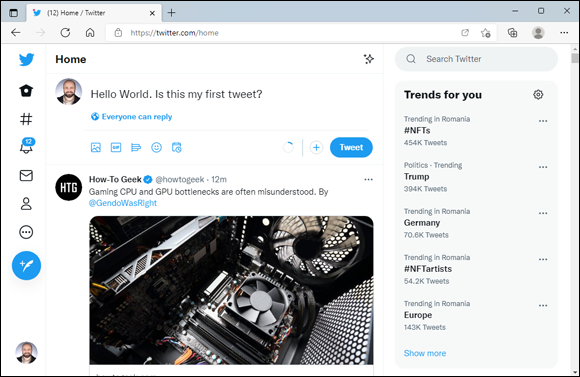
FIGURE 1-22: Creating your first tweet.
Tweeting for beginners
On the surface, Twitter’s easy and fun. Below the surface, Twitter’s a remarkably adept application with lots of capabilities — and a few infuriating limitations.
Beware of hacking
Before I dig into the more interesting parts of Twitter, permit me to give you just one warning.
Unscrupulous people are on Twitter, just as they are anywhere else. If you get a tweet from someone with a gorgeous picture who’s trying to convince you to sign up for something or hand over your password, ignore that account. If you get a tweet saying, “Somebody is writing bad things about you” or “Want to see a funny photo of you?” or “Find out who’s been looking at your bio,” ignore it.
Better yet, report the person as a spammer. Click or tap the spammer’s name. That takes you to the spammer’s profile page. In the upper right, click or tap the ellipsis icon and choose Block or Report. To complete a report, choose the reason from the list, and then click or tap Block.
If your Twitter account has been hacked — somebody talked you into clicking or tapping something that gets into your account or someone guessed your password — don’t feel too bad about it. Fox News was hacked in July 2011. Mark Ruffalo (who plays The Hulk in The Avengers) got hacked in May 2012. Justin Bieber’s account was hacked — back in the old days, when he had only 20 million followers. Ashton Kutcher. Taylor Swift. The Huffington Post. USA Today. Senator Chuck Grassley. Brett Favre. Miley Cyrus. Reuters. Associated Press (bombs at the White House). Newsweek. Queensland Police Department. Chipotle (it also faked a hack, as a publicity stunt). Burger King. US Central Command. Even Twitter’s own chief financial officer. And former President Obama.
It happens. If your account’s been taken over, see the Twitter instructions at https://help.twitter.com/en/safety-and-security/twitter-account-hacked.
On the other hand, if you’ve posted some tweets that you want to categorically disavow, you can always claim that your Twitter account was hacked. You're sure to draw plenty of sympathy.
Using the @ sign and Reply
You see the @ sign everywhere on Twitter. In fact, I used it when listing the people you may want to follow. The @ sign is a universal indication that what follows is an account name.
In the not-so-great old days, sticking an @ and a username at the beginning of a tweet would limit the list of people who would automatically see the tweet. That’s no longer the case. Anything you tweet goes out to all the people who follow you. Easy peasy.
The Twitter viewer on the internet has a Reply option to a tweet. On the Twitter website, hover your cursor over the speech bubble (see Figure 1-23) and you see Reply.
If you click or tap Reply, Twitter starts a new message with an @ sign followed by the sender’s username. If you were to reply to the message in Figure 1-23, Twitter on the web creates a new tweet that starts: @ciprianrusen.
If you type a body to that message and click or tap Tweet, the message goes to people who are following you and an extra copy is sent to @ciprianrusen.
A reply is not a private or hidden message. It’s out in the open. Anybody who searches for your username or @ciprianrusen will see the message in its entirety.

FIGURE 1-23: Reply to a tweet.
Retweeting for fun and profit
If you receive a tweet and want to send it to all the people who follow you, the polite way to do so is with a retweet, or RT for short. To give credit to the person who sent you the tweet, the retweet includes the person's username.
To retweet, click or tap the circling arrows icon (refer to Figure 1-23), and then choose a simple Retweet (Twitter builds a new tweet that copies the original tweet and adds the originator’s username) or a Quote Tweet (you can add a comment to the original tweet), as shown in Figure 1-24. By retweeting a tweet precisely, you pass the information on to your followers yet preserve the attribution. If you want to add a comment to the original message, you can do so with ease, by choosing the Quote Tweet option.
Direct Messaging
No discussion of the advanced part of Twitter would be complete without a mention of direct messaging (DM) — better known as DM-ing. Direct messages are private messages you send to another Twitter user. Unlike tweets, direct messages are not public and open. Think of DM as Twitter’s internal chat feature.
Unfortunately, people screw up DMs all the time, and the results can be embarrassing. I suggest that you limit your use of DMs to situations where email may be a better approach, and that you studiously use the DM tools built into your Twitter account. You’ll generally find DM hiding behind the Messages icon on the left (it looks like a sealed envelope).

FIGURE 1-24: Retweet a tweet to all your followers — with or without your own comment.