CHAPTER 7
Adding Extra Touches
Insert an Online Video
You can insert a video available on the Internet into a Word document. After you have inserted the video, you can play it directly from the Word document.
You can insert videos you find using an Internet search site (such as Google or Bing) or videos available on YouTube, or you can insert a video embed code — an HTML code that uses the src attribute to define the video file you want to embed. Most videos posted on the Internet are public domain, but, if you are unsure, do some research to determine whether you can use the video freely.
Insert an Online Video
![]() Use your web browser to locate the video you want to insert.
Use your web browser to locate the video you want to insert.
![]() Select the address.
Select the address.
![]() Right-click the address and then click Copy.
Right-click the address and then click Copy.
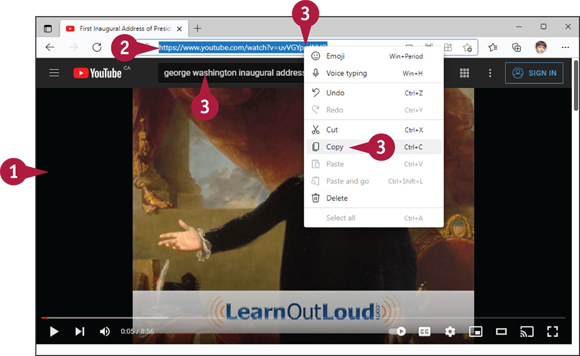
![]() In the Word document, click where you want the video to appear.
In the Word document, click where you want the video to appear.
![]() Click Insert.
Click Insert.
![]() Click Online Videos.
Click Online Videos.
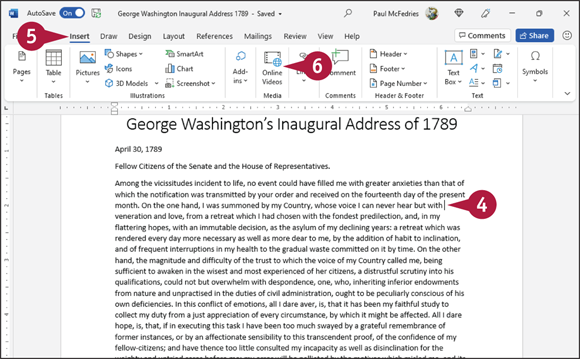
The Insert a Video dialog box appears.
![]() Right-click the text box and then click Paste.
Right-click the text box and then click Paste.
![]() The copied address appears in the text box.
The copied address appears in the text box.
![]() Click Insert.
Click Insert.

![]() The video appears in your document, selected and surrounded by handles (
The video appears in your document, selected and surrounded by handles (![]() ).
).
![]() The Layout Options button (
The Layout Options button (![]() ) controls text flow around the video; see the section “Insert an Online Picture” in Chapter 3 for more information.
) controls text flow around the video; see the section “Insert an Online Picture” in Chapter 3 for more information.
![]() The Picture Format contextual tab appears on the Ribbon; you can use the tools on this tab to format the video.
The Picture Format contextual tab appears on the Ribbon; you can use the tools on this tab to format the video.
Assign a Theme
A theme is a predesigned set of styles, color schemes, fonts, and other visual attributes. Applying a theme to a document is a quick way to add polish to it. And, because themes are shared among the Office programs, you can use the same theme in your Word document that you have applied to worksheets in Excel or slides in PowerPoint.
Word also offers several style sets, each of which is a predefined collection of styles for document titles, headings, and text. The look applied by each style set depends on the selected theme.
Assign a Theme
Apply a Theme
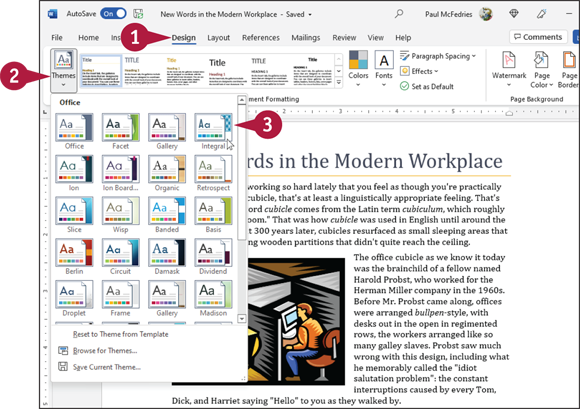
![]() Click Design.
Click Design.
![]() Click Themes.
Click Themes.
Word displays the Themes gallery.
![]() Click a theme.
Click a theme.
Word applies the theme to the current document.
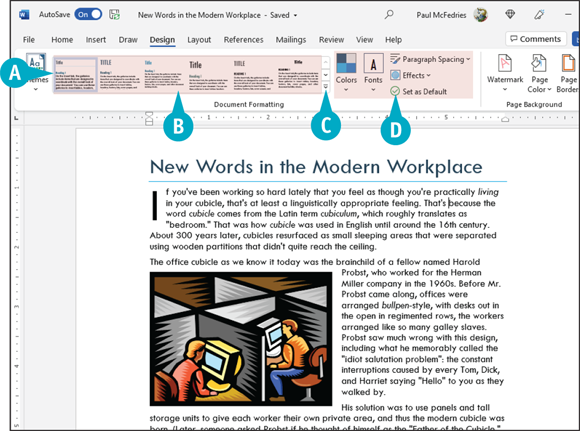
![]() The highlighted entry in the Style Sets gallery represents the currently applied style set.
The highlighted entry in the Style Sets gallery represents the currently applied style set.
![]() You can click a style set to apply it to your document.
You can click a style set to apply it to your document.
![]() You can click the More button (
You can click the More button (![]() ) to display additional style sets.
) to display additional style sets.
![]() You can use these tools to change the formatting of the theme's colors, fonts, paragraph spacing, and effects.
You can use these tools to change the formatting of the theme's colors, fonts, paragraph spacing, and effects.
Create a Custom Theme
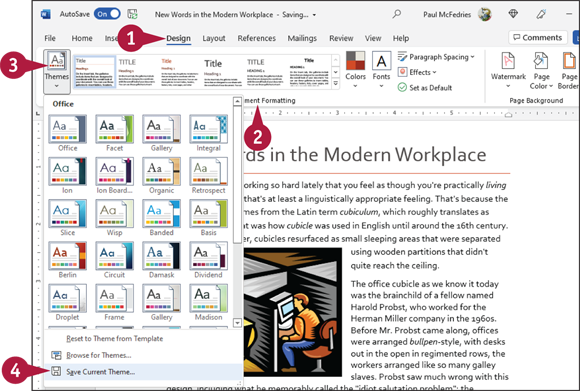
![]() Click the Design tab.
Click the Design tab.
![]() Use the tools in the Document Formatting section of the Ribbon to apply a theme and edit the formatting to create the theme that you want to save.
Use the tools in the Document Formatting section of the Ribbon to apply a theme and edit the formatting to create the theme that you want to save.
![]() Click the Themes button.
Click the Themes button.
![]() Click Save Current Theme.
Click Save Current Theme.
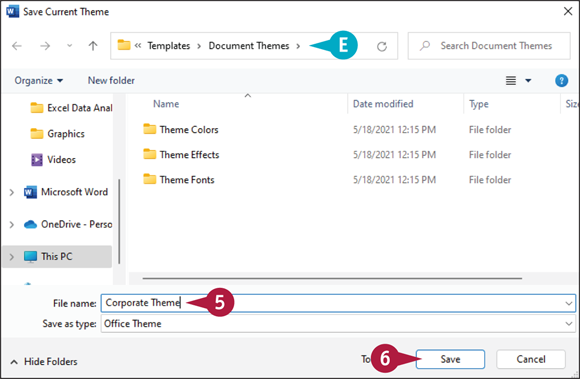
The Save Current Theme dialog box appears.
![]() Type a unique name for the theme.
Type a unique name for the theme.
![]() By default, Word saves the theme to the Document Themes folder so that it is accessible in the Themes Gallery.
By default, Word saves the theme to the Document Themes folder so that it is accessible in the Themes Gallery.
![]() Click Save.
Click Save.
Word saves the theme and adds it to the gallery of available themes.
Add Borders
You can apply borders around your text to separate sections of text or make the document aesthetically appealing. You can add borders around a single paragraph, multiple paragraphs, or each page in the document. (Be aware that you should not add too many effects, such as borders, to your document because it will become difficult to read.)
Word comes with several predesigned borders, which you can apply to your document. Alternatively, you can create your own custom borders — for example, making each border line a different color or thickness. Another option is to apply shading to your text to set it apart.
Add Borders
Add a Paragraph Border
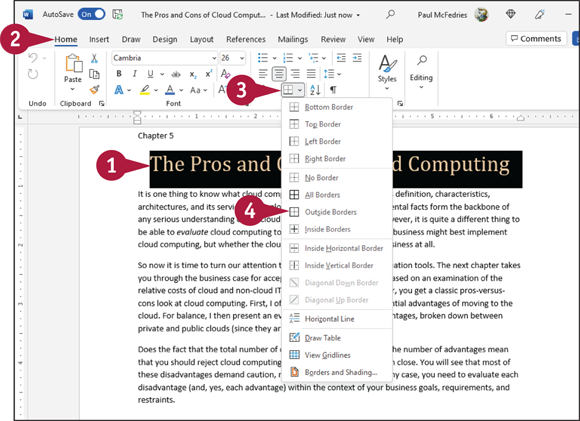
![]() Select the text to which you want to add a border.
Select the text to which you want to add a border.
![]() Click Home.
Click Home.
![]() Click Borders (
Click Borders (![]() ).
).
![]() Click a border.
Click a border.
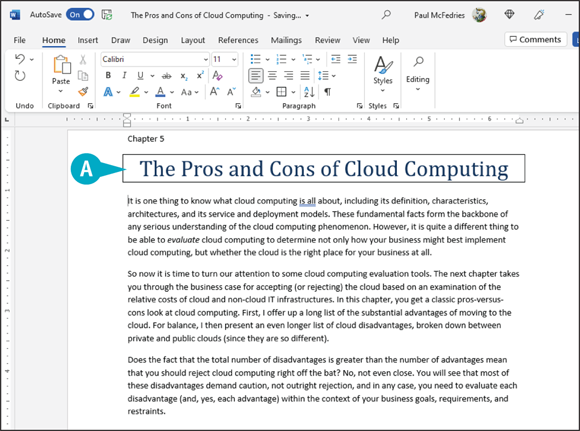
![]() Word applies the border to the text.
Word applies the border to the text.
Add a Page Border
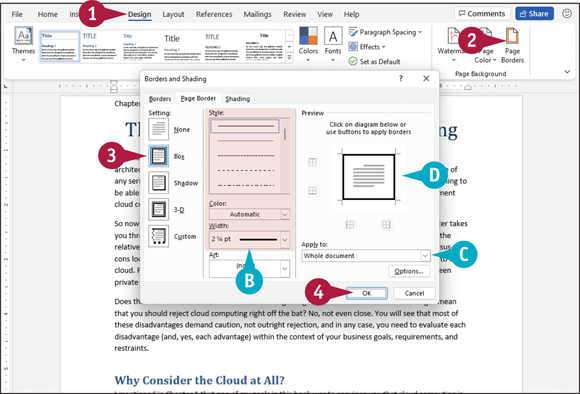
![]() Click the Design tab.
Click the Design tab.
![]() Click the Page Borders button.
Click the Page Borders button.
The Borders and Shading dialog box appears and displays the Page Border tab.
![]() Click the type of border that you want to add.
Click the type of border that you want to add.
![]() You can use these settings to select a different border line style, color, and width.
You can use these settings to select a different border line style, color, and width.
![]() You can click the Apply to
You can click the Apply to ![]() to specify whether to apply the border to each page of your entire document, a section, the first page of a section, or all pages of a section except the first.
to specify whether to apply the border to each page of your entire document, a section, the first page of a section, or all pages of a section except the first.
![]() The Preview area displays a sample of the selections.
The Preview area displays a sample of the selections.
![]() Click OK.
Click OK.
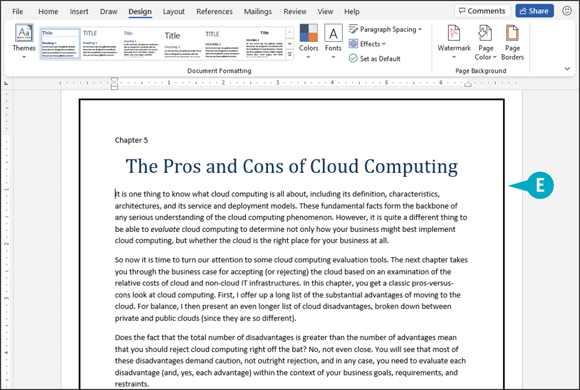
![]() Word applies the page border.
Word applies the page border.
Create Columns
You can create columns in Word to present your text in a format similar to a newspaper or magazine. For example, if you are creating a brochure or newsletter, you can use columns to make text flow from one block to the next.
If you simply want to create a document with two or three columns, you can use one of Word’s preset columns. Alternatively, you can create custom columns, choosing the number of columns you want to create in your document, indicating the width of each column, specifying whether a line should appear between them, and more.
Create Columns
Create Quick Columns
![]() Select the text that you want to place into columns (not shown).
Select the text that you want to place into columns (not shown).
Note: If you want to apply columns to all text in your document, skip step 1.
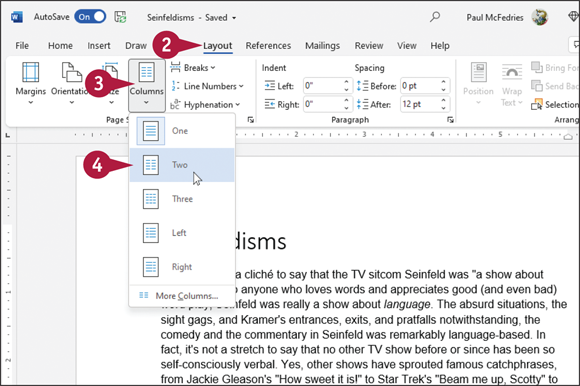
![]() Click the Layout tab.
Click the Layout tab.
![]() Click the Columns button.
Click the Columns button.
![]() Click the number of columns that you want to assign.
Click the number of columns that you want to assign.
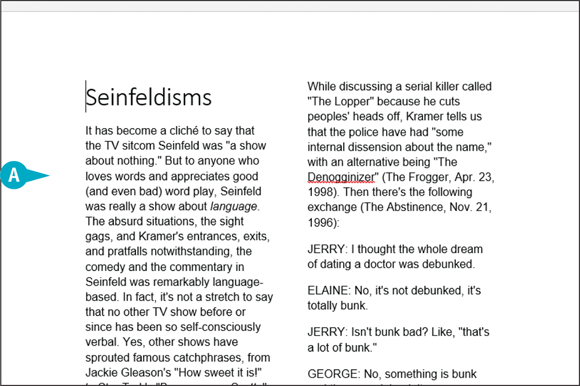
![]() Word displays the selected text, or your document if you skipped step 1, across the number of columns that you specified.
Word displays the selected text, or your document if you skipped step 1, across the number of columns that you specified.
Create Custom Columns
![]() Select the text that you want to place into columns (not shown).
Select the text that you want to place into columns (not shown).
Note: If you want to apply columns to all text in your document, skip step 1.
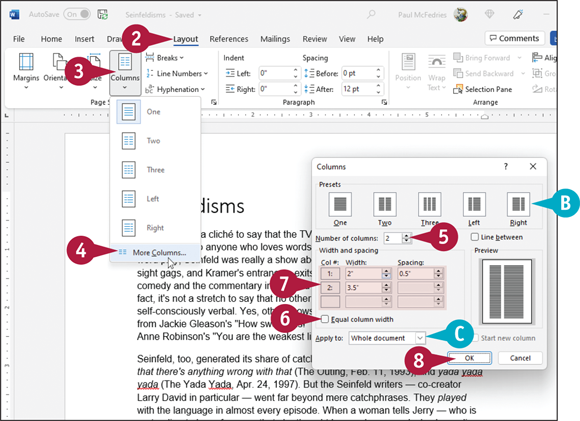
![]() Click the Layout tab.
Click the Layout tab.
![]() Click the Columns button.
Click the Columns button.
![]() Click More Columns.
Click More Columns.
The Columns dialog box appears.
![]() You can click a preset for the type of column style that you want to apply.
You can click a preset for the type of column style that you want to apply.
![]() Use the Number of columns
Use the Number of columns ![]() to set the number of columns.
to set the number of columns.
![]() Deselect the Equal column width check box to set separate widths for each column (
Deselect the Equal column width check box to set separate widths for each column (![]() changes to
changes to ![]() ).
).
![]() Set an exact column width and spacing here.
Set an exact column width and spacing here.
![]() You can specify whether the columns apply to the selected text or the entire document.
You can specify whether the columns apply to the selected text or the entire document.
![]() Click OK.
Click OK.
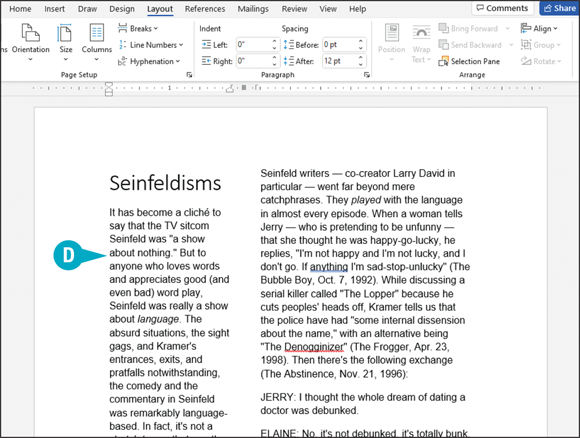
![]() Word applies the column format to the selected text, or to your document if you skipped step 1.
Word applies the column format to the selected text, or to your document if you skipped step 1.
Insert a Table
You can use tables to present data in an organized fashion. For example, you might add a table to your document to display a simple database of items or a roster of classes. Tables contain columns and rows, which intersect to form cells. You can insert all types of data in cells, including text and graphics.
To enter text in a cell, click in the cell and then type your data. As you type, Word wraps the text to fit in the cell. Press ![]() to move from one cell to another. You can select table cells, rows, and columns to perform editing tasks and apply formatting.
to move from one cell to another. You can select table cells, rows, and columns to perform editing tasks and apply formatting.
Insert a Table
Insert a Table
![]() Click in the document where you want to insert a table (not shown).
Click in the document where you want to insert a table (not shown).
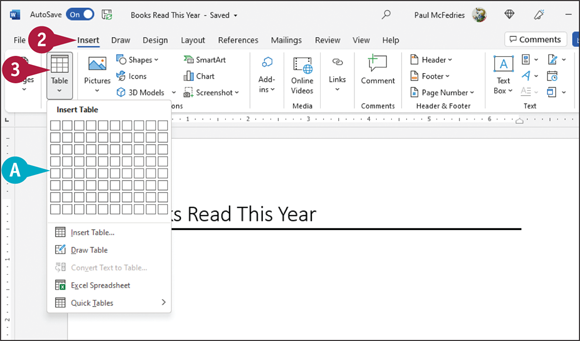
![]() Click Insert.
Click Insert.
![]() Click Table.
Click Table.
![]() Word displays a table grid.
Word displays a table grid.
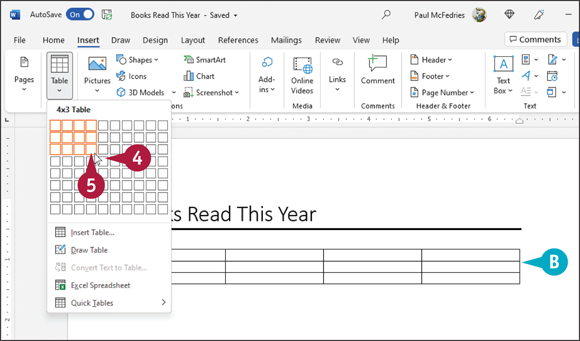
![]() Slide the mouse (
Slide the mouse (![]() ) across the squares that represent the number of rows and columns you want in your table.
) across the squares that represent the number of rows and columns you want in your table.
![]() Word previews the table as you drag over cells.
Word previews the table as you drag over cells.
![]() Click the square representing the lower-right corner of your table.
Click the square representing the lower-right corner of your table.
Word adds the table to your document.
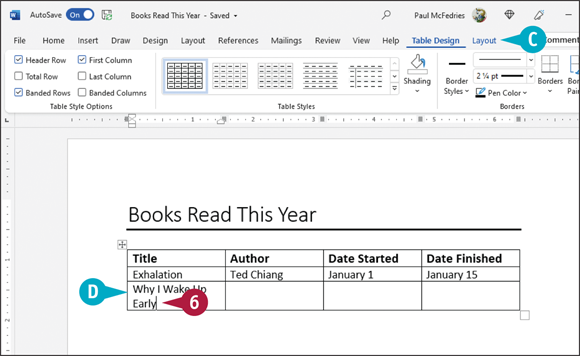
![]() The Table Design and Layout contextual tabs appear on the Ribbon.
The Table Design and Layout contextual tabs appear on the Ribbon.
![]() Click in a table cell and type information.
Click in a table cell and type information.
![]() If necessary, Word expands the row size to accommodate the text.
If necessary, Word expands the row size to accommodate the text.
Note: To change the width of a column, drag the column’s left border; to change the height of a row, drag the row’s bottom border.
You can press ![]() to move the insertion point to the next cell.
to move the insertion point to the next cell.
Delete a Table
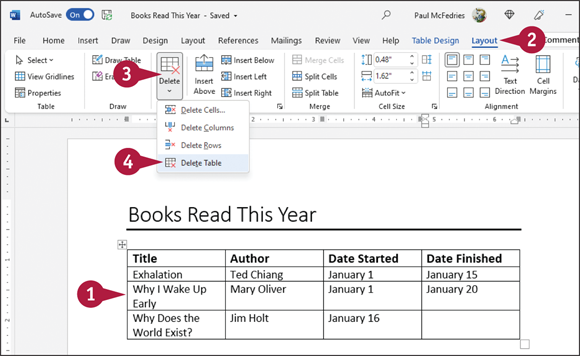
![]() Click anywhere in the table you want to delete.
Click anywhere in the table you want to delete.
![]() Click the Layout contextual tab.
Click the Layout contextual tab.
![]() Click Delete.
Click Delete.
![]() Click Delete Table.
Click Delete Table.
Word removes the table and its contents from your document.
Apply Table Styles
When you click within a table you have added to your document, two contextual tabs appear on the Ribbon: Table Design and Layout. You can use the styles found in the Table Design tab to add instant formatting to your Word tables. Word offers numerous predefined table styles, each with its own unique set of formatting characteristics, including shading, color, borders, and fonts.
The Table Design tab also includes settings for creating custom borders and applying custom shading. You can also use check boxes in the Table Style Options group to add a header row, emphasize the table’s first column, and more.
Apply Table Styles
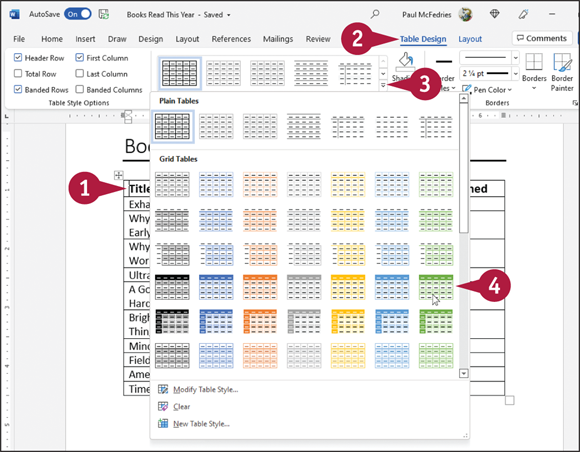
![]() Click anywhere in the table that you want to format.
Click anywhere in the table that you want to format.
![]() Click Table Design.
Click Table Design.
![]() Click the More button (
Click the More button (![]() ) in the lower-right corner of the Table Styles group.
) in the lower-right corner of the Table Styles group.
Word displays the Table Styles gallery.
![]() Click the style you want to apply.
Click the style you want to apply.
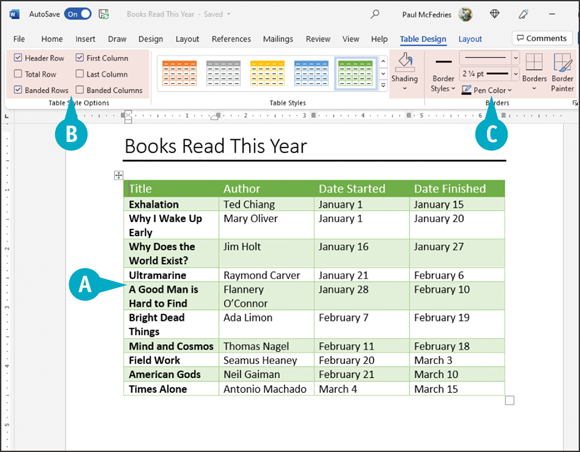
![]() Word applies the style.
Word applies the style.
![]() You can toggle table parts on or off using the Table Style Options check boxes.
You can toggle table parts on or off using the Table Style Options check boxes.
![]() You can click these options to change the shading and borders.
You can click these options to change the shading and borders.
Insert Table Rows or Columns
You can quickly insert rows or columns into a table after you create it. You can insert rows at the top of, the bottom of, or within the table, and you can insert columns to the left of, the right of, or within the table.
If you applied a table style to your table, Word adjusts the appearance of the table to maintain the table style when you add a row or column to the table. For example, if your table style includes alternating shaded rows, Word adjusts the shading when you insert a row.
Insert Table Rows or Columns
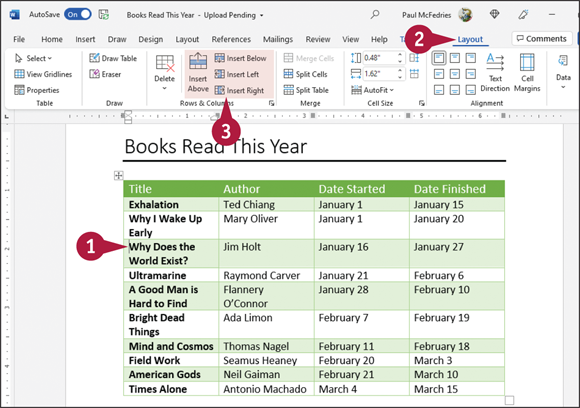
![]() Click in the row next to the row where you want to add a new row.
Click in the row next to the row where you want to add a new row.
Note: To add a column, click in the column next to the column where you want to add a new column.
![]() Click Layout.
Click Layout.
![]() Click Insert Above or Insert Below.
Click Insert Above or Insert Below.
Note: To add a column, click Insert Left or Insert Right.
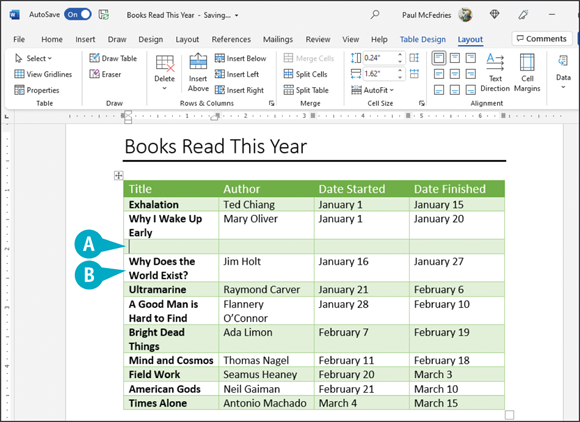
![]() Word inserts the new row (or column) at the location you specified and selects the new row (or column).
Word inserts the new row (or column) at the location you specified and selects the new row (or column).
Note: This section inserts a row above another within the table.
![]() Word adjusts any table style you applied.
Word adjusts any table style you applied.
Note: To quickly add a row to the bottom of your table, click in the cell at the end of the last cell in the table and press ![]() .
.
Add Headers and Footers
To include text at the top or bottom of every page, such as page numbers, your name, or the date, you can use a header or footer. Header text appears at the top of the page above the margin; footer text appears at the bottom of the page below the margin.
Word comes with several predefined header and footer layouts, which add placeholder text that you edit as needed. Word also offers tools for inserting page numbers and other document information into a header or footer. To view header or footer text, you must display the document in Print Layout view.
Add Headers and Footers
Insert a Header or Footer
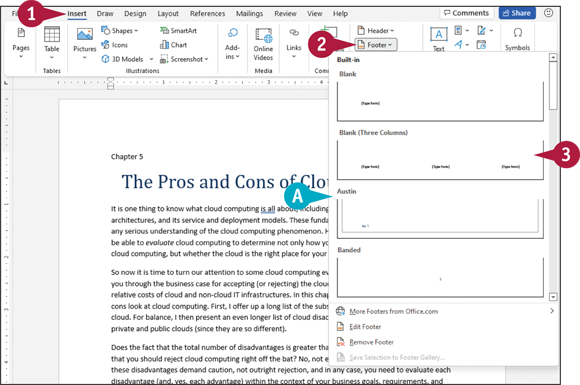
![]() Click Insert.
Click Insert.
![]() Click the Header button to add a header, or click the Footer button to add a footer.
Click the Header button to add a header, or click the Footer button to add a footer.
This example adds a footer.
![]() The header or footer gallery appears.
The header or footer gallery appears.
![]() Click a header or footer style.
Click a header or footer style.
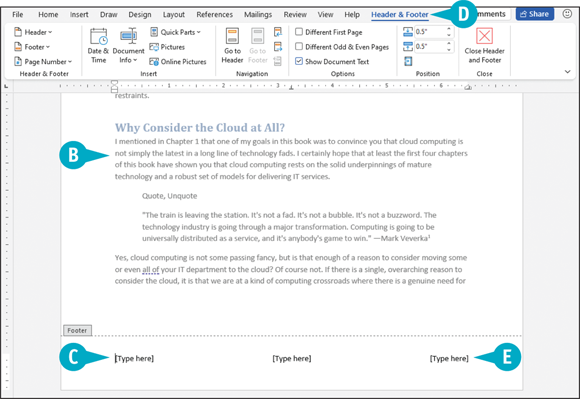
Word adds the header or footer.
![]() The text in your document appears dimmed.
The text in your document appears dimmed.
![]() The insertion point appears in the Footer area.
The insertion point appears in the Footer area.
![]() The Header & Footer contextual tab appears on the Ribbon.
The Header & Footer contextual tab appears on the Ribbon.
![]() Some footers contain placeholder text that you can click to select and then type your own text.
Some footers contain placeholder text that you can click to select and then type your own text.
Add a Page Number Field
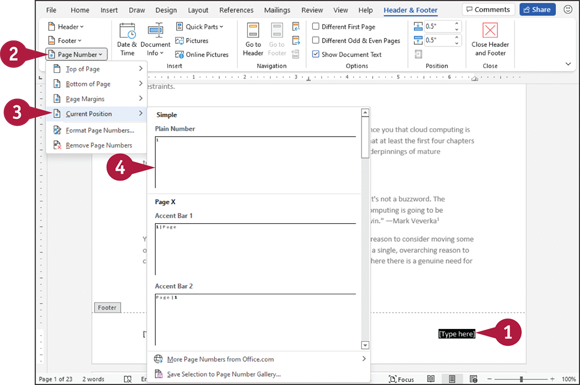
![]() Click to select the text placeholder where you want the page number field to appear.
Click to select the text placeholder where you want the page number field to appear.
![]() Click Page Number.
Click Page Number.
![]() Click Current Position.
Click Current Position.
![]() Click the page number style you want.
Click the page number style you want.
Word adds a field that shows the current number of each page.
Add Other Information Fields
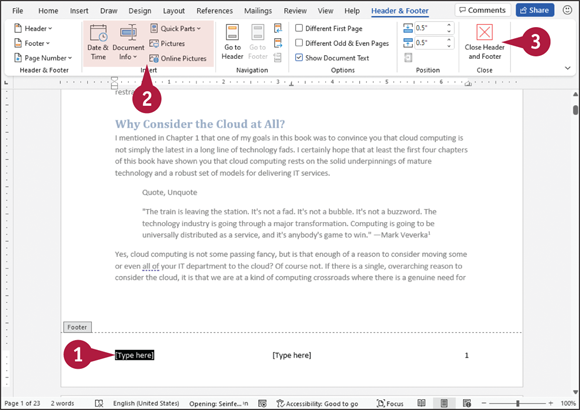
![]() Click to select the text placeholder where you want the information field to appear.
Click to select the text placeholder where you want the information field to appear.
![]() Use a button in the Insert group to add the type of field you want.
Use a button in the Insert group to add the type of field you want.
![]() When you have completed your header and footer tasks, click Close Header and Footer.
When you have completed your header and footer tasks, click Close Header and Footer.
Word closes the Header & Footer tab and displays the header or footer on the document page.
Note: To edit a header or footer, click Insert; then either click Header and then click Edit Header or click Footer and then click Edit Footer.
Insert Footnotes and Endnotes
You can include footnotes or endnotes in your document to identify sources or references to other materials or to add explanatory information. When you add a footnote or endnote, a small numeral or other character appears alongside the associated text, with the actual footnote or endnote appearing at the bottom of a page or the end of the document, respectively.
When you insert footnotes or endnotes in a document, Word automatically numbers them for you. As you add, delete, and move text in your document, any associated footnotes or endnotes are likewise added, deleted, or moved, as well as renumbered.
Insert Footnotes and Endnotes

Insert a Footnote
![]() Click where you want to insert the footnote reference.
Click where you want to insert the footnote reference.
![]() Click the References tab.
Click the References tab.
![]() Click Insert Footnote.
Click Insert Footnote.
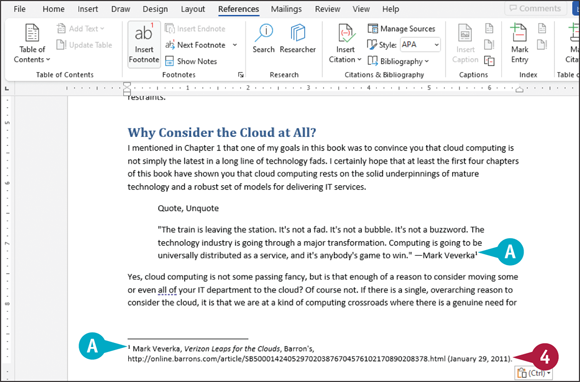
![]() Word displays the footnote number in the body of the document and in the note at the bottom of the current page.
Word displays the footnote number in the body of the document and in the note at the bottom of the current page.
![]() Type the footnote text.
Type the footnote text.
You can double-click the footnote number or press ![]() +
+ ![]() to return the insertion point to the place in your document where you inserted the footnote.
to return the insertion point to the place in your document where you inserted the footnote.
Insert an Endnote
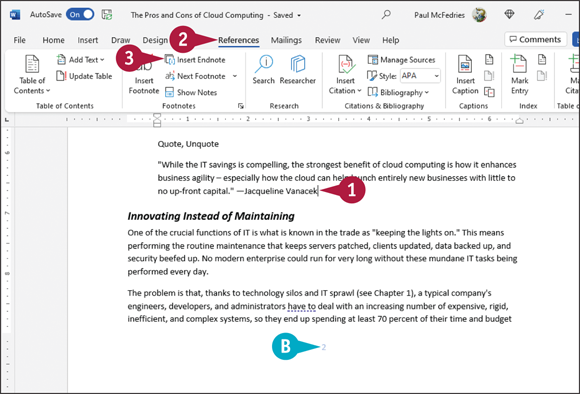
![]() Click where you want to insert the endnote reference.
Click where you want to insert the endnote reference.
![]() In this example, the endnote number appears on Page 2.
In this example, the endnote number appears on Page 2.
![]() Click the References tab.
Click the References tab.
![]() Click Insert Endnote.
Click Insert Endnote.
Word inserts the endnote number in the body of your document (not shown).
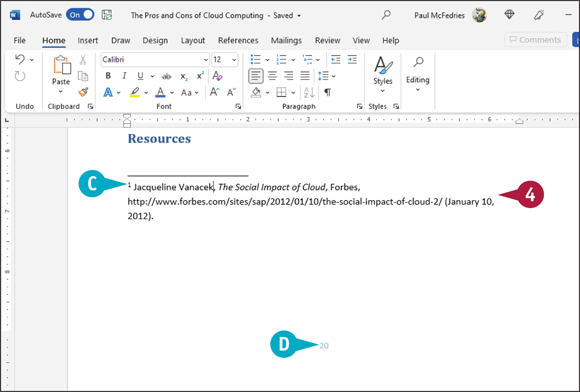
![]() Word inserts the endnote number at the end of your document and displays the insertion point in the endnote area at the bottom of the last page of the document.
Word inserts the endnote number at the end of your document and displays the insertion point in the endnote area at the bottom of the last page of the document.
![]() In this example, the endnote appears on Page 20.
In this example, the endnote appears on Page 20.
![]() Type your endnote text.
Type your endnote text.
You can double-click the endnote number or press ![]() +
+ ![]() to return the insertion point to the place in your document where you inserted the endnote.
to return the insertion point to the place in your document where you inserted the endnote.