CHAPTER 15
Assembling and Presenting a Slideshow
Reorganize Slides
You can change the order of the slides in your presentation. For example, you might want to move a slide to appear later in the presentation or swap the order of two adjacent slides. You can move individual slides or move multiple slides simultaneously.
You can change the slide order in Normal view or Slide Sorter view; choose the view based on the distance from the original position to the new position. If you need to move a slide only a few positions, use Normal view. Slide Sorter view works best when you need to move a slide to a new position several slides away.
Reorganize Slides

Move Slides in Normal View
![]() Click
Click ![]() to switch to Normal view.
to switch to Normal view.
![]() Click to select the slide you want to move.
Click to select the slide you want to move.
Note: To move multiple slides, select them by pressing and holding ![]() as you click each slide.
as you click each slide.
![]() Drag the slide to a new position.
Drag the slide to a new position.
![]() As you drag,
As you drag, ![]() changes to
changes to ![]() .
.
![]() Release the mouse button.
Release the mouse button.
![]() PowerPoint moves the slide.
PowerPoint moves the slide.
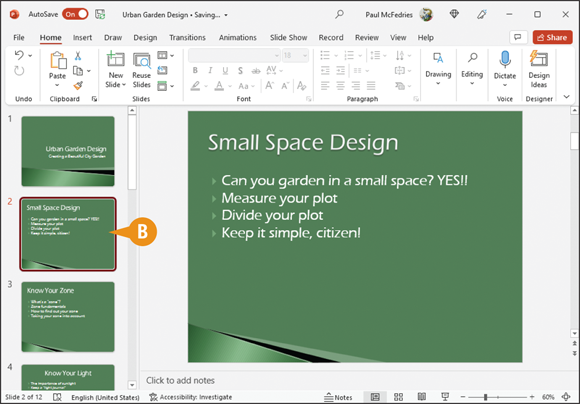
Move Slides in Slide Sorter View
![]() Click
Click ![]() to switch to Slide Sorter view.
to switch to Slide Sorter view.
![]() Click the slide that you want to move to select it.
Click the slide that you want to move to select it.
Note: To move multiple slides, select them by pressing and holding ![]() as you click each slide.
as you click each slide.
![]() Drag the slide to a new location in the presentation.
Drag the slide to a new location in the presentation.
![]() As you drag,
As you drag, ![]() changes to
changes to ![]() .
.
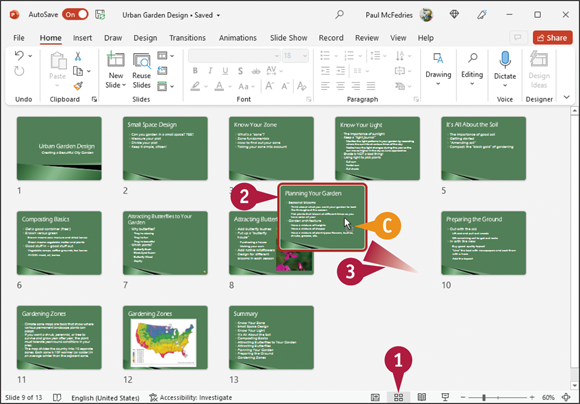
![]() Release the mouse button.
Release the mouse button.
![]() PowerPoint moves the slide.
PowerPoint moves the slide.
Reuse a Slide
You can reuse a slide from an existing presentation in another presentation. When you are building a presentation, you might find that you need to use a slide that is the same as a slide you created in an earlier presentation. Rather than re-creating that slide from scratch, it is much faster and easier to bring a copy of the existing slide into your new presentation. PowerPoint calls this reusing the slide. When you reuse a slide, PowerPoint updates the slide to match the formatting used in the new presentation. You can reuse one or more slides from a presentation.
Reuse a Slide
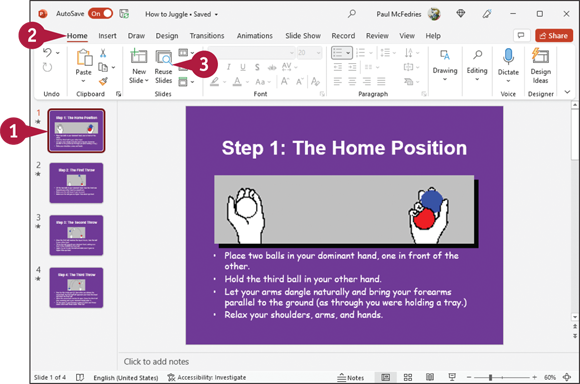
![]() Click the slide that you want to appear before the new slide.
Click the slide that you want to appear before the new slide.
![]() Click Home.
Click Home.
![]() Click Reuse Slides.
Click Reuse Slides.
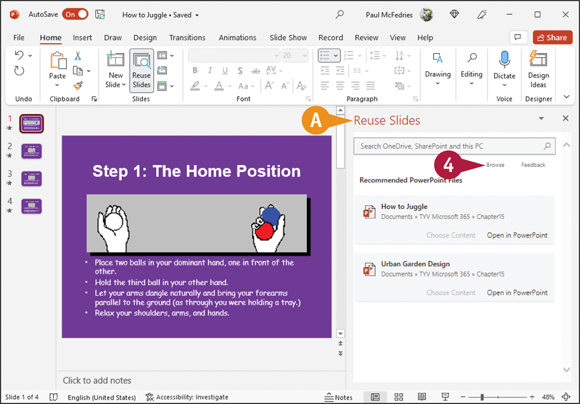
![]() The Reuse Slides pane opens.
The Reuse Slides pane opens.
![]() Click Browse.
Click Browse.
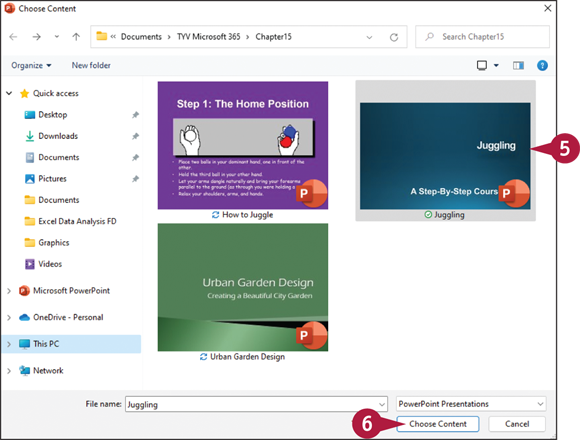
The Choose Content dialog box opens.
![]() Locate and select the presentation containing the slide you want to reuse.
Locate and select the presentation containing the slide you want to reuse.
![]() Click Choose Content.
Click Choose Content.
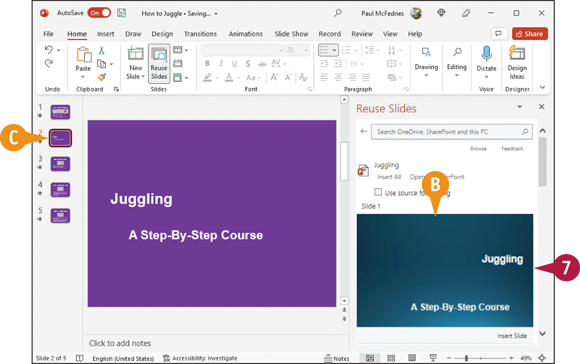
![]() PowerPoint populates the Reuse Slides pane with slides from the presentation you selected.
PowerPoint populates the Reuse Slides pane with slides from the presentation you selected.
![]() Click the slide you want to reuse.
Click the slide you want to reuse.
![]() PowerPoint adds the slide to your presentation after the slide you clicked in step 1.
PowerPoint adds the slide to your presentation after the slide you clicked in step 1.
Organize Slides into Sections
If your presentation has a large number of slides, keeping it organized can be difficult. To more easily manage your slides, you can organize them into sections. For example, you might group all the slides that will be displayed during your introductory speech into a section called “Introduction,” place the slides that pertain to your first topic of discussion into a section called “Topic 1,” and so on.
Organizing a presentation into sections can also help you move slides around in the presentation. Instead of moving individual slides, you can move sections.
Organize Slides into Sections
Add a Section
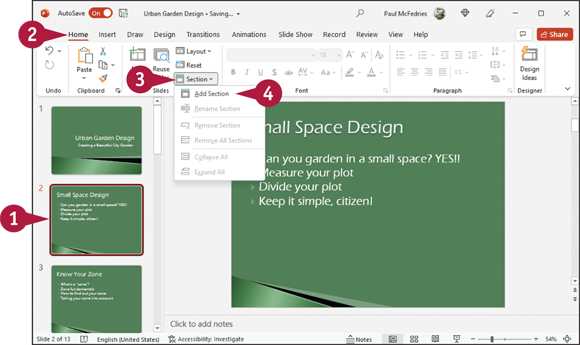
![]() Click the slide that marks the beginning of the section you want to create.
Click the slide that marks the beginning of the section you want to create.
![]() Click Home.
Click Home.
![]() Click Section.
Click Section.
![]() Click Add Section.
Click Add Section.

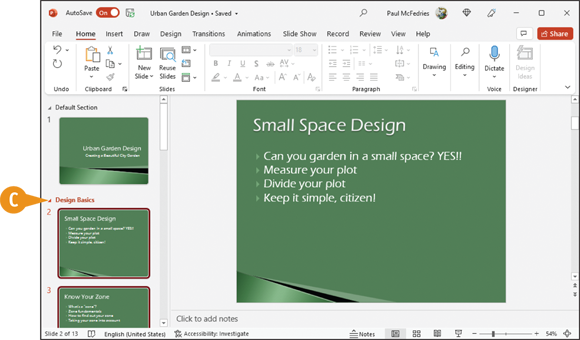
![]() PowerPoint places a Default Section marker at the beginning of the presentation.
PowerPoint places a Default Section marker at the beginning of the presentation.
![]() PowerPoint adds an Untitled Section marker before the slide you selected, adding all slides below the marker to the section.
PowerPoint adds an Untitled Section marker before the slide you selected, adding all slides below the marker to the section.
The Rename Section dialog box appears.
![]() Type a name for the new section.
Type a name for the new section.
![]() Click Rename.
Click Rename.
![]() PowerPoint applies the name to the section.
PowerPoint applies the name to the section.
![]() Repeat steps 1 to 6 for each section you want to create.
Repeat steps 1 to 6 for each section you want to create.
Hide and Display a Section
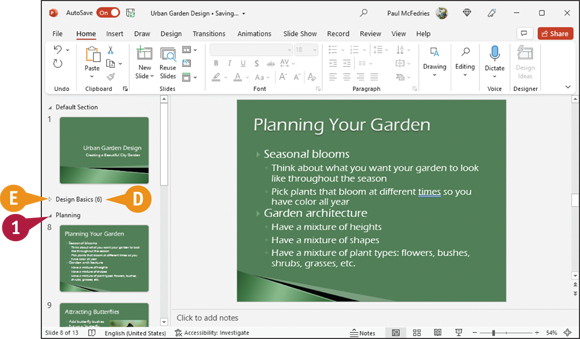
![]() To hide the slides in a section, click the section marker’s collapse button (
To hide the slides in a section, click the section marker’s collapse button (![]() ).
).
![]() PowerPoint collapses the section and identifies the number of slides in the section.
PowerPoint collapses the section and identifies the number of slides in the section.
![]() You can click the section marker’s expand button (
You can click the section marker’s expand button (![]() ) to redisplay the slides in the section.
) to redisplay the slides in the section.
Define Slide Transitions
You can add transition effects, such as fades, dissolves, and wipes, to your slides to control how one slide segues to the next. You can control the speed with which the transition appears. You can also specify how PowerPoint advances the slides, either manually using a mouse click or automatically after a time you specify passes. In addition to adding visual transition effects between your slides, you can add sound effects to serve as transitions.
Use good judgment when assigning transitions. Using too many different types of transitions might distract your audience from your presentation.
Define Slide Transitions
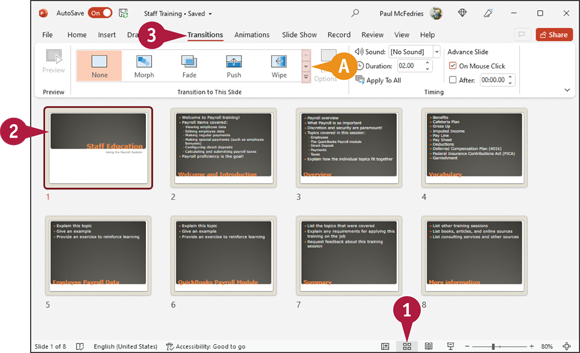
![]() Click
Click ![]() to switch to Slide Sorter view.
to switch to Slide Sorter view.
![]() Click the slide to which you want to apply a transition.
Click the slide to which you want to apply a transition.
![]() Click Transitions.
Click Transitions.
![]() Available transition effects appear in the Transition to This Slide group. You can click
Available transition effects appear in the Transition to This Slide group. You can click ![]() or
or ![]() to scroll through them, or you can click the More button (
to scroll through them, or you can click the More button (![]() ) to view the gallery of transition effects.
) to view the gallery of transition effects.
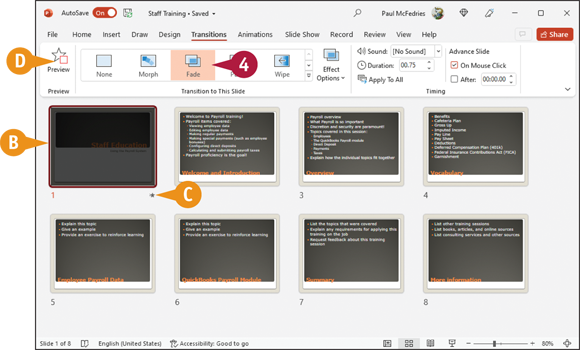
![]() Click a transition.
Click a transition.
![]() PowerPoint demonstrates the animation as it applies.
PowerPoint demonstrates the animation as it applies.
![]() PowerPoint adds an animation indicator (
PowerPoint adds an animation indicator (![]() ) below the slide’s lower-right corner.
) below the slide’s lower-right corner.
![]() You can click Preview to display a preview of the transition effect.
You can click Preview to display a preview of the transition effect.
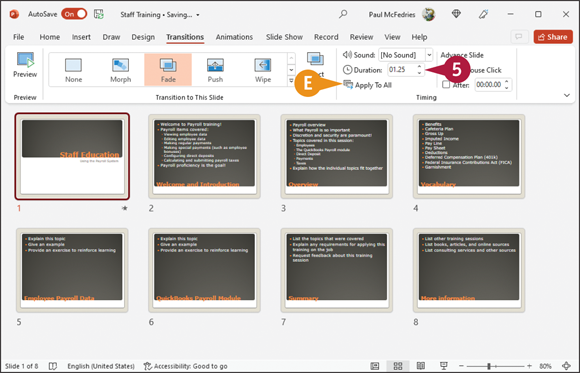
![]() Click the Duration
Click the Duration ![]() to specify a speed setting for the transition.
to specify a speed setting for the transition.
![]() You can click Apply To All to apply the same transition to the entire slideshow, and PowerPoint adds the animation indicator below every slide.
You can click Apply To All to apply the same transition to the entire slideshow, and PowerPoint adds the animation indicator below every slide.
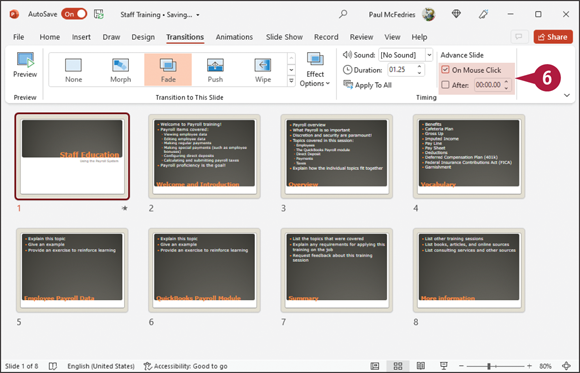
![]() Under Advance Slide, select an advance option (
Under Advance Slide, select an advance option (![]() changes to
changes to ![]() ):
):
To use a mouse click to move to the next slide, select On Mouse Click.
To move to the next slide automatically, select After and use ![]() to specify a duration.
to specify a duration.
Add Animation Effects
You can use PowerPoint’s animation effects to add visual interest to your presentation. For example, if you want your audience to notice a company logo on a slide, you might apply an animation effect to that logo.
You can use four different types of animation effects: entrance effects, emphasis effects, exit effects, and motion paths. You can add any of these effects to any slide object. You can also change the direction of your animations. To avoid overwhelming your audience, limit animations to slides in which the effects will make the most impact.
Add Animation Effects
Add an Animation Effect
![]() Click
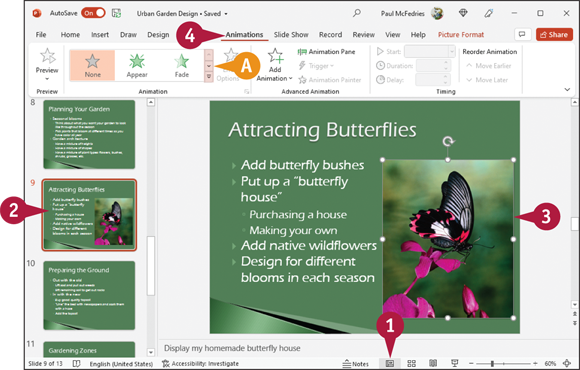
Click ![]() to display the presentation in Normal view.
to display the presentation in Normal view.
![]() Click the slide containing the object to which you want to apply an effect.
Click the slide containing the object to which you want to apply an effect.
![]() Click the object.
Click the object.
You can assign an animation to any object on a slide, including text boxes, shapes, and pictures.
![]() Click Animations.
Click Animations.
![]() You can click
You can click ![]() and
and ![]() to scroll through the available animation effects or click the More button (
to scroll through the available animation effects or click the More button (![]() ) to view the gallery of animation effects.
) to view the gallery of animation effects.
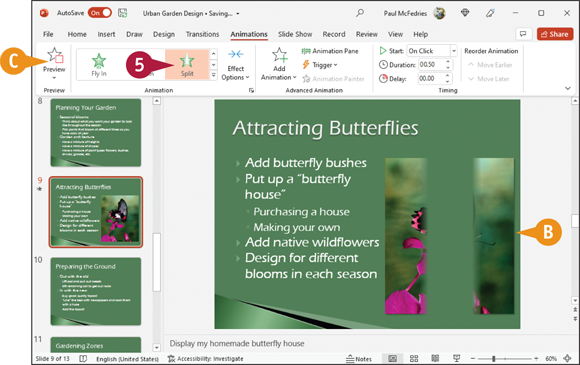
![]() Click an animation effect.
Click an animation effect.
![]() PowerPoint demonstrates the effect as it applies it and displays a numeric indicator for the effect.
PowerPoint demonstrates the effect as it applies it and displays a numeric indicator for the effect.
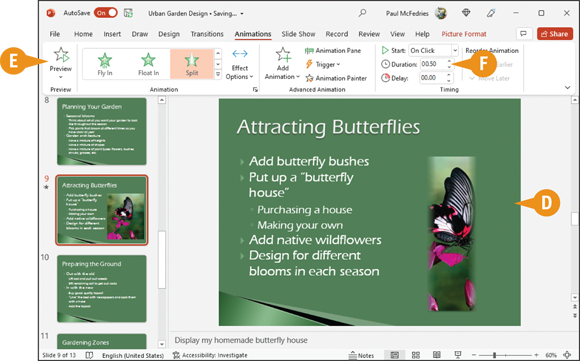
![]() You can click Preview to preview the effect.
You can click Preview to preview the effect.
Change an Animation’s Direction
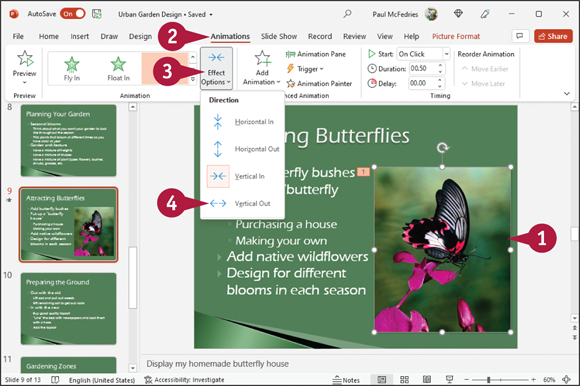
![]() In Normal view, click the slide element containing the animation you want to edit.
In Normal view, click the slide element containing the animation you want to edit.
![]() Click Animations.
Click Animations.
![]() Click Effect Options.
Click Effect Options.
A list of direction options for the animation appears.
![]() Select an option from the list.
Select an option from the list.
![]() PowerPoint demonstrates the new direction as it applies the change; the new direction now appears on the Effect Options button.
PowerPoint demonstrates the new direction as it applies the change; the new direction now appears on the Effect Options button.
![]() You can click Preview to preview the effect on the slide.
You can click Preview to preview the effect on the slide.
![]() You can click the Duration
You can click the Duration ![]() to specify a speed setting for the animation.
to specify a speed setting for the animation.
Create a Custom Animation
In addition to applying a single animation effect to any given slide object — a text box, picture, chart, or table — you can create custom effects by applying two or more animations to a slide object. For example, you might opt to have a slide object “fly in” to the slide and then spin. You can use PowerPoint’s Animation pane when you create a custom effect to help you review and re-order the effect.
To create a custom animation effect, you use a combination of the technique described in the previous section, “Add Animation Effects,” and the technique described in this section.
Create a Custom Animation
![]() Click
Click ![]() to display the presentation in Normal view.
to display the presentation in Normal view.
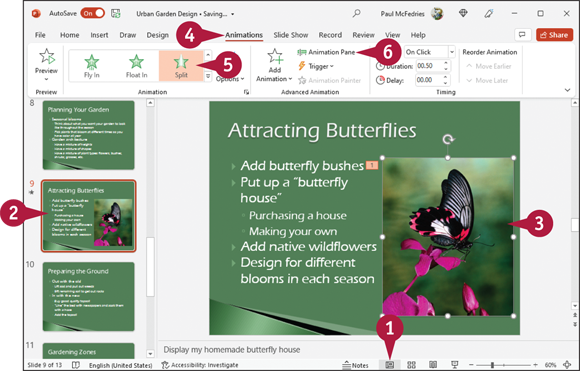
![]() Click the slide containing the object to which you want to apply an animation.
Click the slide containing the object to which you want to apply an animation.
![]() Click the object.
Click the object.
![]() Click the Animations tab.
Click the Animations tab.
![]() Apply an animation effect.
Apply an animation effect.
Note: See the previous section, “Add Animation Effects,” for details.
![]() Click Animation Pane.
Click Animation Pane.
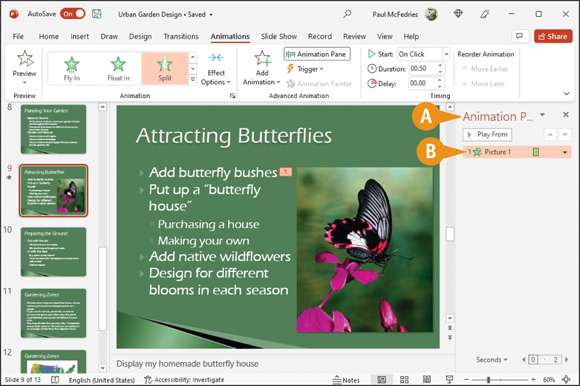
![]() PowerPoint displays the Animation pane.
PowerPoint displays the Animation pane.
![]() The animation you applied appears in the pane.
The animation you applied appears in the pane.
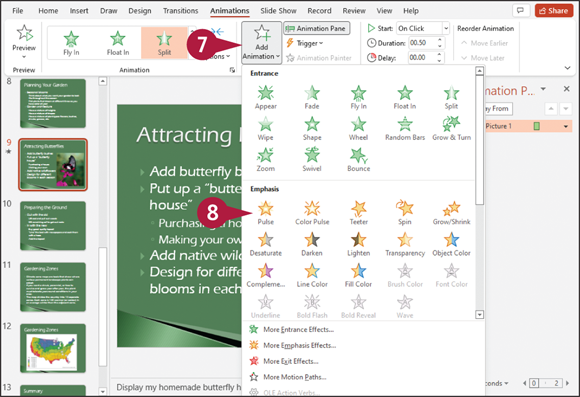
![]() To add your next animation, click Add Animation.
To add your next animation, click Add Animation.
Note: You add an animation using the Add Animation button; if, instead, you choose from the Animation gallery, PowerPoint overwrites the existing animation instead of adding a new one.
![]() Click an animation effect.
Click an animation effect.
PowerPoint adds the effect to the Animation pane.
![]() Repeat steps 7 and 8 to add more animation effects to the selected object.
Repeat steps 7 and 8 to add more animation effects to the selected object.
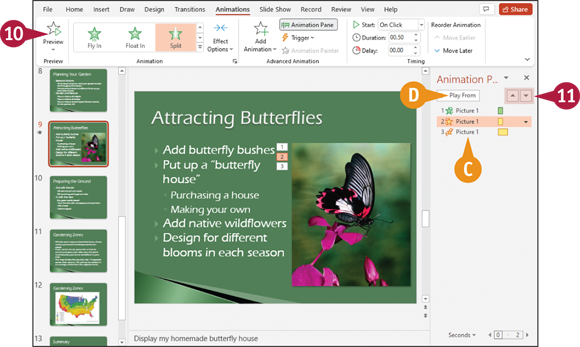
![]() PowerPoint places each effect in the Animation pane in the order you add them.
PowerPoint places each effect in the Animation pane in the order you add them.
![]() To preview your custom effect, click Preview.
To preview your custom effect, click Preview.
![]() You can also click a starting effect in the Animation pane and then click Play From.
You can also click a starting effect in the Animation pane and then click Play From.
![]() To change the order in which effects appear, click an effect and then click the Move Up button (
To change the order in which effects appear, click an effect and then click the Move Up button (![]() ) or the Move Down button (
) or the Move Down button (![]() ).
).
Record Narration
Most presentations benefit from narration. You can speak as you present, or you can use PowerPoint’s Record Narration feature to record a narration track to go along with the show. That way, you do not need to be present for your audience to receive the full impact of your presentation.
To record narration for a presentation, your computer must be equipped with a microphone. When you finish recording, an audio icon appears at the bottom of each slide for which you have recorded narration. When you save the presentation, PowerPoint saves the recorded narration along with the presentation file.
Record Narration
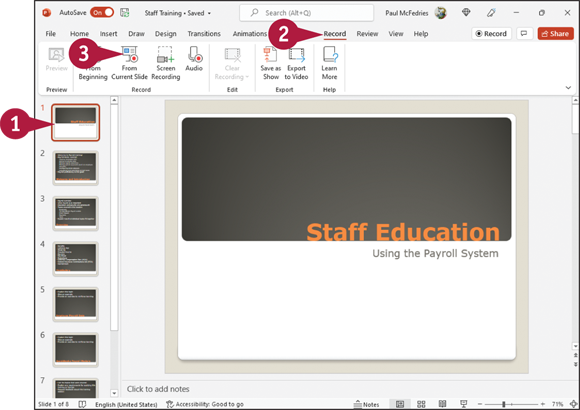
![]() Click the slide where you want your narration to begin.
Click the slide where you want your narration to begin.
![]() Click Record.
Click Record.
![]() Click From Current Slide.
Click From Current Slide.
![]() Click Record (
Click Record (![]() ) to start the slideshow.
) to start the slideshow.
![]() Speak into the computer’s microphone.
Speak into the computer’s microphone.
![]() Click
Click ![]() to move to the next slide in the show and continue recording.
to move to the next slide in the show and continue recording.
![]() Click Pause (
Click Pause (![]() ) to pause the recording. To continue recording, click Record (
) to pause the recording. To continue recording, click Record (![]() ).
).
![]() When you finish, click Record (
When you finish, click Record (![]() ).
).
![]() Click Close (
Click Close (![]() ).
).
An audio indicator appears in the lower-right corner on each slide for which you record narration. You can click the indicator to hear that slide’s narration.
Note: You do not need to record all narration at one time. If you end the show and later want to complete the narration, select the first slide that needs narration. Then, click the Record tab and then click From Current Slide.
Insert a Background Song
You can insert a song that plays repeatedly in the background during your presentation. Playing a background song can be most effective in setting a mood for your presentation with no narration. PowerPoint can play AIFF Audio (.aif), AU Audio (.au), MIDI (.mid or .midi), MP3 (.mp3), Advanced Audio Coding - MPEG-4 (.m4a, .mp4), Windows Audio (.wav), and Windows Media Audio (.wma) files, among others.
You can download music from the Internet for your presentation, but you must first download it to your computer’s hard drive.
Insert a Background Song
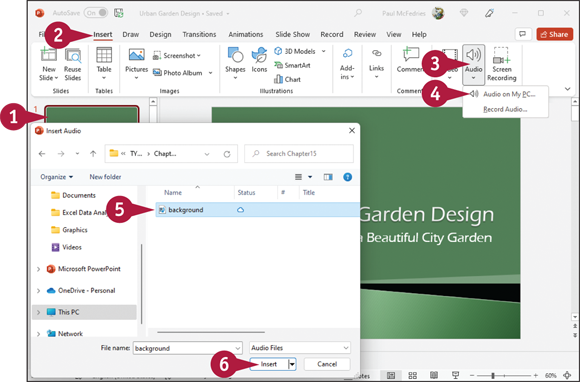
![]() Click the first slide in your presentation.
Click the first slide in your presentation.
![]() Click Insert.
Click Insert.
![]() Click Audio.
Click Audio.
![]() Click Audio on My PC.
Click Audio on My PC.
The Insert Audio dialog box appears.
![]() Navigate to and select the audio file you want to add to your presentation.
Navigate to and select the audio file you want to add to your presentation.
![]() Click Insert.
Click Insert.
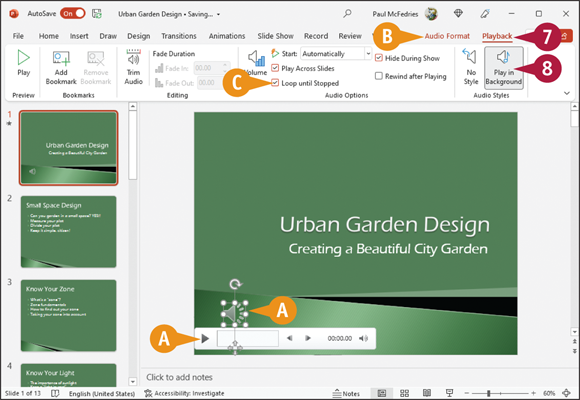
![]() An audio indicator and playback tools appear on the slide.
An audio indicator and playback tools appear on the slide.
![]() The Audio Format and Playback contextual tabs appear on the Ribbon.
The Audio Format and Playback contextual tabs appear on the Ribbon.
![]() Click Playback.
Click Playback.
![]() Click Play in Background.
Click Play in Background.
When you run your slideshow (see the section “Run a Slideshow,” later in this chapter, for details), the song loops in the background from the first slide until the show ends.
![]() If you prefer that the background song play only once, click Loop until Stopped (
If you prefer that the background song play only once, click Loop until Stopped (![]() changes to
changes to ![]() ).
).
Create Speaker Notes
You can create speaker notes for your presentation. Speaker notes, also called notes pages, are notations that you add to a slide and that you can print out and use to help you give a presentation. You can also use speaker notes as handouts for your presentation. When creating notes pages, PowerPoint includes any note text that you add, as well as a small picture of the actual slide. You can add speaker notes in the Notes pane or on the Notes page.
You can print your speaker notes along with their associated slides. For details, see the tip at the end of this section.
Create Speaker Notes
Using the Notes Pane
![]() Click
Click ![]() to switch to Normal view.
to switch to Normal view.
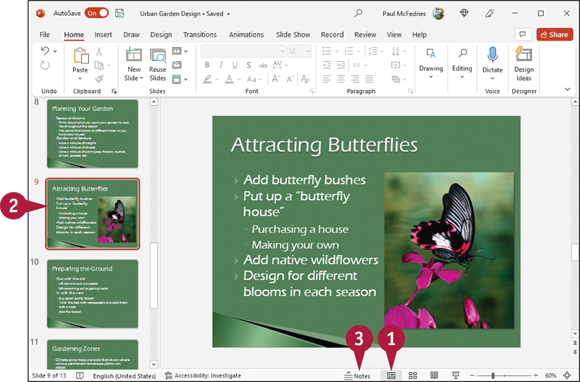
![]() Click a slide to which you want to add notes.
Click a slide to which you want to add notes.
![]() Click Notes in the status bar to display the Notes pane.
Click Notes in the status bar to display the Notes pane.
Note: The Notes button acts as a toggle; each click displays or hides the Notes pane.
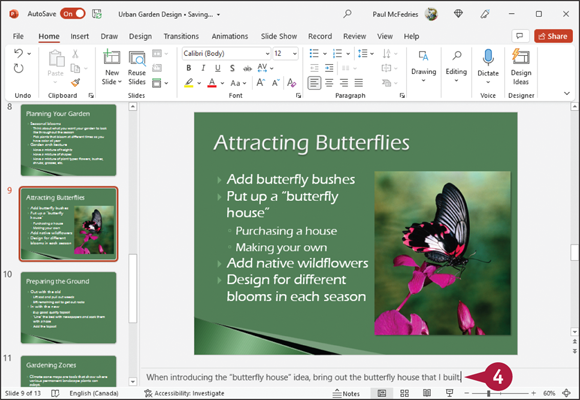
![]() Click in the Notes pane and type any notes about the current slide that you want to include.
Click in the Notes pane and type any notes about the current slide that you want to include.
Note: You can enlarge the Notes pane. Position the mouse (![]() ) over the line separating the Notes pane from the slide (
) over the line separating the Notes pane from the slide (![]() changes to
changes to ![]() ) and drag up.
) and drag up.
You can repeat steps 2 to 4 for other slides to which you want to add notes.
Using the Notes Page
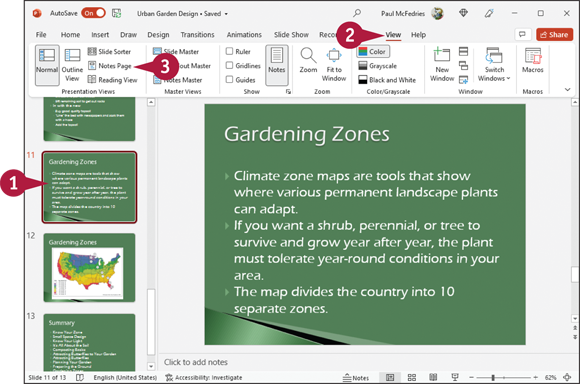
![]() Click a slide to which you want to add notes.
Click a slide to which you want to add notes.
![]() Click View.
Click View.
![]() Click Notes Page.
Click Notes Page.

The Notes Page view opens and displays the selected slide.
![]() Click in the text placeholder and type any notes about the current slide that you want to include.
Click in the text placeholder and type any notes about the current slide that you want to include.
![]() You can click Zoom to display the Zoom dialog box and magnify the notes.
You can click Zoom to display the Zoom dialog box and magnify the notes.
![]() You can also drag the Zoom slider to magnify the notes.
You can also drag the Zoom slider to magnify the notes.
You can edit and format your notes text using buttons on the Home tab.
Rehearse a Slideshow
You can determine exactly how long PowerPoint displays each slide during a presentation using PowerPoint’s Rehearse Timings feature. When you use Rehearse Timings, PowerPoint switches to Slide Show view, displaying your slides in order; you control when PowerPoint advances to the next slide in the show.
When recording how long PowerPoint displays each slide, you should rehearse what you want to say during each slide as well as allow the audience time to read the entire content of each slide. After you record the timings, PowerPoint saves them for use when you present the slideshow to your audience.
Rehearse a Slideshow
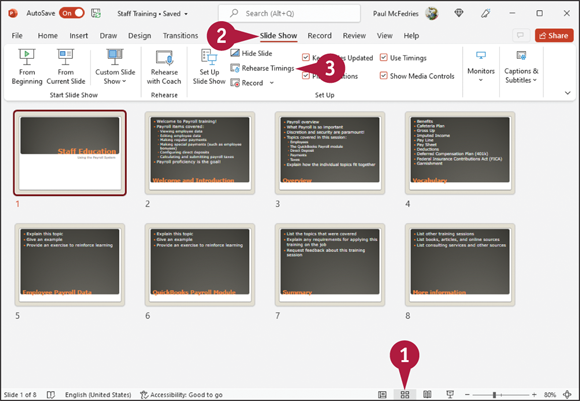
![]() Click
Click ![]() to switch to Slide Sorter view.
to switch to Slide Sorter view.
![]() Click Slide Show.
Click Slide Show.
![]() Click Rehearse Timings.
Click Rehearse Timings.

PowerPoint switches to Slide Show view and displays the first slide.
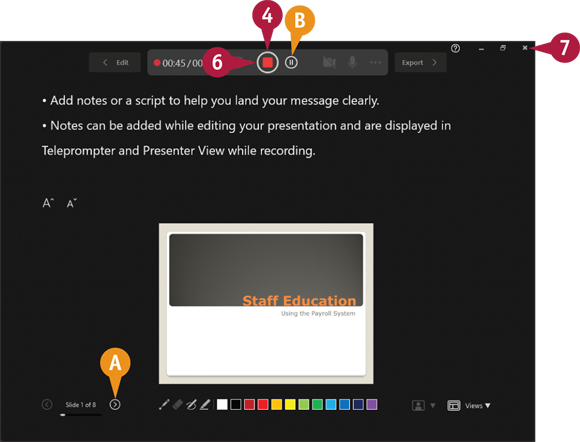
![]() PowerPoint displays the Recording toolbar and starts a timer.
PowerPoint displays the Recording toolbar and starts a timer.
![]() Rehearse what you want to say.
Rehearse what you want to say.
![]() Click
Click ![]() to pause the timer. To restart the timer, click Resume Recording in the window that appears.
to pause the timer. To restart the timer, click Resume Recording in the window that appears.
![]() To cancel the timer on a slide and start timing that slide again, click
To cancel the timer on a slide and start timing that slide again, click ![]() .
.
![]() When you finish timing the first slide, click
When you finish timing the first slide, click ![]() to proceed to the next slide.
to proceed to the next slide.

PowerPoint displays the next slide.
![]() Repeat steps 4 and 5 for each slide in your presentation.
Repeat steps 4 and 5 for each slide in your presentation.
When the slideshow finishes, a dialog box appears and displays the total time for the slideshow. PowerPoint asks if you want to keep the new slide timings.
![]() Click Yes.
Click Yes.
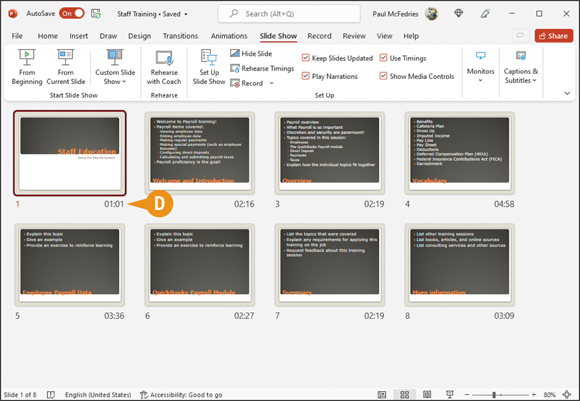
![]() PowerPoint saves the timings and displays them below each slide.
PowerPoint saves the timings and displays them below each slide.
Run a Slideshow
You can run a presentation using PowerPoint’s Slide Show view, which displays full-screen images of your slides. Slides advance in order, but you can, if necessary, view thumbnails of all your slides so that you can display a particular slide out of order.
To enrich the experience for your audience, you can use PowerPoint’s pointer options to draw directly on the screen using the mouse (![]() ). You can choose from several pen tools and colors, and you can present your slideshow using a single monitor or two monitors.
). You can choose from several pen tools and colors, and you can present your slideshow using a single monitor or two monitors.
Run a Slideshow
Run a Presentation
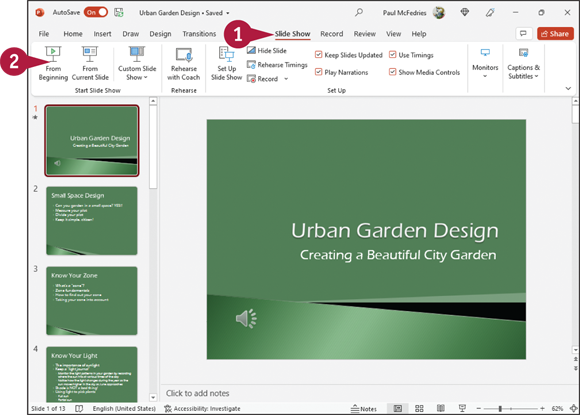
![]() Click Slide Show.
Click Slide Show.
![]() Click From Beginning.
Click From Beginning.

PowerPoint switches to Slide Show view and displays the first slide.
![]() When you move the mouse (
When you move the mouse (![]() ) to the bottom-left corner, faint slideshow control buttons appear.
) to the bottom-left corner, faint slideshow control buttons appear.
![]() Click anywhere in the slide to advance to the next slide or click the Next button (
Click anywhere in the slide to advance to the next slide or click the Next button (![]() ).
).
![]() To redisplay the previous slide, you can click the Previous button (
To redisplay the previous slide, you can click the Previous button (![]() ).
).
Work with Thumbnails
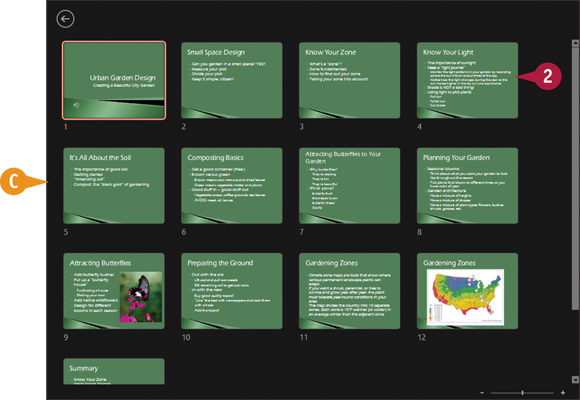
![]() Click the See All Slides button (
Click the See All Slides button (![]() ) (not shown).
) (not shown).
![]() PowerPoint displays thumbnails of all slides in your presentation.
PowerPoint displays thumbnails of all slides in your presentation.
![]() Click any slide to display it in Slide Show view.
Click any slide to display it in Slide Show view.
Point Out Slide Information
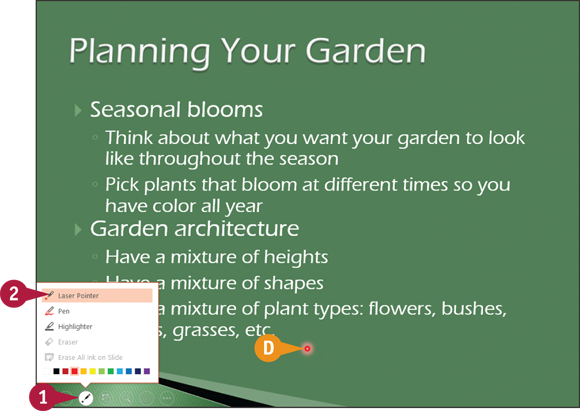
![]() Click the Pen and Laser Pointer Tools button (
Click the Pen and Laser Pointer Tools button (![]() ).
).
![]() Select a tool.
Select a tool.
![]() When you move the mouse (
When you move the mouse (![]() ) over the slide, the mouse appears as the tool you selected.
) over the slide, the mouse appears as the tool you selected.
Note: To redisplay the mouse (![]() ), repeat steps 1 and 2, selecting the same tool.
), repeat steps 1 and 2, selecting the same tool.
To erase all marks, click the Pen and Laser Pointer Tools button (![]() ) and then click Erase All Ink on Slide.
) and then click Erase All Ink on Slide.
In addition to using pen and laser pointer tools, you can call the audience’s attention to objects by zooming in on them. This approach can be particularly useful if you display a slide for a lengthy time; zooming in can recapture your audience’s attention.
Many people like to work in PowerPoint’s Presenter view, which displays your notes as you present, but your audience sees only your slides. If you present on two monitors, PowerPoint automatically uses Presenter view to display notes and slides on separate monitors. Using only one monitor, you can still set up your presentation to use Presenter view.
Zoom an Object
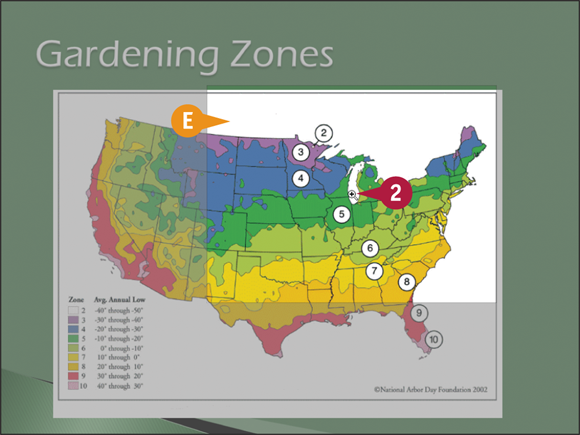
![]() Click the Zoom button (
Click the Zoom button (![]() ) (not shown).
) (not shown).
![]() PowerPoint grays the slide background and displays a lighted square that you can use to focus on an object.
PowerPoint grays the slide background and displays a lighted square that you can use to focus on an object.
![]() Slide
Slide ![]() over the object you want to enlarge and click.
over the object you want to enlarge and click.
![]() PowerPoint zooms in on the object.
PowerPoint zooms in on the object.
To redisplay the original size of the slide, press ![]() .
.

Using Presenter View
![]() Click the Menu button (
Click the Menu button (![]() ).
).
![]() Click Show Presenter View.
Click Show Presenter View.
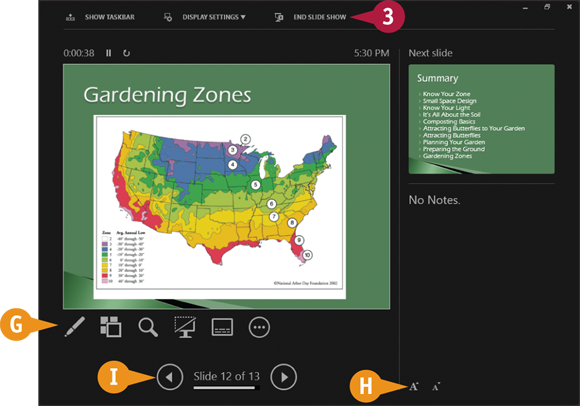
PowerPoint displays your presentation in Presenter view while your audience continues to see Slide Show view.
![]() The tools to control your presentation appear here.
The tools to control your presentation appear here.
![]() You can use these buttons (
You can use these buttons (![]() and
and ![]() ) to increase or decrease the font size of your notes.
) to increase or decrease the font size of your notes.
![]() You can click these arrows (
You can click these arrows (![]() and
and ![]() ) to display the previous or next slide.
) to display the previous or next slide.
Note: When you display your last slide, the next slide area displays “End of slide show.”
![]() Press
Press ![]() or click End Slide Show to end your slideshow.
or click End Slide Show to end your slideshow.