CHAPTER 2
THE NEW INTERFACE OF FLASH CS4
If you've ever watched the TV show Iron Chef, you might wonder how those chefs manage to create such amazing food so quickly. Obviously they are masters in their craft, and all of the experience and training that goes into becoming a master is important. But at the foundation of that training is an understanding so complete of all the tools at their disposal that knowing what tool to use for a task is second nature. Even though some pretty amazing things come out of experimenting or "happy accidents," your day-to-day success depends on knowing what your tools do and how to use them.
Beyond the tool set is the kitchen itself, which has a place for storing food, a place for preparing food to cook, a place for cooking food, and even a place to keep recipes or other information about what the chefs need to make. And then there are the spices and . . . well we could go on and on, but you get the idea, and since we're not writing a cookbook here, we'll spare you the complete analogy. Suffice it to say that Flash works like a kitchen in many ways, and the better you know your tools and workspace, the happier you will find yourself while making your next masterpiece with the "mystery ingredient"—the customer.
If you're coming to Flash CS4 from an older version of Flash, you should feel at home right away. A few notable additions/changes include the Motion Editor, which we'll cover in detail in Chapter 6, a slightly new approach to the Property inspector, and a handful of new tools.
Continue on with this chapter to get acquainted with the new interface of Flash CS4.
Welcome Screen
The first thing you will see when you launch Flash CS4 is the Welcome Screen (see Figure 2-1). The Welcome Screen allows you to open recent documents, create new documents, or create new documents from a template. This page also has useful links to tutorials and other product information and resources including Adobe Exchange, where you can find hundreds of extensions built for Flash by the developer community. You can create content for the Web, mobile devices, and even the desktop using Flash. The Welcome Screen provides you with a number of options under Create New to help you get started.
The Welcome Screen opens by default when you launch Flash and will reopen after closing all open documents. You can turn off the Welcome Screen by selecting the Don't show again check box at the lower left of the page. Alternatively, you can turn it back on by opening the Preferences dialog (select Edit ![]()
Preferences or press Ctrl+U in Windows, or select Flash ![]()
Preferences or press Cmd+U in OS X) and under the General category setting the On launch drop-down to Welcome Screen.
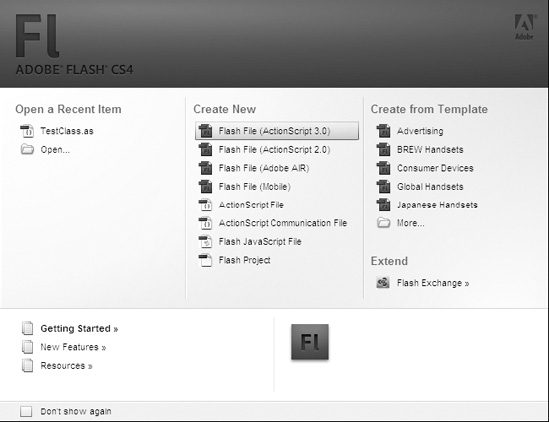
Figure 2-1. The Welcome Screen of Flash CS4
Choosing Flash File (Action Script 2.0) creates a new Flash file that targets Flash Player 10 using ActionScript 2.0. Using ActionScript 2.0 will give you the flexibility of publishing content that is backward-compatible with older versions of the Flash Player (back to Flash Player 6).
Choosing Flash File (Action Script 3.0) creates a new Flash file that targets Flash Player 10. Content that uses ActionScript 3.0 will be compatible only with Flash Player 9 and higher. Using ActionScript 3.0 not only brings with it a tool set geared toward object-oriented programming similar to other important languages, but also changes the behavior of the interface in some ways, which we'll note throughout the book.
Choosing Flash File (Mobile) will launch Adobe Device Central, a handy utility made to help you create content that targets the various versions of the Flash Lite player based on your target device(s). Flash Lite is a runtime that uses a simplified set of ActionScript. Device Central also includes a Flash Lite emulator. Nice!
Choosing Flash File (Adobe AIR) lets you create content for the desktop. AIR, which stands for Adobe Integrated Runtime, allows you to leverage your existing Flash and other web technology chops to create desktop applications that are first-class citizens on the user's computer.
The Flash CS4 interface is nearly identical between operating systems
Changes to the Flash CS4 authoring environment have made the interface behavior and appearance consistent across operating systems. The addition of an application window paradigm has allowed the grouping of panels and document window(s) together on the Mac, and conversely made floating document windows possible in Windows. In fact the interface looks nearly identical between operating systems until you open a modal settings dialog.
That was a whole lot of everything in general and nothing specific. So if you haven't done so already, select Flash File (ActionScript 3.0) from the Welcome Screen, and you should see the default workspace for Flash CS4 shown here in Figure 2-2.
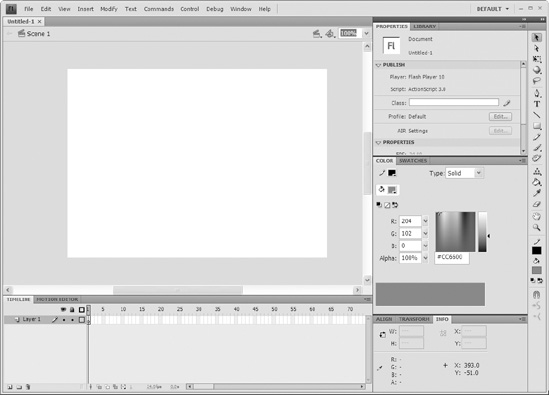
Figure 2-2. The default workspace of Flash CS4
Working with panels and windows
Within the application window the Flash CS4 interface is made up of one or more document windows and several panels. Here we'll explore the other various types of interface elements, how to interact with and modify them in general, the basic operation of each, and finally how to customize and arrange them to best suit your needs.
Understanding panels (color-coded panel parts—three shades of gray)
Panels have three distinct areas that make up the header or bar that runs across the top: the group header (dark gray), panel header (medium gray), and panel tab (light gray), as shown in see Figure 2-3. The exception to this is the document window, which we'll talk about in the section "The document window" later in this chapter.
Figure 2-3. The panel tab, panel header, and panel group header
Panel tab
Clicking the panel tab gives focus to that panel, bringing it in front of any floating panels or to the front of a panel group so that you can interact with it. (Floating panels will always appear in front of panels that are docked to the application window.) Dragging the panel tab allows you to move that panel in the workspace, arrange it within a panel group, add it to or remove it from a panel group, or dock that panel to a docking point in the workspace.
Panel header
The panel header affects all the panels in a panel group as one. Clicking the panel header will vertically collapse/expand the panel and any other panels in a group, but only after bringing that panel or panel group into focus. Dragging the panel header allows you to move that panel or panel group in the workspace, add it to or remove it from another panel or panel group, or dock that panel or panel group to a docking point in the workspace. At the upper-right corner of all panels (except for the Tools panel) is the panel menu. This menu will have options related to the content of the panel. We discuss these in more detail throughout the book.
Panel group header
The panel group header affects every panel group stacked under it. Clicking the panel group header (dark gray) will reduce the panels down to icons. This collapsed-to-icons view is a super-efficient use of space and reduces a sprawling expanse of panels into a compact collection of buttons. As the name implies, you can group panels together in a way that makes sense to you and the way you work. (Figure 2-4 shows a panel group collapsed to icons.) When you click a panel button while collapsed to icons, the panel group that that panel belongs to pops out. Giving focus to any other part of the interface outside of that panel or its panel group will collapse the group automatically. (Horizontally stacked panels or panel groups collapsed to icons do not close automatically.) The panel header appears as two rows of dots above the panel buttons (which function as panel tabs).
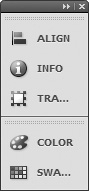
Figure 2-4. A panel group collapsed to icons
Docking, grouping, stacking, and floating
We have mentioned panel groups, docking, and floating a few times, and you may be wondering exactly what these terms mean. See Figure 2-5 for examples of each.
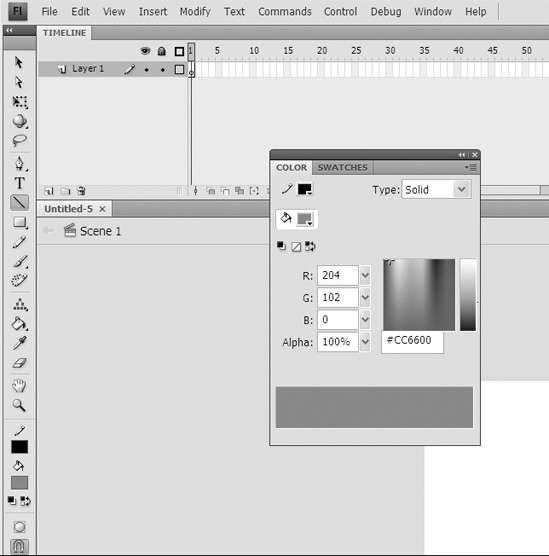
Figure 2-5. Panels in groups, floating and docked
Docking is attaching a panel or panel group to the inside bounds of the application window. This behavior has changed on the Mac from Flash CS3. Instead of an application window, you could dock panels and groups to the bounds of the desktop. This is not an option in Flash CS4 on Macs, although you can still do this on PCs. A side note: you can expand the Tools panel to any width (very cool!).
To see how docking works, drag the timeline away from the panel group it is in. You'll see the entire panel becomes translucent as you drag it. Dragging it close to the side of the application window will cause a light blue line and a translucent gray bar to appear (see Figure 2-6). Releasing the panel here will "dock" it to the application window.
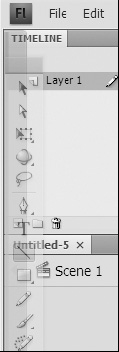
Figure 2-6. The Tools panel as it is about to be docked to the application window
Grouping is basically stacking panels on top of one another (like a deck of cards)—each accessible by tabs running across the top of the panel group. To see how grouping works, drag a panel tab into another panel or panel group. You will see a light blue line around the outside of the panel or panel group you are about to join. In Figure 2-7 we are dragging the Info panel from the bottom group up to the group with the Color and Swatches panels. You can drag panel groups into other panel groups as well by dragging the panel group header instead of a single panel tab.
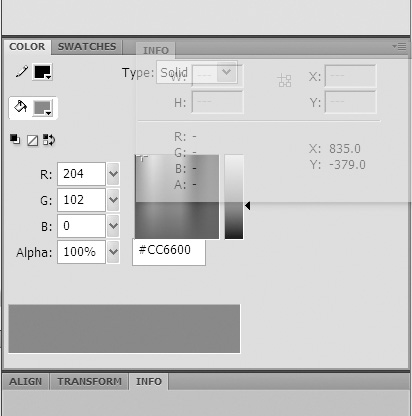
Figure 2.7 The Info panel being grouped with the Color and Swatches panels
Stacking is basically docking panel groups to other panel groups. You can stack vertically and horizontally. Using these features is a great way to organize your workspace. Study Figures 2-7 and 2-8 to see the visual cues used in grouping and stacking. To stack a panel or panel group, grab the panel tab or panel group header and drag it below, above, or in between another panel group or groups. You will see a single light blue line appear where your new panel or group will appear in the stack.
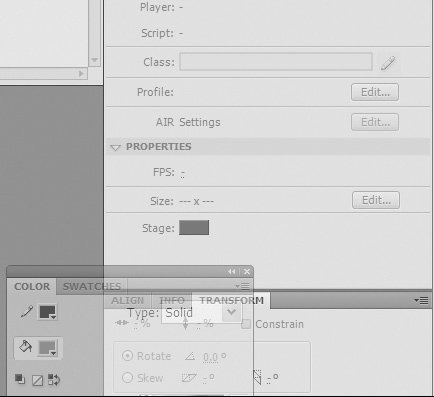
Figure 2-8. A panel group being inserted above another panel group in a stack
The Property inspector—one panel to rule them all
The Property inspector is a context-sensitive panel for modifying the properties of whatever object has focus. As you change focus, say from the workspace to a frame on the timeline to symbols on stage or to some of the tools in the Tools panel, the content of the Property inspector changes to suit what you have selected. We'll cover specific settings and what they do as we go through the book.
Changing numeric property values (new behavior!)
You may be noticing that the numeric values in various panels are underlined with a dotted line. This is known as hot text. Where older versions of Flash had pop-up slider bars and input fields for entering property values, CS4 does away with the sliders and adds mouse control (see Figure 2-9).
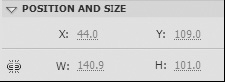
Figure 2-9. New numeric value input areas with dotted underlines indicating hot text
Hovering over one of these and then scrolling your mouse wheel will increment the value up or down by 1. If you scroll while holding the Shift key, it will increment up or down by 10. Finally, if you hold down the Ctrl (Cmd) key while scrolling, it will increment up or down by .1. How convenient is that?! If you don't have a scroll wheel, you can click and drag using the same modifiers with the same result. And of course, single-clicking any of these will allow you to input values via the keyboard but also allow you to continue to adjust using the scroll functions described previously, the difference being that you will not see the changes until you apply them by clicking away or pressing the Enter key.
The document window
As you can probably guess from the name, the document window reflects the output of your work. Tangible characteristics like dimensions and frame rate as well as background color are determined in the Property inspector (which we'll explore shortly) when the document window has focus. The document window contains your stage and work area. Closing it will close the file. You may have more than one document window open at a time. Opening an existing file or creating a new one will open a new document window and group it with the currently active document window, even if it is not docked to the application window. You can then separate it by dragging it away from the group.
Understanding the document window
Like panels, document windows can be grouped—but only with other document windows. Also, they cannot be collapsed. And they can only dock with the application window. Figure 2-10 shows a document window. In the upper-left corner is the window tab, and as you can see we have open the infamous document Untitled-1. Under the window tab is a bar called the edit bar. You can turn this on and off by selecting Window ![]()
Toolbars ![]()
Edit bar from the application menu. On it is a breadcrumb of sorts that shows you what symbol and timeline your stage belongs to and its hierarchical relationship to the stage.
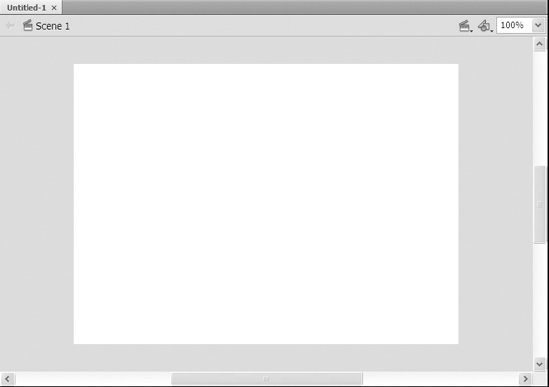
Figure 2-10. A single document window
On the right-hand side of the edit bar are three controls. Left to right they are the Edit Scene, Edit Symbol, and Stage Magnification selectors. Clicking the Edit Scene button will open a drop-down menu of available scenes to edit. Selecting one will change the stage and timeline to reflect the scene you selected in the same state you left it in, including playhead position and selected items, if any.
Clicking the Edit Symbol button will open a drop-down menu of every symbol in your library while keeping folder hierarchy intact using the operating system's style of submenus. (See next section for discussion on the Stage Magnification selector.)
Controlling the document window
So now that you have an understanding of what the document window is and where it fits into the Flash CS4 interface, you are probably wondering what you can actually do with it. Beyond its showing you the stage, what can you do to determine how it shows that to you?
Stage view options
In addition to view percentage, you have a handful of rules-based ways to look at the stage.
The Stage Magnification drop-down offers six preset levels of magnification, but you can dial in any percentage you want between 8 percent and 2000 percent. There are also descriptive options as well, including Fit in Window, Show Frame, and Show All.
Fit in Window: This setting does exactly what it says. It sizes the stage to fill the visible area of the document window (see Figure 2-11). This also removes the vertical and horizontal scrollbars. (If the document window is floating, this will fill the document window, obscured or not, and resizing it will not bring it to the front.)
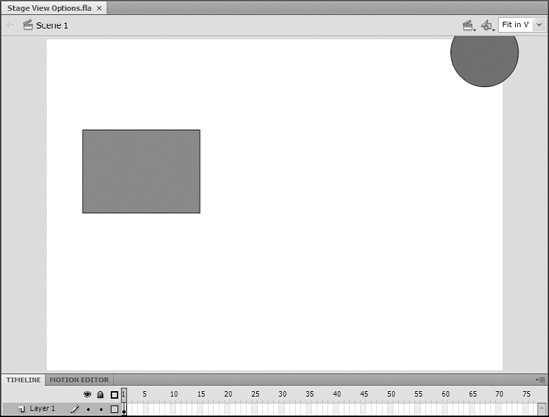
Figure 2-11. Our stage after selecting
Fit in WindowShow Frame: This setting will either zoom in or out to show you all of the contents of the stage (see Figure 2-12).
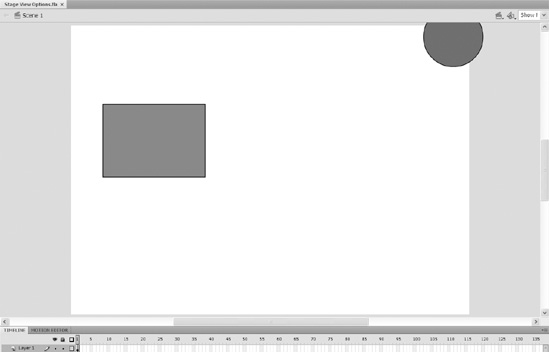
Figure 2-12. Our stage after selecting
Show FrameShow All: This setting will zoom in or out as far as it needs to and reposition the stage in order to show you all of the symbols currently on the stage and pasteboard (see Figure 2-13).
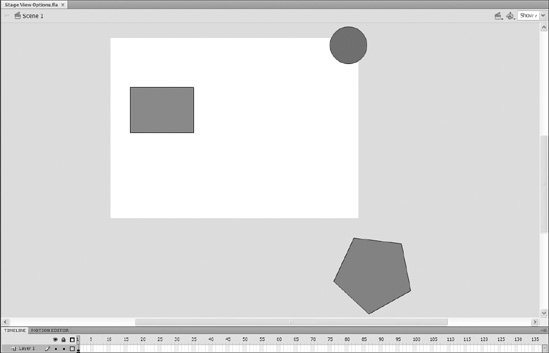
Figure 2-13. Our stage after selecting
Show All
Tools for using the interface
While many of the tools are used for creating and modifying objects in some way, a couple of tools deal specifically with manipulating the workspace itself—the Hand tool and the Zoom tool.
Hand tool
Use the Hand tool to move the stage within the document window. This comes in quite handy while zoomed in. To access the Hand tool without "putting down" your current tool, press the spacebar. When you see the hand, feel free to drag. To resume using your selected tool, simply release the spacebar. This technique might seem a little awkward at first, but it becomes a huge time-saver after just a little practice.
Zoom tool (Z is for bones, silly rabbit!)
To zoom in or out of the workspace, use the Zoom tool. Select the Zoom tool (or magnifying glass) from the Tools panel by pressing M. In previous versions of Flash, you could also press Z for the Zoom tool; however, CS4 assigns the Z shortcut to the Bone tool by default. You can change this default behavior. Read "Customizing keyboard shortcuts" later in this chapter to find out how.
Clicking the document window with the Zoom tool selected will zoom to two times the current magnification (at 150 percent, a click magnifies to 300 percent, the next click magnifies to 600 percent, etc.). Holding the Option key while clicking with the Zoom tool will zoom out by half, or "pull out," the current magnification (at 600 percent, a click decreases the view to 300 percent, the next click decreases the view to 150 percent, etc.).
You can also drag around an area on the stage, and Flash will zoom to show only that area.
Double-clicking the Zoom tool will return the stage to 100 percent.
Rulers, guides, and snapping
Although Flash has fantastic auto-align and snapping options that go beyond rulers and guides, the document window also includes rulers and guides to help you position items on the stage when there may not be anything else to align with or snap to. Ruler and guide options remain under the View menu.
Select View ![]()
Rulers to toggle the rulers off and on. Rulers must be on in order to create guides but not to view or move them.
To create a guide, drag from a ruler toward the stage. As you drag you will see a line appear. When you release the mouse, this will become a guide. While you can have any tool active to make guides, you must use the Selection tool to change their position or remove them individually.
To move a guide, make sure you have the Selection tool active. When you hover over a guide with the Selection tool, an arrow with a line will appear next to it indicating that you can click and drag the guide to move it. To remove the guide, drag it onto the ruler.
To edit guides, select View![]()
Guides from the menu. Here you can show, lock, edit, or clear your guides. Choosing Edit will open the Guides dialog where you can select a color for your guides, lock/unlock, hide/show, and even adjust snap accuracy as well as make your selections the default for all documents.
Snapping is a standard feature of many applications where "moving things around in a view" is part of the workflow. Flash is no exception. Snapping allows you to place objects accurately based on some rules. You can snap to guides, which means that guides will act like magnets when you get objects near them. Additionally, you can have objects snap to other objects and objects snap to a grid on the stage.
Property inspector options of the document window
Property inspector options for the document are divided into two sections, Publish and Properties4, as shown in Figure 2-14.
The Publish settings are determined by what publish profile you have selected. (Using one of the Welcome Screen options selects a publish profile for you.) To change the Flash Player and ActionScript versions you wish to publish for, click the Edit button. This will open the Publish Settings dialog where you can change your settings. If you're chomping at the bit to set up custom profiles or dig deep into the publishing capabilities of Flash, jump to Chapter 18, where we cover the publish settings in detail.
The other option under Publish is the Class field. Use this to assign an ActionScript class to the document. We'll cover this and the Actions panel in Chapter 8.
There are three document properties that can be set in the panel: fps (frames per second, referred to as the frame rate), size, and stage color. You can also access these properties though the File menu by selecting Modify![]()
Document, or by pressing Ctrl+J (or Cmd+J on a Mac).
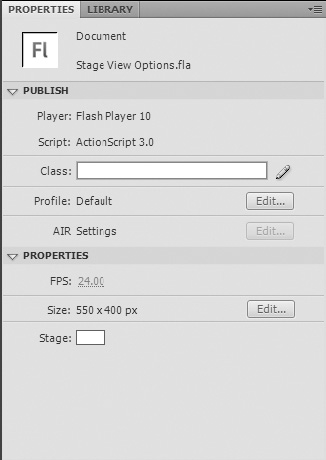
Figure 2-14. The Property inspector for the document window
Changing the document frame rate
The default frame rate is now 24 fps. To change it, use the methods described previously in the section "Changing numeric property values (new behavior!)" or open the Document Properties dialog by clicking the Edit button in the Size section under Properties.
Changing the stage size
Clicking the Edit button next to Size will open the Document Properties dialog, allowing you to adjust the document dimensions as well as the frame rate and stage color.
Changing the default document settings
If you commonly use specific dimensions, frame rate, and stage color, you can make those settings the default by clicking the Edit button in the Properties section of the Property inspector. In the Document Properties dialog, adjust the settings to match your preferences and click the Make Default button in the lower left of the dialog. Now every new document will have these properties!
The Timeline panel
Hated by some, revered by others—the timeline has been a point of contention in these later years of the evolution of Flash. Coders say, "I cannot use Flash. You can put code anywhere! And what's with the timeline?! What is that for?" Animators and designers say, "I cannot use ActionScript to draw and animate. I cannot see what I am doing." And really, we are all right. No matter what side of the fence you are on (including the middle), Flash may have some paradigms you don't "get" or need. But the cool thing about these paradigms is that they are not mutually exclusive worlds. If you don't need the timeline for what you do, don't use it. If you absolutely must have it, then by all means do. Somewhere in the middle there is a place where "timeliners" and coders work together in harmony, and it's much closer than you might think. In fact, we'd be able to see this common ground if we weren't all standing on it together.
Flash programmers will be quick to point out that if you use Flash as a tool for authoring Rich Internet Applications and take advantage of the power of ActionScript, you may need the timeline less than ever—if at all. However, the timeline remains an integral part of what Flash is at its core and is used extensively by a large community of Flash designers and animators, which is why it not only remains a table stake of the Flash interface, but also has been expanded (in a tangential way) by way of the new Motion Editor.
Even if you create an application in Flash with only code, you still need a target Flash source (FLA) file in order to publish it, and it will contain a stage—the fundamental display object container of every Flash movie (SWF file). The stage contains the main timeline of your application, also a display object container.
We discuss the display list in detail later in the book, but for now let's say that in AS 3.0, it's a list of things designed to help you manage the relationship of everything you see on that list. If you can see it, it's a display object. If it's a display object, it is the child of a display list container. And yes, some display objects can be display object containers at the same time, which results in nesting.
For character and motion graphics animators, being able to see the relationship of multiple events over time is critical to imparting personality into their work. The timeline does just that. For interface designers, the timeline can be used for organizing layout elements using layers and folders and representing view states of an application using frames. Prototypes of transition animations or special visual effects can be created by artists in the timeline to later be replicated and modified in code if need be.
Understanding the Timeline panel
The Timeline panel (see Figure 2-15) is the visual representation of the items on your stage over time. It lets you arrange and organize your stage during the authoring process (when you are building your movie or application). You can organize visual depth by using layers and folders much the way you might in Photoshop. You can then manage your visual composition over time by using frames.
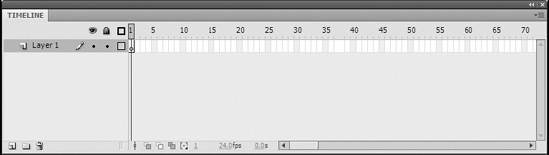
Figure 2-15. The Timeline panel
Controlling layers
Timeline layer options allow you to manage and organize your layers as well as give you control over settings for each layer independently. Following is a detailed discussion of each of these options.
- The layer strip: The layer strip is the horizontal strip of space in the
Timelinepanel to the left of the timeline that shows (from left to right) whether the layer is a folder or not, the layer name, whether it is editable or not (if selected), hidden or not, locked or not, and the outline color setting. Double-clicking thelayericon will open theLayer Propertiesdialog and allow you to change all of the layer's properties (see Figure 2-16).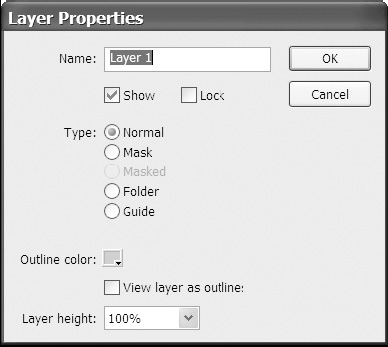
Figure 2-16. The
Layer Propertiesdialog Show/Hide layer: Clicking theeyeballicon at the top of theTimelinepanel will affect all of the layers in the following way. If some or all layers are visible, clicking this icon will hide all layers. If all layers are hidden, clicking this icon will show all layers. In addition to this icon, you can show and hide layers individually by clicking the first black dot that appears beside the layer name under theeyeballicon. A red X indicates that the layer is now hidden.Lock layer: Clicking thelockicon at the top of theTimelinepanel will affect all of the layers in the following way: If some or no layers are unlocked, clicking this will lock all layers. If all layers are locked, clicking this icon will unlock all layers. In addition to this icon, you can lock and unlock layers individually by clicking the second black dot that appears beside the layer name. Alockicon appears indicating that the layer is now locked.
- Outline layer: Clicking the
square outlineicon at the top of theTimelinepanel will affect all of the layers in the following way: If some or no layers are in outline view, all layers will be set to outline view. If all of the layers are in outline view, all layers will be set to normal view. When a layer is in outline view the outline indicator on the layer strip appears as an outline of a square. The color of the outline indicates what color outline the object on that layer will be. - Add layer: Use the
Add Layerbutton to add a layer to your timeline above the currently selected layer or folder. Layers are named sequentiallyLayer 1, Layer 2, etc. - Add folder: Use the
Add Folderbutton to add a folder to your timeline above the currently selected layer or folder. Folders are named sequentiallyFolder 1, Folder 2, etc. - Delete layer/folder: Use the
Delete Layer/Folderbutton to remove the selected layer(s) or folder(s) from the timeline. Deleting a folder will also delete any content within it as well, including layers, subfolders, etc.
The timeline
The ruler or timeline header side of the Timeline panel is where "time is measured"—or broken into equal parts we call frames.
- Ruler or timeline header: Moving to the right side of the
Timelinepanel, you will see at the top a row of numbers incremented by 5. These are frame numbers. Directly below them is a row of small ticks (short vertical lines). Together they make up a sort of frame ruler that gives you a visual indication of the frame numbers of the frames in the grid below. (You can always look at the current frame indicator, discussed a little later in this list, to see exactly what frame the playhead is on.) - Playhead: On the timeline is a red rectangle with a red line extending down through the grid. This playhead indicates what frame on the timeline will be reflected on the stage in the document window.
- The grid: As you add frames to layers, you will begin to fill in the space under the ruler. Every fifth frame is shaded gray as a visual aid, and all of the frames are delineated by vertical lines (see Figure 2-17).

Figure 2-17. Many of the types of frames and keyframes you will encounter on the timeline
Frame View Options: This menu lets you adjust frame width, layer height, and frame tinting (discussed in the upcoming section "Persistence and tinting frames").Center Frame: This button horizontally scrolls the timeline so that the frame that the playhead is on appears centered in theTimelinepanel.Onion Skin: SelectOnionSkin to simultaneously see multiple frames of animation.Onion Skin Outlines: Click this button to display the onion-skinned frames as outlines.Current Frame: During playback of the timeline, this will show the position of the playhead. At rest, you can click to enter a value or use your mouse wheel as described in "Changing numeric property values (new behavior!)" earlier in the chapter. Entering a number will immediately move the playhead to that frame. Scrolling will move the playhead back and forth as you scroll.Frame Rate: During playback this indicates the actual frame rate of playback. At rest you can use it to set the document's target frame rate by using the methods described in "Changing numeric property values (new behavior!)" earlier in the chapter.Elapsed Time: During playback this shows the calculated elapsed time of the playhead based on frame 1.
Adding frames/keyframes to the timeline
A new FLA document will have a single layer and a single keyframe by default when you open it. If you're interested in controlling the visual state of an application from the timeline or using it for linear animation, you'll want to know how to add frames to your timeline. First let's have a look at the various types of frames. Look back at Figure 2-17 for examples of an empty frame, empty keyframe, and keyframe.
Now there's also a sort of ready state the grid is in before it has any frames on it. The frame-like rectangles you see under the timeline are simply individual placeholders for where frames might eventually be. We'll call them "unpopulated" to keep them distinct from empty keyframes and empty frames, the difference being that you can't do anything to an unpopulated spot on the grid—you must have a frame of some kind there. In fact, you can't even move the playhead over them. (This is an easy way to tell whether you've got frames.) So enough already—let's add some frames to the timeline.
Persistence and tinting frames
Whether you use the timeline to keep things separated or for linear motion, you'll want to know at a glance where things exist—and how they persist—in time. One useful feature to aid you in this is frame tinting. With frame tinting turned on, any frame that has a symbol or shape on it will be shaded gray, distinguishing it from empty frames, which are white. With tinting turned off, all of the frames are white, which makes it difficult to see how content on stage persists over time.
To turn on frame tinting, use the Frame View Options menu at the top-right corner of the Timeline panel and make sure the option Tinted Frames is checked.
The timeline flows like water
This section is for brand-new users of Flash or folks who are having a hard time understanding how the timeline behaves. Let's imagine the keyframe is a lake or some other small body of water. Add a single empty keyframe to the timeline (see Figure 2-18).
Figure 2-18. A single empty keyframe on the timeline
When you add a symbol or shape to the stage when that keyframe is selected, think of this as adding water to your lake. See Figure 2-19 to see a single keyframe with content. If you have no frames on that layer, you have no place for the water to flow.
All of the water stays in the lake. Adding frames to your layer is like adding a river to that lake, and when you do, all of the water flows from it down the river (that is, the content moves into every frame on that layer) until it meets another keyframe.
If there is already a keyframe on your layer, the content from your first keyframe cannot continue into it. Each keyframe carries its own distinct set of content (see Figure 2-20).
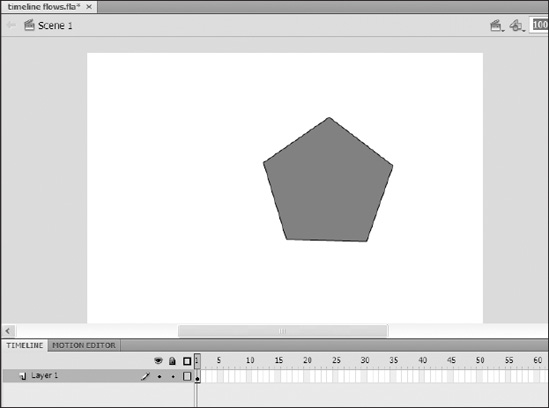
Figure 2-19. A single keyframe with content
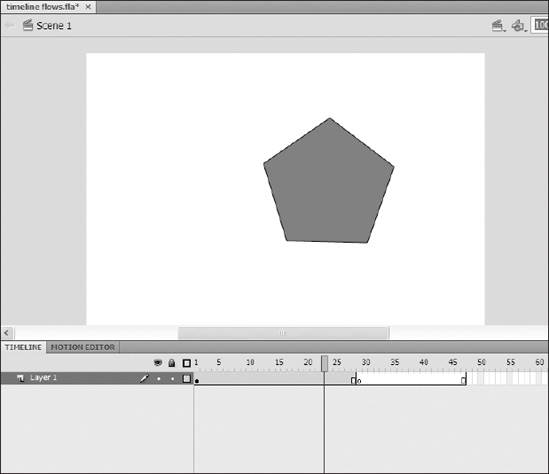
Figure 2-20. What happens when you add content to a keyframe on a layer with a preexisting (empty) keyframe further down the timeline. Note that the frames following the second keyframe remain empty.
That being said, if you add a lake to a river (that is, you add a keyframe after a set of frames), the lake will fill up with water from the river—or collection of symbols and shapes that made up the original keyframe; you can then change the contents of the newly added keyframe without changing the content of the keyframe or frames that preceded it—only on the frames that follow (see Figure 2-21).
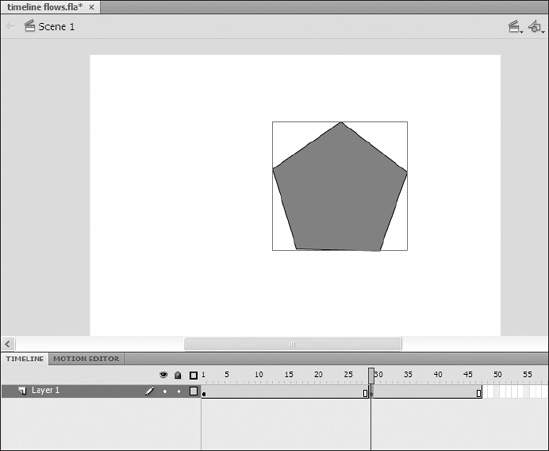
Figure 2-21. What happens when you insert a keyframe to a layer with content
Adding and inserting frames and keyframes to layers
The easiest way to add frames to the grid is to click anywhere under the timeline where there is a layer (selecting where there is no layer will only give focus to the Timeline panel) and pressing F5 (or selecting Insert![]()
Timeline ![]()
Frame). This will add frames on that layer from the point at which there is a frame to the point at which you clicked under the timeline. For instance, if you click in the unpopulated placeholder under the number 50 on the timeline, you'll see that that placeholder turns a nice green, indicating that it is selected. Pressing F5 will populate every placeholder between frame 1 up to and including frame 50 (we're assuming that frame 1 is the closest frame—not placeholder—to the placeholder under 50). Pressing F6 will add an empty keyframe in the placeholder (or last placeholder) you have selected (look for the green) on that layer and fill the rest with empty frames.
You made frames!
If the current timeline has more than one layer, you can add frames to multiple layers by dragging under the timeline to include all of the layers you'd like to add frames to. You will notice the placeholders turn that lovely green to let you know they've been selected. Press F5, and you'll have frames on all of the layers you selected—from the first at which there is a frame to the position you selected. Pressing F6 will add an empty keyframe to the point (or points) you have selected on all of the layers you have selected (look for the green) and fill the rest with empty frames.
Adding and inserting frames and keyframes to all layers
So selecting placeholders on all of the layers of a timeline can get to be a drag if you're working on a timeline with many layers; but there is an easy way to add or insert frames and keyframes to every layer in the timeline.
To add frames to the end of the timeline to all layers, position the playhead at the last frame of the timeline, making sure none of the grid is selected (look for the green). Now press F5 to add a frame to the end of every layer. To add a keyframe, press F6 instead. To remove a frame, press Shift+F5. If the last frame on any layer happens to be a keyframe, it will also be removed.
Inserting frames willy nilly
That's right—willy nilly. It sounds better than "multiple noncontiguous selection" don't you think? Let's suppose you have a timeline with three layers (each with 15 frames), and you want to insert 5 frames into the middle of Layer 1 and add 2 frames to the end of Layer 3. To do this, follow these steps:
- Drag over 5 frames on
Layer 1. - Press Ctrl (Cmd on a Mac) and drag over the last 2 frames of
Layer 3.You should now have a selection that looks like Figure 2-22.
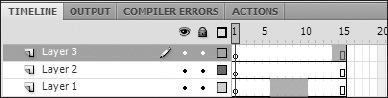
Figure 2-22. Multiple discontiguous selections
- Press F5 to insert frames or F6 to insert keyframes.
Just remember the following:
- Green indicates a selection.
- Press F5 to add/insert frames.
- Press F6 to add/insert keyframes.
- Press Shift+F5 or Shift+F6 to remove frames or keyframes.
Copying/pasting frames
As in any creation process you will at some point want or need to duplicate or move your work. Copying frames is a quick way to duplicate your efforts on the timeline.
To copy a frame select it on the timeline and press Ctrl+C or Cmd+C. This places all of the contents of that frame (all of the symbols on the stage) on the clipboard. Pressing Ctrl+X or Cmd+X will "cut" or remove everything from your selected frame and place all of the contents on the clipboard. Doing this will not remove the keyframe itself, just the stage content.
To paste the content of your clipboard back onto the stage, select a keyframe on the timeline (or create one) and press Ctrl+V (Cmd+V on a Mac). There will be times when you might want to paste everything into its prior position on the stage. To do this press Ctrl+Shift+V (Cmd+Shift+V)—or select Paste in place from the Edit menu.
Controlling the timeline
In order to see what you have on stage at any given time (or in any given frame), you will need to be able to move the playhead along the timeline. During authoring the playhead can be either playing or stopped. When it is playing it will move across the screen from left to right, and items on stage will reflect this. When it is stopped the stage will show only the items for that frame.
When the playhead reaches the last frame of the timeline, it will stop. You can change this by selecting Menu ![]()
Control ![]()
Loop playback. You can also extend playback in the authoring environment to multiple scenes by selecting Menu ![]()
Control ![]()
Play all scenes.
There are several ways to change the position of the playhead on the timeline:
- Press the Enter key to toggle play/stop.
- Drag the playhead.
- Use the less than and greater than keys, scroll/drag the current frame, or use elapsed time controls on the timeline (during authoring).
- Use the Controller.
- Use ActionScript.
The Tools panel
We think it should be required in every instructional book to say at least once, "You must have the right tool for the job." So there it was. And it's true—really! The Tools panel (see Figure 2-23 ) is where most of them live. We will be investigating each tool in more detail throughout the book.

Figure 2-23. The Tools panel
Customizing the interface
Each and every one of us is different. We will all use Flash CS4 a little differently than everyone else. And so chances are you might want to customize this tool in some way and make it your own. Fortunately for all of us, Flash CS4 will let us do just that. You can create workspaces for customizing the collection and location of panels. You can modify the Tools panel to include the tools you need—and even tools you create yourself. You can adjust the general preferences of the software to reflect what is important to you through the nearly 100 options in the Preferences dialog (see Figure 2-24).
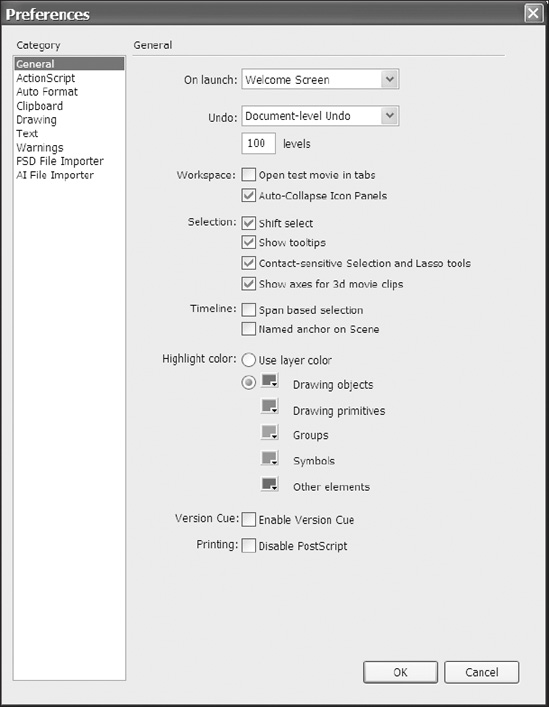
Figure 2-24. The Preferences dialog of Flash CS4
Working with workspaces
Why workspaces? No matter how many monitors you can plug into the back of your computer or how lovely that 30-inch cinema display is, there will be times when rearranging the workspace improves the pace of your work for the task at hand. For instance, you may find that for some tasks having the Tools panel horizontal makes work much faster than having it vertical. Setting up workspaces specific to regular work activities might wind up saving you loads of time (not to mention an unknown number of miles in mouse motion).
Customizing the interface with workspaces
To create a new workspace, follow these steps:
- Arrange the workspace to your liking. From the menu bar select
Window
Workspaces New Workspace. (You can also open this menu by clicking the Workspace button in the upper-right corner of the application window.) You will see theNew Workspacedialog shown in Figure 2-25.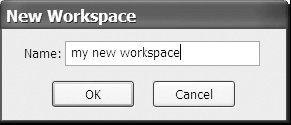
Figure 2-25. The
New Workspacedialog - Enter a name for your workspace and then click
OKto save orCancelto exit the dialog without saving.
Switching between workspaces
To change workspaces, click the Workspace button in the upper right of the application window. You should see the name of the workspace you just created in the top section of the menu, Default in the middle section, and the options Reset [name of the current workspace], New Workspace, and Manage Workspaces in the bottom section. To change workspaces simply select any custom workspaces from the top section or Default from the middle section of the menu.
Managing workspaces
Managing workspaces really boils down to deleting or renaming workspaces. To delete a workspace, click the Workspace button in the upper right of the application window and select Manage Workspaces from the menu. In the dialog that opens, select the workspace you wish to delete from the list on the left (as shown in Figure 2-26) and click Delete.
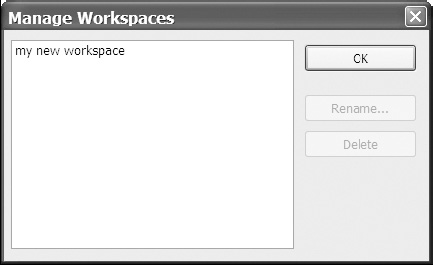
Figure 2-26. The Manage Workspaces dialog
To rename a workspace, click the Workspace button in the upper right of the application window and select Manage Workspaces from the menu. In the dialog that opens, select the workspace you wish to rename from the list on the left (as shown in Figure 2-27), click the Rename button, enter the new name in the Rename Workspace dialog that appears, and click OK. You can also just double-click the workspace name to open the Rename Workspace dialog.

Figure 2-27. A custom workspace selected in the Manage Workspaces dialog
Modifying existing workspaces
There will be times when the workspace you crafted for a task just doesn't work out the way you intended and you want to tweak it a little bit but keep the workspace name the same. To do this, change to the workspace you want to update (as described previously in "Switching between workspaces"), make any changes you want, and then follow the steps given earlier for creating a new workspace, being sure to keep the name the same. Clicking Save in the New Workspace dialog will open a warning dialog telling you that a workspace with that name already exists and asking if you want to overwrite the existing workspace. Click Yes to update the existing workspace.
Customizing the Tools panel
To customize the toolbar select Edit![]()
Customize Tools Panel (or Flash![]()
Customize Tools Panel on a Mac). This will open the dialog shown in Figure 2-28. There are only 18 spaces on the Tools panel, and while leaving some empty will remove the corresponding spaces from the Tools panel, you cannot add more.
Select a square on the Tools panel diagram on the left of the dialog. You will see the tools assigned to this space appear in the right-hand column under Current selection. To add tools to that space, select a tool from the Available tools column and click the Add button. (You can add up to ten tools per space.) To remove a tool from a space on the Tools panel, select the space you wish to remove the tool from. Select the tool you wish to remove from the Current selection column and click the Remove button.
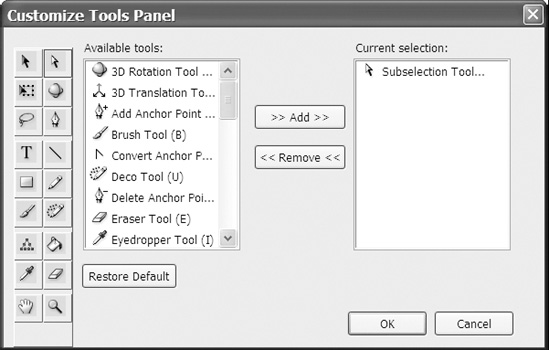
Figure 2-28. The Customize Tools Panel dialog
Customizing keyboard shortcuts
To customize your keyboard shortcuts, select Edit![]()
Keyboard Shortcuts. A few sets are preloaded, and as their names indicate, they are meant to be (as close to) the default keyboard settings of the applications that they are named after.
The first thing you need to do is to duplicate a set of keyboard commands by clicking the Duplicate set button. Enter the name of your new keyboard command set and click OK. This will close the dialog completely. Reopen it, and your new command set will be selected. You may now change the keyboard commands as you wish.
As you attempt to create new commands, you will notice that the dialog will post warnings about limitations and preexisting assignments.
Browse to a command you wish to add or change a shortcut to by selecting the command's category from the Commands drop-down and then the command itself from the tree in the list box below (see Figure 2-29). Once selected the + button will be enabled (next to Shortcuts). Click the + button to add a shortcut. Press the key or key combination you wish to assign to that command. If you get a "not" symbol (red circle with slash through it), you cannot proceed. If you get a caution symbol, you may go ahead and click the Change button.
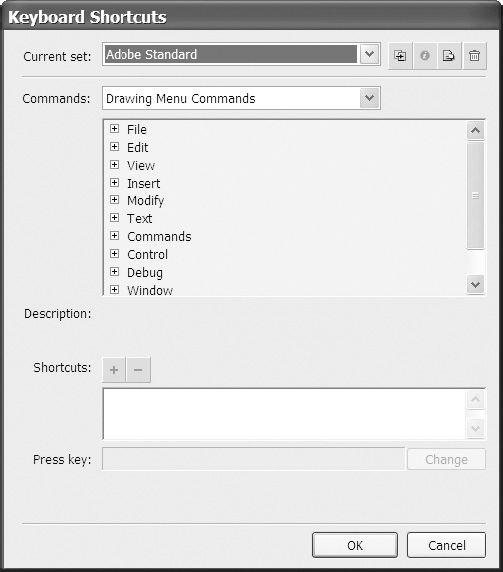
Figure 2-29. The Keyboard Shortcuts dialog
To rename a command set, click the Info button (circle with an "i" in it). Type in the new name for the command set and click OK. To delete a command set, click the Trash Can button. This will open a dialog with all of the command sets (except for Adobe Standard, which you cannot delete). You can select one or more command sets from the list and then click Delete to remove them.
The last option in this dialog allows you to export your keyboard commands as HTML, which is a nice feature if you'd like to print them out.
Summary
The goal of this chapter was to give you enough of an orientation with the Flash CS4 authoring environment so that as you progress through the book you will feel comfortable reaching for the tools you need and finding your way around. We covered a lot of ground, including how to create new documents with the Welcome Screen. We also explored how to use the Flash CS4 authoring environment:
- How to work with panels and windows
- The timeline
- The
Toolspanel - The
Property inspector - Customizing the Flash CS4 interface