
Now that your app can add, edit, and remove events, you need to protect those actions by requiring users to log in before they can make any changes. You'll need to create a new table in the database and a new class in the app to make this happen; you'll also need to make a few modifications to existing files.
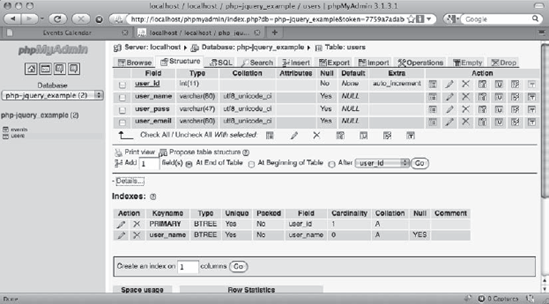
To store information about users authorized to modify events, you'll need to create a new database table. This table will be called users, and it will store four pieces of information about each user: an ID, name, password hash, and email address.
To create this table, navigate to http://localhost/phpmyadmin and select the SQL tab to execute the following command:
CREATE TABLE IF NOT EXISTS `php-jquery_example`.`users` (
  `user_id` INT(11) NOT NULL AUTO_INCREMENT,
  `user_name` VARCHAR(80) DEFAULT NULL,
  `user_pass` VARCHAR(47) DEFAULT NULL,
  `user_email` VARCHAR(80) DEFAULT NULL,
  PRIMARY KEY (`user_id`),
  UNIQUE (`user_name`)
) ENGINE=MyISAM CHARACTER SET utf8 COLLATE utf8_unicode_ci;
After this code executes, select the php-jquery_example database from the left-hand column and click the users table to view the new table (see Figure 6-1).
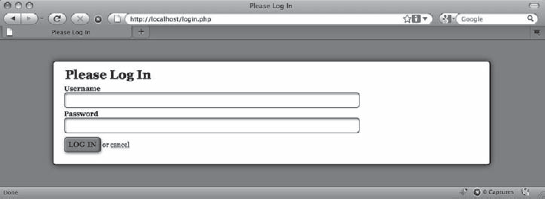
In order to log in, users will need access to a login form. This will be displayed on a page called login.php, which is stored in the public folder (/public/login.php). This file will be similar to admin.php, except it will simply output the form since none of its information is variable.
The form will accept a username and a password, and it will pass the session token and an action of user_login, as well. Insert the following code into login.php to create this form:
<?php/** Include necessary files*/include_once '../sys/core/init.inc.php';/** Output the header*/$page_title = "Please Log In";$css_files = array("style.css", "admin.css");include_once 'assets/common/header.inc.php';?>
<div id="content"><form action="assets/inc/process.inc.php" method="post"><fieldset><legend>Please Log In</legend><label for="uname">Username</label><input type="text" name="uname"id="uname" value="" /><label for="pword">Password</label><input type="password" name="pword"id="pword" value="" /><input type="hidden" name="token"value="<?php echo $_SESSION['token']; ?>" /><input type="hidden" name="action"value="user_login" /><input type="submit" name="login_submit"value="Log In" />or <a href="./">cancel</a></fieldset></form></div><!-- end #content --><?php/** Output the footer*/include_once 'assets/common/footer.inc.php';?>
Save this code and navigate to http://localhost/login.php in your browser to see the resulting login form (see Figure 6-2).
With your table in place, you can now start structuring the class that will interact with it. In the class folder, create a new file called class.admin.inc.php (/sys/class/class.admin.inc.php). This class will contain methods to allow users to log in and log out.
First, you define the class, which will extend DB_Connect in order to have database access. This class will have one private property, $_saltLength, which you'll learn about a little later in this section.
The constructor will call the parent constructor to ensure a database object exists, and then it will check whether an integer was passed as the constructor's second argument. If so, the integer is used as the value of $_saltLength.
Now insert the following code into class.admin.inc.php to define the class, the property, and the constructor:
<?php/*** Manages administrative actions** PHP version 5** LICENSE: This source file is subject to the MIT License, available* at http://www.opensource.org/licenses/mit-license.html** @author Jason Lengstorf <[email protected]>* @copyright 2010 Ennui Design* @license http://www.opensource.org/licenses/mit-license.html*/class Admin extends DB_Connect{/*** Determines the length of the salt to use in hashed passwords** @var int the length of the password salt to use*/private $_saltLength = 7;/*** Stores or creates a DB object and sets the salt length** @param object $db a database object* @param int $saltLength length for the password hash*/public function __construct($db=NULL, $saltLength=NULL){parent::__construct($db);
/** If an int was passed, set the length of the salt*/if ( is_int($saltLength) ){$this->_saltLength = $saltLength;}}}?>
The data from login.php needs to be validated in order to verify that a user is authorized to make changes to the events table. You can follow these steps to accomplish this:
Verify that the form was submitted using the proper action.
Sanitize the user input with
htmlentities().Retrieve user data that has a matching username from the database.
Store the user information in a variable,
$user, and make sure it isn't empty.Generate a salted hash from the user-supplied password and the password stored in the database.
Make sure the hashes match.
Store user data in the current session using an array and return
TRUE.
Note
Salted hashes will be covered in the next section, "Build a Method to Create Salted Hashes."
Start by defining the method in the Admin class and completing the preceding Steps 1 and 2 using the following bold code:
<?php

class Admin extends DB_Connect
{

    private $_saltLength = 7;

    public function __construct($db=NULL, $saltLength=NULL) {...}

    /**
* Checks login credentials for a valid user** @return mixed TRUE on success, message on error*/public function processLoginForm(){/** Fails if the proper action was not submitted*/if ( $_POST['action']!='user_login' ){return "Invalid action supplied for processLoginForm.";}/** Escapes the user input for security*/$uname = htmlentities($_POST['uname'], ENT_QUOTES);$pword = htmlentities($_POST['pword'], ENT_QUOTES);// finish processing...}} ?>
Next, complete Steps 3 and 4 by adding the following code shown in bold:
public function processLoginForm()
{
    /*
     * Fails if the proper action was not submitted
     */
    if ( $_POST['action']!='user_login' )
    {
        return "Invalid action supplied for processLoginForm.";
    }

    /*
     * Escapes the user input for security
     */
     $uname = htmlentities($_POST['uname'], ENT_QUOTES);
     $pword = htmlentities($_POST['pword'], ENT_QUOTES);

     /*
      * Retrieves the matching info from the DB if it exists
      */
     $sql = "SELECT
                 `user_id`, `user_name`, `user_email`, `user_pass`
FROM `users`WHERE`user_name` = :unameLIMIT 1";try{$stmt = $this->db->prepare($sql);$stmt->bindParam(':uname', $uname, PDO::PARAM_STR);$stmt->execute();$user = array_shift($stmt->fetchAll());$stmt->closeCursor();}catch ( Exception $e ){die ( $e->getMessage() );}/** Fails if username doesn't match a DB entry*/if ( !isset($user) ){return "Your username or password is invalid.";}// finish processing... }
Now the user's data is stored in the variable $user (or the method failed because no match was found for the supplied username in the users table).
Finishing Steps 5–7 completes the method; do this by adding the following bold code:
public function processLoginForm()
{
    /*
     * Fails if the proper action was not submitted
     */
    if ( $_POST['action']!='user_login' )
    {
        return "Invalid action supplied for processLoginForm.";
    }

    /*
     * Escapes the user input for security
     */
    $uname = htmlentities($_POST['uname'], ENT_QUOTES);
    $pword = htmlentities($_POST['pword'], ENT_QUOTES);

    /*
     * Retrieves the matching info from the DB if it exists
     */
    $sql = "SELECT
`user_id`, `user_name`, `user_email`, `user_pass`
FROM `users`
WHERE
`user_name` = :uname
LIMIT 1";
try
{
$stmt = $this->db->prepare($sql);
$stmt->bindParam(':uname', $uname, PDO::PARAM_STR);
$stmt->execute();
$user = array_shift($stmt->fetchAll());
$stmt->closeCursor();
}
catch ( Exception $e )
{
die ( $e->getMessage() );
}
/*
* Fails if username doesn't match a DB entry
*/
if ( !isset($user) )
{
return "No user found with that ID.";
}
/*
* Get the hash of the user-supplied password
*/
$hash = $this->_getSaltedHash($pword, $user['user_pass']);
/*
* Checks if the hashed password matches the stored hash
*/
if ( $user['user_pass']==$hash )
{
/*
* Stores user info in the session as an array
*/
$_SESSION['user'] = array(
'id' => $user['user_id'],
'name' => $user['user_name'],
'email' => $user['user_email']
);
return TRUE;
}
/*
* Fails if the passwords don't match
*/else{return "Your username or password is invalid.";}}
This method will now validate a login form submission. However, it doesn't work just quite yet; first, you need to build the _getSaltedHash() method.
In order to validate a user's password hash stored in the database, you need a function to generate a salted hash from the user's supplied password (a hash is an encrypted string generated by a security algorithm such as MD5 or SHA1).
Note
For more information on password hashing and security algorithms, visit http://en.wikipedia.org/wiki/Cryptographic_hash_function.
Creating this function is relatively straightforward, requiring only a few steps:
Check whether a salt was supplied; if not, generate a new salt by hashing the current UNIX timestamp, and then take a substring of the returned value at the length specified in
$_saltLengthand store it as$salt.Otherwise, take a substring of the supplied salted hash from the database at the length specified in
$_saltLengthand store it as$salt.Prepend the salt to the hash of the salt and the password, and return the new string.
Complete all three steps by inserting the following method into the Admin class:
<?php

class Admin extends DB_Connect
{

    private $_saltLength = 7;

    public function __construct($db=NULL, $saltLength=NULL) {...}

    public function processLoginForm() {...}

    /**
     * Generates a salted hash of a supplied string
     *
     * @param string $string to be hashed
     * @param string $salt extract the hash from here
     * @return string the salted hash
     */
    private function _getSaltedHash($string, $salt=NULL)
    {
        /*
         * Generate a salt if no salt is passed
         */
        if ( $salt==NULL )
        {
            $salt = substr(md5(time()), 0, $this->_saltLength);
        }

        /*
         * Extract the salt from the string if one is passed
         */
        else
        {
            $salt = substr($salt, 0, $this->_saltLength);
        }

        /*
* Add the salt to the hash and return it*/return $salt . sha1($salt . $string);}} ?>
To see how salted hashes work, create a quick test method for _getSaltedHash() called testSaltedHash(). This will be a public function that calls and outputs the values, enabling you to see how the script functions.
In the Admin class, define the testSaltedHash() method:
<?php

class Admin extends DB_Connect
{

    private $_saltLength = 7;

    public function __construct($db=NULL, $saltLength=NULL) {...}

    public function processLoginForm() {...}

    private function _getSaltedHash($string, $salt=NULL) {...}

    public function testSaltedHash($string, $salt=NULL)
    {
        return $this->_getSaltedHash($string, $salt);
    }

}

?>
Next, add a new file called test.php to use this function and place it in the public folder (/public/test.php). Inside this function, call the initialization file, create a new Admin class, and output three hashes of this word: test. Create the first hash with no salt, and then sleep for one second to get a new timestamp. Create the second hash with no salt, and then sleep for another second. Finally, create the third hash using the salt from the second hash. Insert the following code to accomplish this test:
<?php// Include necessary filesinclude_once '../sys/core/init.inc.php';// Load the admin object
$obj = new Admin($dbo);// Load a hash of the word test and output it$hash1 = $obj->testSaltedHash("test");echo "Hash 1 without a salt:<br />", $hash1, "<br /><br />";// Pause execution for a second to get a different timestampsleep(1);// Load a second hash of the word test$hash2 = $obj->testSaltedHash("test");echo "Hash 2 without a salt:<br />", $hash2, "<br /><br />";// Pause execution for a second to get a different timestampsleep(1);// Rehash the word test with the existing salt$hash3 = $obj->testSaltedHash("test", $hash2);echo "Hash 3 with the salt from hash 2:<br />", $hash3;?>
Note
The sleep() function delays execution of a script by a given number of seconds, passed as its sole argument. You can learn more about this function at http://php.net/sleep.
Your results will not be identical because the timestamp hashes used for the salt will differ; however, your results should look something like this:
Hash 1 without a salt: 518fd85bb85815af85e88b7c43d892238af9a5ca5775807 Hash 2 without a salt: 93b14e3f42ca09cafc1330b592669a5d02e9815bc2f69de Hash 3 with the salt from hash 2: 93b14e3f42ca09cafc1330b592669a5d02e9815bc2f69de
As you can see, hashes of the word test don't match up when passed separately; however, if you supply an existing salted hash of test, the same hash is produced. This way, even if two users have the same password, their stored hashes will be different, making it much more difficult for potential attackers to crack passwords.
Note
Bear in mind that no algorithm is 100% effective. However, using techniques like salted hashes makes it possible to reduce the possibility of an attack significantly.
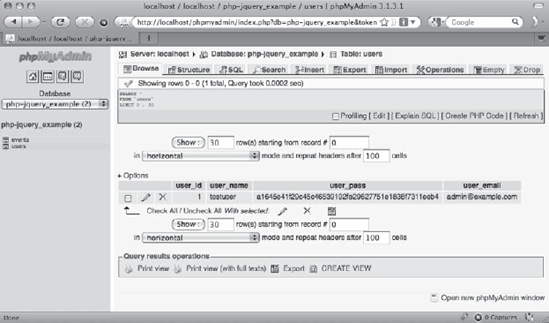
In order to test the administrative functions, you'll need a username/password pair to exist in your users table. For simplicity, the username will be testuser, the password will be admin, and the email address will be [email protected]. Keep in mind that this is not a secure password; it is being used for illustration purposes only, and it should be changed before you use it with any production scripts.
Begin by generating a hash of the password, admin, which is easy using the test method testSaltedHash() and test.php. Add the following bold code to test.php to generate a salted hash of your test user's password:
<?php

// Include necessary files
include_once '../sys/core/init.inc.php';

// Load the admin object
$obj = new Admin($dbo);// Generate a salted hash of "admin"$pass = $obj->testSaltedHash("admin");echo 'Hash of "admin":<br />', $pass, "<br /><br />";?>
Navigate to http://localhost/test.php, and you'll see output similar to the following:
Hash of "admin":

a1645e41f29c45c46539192fe29627751e1838f7311eeb4
Copy the hash, navigate to http://localhost/phpmyadmin, and then click the SQL tab. Execute the following query to insert a test user into the table:
INSERT INTO `php-jquery_example`.`users`
  (`user_name`, `user_pass`, `user_email`)
VALUES
(
    'testuser',
    'a1645e41f29c45c46539192fe29627751e1838f7311eeb4',
    '[email protected]'
  );
After executing the preceding code, click the php-jquery_example database, and then the users table. Select the Browse tab to view the user info in the table (see Figure 6-3).
Now that a user exists in the user database with a salted hash stored, you can delete both the testSaltedHash() method from the Admin class and the entire test.php file.
At this point, you're almost ready to test a user login. Before it will work, however, you need to modify process.inc.php to handle form submissions from the login form.
Due to the way the file is set up, this change is as simple as adding a new element to the $actions array. Open process.inc.php and insert the following bold code:
<?php

/*
* Enable sessions
 */
session_start();

/*
 * Include necessary files
 */
include_once '../../../sys/config/db-cred.inc.php';

/*
 * Define constants for config info
 */
foreach ( $C as $name => $val )
{
    define($name, $val);
}

/*
 * Create a lookup array for form actions
 */
$actions = array(
        'event_edit' => array(
                'object' => 'Calendar',
                'method' => 'processForm',
                'header' => 'Location: ../../'
            ),
        'user_login' => array(
                'object' => 'Admin',
                'method' => 'processLoginForm',
                'header' => 'Location: ../../'
            )
    );

/*
 * Make sure the anti-CSRF token was passed and that the
 * requested action exists in the lookup array
 */
if ( $_POST['token']==$_SESSION['token']
        && isset($actions[$_POST['action']]) )
{
    $use_array = $actions[$_POST['action']];
    $obj = new $use_array['object']($dbo);
    if ( TRUE === $msg=$obj->$use_array['method']() )
    {
        header($use_array['header']);
        exit;
    }
    else
    {
        // If an error occured, output it and end execution
        die ( $msg );
}
}
else
{
// Redirect to the main index if the token/action is invalid
header("Location: ../../");
exit;
}
function __autoload($class_name)
{
$filename = '../../../sys/class/class.'
. strtolower($class_name) . '.inc.php';
if ( file_exists($filename) )
{
include_once $filename;
}
}
?>Now you can officially test a login. Because no checks for a login are in place yet, simply add a conditional comment in index.php to show login or logout status by inserting the following bold line into the file:
<?php
/*
* Include necessary files
*/
include_once '../sys/core/init.inc.php';
/*
* Load the calendar
*/
$cal = new Calendar($dbo, "2010-01-01 12:00:00");
/*
* Set up the page title and CSS files
*/
$page_title = "Events Calendar";
$css_files = array('style.css', 'admin.css'),
/*
* Include the header
*/
include_once 'assets/common/header.inc.php';
?>
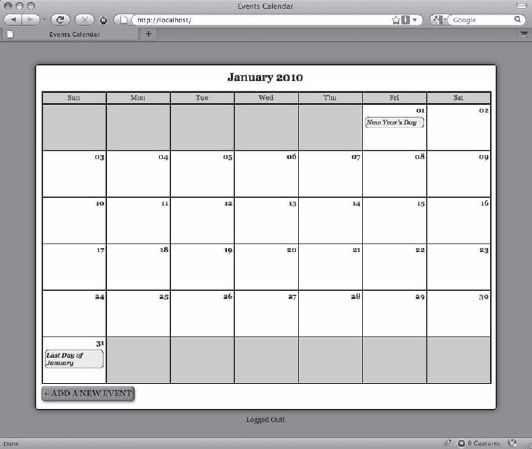
<div id="content"><?php /* * Display the calendar HTML */ echo $cal->buildCalendar(); ?> </div><!-- end #content --><p><?phpecho isset($_SESSION['user']) ? "Logged In!" : "Logged Out!";?></p><?php /* * Include the footer */ include_once 'assets/common/footer.inc.php'; ?>
Now save this file and navigate to http://localhost/ to see the "Logged Out!" message below the calendar (see Figure 6-4).
Next, navigate to http://localhost/login.php and enter the username testuser with the password, admin (see Figure 6-5).

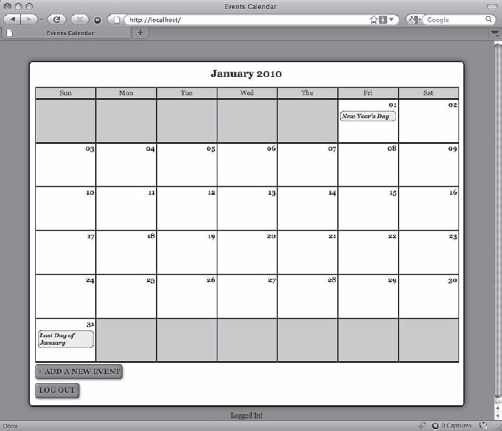
After clicking the Log In button, you'll be redirected back to the calendar; however, now the message below the calendar will read "Logged In!" (see Figure 6-6).
Next, you need to add a method that allows the user to log out. You will do this using a form that submits information to process.inc.php. The method _adminGeneralOptions() in the Calendar class generates the form.
To add a button that allows users to log out, modify _adminGeneralOptions() in the Calendar class. In addition to providing a button for adding new events, this method will now also output a form that submits the site token and an action value of user_logout to process.inc.php. Open the Calendar class and modify _adminGeneralOptions() with the following bold code:
private function _adminGeneralOptions()
{
/*
* Display admin controls*/
return <<<ADMIN_OPTIONS
<a href="admin.php" class="admin">+ Add a New Event</a>
<form action="assets/inc/process.inc.php" method="post">
<div>
<input type="submit" value="Log Out" class="admin" />
<input type="hidden" name="token"
value="$_SESSION[token]" />
<input type="hidden" name="action"
value="user_logout" />
</div>
</form>
ADMIN_OPTIONS;
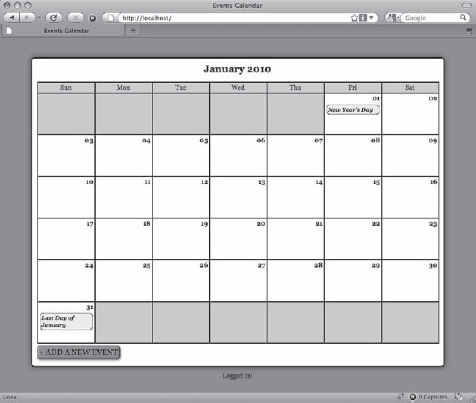
}Now save the changes and refresh http://localhost/ in your browser to see the new button (see Figure 6-7).
To process the logout, a new public method called processLogout() needs to be added to the Admin class. This method does a quick check to make sure the proper action, user_logout, was supplied, and then uses session_destroy() to remove the user data array by destroying the current session entirely.
You add this method to the Admin class by inserting the following bold code:
<?php
class Admin extends DB_Connect
{
private $_saltLength = 7;
public function __construct($db=NULL, $saltLength=NULL) {...}
public function processLoginForm() {...}
/**
* Logs out the user
*
* @return mixed TRUE on success or messsage on failure
*/
public function processLogout()
{
/*
* Fails if the proper action was not submitted
*/
if ( $_POST['action']!='user_logout' )
{
return "Invalid action supplied for processLogout.";
}
/*
* Removes the user array from the current session
*/
session_destroy();
return TRUE;
}
private function _getSaltedHash($string, $salt=NULL) {...}
}
?>The last step you need to take before users can successfully log out is to add another array element to the $actions array in process.inc.php. Insert the following bold code into process.inc.php to complete the logout process:
<?php
/*
* Enable sessions
*/
session_start();
/*
* Include necessary files
*/
include_once '../../../sys/config/db-cred.inc.php';
/*
* Define constants for config info
*/
foreach ( $C as $name => $val )
{
define($name, $val);
}
/*
* Create a lookup array for form actions
*/
$actions = array(
'event_edit' => array(
'object' => 'Calendar',
'method' => 'processForm',
'header' => 'Location: ../../'
),
'user_login' => array(
'object' => 'Admin',
'method' => 'processLoginForm',
'header' => 'Location: ../../'
),
'user_logout' => array(
'object' => 'Admin',
'method' => 'processLogout',
'header' => 'Location: ../../'
)
);
/*
* Make sure the anti-CSRF token was passed and that the
* requested action exists in the lookup array
*/if ( $_POST['token']==$_SESSION['token']
&& isset($actions[$_POST['action']]) )
{
$use_array = $actions[$_POST['action']];
$obj = new $use_array['object']($dbo);
if ( TRUE === $msg=$obj->$use_array['method']() )
{
header($use_array['header']);
exit;
}
else
{
// If an error occured, output it and end execution
die ( $msg );
}
}
else
{
    // Redirect to the main index if the token/action is invalid
    header("Location: ../../");
    exit;
}

function __autoload($class_name)
{
    $filename = '../../../sys/class/class.'
        . strtolower($class_name) . '.inc.php';
    if ( file_exists($filename) )
    {
        include_once $filename;
    }
}
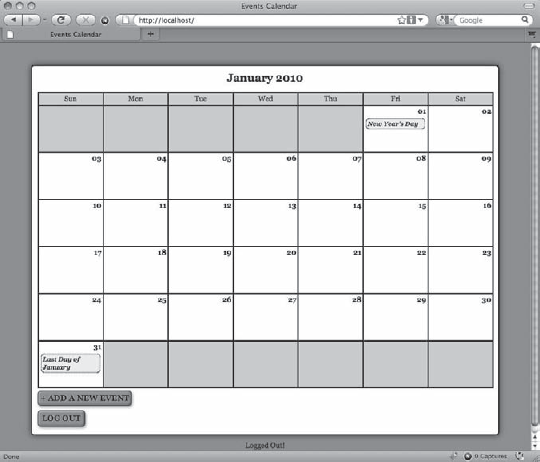
?>Save this file, then navigate to http://localhost/, and click the Log Out button at the bottom of the calendar. Clicking this button causes the message below the calendar to now read, "Logged Out!" (see Figure 6-8).
Note
Now that you know the login is working, remove the Logged In!/Logged Out! message logic and the paragraph tags that enclose it from index.php.
Your users can log in and log out; the last steps you need to take are to make sure that all actions and options that require administrative access are only shown to users who are logged in.
The buttons for adding and editing events should not be displayed unless a user is logged in. To perform this check, you need to modify both the _adminGeneralOptions() and _adminEntryOptions() methods in the Calendar class.
Now let's take a look at the calendar's general options. If the user is logged in, you want to show her the options to create a new entry and to log out.
However, if the user is logged out, she should see a link to log in. Perform this check by making the modifications shown in bold to the _adminGeneralOptions() method in the Calendar class:
<?php

class Calendar extends DB_Connect
{

    private $_useDate;

    private $_m;

    private $_y;

    private $_daysInMonth;

    private $_startDay;

    public function __construct($dbo=NULL, $useDate=NULL) {...}

    public function buildCalendar() {...}

    public function displayForm() {...}

    public function processForm() {...}

    public function confirmDelete($id) {...}

    private function _loadEventData($id=NULL) {...}

    private function _createEventObj() {...}

    private function _loadEventById($id) {...}

    private function _adminGeneralOptions()
    {
        /*
         * If the user is logged in, display admin controls
         */
        if ( isset($_SESSION['user']) )
        {
            return <<<ADMIN_OPTIONS

    <a href="admin.php" class="admin">+ Add a New Event</a>
    <form action="assets/inc/process.inc.php" method="post">
        <div>
            <input type="submit" value="Log Out" class="admin" />
<input type="hidden" name="token"
value="$_SESSION[token]" />
<input type="hidden" name="action"
value="user_logout" />
</div>
</form>
ADMIN_OPTIONS;
}
else
{
return <<<ADMIN_OPTIONS
<a href="login.php">Log In</a>
ADMIN_OPTIONS;
}
}
private function _adminEntryOptions($id) {...}
}
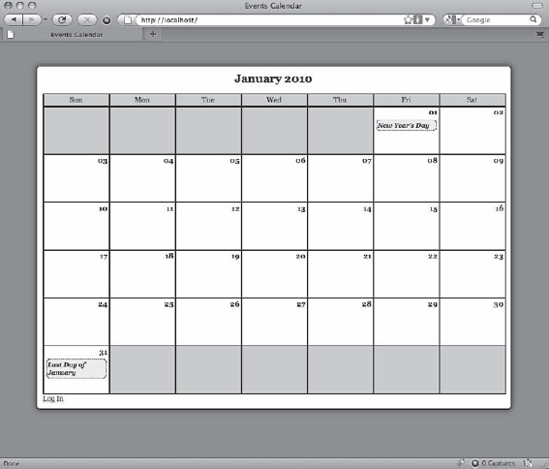
?>After saving the changes, reload http://localhost/ while logged out to see the administrative options replaced with a simple Log In link (see Figure 6-9).
Next, you want add code to prevent the editing and deletion of events by unauthorized users; you do this by modifying _adminEventOptions() in the Calendar class with the following bold code:
<?php

class Calendar extends DB_Connect
{

    private $_useDate;

    private $_m;

    private $_y;
private $_daysInMonth;
private $_startDay;
public function __construct($dbo=NULL, $useDate=NULL) {...}
public function buildCalendar() {...}
public function displayForm() {...}
public function processForm() {...}
public function confirmDelete($id) {...}
private function _loadEventData($id=NULL) {...}
private function _createEventObj() {...}
private function _loadEventById($id) {...}
private function _adminGeneralOptions() {...}
private function _adminEntryOptions($id)
{
if ( isset($_SESSION['user']) )
{
return <<<ADMIN_OPTIONS
<div class="admin-options">
<form action="admin.php" method="post">
<p>
<input type="submit" name="edit_event"
value="Edit This Event" />
<input type="hidden" name="event_id"
value="$id" />
</p>
</form>
<form action="confirmdelete.php" method="post">
<p>
<input type="submit" name="delete_event"
value="Delete This Event" />
<input type="hidden" name="event_id"
value="$id" />
</p>
</form>
</div><!-- end .admin-options -->
ADMIN_OPTIONS;
}
else
{
return NULL;}
}
}
?>After inserting these changes, navigate to http://localhost/ while logged out and click an event to bring up its full view; the administrative options will not be displayed (see Figure 6-10).
As an additional security precaution, you should ensure that any pages that only authorized users should have access to, such as the event creation/editing form, check for proper authorization before executing.
You can prevent a mischievous user from finding the event creation form while logged out by performing a simple check that you add to the file. If the user is not logged in, he'll be sent to the main calendar view before the script has the chance to execute.
To implement this change, open admin.php and insert the code shown in bold:
<?php /* * Include necessary files */ include_once '../sys/core/init.inc.php';/** If the user is not logged in, send them to the main file*/
if ( !isset($_SESSION['user']) ){header("Location: ./");exit;}/* * Output the header */ $page_title = "Add/Edit Event"; $css_files = array("style.css", "admin.css"); include_once 'assets/common/header.inc.php'; /* * Load the calendar */ $cal = new Calendar($dbo); ?> <div id="content"> <?php echo $cal->displayForm(); ?> </div><!-- end #content --> <?php /* * Output the footer */ include_once 'assets/common/footer.inc.php'; ?>
After saving this file, attempt to navigate to http://localhost/admin.php while logged out. You'll automatically be sent to http://localhost/.
Also, to keep unauthorized users from deleting events, insert a check for a valid user session in the confirmdelete.php file:
<?php/** Enable sessions*/session_start();/*
* Make sure an event ID was passed and the user is logged in*/if ( isset($_POST['event_id']) && isset($_SESSION['user']) ){ /* * Collect the event ID from the URL string */ $id = (int) $_POST['event_id']; } else {/** Send the user to the main page if no ID is supplied* or the user is not logged in*/header("Location: ./"); exit; } /* * Include necessary files */ include_once '../sys/core/init.inc.php'; /* * Load the calendar */ $cal = new Calendar($dbo); $markup = $cal->confirmDelete($id); /* * Output the header */ $page_title = "View Event"; $css_files = array("style.css", "admin.css"); include_once 'assets/common/header.inc.php'; ?> <div id="content"> <?php echo $markup; ?> </div><!-- end #content --> <?php /* * Output the footer */
include_once 'assets/common/footer.inc.php';

?>
Now save this code and try to directly access http://localhost/confirmdelete.php while logged out. As expected, you'll be redirected to http://localhost/ instead.
In this chapter, you learned how to add user authorization to your calendar app, which means only authorized users can now make modifications to the calendar. You learned how to create the Admin class, check login credentials, display admin tools to admins only, and limit access to admin pages. In the next chapter, you'll start integrating jQuery into the application to progressively enhance the user experience.