
You've designed, written, and tested your application. Now it's time to bring it to market.
As we promised in the first chapter, it isn't hard. In this chapter, you learn precisely what you need to do. We begin by providing a deployment checklist before describing some final packaging steps that may be necessary for certain MeeGo and Symbian applications, and then discuss the important concept of application signing required by Symbian applications. Finally, we close the chapter by describing the publishing process through the Ovi Store.
While every application is different, there are some things common to deploying nearly all applications. Larger companies, especially those with clear development and release criteria, often provide some sort of deployment checklist or signoff—often called a release gate—that defines the criteria an application must meet before it reaches the customer. (Larger companies with mature development cycles may have a sequence of gates through which an application passes as it goes from inception through customer delivery.) Especially if you're just starting out, you should have a deployment checklist of things not to forget when you deliver your application. Your list should address things such as:
Resources. Has your application been built with all production resources, or is it still using temporary artwork in places? Do you own the rights to distribute the resources (text, images, sounds, and music) with your application?
Services. Does your application rely on back-end servers or services? Are they prepared to handle the load your application is expected to generate? What if they're not available when your application launches?
Testing. How much testing is enough? On what platforms have you tested your application? Has your application been tested thoroughly? What defects remain? What hasn't been tested?
Marketing. Is your marketing message ready? Where besides Ovi (your web site, other web sites, comarketing opportunities, and so forth) will you be marketing your application?
Deployment. Do you have the necessary screenshots, icons, copy, and search terms for your submission to publish on Ovi Store? If your application needs to be signed (see "Signing Your Qt Application for Symbian Devices" in this chapter) have you done the necessary homework to obtain a digital certificate and left enough time in your schedule for the Symbian Signed process?
It's easy—especially when you're flying solo and doing it all yourself—to forget something you'll need later. Some, such as the search terms you'll provide to Ovi Store, are things to come up with on the spot. Others, like adequate testing, require planning and preparation; your deployment checklist can help you make sure you haven't forgotten anything.
Although it's not immediately obvious when you're in the tight loop of coding, compiling, and testing on a device, the Nokia Qt SDK produces output to the device in a manner already roughly packaged for production. Symbian handsets require their applications to be packaged in a platform-specific format known as the Software Installation Script (SIS) file, a binary archive file that contains your application, application icon, and other files your application needs. As you learn in the section "Signing Your Application," later in the chapter, you need to cryptographically sign your application, yielding what's commonly called a sisx file because its extension is .sisx. MeeGo, on the other hand, uses the standard Debian software package format—called deb files—and does not support cryptographic signing.
Before we discuss signing—the last thing you can do to your file before publishing it—let's talk about a few last-minute details, such as including other files within your application and providing an application icon. We also touch on a minor platform-specific difference between Symbian and MeeGo, showing you how to get and use a unique id (UID) for your application on Symbian.
In Chapter 5, we showed you how to use Qt's support for data resources to include arbitrary text and binary resources in your application. Sometimes, there's a good reason to include this data as separate files—you're writing an image editing application, say, and you want to include some sample images. You could carry these as application resources and copy them to the appropriate place on the device, but then your application consumes twice as much space as it needs for data only necessary at installation time—a high premium for mobile devices. Instead, what you'd really like to do is include these sample files as files in the application's installer. You can do this by specifying the files to include in the installer in your application's PRO file.
Qt's PRO files, which you first encountered in Chapter 3, use variables that can contain lists of strings as the primary mechanism for its declarative power. For example, you include source files for compilation by adding them to the SOURCES variable. You can define your own variables, too.
When building your application, qmake also uses the contents of your application's PRO file to create the input scripts that the build system uses to generate your application's sisx and deb files. As it does so, it examines the DEPLOYMENT variable and copies the files you specify to the paths you specify. You do so by creating a variable that contains the list of files to install and the destination location, like this:
files.sources = photo1.jpg photo2.jpg photo3.jpg
files.path = /images
DEPLOYMENT += files
Note that we write += to add our variable's contents to the DEPLOYMENT variable so we append, rather than replace, any other files to be deployed.
The principle for including additional files with MeeGo applications is similar, but instead of using the DEPLOYMENT variable, you use the INSTALLS variable, like this:
files.sources = photo1.jpg photo2.jpg photo3.jpg
files.path = /usr/local/share/photoeditor/samples
INSTALLS += files
Of course, this is best done in the context of PRO scopes, so you can support both platforms, like this:
files.sources += photo1.jpg photo2.jpg photo3.jpg
symbian {
    files.path = /images
    DEPLOYMENT += files
}
unix {
    files.path = /usr/local/share/photoeditor/samples
    INSTALLS += files
}
Here, the photo list remains the same for both platforms, but on Symbian, the installer is directed to copy the images to the root-level directory for images shared by all applications, while on MeeGo, the installer copies them to a separate directory. In addition, the appropriate PRO file uses the appropriate qmake variable in each case.
For some time, Symbian has supported scalable vector graphics within both native applications and as resources for application icons; this makes it easier for applications to look polished across the variety of phone form factors and display technologies Symbian supports.
To include your application icon on Symbian, all you need to do is assign the path to the icon to the ICON variable in your PRO file, like this:
symbian {
    ICON = ./icon/icon.svg
}
Internally, qmake uses tools in the Symbian build chain to add the icon file to the registration file needed by Symbian's application framework, and ensures that it's part of the application installer script.
Including your application icon on MeeGo is a little trickier, as you provide several separate images of different sizes, so that the application manager can choose the appropriate image based on its needs. Each image is a separate Portable Network Graphic (PNG) or X Pixmap (XPM) image that your installer copies to a predetermined location. You name each image after the application name, but place the images in separate directories using the INSTALL variable as you see in Listing 9-1.
Example 9.1. Including application icons on MeeGo with your PRO file.
unix {
    isEmpty(PREFIX) {
        PREFIX = /usr/local
    }
    BINDIR = $$PREFIX/bin
    DATADIR =$$PREFIX/share

    INSTALLS += iconxpm icon26 icon48 icon64

    iconxpm.path = $$DATADIR/pixmap
    iconxpm.files += ./icon/maemo/$${TARGET}.xpm
    icon26.path = $$DATADIR/icons/hicolor/26x26/apps
    icon26.files += ./icon/26x26/$${TARGET}.png
    icon48.path = $$DATADIR/icons/hicolor/48x48/apps
    icon48.files += ./icon/48x48/$${TARGET}.png
    icon64.path = $$DATADIR/icons/hicolor/64x64/apps
    icon64.files += ./icon/64x64/$${TARGET}.png
}
This example starts with a bit of magic, defining variables for the local installation directories for applications and their data (defaulting to /usr/local). Next, it adds the information for four icons to the INSTALLS list:
The iconxpm image is a 16×16 image in XPM format.
The icon26 image is a 26×26 image in PNG format.
The icon48 image is a 48×48 image in PNG format.
The icon64 image is a 64×64 image in PNG format.
The Symbian platform requires all applications to have a unique id (UID)—a thirty-two bit integer—that identifies the applications. In native Symbian programming, UIDs are used in a number of places; in fact, your application actually has three UIDs, but the first two are the same across all Symbian applications, identifying your application as an executable binary.
During development, the UID usually doesn't matter, as long as it's unique. To facilitate application development, the Nokia Qt SDK randomly generates a UID from a subset of thirty-two bit values, letting you do your development without needing to stop and get a UID. However, before you can release your application, you need to obtain a unique ID. As we write this, there are two ways to do this.
First, if you plan on signing your own application with Symbian Signed (see the section "Signing Your Application") before submitting your application to the Ovi Store, you need to obtain your UID directly from Symbian Signed at http://symbiansigned.com. Before you begin, you must determine if you need to sign your application; see the section "Signing Your Application" to help you make that decision.
Log in to your Symbian Signed account.
Choose "UIDs" from the box on the left.
Choose "Request" from the box on the left.
Follow the instructions and obtain UIDs from the protected range if you intend to sign your application, or the unprotected range if not.
Alternately, if you plan to submit your application through Nokia's Signing Symbian Applications Program, the process is similar, but Nokia will provide you with the UID.
Regardless, once you have the UID—a number such as 0xE1234567—you need to include the UID as a field in your PRO file's TARGET variable, like this:
symbian {
    TARGET.UID3 = 0xE1234567
}The MeeGo application manager also requires a desktop file that includes information such as the path to your application. The format of this file matches a Windows initialization (INI) file, is named after your application with the suffix .desktop, and looks like this:
[Desktop Entry]
Encoding=UTF-8
Version=1.0
Type=Application
Name=Shake
Exec=/usr/local/bin/quake
Icon=quake
StartupWMClass=quake
X-Window-Icon=shake
X-HildonDesk-ShowInToolbar=true
X-Osso-Type=application/x-executable
Terminal=false
These fields are reasonably self-explanatory; the only catch is that you must ensure that the Exec field points to your application's binary—that is, the value of your TARGET variable in your PRO file. Like the icon files, you include this file in your INSTALLS variable, like this:
unix {
    INSTALLS += desktop

    desktop.path = $$DATADIR/applications/hildon
    desktop.files += $${TARGET}.desktop
}
The installer must place the desktop file in the /usr/local/share/applications/hildon directory in order for the application manager to see it and include your application in the application launcher screen.
Listing 9-2 shows the PRO file for the Shake application with scopes for both Symbian and MeeGo, including all we've discussed here.
Example 9.2. Including application icons, UIDs, and capabilities for a cross-platform application.
symbian {
    TARGET.CAPABILITY = NetworkServices ReadUserData Location
    CONFIG += mobility
    MOBILITY += bearer
    TARGET.UID3 = 0xE1234567 # example UID
    ICON = ./icon/icon.svg
}
unix {
isEmpty(PREFIX) {
PREFIX = /usr/local
}
BINDIR = $$PREFIX/bin
DATADIR =$$PREFIX/share
INSTALLS += iconxpm icon26 icon48 icon64 desktop
iconxpm.path = $$DATADIR/pixmap
iconxpm.files += ./icon/maemo/$${TARGET}.xpm
icon26.path = $$DATADIR/icons/hicolor/26x26/apps
icon26.files += ./icon/26x26/$${TARGET}.png
icon48.path = $$DATADIR/icons/hicolor/48x48/apps
icon48.files += ./icon/48x48/$${TARGET}.png
icon64.path = $$DATADIR/icons/hicolor/64x64/apps
icon64.files += ./icon/64x64/$${TARGET}.png
desktop.path = $$DATADIR/applications/hildon
desktop.files += $${TARGET}.desktop
}This example uses qmake's scopes to provide separate information to the Symbian and MeeGo install script generators, each with the code you've already seen for each platform.
Your signature on a credit card transaction provides a way for a vendor to verify that you're the one who signed for a purchase—or for you to repudiate a fraudulent charge made by someone without your authorization. Similarly, application signing lets you prove that you are in fact connected to the application that you published—or not.
From the standpoint of identity, application signing uses a trusted authority and cryptography to prove your relation to your application. First, you must obtain a digital certificate from a trusted third party—a certificate authority. In the case of Symbian Signed, it's a firm such as TC TrustCenter. To obtain a digital certificate, you typically must contact the firm, start a request, and provide some sort of official documentation that you (or your firm) are who you claim to be. The company then responds by providing you with a file that contains your digital certificate. You then use this digital certificate to sign your application, and then provide it to a testing house to perform some basic application validation. The testing then ensures that the application is Symbian Signed—signed by a third party trusted by the Symbian Foundation, Nokia, and carriers—before you give it to Nokia to publish in the Ovi Store.
Fortunately, for a large percentage of today's applications, you no longer need to do this. Symbian applications may be self-signed, meaning that you can sign them yourself using a unique certificate that you generate (think of this as similar to the case where you go to a café and buy a coffee with your credit or debit card and you don't have to sign the receipt.) Self-signed applications prompt the user before using facilities that require the user's trust, such as determining the handset's location. Self-signed applications can use the following capabilities:
Location, for determining the handset's position
NetworkServices, for using the device's network connectivity
UserEnvironment, for camera and audio recording and other sensors related to the device's immediate environment
ReadUserData and WriteUserData for access to confidential user information such as the user's contacts.
Given the features of Qt Mobility and the relationship between those features and these capabilities, you can see that for a large number of applications, self-signing will suffice as long as your users can tolerate being asked to confirm the use of trusted services while the application runs. If that isn't appropriate, you can have your application Express Symbian Signed, in which you perform specific tests and submit your application to Symbian Signed for a potential audit.
If your application needs additional capabilities—say, reading device settings and parameters such as cell tower IDs—you need to obtain a certificate and make sure your application is Certificate Symbian Signed. A third-party testing house ensures that your application meets both functional and security requirements (the intent is not full functional testing, but to determine whether your application behaves appropriately, given the capabilities you gave it) before being signed. In that case, you can begin your development using a device certificate for testing (see http://wiki.forum.nokia.com/index.php/Developer_certificate), and when you are ready to submit your application, you sign it using the certificate that the certificate authority has given you.
If you determine that you need capabilities that require you to get your application Symbian Signed, you need to follow these steps through the Symbian Signed web site at www.symbiansigned.com:
Use a developer certificate while testing your application.
While you are finishing application development, obtain a certificate from a trusted certificate authority. This can take a few days to a week, so don't wait until the last minute thinking you can get your application signed and publish later the same day. Be prepared to spend money upfront for this service.
Finish developing your application. Once you have a third-party sign your application, you cannot make any changes to the installer!
Test your application to ensure that you'll pass the tests required to earn a signing for your application. You can find the tests at the
Symbian.comwebsite (currently they're athttp://wiki.forum.nokia.com/index.php/How_to_conform_with_Symbian_Signed_criteria.)Choose whether you want to sign your application through the Express Signed program or Symbian Signed. If you choose Certified Symbian Signed, select a testing house and follow its procedures to submit your application and any required documentation. The testing house may charge you a fee for this service.
When testing is complete, you will receive notification through Symbian Signed, You can download your Symbian Signed application from the Symbian Signed portal.
Tip
Before you have your application Symbian Signed, check with Forum Nokia and look at the latest requirements for the Ovi Store. As we write this, Nokia is provides free signing for applications to be published to the Ovi Store.
For publishers like yourself, the URL you need to remember isn't the one for Forum Nokia, but http://publish.ovi.com. There, you can register to become a publisher, submit new content for distribution, use the Ovi App Wizard to make RSS-based Web applications, and learn about Ovi Store distribution.
Before you can publish your first application, you must register with the Ovi Store. Registration entails giving Nokia the following information:
Contact information for you or your organization, including its location, URL, tax ID, and a single point of contact available via phone or email.
A public name, description, and icon or avatar that constitutes your organization's public presence on Ovi.
Contact information for an administrator for your relationship with Ovi (you can create additional accounts for other members of your organization later).
Your agreement to the Ovi Store's terms and conditions.
The payment of a one-time registration fee (currently €50), payable through a Visa or MasterCard. (Of course, the payment is due once the registration has successfully completed.)
Once you successfully register as a publisher, you can log in to your Ovi Publish account using the information it provides to your e-mail address. Like most online presences, your account has a profile, where you can change your password or request a temporary password if you lose it. Equally important, from your profile you can provide your bank details, so that the Ovi Store can pay you for your share of sales revenue for your content. When providing this information, you'll need:
The payment type (for example, bank wire transfer).
Your bank's name and bank code.
Your bank account number.
An e-mail to which Nokia will send information about payments to your account.
Optionally (it's a good idea), your bank's street address and city.
To publish your application, you should first assemble the following resources for registering your content on the Ovi Store:
The application installer (sisx or deb) for your application.
The internal and externally viewable names for your application (these may be the same).
A short description of your application.
The Ovi Store category—which you can determine by browsing the Ovi Store—for your application.
The approximate price point.
How you prefer your customers to be billed—usually via operator billing and credit card. Typically you'll want to opt for both, because operator billing is not available in all regions, and different regions have different expectations about the use of credit cards.
A support e-mail address and web site where Nokia's customer care team can contact your organization for customer support.
An icon and up to three small screen shots of your application.
Search keywords for your application.
For each file you want to distribute, a list of devices and languages that it supports and countries where it should be distributed.
As you plan your business strategy, you should be aware that the Ovi Store doesn't let you set precise pricing per locality. Instead, you enter an approximate price point for your application, one of:
Free
€1
€2
€3
€5
€7
€10
€15
€20
€25
€30
€40
€50
€60
€80
€100
The Ovi Store maps these amounts to similar amounts in local currency, such as dollars in the United States, pounds in Great Britain, and so forth.
Your customers can remit payment for your application through operator billing (where the charge for your application shows directly on their mobile service bill) and credit card, or only by credit card if you want to omit operator billing. You may choose which applies, but be aware that, in some areas, only credit card billing is permitted due to relationships between Nokia and local operators. Of course, it's probably best to support both, so that it's as convenient as possible for prospective users to pay. In either case, you are not directly involved with the billing transaction; the Ovi Store handles this for you.
Plan to spend some careful time crafting an application description and coming up with good search keywords for your application. The Ovi Store supports searching by keyword, and it's likely that a good number of potential buyers will discover your application through targeted solutions for a specific problem (e.g., determining the weather or playing a role-playing game). The category where your application is placed, which you pick from a drop-down menu, is equally important so that it catches the eye of people who window-shop in the Ovi Store.
To enter this information and publish your application, you sign in to your Ovi account and click "New Item". When you do so, you see a form that prompts you for this information. Once you've provided it, you will be prompted with a list of Nokia devices by configuration, presented as a tree view, to indicate how well your application works on those configurations. For each, you can specify:
Fully Tested: You have executed all test cases with the application for this configuration successfully.
Briefly Tested: The application's main functionality has been briefly tested with this configuration.
Assumed to Work: You assume that platform compatibility will guarantee that this file works with this configuration.
Might Work: The file has not been tested, but might work with this configuration.
Not Compatible: The file should not work with the configuration. Do not even try.
Not Known: This should only show when a new configuration is added and compatibility is not yet defined.
As with configurations, you enter the countries and languages in which you want to market your applications using the same tree view; countries are divided into regions (e.g., "Asia-Pacific"), while languages have a single-category hierarchy of "All Languages" and then a list of languages to which you may have localized your application.
Once you enter the information and upload your file, the Ovi Store's QA team must test your application. During this time, you cannot change the application and metadata, and they will not be available on the Ovi Store. The testing is not comprehensive, but does look to ensure that the basic functionality your application promises exists and that your application meets Nokia's Terms and Conditions for the Ovi Store. Thus, it's important that you fully test your application (the key topic of the previous chapter). These tests include:
Your application must be Symbian Signed for it to be accepted for Symbian devices.
You must submit your application as Fully Tested for at least one configuration.
Only Nokia billing is accepted. You cannot externally bill customers or incrementally bill them within the application.
Your application must provide help and developer attribution somewhere.
The language within the application must be consistent and appropriate throughout.
The application must meet the Ovi Store's content guidelines.
While Nokia is testing your submission, you can see its testing status within your Ovi account for the application. When testing is complete you will receive a testing report letting you know that your application has passed or failed and, if it has failed, what you must correct before you resubmit your application.
While your application is being tested, you can make changes, but only if you unlock the installer file, which interrupts the testing process. You might wish to do this if you find a defect in your application, for example, or if you need to update the application's metadata. When you finish, lock your application again so that testing can resume.
Once your application passes QA, it's live on the Ovi Store! Every application in the Ovi store receives a unique URL, which you can use in your own promotional materials or deep-link in your web site.
Nokia staff at the Ovi Store may choose to promote your application through the handset, mobile web site, desktop web site, or some combination of these. To ensure that the staff can do this, you need to be sure you provide additional marketing assets, including:
Teaser text for the mobile web site (up to 23 characters).
Large and medium spotlight banners.
Small desktop images in 4:3, 3:4, and 9:16 aspect ratios,
High and low-resolution spotlight images of the application.
These are optional, but a good idea in case Nokia selects your application for promotion. See the Ovi Publisher Guide for the precise sizes and uses of these marketing assets.
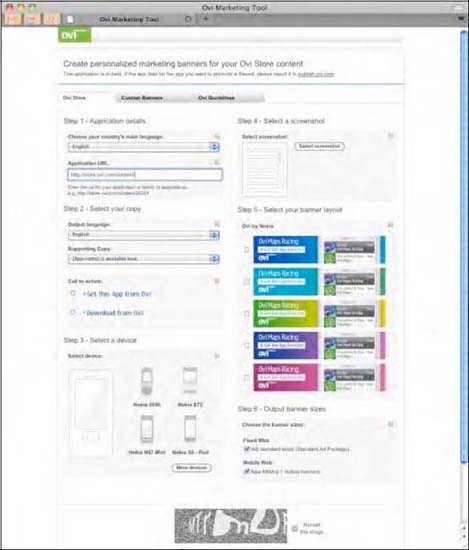
You can also market your application directly, of course; the Ovi Store provides a promotional banner creator that includes your application icon, name, category, and price, with a variety of banners, as you see in Figure 9-1. You can use the resulting banners in your own web marketing campaigns.
From time to time Nokia may provide other comarketing or promotional opportunities, too. Keep an eye on the Ovi Publish web site at http://publish.ovi.com for details.
Publishing with the Ovi Store is about as simple as it can be, given that it provides wide reach, operator and credit-card billing, and multiple-country distribution.
Both Symbian and MeeGo applications require some work beyond simply coding your application: you must provide icons for consumers to recognize your application, and Symbian applications require a unique ID and signing as well. Obtaining a unique ID and signing requires that you work with Symbian Signed at symbiansigned.com, although in many cases Nokia may be willing to manage the unique ID allocation and signing on your behalf.
Publishing your application requires you to register as a publisher with the Ovi Store, a process that means gathering some information about your organization, including banking details, and entering them on the Ovi Publisher web site at http://publish.ovi.com. Once you've done this, Nokia will contact you with your login credentials, and you can publish your application.
To publish, you should be prepared to provide good metadata about your application, including engaging screen shots, an icon, and search metadata. Publishing entails entering this information, as well as indicating which configurations your application supports and waiting while Nokia conducts a brief test cycle of your application to determine its fitness for the store. Once the application passes, you can comarket your application with Nokia, on your own using the application's unique URL in the Ovi Store, or by creating banners with additional information about your application that link back to the Ovi Store.