
C H A P T E R 11
Secure Feedback Methods
Emails and feedback forms are the most popular contact methods allowing users to communicate easily with web site owners. Unfortunately, both contact methods can be abused. Hackers can hijack a form and use it to send malware to the site owner. E-mail addresses are harvested and sold to spammers. Both actions cause distress and an influx of spam to the site owner; and they don’t enhance the reputation of the web designer. This chapter discusses some options to prevent these risks.
Enciphering Email Addresses to Prevent Spam
Escrambler is a free, anti-spam device. It was originally produced as a plain, clickable link, and was later enhanced by the addition of an image of the email address by InnerPeace.org. Their web page at http://innerpeace.org/escrambler.shtml will quickly generate the code for you. Or you can adapt the JavaScript snippet that follows.
Insert the following JavaScript snippet into the <body> section where you want the email address to appear. The JavaScript also places a picture of the email address on the page so that the user can click it or make note of it for future use. However, the email address image is no help if the user has disabled JavaScript; therefore the picture (with no link) should also be shown somewhere on the page in the usual way.
The JavaScript will disguise the email address so that spam spiders can’t read it. The JavaScript breaks down the traditional email address into little bits and then reassembles it. Spam spiders have great difficulty reading JavaScript and images; even if they could read JavaScript, the email address is so fragmented that they would not make sense of it. For your own email scrambler, just change the items in bold.
The following example hides the address [email protected]
<p>

<script type="text/javascript">

<!--

        function escramble(){

        var a,b,c,d,e,f,g,h,i

        a='<a href="mai'

        b='fredbloggs'

        c='">'

        a+='lto:'

        b+='@'

        b+='aol.com'

        e='</a>'

        f=''
        g='<img src="'

        h='images/bloggs-email.jpg'

        i='" alt="Email Me" border="0">'

        if(f) d=f

        else if(h) d=g+h+i

        else d=b

        document.write(a+b+c+d+e)

        }

        escramble()

        //-->

        </script></p>
![]() Caution The variable
Caution The variable f is followed by two single quotes, not a double quote. The line g='<img src="' ends in a double quote followed by a single quote.
The JavaScript code allows for the following two conditions:
- The full e-mail address appears on the screen in the form of an image that is clickable, but invisible to spam spiders.
- If no image is available, a link having the words Email Me appears on the web page.
Clicking either the image or the words “Email Me” causes the user’s default email program to open with the email address already filled in. Users may need to be told that the email may go into their Outbox and, therefore, needs to be sent by clicking the Send/Receive button.
Creating an Image of the email Address
Most paint programs can create a .png or .gif image containing the mail address. Make the background transparent so that the background color of the page shows through. However, creating text with a paint program may not give a satisfactory result. It can also be time-consuming and sometimes downright frustrating, especially if you need to match a page’s colored background. The following is a method that always gives a good result and can be less complicated than adding text with a paint program:
- In your WYSIWYG web page editor, make a copy of a web page containing the appropriate background color.
- In a clear space on that page, type the email address using the preferred font size and color.
- Make a screen capture of the page using the Alt+ Print Screen keys (or use the Snipping tool in Windows 7).
- Open your paint program and paste into it the screenshot.
- Crop the picture and save the result as a
.jpgor a .pngfile (see Figure 11-1).
Figure 11-1. Example image for a colored background using this method
A Minor Problem Solved
Your client may decide not to put her email address on the web site. Instead she may prefer to use a feedback form. However, there is nothing to prevent someone from ignoring the form and contacting her directly by guessing her e-mail address. This very rarely happens, and the sender is not a spammer, so tell your client to not be alarmed. I have personally received only a handful of these emails in a decade. This is a minor problem and can be ignored.
So how does he know your client’s email address? He knows because he found her web site. Why does he try to contact her? He wants to establish a reciprocal link from her web site to his web site. Her secure feedback form (described in the next section) prevents the sender from supplying his URL details. He must use a normal email so he makes an intelligent guess. He tries [email protected] or [email protected], and so on. If your client has a “catchall” email address, the person could also type something like [email protected] and it might reach your client. His email would then be able to include his genuine URL. He won’t include a dodgy URL because he could be traced through his email.
By establishing a reciprocal link, he is hoping to improve his search engine ranking by having as many external links as possible to his site. Your client should look at the person’s web site(s); she will usually find that his content is in no way related to her web site, so she should not agree to a reciprocal link. Also, she will most likely find that his link page has between 40 and 100 links on it. If she agrees to a reciprocal link, search engines will assume she is using a link farm and as a consequence they may penalize her web site.
If your client is receiving this type of email, the simplest solution is to use a different email address in the handler, such as her home broadband address, [email protected]. No one will be able to guess her home email address, but the downside is that her business replies won’t be distinguished from her personal emails.
Secure Feedback Forms
When designing feedback forms, we need to consider the following three points:
- Because layout tables are deprecated, CSS must be used to align the input fields neatly.
- Blind and severely visually-impaired users can use their screen readers to read and reply to forms. Accessibility rules must be observed; these are covered in Chapter 14.
- Filters must be built into the form handler to prevent the form being hijacked for nefarious purposes.
Bogus Replies
Concerning the third point, when I first began to design web sites, I added feedback forms to many of my clients’ web sites and all of them were plagued by people who used the form to send bogus replies to the site owners. The replies contained gobbledygook and dodgy URLs. The hijackers used robots to send bogus replies once or twice a week. The site owners were naturally disappointed and puzzled because they thought they had received an order. Fortunately, they did not click a link on these bogus replies, but they contacted me immediately for a solution.
What do bogus replies look like? A typical bogus reply is shown in the box that follows. For security, I have altered the URLs and the email address. The replies contain gobbledygook as well as live links that lead to dodgy web sites. A web site owner unfamiliar with the weird behavior of hackers might be tempted to click a link, which could lead to all sorts of mayhem.
Content-type: text/html;charset=“iso-8859-1”
From: [email protected]
X-Antivirus: AVG for E-mail 8.0.100 [270.4.1/1510]
From: Damon Rosario
superobligation hobbledehoyish foreread minaway wips taenioid chancellorism unsocket
3Sy6Rl <a href="http://qmuxlytwkukt.com/">qmuclytwkuxt</a>,
[url=http://iqdqouydsqzn.com/]iqdqouydsqzn[/url],
[link=http://lvcukrrfrlpj.com/]lvkuckrfrlsj[/link], http://uiaopyzucuiyba.com/
<a href= http://www.axtemplate.com/ >Axtemplate.com</a>
http://www.moley.co.jp/
The following is a genuine email received from the secure form:
This message was sent from:
http://www.theowners-website.co.uk/form.html
------------------------------------------------------------
Name of sender: Andrew Eastman
Email of sender: [email protected]
Telephone No: 01390 5233726
W98,ME,2000?: No
XP?: No
Vista?: No
Windows7?: Yes
Laptop?: Yes
Desktop?; No
------------------------- MESSAGE ------------------------------------
How can I persuade my computer to make a decent cup of coffee?
---------------------------------------------------------------------------
An Example of a Hack-Proof Feedback Form
Bogus feedback can be stopped by means of a PHP, ASP.NET, or other server-side handlers. In this chapter, I have chosen to use a PHP handler because the language is a little easier to understand and implement. The handler causes an error message to pop up if a URL is entered into any text field. This stops bogus replies completely in every case. Hackers do not hijack a form to send advertisements for Viagra; they are hoping the site owner will click the URL link and fire up the sender’s dodgy web site(s). The web sites could be pornographic or more likely, contain malware such as a Trojan that would take control of the site owner’s computer. Figure 11-2 shows the form used in this project.
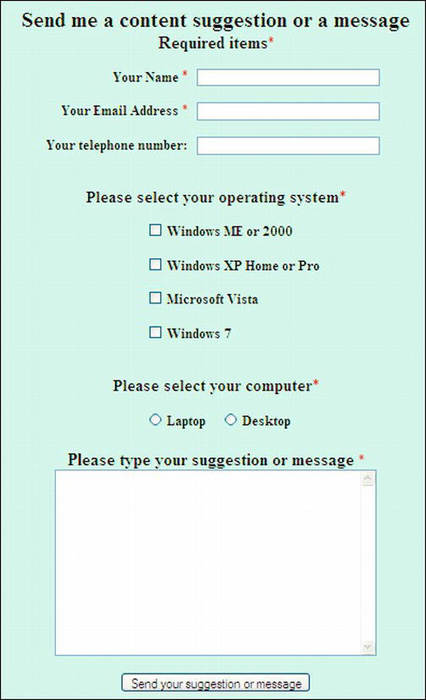
Figure 11-2. A form using CSS layout
You can download the example form, the handler, and the associated files from the companion web site at http://www.apress.com. Insert your own details in place of the items shown in bold text in Listings 11-2a, 11-2b, and 11-2c.
![]() Note HTML5 has new tags and attributes for forms. These will be mentioned later in this chapter. Meanwhile, this example uses HTML4 tags because the HTML5 recommendations for forms are still being developed. Also, browser support is currently patchy, and unfortunately, the new controls do not prevent the entry of URLs.
Note HTML5 has new tags and attributes for forms. These will be mentioned later in this chapter. Meanwhile, this example uses HTML4 tags because the HTML5 recommendations for forms are still being developed. Also, browser support is currently patchy, and unfortunately, the new controls do not prevent the entry of URLs.
![]() Tip An internal CSS style sheet may be used if no other page needs the form styling instructions. Or you could have a separate external style sheet to specify only the layout of the form elements. The link statement for this would have to be the last of a series of link statements in the
Tip An internal CSS style sheet may be used if no other page needs the form styling instructions. Or you could have a separate external style sheet to specify only the layout of the form elements. The link statement for this would have to be the last of a series of link statements in the <head> section. This would be in addition to a link to an external style sheet for styling the rest of the page (such as navigation buttons). If you don’t want navigation buttons on the form, you should at least put a Go Back button on the form (see Chapter 20).
Determine the widths and padding in the style sheet by trial and error. As some web design programs are not true WYSIWYG, always test the layout in various browsers. The next groups of code describe the elements of a typical form.
The code snippet for a typical text field takes the following form:
<div id="name">

        <label for="username"><b>Your Name:</b></label>

        <input id="username" name="username" size="30">

</div>
For every text field on the form, <label>…</label> and <input>…</input>, tags must be used with the two attributes for and id, as shown in the code snippet. This is very important for persons using a screen reader.
For text fields and text areas, the <label> tag must come first before the <input> tag so that the label sits to the left of the field.
For checkboxes and radio buttons, the opposite order must be used; the <input> tag must come first before the <label> tag so that the label sits to the right of the field.
The following is the code snippet for CSS for checkboxes(by using CSS, the checkboxes have been lined up nicely with the same class/identifier on each):
/*The CSS for positioning the checkboxes on the page*/

.chk1 {text-align:left; padding-left:30%;

}
The code snippet for the HTML for check boxes follows:
<div class="chk1">

  <input id="chkbox1" name="w98me2000" value="Yes" type="checkbox">

  <label for="chkbox1"><b>Windows ME or 2000</b></label>

</div><br>

<div class="chk1">

  <input id="chkbox2" name="xp" value="Yes" type="checkbox">

  <label for="chkbox2"><b>Windows XP Home or Pro</b></label>

</div> <br>
The two radio buttons are positioned on the page by CSS a style that targets the id named rad.
/*Position the radio buttons on the page*/

#rad {text-align:left; padding-left :30%;

}
The following is the code snippet for the HTML for the radio buttons:
<div id="rad">
<input id="radio1" name="laptop" value="Yes" type="radio">
<label for="radio1"><b>Laptop</b></label>
<input id="radio2" name="desktop" value="Yes" type="radio">
<label for="radio2"><b>Desktop<br></b></label>
</div>
Semantic tags are not used in Listing 11-2a to avoid the need to add JavaScript for IE 7 and IE 8 users, the form then works in all browsers, including IE 7 and IE 8.
Listing 11-2a. Creating a Secure Form as Shown in Figure 11-2 (feedback-form.html)
<!doctype html>

<html lang=en>

<head>

<title>Send a suggestion to my computer help and advice service</title>

<meta charset=utf-8>

<!--<meta details go here>-->

<link rel="stylesheet" type="text/css" href="feedback.css" media="screen">

</head>

<body>

<a id="top"></a>

 <br><div>

<h2>Send me a content suggestion or a message</h2>

<h3>Required items <span class="red">*</span></h3>

<!--start of form-->

<div id="form">

<form action="form-handler.php" method="post">

<div>

        <label class="label" for="username"><strong>Your Name</strong>

        <span class="red">*</span>

        <input id="username" name="username" size="30"></label>

</div><br><br>

<div>

        <label class="label" for="useremail"><strong>Your Email Address</strong>

        <span class="red">*</span>

        <input id="useremail" name="useremail" size="30"></label>

</div><br><br>

<div>

        <label class="label" for="phone"><strong>Your Telephone Number </strong>

        <input id="phone" name="phone" size="30"></label>

</div><br><br>

<div>

  <h3>Please select your operating system <span class="red">*</span></h3>

</div>
<div class="chk1">
<input id="chkbox1" name="w98me2000" value="Yes" type="checkbox">
<label for="chkbox1"><strong>Windows ME or 2000</strong></label>
</div><br>
<div class="chk1">
<input id="chkbox2" name="xp" value="Yes" type="checkbox">
<label for="chkbox2"><strong>Windows XP Home or Pro</strong></label>
</div><br>
<div class="chk1">
<input id="chkbox3" name="vista" value="Yes" type="checkbox">
<label for="chkbox3"><strong>Microsoft Vista</strong></label>
</div><br>
<div class="chk1">
<input id="chkbox4" name="windows7" value="Yes" type="checkbox">
<label for="chkbox4"><strong>Windows 7</strong></label>
</div><br>
<div>
<h3>Please select your computer<span class="red">*</span></h3>
</div>
<div id="rad">
<input id="laptop" name="computer" value="Laptop" type="radio">
<label for="laptop"><strong>Laptop</strong></label>
<input id="desktop" name="computer" value="Desktop" type="radio">
<label for="desktop"><strong>Desktop</strong></label></div>
<div id="sug"><br>
<label for="suggest"><strong>
Please type your suggestion or message</strong><span class="red">*</span></label>
<br><br>
<textarea id="suggest" name="suggestion" rows="12" cols="40"></textarea><br><br>
</div>
<div id="submit">
<input id="sb" value="Send your suggestion or message" title="Send suggestion
or message" type="submit">
</div>
</form>
</div>
<!--end of form-->
</div>
</body>
</html>
![]() Note When the Submit button is clicked, the items in bold type in Listing 11-2a will be sent to the form handler (Listing 11-2c) for processing.
Note When the Submit button is clicked, the items in bold type in Listing 11-2a will be sent to the form handler (Listing 11-2c) for processing.
The form in Listing 11-2a is linked to the following style sheet, Listing 11-2b. This creates the layout of the various form fields.
Listing 11-2b. Creating the CSS Style Sheet for Listing 11-2a (feedback.css)
/*FEEDBACK.CSS*/

/*reset browsers for cross-client consistency*/

html,body,h1,h2,h3,h4,h4,h5,h6,p {margin:0; padding:0

}

img {border-style: none; float: none; margin-left: 0; margin-right: 0;

}

body {text-align:center; background-color:#D7FFEB; color:black;

font-family: "times new roman"; max-width:1024px; min-width:800px;font-size: medium;

color: #000; margin: auto; width:95%;

}

/*The h1 heading is not used on the form shown; its inclusion is for a probable h1

heading on your own form*/

h1 {padding: 110px 0 0 12%; font-family :"times new roman"; font-size: 250%;

color: #000; font-weight:bold;}

h2 { margin-top:15px; }

span.red { font-size:medium; color:red; font-weight:bold;

}

/*center the back button on the thankyou page*/

#back-button { margin:auto; text-align:center; width:200px; height:25px; padding:5px;

background-color:brown; color:white; font-size:110%; font-weight:bold;

}

#back-button a { text-decoration:none; color:white;

}

#back-button a:hover { color:red;

}

/*set heading details*/

h1,h2 , h3, h4, h5 { margin-top:0; margin-bottom:10px;

}

h2 { font-size:130%; font-weight:bold;

}

h3 { font-size:110%; font-weight:bold; text-align:center;

}

/*PARAGRAPHS*/

p {margin-bottom:10px; margin-top:0;

}

/*FORM. Position the form elements on the page*/

#form {width :500px; margin:auto; text-align:center;

}

.label { float:left; width: 400px; text-align:right; clear:left;

}

.chk1 { text-align:left; padding-left :30%;

}

#rad { text-align:left; padding-left :30%;

}

#sug { text-align:center; margin:auto;

}

#submit { text-align:center;

}
As previously stated, when the Submit button on the form is clicked, the user’s details are sent to the form handler. The form handler is described next in Listing 11-2c.
The Form Handler and Its Anti-Hack Filters
You can download the form, the style sheets, and the form handler from the companion web site at http://www.apress.com. The handler is a piece of PHP code, but you do not need to learn PHP to use it. The handler contains logical operators that will filter out errors and URLs. The URL filters will exasperate and stop a human hijacker, and will cause a robotic device to have a nervous breakdown.
![]() Note To begin testing, set your own email address so that you are the recipient, then test the form. When you are satisfied that the form is sending test emails to you, and the resulting email is satisfactory, then comment-out your own email address and remove the comment slashes from the client’s email address so that the client (the web owner) receives the emails instead of you. Of course, this does not apply if the web site is your own.
Note To begin testing, set your own email address so that you are the recipient, then test the form. When you are satisfied that the form is sending test emails to you, and the resulting email is satisfactory, then comment-out your own email address and remove the comment slashes from the client’s email address so that the client (the web owner) receives the emails instead of you. Of course, this does not apply if the web site is your own.
Note that in Listing 11-2c, single line comments are preceded by a double slash // and multi-line comments use /*……*/ just like CSS comments. Also, a PHP document begins with <?php and ends with ?> and these tags must not include spaces.
For the curious, the weirder bits of code are explained at the end of this section.
![]() Caution The handler must be saved as a PHP document, and after uploading the handler, right-click it in the server pane of your FTP client, there you will be able to set the CHMOD to 644. This will stop unauthorised persons accessing it. If they try using the handler’s file name to open it, they will not see the handler; they will be directed instantly to the form. Make sure your server has PHP enabled, if it is not enabled, contact the host and instruct them to enable the server.
Caution The handler must be saved as a PHP document, and after uploading the handler, right-click it in the server pane of your FTP client, there you will be able to set the CHMOD to 644. This will stop unauthorised persons accessing it. If they try using the handler’s file name to open it, they will not see the handler; they will be directed instantly to the form. Make sure your server has PHP enabled, if it is not enabled, contact the host and instruct them to enable the server.
Substitute your own details for the items shown in bold italics in the handler Listing 11-2c Because the person sending the message will be entering his own details (name, email address, and phone number); they are not shown in bold italics.
Listing 11-2c. Creating the PHP Form Handler (form-handler.php)
<?php

/* FORM-HANDLER.PHP Feedback Form PHP Script Ver 5.0 */

// set the email address for the recipient, this setting sends it to your client for example

//$mailto = "[email protected]" ;

$mailto = "[email protected]" ;

//choose the subject so that you can recognize emails sent from this form

$subject = "Help query" ;

/*The next block of code tells the handler where to find the various documents

associated with it. In this case the documents and the form are all in the same root

folder.*/

// list the pages to be displayed,
$formurl = "http://www.clients-website.com/feedback-form.html" ;

$errorurl = "http://www.clients-website.com/error.html" ;

$thankyouurl = "http://www.clients-website.com /thankyou.html" ;

$emailerrurl = "http://www. clients-website.com /emailerr.html" ;

$errorphoneurl = "http://www. clients-website.com /phonerror.html" ;

$errorsuggesturl = "http://www. clients-website.com /suggesterror.html" ;

$errorboxurl = "http://www. clients-website.com /error.html" ;

$uself = 0;

// ------- Set the information received from the form as $ values ---------------

$headersep = (!isset( $uself ) || ($uself == 0)) ? "
" : "
" ;

/*The following code receives the items from the HTML form and converts them to formats

 that can be used by the handler, for example, username is converted to $username.*/

$username = $_POST['username'] ;

$useremail = $_POST['useremail'] ;

$phone = $_POST['phone'];

$w98me2000 = $_POST['w98me2000'];

$xp = $_POST['xp'];

$vista = $_POST['vista'];

$w7=$_POST['windows7'];

$computer=$_POST['computer'];

$suggestion = $_POST['suggestion'] ;

$http_referrer = getenv( "HTTP_REFERER" );

if (!isset($_POST['useremail'])) {

        header( "Location: $formurl" );

        exit ;}

//Check that all three essential fields are filled in

if (empty($username) || empty($useremail) || empty($suggestion)) {

header( "Location: $errorurl" );

        exit ; }

//Check that at least one box has been ticked

if ((!$w98me2000 and !$xp and !$vista and !$w7)) {

        header( "Location: $errorboxurl" );

        exit ; }

//check that no urls have been inserted in the username text area

if (strpos ($username, '://')||strpos($username, 'www') !==false){

        header( "Location: $errorsuggesturl" );

        exit ; }

//Check that no urls haves been entered in the phone field

if (strpos ($phone, '://')||strpos($phone, 'www') !==false){

        header( "Location: $errorphoneurl" );

        exit ; }

//check that no urls have been inserted in the suggestion text area

if (strpos ($suggestion, '://')||strpos($suggestion, 'www') !==false){

        header( "Location: $errorsuggesturl" );

        exit ; }

        if ( ereg( "[
]", $username ) || ereg( "[
]", $useremail )) {

        header( "Location: $errorurl" );

        exit ; }

#remove any spaces from beginning and end of email address

$useremail = trim($useremail);

#Check for permitted email address patterns
$_name = "/^[-!#$%&'*+\./0-9=?A-Z^_`{|}~]+";

$_host = "([-0-9A-Z]+.)+";

$_tlds = "([0-9A-Z]){2,4}$/i";

if(!preg_match($_name."@".$_host.$_tlds,$useremail)) {

        header( "Location: $emailerrurl" );

        exit ; }

if (get_magic_quotes_gpc()) {

        $message = stripslashes( $message ); }

if(!$w98me2000) {$w98me2000 = "No";}

if(!$xp) {$xp = "No";}

if(!$vista) {$vista = "No";}

if(!$w7) {$w7 = "No";}

if($computer !=null) {$computer = $computer;}

//-- SET UP THE EMAIL’S CONTENT, FORMAT IT, SEND IT. THEN SHOW A THANK YOU PAGE --

$messageproper =

        "This message was sent from:
" .

        "$http_referrer
" .

        "------------------------------------------------------------
" .

        "Name of sender: $username
" .

        "Email of sender: $useremail
" .

        "Telephone No: $phone
" .

        "W98,ME,2000?: $w98me2000
" .

        "XP?: $xp
" .

        "Vista?: $vista
" .

        "Windows7?: $w7
" .

        "Computer?:$laptop
" .

        "Computer?;$desktop
" .

        "------------------------- MESSAGE -------------------------

" .

        $suggestion .

        "

------------------------------------------------------------
" ;

mail($mailto, $subject, $messageproper, "From: "$username" <$useremail>" . $headersep .

"Reply-To: "$username" <$useremail>" .

$headersep . "X-Mailer: feedback4.php 5.0" ); header( "Location: $thankyouurl" ); exit ;

?>
For the Curious: An Explanation of Some of the PHP Code
(Skip this section if you are too busy or not interested.)
The !isset function checks to ensure the value for the sender’s email has been set in the $_POST array. The exclamation mark (!) means NOT.
if (!isset($_POST['useremail'])) {

        header( "Location: $formurl" );

        exit ;

}
if(!preg.match completes the test to see if the email address is in the correct format. The reg part stands for regular expression (this the US translation, where regular = standard, not the UK meaning, in which regular means “at equal intervals”). If the email address does not conform to the accepted standard, then an error message is displayed.
magic_quotes is a PHP filter which, if turned on, will insert an escape slash to preserve any single or double quote marks in the message entered by the user.
if (get_magic_quotes_gpc()) { $message = stripslashes( $message );

}
When checking that the essential fields have been filled in, double vertical lines (||) means OR.
The next piece of code translates like this: if the username field is empty or the useremail field is empty or the suggestion field is empty, then show an error message called errorurl, which says that an essential field has not been filled in.
if (empty($username) || empty($useremail) || empty($suggestion)) { header( "Location:

$errorurl" ); exit;

}
In the HTML form, the default for the check boxes and radio buttons was set to Yes.
If a box or radio button is not clicked, then the value can be changed to "No" by the handler, as follows:
if(!$xp) {$xp = "No";}
This means if $xp has not been selected, then assign the value "No" to $xp.
Test to ensure that at least one check box has been ticked (note the use of and in this statement).
        if ((!$w98me2000 and !$xp and !$vista and !$w7)) {

        header( "Location: $errorboxurl" );

        exit ;

}
The user needs to be notified if the message has been sent successfully. He also needs to know if he has made an error when filling in the form. The following section gives suggested feedback pages that will inform the user, and also offer help if he has provided faulty or unacceptable data.
The “Thank You” Page and the Error Messages
The “thank you” page confirms to the user that the email was sent successfully. For consistency, the “thank you” page should look like all the other pages on your web site. Try to include your navigation menu in the “thank you” page (or at least a Go Back button). It would be a pity to lose the visitor. It would also be helpful to add a Go Back button to each error page. The “thank you” page is shown in Figure 11-3 and the code is Listing 11-3. The page has a Go Back button with the text—“Return to Home Page”—but you can replace this button with your main navigation menu. The styling for the button is incorporated in the style sheet feedback.css.
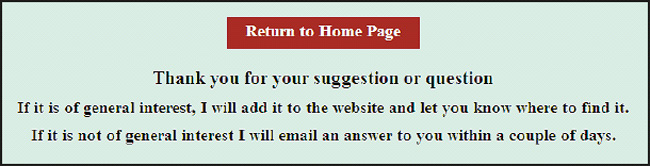
Figure 11-3. A “thank you” page
Listing 11-3. Creating the Thank You Page (thankyou.html)
<!doctype html>

<html lang=en>

<head>

<title>Thank you for your message</title>

<meta charset=utf-8>

<!--<meta details go here>-->

<link rel="stylesheet" type="text/css" href="feedback.css" media="screen">

</head>

<body>

<a id="top"></a><br>

<div id="back-button"><a title="Return to the Home page" href="index.php">Return to Home

Page</a>

</div>

<div><br>

<h2>

Thank you for your suggestion or question</h2>

<h3> If it is of general interest, I will add it to the website and let you know where

to find it.</h3>

<h3>If it is not of general interest I will email an answer to

you within a couple of days.</h3>

</div>

</body>

</html>
If the email message was not sent successfully, an explanatory error message will appear.
Why use error pages instead of echoing a piece of text to the screen? My clients prefer the distinct message and the help that a page provides, rather than the usual, small, error messages in red that can be overlooked or that are so often too brief.
The style sheet in Listing 11-4 is used for all five error messages (Listings 11-5 through 11-9).
Listing 11-4. (error.css)
body { text-align:center; font-size: large; font-weight:bold;

}

span.red {color:red; font-size:xlarge; font-weight:bold;

}
Listing 11-5 provides the code for the Missing Essentials Error Message.
Listing 11-5. (error.html)
<!doctype html>

<html lang=en>

<head>

<title>Error message. Missing essentials</title>

<meta charset=utf-8>

        meta details go here

<link rel="stylesheet" type="text/css" href="error.css">

</head>

<body>
<p>One or more of the essential items in the form has not been filled in.</p>

<p>Essential items have a red asterisk like this <span class="red">*</span></p>

<p>Please click the Back button on your internet browser and then supply the

missing information.</p>

</body>

</html>
Listing 11-6 shows the code for the email error message.
Listing 11-6. (emailerr.html)
<!doctype html>

<html lang=en>

<head>

<title>Email error message</title>

<meta charset=utf-8>

<meta details go here>

<link rel="stylesheet" type="text/css" href="error.css">

</head>

<body>

<p>Your email address has an incorrect format.</p>
<p>Please click the Back button on your internet browser<br> and then correct your

email address.</p>

</body>

</html>
Listing 11-7 provides the code for the phone error message.
Listing 11-7. (phonerror.html)
<!doctype html>
<html lang=en>
<head>
<title>Phone error message</title>
<meta charset=utf-8>
meta details go here
<link rel="stylesheet" type="text/css" href="error.css">
</head>
<body>
<p> </p><p> </p>
<p>The telephone number must be numbers and spaces only, with no letters or punctuation></p>
<p>Please click the Back button on your internet browser<br> and then correct your
telephone number.</p>
</body>
</html>
Listing 11-8 provides the code for the tick box error message.
Listing 11-8. (boxerror.html)
<!doctype html>

<html lang=en>

<head>

<title>Box error</title>

<meta charset=utf-8>
meta details go here
<link rel="stylesheet" type="text/css" href="error.css">
</head>
<body>
<p> </p><p>Please tick one of the boxes to say which Operating System your
have on your computer.</p>
<p>Essential items have a red asterisk like this<span class="red">*</span></p>
<p>Please click the Back button on your Internet browser and then supply the
missing information.</p>
</body>
</html>
Listing 11-9 provides the code for the message forbidding the entry of URLs.
Listing 11-9. (suggesterror.html)
<!doctype html>

<html lang=en>

<head>

<title>Error message. Do not enter URLs</title>
<meta charset=utf-8>

        meta details go here

<link rel="stylesheet" type="text/css" href="error.css">

</head>

<body>

Sorry, but website addresses are not allowed<br><br>This is to prevent low-life

scumbags from inserting links which lead to dodgy websites.

<p>Please click the Back button on your internet browser<br>and then remove any

website addresses from the form.</p>

</body>

</html>
The new HTML5 form controls were explained in Chapter 1. We now need to consider whether these controls will eventually replace the input filters in the PHP form handler provided in this chapter.
The New HTML5 Form Controls
The HTML5 recommendations for forms are almost complete, but various browsers interpret them differently. HTML5 forms are not straightforward because other factors affect them.
- A hack-proof form needs a handler in PHP, ASP.NET, or Perl server-side code. The handler must match the new HTML5 form tags.
- Accessibility will be compromised unless great care is taken to integrate the new HTML5 elements with the requirements of screen readers.
- For some time, IE conditionals and alternative style sheets will have to be used so that surfers with the most-used browser can see and use your forms.
- At the time of writing, IE 9 does not support HTML5 forms. IE 10 will most likely support them.
![]() Note Only Opera 9.5 + supports all the new form elements at the time of writing. Other new browsers support some of the form features. To see which browsers currently support HTML5 form controls, visit
Note Only Opera 9.5 + supports all the new form elements at the time of writing. Other new browsers support some of the form features. To see which browsers currently support HTML5 form controls, visit http://wufoo.com/html5/
Even though HTML5 controls are built-in to the HTML5 forms, robots and humans can still enter dodgy URLs. Therefore, you will still need the protection of an anti-hack form handler for some fields.
You could add further protection against robots when using the PHP feedback handler described earlier; for instance, you might place an image of some text on the page so that the text must be entered correctly, or you could ask a question that must be answered before the form handler will send the email. An alternative solution would be to use CAPTCHA, as described next.
Using CAPTCHA
CAPTCHA is one way of making a feedback form more secure. We are all familiar with the wiggly script of a CAPTCHA image, like the one shown in Figure 11-4.
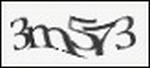
Figure 11-4. A CAPTCHA image
It is designed to stop robots using the form. Unfortunately, it won’t stop an unscrupulous human from sending your client a feedback message containing an unpleasant or dangerous link or a dodgy web address. The PHP handler is the only way to do that. Perhaps the safest solution is to use CAPTCHA in conjunction with the secure feedback form and its PHP handler.
When using CAPTCHA, each time the form is accessed, a different image appears. This can be actioned by the organization supplying the CAPTCHA service or a random generator can be programmed and called up on the form. Some CAPTCHA methods incorporate spoken versions of the characters so that blind or partially-sighted persons can use the form.
The CAPTCHA code is downloaded and embedded in the page containing the form. CAPTCHA can be a free service and it can be used on commercial sites. Visit http://captchas.net (note the letter “s” after CAPTCHA in the URL) to learn more and download the code.
The simplest code version for downloading is PHP. It can be embedded directly into an HTML5 page. Three files have to be downloaded and installed on your server. This solution needs knowledge of JavaScript and PHP. To see if you are skilled enough to use the captchas.net method, have a look at the sample code at http://captchas.net/sample/php/
![]() Tip Several other CAPTCHA suppliers exist; some require payment and some are easier to embed and understand than others. Try exploring
Tip Several other CAPTCHA suppliers exist; some require payment and some are easier to embed and understand than others. Try exploring http://hellocaptcha.com and http://www.google.com/recaptcha.
Summary
In this chapter, you learned how to use a little JavaScript to stop spam spiders from collecting your client’s email address. By using this script, your clients will not be deluged with spam. You also learned the reason for using a hack-proof feedback form. The chapter and the companion web site provide you with a template for a form and its hack-proof handler. Although the handler is written in PHP, no knowledge of PHP is required to implement it. Just download the template and enter your own information where the listings in this chapter show items in bold type.
Some information about CAPTCHA was provided, although I would rather use the feedback form-handler because it is a little safer than CAPTCHA for preventing access by human rogues. No safeguards are 100 percent secure and CAPTCHA has been bypassed by determined criminals using optical character recognition (OCR). For more information, see the Wikipedia article on CAPTCHA at http://en.wikipedia.org/wiki/CAPTCHA.
In the next chapter, we will examine the problems presented by the large variations in monitor color rendition, screen size, and display resolution. Several solutions will be offered and their advantages and drawbacks will be explained.