![]()
Start Up Your App
The main objective of this book is to teach you how to create a Windows 8.1 application with the tools and languages (C# and VB) offered by Microsoft. After the previous five chapters where we explained the required basic concepts to entry in the platform, using the Microsoft Design Language guidelines with the Windows 8.1 Runtime and the languages available within the Microsoft tools, we are ready now to illustrate how to prototype your app.
Design the User Interface
In the design process, the best way to show customers and programmers the product you want create to make a mockup of the views that compose the application user interface. There are many solutions for this purpose, some free and some for a fee, some for creating static mockups and others for creating functional mockups. If you want to stay on the Microsoft stack, you can use Microsoft SketchFlow to create a mockup application that permits the actors in the project to try the application flow and give you feedback. This tool is released with the enterprise version of Microsoft Expression Blend and allows you to create a WPF or Silverlight application that shows a functional mockup and captures user feedbacks.
For static mockups, there are two Microsoft products, Visio and PowerPoint Storyboard template. Visio allows you to create many types of diagrams, with various components and also typical UI components. The PowerPoint Storyboard template is a new tool, introduced with Team Foundation Server 2012; it’s a free template that allows you to create static mockups, adding user interface components (you can also include Windows 8.x and Windows Phone elements) on PowerPoint slides. At the end of your work, you have a PowerPoint presentation to show to your collaborators and customers. Otherwise, if you want to use a non-Microsoft product such as Balsamiq Mockups, you can download the stencils for Windows Store apps directly at http://msdn.microsoft.com/en-us/library/windows/apps/dn144786.aspx.
For this book’s purposes, we will use the PowerPoint Storyboard template, choosing from the assets the Windows 8.1 Application components available through the last version of the template. In the following images, we will show you how to create a mockup for an application that saves a user’s favorite places.
Figure 6-1 shows the Start screen of the app with mouse pointer about to click the app tile. Figure 6-2 shows what happens after the user clicks the app title: the main view of the app appears, showing the grid visualization of the places.
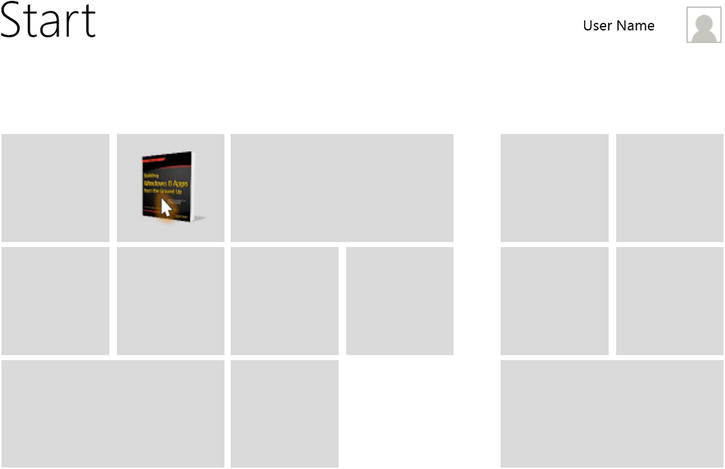
Figure 6-1. Mockup of the Start screen
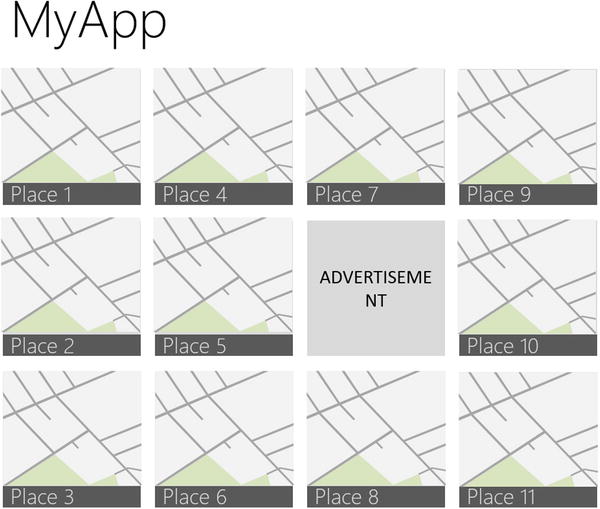
Figure 6-2. Main page of the app
Note that Figure 6-1 does not provide a real value to your mockup, but it will help you involve the observer in order to mimic the user experience.
The view in Figure 6-2 is based on the standard Windows Store Grid template available starting with Visual Studio 2013, but in the tile, you will visualize the title of the item and a map snapshot. You can also show an example of what happens when you select one or more elements by clicking or tapping: a special border will indicate that the user’s selection was a success (as shown in Figure 6-3). By PowerPoint storyboarding, you can also show the application bar (Figure 6-4) where you can see the available operations.
Figure 6-3. Item selection

Figure 6-4. Application bar
Finally, Figure 6-5 shows an example of how to create a mockup for an item detail page.
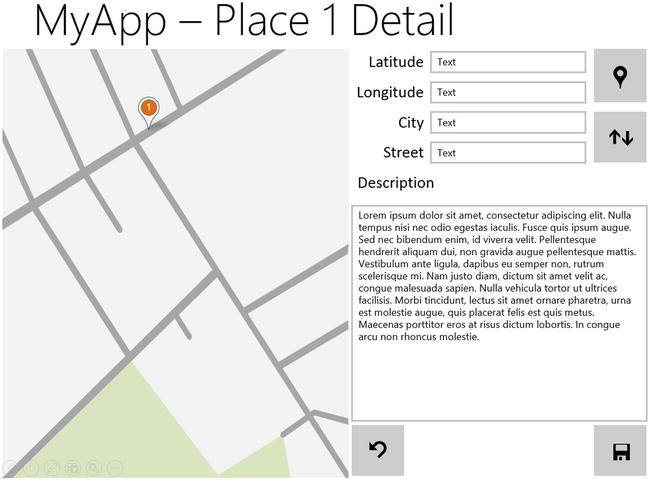
Figure 6-5. Item detail page
Using this kind of tool can help to simplify the design of your application and avoid misunderstanding with the stakeholders. Use it as much as possible!
Choose the Right Tool
When your mockup is complete, it’s time to start coding your app. Even if the Visual Studio editor is equal to Blend, this latter is still the best choice for designers. For this reason we’ll introduce you to Blend in this section and identify core functionalities that you can use in this application.
Starting with VS2012, Blend is integrated with VS, so you can find in the contextual menu of Blend-compatible projects an item labeled Edit in Blend (shown in Figure 6-6). This menu will open the solution in Blend and, if you select a file, open it in the editor.

Figure 6-6. Open in Blend menu
When you need to work with layout and styles, Blend should be your first choice because it’s made for this. Blend ships with two workspaces, Design and Animation. Every workspace has its own widget disposition. As you can imagine, the first one is dedicated to designing the UI, while the second one facilitates your work on animations. This is the main difference between the UI design approach in VS or Blend: both are good for design, but Blend is better for animation.
There are three types of animations:
- TransitionAnimations: Good for transition effects
- Theme Animations: Good for animation with a theme
- Custom Animations: For every case not covered by the previous two
Transition animations are used to render a control and are visible in the class diagram show in Figure 6-7. If you want to apply one of these transitions, you can simply add one them to the TransitionCollection of a control in the following way:
 <Button>
   <Button.Transitions>
       <TransitionCollection>
        <EntranceThemeTransition FromHorizontalOffset="-229"/>
      </TransitionCollection>
   </Button.Transitions>
</Button>
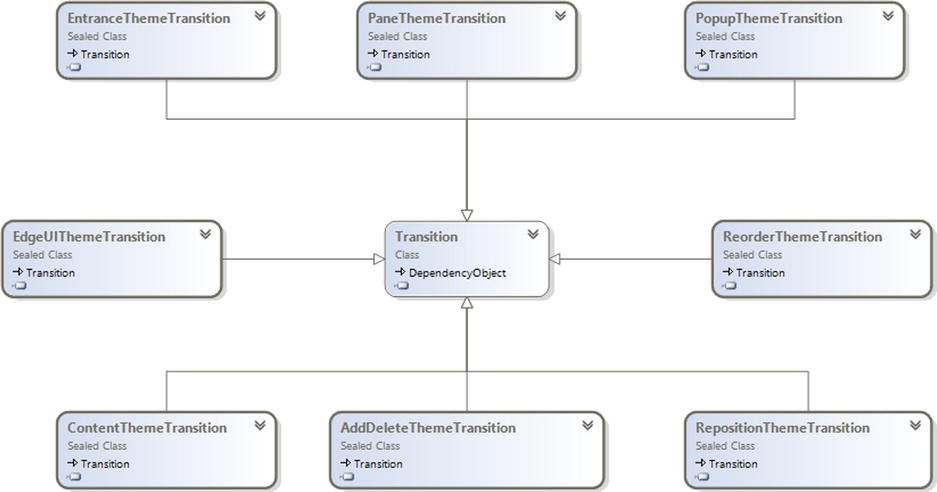
Figure 6-7. Transition class diagram
In this example, we create an instance of EntranceThemeTransition with an initial offset of -229 pixels to the Button, so when rendered it will appear with the effect of an entrance from the left.
Theme animations are built-in animations that are used in standard Windows Store app controls. This type of animation is based on TimeLine class and must be triggered explicitly, because you must use them in conjunction with a storyboard.
![]() Note A storyboard is the class used to define changes of value in a control’s dependency properties in a period. A storyboard can only be started by using the StoryboardName.Begin( ) method, because you cannot use triggers to modify the aspect of a control, only the VisualStateManager.
Note A storyboard is the class used to define changes of value in a control’s dependency properties in a period. A storyboard can only be started by using the StoryboardName.Begin( ) method, because you cannot use triggers to modify the aspect of a control, only the VisualStateManager.
When you use a ThemeAnimation, you add it as a child of Storyboard in this way:
<Storyboard x:Name="MyStory">
   <FadeOutThemeAnimation TargetName="MyControl"  />
</Storyboard>
And in your code-behind you must write MyStory.Begin() both for C# and VB.
The last category of animations is custom animations. Under this category are classified the classical storyboards written in XAML. This type of animation has two categories:
- Dependent
- Independent
Dependent animation is an animation that needs information from the UI thread; for this reason by default it’s not executed, so requires an opt-in from the app developer to enable it (PointAnimation.EnableDependentAnimation = true). When enabled, this animation type runs smoothly on the UI thread, but when the system starts doing something, the storyboard can stutter. For this reason, you should avoid dependent animations.
To create an independent animation your storyboard must respect these requirements:
- Duration of the animation set to 0 (zero)
- Animation can target
- UIElement.Opacity
- Canvas.Left or Canvas.Top
- Brush (using SolidColorBrush)
- RenderTransorm, Projection, Clip
- ObjectAnimationUsingKeyFrames
Conclusion
In this chapter, you took the first step in the creation of a Windows Store app. You also took a quick tour in Blend for Visual Studio. Starting in the next chapter, you will go deep inside the Windows RT features. So let the fun begin!