
Chapter 7. Custom Functions for Custom Effects: What Have You Done for Me Lately?

When you combine jQuery’s custom effects with JavaScript functions you can make your code—and your web app—more efficient, more effective, and more powerful. In this chapter, you’ll dig deeper into improving your jQuery effects by handling browser events, working with timed functions, and improving the organization and reusability of your custom JavaScript functions.
A storm is brewing
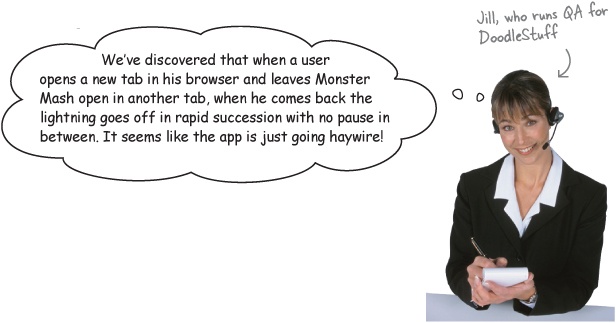
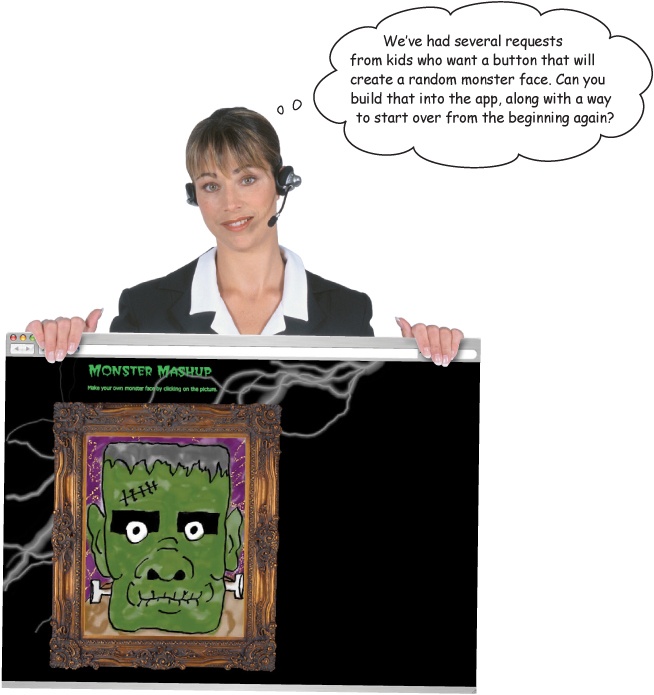
The Monster Mashup web app you built in Chapter 5 was a big hit with kids and their parents. But it sounds like there might be a bug that’s making the lightning go haywire. DoodleStuff’s quality assurance manager contacts you with some issues and a feature request for making Monster Mashup better.
We’ve created a monster...function
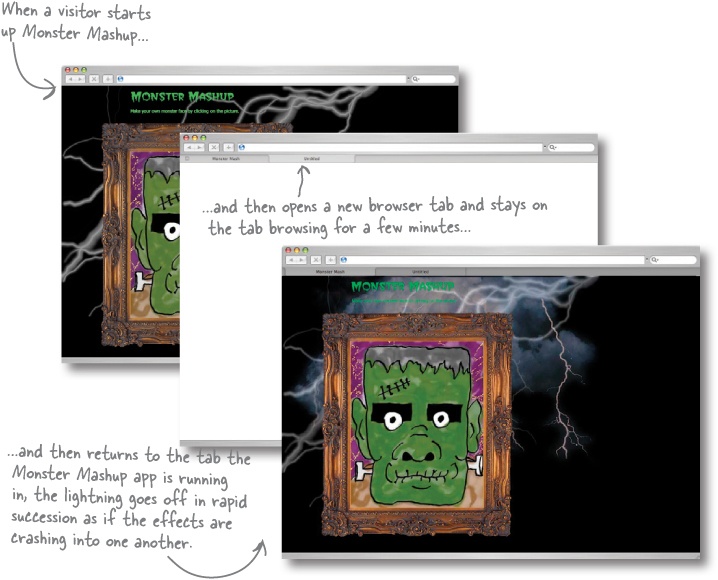
The lightning function we created in Chapter 5 has turned out to be a bit of a monster. It runs and runs, even if the user navigates away from the page. When the user returns to the tab, the timer has to catch up, and it tries to redraw the lightning on screen in rapid succession. It seems that the timer doesn’t work the way we wanted it to, so what happened?
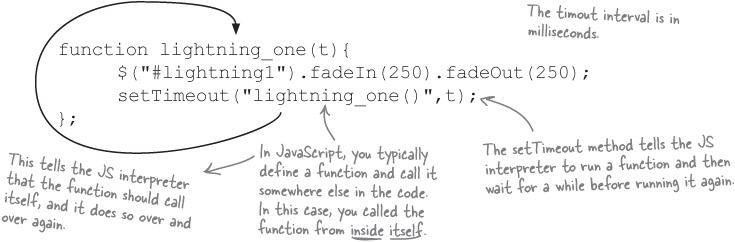
In Chapter 5, we needed a way to call the method again and again, with a timeout in between those calls. In solving that problem, we unknowingly created a new problem: the function continues to run when the window loses the visitor’s focus (i.e., when the visitor opens a new tab and moves away from the active window).

Get control of timed effects with the window object
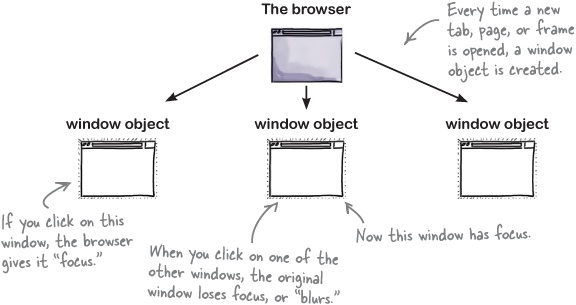
Fortunately, you have a way to get control of your lightning animation using JavaScript’s window object. The window object is created every time the visitor opens a new window in his browser, and it offers a lot of jQuery and JavaScript power. In the world of JavaScript, the window object is the global object. In other words, window is the topmost object of the JavaScript world.

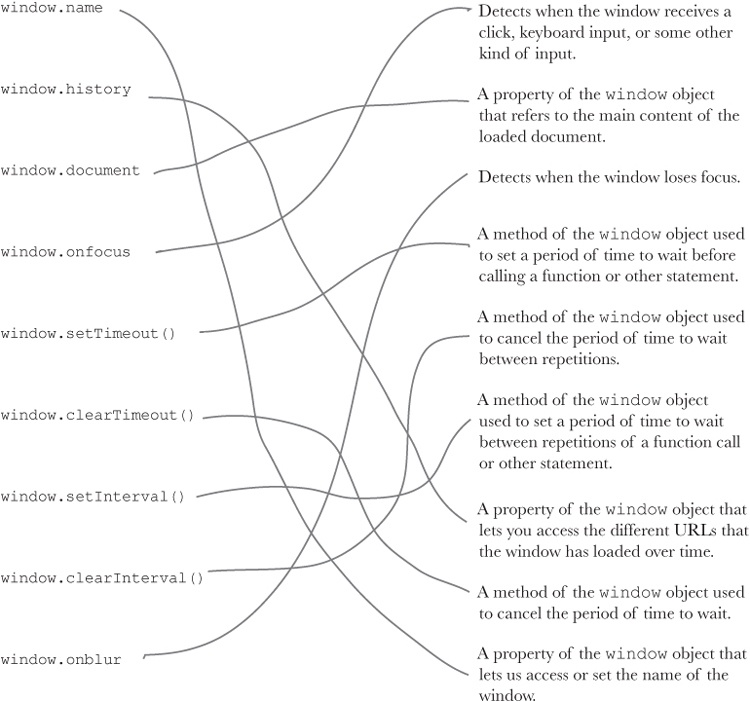
Let’s say you’ve opened three tabs in your browser. The browser creates one window object for each of those tabs. The window object is an object just like the ones you worked with in Chapter 6, so it has properties, event handlers, and methods. And they’re super handy—we can use the window object’s onblur and onfocus event handlers to find out what the visitor is doing at the browser level.
The window object also offers timer methods that you can leverage for running your custom timed functions. window has many more methods, but these are the ones we need to use to fix the lightning functions.
Respond to browser events with onblur and onfocus
So we know that with window.onfocus, you can tell when the window gains focus (i.e., a visitor activates the page or directs mouse or keyboard input to the window), and with window.onblur, you can tell when the active browser window loses focus. But what can you do in response to these events? You can assign a function reference to onfocus or onblur.
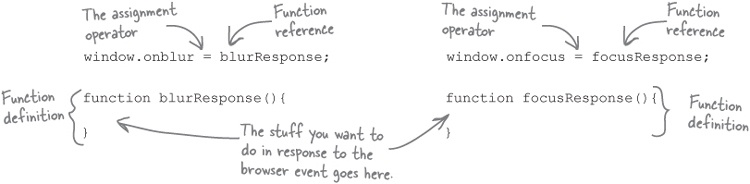
And here’s where the power of writing your own custom functions really starts to come into play. Now you’ve got a window object that gives you a ton of information about what your user is doing in the browser, and you can assign your own custom functions based on what that object tells you. So, really, you can do just about anything you want, as long as you can write your own custom function for it...
Here’s what you should see when you open the window_tester.html file, open a second tab, and switch between the two windows by clicking on them alternately.
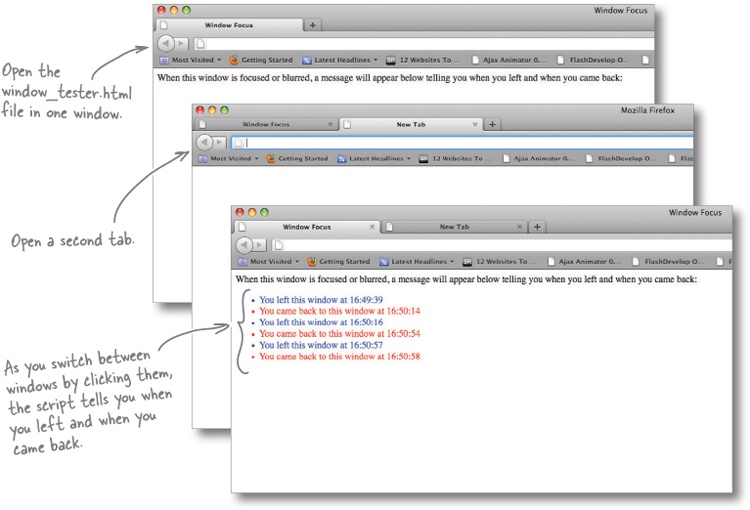
Using the information you get from the window object, you can stop the lightning when the visitor wanders away from the Monster Mashup window and then restart it when she returns.
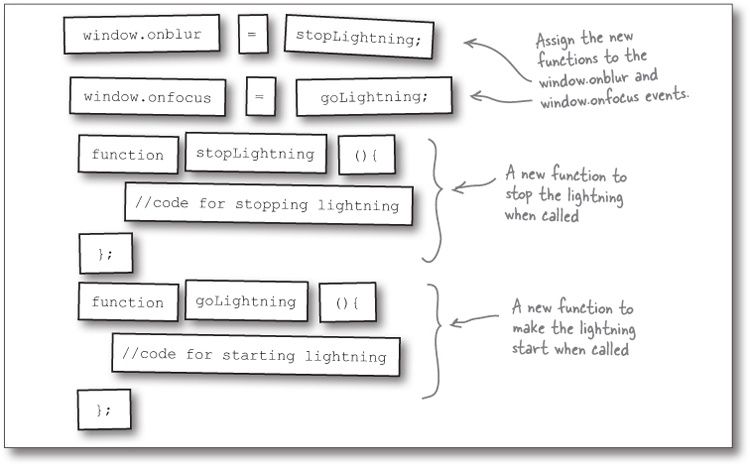
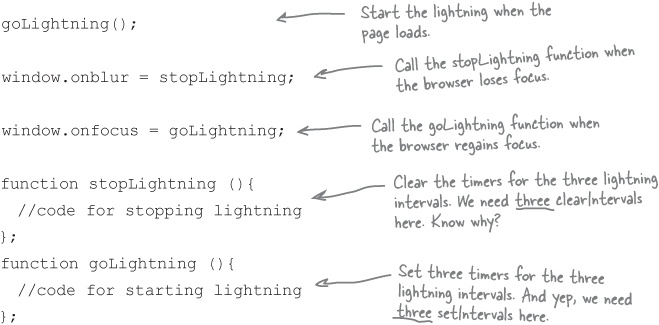
Put the code magnets in the right order to assign function definitions to the onblur and onfocus handlers. One function definition will stop the lightning when the browser loses focus (call this one stopLightning). The other function definition will start the lightning back up when the browser regains focus (call this one goLightning). You won’t write the code for the functions just yet, so for now, just put the magnets with comments (starting with //) inside each function.
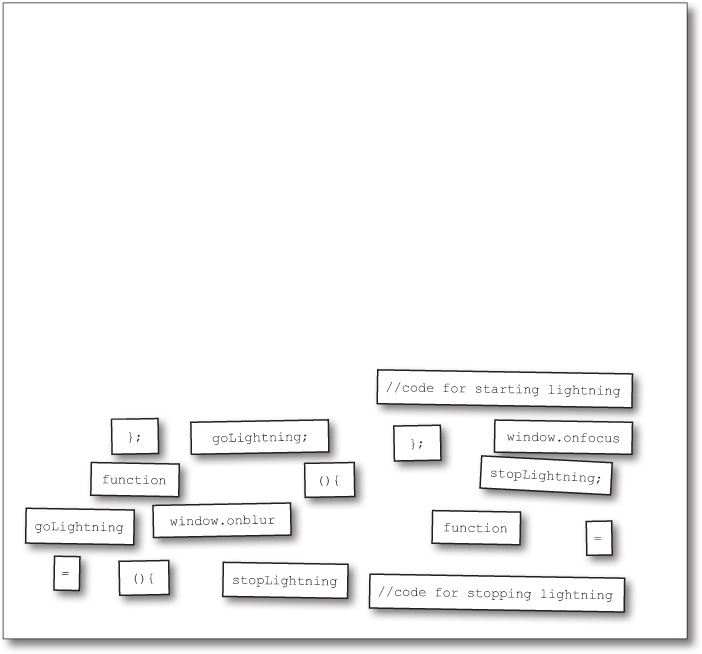
Now you’re ready to go with function declarations for both window object event handlers.
Right. The functions don’t do anything...yet.
Instead of copying and pasting our old code, let’s look at one of the window object’s methods—a timer method—that might give us a better way of handling the timing effects for the lightning.
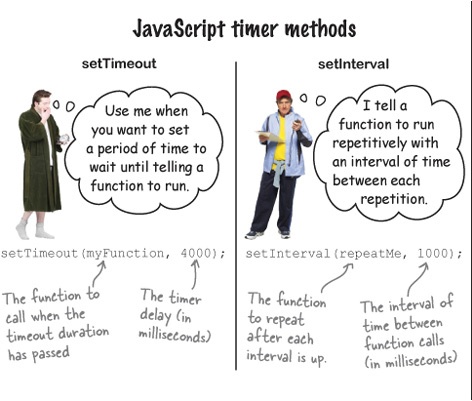
Timer methods tell your functions when to run
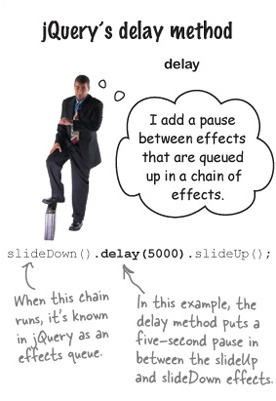
Both JavaScript and jQuery offer us timer methods that call functions to run based on time passing. JavaScript’s window object has four timer methods for timed control: setTimeout, clearTimeout, setInterval, and clearInterval. jQuery offers us the delay method. Let’s take a closer look at these methods and what they offer us.
Great question!
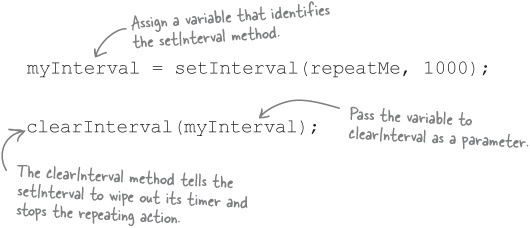
You can use the clearInterval method to stop the repeating schedule of function calls created by setInterval. To do so, you need to pass a variable to clearInterval as a parameter. Let’s take a closer look at how that works.
Write the stopLightning and goLightning functions
Now that you know more about timer methods, let’s review where we need them.
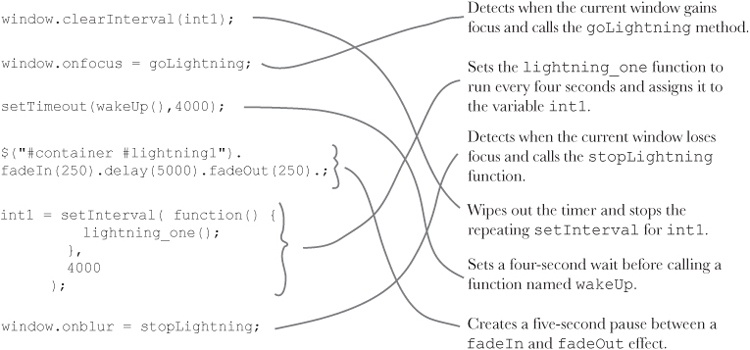
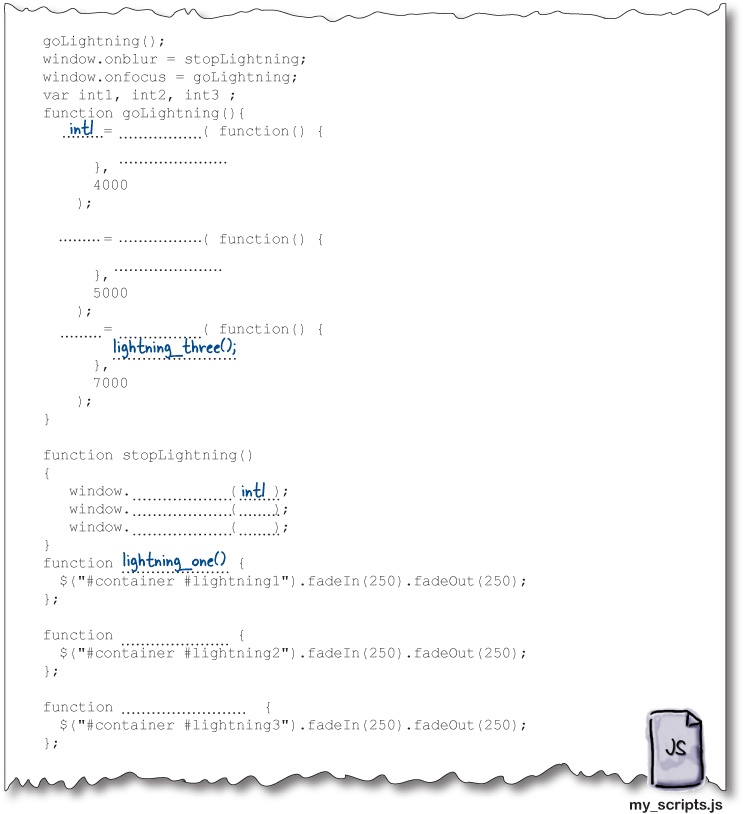
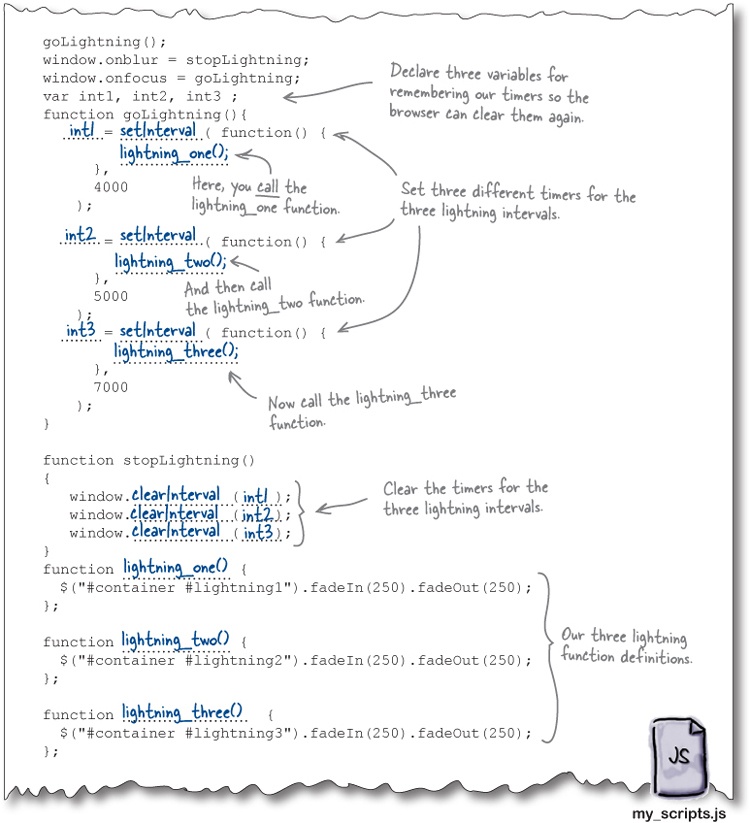
For each blank line in the file, write in the variable, function, or method that will help fix the Monster Mashup app. When in doubt, look at the previous two pages for guidance. We’ve done a few for you.
Now you’ve got two custom functions—each with references to the lightning functions you wrote back in Chapter 5—that respond to the window object’s onfocus and onblur events.
You’ll be updating a bunch of code to fix and improve on what you built in Chapter 5, so let’s start with a blank script file. The code files you downloaded for this book contain a folder for Chapter 7. In the folder, you’ll find a begin folder structured like this:
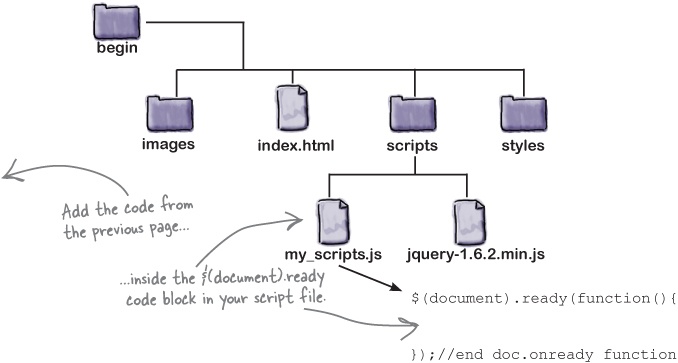
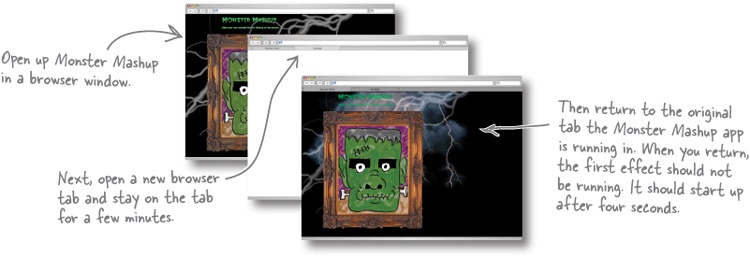
Once you’ve added the code from the previous page to the script file, open the page up in your favorite browser to see if your lightning effect fix was successful.

Great idea. We have a bunch of click-related functions for that face that we could likely combine into one multipurpose function.
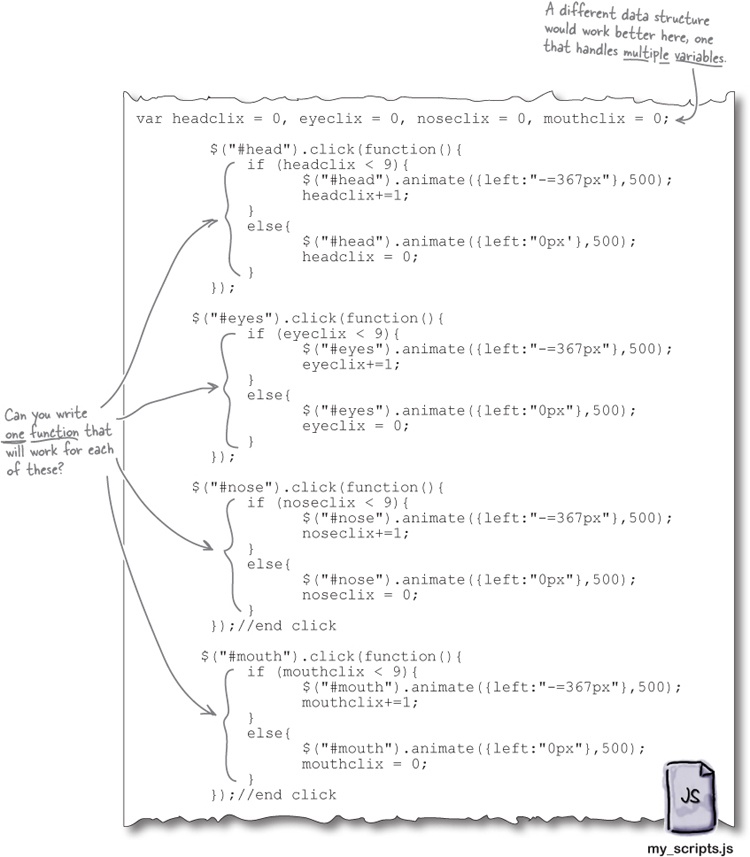
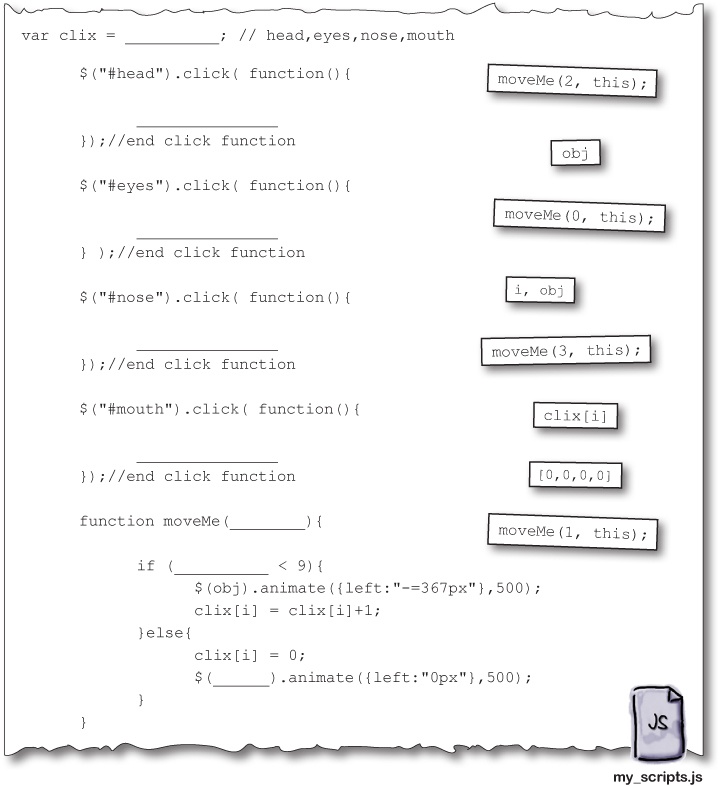
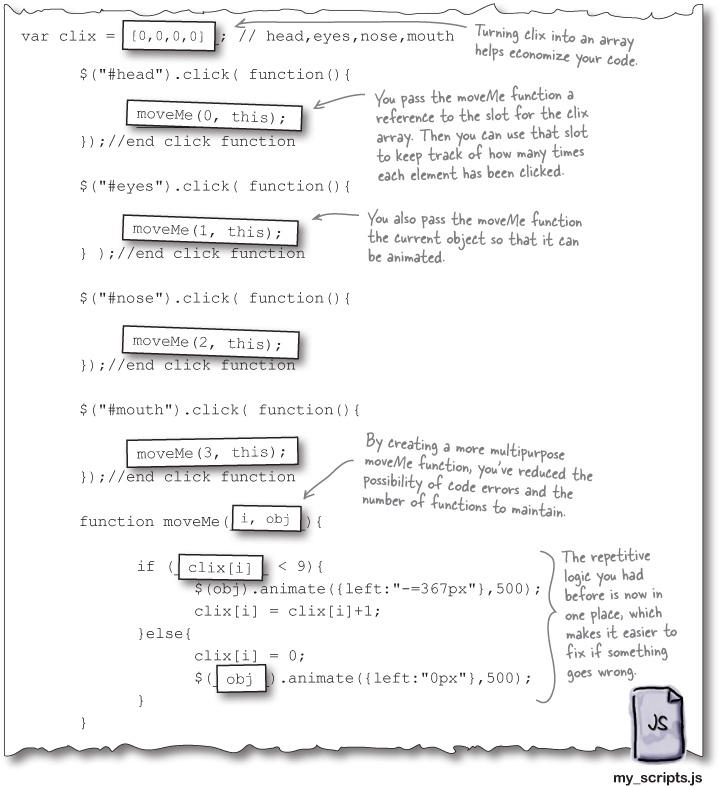
From the previous page, identify which snippets of code are common to all of the different aspects of the application. Use the magnets below to create a generic function, called moveMe, that will be called whenever a user clicks on any of the moveable images. For the moveMe function, the first parameter is the corresponding index in the clix array, and the second is a reference to whatever was clicked.
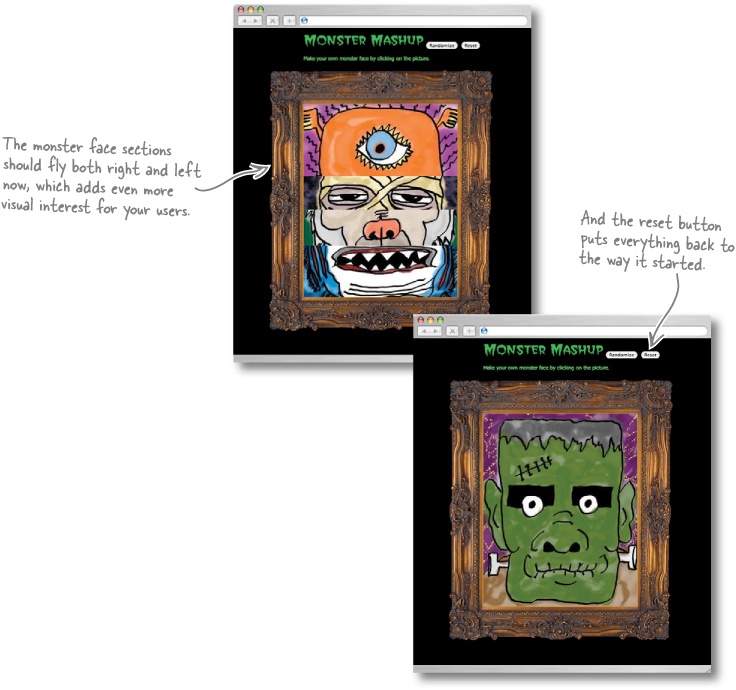
Feature request for Monster Mashup
Jill and the QA team are really happy with your fixes, and since they like your work, they want to pass along a feature request for Monster Mashup from the product team.

Let’s get (more) random
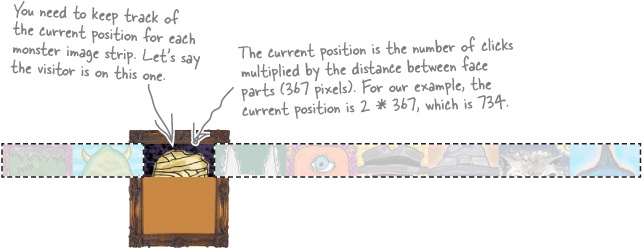
You’ve been building random functions throughout the book, so you’re likely a pro at that by now. In this case, you need to create a function that randomly animates the monster faces. Let’s divide and conquer the problem by breaking it down into smaller steps. Let’s start with figuring out the current position for each image strip.
From the current position, we need to figure out the target position, which is essentially a random position on the screen. It helps to think of this in two parts:

It’s not as hard as you think.
In fact, just turn the page to find out how.
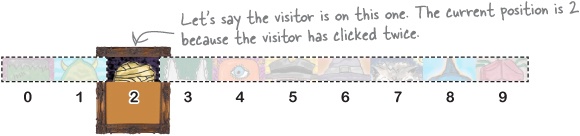
You already know the current position...
Fortunately, you don’t have to come up with all new variables or functions here. The index value of the clix array provides the current position because it tells us how many times the user has clicked on each monster face part. So all you need is one line of code:

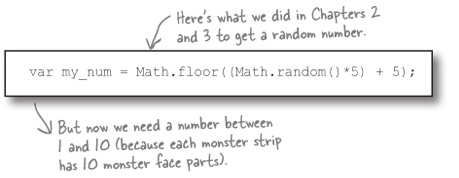
...and the getRandom function too
We built a function for getting random numbers in Chapter 2, Chapter 3, and Chapter 6. We can reuse that function here with minimal tweaks.
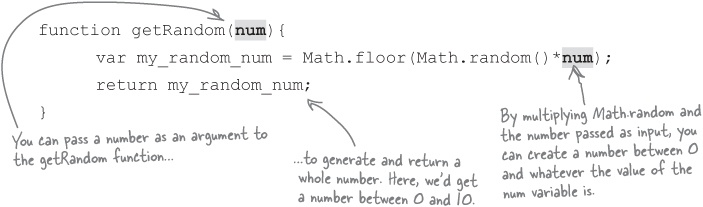
Set your variable and pass it to the function:
Here’s the core operation of the function:
And the result (or output) of the function:
Next up: the
target_position(i.e., the random face part) we want to slide to.
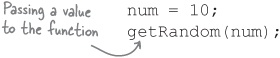


Add the bolded code to your index.html and my_scripts.js files. This will get your randomize function set up, along with some alerts that will show you the target position (which uses a random number) and the current position (which is determined by the number of times the visitor clicked).

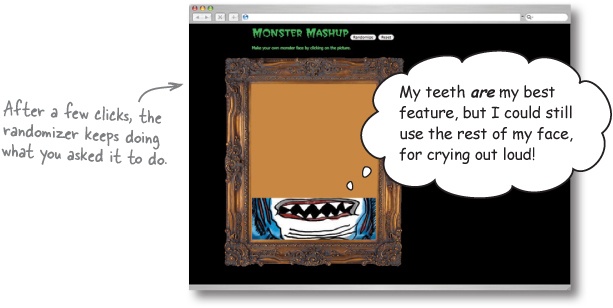
After entering the code from the previous page to your files, open up the index.html page in your favorite browser to test the randomize function. Click the Randomize button 10 to 20 times to make sure you do a full test.
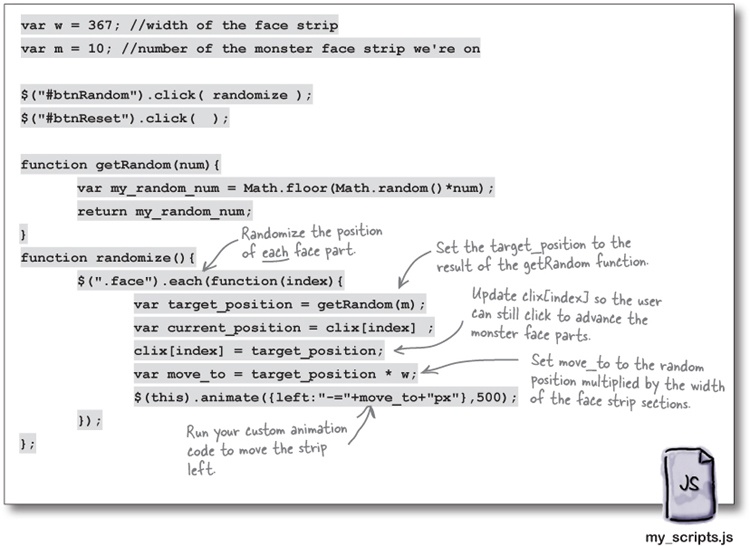
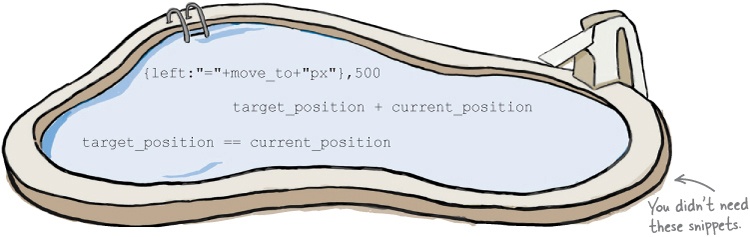
The randomizer works...
...for the first few clicks
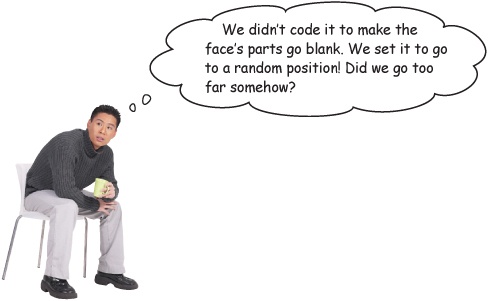
You’re right.
Those custom functions had unintended effects, but they likely did exactly what we wrote in the code. Let’s have a look at what we might not have thought about.

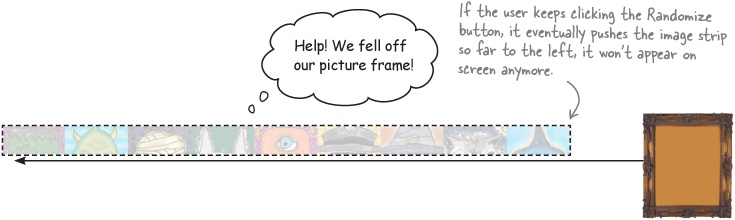
Move relative to the current position
To keep the image strip from going off the grid—but still falling correctly on a random monster face part—you need to move it relative to the current position, which means including the current position and some conditional logic. Let’s break it down.
Then the user clicks on the Randomize button, which comes up with a random number between 0 and 9. Let’s look at two different scenarios that could happen as a result.
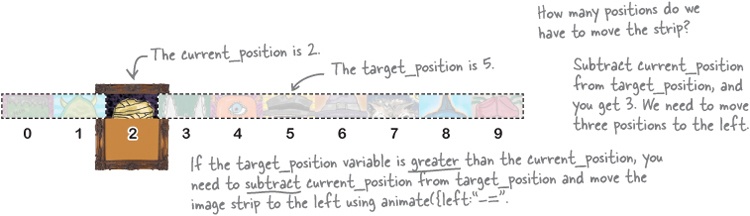
Scenario 1: target > current
The getRandom function returns a value of 5. So the target_position variable gets set to 5, which means that it’s greater than the current_position variable. We need to write conditional logic to handle this situation.
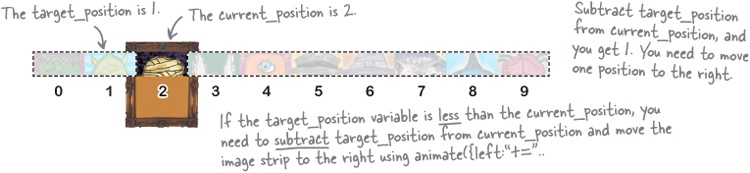
Scenario 2: target < current
The getRandom function returns a value of 1. The target_position variable is 1, which means that it’s less than the current_position variable. Based on the conditional logic from Scenario 1, can you figure out what logic you need here?
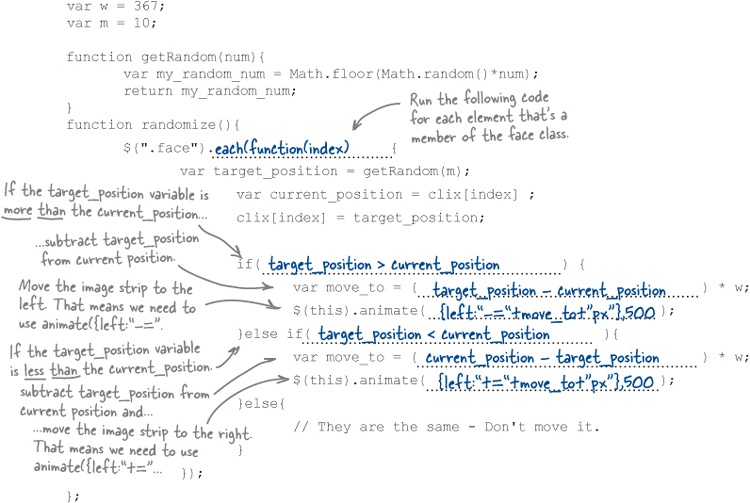
Your job is to take code snippets from the pool and place them into the blank lines in the code. You may not use the same snippet more than once, and you won’t need to use all the snippets. Your goal is to make the randomizer function work the way it is intended to, so parts of the face doesn’t go blank.
var w = 367;
var m = 10;

function getRandom(num){
       var my_random_num = Math.floor(Math.random()*num);
       return my_random_num;
}
functionrandomize(){
       $(".face").__________________{
             var target_position = getRandom(m);
                    var current_position = clix[index] ;
                    clix[index] = target_position;

                    if(____________________________________) {
                           var move_to = (____________________________________) * w;
                           $(this).animate(_____________________________);
                    }else if(____________________________________);
                           var move_to = (____________________________________) * w;
                           $(this).animate(______________________________);
                    }else{
                           // They are the same - Don't move it.
                    }
             });
};
Note: each thing from the pool can only be used once!
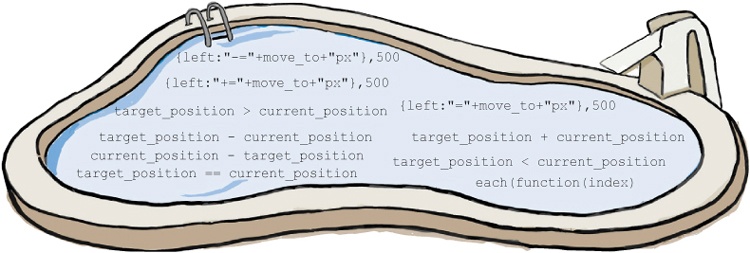
Your job is to take code snippets from the pool and place them into the blank lines in the code. You may not use the same snippet more than once, and you won’t need to use all the snippets. Your goal is to make the randomizer function work the way it is intended to, so parts of the face doesn’t go blank.
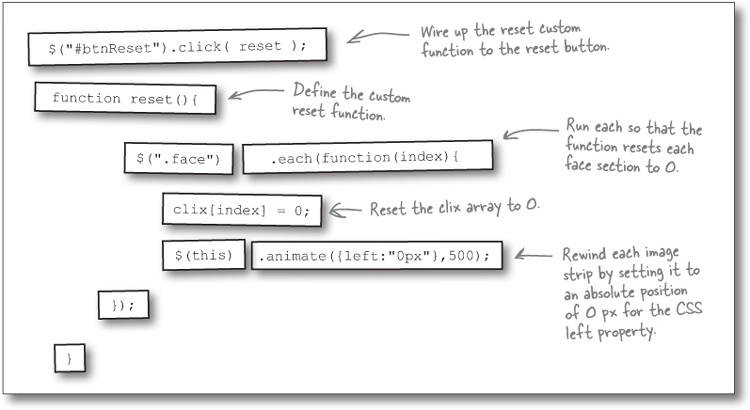
Remember that reset button in the index.html file a few pages back? Now you just need to wire it up to a custom reset function.
Put the code magnets in proper order to write the code for the reset button and build your custom reset function. We’ve done some of them for you.

Below, you’ll find all the code you’ve built in the last few pages. If you haven’t done so already, add the bolded code to your my_scripts.js file and get ready to test all the new functionality you’ve built.
Do this!
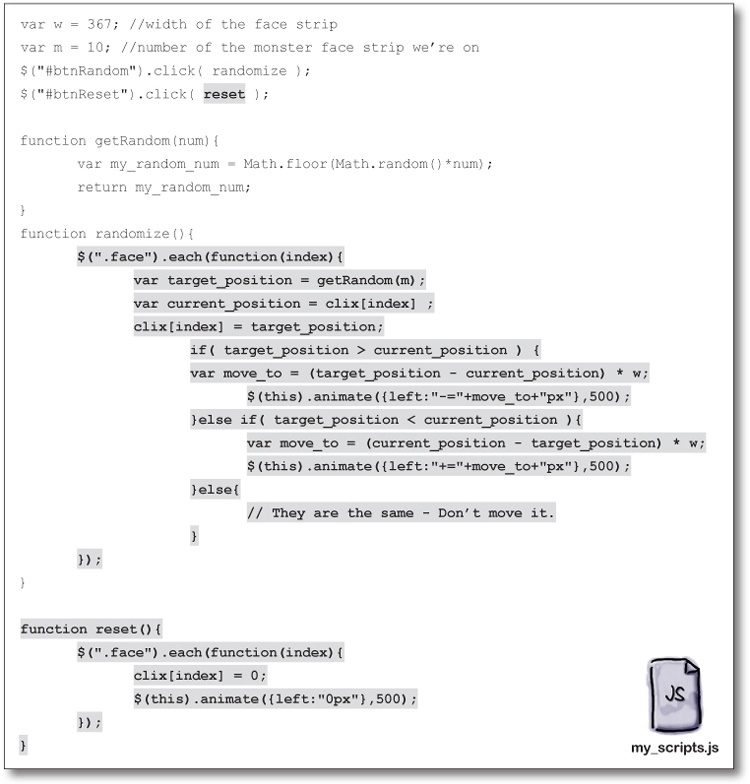
After entering the code from the previous page, open the index.html page up in your favorite browser to test the randomize and reset functions. Click the Randomize button 10 to 20 times to make sure you do a full test. Click the reset button intermittently too to make sure that’s also working how you want it to.
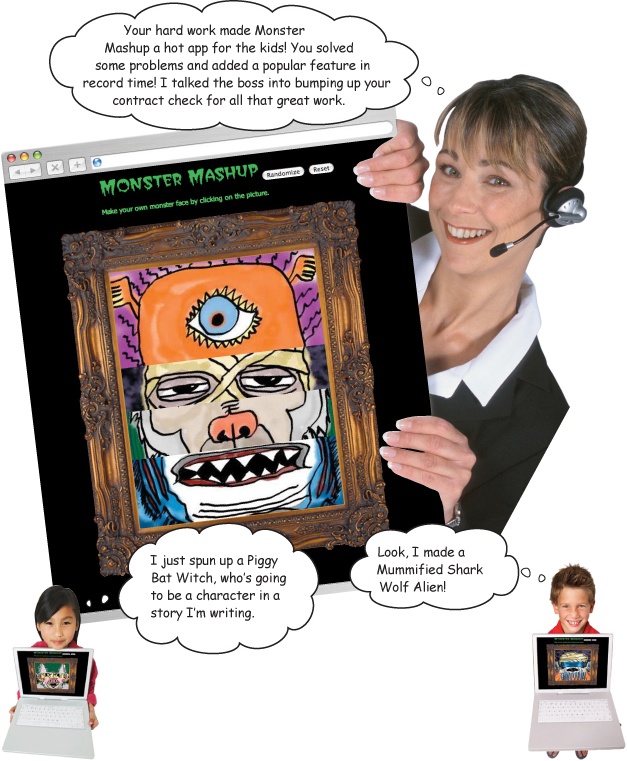
It all works!
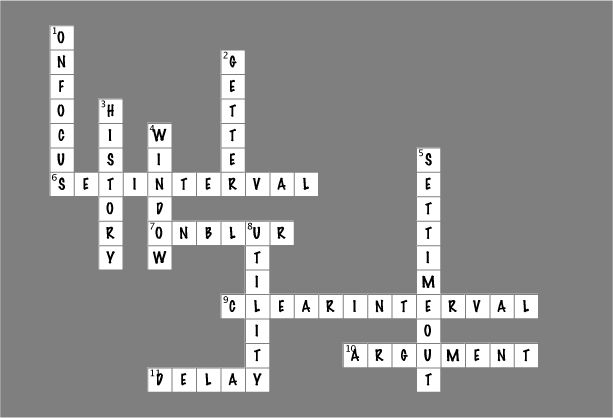
It’s time to sit back and give your left brain something to do. It’s your standard crossword; all of the solution words are from this chapter.
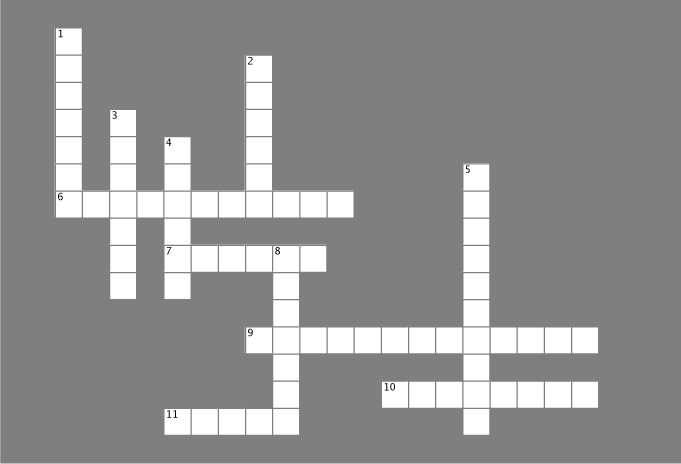
Across | Down |
6. Tells a function to run repeatedly with an interval of time between each repetition. 7. JavaScript event handler that detects when the window loses focus. 9. A JavaScript method used to cancel the period of time to wait between repetitions. 10. Used to “pass” variables or objects to a function. Hint: Think parentheses. 11. jQuery method that adds a pause between effects in a method chain. | 1. Event handler that detects when the window receives a click, keyboard input, or some other kind of input. 2. Functions that return values are sometimes referred to as ______ functions. 3. A property of the 4. The global object that’s created every time the visitor opens a new window in her browser. 5. Use this JavaScript timer method when you want to set a period of time to wait until telling a function to run. 8. What some folks call a function that does one thing and does it well: a _______ function. |
Your jQuery Toolbox
You’ve got Chapter 7 under your belt and now you’ve added the window object, timed functions, and custom functions to your toolbox.
window object
This is the topmost object in JavaScript.
It has properties, event handlers, and methods that help you detect and respond to browser events.
onFocus tells you when a browser window is active.
onBlur detects when a window loses focus.
Timed functions
Methods available for the window object.
setTimeout waits a set period of time before telling a function to run.
setInterval runs a function repeatedly, with a certain amount of time in between.
clearInterval wipes clean the schedule of repeated function calls.
Optimized custom functions
Writing your own custom functions allows you to really start making interactive web pages that people will want to use.
But you can also get carried away, and it’s important to look at how best to combine and optimize your functions so you’re writing less code that is easier to maintain and debug.