Apple put a lot of energy into exploiting the size and shape of your screen. In a program made for managing lists and reading messages, you need all the room you can get.
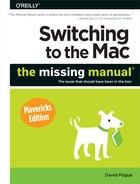
You’ve always been able to tweak Mail’s look, layout, and proportions—but now you have both the modern layout (three columns) and the Classic layout (list above, message below), which is still around. The following pages offer advice in modifying the design of both layouts.
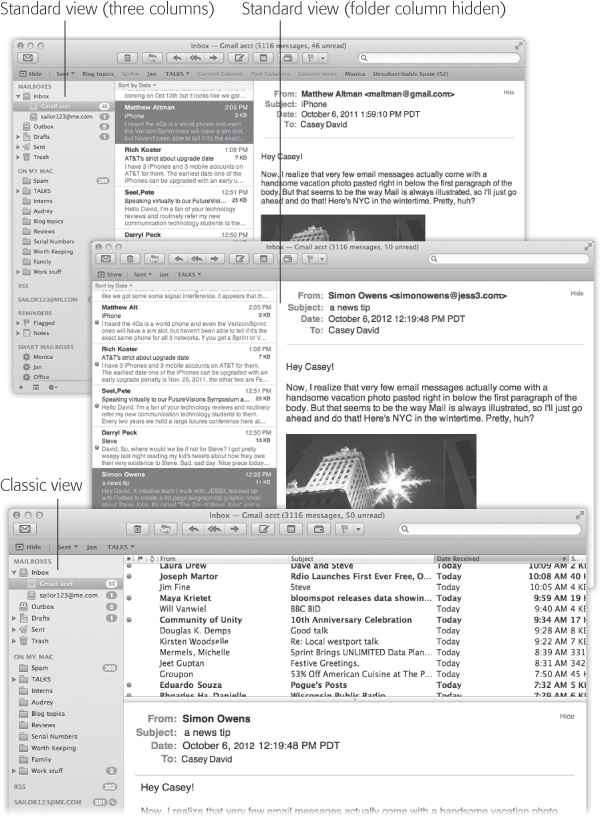
The three-column view is shown in Figure 11-1 at top. Here’s some of the plastic surgery you can perform:
Try Full Screen mode. Click the
 in the upper-right corner to make the Mail window expand to fill your monitor. (See Full Screen Mode for details on Full Screen mode.) Full Screen mode is a natural for space-hungry email, especially on a small laptop screen.
Note
In Full Screen mode, any individual message or note that you double-click pops front and center; the rest of the screen, including all your lists and panes and other messages, fades and becomes inactive. While that special effect certainly draws your attention to the one open message, it also means that you can’t copy and paste from another message, refer to another message, or drag to or from another message.
If you want to do something like that, you have to exit Full Screen mode first.
Install folders onto the Favorites bar. You can drag any icon in the mailboxes list onto the Favorites toolbar, where it becomes a button or a pop-up menu. The button works exactly like a folder: For example, you can drag a message onto one to file it there, or you can click one of these folder buttons (or use its pop-up menu) to see what’s inside.
Figure 11-1. Mail can have several different layouts. In the standard three-column view (top), all your mailboxes are grouped tidily in the far-left column. You can hide that column, though, so that you have more space for reading (middle). You can also return to the old layout (bottom), in which the messages list is above the message body.
The Favorites bar comes with starter buttons already installed, like Inbox, Sent, Notes, and so on. But you can, and should, install your own favorites there, and remove the ones you don’t want (Figure 11-2 shows this effect). (To move a button around, ⌘-drag it. To get rid of it, just drag it away from the toolbar.)
Hide the mailboxes panel completely. To do that, click the
 button above it. Now you have much more screen space to work with.
Label the toolbar buttons. Out of the box, the buttons on the toolbar (
 ,
,  , and so on) have no labels. But if you right-click (or two-finger click) the toolbar, you get a pop-up menu that offers you other styles for those buttons: Icon & Text, Icon Only, Text Only (which is very space-efficient), and None (which is even more space-efficient—provided you know the keyboard shortcuts for all the buttons you’ve just hidden away).
Change the type size/icon size for the folders in the mailboxes panel. To do that, open System Preferences→General. Use the “Sidebar icon size” pop-up menu to choose Small, Medium, or Large.
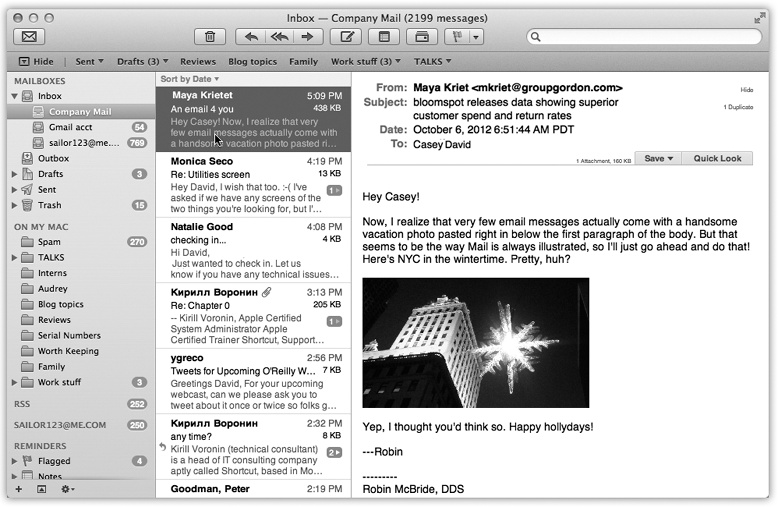
Redesign the New Message window. What signature do you want stamped on every outgoing message? Do you want the Cc and Bcc lines to show up? How about the Priority pop-up menu?
Figure 11-3. To redesign the New Message window, choose Customize from the little pop-up menu shown here (top). Now you get a full-scale model of the New Message window with all the available parts visible. Turn on the checkboxes of the pieces you want in your everyday email composing (bottom).
You can make all these settings using the little
 menu in the New Message window; see Figure 11-3.
Adjust the message window width. Drag the very right edge of the window inward or outward to adjust the width of the message itself. Double-click the edge of the messages list to hide the message completely. Now you have only the mailboxes list and the very wide messages list; to read a message, you have to double-click it to open it into a new window. (Double-click the right edge of the window to restore the message-reading pane.)
Adjust the width of the mailboxes or messages list. Similarly, you can drag the right edges of the first two columns to adjust their width. Or double-click the right edge to make the column exactly as wide as Mail thinks it should be.
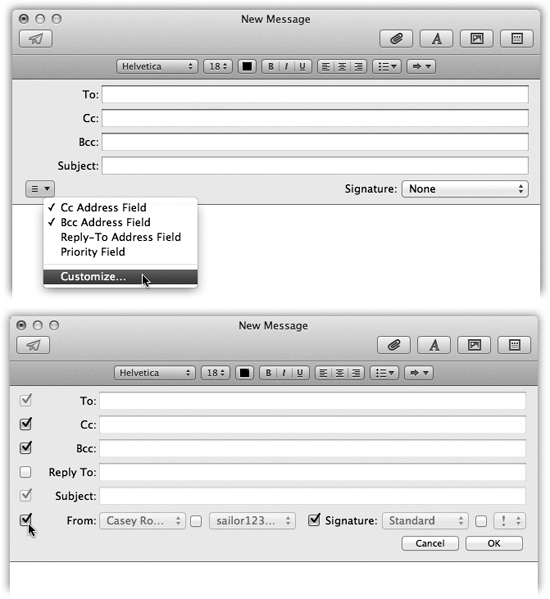
Change what morsels show up in the messages list. The messages list (center column) usually shows the sender’s name, subject line, and the first few lines of the message itself (an iPhone/iPad feature brought to the Mac). But you can add additional info displays to the list—message size, mailbox, date sent, and so on—by choosing from the View→Message Attributes submenu.
Change what details show up in the header. The header is the top part of a message, where you see the details of how the message reached you. Ordinarily, Mail shields you from the geekiest details of the header; if you really want to see it all, choose View→Message→All Headers.
But if you’d rather, you can tailor the standard header so that Mail always shows you exactly the information you want. In Mail→Preferences→Viewing, use the “Show header detail” pop-up menu to choose Custom. Now you can add just the details you always want to see: Attachments, Bcc, Cc, Flag, From, Reply-To, Resent-Cc, and so on.
Control how many lines of preview text appear. In Mail→Preferences→Viewing, you can use the List Preview pop-up menu to control how many lines of each message you want to appear, in light gray, as a preview of what’s in the message itself. You can choose up to five lines or choose None to hide the preview completely.
Sort the messages. Use the “Sort by” pop-up menu above the messages list (“by Date,” “by Attachment,” “by Unread,” and so on). Use the bottom two commands—Ascending or Descending—to control which way the sorting goes (A to Z, Z to A, or whatever).
You have full control over the toolbar. You can rearrange or remove icon buttons (by ⌘-dragging them); add interesting new buttons to the toolbar (View→Customize Toolbar); change its display to show just text labels or just icons (choose View→Customize Toolbar, and then use the Show pop-up menu); or hide the toolbar entirely (using the View→Hide Toolbar command).