
![]()
Building and Managing Azure HDInsight Clusters
Big data is at the foundation of all of the megatrends that are happening today, from social to mobile to the cloud to gaming.
—Chris Lynch, the ex-CEO of Vertica Systems
Data size has massively exploded, and with more and more terabytes generated every day, normal relational database systems cannot keep up. Now, we have what is called big data. It is a must to find faster solutions to process these massive volumes of data.
Big data processing solutions simply break the data into blocks, distributed across a cluster of nodes, which then process the data on each node in parallel, to finally combine it into an aggregated results set.
This chapter looks at Azure HDInsight as one of the big data solutions implemented by Microsoft, hosted on the Azure platform and delivered as Platform-as-a-Service. The chapter also discusses how developers and business users work with big data to get the most out of it in an easy and fast way.
What Is Big Data?
As a matter of fact, there are a lot of definitions out there for big data, so there is no need to focus on one or even come up with a new one. What’s common among big data are its characteristics, or what’s called the 3Vs.
- Volume: Big data always comes with large volume, in terabytes, thus the origin of the name. Let’s take YouTube as an example: every minute, more than 25 hours of videos are uploaded to YouTube. This gives you a quick perspective on the size of big data. Another example is the log data generated from machines creating the Internet of Things (IoT). Processing big volumes of date was a difficult issue in the past, but not anymore.
- Velocity: The speed at which big data is generated is very fast. And handling data that is received out of a fire hose is very challenging and requires special tools and skills. For example, the number of tweets generated every minute surpasses 98,000. Social media analytics solutions have to handle this frequency of received data.
- Variety: Big data is not just logs and records; it’s also audio, videos, images, and binary files that need to be processed. Sometimes, it is a mix between these different types. Getting the most valuable information out of such a variety of data is no easy job.
A lot of enterprises now make use of the concept of the data lake. This is where all their data resides, from structured data solutions (like ERP and CRM) and normal database solutions, to unstructured types of data like server logs, PR materials, and even the social feed that’s concerned with their products. Trying to marry both types is a key differentiator for an enterprise, and a challenging job as well.
Now you understand what big data is. Next, you need to understand what HDInsight is, but before then, it is very important to understand what Hadoop is since it’s the core of HDInsight.
Hadoop is an Apache open source software library and framework that enables distributed storage and the processing of large data sets across clusters of computers.
The framework can handle high availability, detect and handle any issues of failures in the application layer, and is designed to scale from a single computer to thousands of machines. Storing data and processing it happens on each machine, which allows a parallel processing of data in an easier and faster way.
Hadoop was founded by Doug Cutting and Mike Cafarella in 2005. Cutting was a Yahoo! employee at the time. He named Hadoop after his son’s toy elephant (that’s why the elephant icon is always the representation for Hadoop, and many times for big data in general).
Currently, Hadoop has a very large ecosystem of libraries and a wide community of committers and contributors to its source. However, the framework basically consists of four main components:
- Hadoop Common: The common utilities that support other modules.
- Hadoop Distributed File System (HDF): A distributed file system that provides high-throughput and performance access to application data across Hadoop clusters.
- Hadoop YARN: A framework for job scheduling and cluster resource management.
- Hadoop MapReduce: A YARN-based system for parallel processing of large data sets.
Remember that Hadoop is written in Java. In this chapter you are introduced to Hadoop components and usage, and you are shown how you can work with it.
Introduction to HDInsight
HDInsight is the result of a partnership between Hortonworks and Microsoft. It’s the implementation of Hadoop in the cloud.
Using Microsoft Azure, developers and administrators can easily create, scale, and maintain a large cluster of nodes. So, you can imagine that Microsoft layered Apache Hadoop with a thin layer of .NET libraries and integrated it into Windows to facilitate working on the Azure infrastructure.
HDInsight can be found in three implementations:
- Windows downloadable: A single node for HDInsight on one machine; for testing and development purposes only, not for production use.
- Microsoft APS: The Analytical Platform System. HDInsight can be bought as a separate portion, mounted and connected to the platform.
- Microsoft Azure: The focus of this chapter. You can utilize the cloud computing capabilities and infrastructure to create and use any number of nodes per cluster.
![]() Note Microsoft APS is the Analytical Platform system, formerly known as Parallel Data Warehouse (PDW). It’s an implementation of shared-nothing parallel SQL Servers deployed on a number of machines with a master node that distributes tables between different servers, and queries and returns the results. It exists as a stand-alone appliance in which customers can add more servers for storage and processing power. Also, customers can choose either a SQL Server or HDInsight portion to be added to the appliance.
Note Microsoft APS is the Analytical Platform system, formerly known as Parallel Data Warehouse (PDW). It’s an implementation of shared-nothing parallel SQL Servers deployed on a number of machines with a master node that distributes tables between different servers, and queries and returns the results. It exists as a stand-alone appliance in which customers can add more servers for storage and processing power. Also, customers can choose either a SQL Server or HDInsight portion to be added to the appliance.
Creating an HDInsight cluster on Azure is an easy and straightforward task. Just enter the name of the cluster, which must be unique, give it a password for the admin user, and enter the number of data nodes required. Azure provisions and configures the cluster in minutes and it will be operational.
So, what actually happens in the background when you first create a new cluster request? As an example, let’s assume you are creating a four-node cluster.
First, Azure validates the cluster requirements, and then creates two head nodes on A3 or A4 VM instances and two nodes for high-availability clusters; according to the requested number of data nodes, there is an A3 VM instance for each node—in this case, four A3 VM instances. These six machines (two head VMs and four data VMs) are billed from the user account. Head and data nodes are billed by the minute.
Next, Azure creates another two machines on A2 VM instances for security and three Zookeeper nodes on A1 VM instance for cluster management. These five machines are free—users don’t get charged for them.
Keep in mind that there are other Azure-associated services that charge for use, such as storage and data transfer. However, compared to the cost of the VMs, these charges are considered minimal to some extent.
![]() Note An HDInsight cluster is billed the moment the cluster is created. Clusters cannot be deallocated or put on hold. Therefore, the only way to stop billing is to delete the cluster itself.
Note An HDInsight cluster is billed the moment the cluster is created. Clusters cannot be deallocated or put on hold. Therefore, the only way to stop billing is to delete the cluster itself.
Unlike typical Hadoop distribution installation that requires data to be stored on machines that contain data nodes, Microsoft implemented a seamless library for HDInsight to access Azure Storage blobs. So, no need to move the data inside the data nodes. Data can reside in normal Azure blob storage and HDInsight is able to access and process it. This is extremely useful for two reasons:
- The ease of uploading data to Azure, either from a running system or using PowerShell.
- When the cluster is deleted, data is preserved so that the cluster can be utilized for processing only, instead of maintaining data; this saves a lot of cost.
Still, you can use the internal storage of the data nodes, but it’s always preferable to use the Azure blob storage for the previous two points. Figure 12-1 shows how the storage works in Azure HDInsight.

Figure 12-1. HDInsight cluster storage mechanism
Understanding how the storage for HDInsight works is crucial before proceeding, because all the examples utilize the Azure blob storage.
Creating Your First Cluster
Now, let’s get started with creating your first HDInsight cluster. You can use either the Azure management portal or PowerShell.
Creating HDInsight Cluster Using PowerShell
Before you start building the HDInsight cluster, let’s prepare the storage that will be used by your cluster. Actually, Azure storage was discussed in Chapter 3, but this is a good opportunity to refresh your memory.
To provision the cluster, you first need to add storage to be used for the cluster.
New-AzureStorageAccount -StorageAccountName "pshdclstrstorage" -Location "East US"
![]() Note Remember that the storage location should in one of the data centers with available HDInsight service, which are Southeast Asia, North Europe, West Europe, East US, and West US.
Note Remember that the storage location should in one of the data centers with available HDInsight service, which are Southeast Asia, North Europe, West Europe, East US, and West US.
After successfully creating a storage account, you need to create a container for the cluster data so that you can provision the cluster. Just remember that to create the container, you need the storage context object.
$StorageAccountName = "pshdclstrstorage"

$StorageAccountKey = Get-AzureStorageKey pshdclstrstorage | %{$_.Primary}

$storageContext = New-AzureStorageContext -StorageAccountName $StorageAccountName -StorageAccountKey $StorageAccountKey

New-AzureStorageContainer -Name "storageforcluster" -Context $storageContext
Now you’re ready to provision your cluster. For this purpose, you will use the New-AzureHDInsightCluster cmdlet. The following code sample creates a one node cluster named pshdclstr located in the East US region.
$ClusterName = "pshdclstr"

$ClusterStorageAccountName = "pshdclstrstorage.blob.core.windows.net"

$ClusterStorageContainer = "storageforcluster"

$ClusterSize = 1

New-AzureHDInsightCluster -Name $ClusterName -Location "East US" -DefaultStorageAccountName $ClusterStorageAccountName -DefaultStorageAccountKey $StorageAccountKey -DefaultStorageContainerName $ClusterStorageContainer -ClusterSizeInNodes $ClusterSize
After submitting the request, a pop-up for username and password appears. It asks you for the cluster’s credentials. The credentials that you enter create a new account to start the Azure HDInsight cluster.
You may watch the progress in the upper bar of the PowerShell window or by logging in to the management portal and watching the updates. After the successful creation of the cluster, you receive the message shown in Figure 12-2.
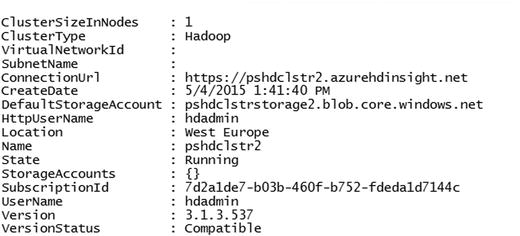
Figure 12-2. Created cluster information
Congratulations, you have created your first cluster. Now list the details of your new cluster using the Get-AzureHDInsightCluster cmdlet. Specify the name of the cluster using the -Name parameter.
Get-AzureHDInsightCluster -Name pshdclstr
You can also destroy (delete) the cluster using the Remove-AzureHDInsightCluster cmdlet.
Remove-AzureHDInsightCluster -Name pshdclstr
Now that you’ve created your first Azure HDInsight cluster and learned how to destroy it, let’s look at what you can achieve with it.
Working with HDInsight Clusters
The cluster is now ready to operate. You can start using it to submit the MapReduce jobs you need. But, first you need to understand the MapReduce concepts and methods of dealing with big data.
From the name, you may notice that MapReduce is divided into two actions: the Map job and the Reduce one. For mapping, code is written to run on the data nodes to do actions on the data, such as counting the number of occurrences of a specific word, or calculating the average of all numbers. The Reduce job is the code that happens on the master node that collects all the results from all the nodes and presents the result at the end.
MapReduce is a framework that is used by many other applications of the Hadoop ecosystem to carry out functions. Also, many MapReduce jobs can run simultaneously with the YARN framework (which separates the resource allocation from MapReduce).
Hadoop MapReduce job code is written in Java, and with HDInsight it can be written in C# as well. The following example shows how to submit a MapReduce job, receive the output, read the files, and print it to the screen.
Now you use the word count sample that’s available with every newly created cluster. First, you have to define the MapReduce job using the New-AzureHDInsightMapReduceJobDefinition cmdlet. Also, you need to use the -JarFile parameter to specify that the jar file contains the code, the -ClassName parameter to define the name of the job class in the jar file, and the -Arguments parameter to select the file that you want to count the number of words and the location to store the output file.
#Specify the Jar file location
$JarFilePath = "/example/jars/hadoop-mapreduce-examples.jar"

#Define the Job class name within the JarFile
$ClassName = "wordcount"

#Define the MapReduce Job
$wordCountJob = New-AzureHDInsightMapReduceJobDefinition -JarFile $JarFilePath -ClassName $ClassName -Arguments "/example/data/gutenberg/ulysses.txt", "/example/data/WordCountOutput2"
Next, you use the Start-AzureHDInsightJob cmdlet to execute the MapReduce job. Don’t forget the -Cluster parameter to choose which HDInsight cluster to execute this job on, in case you have more than one. Then, within the same code, you use the Wait-AzureHDInsightJob cmdlet to wait for the job completion or failure. Finally, you retrieve the log output of the job using the Get-AzureHDInsightJobOutPut cmdlet (see Figure 12-3).
$wordCountJob | Start-AzureHDInsightJob -Cluster pshdclstr | Wait-AzureHDInsightJob -WaitTimeoutInSeconds 3600 | %{Get-AzureHDInsightJobOutput -Cluster pshdclstr -JobId $_.JobId -StandardError}

Figure 12-3. MapReduce Job output
The preceding output shows the map-and-reduce process in the running code. The rest of the output is the 49 counters of the job, listed here:
File System Counters
                FILE: Number of bytes read=364953
                FILE: Number of bytes written=929898
                FILE: Number of read operations=0
                FILE: Number of large read operations=0
                FILE: Number of write operations=0
                WASB: Number of bytes read=1573207
                WASB: Number of bytes written=527522
                WASB: Number of read operations=0
                WASB: Number of large read operations=0
                WASB: Number of write operations=0
        Job Counters
                Launched map tasks=1
                Launched reduce tasks=1
                Rack-local map tasks=1
                Total time spent by all maps in occupied slots (ms)=8391
                Total time spent by all reduces in occupied slots (ms)=15500
                Total time spent by all map tasks (ms)=8391
                Total time spent by all reduce tasks (ms)=7750
                Total vcore-seconds taken by all map tasks=8391
                Total vcore-seconds taken by all reduce tasks=7750
                Total megabyte-seconds taken by all map tasks=6444288
                Total megabyte-seconds taken by all reduce tasks=11904000
        Map-Reduce Framework
                Map input records=33055
                Map output records=267975
                Map output bytes=2601773
                Map output materialized bytes=364958
                Input split bytes=164
                Combine input records=267975
                Combine output records=50091
                Reduce input groups=50091
                Reduce shuffle bytes=364958
                Reduce input records=50091
                Reduce output records=50091
                Spilled Records=100182
                Shuffled Maps =1
                Failed Shuffles=0
                Merged Map outputs=1
                GC time elapsed (ms)=67
                CPU time spent (ms)=8562
                Physical memory (bytes) snapshot=528752640
                Virtual memory (bytes) snapshot=829153280
                Total committed heap usage (bytes)=584056832
        Shuffle Errors
                BAD_ID=0
                CONNECTION=0
                IO_ERROR=0
                WRONG_LENGTH=0
                WRONG_MAP=0
                WRONG_REDUCE=0
        File Input Format Counters
                Bytes Read=1573043
        File Output Format Counters
                Bytes Written=527522
The counters give full diagnostics information of the job run. This helps a lot in realizing and optimizing the time consumed and the size of the bytes read in the process. However, in this example, you do not see the results of the function that run, because you export the results to a file named WordCountOutPut2 in the job definition command.
The following code generates a URI for the output file so that you can get it and read the results inside.
Get-AzureStorageBlobContent -Container storageforcluster -Blob "example/data/WordCountOutput2/part-r-00000" -Context $storageContext -Force
Then, you search for how many times a word, book, is mentioned (see Figure 12-4).
Get-Content "./example/data/WordCountOutput2/part-r-00000" | findstr "book"

Figure 12-4. The results outputHive file in HDInsight
Hive is one of the most useful platforms on Hadoop; it utilizes the MapReduce framework to submit SQL-like queries to the data and return the results. Some people consider it the data warehouse of big data.
Hive creates tables in the data files or file folder in the Hadoop system; In HDInsight, it can be a container or a blob in Azure storage. Queries to this table like normal SQL queries get translated into a MapReduce job executed on the cluster; the results are returned to the user.
Let’s look at an example of working with airline data logs on Hive and see how PowerShell helps in the process.
For this example, you will use the airline and airport information from the US Bureau of Transportation Statistics, available at www.rita.dot.gov/bts/sites/rita.dot.gov.bts/files/subject_areas/airline_information/index.html. You will use it to generate air carrier summary data to analyze with Hive.
First, using the Set-AzureStorageBlobContent cmdlet, you need to upload the file to a container on Azure storage to create a table accessing this data.
Set-AzureStorageBlobContent -File "c:airlinesdata.csv" -Container "storageforcluster" -Blob "/example/data/airlinesdata.csv" -context $storageContext
You use the same context you created earlier to access the same storage. Also, you created a container named data to upload all the files to. A file named airlinedata.csv has been uploaded to the storage. Now, you are ready to create a table over this file, but first connect to the cluster using the Use-AzureHDInsightCluster cmdlet.
Use-AzureHDInsightCluster -ClusterName pshdclstr
You will receive a message that you are successfully connected to the pshdclstr cluster. Here, you can invoke queries on Hive and receive the results. Let’s create the queries first.
$q= "CREATE EXTERNAL TABLE airlines(QUARTER string,UNIQUE_CARRIER string,UNIQUE_CARRIER_NAME string,CARRIER_NAME string,ORIGIN_AIRPORT_ID int,ORIGIN string,ORIGIN_CITY_NAME string,SERVICE_CLASS string,REV_PAX_ENP_110 float) ROW FORMAT DELIMITED FIELDS TERMINATED BY ’,’ STORED AS TEXTFILE LOCATION ’wasb://[email protected]/storageforcluster/example/’;"
Assign a variable named $q with the table that you named airlines. This table contains nine columns, as mentioned in the create statement. You can see that it’s similar to normal SQL, to an extent.
Hive doesn’t handle quoted text so we use "ROW FORMAT DELIMITED FIELDS TERMINATED BY ’,’" to process the data and define its format in the the .csv file; the rows are normally formatted; the delimiter of columns is the ’,’. The final part is "STORED AS TEXTFILE LOCATION ’wasb://[email protected]/ ’;", which tells HDInsight that the source file is located in a blob storage named pshdclstrstorage and in a blob named data.
Notice the "wasb://", which is used to locate the files stored on the default HDInsight storage container, called storageforcluster in this case, to be accessed by the cluster data or code files.
![]() Note You used the external table type, not the normal (internal) tables. When internal tables are created, it moves the file containing the data inside the cluster in /data/warehouse/. However, when you use external, files aren’t moved, so the table is connected to the original file—in this case, all the data under the blob. So, adding more files of the same format to the blob will change the query results every time, without the need to rebuild the table.
Note You used the external table type, not the normal (internal) tables. When internal tables are created, it moves the file containing the data inside the cluster in /data/warehouse/. However, when you use external, files aren’t moved, so the table is connected to the original file—in this case, all the data under the blob. So, adding more files of the same format to the blob will change the query results every time, without the need to rebuild the table.
Now, execute the query using the Invoke-Hive cmdlet. The Invoke-Hive cmdlet executes the query to the Hive framework on the cluster and returns the results with the job_id, or errors, if they occurred (see Figure 12-5).
Invoke-Hive -Query $q

Figure 12-5. The results of creating the Hive table
To make sure of the creation of the report, you can list all the tables in the Hive metastore by using the following command:
Invoke-Hive -Query "show tables;"
PowerShell executes and returns two tables: Hivesampletable, which is a demo table created by default, and the airlines table, as shown in Figure 12-6.

Figure 12-6. Hive query results
You want to query the total number of flights flown in 2014 according to the downloaded report. Thus, you create another query and submit it to Hive.
$q2 = "select count(1) from airlines"

Invoke-Hive -Query $q2
For Hive to calculate the total number of records, it needs to submit a MapReduce job and return the results to the screen, as shown in Figure 12-7.

Figure 12-7. The count query results
To get more information on the job execution, such as status or the time the job executed in, use the Get-AzureHDInsightJob cmdlet along with the -JobId parameter. An example output is shown in Figure 12-8.
Get-AzureHDInsightJob -Cluster pshdclstr -JobId "job_1421053567758_0019"

Figure 12-8. The job query output
Some queries do not need to use MapReduce, such as retrieving the whole data set using the Select * command as Hive dumps back the whole file. Of course, showing 13,000 records is not something you want to read on a PowerShell console screen, but you can try to select the top five records by using the following command:
Invoke-Hive -Query "select * from airlines LIMIT 5;"
PowerShell returns the results back to shell. Five records can be human readable to confirm the correct creation of the table.
So, you have created a Hive table, but what about updating it? Can you update the data in the Hive table? Let’s try to update all the values in the Quarter column from 1 to Q1 and see the results (see Figure 12-9).
Invoke-Hive -Query "update airlines set QUARTER=Q1 where QUARTER=1;"

Figure 12-9. An error submitting the update query
You receive an error that the word update cannot be recognized. This is because the current version of Hive does not allow insert, update, and delete operations. Hive is for data warehousing; it is not a transactional data store, so it is very important to define the workload required to use Hive. Hive’s edge is in using it for heavy scan-centric queries.
Another method for submitting a Hive query is to use the Hive job definition in the PowerShell library. Submitting the same query for the count can be done using the New-AzureHDInsightHiveJobDefinition cmdlet along with the query syntax. This cmdlet returns a job id that is used as an input for the Start-AzureHDInsightJob cmdlet.
#Define Hive Job
$hiveJobDef = New-AzureHDInsightHiveJobDefinition -Query "select count(1) from airlines;"

#Star Hive Job
$hiveJob = Start-AzureHDInsightJob -Cluster pshdclstr -JobDefinition $hiveJobDef
The job is submitted, but unlike the Invoke-Hive cmdlet, you don’t see the results of the progress on the PowerShell; so you use the Wait-AzureHDInsightJob cmdlet to show the progress.
Wait-AzureHDInsightJob -Job $hiveJob -WaitTimeoutInSeconds 3600
PowerShell brings up the progress bar at the upper side of the console, as shown in Figure 12-10.

Figure 12-10. Job status details
Although, you didn’t receive the result of the query, the brief results appear on the console. This is where the Get-AzureHDInsightJob cmdlet becomes handy, as follows, to show the results on the console.
Get-AzureHDInsightJobOutput -Cluster pshdclstr -JobId $hiveJob.JobId
You still can submit Hive queries on the HDInsight web interface when logging into the cluster page. The URL is on the dashboard screen when you click the cluster on the Azure management portal, as shown in Figure 12-11.

Figure 12-11. A cluster dashboard showing the web link
A pop-up for the username and password appears so that you can authenticate the user. Clicking the Hive Editor tab opens the Hive editor, where you can see all submitted queries, execute new ones, and get the results, as shown in Figure 12-12.

Figure 12-12. Running the count from the web screen
Clicking the name of the query in the lower table opens a pop-up showing the MapReduce job results and the query results.
In summary, you can see how Hive is easy and efficient for querying big data on HDInsight clusters. You can also see the seamless integration that Microsoft provides for such a powerful platform.
There are differences between normal SQL and HiveQL (the name of the SQL used with Hive). For a SQL background engineer, it’s very easy to get around, as it still requires a base knowledge of database concepts.
As previously mentioned, all interaction done on an HDInsight cluster happens with PowerShell. And the library is powerful in facilitating all required actions—creation, management, interactive job submission, and working with the rest of the ecosystem tools, such as Hive.
You can do some of these actions on the web interface and you have access to the head node as well. Some of the special configurations require access to the HDP distribution files, such as configuring third-party tools. An example is the AVRO serialization configuration that requires access to the configuration file on Hive. For this purpose, you can use the Add-AzureHDInsightConfigValues cmdlet, or request remote access to the head node from the configuration tab on the Azure management portal section of the cluster.
When you open the configuration tab on the management portal, you see an Enable remote icon in the lower strip. Clicking it opens a window asking for a new username, password, and expiration date to specify when access to the head node will be revoked. The expiration should be within seven days of the creation day, as shown in Figure 12-13.

Figure 12-13. Head node remote desktop configuration
A few minutes are required for the configuration to complete, and a new connect icon appears. Clicking it opens a remote desktop configuration file that can be used to access the head node machine.
Entering the correct username and password lets you access the head node and begin interacting with the virtual machine. On the desktop, you find four shortcuts:
- Hadoop Command Line: This is a shortcut to the command line that uses the Hadoop shell, Hive shell, or the Grunt shell (Pig). You can use this command line to put files in internal HDFs and work with them.
- Hadoop Name Node Status: A web page showing the current status of node storage and connectivity.
- Hadoop Service Availability: A web page showing the all available services statuses.
- Hadoop YARN Status: This shows the currently running MapReduce jobs and the logs of the jobs on the YARN platform.
Let’s use the Hadoop command line to interact with HDP. First, you can query the currently available files. As you can see, the command opens on the Hadoop exe location that resides under the appsdisthadoop<version> directory, where the version is being changed according to the distribution used in the creation. The following command lists the Hadoop system files (also see Figure 12-14).
C:appsdisthadoop-2.4.0.2.1.9.0-2196> hadoop fs -ls /

Figure 12-14. Hadoop command shell
To add new files, use the Hadoop fs -put command. Upload the airlines file (that you used earlier in Hive) from the local machine to the remote machine (copy and paste to c:data in the remote machine). Then, you use the command below
C:appsdisthadoop-2.4.0.2.1.9.0-2196> hadoop fs -put c:dataairlinedata.csv /airlinedata.csv
This uploads the file to the Hadoop system. If you do another hadoop fs -ls /, you can see that the file is shown and you can tail this file to read it.
C:appsdisthadoop-2.4.0.2.1.9.0-2196> hadoop fs -tail /airlinedata.csv
The last few records appear on the shell. Now you can create submit MapReduce jobs on this file and create Hive table accessing it. But remember that once the cluster is deallocated, all virtual machines associated will be deleted and the file will be lost. So, that’s why it is always preferable to use Azure blob storage to keep the data persistent.
Opening the Hadoop Name Node Status shortcut accesses the status of the cluster, first showing a quick overview on the cluster. Also, all information regarding the data nodes are available in another tab. Snapshots, startup progress, and some utilities are available as well. Figure 12-15 shows the overview information available.

Figure 12-15. Hadoop status overview
The Hadoop YARN status shows a log of all the MapReduce runs with details. This can be used for looking at the execution details of jobs, as well as having a full picture about the status of all jobs. Figure 12-16 shows the listing of all jobs.

Figure 12-16. Hadoop YARN status
You can see how to retrieve the output of a specific job and show the results. But sometimes it’s required and easier to list all the run jobs and drill further into the information.
Summary
Big data is one of the biggest trends in IT, and Microsoft certainly realizes how important it is. With a rich set of features, Microsoft utilizes one of the best Hadoop distributions in the market by adding it to Azure with seamless integration with PowerShell. Capitalizing on the knowledge of administrators and developers, processing big data isn’t an issue. With simple clicks and commands, a big data solution can be created—doing all the heavy lifting so that developers can focus on the business.
Well, unfortunately this chapter is the last destination in our Azure PowerShell journey! I want to thank you for being on board. There is no doubt that cloud computing is becoming the new norm in the IT industry. There is also no doubt that Microsoft Azure and Windows PowerShell are two great technologies, and that they are better together. I hope this book has demonstrated that.
To remind you of what you learned in this book, we started from scratch with an overview of Microsoft Azure services and architecture, and Azure PowerShell. Then, we moved on to more advanced topics, discovering how to use Azure PowerShell to automate the different Azure IaaS components such as Azure Storage Accounts, Azure VMs, Azure Virtual Networking, and Azure RemoteApp; also, PaaS components such as Azure web apps, Azure SQL Database, Azure HDInsight, and Azure Automation. Finally, we jumped into the identity and access management components such as Azure Active Directory and Azure Rights Management.
Most probably, while you are reading this now, there are more Azure services that support Azure PowerShell, and even more updates to the existing services than at the time I wrote this book. However, as long as you understand how the service works, I guarantee you that the knowledge you gained here is enough to let you catch onto and adopt those changes and updates smoothly with minimal guidance.
Well, it seems that I can’t stop writing! I hope that you enjoyed reading the book as much as I enjoyed writing it.
Stay Safe. I’ll miss you. Good Luck!