
![]()
Testing React Components
As our applications grow more complex and we continue to add new features, we need to verify that our new implementations haven’t introduced bugs to our existing functionalities. Automated testing provides a living documentation of expected behaviors and allows us to develop with more confidence, knowing that any problems will be immediately apparent.
In this chapter, we will introduce Jest (React’s preferred testing framework) and TestUtils, a set of methods that makes it easy to test React components in any common JavaScript testing framework.
Jest
Jest is React’s recommended testing framework. It is based on the popular Jasmine framework and adds a few helpful features:
- It runs your tests with a fake DOM implementation (so that your tests can run on the command line).
- It has support for JSX out of the box.
To use Jest on a project, only two things are necessary: a test task configured in the package.json file and a __tests__ folder that is the default location for Jest test files. To illustrate, let’s create a new folder and set up this structure.
In a new folder, create a package.json project file (npm init -y) and install Jest and babel-jest (npm install –save-dev jest-cli babel-jest).
Next, edit the package.json file to set up the test task using Jest and babel-jest. Listing 9-1 shows the updated file.
It is worth noticing in Listing 9-1 the usage of the <rootDir> config param. It points to the root directory that Jest should scan for tests and modules within. When used inside the package.json, the value for this config param defaults to the directory of the package.json.
Finally, create a __tests__ folder (notice the double underscore characters at the beginning and end) to complete the basic structure.
Getting Started
Before moving to React, let’s set up a Jest test environment using a plain JavaScript object. Consider a scenario where you want to test the following sum.js file in the root folder of the project (as shown in Listing 9-2).
In the __tests__ folder, create a sum-test.js file, as shown in Listing 9-3.
Now you can run the tests using the test task you set up in the earlier section (npm test). The output is shown in Figure 9-1.

Figure 9-1. Test passed
![]() Note In the first line of your test file, notice that you disabled Jest’s auto-mocking (with jest.autoMockOff).
Note In the first line of your test file, notice that you disabled Jest’s auto-mocking (with jest.autoMockOff).
Automatic mocking allows the isolation of a module from its dependencies. The intention is to be able to test only a unit of code in isolation without relying on the implementation details of its dependencies.
However, not all code can be tested without relying on its dependencies (especially in existing code bases where code wasn’t generated with testing in mind). In these cases, a better strategy is to disable auto-mocking and explicitly set mock on for some specific modules.
React Test Utilities
React comes with a suite of built-in test utilities that facilitates the process of testing components. The test utilities are provided as a separated add-on package on npm. Install it using npm install --save-dev react-addons-test-utils.
Rendering a Component for Testing
The most-used React test utilities method is renderIntoDocument. As the name suggests, it renders a component into a detached DOM node; this allows you to make assertions about the generated DOM without inserting the actual component in the page. In the most basic form, you can do something like this:
let component = TestUtils.renderIntoDocument(<MyComponent />);
You can then use findDOMNode() to access the raw DOM element and test its values.
Example Using renderIntoDocument and Jest
To exemplify, let’s create a new project using the default structure you saw in the “Jest Test Project Structure” section. Create a CheckboxWithLabel component in the root folder and a CheckboxWithLabel_test.js file in the __tests__ folder. Figure 9-2 shows the project structure.

Figure 9-2. React project structure with tests
Next, update the package.json file to include the jest test task configuration. It will be a little different from the previous version because you will include a React-specific configuration. Listing 9-4 shows the updated package.json.
The React component is pretty straightforward: you implement a simple checkbox that swaps between two labels, as shown in Listing 9-5.
In the test code, you start by using React’s TestUtils renderIntoDocument to get a detached DOM node with your component. Immediately after that you use ReactDOM.findDOMNode() to access the raw DOM element from your component. Finally, you make an assertion, expecting that the component label starts with the “off” label. Listing 9-6 shows the test file.
Running the npm test, your test passes. Notice that we were only able to write our tests using ES6 syntax because we’ve using babel-jest (included as a dependency in the package.json project file), as shown in Figure 9-3.

Figure 9-3. Test result
Transversing and Finding Children
Having a component rendered into a DOM node is the first step in testing React components, but in most cases you will want to transverse the component’s rendered tree to find and make assertions on specific children. React’s TestUtils provide six functions for this purpose, as shown in Table 9-1.
Table 9-1. Utility Functions for Transversing and Finding Children in the Component’s Rendered Tree
Function | Description |
|---|---|
scryRenderedDOMComponentsWithClass | Finds all instances of components in the rendered tree that are DOM components with the class name matching className. |
findRenderedDOMComponentWithClass | Like scryRenderedDOMComponentsWithClass() but expects there to be one result, and returns that one result, or throws an exception if there is any other number of matches besides one. |
scryRenderedDOMComponentsWithTag | Finds all instances of components in the rendered tree that are DOM components with the tag name matching tagName. |
findRenderedDOMComponentWithTag | Like scryRenderedDOMComponentsWithTag() but expects there to be one result, and returns that one result, or throws an exception if there is any other number of matches besides one. |
scryRenderedComponentsWithType | Finds all instances of components with type equal to componentClass. |
findRenderedComponentWithType | Same as scryRenderedComponentsWithType() but expects there to be one result and returns that one result, or throws an exception if there is any other number of matches besides one. |
Let’s add a new test to your sample project to exemplify the use of the find utilities. Use the findRenderedDOMComponentWithTag function to get the input element and verify that it is not checked by default. Listing 9-7 shows the updated source code.
One of the most useful utilities in React’s TestUtils is the Simulate function, which lets you trigger user events like mouse clicks, for example. Let’s add a new test to your previous project, simulating a click to change the CheckboxWithLabel text. Listing 9-8 shows the updated test file.
Shallow rendering is a new feature introduced in React 0.13 that lets us output a component’s virtual tree without generating a DOM node. This way we can inspect how the component would be built, but without actually rendering it. The advantages of this approach over using renderIntoDocument includes removing the need for a DOM in the test environment (which is consequentially much faster), and the fact that is allows us to test React components in true isolation from other component classes. It does this by allowing us to test the return value of a component’s render method, without instantiating any subcomponents.
In its current state, shallow rendering is still an experimental feature, but it is starting to gain traction and will be the recommended way to test components in the future.
Using shallow rendering is straightforward. You begin by creating an instance of the shallow renderer and then use it to render a component and grab the output. Listing 9-9 shows a sample implementation, assuming you’re testing a component called <MyComponent />.
This gives you an object that represents the React component and looks roughly like Listing 9-10 (with some properties omitted for brevity).
You can now create tests that make assertions on this component representation:
expect(component.props.className).toEqual(’MyComponent’);
When you looked at the structure of the object returned from the shallow renderer, you may have noticed the children property. This will contain any text, DOM elements, or other React components that might make up the component being tested.
To exemplify, start rewriting the tests in your previous example to use shallow rendering. Remove the old test cases and start creating a new one to check if the checkboxes default to unchecked with the label “Off.” Listing 9-11 shows the updated source code.
This works fine for simple components but it can feel quite brittle to traverse heavily nested objects and select array elements this way.
As mentioned, shallow rendering is still in the early stages of development and is lacking some functionality in React 0.13 and 0.14. (including the ability to return a mounted instance of the component and support for TestUtils’s transversing and finding functions). Much of this will be available by default in React 0.15, but for now you can install a npm package called react-shallow-testutils to get access to these functions. Install it with npm install --save-dev react-shallow-testutils.
The first great capability provided by the react-shallow-testutils package is the ability to access not only the object representing the component, but also the mounted component.
Let’s use the instance to rewrite the previous test. Instead of manually referencing the array of elements, create the expected render method output in the test and then compare that with your component. Listing 9-12 shows the updated test.
You may have noticed the previous example referred to an onChange method: onChange={component.onChange}.
Here you use the component mounted instance that react-shallow-testutils provided for you to ensure that you are testing against the same function that your React component uses.
If you want to call a mountedInstance method that will end changing the component state, make sure to call shallowRenderer.getRenderOutput again to get the updated render. For example, let’s implement a new test in your example project calling the component’s onChange. Listing 9-13 shows the updated file.
If you run the tests again with npm test, the result will look like Figure 9-4.
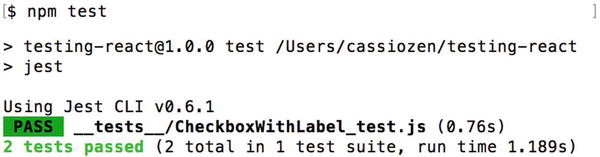
Figure 9-4. Two tests passed
Summary
In this chapter, you saw how React components can be tested using React’s Test Utils. You can either generate the component DOM tree into a detached DOM node (using renderIntoDocument) or use shallow rendering to output a component’s virtual tree without actually rendering it. After having a representation of the component, you can use any testing framework to make assertions about the component’s props, nodes, etc. You also learned about Jest, the testing framework made by Facebook that is the preferred way to test React projects.