
My Account
At this point, the app can finish its main job—buy and then pay for products. However, there is still some work to do to make it a complete app. For instance, users should be able to change their shipping addresses and update their payment methods. They should also be able to look up the products they marked as favorites, look up their order history, and log out of their account—none of these features have been implemented yet.
In this chapter you will learn how to:
- Implement a static “My Account” screen. This screen is where a user can sign out or log in, depending on whether you have a logged-in user; show one’s shipping address; visit order history; and manage payment methods.
- Allow a user to visit and edit one’s shipping address.
- Let the user visit one’s order history.
- Let a user manage one’s payment methods.
- Enable a user to manage one’s favorite list.
Start by creating a UITableViewController subclass and name it EMABUserAccountTableViewController. Next, you will organize some static information into the UITableView. Define an enum type for the cell content you need.
typedef NS_OPTIONS(NSInteger, TABLE_ROW){
    SIGNED_IN = 0,
    CONTACT_INFO = 1,
    PAYMENT = 2,
    FAVORITE = 3,
    HISTORY
};
You also need a property to represent the current logged-in user.
@interface EMABUserAccountTableViewController ()
@property (nonatomic, strong) EMABUser *customer;
@end
In general, this screen is pretty simple to implement. Most of the following code is self-explanatory:
@implementation EMABUserAccountTableViewController

- (void)viewDidLoad {
    [super viewDidLoad];
    self.customer = [EMABUser currentUser];
}
The user is instantiated on -(void)viewDidLoad. If there is no logged-in user, self.customer will be nil. You will use this information to decide how many cells you need for the UITableView.
#pragma mark - Table view data source

- (NSInteger)numberOfSectionsInTableView:(UITableView *)tableView {
    // Return the number of sections.
    return 1;
}

- (NSInteger)tableView:(UITableView *)tableView numberOfRowsInSection:(NSInteger)section {
    // Return the number of rows in the section.
    return (self.customer)?5:1;
}
If there is no valid user, only one cell is returned; for any valid user, five cells are created.
- (UITableViewCell *)tableView:(UITableView *)tableView cellForRowAtIndexPath:(NSIndexPath *)indexPath {
    UITableViewCell *cell = [tableView dequeueReusableCellWithIdentifier:@"AccountCell" forIndexPath:indexPath];

    // Configure the cell…
    NSString *title = @"";
    NSString *subtitle = @"";
    switch (indexPath.row) {
        case SIGNED_IN:
            title = (self.customer)?NSLocalizedString(@"Sign In", @""): NSLocalizedString(@"Sign Out", @"");
            subtitle = self.customer.email;
            break;
        case CONTACT_INFO:
            title = NSLocalizedString(@"Contact Info", @"");
            break;
        case PAYMENT:
            title = NSLocalizedString(@"Payment", @"");
            break;
        case FAVORITE:
            title = NSLocalizedString(@"Favorite", @"");
            break;
        case HISTORY:
            title = NSLocalizedString(@"Order History", @"");
            break;

        default:
            break;
    }
    cell.textLabel.text = title;
    cell.detailTextLabel.text = subtitle;
    return cell;
}
The following UITableView delegate methods accomplish two things:
- The first cell is for letting users sign out if the cell is tapped, corresponding to “Sign Out” text. For a user not logged in, the Signup or Login screen is displayed, corresponding to “Log In” text.
- The remaining cells present the different view controllers based on the cell selected.
#pragma mark -
-(void)tableView:(UITableView *)tableView didSelectRowAtIndexPath:(NSIndexPath *)indexPath  {
    NSString *viewControllerIdentifier = @"";
    switch (indexPath.row) {
        case SIGNED_IN:
            if (self.customer) {
                [self signOut];
            } else {
                [self presentSignupOrLogin];
            }
           break;
        case CONTACT_INFO:
            viewControllerIdentifier = @"EMABUserProfileTableViewController";
            break;
        case FAVORITE:
            viewControllerIdentifier = @"MABUserFavoriteHistoryTableViewControlle";
            break;
        case HISTORY:
            viewControllerIdentifier = @"EMABUserOrderHistoryTableViewController";
            break;
        case PAYMENT:
            viewControllerIdentifier = @"EMABUserPaymentMethodTableViewController";
            break;
        default:
            break;
    }
    if ([viewControllerIdentifier length] > 0) {
        UIViewController *viewController = [self.storyboard instantiateViewControllerWithIdentifier:viewControllerIdentifier];
        [self.navigationController pushViewController:viewController animated:YES];
    }

}

-(void)signOut {
    [EMABUser logOut];
    [self.tableView reloadData];
}

-(void)presentSignupOrLogin {
    UIStoryboard *dispatchStoryboard = [UIStoryboard storyboardWithName:@"LoginSignup" bundle:nil];
    UINavigationController *navController = (UINavigationController *)[dispatchStoryboard instantiateInitialViewController];
    [self presentViewController:navController animated:YES completion:nil];
}
@end
Figure 15-1 shows the final result.

Figure 15-1. Screen of My Account UITableViewController
Contact Info
I have shown you how to implement EMABUserProfileTableViewController in Chapter 11. When a user wants to view and edit his or her shipping address, he or she has a chance to open EMABUserProfileTableViewController from “Contact Info” in “My Account,” then view and edit if necessary.
Payment Method
Customers may use different credit cards, whether they shop at a brick and mortar store, online, or via an app. If you save an EMABPaymentMethod instance every time you see a different credit card, the user might have several cards stored with you. You need to provide a place for the user to manage those credit cards, such as setting one card as the default one, deleting a credit card, or adding a new one.
This section covers how to display all credit cards associated with a user, as well as how to let users add additional ones and/or delete some.
The model for this section is the EMABPaymentMethod model.
View
Use a standard UITableViewCell to display the basic credit card information such as the card’s last four digits and expiration date. Figure 15-2 shows the basic UITableViewCell.

Figure 15-2. The Payment method cell shows the last four digits and the expiration date
Controller
For the controller, create a PFQueryTableViewController subclass and name it EMABUserPaymentMethodTableViewController. Here is how to use PFQueryTableViewController, covered in the previous chapter:
- (void)awakeFromNib {
    [super awakeFromNib];
    self.parseClassName = kPaymentMethod;
    self.objectsPerPage = 10;
    self.paginationEnabled = YES;
    self.pullToRefreshEnabled = YES;
}

- (PFQuery *)queryForTable {
    PFQuery *query = [EMABPaymentMethod queryForOwner:[EMABUser currentUser]];
    if ([self.objects count] == 0) {
        query.cachePolicy = kPFCachePolicyCacheThenNetwork;
    }
    return query;
}
The EMABPaymentMethod model uses a helper query method, +(PFQuery *)queryForOwner:(EMABUser *)user;
#pragma mark - UITableView Datasource
- (UITableViewCell *)tableView:(UITableView *)tableView cellForRowAtIndexPath:(NSIndexPath *)indexPath object:(EMABPaymentMethod *)object{
    UITableViewCell *cell = [tableView dequeueReusableCellWithIdentifier:@"PaymentMethodCell" forIndexPath:indexPath];
    if (indexPath.row == [[self objects] count]) {
        cell.textLabel.text = NSLocalizedString(@"Load More…", @"");
    } else {
        cell.textLabel.text = [object friendlyCreditCardNumber];
        cell.detailTextLabel.text = [object friendlyExpirationMonthYear];
    }
    return cell;
}
For each cell, use the EMABPaymentMethod helper method to show two pieces of information: a formatted last four digits and the expiration date.
You want the user to swipe to delete a credit card. To do so, you need to declare this with -(void)viewDidLoad.
UISwipeGestureRecognizer *leftSwipe = [[UISwipeGestureRecognizer alloc] initWithTarget:self action:@selector(onLeftSwipe:)];
        [leftSwipe setDirection:UISwipeGestureRecognizerDirectionRight];
        leftSwipe.delegate = self;
        [self.tableView addGestureRecognizer:leftSwipe];
When a user makes a left swipe gesture, you find out which cell is swept based on the point on the screen. Then call the PFObject asynchronous deletion method, and make another query method call to update the UI:
-(void)onLeftSwipe:(UIGestureRecognizer *)gestureRecognizer
{
    CGPoint point = [gestureRecognizer locationInView:self.tableView];
    NSIndexPath *indexPath = [self.tableView indexPathForRowAtPoint:point];
    if (indexPath) {
        EMABPaymentMethod *paymentMethod = (EMABPaymentMethod *)[self objectAtIndexPath:indexPath];
        __weak typeof(self) weakSelf = self;
        [paymentMethod deleteInBackgroundWithBlock:^(BOOL succeeded, NSError *error) {
            if (!error) {
                [weakSelf loadObjects];
            }
        }];
    }
}
As shown in Figure 15-3, the “+” bar button item (see Chapter 2) is set up to allow the user to add a new credit card. You have had EMABAddCreditCardViewController, so simply present it; a EMABPayment instance will be created in the process.

Figure 15-3. A “+” bar button item on UINavigationBar lets users add another payment method
Here is the code:
#pragma mark - IBAction
-(IBAction)onAdd:(id)sender
{
    EMABAddCreditCardViewController *viewController = (EMABAddCreditCardViewController *)[self.storyboard instantiateViewControllerWithIdentifier:@"EMABAddCreditCardViewController"];
        __weak typeof(self) weakSelf = self;
        viewController.finishBlock = ^(NSString *customerId){
            [weakSelf loadObjects];
        };
        [self.navigationController pushViewController:viewController animated:YES];

}

@end
In the previous code, -(void)loadObjects is a PFQueryTableViewController method. You use it to make an API request to load new credit card information and show it on this table view.
Per requirements, users should be able to browse all of their order history and also view details for a particular order. In this section, I cover how to implement this feature.
View
Figure 15-4 shows how you want to display a user’s order history in a UITableViewCell. It’s pretty simple. Use, in this order, a UILabel to show the order date, a UILabel to show the total amount of the order, and the product’s name. You might have multiple products in one order. Since you don’t have the space for displaying all products in an order, only show the first one.
You can use a helper method to connect your data model with this view:
-(void)configureItem:(EMABOrder *)item;

Figure 15-4. A basic order history cell
#import "PFTableViewCell.h"

@class EMABOrder;
@interface EMABOrderHistoryTableViewCell : PFTableViewCell

-(void)configureItem:(EMABOrder *)item;
@end
Here is the implementation file:
#import "EMABOrderHistoryTableViewCell.h"
#import "EMABOrder.h"

@interface EMABOrderHistoryTableViewCell()
@property (nonatomic, weak) IBOutlet UILabel *dateLabel;
@property (nonatomic, weak) IBOutlet UILabel *totalLabel;
@property (nonatomic, weak) IBOutlet UILabel *nameLabel;
@end

@implementation EMABOrderHistoryTableViewCell

-(void)configureItem:(EMABOrder *)item
{
    if (item) {
        NSDateFormatter *dateFormatter = [[NSDateFormatter alloc] init];
        [dateFormatter setDateStyle:NSDateFormatterMediumStyle];
        [dateFormatter setTimeStyle:NSDateFormatterMediumStyle];

        self.dateLabel.text = [dateFormatter stringFromDate:item.updatedAt];
        self.totalLabel.text = [item friendlyTotal];
        self.nameLabel.text = [item.items[0] name];
    }
}

@end
Controller
Create a PFQueryTableViewController subclass, and name it EMABUserOrderHistoryViewController. For this view controller, the whole implementation is straightforward.
@implementation EMABUserOrderHistoryViewController

- (void)awakeFromNib {
    [super awakeFromNib];
    self.parseClassName = kOrder;
    self.objectsPerPage = 10;
    self.paginationEnabled = YES;
    self.pullToRefreshEnabled = YES;
}

- (void)viewDidLoad {
    [super viewDidLoad];
    // Do any additional setup after loading the view.
    self.title = NSLocalizedString(@"Order History", @"Order History");
}

- (void)didReceiveMemoryWarning {
    [super didReceiveMemoryWarning];
    // Dispose of any resources that can be recreated.
}

- (PFQuery *)queryForTable {
    PFQuery *query = [EMABOrder queryForCustomer:[EMABUser currentUser] orderStatus:ORDER_MADE];
    if ([self.objects count] == 0) {
        query.cachePolicy = kPFCachePolicyCacheThenNetwork;
    }
    return query;
}

-(CGFloat)tableView:(UITableView *)tableView heightForRowAtIndexPath:(NSIndexPath *)indexPath
{
    return 60.0;
}
- (EMABOrderHistoryTableViewCell *)tableView:(UITableView *)tableView cellForRowAtIndexPath:(NSIndexPath *)indexPath object:(EMABOrder *)object{
    EMABOrderHistoryTableViewCell *cell = [tableView dequeueReusableCellWithIdentifier:@"HistoryCell" forIndexPath:indexPath];
    [cell configureItem:object];
    return cell;
}


#pragma mark - Navigation

// In a storyboard-based application, you will often want to do a little preparation before navigation
- (void)prepareForSegue:(UIStoryboardSegue *)segue sender:(id)sender {
    // Get the new view controller using [segue destinationViewController].
    // Pass the selected object to the new view controller.
    if  ([segue.identifier isEqualToString:@"ShowOrderDetail"]){
        NSIndexPath *indexPath = [self.tableView indexPathForSelectedRow];

        EMABOrder *order = self.objects[indexPath.row];
        EMABOrderDetailTableViewController *viewController = segue.destinationViewController;
        [viewController setOrder:order];
    }
}

@end
When a user taps an order cell, more information about the order is displayed. This order detail screen might be very close to the EMABBagTableViewController. However, you won’t let the user change the order items, and there are no payment options, obviously. This can be achieved in one of two ways: you can reuse EMABBagTableViewController and hide the UI controls you don’t want to show, or you create another view controller. For this example, use the second approach. One reason is that the EMABBagTableViewController has already been quite messy. The other is that you might want to add more features later. It’s easier when you don’t have that much code to mess around with.
Start by creating a new UITableViewController, and name it EMABOrderDetailTableViewController. You still want to show the order number, order date, complete description, and total amount of an order. In the same fashion, use a UITableView header view to show the order number and the order date; use UITableView footer view to show the complete description and the total amount.
For each UITableViewCell, show each item’s name, unit price, and quantity. Here is the implementation:
#import "EMABOrderDetailTableViewController.h"
#import "EMABOrder.h"
#import "EMABOrderItem.h"
#import "EMABProduct.h"
@interface EMABOrderDetailTableViewController ()
@property (nonatomic, weak) IBOutlet UILabel *ordeNoLabel;
@property (nonatomic, weak) IBOutlet UILabel *ordeDateLabel;
@property (nonatomic, weak) IBOutlet UILabel *totalLabel;
@property (nonatomic, weak) IBOutlet UILabel *totalTextLabel;
@end

@implementation EMABOrderDetailTableViewController

-(void)setOrder:(EMABOrder *)order
{
    if (_order != order) {
        _order = order;

        [self configureView];
    }


}

-(void)configureView {
    self.ordeNoLabel.text = [self.order friendlyOrderNo];
    NSDateFormatter *dateFormatter = [[NSDateFormatter alloc] init];
    [dateFormatter setDateStyle:NSDateFormatterMediumStyle];
    [dateFormatter setTimeStyle:NSDateFormatterShortStyle];
    self.ordeDateLabel.text = [dateFormatter stringFromDate:[NSDate date]];
    self.totalLabel.text = [self.order friendlyTotal];

    [self.tableView reloadData];

}

- (void)viewDidLoad {
    [super viewDidLoad];
    self.title = NSLocalizedString(@"Order Detail", @"Order Detail");
    [self configureView];
}

- (void)didReceiveMemoryWarning {
    [super didReceiveMemoryWarning];
    // Dispose of any resources that can be recreated.
}

#pragma mark - Table view data source

- (NSInteger)numberOfSectionsInTableView:(UITableView *)tableView {
    // Return the number of sections.
    return 1;
}

- (NSInteger)tableView:(UITableView *)tableView numberOfRowsInSection:(NSInteger)section {
    // Return the number of rows in the section.
    return [self.order.items count];
}

- (UITableViewCell *)tableView:(UITableView *)tableView cellForRowAtIndexPath:(NSIndexPath *)indexPath {
    UITableViewCell *cell = [tableView dequeueReusableCellWithIdentifier:@"OrderItemCell" forIndexPath:indexPath];

    if (self.order) {
        EMABOrderItem *item = self.order.items[indexPath.row];
        cell.textLabel.text = item.product.name;
        cell.detailTextLabel.text = [NSString stringWithFormat:@"%@ x %lld",[item.product friendlyPrice], item.quantity];
    }
    return cell;
}


@end
This shows you how to display a user’s list of favorite products, and it allows a user to remove a product from the list. You also enable the user to tap an item on this list to see the product detail.
Model
Use the EMABFavoriteProduct model introduced in Chapter 7.
View
Reuse the EMABProductTableViewCell, introduced in Chapter 6. See Figure 15-5.
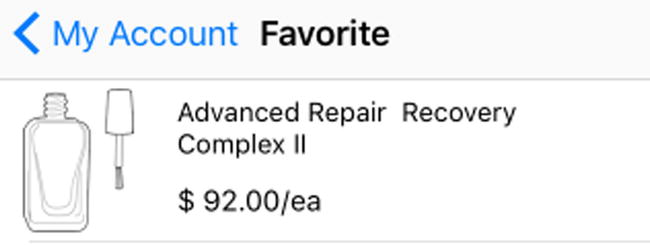
Figure 15-5. The Favorite product cell
Controller
Create a PFQueryTableViewController subclass, and name it EMABUserFavoriteHistoryTableViewController.
#import "EMABUserFavoriteHistoryTableViewController.h"
#import "EMABConstants.h"
#import "EMABFavoriteProduct.h"
#import "EMABProduct.h"
#import "EMABUser.h"
#import "EMABProductTableViewCell.h"
#import "EMABProductDetailViewController.h"

@implementation EMABUserFavoriteHistoryTableViewController

- (void)awakeFromNib {
    [super awakeFromNib];
    self.parseClassName = kProduct;
    self.objectsPerPage = 10;
    self.paginationEnabled = YES;
    self.pullToRefreshEnabled = YES;
}

- (PFQuery *)queryForTable {
    PFQuery *query = [EMABFavoriteProduct queryForCustomer:[EMABUser currentUser]];
    if ([self.objects count] == 0) {
        query.cachePolicy = kPFCachePolicyCacheThenNetwork;
    }
    return query;
}

#pragma mark - UITableView Datasource

-(CGFloat)tableView:(UITableView *)tableView heightForRowAtIndexPath:(NSIndexPath *)indexPath
{
    return 80.0;
}

- (EMABProductTableViewCell *)tableView:(UITableView *)tableView cellForRowAtIndexPath:(NSIndexPath *)indexPath object:(EMABFavoriteProduct *)object{
    EMABProductTableViewCell *cell = [tableView dequeueReusableCellWithIdentifier:@"ProductCell" forIndexPath:indexPath];
    if (indexPath.row == [[self objects] count]) {
        cell.textLabel.text = NSLocalizedString(@"Load More…", @"");
    } else {
        [cell configureItem:object.product];
    }
    return cell;
}
To make this list editable, use the UITableView delegate method, tableView:(UITableView *)tableView commitEditingStyle:(UITableViewCellEditingStyle)editingStyle forRowAtIndexPath:(NSIndexPath *)indexPath.
First, give the user a button so you know the user has the intention to edit. Add a bar button item as the right-bar button item of UINavigationItem, and use the system Edit button style.
Second, enable the row’s “editing mode” by calling the following method:
-(BOOL)tableView:(UITableView *)tableView canEditRowAtIndexPath:(NSIndexPath *)indexPath{
    return YES;
}
Once a user taps the “Edit” button, a red “-” appears on each cell. Tap the “-” icon, and the following method will be executed:
-(void)tableView:(UITableView *)tableView commitEditingStyle:(UITableViewCellEditingStyle)editingStyle forRowAtIndexPath:(NSIndexPath *)indexPath
{
    if (editingStyle == UITableViewCellEditingStyleDelete) {
        EMABFavoriteProduct *fProduct = (EMABFavoriteProduct *)[self objectAtIndexPath:indexPath];
        [fProduct deleteInBackgroundWithBlock:^(BOOL succeeded, NSError *error) {
            if (!error) {
                [self loadObjects];
            }
        }];
    }
}
You will only listen to the delete action and call the PFObject asynchronous deletion method. Once the deletion is finished successfully, query the back-end server and update the UI.
When a user taps a product on the list, the product detail is displayed. You have had EMABProductDetailViewController in place; you only need to pass the right EMABProduct instance to it. Since your PFQuery returns the list of EMABFavoriteProduct, you need to take an extra step to get the EMABProduct. Here is the code:
#pragma mark - UITableView Delegate
-(void)tableView:(UITableView *)tableView didSelectRowAtIndexPath:(NSIndexPath *)indexPath{
    if (indexPath.row == [[self objects] count]) {
        [self loadNextPage];
    } else {
        EMABProductDetailViewController *viewController = [self.storyboard
instantiateViewControllerWithIdentifier:@"EMABProductDetailViewController"];
        [viewController setProduct:(EMABProduct*)[self objectAtIndexPath:indexPath]];
        [self.navigationController pushViewController:viewController animated:YES];
    }
}

@end
Summary
In this chapter, I have shown you how to implement a basic “My Account” screen. Based on whether a user is logged in or not, we presented different content for each scenario. I also demonstrated how a logged-in user can see one’s shipping address, payment methods, favorites list, and order history. On the other hand, I will only show “Sign In” when we don’t have a signed-in user.
I also showed how to use PFQueryTableViewController to show a user’s credit card information that has previously been entered. Then I showed you who to let the user add a new credit card or delete an existing one, and how to view a user’s order history and a specific order’s detail.
Finally, I discussed how to display a list of favotie products. Following this, you learned how to show the product detail while the user tapped one product on the list.