
Security
So far, I have discussed all of the features for an e-commerce iPhone app that I want to talk about except one: how secure the implementation is, or how safe it is to use Parse. I will use this chapter to cover the Parse security features and how you could follow some industry-standard best practices to make this iPhone app more secure.
Keys
As you have noticed, there are a few keys generated in the project dashboard after a Parse project is created. You have used the client key for this iPhone app and the master key in the Parse Cloud code. Keep in mind, the client key is not meant to be a security mechanism. This key is shipped with your app. Anyone will know what it is by decompiling your app and reading the source code or proxying network out traffic and seeing it on this app on another device. The same rule applies for those other keys such as the REST key, .net key, and JavaScript key, which are in the Parse dashboard.
On the other hand, you might have noticed that you need to protect the master key, as mentioned in Chapter 14. Just like its name sounds, a master key is like an admin password to your app’s server. Keep in mind, don’t include this key into your source code or check-in source control. Don’t share it with others. In the Parse Cloud code, you only need to call the following method to use the master key:
Parse.Cloud.useMasterKey();
If your master key is compromised, you can reset it. Simply scroll down the page where you can see all of your keys, and then you will see how to reset your master key (see Figure 18-1).
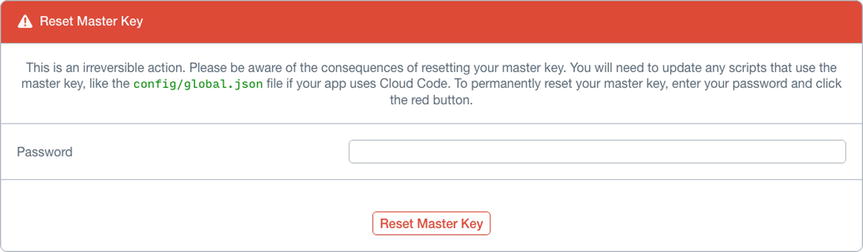
Figure 18-1. You can reset master key
Permissions
In this e-commerce app, most of your users can only read brands and products information. Only a few can create, edit, or delete a brand and a product. This is a typical use case of permissions.
Parse makes it easier for you to create class-level permissions. Almost every class that you create should have some read-write permissions to some degree.
To start with your class-level permissions, click on “Security” in the Data Browser for the class you want to configure (see Figure 18-2).

Figure 18-2. Set the class-level permission (CLP)
In the “FavoriteProduct” class, the default permission is that everyone can read and write this class, which fits your use case. However, the correct permission for the “Product” class should be “Read” for everyone, and “Write” for “a few.” “A few” can be certain predefined Roles or Users. A Role is simply a set of Users and Roles who should share some of the same permissions. For example, you can set up a Role called “admins” and make a table writable only by that role.
While in development mode, the “client class creation” is automatically on, which is a great benefit for a developer who doesn’t needs to leave Xcode to create a class with its properties. It’s recommended to turn this feature off while your app is in production mode. Figure 18-3 shows how you can disable it.

Figure 18-3. App-level client class creation
If an object doesn’t have an ACL, it’s readable and writable by everyone. The only exception is the _User class. You never allow users to write each other’s data, but they can read it by default. To make it super easy to create user-private ACLs for every object, you have a way to set a default ACL that will be used for every new object you create.
[PFACL setDefaultACL:[PFACL ACL] withAccessForCurrentUser:YES];
And you put this line code in the method of - (BOOL)application:(UIApplication *)application didFinishLaunchingWithOptions:(NSDictionary *)launchOptions in AppDelegate.m.
Let me also go over some other common use cases you might need to handle.
The first and quite common use case is that you can set different read and write permissions on an object. For example, this is how you would create an ACL for a product review posted by a user, where anyone can read it:
PFACL *acl = [PFACL ACL];
[acl setPublicReadAccess:true];
[acl setWriteAccess:true forUser:[PFUser currentUser]];
[review setACL: acl];
The second case is a user’s data, such as e-mail addresses or phone numbers. You don’t want to let other users see each other’s e-mail. To set an ACL on the current user’s data that should not be publicly readable, all you have to do is this:
PFUser *user = [PFUser currentUser];
user.ACL = [PFACL ACLWithUser:user];
The third case is that you want some data created by a user that is public and some that is private; it’s best to have two separate objects. You can add a pointer to the private data from the public one.
PFObject *privateData = [PFObject objectWithClassName:@"PrivateUserData"];
privateData.ACL = [PFACL ACLWithUser:[PFUser currentUser]];
[privateData setObject:@"555-5309" forKey:@"phoneNumber"];
 [PFUser setObject:privateData forKey:@"privateData"];
The fourth use case is that you only limit some super users to write other users’ data, or if you don’t want to manage permission per-user basis, you can use a Role object. Roles are a special kind of object that let us create a group of users that can all be assigned to the ACL. For example, you have an “admins” role, and you can let some users have this role. While you create a Review object, you let “admins” have the full permission of read and write. You can do the following:
PFACL *acl = [PFACL ACL];
[acl setPublicReadAccess:true];
[acl setWriteAccess:true forRoleWithName:@"admins"];
One of the benefits about roles is that you can add and remove users from a role without having to update every single object that is restricted to that role.
Last, if you, as the developer, need to update other _User objects, you can use Cloud Code combing with the user MasterKey option to do this.
Cloud Code
In this e-commerce iPhone app, I have shown that you can leave important functionality to the Cloud Code, which means you upload JavaScript code to your Parse project server. You call some functions to let Parse run it for you. This is different from the code for this iPhone app in that it is running on users’ devices. This is much easier for people who want to modify your code. On the other hand, you can’t always trust what a user has entered. The better practice is that you should validate the data that a user has entered; the right place is in Cloud Code so that you know a malicious client won’t be able to bypass the validation logic you implemented for the client.
For instance, I have shown that you need to verify a user’s e-mail address input before sign-up or login for this user in this iPhone app in Chapters 8 and 9. This practice makes for a better user experience purpose than does a security measure. In other words, you don’t want to make an app call and then tell the user that the e-mail address entered is not valid. However, a hacker can easily bypass the client-side e-mail validation. The correct way to validate a user’s input, Cloud Code has beforeSave triggers. These triggers can be used whenever an object is saved. You also have the chance to modify the object or completely reject a save.
For example, this is how you validate that a user has an e-mail address while signing up a user:
Parse.Cloud.beforeSave(Parse.User, function(request, response) {
  var user = request.object;
  if (!user.get("email")) {
    response.error("Every user must have an email address.");
  } else {
    response.success();
  }
});
On the other hand, there are other cases in which your users don’t have full permission to write an object, but you want to bypass that limitation. For example, if you want to allow a user to “like” a “Post” object but the user doesn’t have full write permissions on the “Post,” you can implement this feature by using a Cloud Code function and useMasterKey option in your JavaScript code. With the useMasterKey option, you will override the limitation of writing or reading permission.
Parse.Cloud.define("like", function(request, response) {
  var post = new Parse.Object("Post");
  post.id = request.params.postId;
  post.increment("likes");
  post.save(null, { useMasterKey: true }).then(function() {
    response.success();
  }, function(error) {
    response.error(error);
  });
});
Last but not least, Parse has provided a great feature by allowing a client (for example, your iPhone app) to initiate sending a push notification. It provides some flexibility while developing your app. While your app is in production, it’s best that you turn this feature off by disabling “client push” in your Parse project setting. The reason is the same: you can’t trust the behavior from your app. Instead, you should validate the data that will be sent by your Cloud Code functions.
While a user is logged into your app through multiple devices, the Parse Cloud will assign a unique revocable Session object on a given device for your app. This means different devices and your browsers will have different session tokens for the same user. On mobile and your apps, you don’t have to worry about creating and destroying sessions. When users log in or sign up, the Parse Cloud automatically creates the corresponding Session object. When users log out, the Parse Cloud automatically destroys the corresponding Session object, which invalidates the session token that was previously assigned to that user’s device.
Parse also introduces a flexible Revocable Sessions API that lets you easily understand and securely manipulate user sessions in your app. You can see your app’s Session objects in Data Browser, just like any other Parse object. If a user contacts you about his or her account being compromised, you can use the Data Browser, REST API, or Cloud Code to forcefully revoke user sessions using the Master Key. In addition, for increased security, you can configure your apps to automatically expire user sessions due to inactivity.
Note Futher information, visit an excellent blog series from Parse at http://blog.parse.com/learn/engineering/parse-security-i-are-you-the-key-master/.
Summary
In this chapter, I talked about the security mechanism Parse provides to secure your apps and users’ data. Namely, they are Class-Level Permission, Access Control List (ACL), Cloud Code, and Revocable Sessions. Keep in mind they are not independent from each other. Most likely, you’ll need to use all those approaches in a real-world production-ready app.
Note To read more about Parse security, please visit https://parse.com/docs/data