
More from Parse
In Chapter 8, I introduced the sign-up feature. But how do you know whether the user has entered a valid e-mail? You need to do some verification to make sure the e-mail address the user entered is a valid e-mail address format. But you don’t really do anything to make sure the e-mail address actually belongs to the user. In the world of e-commerce, e-mail marketing proves to still be effective. So you need a way to verify the e-mail while a user is signing up.
Luckily, Parse also thought about those common use cases and provided easy solutions. Let’s dive into the e-mail verification process.
E-Mail Verification
To begin, enable the e-mail verification feature under Settings > Email in your project Parse Dashboard, as shown in Figure 19-1.

Figure 19-1. Enable Verify user e-mail feature
Next, in your EMABUser model, add a new Boolean property: emailVerified:
@property (nonatomic, assign) BOOL emailVerified;
Also add this property to the @dynamic declaration in the EMABUser.m file.
Next, create an e-mail verification request e-mail template, as shown in Figure 19-2.

Figure 19-2. This is an E-mail verification e-mail template
You can add or edit the content as you wish. Make sure you don’t change the following URL, shown in Figure 19-3, if you don’t want to host the template on your own server.

Figure 19-3. This is an example e-mail verified page URL
Now, when you want to check whether the user has verified his or her e-mail, use the property in this way:
if (self.user.emailVerified) {
               // we proceed ahead
            } else {
// we ask this user 's verify it
UIAlertView *emailAlert =  [[UIAlertView alloc] initWithTitle:NSLocalizedString(@"Email Verification Request",@"") message:NSLocalizedString(@"Your email has not been verified, please verify it to finish signing up.",@"") delegate:nil cancelButtonTitle:NSLocalizedString(@"OK ",@"") otherButtonTitles:nil, nil];

                [emailAlert show];

}
You still need a user to verify the e-mail. This user might have deleted the verification e-mail accidently, but now he or she is asking us to resend it. How do you this?
Basically, the solution is to set the “e-mail” property of the user as the same e-mail address you have on file, then save the user. Once saved successfully, it will trigger a resending of a verification e-mail to the e-mail address the user has provided. Here is the code:
if (!self.user.emailVerified) {
    UIAlertView *emailAlert =  [[UIAlertView alloc] initWithTitle:NSLocalizedString(@"Email Verification Request",@"") message:NSLocalizedString(@"Your email has not been verified, please verify it to finish signing up.",@"") delegate:self cancelButtonTitle:NSLocalizedString(@"Resent it",@"") otherButtonTitles:NSLocalizedString(@"OK",@""), nil];
                emailAlert.tag = 99;
                [emailAlert show];
            }

-(void)alertView:(UIAlertView *)alertView clickedButtonAtIndex:(NSInteger)buttonIndex
{
    if (buttonIndex == alertView.cancelButtonIndex) {
        [alertView dismissWithClickedButtonIndex:buttonIndex animated:YES];
    } else if (alertView.tag == 99){
        if (buttonIndex == 1) {
            [alertView dismissWithClickedButtonIndex:buttonIndex animated:NO];
        } else if (buttonIndex == 0){
            NSString *email = self.user.email;
            [self.user setEmail:email];
            [self.user saveEventually:^(BOOL succeeded, NSError *error) {
                if (!error) {
                    [SVProgressHUD showSuccessWithStatus:[NSString stringWithFormat:@"%@
                    %@.", NSLocalizedString(@"An verifification email has been sent
                    to",@""),self.useremail]];
                }
            }];
        }
    }
}
On the other hand, you have implemented the feature to allow a user login in Chapter 9. What if the user forgets his or her password? As you have noticed from the Parse Dashboard, developers can’t see a user’s password either. You won’t be able to tell the user his or her password. So you need a way to help the user recover or reset his password when needed.
The flow for password reset is as follows:
- User requests that typing in his or her e-mail resets the password.
- Parse sends an e-mail to the address, with a special password reset link.
- User clicks on the reset link and is directed to a special Parse page that will allow him or her to type in a new password.
- User types in a new password. The password has now been reset to the value specified.
On the login screen, add a new button with the title “Forgot password?” Once a user taps this button, execute a password reset action; bring up an alertView and let the user enter his or her e-mail address; a password reset instruction will be send to this email address. Here is the implementation for asking for the user’s e-mail address:
- (IBAction)onPasswordReset:(id)sender
{

    UIAlertView *alertView = [[UIAlertView alloc] initWithTitle:NSLocalizedString
    (@"Password Reset",@"") message:NSLocalizedString(@"Enter your email to reset
    password",@"") delegate:self cancelButtonTitle:NSLocalizedString(@"Cancel",@"")
    otherButtonTitles:NSLocalizedString(@"Reset",@""), nil];
    alertView.alertViewStyle = UIAlertViewStylePlainTextInput;
    UITextField *emailField = (UITextField*)[alertView textFieldAtIndex:0];
    emailField.placeholder = NSLocalizedString(@"Email",@"");
    [alertView show];
}
Next, implement the alertView delegate method:
-(void)alertView:(UIAlertView *)alertView clickedButtonAtIndex:(NSInteger)buttonIndex
{
    if (buttonIndex == alertView.cancelButtonIndex) {
        [alertView dismissWithClickedButtonIndex:buttonIndex animated:YES];
    } else {
        UITextField *emailField = (UITextField*)[alertView textFieldAtIndex:0];
        [PFUser requestPasswordResetForEmailInBackground:emailField.text block:^(BOOL
        succeeded, NSError *error) {
            if (!error) {
                [SVProgressHUD showSuccessWithStatus:NSLocalizedString(@"Password reset
                instruction sent", @"Password reset instruction sent")];
            }

        }];
    }

}
The code above calls the PFUser’s +(void) requestPasswordResetForEmailInBackground method. Parse will take care of sending a password reset instruction e-mail to this user’s e-mail address.
Likewise, Parse has created an e-mail template for us, as shown in Figure 19-4.
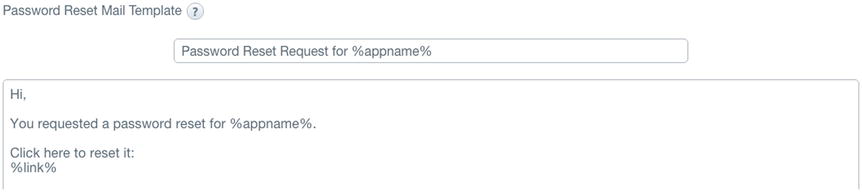
Figure 19-4. This is an example password reset e-mail template
Also notice that Parse has provided the “choose password” and “password reset success” URLs, as shown in Figure 19-5.

Figure 19-5. Here are sample URLs for “choose a new password” and “password changed” page
If you want to upload these templates to your own server, hide parse.com from users.
Parse provides a number of hooks for you to get a glimpse into the ticking heart of your apps. Without having to implement any client-side logic, you can view real-time graphs and breakdowns (by device type, Parse class name, or REST verb) of our API requests in your app’s dashboard and save these graph filters to quickly access just the data you’re interested in.
Parse App-Open & Push Analytics hook allows you to track the application being launched. By adding the following line to applicationDidFinishLaunching:, you’ll begin to collect data on when and how often your application is opened.
[PFAnalytics trackAppOpenedWithLaunchOptions:launchOptions];
Graphs and breakdowns of your statistics are accessible from your app’s dashboard.
PFAnalytics also allows you to track free-form events, with a handful of NSString keys and values. These extra dimensions allow segmentation of your custom events via your app’s dashboard. Say your apps offer search functionality for apartment listings, and you want to track how often the feature is used, with some additional metadata. Here is the code:
NSDictionary *dimensions = @{
  // Define ranges to bucket data points into meaningful segments
  @"priceRange": @"1000-1500",
  // Did the user filter the query?
  @"source": @"craigslist",
  // Do searches happen more often on weekdays or weekends?
  @"dayType": @"weekday"
};
// Send the dimensions to Parse along with the 'search' event
[PFAnalytics trackEvent:@"search" dimensions:dimensions];
Crash Report
The Parse Crash Report iOS SDK is a great way for Parse developers to understand crashes after apps are downloaded and used by users. There are a few libraries that existed that can help track iOS app’s crash and generate reports, namely, Crashlytics and Apple’s Xcode Crash Report feature. The nice things about Parse’s crash report, in my opinion, are threefold:
- First, you can see all data and analytics from one dashboard, given you have chosen Parse as your back end. Parse has provided a nice Analytics feature, and you can directly see your app’s crash report from the same dashboard.
- Second, compared to Xcode’s Crash Report feature, you can easily add members to the Parse project so a member who doesn’t have Xcode installed still can easily browse crashes and mark them as solved. It’s a great feature if you have a dedicated QA team. On the other hand, Xcode is mandatory if you choose to use Xcode’s Crash Report.
- Third, Parse tracks crashes on a per-version basis. If you have introduced an old bug in new version of your app, Parse lets you notice that old bug easily so you can fix it quickly, even if you’ve marked it as “resolved.”
To include the Parse Crash Report iOS SDK in your project, use CocoaPods by adding this line into our podfile:
pod 'ParseCrashReporting'
Then run ‘pod update’; you should have it included into your project.
Next, enable the ParseCrashReporting in your EMABAppDelegate before setting Parse Application ID and the client key.
// Enable Crash Reporting
[ParseCrashReporting enable];
// Setup Parse
[Parse setApplicationId:@"YOUR-PARSE-APP-ID" clientKey:@"YOUR-PARSE-APP-CLIENT-KEY"];
After that, configure your project to send Parse the symbol files for each build of your apps. This allows Parse to properly aggregate crash incidents together and show these crashes on the dashboard with proper symbols in the stack trace. To automatically upload symbol files for your application whenever you build your app, initialize a new Parse Cloud Code directory by running the following (for example, in the same directory as your Xcode project):
parse new
Add a new Run Script phase to the Build Phases of your App’s target:
export PATH=/usr/local/bin:$PATH cd <path_to_cloudcode_folder> parse symbols <app_name_from_cloud_code_config_globals> --path="${DWARF_DSYM_FOLDER_PATH}/${DWARF_DSYM_FILE_NAME}"
That’s all you need to do.
Summary
In this chapter, I have introduced e-mail verification upon a user’s sign-up, and how you could reset a user’s password by uploading some templates to your own server. I introduce the Parse Analytics briefly. At the end, I also introduced Parse’s crash report feature so that you can see the crash history in Parse Dashboard.