
Libraries are used to store and manage files within SharePoint. Whether you want to manage Microsoft Office documents, PDF files, images, videos, or some other type of file, you use libraries to store, track, and manage them. Chapter 5 discussed how to create and configure lists and libraries. Now this chapter discusses the different types of libraries available in SharePoint 2016 and how to create and manage content within them.
Types of Libraries
There are several default library templates available in SharePoint 2016 that can be used to create new libraries in your sites. Several different types of libraries can be created to store and manage a variety of file types. Default libraries available in SharePoint 2016 include the following.
Document Libraries
The document library is the most general-purpose and commonly used type of library in SharePoint. Document libraries can store documents that need to be managed, edited, and shared within SharePoint, including Microsoft Office files, PDF files, and others (managing content in document libraries is discussed later in this chapter). When created document libraries contain only a single metadata column, which is used to store the document’s title. Document libraries can be updated after their creation to include other metadata columns to track details that need to be associated with the documents to organize, manage, and present them (configuring library columns and creating and managing views are discussed in Chapter 5).
When document libraries are created, they include only a single view , the All Documents view. Views are used to organize and present documents within a library and the All Documents view lists all documents contained within the library. By default, this view shows the following details for each document:
Type (linked to document)
Name (linked to document with Edit menu)
Modified
Modified By
When document libraries are added to pages within the site using their app parts, the information is presented in a standard library view (see Figure 7-1). From this view, you can perform all of the same management tasks available when working directly within the library.

Figure 7-1. Document library web part
As with some of the lists discussed in Chapter 6, document libraries support some extended capabilities that are not available across all libraries or lists. The advanced capabilities of document libraries include the following.
Incoming E-Mail Capabilities
As with some lists, a document library can be configured with an e-mail address. This allows e-mail message to be sent to the document library so the e-mail message and/or attachments to the e-mail can be saved. Incoming E-mail in document libraries is useful when you have systems that generate documents, such as reports, and are capable of distributing them via e-mail. These systems can be configured to e-mail the documents they generate to a SharePoint library for users to access. The saving of these documents can start a workflow process that can update, move, or manage these documents. Inbound e-mail routing can be configured to store documents attached to e-mail messages in the associated library or to store the e-mails themselves. When routed to a library, documents maintain their original name.
Note
Before incoming e-mail capabilities can be configured within a library, your SharePoint technical administrator will need to configure your environment to support inbound e-mail.
To configure a document library to support incoming e-mail, do the following:
Navigate to the document library where you want to configure incoming e-mail capabilities.
On the document library view page, select the Library Settings option from the Library ribbon tab.
On the Settings page, select the Incoming E-mail Settings option from the Communications section.
On the Incoming E-mail Settings page, make the following selections:
In the Incoming E-mail section, select Yes for the Allow This Document Library to Receive E-Mail? option and enter the e-mail address for the document library.
In the E-mail Attachments section, identify how attachments in e-mails sent to the library are handled. Also, identify how files added to the location having the same name as items already there are handled by specifying whether these files are to be overwritten when new items with the same name are added. Options for handling attachments include these:
Save all attachments in root folder: Causes attachments to be placed in the root folder of the library.
Save all attachments in folders grouped by e-mail subject: Places e-mail attachments within a folder named for the subject of the e-mail message.
Save all attachments in folders grouped by e-mail sender: Places e-mail attachments within a folder named for the sender of the e-mail message.
In the E-mail Message section, identify whether the e-mail itself is to be saved to the library. If you select Yes, the e-mail message will be saved as an EML file. If you select No, only the e-mail’s attachments will be saved to the library.
In the E-mail Meeting Invitations section, identify whether meeting invitation messages are to be saved to the library if sent to it.
In the E-mail Security section, specify whether e-mail messages are to be accepted into the library from any e-mail address or only from e-mail addresses associated with users having access to the library.
Once all of the details are entered, click the OK button.
The inbound e-mail settings are activated, and e-mail messages sent to the identified address will be added to the library.
Form Libraries
Form libraries allow storage and management of InfoPath forms. They use an InfoPath form as the library template and allow for form fields to be displayed as columns within the library. Use form libraries when you need to collect information from users in a formatted or structured fashion and want this data saved within the XML-based form file or in a database. This data can then be used for reporting or integrated into related business processes.
For example, forms are valuable when you want to collect monthly expense details from your sales team. The form can be configured to manage the collection of all the necessary details and can then be sent through an approval process in which the submitter’s manager approves the expenses. After approval has been given, the information can be populated into the accounting system for payment processing.
When initially created, a form library, like a document library, includes only a Title field. However unlike a document library, a form library includes two default views .
All Documents: This is the default view for a form library. It lists all forms located within the library. This view includes the following columns:
Type (icon linked to document)
Name (linked to document with edit menu)
Modified
Modified By
Checked Out To
My Documents: This view, which lists the library items created by the user viewing the library, includes the following columns:
Type (icon linked to document)
Name (linked to document with edit menu)
Modified
Modified By
Adding Forms
The first step in using a newly created form library is to configure the form to be used within it. To do so, set the template for the library. The template identifies the information to be populated and the format of that information.
Managing Form Templates
The form template for the library defines the structure and functionality provided by the form when it is populated by site users. To edit the form template for the library, do the following:
Navigate to the form library where the form needs to be populated.
On the library view page, select the Library Settings option from the Library ribbon tab.
On the Settings page, select the Advanced Settings option from the General Settings section.
On the Advanced Settings page in the Document Template section, select the Edit Template link.
In the opened InfoPath form, add the fields, logic, and formatting desired for the new form.
Once all updates to the form are made, click the Save button, and select a location to save a copy of the form to. This can be any locally available location.
Once the form has been saved, it can be published by selecting the Publish option from the File tab (see Figure 7-2) and then choosing the Quick Publish option.
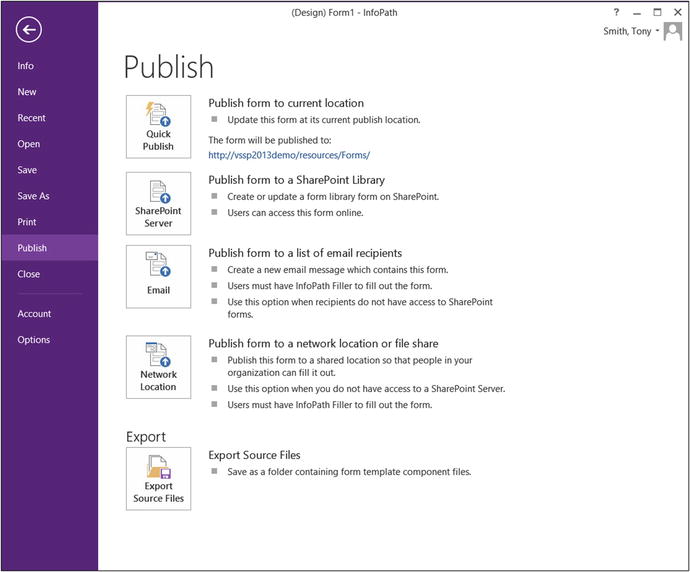
Figure 7-2. InfoPath Publish option
Once the publishing of the form is complete, click the OK button on the published confirmation window.
Once the form has been published to the library, it becomes the form displayed to users when they select to create a new item in the library. With the form published this way, no data from the form is displayed as columns in the library. This limits the visibility of the content. To override this, you can create the library and the forms for the library directly within InfoPath.
Creating Form Libraries in InfoPath
As you see, creating a form library and customizing the library template through SharePoint requires several separate steps to completely set up the library. The process has limitations in that the form’s fields are not included as fields in the library. An alternative method involves creating the form in InfoPath and then using the form publishing process in InfoPath to create the form library itself. This process will also publish the form to the library and expose the desired form fields as columns in the library. To use InfoPath to create a form library and publish a form for use in the library, do the following:
Create an InfoPath form containing the desired layout fields and business logic.
On the InfoPath File tab, select the Publish option.
On the Publish page, click the SharePoint Server option.
If the form is not yet saved locally, select to save it when prompted and identify a save location. This can be any accessible location. It has no direct relationship with the final form library or template once the item is published.
In the first Publishing Wizard window, enter the URL for the SharePoint site where the form is to be created and click the Next button.
In the second Publishing Wizard window, do the following:
Verify that the Enable This Form to Be Filled Out by Using a Browser option is clicked. This will render the form to be filled out in the web browser instead of requiring InfoPath to be present on a user’s computer to open the form. Rendering the form in the browser leverages SharePoint’s Form Services, which are available only in SharePoint Server Enterprise.
Identify the type of object to create in SharePoint using the form. Options include the following. However, we will assume we are selecting the first option, Form Library, to publish our form.
Form Library: This is the most common type of object created. It is used to generate a form library in an identified site.
Site Content Type: This option creates a content type allowing the form to be associated with multiple form libraries within SharePoint.
Administrator-Approved Form Template: This option creates an approval request for an administrator to approve to create a new form template.
Click the Next button to continue the publishing process.
In the third Publishing Wizard window, either select to create a new form library in the specified site or select an existing form library to update the form template within. Then click the Next button.
If you selected to create a new form library, in the fourth Publishing Wizard window, enter the name for the new form library and an optional description, and click the Next button.
On the fifth Publishing Wizard screen, identify the fields from the form to include as columns in the library and the fields to be used as parameters for creating connections with other web parts for filtering purposes. Then click the Next button.
On the sixth Publishing Wizard page, click the Publish button to publish the form.
In the published confirmation window, click the Close button.
The form library is created, the form is made the template of the library, and identified form fields to be included as library columns are exposed to the library.
Filling Out Forms
To fill out a form published in a form library, users will choose to create a new document in the library. Doing this opens a new instance of the form to be filled out. Once the details are entered into the form, it can be saved to the library. An alternative method for completing a form in a library is to upload a completed copy of the form into the library. Adding and uploading documents into libraries are discussed later in this chapter.
Wiki Page Libraries
Wiki page libraries are SharePoint libraries designed to store and manage wiki pages (discussed in detail in Chapter 4). Many sites within SharePoint, such as those created based on the Team Site template, have a wiki page library, the Site Pages library, available by default. A wiki page library is also automatically added to a site when the Wiki Page Home Page feature is activated. You can also introduce new wiki page libraries into sites by selecting to create a new wiki page library.
Wiki page libraries, when created through the Wiki Page Library template, have a unique view when the library is initially accessed. It navigates the user to the default page in the wiki page library (see Figure 7-3). This initial page describes what wiki libraries are and how to work with them.

Figure 7-3. Wiki page library default page
When created, wiki pages contain a single column, called the Wiki Content, in which page content details are stored. Also when created, wiki page libraries have several default views to help organize and manage contained wiki pages. These views include the following:
All Pages: The default view for the library, it lists all pages contained within it. Pages are sorted based on when they were last changed and include the following columns in the view:
Type (icon linked to document)
Name (linked to document with edit menu)
Modified By
Modified
Created By
Created
Recent Changes: This view contains the same layout and structure as the All Pages view.
Created By Me: This view lists the wiki pages created by the user viewing the library. The view lists the following library columns:
Type (icon linked to document)
Name (linked to document with edit menu)
Modified By
Modified
Created By
Created
By Author: This view groups the wiki pages in the library by who created the pages. Grouped by Created By, the view lists the following columns:
Type (icon linked to document)
Name (linked to document with edit menu)
Modified By
Modified
Created By
Created
By Editor: This view groups the wiki pages by who last modified them. This view, grouped by Modified By, lists the following columns:
Type (icon linked to document)
Name (linked to document with edit menu)
Modified By
Modified
Created By
Created
Picture Libraries
Picture libraries, specifically designed to store and manage image files, include all of the capabilities found in a standard document library, as well as the following additional resources for handling images:
Generation of thumbnail versions of files added to the library. The thumbnails are used in library views to preview images in the library.
Preview views that show the thumbnails created from the images. They allow reviewing of image files in the library, as Figure 7-4 shows.

Figure 7-4. Picture library preview view
The structure of a newly created picture library includes the fields in Table 7-1.
Table 7-1. Picture Library Columns
Column | Required | Type | Properties |
|---|---|---|---|
Title | No | Single Line of Text | |
Date Picture Taken | No | Date and Time | Date and Time |
Description | No | Multiple Lines of Text | Plain Text |
Keywords | No | Multiple Lines of Text | Plain Text |
Created | -- | Date and Time | Date and Time Friendly Format Populated by System |
Modified | -- | Date and Time | Date and Time Friendly Format Populated by System |
Created By | -- | Person or Group | People Only Populated by System |
Modified By | -- | Person or Group | People Only Populated by System |
Checked Out To | -- | Person or Group | People Only Populated by System |
A picture library includes views with different displays of the picture details than those provided by other libraries. These views allow easy previewing of the files. The default set of views for picture libraries include the following:
Thumbnails: Shows the thumbnail previews for the images contained in the library (see Figure 7-4). It is the default view. Hovering over a thumbnail causes the image details—including the title, type, dimensions, and size information—to be shown over the top of the image (see Figure 7-5). Clicking the thumbnail image for a listed image opens the properties display form and shows all of the image properties. From this page, you can click on the name or image preview to open the associated image within the browser.

Figure 7-5. Picture library preview image hover
All Pictures: A standard list view that includes all images in the library sorted by name. It lists the following columns:
Type (icon linked to document)
Name (linked to document with edit menu)
Picture Size
File Size
Modified
Slides: Another specialty view for picture libraries. It lists each of the images in the slide library one at a time (see Figure 7-6), and as you scroll through the images, it displays the image and its name.

Figure 7-6. Picture library slides view
Asset Libraries
Asset libraries include capabilities specifically designed to support management and sharing of images, audio files, and video files. When initially created, an asset library leverages the Image, Audio, and Video content types to allow collection of appropriate details supporting each of these media types. Table 7-2 lists the details tracked for images, audio files, and videos managed in asset libraries.
Table 7-2. Asset Library Columns
Column | Required | Type | Properties | Content Type |
|---|---|---|---|---|
Title | No | Single Line of Text | Image, Audio, Video Rendition | |
Keywords | No | Multiple Lines of Text | Plain Text | Image, Audio, Video Rendition |
Comments | No | Multiple Lines of Text | Plain Text | Image, Audio, Video Rendition |
Author | No | Single Line of Text | Image, Audio, Video Rendition | |
Date Picture Taken | No | Date and Time | Format: Date and Time | Image |
Copyright | No | Single Line of Text | Image, Audio, Video Rendition | |
Preview Image URL | No | Hyperlink or Picture | Format Picture | Audio, Video, Video Rendition |
Length (Seconds) | No | Integer | Audio, Video, Video Rendition | |
Description | No | Multiple Lines of Text | Plain Text | Video |
Owner | No | Person or Group | People or Groups Allowed | Video |
Show Download Link | No | Yes/No | Defaulted to Yes | Video |
Show Embed Link | No | Yes/No | Defaulted to Yes | Video |
Frame Width | No | Integer | Video, Video Rendition | |
Frame Height | No | Integer | Video, Video Rendition | |
People in Video | No | Person or Group | Allow Multiple People or Groups Allowed | Video |
Label | No | Single Line of Text | Video Rendition | |
Bit Rate | No | Integer | Video Rendition | |
Scheduling End Date | No | Yes/No | ||
Scheduling Start Date | No | Yes/No | ||
Created | -- | Date and Time | Date and Time Friendly Format Populated by System | Image, Audio, Video Rendition |
Modified | -- | Date and Time | Date and Time Friendly Format Populated by System | Image, Audio, Video Rendition |
Created By | -- | Person or Group | People Only Populated by System | |
Modified By | -- | Person or Group | People Only Populated by System | |
Checked Out To | -- | Person or Group | People Only Populated by System | |
Preview | No | Computed | Image, Audio, Video Rendition | |
Thumbnail Preview | No | Computed | Image, Audio, Video Rendition | |
Picture Size | No | Computed | Image |
The asset library, when initially created, includes a set of views designed to help review and manage the image, video, and audio files in the library. The views available by default in the asset library include the following:
Thumbnail: Previews all items stored in the library sorted by name (see Figure 7-7). Hovering over the thumbnail displays an item’s details, which vary based on whether it is an image, audio, or video file.

Figure 7-7. Asset library thumbnail view
Clicking on a video file brings you to the video play page, which shows the video’s details and plays it in the page (see Figure 7-8).

Figure 7-8. Library view page
Clicking an image file brings you to a standard list item properties view for the image files. Hovering over the file displays the image’s properties, and clicking on the name or thumbnail opens the image in the browser for viewing.
Clicking on an audio file brings you to the list item properties view page, which displays the standard audio file properties (see Figure 7-9). Click on the audio file’s thumbnail or name to play the file.

Figure 7-9. Document view page
All Assets: This standard SharePoint library view includes all of the items in the library sorted by name and displays the following columns:
Content Type
Type (icon linked to document)
Name (linked to document with edit menu)
Thumbnail Preview
Modified
Modified By
Length (seconds)
Approval Status
Scheduling Start Date
Scheduling End Date
Report Libraries
The Report Library template manages web pages and documents that relay analytical information to site users. This type of library has columns for storing metadata to help manage reports and includes two content types—Report and Web Part Page with Status List (see Table 7-3 ). The Report type can track and manage report files: Excel reports, PDFs, Word files, and others. The Web Part Page with Status List type creates web part pages with a status list web part and can be used to make online scorecards and reports.
Table 7-3. Report Library Columns
Column | Required | Type | Properties | Content Type |
|---|---|---|---|---|
Title | No | Single Line of Text | Report, Web Part Page with Status List | |
Report Description | No | Multiple Lines of Text | Plain Text | Report, Web Part Page with Status List |
Parent ID | No | Number | Report | |
Owner | No | Person or Group | People or Groups Allowed | Report |
Report Category | No | Choice | Options: Category 1 Category 2 Category 3 | Report |
Report Status | No | Choice | Options: Final Preliminary Period to Date | Report |
Created | -- | Date and Time | Date and Time Friendly Format Populated by System | Report, Web Part Page with Status List |
Modified | -- | Date and Time | Date and Time Friendly Format Populated by System | Report, Web Part Page with Status List |
Created By | -- | Person or Group | People Only Populated by System | |
Modified By | -- | Person or Group | People Only Populated by System | |
Checked Out To | -- | Person or Group | People Only Populated by System |
The report library contains three views for presenting documents within it. These views include the following:
Current Reports: Shows all Report items within the library and includes the following columns:
Type (icon linked to document)
Name (linked to document with edit menu)
Report Status
Report Category
Modified
Owner
Report Description
Dashboards: Shows all of the Web Part Page with Status List items in the library and includes the following columns:
Type (icon linked to document)
Name (linked to document with edit menu)
Modified
Modified By
Checked Out To
Report Description
All Reports and Dashboards: Lists all library items and sorts them with the most recently modified at the top. It includes these fields:
Type (icon linked to document)
Name (linked to document with edit menu)
Modified
Modified By
In a report library, items managed by Report content type function just as documents in any other document library do. However, the Web Part Page with Status List content type provides a unique approach to creating web part pages to be added to the library. To create a new Web Part Page with Status List item, do the following:
Navigate to the Report Library where you want to create a Web Part Page with Status List.
On the library view page, select the Web Part Page with Status List option from the New Document drop-down menu on the Files ribbon tab.
On the New Web Part Page with Status List screen, do the following:
In the Page Name section, enter the filename, page title, and optional description for the new web part page.
In the Location section, the report library will be listed. You can select this or some other report library in the site. You can also select the folder within the library where the page is to be created.
In the Create Link in Current Navigation Bar section, specify whether a link to the page is to be created in the navigation bar and, if it is, what heading the link is to be placed under.
In the Web Part Page with Status List Layout section, select the page layout to use in the web part page from the following choices:
Three Column Horizontal Layout: Creates a page containing two zones, with a larger left zone followed by a full-width page zone and then two sets of three side-by-side zones.
One Column Vertical Layout: Like the Three Column Horizontal Layout, this one has a set of two zones: a larger left and a single zone, then a single web part zone in the page.
Two Column Vertical Layout: Like the Three Column Horizontal Layout, this one has a set of two zones: a larger left and a single zone, then a two column web part zone area with the columns listed side by side.
In the Status Indicators section, identify how a status indicator list is to be added, with options including the following:
Create a status indicator list for me automatically.
Allow me to select an existing status indicator list later.
Do not add a status indicator list to this dashboard.
Once all information has been entered, click the OK button
The new web part page is created in the report library, and you are brought to the page to make any necessary updates.
Data Connection Libraries
Data connection libraries , available only in SharePoint Enterprise, are used to store and manage data connection files for use in Microsoft Office documents, such as InfoPath and Excel, that need to connect to other data. Data connection libraries store Office Data Connection files and Universal Data Connection files. They contain a content type for each of these types of connection files and include the fields listed in Table 7-4.
Table 7-4. Data Connection Library Columns
Column | Required | Type | Properties | Content Type |
|---|---|---|---|---|
Title | No | Single Line of Text | Office Data Connection File, Universal Data Connection | |
Description | No | Single Line of Text | Office Data Connection File, Universal Data Connection | |
Keywords | No | Single Line of Text | Office Data Connection File | |
UDC Purpose | Yes | Choice | Options: ReadOnly WriteOnly ReadWrite | Universal Data Connection |
Connection Type | Yes | Choice | Allow Fill-In Options: SharePointList SharePointLibrary Database XMLQuery XMLSubmit WebService | Universal Data Connection |
Created | -- | Date and Time | Date and Time Friendly Format Populated by System | Office Data Connection File, Universal Data Connection |
Modified | -- | Date and Time | Date and Time Friendly Format Populated by System | Office Data Connection File, Universal Data Connection |
Created By | -- | Person or Group | People Only Populated by System | |
Modified By | -- | Person or Group | People Only Populated by System | |
Checked Out To | -- | Person or Group | People Only Populated by System |
Data connection libraries initially include five views to manage the files they contain. These views include the following:
All Items: Lists all files in the library, sorted by title, and includes the following fields:
Type (icon linked to document)
Title
Name (linked to document with edit menu)
Description
Modified
Document Modified By
Keywords
By Author: Lists all items in the library, grouped by created by, and includes the following columns:
Type (icon linked to document)
Title
Name (linked to document with edit menu)
Description
Modified
Document Modified By
Created By
Keywords
All Info: Like the All Items view, this view lists all items in the library. However, it includes all columns used to manage information in the library, including the following:
Type (icon linked to document)
Title
Name (linked to document with edit menu)
Description
Modified
Created By
ID
Keywords
UDC Purpose
Connection Type
My Submissions: Lists items added to the library by the user viewing it, with the items sorted by Title. It includes the following fields:
Type (icon linked to document)
Title
Name (linked to document with edit menu)
Description
Modified
Created By
ID
Keywords
UDC Purpose
Connection Type
Approval Status
Approval Comments
Approve/Reject: Has a list of all files sorted by title and lists the details related to the approval of the item, including:
Type (icon linked to document)
Title
Name (linked to document with edit menu)
Description
Modified
Created By
ID
Keywords
UDC Purpose
Connection Type
Approval Status
Approval Comments
Unlike most other libraries in SharePoint, data connection libraries do not contain document templates that can be opened in the library and edited directly. Instead, the library supports only the upload of files for storage.
Data Connections Library for PerformancePoint
The data connections library for PerformancePoint template is used to store and manage data connection files, much as the standard data connections library discussed earlier in this chapter does. However while the standard data connection library allows management of Office data connection files and universal data connection files, the source data connections library for PerformancePoint introduces a third content type, PerformancePoint Data, which is used to manage connection files for data contained in PerformancePoint dashboards. This library template is available only in SharePoint Server Enterprise and only when the PerformancePoint Site Feature is enabled. The structure created from the data connections library for PerformancePoint is detailed in Table 7-5.
Table 7-5. Data Connections Library for PerformancePoint Columns
Column | Required | Type | Properties | Content Type |
|---|---|---|---|---|
Title | No | Single Line of Text | Office Data Connection Files, Universal Data Connection, PerformancePoint Data Source | |
Description | No | Single Line of Text | Office Data Connection Files, Universal Data Connection | |
Description | No | Multiple Lines of Text | Plain Text | PerformancePoint Data Source |
Keywords | No | Single Line of Text | Office Data Connection Files | |
UDC Purpose | Yes | Choice | Options: ReadOnly WriteOnly ReadWrite | Universal Data Connection |
Connection Type | Yes | Choice | Allow Fill-In Options: SharePointList SharePointLibrary Database XMLQuery XMLSubmit WebService | Universal Data Connection |
Person Responsible | No | Single Line of Text | PerformancePoint Data Source | |
Display Folder | No | Single Line of Text | PerformancePoint Data Source | |
Image | No | Hyperlink or Picture | Formatted as Picture | PerformancePoint Data Source |
Created | -- | Date and Time | Date and Time Friendly Format Populated by System | Office Data Connection Files, Universal Data Connection, PerformancePoint Data Source |
Modified | -- | Date and Time | Date and Time Friendly Format Populated by System | Office Data Connection Files, Universal Data Connection, PerformancePoint Data Source |
Created By | -- | Person or Group | People Only Populated by System | |
Modified By | -- | Person or Group | People Only Populated by System | |
Checked Out User | -- | Person or Group | People Only Populated by System |
The data connections library for PerformancePoint includes several list views for managing and presenting data connection files. These views include the following:
All Items: Shows all files within the library, sorted by title, and lists the following columns:
Type (icon linked to document)
Title
Name (linked to document with edit menu)
Description
Modified
Modified By
Keywords
My Submissions: Lists the library items, sorted by title, created by the user viewing the library and includes the following columns:
Type (icon linked to document)
Title
Name (linked to document with edit menu)
Description
Modified
Created By
ID
Keywords
UDC Purpose
Connection Type
Approval Status
Approval Comments
Approve/Reject: This view, which is used to show the approval status for items in the library, sorted by Title, includes the following columns:
Type (icon linked to document)
Title
Name (linked to document with edit menu)
Description
Modified
Created By
ID
Keywords
UDC Purpose
Connection Type
Approval Status
Approval Comments
By Author: Lists the items in the library, grouped by the created by information, and includes the following columns:
Type (icon linked to document)
Title
Name (linked to document with edit menu)
Description
Modified
Modified By
Created By
Keywords
By Display Folder: Groups the columns in the library by the Display Folder information. It includes the following columns:
Type (icon linked to document)
Name (linked to document with edit menu)
Description
Modified
Modified By
Keywords
Person Responsible
Version
By Data Source Type: Organizes the data connection files by the data source type, or content type, field and lists the following fields:
Name (linked to document with edit menu)
Description
Modified
Modified By
Keywords
Person Responsible
Version
Content Type
Working with Documents
Libraries store and manage a variety of types of files, from Microsoft Office documents and PDF files to web pages and data connections. Libraries provide you with the ability to work with the documents so you can locate and manage information you have been given rights to work with.
Adding Documents to Libraries
There are several different approaches available for adding documents to libraries. These options include approaches for uploading documents that already exist as well as approaches for creating new documents directly in the libraries.
Uploading Documents
When you want to place existing documents in SharePoint, several options are available for copying the items into the desired library. These options support both uploading of individual documents and multiple items at once.
You can upload individual files into a SharePoint library using the library toolbar. The toolbar is available when in a library view page or on pages where the library view web part has been added. The library toolbar contains an Upload option, as shown in Figure 7-8.
To upload a document to a SharePoint library using the toolbar’s Upload option, do the following:
Navigate to the library or page containing the library view app part.
From the library toolbar, select the Upload option.
In the Add a Document window, do the following:
Choose the Browse button and select the file to upload in the Choose a File section.
Identify the upload behavior for the document if it has the same name as a file already in the library. Specify whether to add it as a new version of that file. If you choose not to allow this by unchecking the Add as a New Version to Existing Files option, an error message appears if you try to upload a file with the same name as one already in the library.
In the Version Comments section, you can enter an alternate version comment.
Once the details for the file to upload have been provided, click the OK button.
If the document library has required columns, then the document properties window will be displayed. On this window, do the following:
Populate the columns for the document ensuring to populate any required fields.
Click the Save button.
The document is added to the library and the identified metadata is applied to the document.
Note
If you select Cancel in the document properties window instead of the Save option when there are required fields, the document is added to the library in a checked-out state. You must edit the properties to provide any required data before checking in the document. Since the document has not yet been checked in, it will be available only to the individual who uploaded it.
The second most common method for adding a document to document library is by dragging and dropping the document into the library view from some other library, network share or local drive. Doing this requires the use of an HTML5 compliant browser, such as Internet Explorer 10 or 11. When uploading a document in this way, any metadata columns associated to the document must be populated by editing the document properties once the upload is complete. If the library has required columns then the newly added document will be added in a checked out state requiring the columns to be populated before the document can be checked in.
A third option to upload a single document into a library is done using the Upload Document option from the Files ribbon tab. To upload a document to a library using the ribbon upload options, do the following:
Navigate to the library where you want to upload the file.
On the library view page, click the Upload Document option from the Files ribbon tab, as shown in Figure 7-9.
In the Add Document window, do the following:
Find the document to add by browsing to it, then select it.
Identify the upload behavior for a document with the same name as a file already in the library. Specify whether to add it as a new version of that file. If you choose not to allow this by unchecking the Add as a New Version to Existing Files option, an error message appears if you try to upload a file with the name of one already in the library.
Add an optional version comment.
Click the OK button.
If the document has required metadata columns, the document properties window is presented where the document metadata can be populated. Once this information is entered, click the Save button.
The document is added to the library, and the identified metadata is assigned to the document.
While all the document upload options we have discussed so far work well for uploading individual documents, at times you may want to upload multiple items all at once. A couple of different approaches can be used to upload multiple documents into a library in this way. First you can use the same drag-and-drop approach discussed earlier by selecting multiple documents instead of one. The second approach is to upload them through the Windows Explorer view. This view opens the library in an Explorer window, like the one you see when you browse through directories on your local computer. Then you can drag and drop or copy and paste files into the Explorer window. To upload files through Windows Explorer view, do the following:
Navigate to the library were you want to upload the files.
Select the Open with Explorer option from the Library ribbon tab or click the Upload Files using Windows Explorer Instead link when on the Add a Document window.
In the Windows Explorer window, drag and drop or copy and paste files from the other locations into the opened Explorer window.
Once the files are uploaded, edit their properties to assign any required metadata column values, and then check the documents into the library. Editing document properties is discussed later in this chapter.
Note
There are some restrictions to the types of files that can be uploaded into a library. For example, by default EXE and DLL files are not allowed. The file types not allowed in libraries are managed by your SharePoint technical administrator.
Creating New Documents in a Library
As well as uploading existing documents into a library, you can also create new documents within a library directly. This allows you to generate a new document in the desired library directly. To create a new document in a SharePoint library, do the following:
Navigate to the library where you want to create the new document.
On the document view page, select the type of document to be created from the New Document drop-down menu on the Files ribbon tab. If you click on the New Document drop-down option directly, the default document type will be created.
The document will open in the associated document’s editing program.
A document saved from the opened program is saved in the library where you created the file.
Using the New Document Menu
Whether you are working in a document library view page or through a library app part listed on a web part or wiki page, SharePoint 2016 has a New link in the toolbar of the app part. This link enables you to easily upload content and create new documents within the library. Clicking this link opens a list of new document activities, including a list of the possible documents that can be created directly in the library and a link to upload a document, as Figure 7-10 shows.

Figure 7-10. New document menu
To create a new document in the site through the New link, do the following:
Navigate to the library where you want to create the new document.
Click the New link in the document library view toolbar to show the Create a New File menu.
In the Create a New File menu, click the type of document to be created.
In the Create a New Document window, enter the name for the new document to be created.
In the document’s Edit Properties window, enter the document property details and click the Save button.
The new document is added to the library. You can also use the New Document menu to upload a document to the library. When you select the Upload Existing File option from the New Document menu, you are prompted to identify the file and then the document properties, using the process described in the “Uploading Documents” section earlier in this chapter.
Editing Documents in SharePoint
Once documents are uploaded or created in SharePoint, the documents and their properties can be edited. Several capabilities exist within SharePoint to help you manage and edit documents.
Checking Documents In and Out
Check a file out of a library when you plan to make edits and want to prevent others from editing the document until you are done with your edits. Checking out the file prevents others from editing the file until it is checked back in. Individuals visiting a library can see whether files are checked out and to whom. For example, you may want to check out a file if you plan to make edits spanning several days. A checked-out file, even when not open in a program such as Word or Excel, will be unavailable for edit by any other individual, and others will not see your changes until the file is checked back into the library.
To check out a document in a library, do the following:
Navigate to the library where you want to check out the document.
Check the selection box next to the document or documents you want to check out, and click the Check Out option from the Files ribbon tab (see Figure 7-9).
The files are checked out, and the library view is updated. This update includes details about the individual who checked out the file, as well as changing the file’s icon to include the checked-out symbol (see Figure 7-11).

Figure 7-11. Library view with checked out documents
There is another method you can use to check out a file:
Navigate to the library where the file to be checked out is located.
In the library view, select the Hover Panel option.
From the document’s hover panel menu, select the Check Out option from the ellipse’s Advanced submenu (see Figure 7-12).

Figure 7-12. Document’s hover panel menu
The document is checked out to the current user. Documents checked out are later checked back into a library using the same approach discussed for checking items out, the only exception being that the Check In option is used instead of the Check Out option.
Library managers can require that items in a library be checked out in order to be edited. To configure a library to require items to be checked out for editing, do the following:
Navigate to the library where checkout is to be required.
On the library view page, select the Library Settings option from the Library ribbon tab.
On the Settings page, select the Versioning Settings from the General Settings section.
On the Versioning Settings page in the Require Check Out section, select Yes for the Require Documents to Be Checked Out Before They Can Be Edited option and click the OK button.
The library is configured to require documents to be checked out. With this option enabled, when you want to edit a document from a Microsoft Office program, you are prompted to check out the files (see Figure 7-13). Click the Check Out button to check out the associated file.

Figure 7-13. Microsoft Office Check Out prompt
Any file checked out to you can be checked back into the library. But if you want, you can also discard the checkout of a document. When you discard checkout, any changes made to the file since it was checked out are lost, and the file returns to the state it was in when you checked it out. To discard your checkout of a file, do the following:
Navigate to the library where the checked-out file exists.
Check the box next to the document to discard checkout, and choose the Discard Checkout option from the Files ribbon tab.
The file is checked back into the library, and changes made to it while it was checked out are discarded. Individuals with Full Control rights to the library can not only discard the checkout of files they had checked out but also discard the checkout of items checked out by others. Thus, administrators can override the checkout of these items, making documents checked out by other library users available for edit in their earlier state.
Editing Documents
A document in a SharePoint library is edited by opening the file in its associated program or, for a Microsoft Office document, opening it in Microsoft Office Web Apps. Clicking the name of a file in a library opens that file. A file associated with a program not in Microsoft Office opens in its associated program—for example, a PDF file opens in Adobe Reader. Microsoft Office documents, including Word, Excel, and PowerPoint files, open in either their associated program or in Microsoft Office Online Server. The way they are opened depends on the settings of the library where the document is being opened.
Managing Document Opening Settings
When your SharePoint technical administrator configures Microsoft Office Online Server within your SharePoint environment, Microsoft Office documents, including Word files, Excel spreadsheets, and PowerPoint presentations, are configured by default to open in Microsoft Office Online Server instead of their associated Microsoft Office desktop program. You can configure SharePoint libraries to determine the default program in which to open these files. To specify whether a Microsoft Office document is to open in the associated Office program or in Microsoft Office Online Server, do the following:
Navigate to the library where you want to edit the document opening settings.
On the document view page, select the Library Settings option from the Library ribbon tab.
On the Settings page, select the Advanced Settings option from the General Settings section.
On the Advanced Settings page in the Opening Documents in the Browser section, specify the behavior for opening documents. One option is Use the Server Default. This is the default option where the library inherits the document-open settings defined by the SharePoint technical administrator. A second option is Open in the Browser, which opens files in Microsoft Office Online Server, letting you view and edit them in the web browser. A third option is Open in the Client Application, which opens files in the associated Office program. Once the setting is configured, click the OK button.
Even when the default opening behavior of files is defined, however, users of the library can still explicitly identify the method they want to use to open a file.
Opening Documents
You can open a document in a library for viewing or editing by navigating to the library and clicking the name of the document. When this is done, the document opens in the file’s default program. For Office documents, files open in either the associated Office program or Office Online Server, depending on the library settings. You yourself can also determine how to open a document by choosing the opening method.
Open in Program: To open the document in its associated program, display the hover panel, and select the Open in Word option from the ellipse submenu.
Open in Browser: To open a Microsoft Office document for editing in Office Online Server, select the Open in Browser option from the hover panel menu. To open an Office document for viewing only, select the View in Browser option from the hover panel menu. This choice opens the document in the Office Online Server, as Figure 7-14 shows.
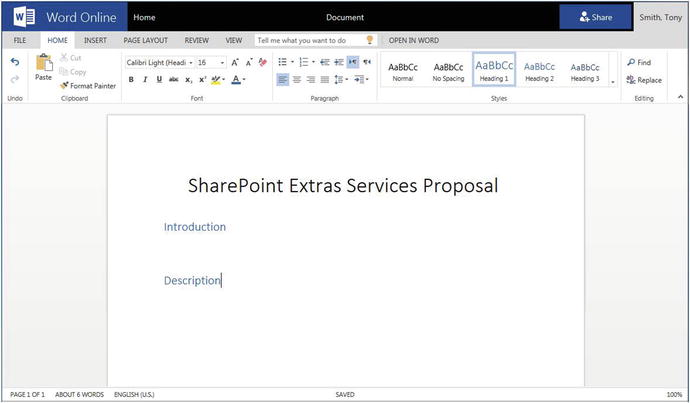
Figure 7-14. Word Online, Office Online Server application
Office Online Server gives the web browser the full editing capabilities of Microsoft Office Word, Excel, PowerPoint, and OneNote. Use Office Online Server to open a document when your local computer does not contain a copy of Microsoft Office but you need to edit a document or when your computer’s version of Microsoft Office is not Office 2013 and you want to take advantage of capabilities not available in the installed earlier version of Office.
Note
It is not required that you have Microsoft Office 2016 to work with documents in SharePoint 2016. You can manage documents within SharePoint using previous versions of Office, but you will be limited to the features available in your Office version.
Editing Document Properties
When you work with documents in libraries, you can edit the information in the metadata columns. (How to create columns in lists and libraries to determine the metadata to manage is discussed in Chapter 5.) To edit the properties of a document, do the following:
Navigate to the library containing the document to be edited.
On the library view page, check the selection box next to that document, and then select the Edit Properties option from the Files ribbon tab.
If the library requires checkout and the document is not checked out, click the OK button in the checkout window.
On the document’s properties edit page, make any needed changes to the document’s details. Once done, click the Save button.
The document properties are updated, and you are returned to the document library view.
You can also edit a document’s properties by doing the following:
Navigate to the library containing the document to be edited.
On the library view page, select the Hover Panel option.
In the hover panel, open the ellipse menu and select the Properties option (see Figure 7-15).

Figure 7-15. Hover submenu
If the library requires checkout and the document is not yet checked out, click the OK button in the checkout window.
On the document’s properties edit page, make any needed changes to the document’s details. Once done, click the Save button.
The document properties are updated, and you are returned to the library view page.
Using Quick Edit
Quick Edit, used to make multiple changes to a document’s properties, opens a SharePoint list or library view in a datasheet view resembling Excel (see Figure 7-16).

Figure 7-16. Quick Edit
To open a library in the Quick Edit view, do the following:
Navigate to the library in which you want to edit a file’s properties.
On the library view page, select the Quick Edit option from the Library ribbon tab.
The library appears in the Quick Edit view, where you can make needed changes to library properties. Changes are made individually, by typing in columns, or through multi-cell copy-and-paste actions, like those used to edit data in Excel files. Once done, selecting the View option from the Library ribbon tab returns you to the standard view of the library.
Managing Files with No Checked-in Version
When a document is added to a library requiring checkout or is added without entering required metadata, the file is added in a checked-out state and must be checked in by its creator. Until a document is checked in the first time, other users of the library will not see it.
Library managers are able to manage files that have no checked-in versions. That is, they can manage files when their creator is not available to check them in the first time. To manage a file with no checked-in version, a library manager must take ownership of the file. To take ownership of a file with no checked-in version, do the following:
Navigate to the library containing the file to be managed.
On the library view page, select the Library Settings option from the Library ribbon tab.
On the Settings page, select the Manage Files which have No Checked-In Version option from the Permissions and Management section.
On the Checked Out Files page (see Figure 7-17), check the box next to the file you want to take ownership of, and click the Take Ownership of Selection option.

Figure 7-17. Checked Out Files page
The file is updated to give the current user control of the checked-out item. Once the control is set, you can edit, check in, or delete the item from the library.
Deleting Documents in a Library
Documents within SharePoint libraries can be deleted by individuals who are able to manage library content. Several different approaches can be used to delete documents. To delete a single item from a library, do the following:
Navigate to the library where you want to delete a document.
On the library view page, select the Hover Panel option to show the hover panel for the selected item.
In the hover panel, select the ellipse menu, and choose the Delete option (see Figure 7-15).
On the delete confirmation screen, click the OK button.
The file is deleted, and the library view is refreshed to reflect the change. The deleted file is moved to the site’s recycle bin (the recycle bin is discussed in Chapter 3).
At times you may want to delete multiple documents all at once. In this case, deleting items individually would not be efficient. Deleting multiple items at once from SharePoint libraries is done in one of two ways. The first method is as follows:
Navigate to the library containing the documents to be deleted.
In the library view, check the box next to each item to be deleted, and then select the Delete Document option from the Files ribbon tab.
On the delete confirmation screen, click the OK button.
The items are deleted from the library, and the view is updated. The deleted files are moved to the site’s recycle bin.
A second method for deleting multiple files is through Windows Explorer. To delete multiple files from a library using Windows Explorer, do the following:
Navigate to the library containing the files to be deleted.
On the library view, select the Open with Explorer option from the Library ribbon tab.
On the Windows Explorer screen, select the files to be deleted, and select to delete the files.
The items are deleted from the library.
Editing Documents Through Document Workspaces
A document workspace can be used to manage document editing processes. These sites are designed to facilitate comprehensive document management editing, including the management of supporting documents, links, and tasks related to the document’s update process. When a document workspace is used to manage editing, an editable copy of the document is placed in a workspace. The original document is left in its source location untouched until the workspace copy is appropriately updated and published back to the source.
To create a document workspace to manage a document’s editing process, do as follows:
Navigate to the library containing the document to be edited.
On the document view page, check the box next to the document to be edited in a document workspace. Then select the Create Document Workspace option from the Send To drop-down menu on the Files ribbon tab.
On the Create Document Workspace page, click the OK button.
A document workspace is created (see Figure 7-18), and a copy of the selected document is placed in the workspace. You are brought to the workspace, where you can work on the document as well as manage any materials and information related to the edits you make.

Figure 7-18. Document workspace
A document workspace contains a set of resources designed to support the editing of documents, including the following:
Announcements list
Calendar list
Documents library, containing a copy of the document for which the workspace was created.
Links list
Team Discussion list
When working in a document workspace, you can use the available lists and libraries and create additional resources to help make necessary changes to the document. Once the document is appropriately updated, you can publish it back to the original source file by doing the following:
Check the box next to the finalized file in the document workspace and select the Copy option from the Send To drop-down on the Files ribbon tab.
On the Copy window, the original file location will be listed. Click the OK button.
Download a Copy
Users of a SharePoint library are able to download copies of files from the library. That is, users can save copies of documents to another location they have access to, such as the local computer or an accessible network location. To download a copy of a file from a library, do the following:
Navigate to the library containing the file to be downloaded.
On the library view page, select the Hover Panel option.
On the hover panel, choose the Download option from the hover menu.
In the Do You Want to Save… message, click Save or Save As and then choose the save location.
A copy of the file is saved to the identified location.
Working with Folders
Folders can be used in libraries to organize documents and to provide a container to uniquely secure groups of documents. By default, folders are enabled within libraries and can be nested into any needed hierarchy. A folder is best used when a set of documents to be stored needs to be secured differently from the rest of the library materials. Both the folder and the documents in it can be updated to reflect the files’ special security needs.
To create a new folder in a library, do the following:
Navigate to the library where you want to create the folder.
On the library view page, select the New Folder option from the Files ribbon tab.
In the Create a New Folder window, enter the name of the folder to be created and click the Create button.
The folder is created, and you are returned to the library view.
Note
Placing documents in a folder results in a fixed structure. Instead of using folders to organize content for display purposes, it is better to use the grouping capabilities against columns in views to create these structures. This approach allows you the flexibility to create multiple views and to organize documents in different ways.
Folders are most effectively used to secure groups of documents requiring special security. Doing this need not adversely affect the display of the documents in the library. If you configure the library’s views to ignore folders, you preserve the security you want, and the documents will be listed as if they are all contained in the root of the library. To configure a view to ignore folders in the display, do the following:
Navigate to the library containing the folders to be ignored in the view.
Select the library view that you want to update.
On the library view page for that view, select the Modify View option from the Library ribbon tab.
On the Edit View page in the Folders section, select the Show All Items Without Folders option and click the OK button.
The library view is updated and shows all content without listing the folders.
Document Sets
At times multiple documents will make up what your organization considers a single piece of business content. For example, an RFP response may consist of a Word document response and a PowerPoint response presentation. Another example is a contract consisting of the original contract and one or more amendment documents. Not uncommonly, such a set of closely related documents need to share metadata properties, go through workflow processes together, or be subject to the same information management policies. A document set is a special kind of folder that allows multiple documents to be managed together and treated as if they were a single item. A document set can have:
Metadata columns that are shared with the documents contained within it.
Workflow processes that can be run against the document set (workflows are discussed in detail in Chapter 9).
Information management policies, such as retention or auditing policies, that can be configured within the set itself (information management policies are discussed in detail in Chapter 9).
Versions assigned that group together the existing individual document versions into a comprehensive document set version.
The document set is a special content type that must be enabled within a library for it to be used. To configure a library to allow content types and to include document sets, do the following:
Navigate to the library where you want to enable document sets.
On the library view page, select the Library Settings option from the Library ribbon tab.
On the Settings page, select the Advanced Settings option from the General Settings section.
On the Advanced Settings page, select Yes for the Allow Management of Content Types option in the Content Types section. Click the OK button.
On the Settings page in the Content Types section, select the Add From Existing Site Content Types option.
On the Add Content Types page:
Select the Document Set Content Types option from the Select Site Content Types From drop-down to filter the list of content types to only the Document Set type.
Select the Document Set option from the Available Site Content Types section, and click the Add button to move the content type to the Content Types to Add section.
Click the OK button.
The Document Set content type is added to the library for use. The Document Set content type must next be configured to identify the display setting used when sets are accessed and the column properties that sets will share with contained documents. To configure document set properties in a library where the document set content type has been enabled, do the following:
Navigate to the library containing the document set to be configured.
On the library view page, select the Library Settings option from the Library ribbon tab.
On the Settings page, select the Document Set option from the Content Types section.
On the List Content Type page, select the Document Set Settings option from the Settings section.
On the Document Set Settings page:
In the Allowed Content Types section, select the content types to be created within the document set.
In the Default Content section, specify materials to be added to the document set when it is created by identifying the content type and then selecting the items to be added. Also, specify whether filenames, when added to the set, are to include the document set’s name.
In the Shared Columns section, identify the metadata columns in the library to be inherited from the set. Documents added will inherit the values of the columns identified as inherited from the set.
In the Welcome Page columns section select the library columns to include on the page displayed where navigating to a document set.
In the Welcome Page View section, identify the library view to be used to display contained documents when the set is first accessed.
In the Welcome Page section, select whether you want to change the layout of the welcome page (the page displayed when you navigate to the document set). A new window will open, in which you can tailor the page layout.
Click the OK button to save the document set settings.
The document set is updated based on the changes made. With the set configured, you can create a new document set within the library. Do this as follows:
Navigate to the library where you want to create the document set.
On the document view page, select the Document Set option from the New Document drop-down menu on the Files ribbon tab.
On the New Document Set page, enter the details for the new document set, and click the Save button.
The new document set is created, and you are brought to its welcome page (see Figure 7-19).

Figure 7-19. Document Set welcome page
Working in Document Sets
Once a document set is created, you can add and manage documents within it just as you work with documents in any other library. (The only exception is that column properties inherited by the document set will be prepopulated with the values of those properties in the set.) While within a document set, you can view and manage its properties. As discussed earlier, the welcome page initially lists the details identified for display when the set was configured. Clicking the View All Properties link brings you to the set’s properties display page, where all the set’s details are shown.
When viewing the document set welcome page, you can edit the set’s properties. To do this, click the Edit Properties option and make any necessary updates to the details. When updates are made to set properties that are inherited by the documents in it, the properties of the contained documents are updated.
Document Set Version Management
When versioning is enabled in a library that contains document sets, you can create document set versions. Creating a version of a document set identifies the version of each file within the set and ties them to the set version so that you can track and view the state of all the set’s materials when the version was created.
To capture a version of the document set, do the following:
Navigate to the document set in which you want to capture the version.
On the document set welcome page, select the Capture Version option from the Manage ribbon tab.
In the Capture Document Set Version window, do the following:
In the Version Options section, specify whether the version is to include the latest major versions of contained documents or just the most recent version of each, whether it be a major or minor version.
In the Comments section, optionally enter a comment to associate with the version.
Click the OK button to save the version.
The version of the set is saved. To view the captured versions of a document set, navigate to it, and select the Version History option from the Manage ribbon tab. This will show the details for the saved version of the set, including references to the contained document versions (see Figure 7-20).

Figure 7-20. Document set version history
Managing Item Level Security
As discussed in previous chapters, security can be managed against sites, lists, libraries, and list items. You can also manage security for documents and folders directly within libraries. To manage security for a document or folder in a library, first configure the document or folder to no longer inherit its permissions from its parent library or folder. You can then manage the document’s or folder’s permissions directly. Typically you would edit the permissions when you want to restrict access to an item beyond the rights assigned to the library itself.
Managing Permission Inheritance
As just noted, before you can change a document’s permissions, you must reconfigure it to stop inheriting its permissions from its library. To break inheritance on a document in a library, do the following:
Navigate to the library view showing the document that requires permissions to be managed.
On the library view page, select the document whose permissions are to be managed by checking the selection box for the item, and then select the Shared With option on the Files ribbon tab.
In the Shared With window, select the Advanced option.
On the Permissions page, update the permission inheritance settings for the document by doing the following:
To stop inheriting permissions, select the Stop Inheriting Permissions option from the Permissions ribbon tab. In the confirmation window, click the OK button.
To reestablish inheritance between the library and the document, select the Delete Unique Permissions option from the Permissions ribbon tab. In the confirmation window, click the OK button.
Permission inheritance is updated based on your choices. Once a document or folder no longer inherits permissions from the library, you can set permissions directly against the item.
Editing Document Permissions
To change the permissions of a document or folder that does not inherit its permissions from the library, do the following:
Navigate to the library view showing the document to be updated.
On the library view page, check the selection box next to the document, and then select the Shared With option on the Files ribbon tab.
In the Shared With window, select the Advanced option.
On the Permissions page, do the following:
To add permissions:
Select the Grant Permissions option from the Permissions ribbon tab.
On the Share screen, enter the accounts to which permissions are to be added. If providing permissions other than Edit, click the Show Options item, and then select the permission level to provide. Once the appropriate permissions are set, click the Share button.
To edit permissions:
Check the box next to the item to be edited and click the Edit User Permissions button from the Permissions ribbon tab.
On the Edit Permissions page, select the appropriate permissions and click the OK button.
To delete permissions:
Check the box next to the item or items to be deleted and select the Remove User Permissions option from the Permissions tab.
In the delete confirmation window, click the OK button to delete the item.
Once the permission updates are complete, you are returned to the Permissions page, where the permissions changes are reflected.
Note
Resetting a document or folder to inherit permissions removes the security permissions you configured for the item and resets it to those of the parent folder or library.
Audience Targeting
In a document targeted to specific individuals or groups, web parts and library views can be configured to display the information only to identified users or groups. This is done by defining targeting settings for the item. To enable targeting within a library, do the following:
Navigate to the library where you want to enable targeting.
On the library view page, select the Library Settings option from the Library ribbon tab.
On the Settings page, select the Audience Targeting Settings option in the General Settings section.
On the Enable Audience Targeting page, click the Enable Audience Targeting option and click the OK button.
When audience targeting is enabled in a library, an additional field, Target Audiences, is listed on the document’s Edit Properties form. This field lets you select users, groups, and SharePoint groups as target audiences for the information.
Document Versioning
As is discussed with lists in Chapter 6, versioning is used to maintain a record of all changes made to a document over time. The version history lets you view past iterations of a document, along with the date, time, and editor of the document for each version. With versioning enabled, you can also revert a document to a previous version if necessary and compare the current state of the document to that of past versions to identify changes made to it over time.
Enable Versioning
To enable versioning for a document library, do the following:
Navigate to the library where you want to enable versioning.
On the library view page, select the Library Settings option from the Library ribbon tab.
On the Settings page, select the Versioning Settings option from the General Settings section.
On the Version Settings page, do the following:
In the Content Approval section, select whether the document is to require content approval.
In the Document Version History section, select to either create major versions only or to create both major and minor versions. Optionally select whether the number of versions tracked is to be limited and, if it is to how many. Also, optionally identify whether the number of major versions that draft versions should be maintained for is to be limited and, if so, how many major versions should have minor versions.
In the Draft Item Security section, identify whether all users, only editors, or only approvers are to see draft items.
In the Require Check Out section, identify if items must be checked out for them to be edited.
Click the OK button to save the version settings.
The version settings are saved, and you are returned to the Settings page.
Working with Existing Versions
When versioning is enabled in a library and a document has versions created, you can access details of its past versions. To access the version details for an existing document, do the following:
Navigate to the library where you want to review the version history.
On the library view page, open the document’s hover panel.
On the document’s hover panel, select the Version History option from the hover panel’s ellipse menu (see Figure 7-15).
Alternatively, do the following to access this information:
Navigate to the library where you want to review the version history.
In the library view, click the box next to the document whose history you want to view, and then select the Version History option from the Files ribbon tab.
The Version History window, shown in Figure 7-21, appears. This window provides access to all the version details for the selected document.
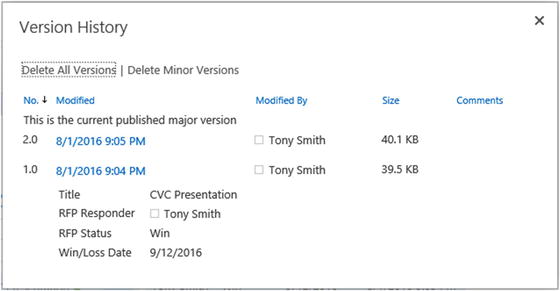
Figure 7-21. Version history window
When you access a document’s version history details, the version’s context menu can be used for the following activities:
View Previous Versions: Selecting the View option from the document version’s context menu opens the selected version for review.
Restore Previous Versions: Restoring a previous version of a document creates a copy of the selected version and makes it the current version. To do this, select the Restore option from the document version’s context menu.
Delete Previous Versions: Individuals with appropriate rights can delete specific versions of a file. To delete a version, select the Delete option. To delete all versions, select the Delete All Versions link in the version history window.
Content Approval
Along with versioning, content approval is used to help ensure the integrity of a document and ensure that only approved changes to it are available to its users (enabling content approval is discussed earlier in this section). Content approval lets multiple individuals edit a document but includes a set of people that must approve the changes made by these individuals before the changes to the document are seen by others.
To approve changes made to a document requiring content approval, do the following:
Navigate to the library view containing the document.
Select the hover panel for the document to be approved or rejected.
In the hover panel, select the Approve/Reject option from the hover panel’s Advanced submenu.
In the Approve/Reject window, update the approval status for the document, optionally add a comment, and click the OK button.
The document’s approval status is updated to reflect the selection made. If the content was approved, it is made visible to site users. If rejected, the document will not become available to general site users.
A user who has added documents to the library can select the My Submissions view to see the status of documents submitted for approval. This view presents all documents that a user has created and categorizes them by their approval status. If a content approver rejects a document, any comments the approver entered are also displayed in the My Submissions view in the Approver Comments column so that the submitter understands why the rejection occurred. Each time a document in a library where content approval is enabled is edited, its status is set to Pending. It must be approved again before the changes are available to users.
Copying Documents with the Send To Option
The Send To option in document libraries lets you copy a document to another library in your SharePoint environment. When the Send To option is used to create copies of a document, a relationship between the source document and the copies is established. This relationship allows you to navigate between the original document and its copies.
To create a copy of a document using the Send To options, do the following:
Navigate to the library containing the document to be copied.
On the document view page, check the selection box next to the document, and select the Copy option from the Send To drop-down menu on the Files ribbon tab.
In the Copy window, do the following:
In the Destination section, enter the URL to the library where you want to copy the file, and specify a name for the file.
In the Update section, identify whether the author of the document is to be prompted to send updates when it is checked in and whether an alert is to be created for the source document so that the user making the copy is kept aware of updates made to the source document.
Click the OK button.
In the Copy Progress window, click the OK button.
Once the copy is created, click the Done button in the copy progress window.
The file is copied to the identified location. Once copies of a document have been created, you have the ability to view the copies by doing the following:
Navigate to the library containing the source document.
On the document view page, check the selection box next to the document and select the Manage Copies option from the Files ribbon tab.
On the Manage Copies page, you can view and select listed copies (see Figure 7-22).

Figure 7-22. Manage Copies page
The Manage Copies page allows the following:
Edit the Properties of a Document Copy: Selecting the Edit icon allows editing of the destination location and filename for the copy, as well as whether the author is to be sent an update when the document is checked in. You can also use this option to remove the link to this copy.
New Copy: Allows you to enter details for a new copy, including the destination location and filename, and to identify whether an update is to be sent to the author when the document is checked in.
Update Copies: Allows you to identify copies to be updated based on the content of the source.
When viewing a document that is a copy, you can get back to the source file the copy is based on by selecting the Go to Source Item from the Advanced submenu of the document’s hover panel. This will bring you to the source file’s document view page.
Item Validation
SharePoint has the ability to validate document properties when a document is added to a library and when the properties are edited. This allows you to add conditional validation requirements to your document’s details. To configure validation rules for a library, do the following:
Navigate to the library where you want to configure validation settings.
On the library view page, select the Library Settings option from the Library ribbon tab.
On the Settings page, select the Validation Settings option from the General Settings section.
On the Validation Settings page, do the following:
In the Formula section, define the rules to use to validate the information added to the library.
In the User Message section, enter a message for users to help them understand what is needed to save the information in the library.
Once the information is entered, click the Save button to save the information.
The validation settings for the library are configured. You can also configure validation rules for an individual column in a library when the rules are specific to the column and do not need to reference other columns. To configure validation for individual library columns, do the following:
Navigate to the library where you want to add validation to columns.
On the library view page, select the Library Settings option from the Library ribbon tab.
On the Settings page in the Columns section, click the title of the column to which you want to add validation settings.
On the Edit Column page, do the following:
Select the Column Validation option to expand the column validation settings.
In the Formula box, enter the formula to use to validate the information entered in the column.
In the User Message box, enter the text to show users to help them identify the needs of the column.
Click the OK button to save the column validation rules.
The validation rule is configured against the updated column.
Document Templates
Document libraries use template files to identify the type of file to create when you choose to create a new document in a library, and the document template the new document will be based on. Templates allow you to control the types of documents created within libraries. When you create a document library, as discussed in Chapter 5, you can select from several document templates, including the following:
None: With this choice, the New Document option is not available in the library. Documents can only be uploaded to the library.
Microsoft Word 97-2003 Document: A document created using the New Document option will be a Microsoft Word document (.doc).
Microsoft Excel 97-2003 Spreadsheet: A document created using the New Document option will be an Excel spreadsheet (.xls).
Microsoft PowerPoint 97-2003 Presentation: A document created using the New Document option will be a PowerPoint presentation (.ppt).
Microsoft Word Document: A document created with the New Document option will be a Word document (.docx).
Microsoft Excel Spreadsheet: A document created with the New Document option will be an Excel spreadsheet (.xlsx).
Microsoft PowerPoint Presentation: The New Document option will create a PowerPoint presentation when clicked (.pptx).
Microsoft OneNote 2010 Notebook: With this selected, the New Document option will create OneNote notebook files.
Microsoft SharePoint Designer Web Page: A document created with the New Document option will be a SharePoint page opening in SharePoint Designer for editing.
Basic Page: The New Document option will create a SharePoint Basic page.
Web Part Page: The New Document option will create a SharePoint web part page.
After a library has been created, document templates can be edited to establish an appropriate starting point for new documents. For example, if the library will store case studies, the template can include a standard layout and standard content that all case study documents will include. To edit the document template for a library, do the following:
Navigate to the library where the template needs to be edited.
On the library view page, select the Library Settings option from the Library ribbon tab.
On the Settings page, select the Advanced Settings option from the General Settings section.
On the Advanced Settings page, select the Edit Template option in the Document Template section.
In the opened document, make necessary updates to the file, and save the changes.
On the Advanced Settings page, click the OK button.
The template is updated. Another approach to changing the library template is to replace the template file instead of editing the existing template. Replacing the template file allows you to use an existing document as the template for new documents created in the library. To choose a document as the template for the library, do the following:
Open the library in Windows Explorer view, and ensure that the folder option to show hidden files and folders is in place.
Navigate to the Forms folder (a hidden folder) in the Explorer view of the library.
Copy the file to use as the template to the Forms folder.
On the library view page, select the Library Settings option from the Library ribbon tab.
On the Settings page, select the Advanced Settings option from the General Settings section.
On the Advanced Settings page, update the filename in the Document Template section to the name of the new file you copied into the Forms folder. Click the OK button when done.
Note
When a library is configured with content types enabled, you cannot edit the template for the library. With content types enabled, the templates are managed through the content types themselves. Content types are discussed in more detail in Chapter 8.
Rating Library Content
Like lists, libraries can be configured to allow items in them to be rated by site users. Rating lets people declare their general opinion of the files and consolidates these opinions to give an overall evaluation of content. Content rating is configurable as a five star rating model or as Likes placed against items. To use ratings, the rating capability must be activated in the library. Activate ratings by doing the following:
Navigate to the library where you want to activate ratings.
On the library’s view page, select the Library Settings option from the Library ribbon tab.
On the Settings page, select the Rating Settings option from the General Settings section.
On the Rating Settings page, do the following:
For the Allow Items in This List to Be Rated option, select Yes.
For the Which Voting/Rating Experience You Would Like to Enable for this List option, select Star Ratings, if you want the five star rating scale, or Likes, if people are to rate content by Liking it.
Click the OK button to save the changes.
Content rating for the library is enabled.
Using Star Ratings
When a library is configured for star ratings, visitors are allowed to specify, on a five star scale, a rating for the documents. To rate a document in a library, click on the star that represents the rating you want to give the document. Once you select a rating, the document is updated to include it. That is, your rating becomes part of the document’s overall rating average and increments the number of ratings placed against the document. If a user rates the document a second time, the previous rating applied is replaced by the newly selected one. Figure 7-23 shows a page with star ratings.

Figure 7-23. Star ratings
Using Like Ratings
When ratings are configured to allow users to Like content, documents in the library appear with Like details listed. Like details show the number of Likes the document has received to date. Users can Like a document, if they have not yet done so, or Unlike a document, if they earlier Liked it. To Like a listed document, click the Like link. This updates the document to include your Like. If you decide to Unlike a document, clicking the Unlike option removes your Like and allows you to Like the document again. Figure 7-24 shows a document library with Like ratings enabled.

Figure 7-24. Like ratings
Document ID Service
The Document ID Service is a feature that can be activated in SharePoint to provide unique IDs to documents in a site collection. The feature creates a reference to the document that is consistent even if the document is moved around the environment as it matures. The ID is viewable on the document properties page, along with other standard document properties. When this service is active, the document acquires a URL that can be used to access the document regardless of its location. This URL has the following format:
http://<SiteCollection>/_layouts/DocIDRedir.aspx?ID=<DocumentID>Once the Document ID Service feature is activated, you can configure the layout of the IDs created and specify the search scope to locate documents based on the ID. To configure the Document ID Service settings, do the following:
Navigate to the root site in the site collection.
On the site collection home page, select the Site Settings option from the Settings menu.
On the Site Settings page, select the Document ID Settings option from the Site Collection Administration section.
On the Document ID Settings page, identify the characters to use as a prefix for document IDs and the search scope for locating documents by ID. Then click the OK button to save the Document ID settings.
Working with Documents in Office
There are several capabilities available in Microsoft Office to make working with SharePoint documents easier.
Saving Documents to SharePoint
Microsoft Office programs can natively save files in SharePoint. When you create a new file in Office or want to save an opened file to SharePoint for the first time, do as follows:
In Office 2013:
From the Office program’s File Menu, select the Save As option.
On the Save As screen, select SharePoint.
On the SharePoint screen, select the SharePoint location from the Recent Locations list, if it is there, or browse for a location option. In the Save As box, type the URL for your SharePoint site collection and navigate to the appropriate site and library from the listed locations.
Enter a name for the file in the File Name field and click the Save button.
If the document library where the file is to be saved has required metadata:
In the presented file warning message, click the Go to Document Information Panel button.
In the Document Information Panel section (see Figure 7-27), enter the document metadata and click the Retry Save Button.

Figure 7-25. Word 2016 Save As screen
The document is saved to the library.
In Office 2016:
From the Office program’s File menu, select the Save As option.
On the Save As screen, select the SharePoint location from the Recent Locations listed, as shown in Figure 7-25. If the desired location is not listed, check the Browse option and type the URL of your SharePoint library.
Enter a filename for the document and click Save.
The document is saved to the library.
Editing Document Properties
Document properties managed within SharePoint can be edited directly within Microsoft Office 2013 from the Document Information Panel. To edit a document’s properties in Office, open the Document Information Panel in Office 2013 by selecting the File menu. On the Info page, select the Show Document Panel from the Properties drop-down menu (see Figure 7-26).

Figure 7-26. Word 2013 File menu
In Microsoft Office 2016, there is no Document Panel. To edit a document’s SharePoint properties in Office 2016, select the Advanced Properties option from the Properties drop-down on the Info page.
Accessing Documents While Offline in Outlook
Connecting SharePoint libraries to Outlook makes files accessible in an Outlook folder. When the connection is established, the files in the library are synchronized with Outlook and are available even when you are not connected to SharePoint. This approach works well for a set of documents you need to reference while traveling. For example, if you have a sales team requiring access to marketing materials wherever they are, you can synchronize these files with Outlook. This is done as follows:
Navigate to the document library to connect to Outlook.
On the library view page, select the Connect to Outlook option from the Library ribbon tab.
If a warning message is presented about access to content, click the Allow button.
In the confirmation window, click the Yes button to confirm the connection with Outlook.
The library will appear in the SharePoint lists section of Outlook (see Figure 7-27).

Figure 7-27. Synchronized library in Outlook
Note
When you open a document in the Outlook view, the file is opened for offline editing. Any changes you make to the document from this view must be synchronized with the SharePoint library when the SharePoint server is available.
Summary
In this chapter we introduced the various types of libraries that can be created within SharePoint 2016 and discussed the purposes for each. We reviewed how content can be managed across these libraries. We then detailed how to work with content, including how to create files and edit and manage them within the libraries. We then reviewed folders and how to use them to organize content in a way that makes it easier to secure. We also discussed document sets and how they can be used to bring related content together and manage it as if the multiple items were one piece of content. We then detailed how to secure and target libraries and the documents contained within them. We discussed how to manage versioning content approval and ratings. Lastly, we discussed how to use Microsoft Office to work with documents stored in SharePoint.