In this chapter, we’re going to look at web application (or web app, for short) frameworks—libraries of code that provide an easily reusable structure and design patterns for developing web applications. If you want to develop something useful for the Web, you’ll probably find a web application framework very useful, and Ruby has a wonderful selection of them, of which we’ll look at two: Rails and Sinatra.
Background
Ruby’s most famous web application framework is the Ruby on Rails, and the majority of this chapter will be dedicated to it. We’ll walk through developing a (very) basic Rails application and getting it running with a database. After I’ve covered Rails, we’ll take a more cursory look at Sinatra, another library that provides a lightweight approach that is quick and easy to learn.
The Limitations and Benefits of Our Approach
It is very important to note at this stage that web application development is a significant branch of development in general. This book is an introductory Ruby book, rather than a web application development book, so this chapter is focused on giving you a brief walk-through of the concepts involved with Rails and Sinatra, and information on where to go to learn more, rather than exhaustively showing you how to develop complete applications from scratch. Apress has a selection of books specifically about Ruby on Rails and web development available if you wish to learn more and progress further down this line of development. Also, links to further resources and tutorials are provided throughout this chapter.
As well as limitations of space, a key reason for not focusing too much on the details in this chapter is that web application frameworks in particular have a history of changing rapidly. Indeed, this chapter has had to be rewritten twice almost entirely since the first edition of this book in 2006 because the techniques have become obsolete. To prevent you running into too much obsolete code if you come to this book a year or two after publication, we’ll focus on the higher-level concepts and look at quick examples of how they relate to code. Then, when you decide to investigate web application frameworks on your own, you’ll be informed as to their basic operation, even if the specific techniques have changed.
Pros and Cons of the Frameworks Covered
Rails is a large, robust web application framework that has lots of features baked in. Rails can be used to build applications that are both large and small, but it tends to use more memory and resources than the other frameworks. A typical Rails application will be composed of many tens of files and have a tight structure built of models, views, and controllers (these are explained later). Rails is popular because it’s powerful, reasonably standardized, and, admittedly, has the critical mass of community support to keep its popularity growing.
Sinatra is almost the direct opposite of Rails in terms of its qualities. It’s fast, lightweight, and pragmatic, and an application can be built within a single Ruby file. There’s a lack of any enforced structure (though you could build your own), and fewer features are available out of the box; you will often need to call on other Ruby libraries to fill in the basics, like database support. Despite this, Sinatra is popular due to its extreme simplicity and its suitability for small, agile web applications and services.
Rails: Ruby’s Killer App
Due to Rails’ significance in making Ruby more popular and its popularity with Rubyists generally, Rails is often called “Ruby’s killer app.” It’s the biggest attractor of new developers to Ruby, and many popular Ruby-related projects online (including Twitter and GitHub) tend to use Rails in some form or another.
Before you can begin to use Rails, it’s essential first to know what it is and why it’s used, as well as how to get it running, as its installation process is more involved than that of other Ruby libraries.
What Is Rails and Why Use It?
Ruby on Rails is an open source web application development framework. It makes the development of web applications simple. For some of the nontechnical history behind Rails, including the motivation for its development, refer to Chapter 5.
The goal of Rails (as with other web application frameworks) is to make it possible to develop web applications in an easy, straightforward manner and with as few lines of code as necessary. By default, Rails makes a lot of assumptions and has a default configuration that works for most web applications. It’s easy to override most of Rails’ default assumptions, but these defaults are in place to keep initial application development simple. In Rails parlance, this is commonly called “convention over configuration.” That is, there’s no need to work on lots of complex configuration files to get going, since sensible defaults will be assumed.
Models: These are used to represent forms of data used by the application and contain the logic to manipulate and retrieve that data. In Rails, a model is represented as a class. You can think of models as abstracted, idealized interfaces between controller code and data. These forms of data are not low-level things like strings or arrays, but domain-specific things like users, websites, videos, animals, or classrooms (which could be represented by classes named User, Website, Video, Animal, and Classroom, respectively).
Views: These are the templates (typically formed of a mixture of HTML and Ruby code) that are used to build up the data that users of the web application see in their browsers or through other clients. Views can be rendered as HTML for web browsers, XML, RSS, or other formats. While views can contain any combination of HTML and Ruby code, typically only the minimal Ruby code necessary to produce the view should be used, as the controller should be handling most of the logic.
Controllers: Controllers provide the logic that binds together models (and their associated data) and views. They process input, call methods made available by models, and deliver data to the views. In Rails, controllers contain methods known as actions that, generally, represent each action relevant to that controller, such as “show,” “hide,” “view,” “delete,” and so forth.

The interactions between an application’s users, views, controllers, and models
You can learn more about the MVC paradigm at https://en.wikipedia.org/wiki/Model-view-controller.
The most common motivation to use Rails is that it removes a lot of the groundwork necessary to develop web applications using other technologies. Features such as database access, dynamic page elements (using Ajax—Asynchronous JavaScript and XML), templating, and data validation are either preconfigured or take only a few lines of code to configure.
Rails also encourages good development practices. All Rails applications come with support for unit testing (among other forms of testing), and Rails’ guiding principles are “don’t repeat yourself” (known as DRY) and “convention over configuration.”
Installing Rails
Rails: The core library of the Ruby on Rails framework that ties the other libraries together.
Action Mailer: A library that makes it easy to send email from Rails applications. A basic overview of ActionMailer, including how to use it to send mail separately from Rails, is given in Chapter 14.
Action Pack: A framework for handling and responding to requests. The framework includes components to perform routing, define controllers, and render views.
Active Record: An object-relational mapper that ties database tables to classes. If you have an ActiveRecord object that references a row in a database table, you can work with that object as you would any other Ruby object (by using attributes and other methods), and changes will be stored in the relevant database table. A basic overview of ActiveRecord was given in Chapter 9.
Active Support: A library that collects a number of support and utility classes used by various Rails features. For example, ActiveSupport implements many useful methods for manipulating times, numbers, arrays, and hashes.
Active Job: A framework for defining tasks that can take place independently of the usual request and response cycle of the web app.
ActiveStorage: Makes uploaded and referencing files in the cloud easy.
ActiveModel: A building block for ActiveRecord. This library allows you to create models using a common template.
ActionView: A framework for handling view template lookup and rendering.
ActionText: Provides rich text editing for Rails. It includes the Trix editor (https://trix-editor.org/) to use as a rich text editor in your app .
Using sudo or run as a superuser on UNIX-like operating systems may fix permissions issues but is not recommended. If you are having issues installing gems, try using either rbenv (https://github.com/rbenv/rbenv) or rvm (https://rvm.io/) to manage your Ruby environment.
Database Considerations
As Rails is used primarily to develop data-driven web applications, it’s necessary to have a database system available to use on your computer.
Database engines are covered in Chapter 9, and you can use all those covered (MySQL, SQLite, and PostgreSQL) with Ruby on Rails. In production, most developers use MySQL or PostgreSQL, as Rails supports these database engines best, but SQLite is the “default” with Rails as it’s so easy to set up and is more than fast enough for development purposes (some sites even use it in production with no troubles).
If you’re using a different distribution or have standing issues with getting SQLite3 installed, the best source of help is the many random blog posts you can find on Google by searching for “install sqlite3 [your operating system’s name].”
Building a Basic Rails Application
As explained in the previous section, Rails is popular because it makes developing web applications easy. In this section, I’ll demonstrate that by showing you how to generate a very basic web application, and we’ll take a look through how certain parts of it work.
Creating a Blank Rails Application
As you can use Rails to develop both small and large applications, different types of files are organized into different directories to keep elements separated for tidiness on large projects. A lot of pre-created files are also placed within a new, blank Rails project. The quickest way to look at these files and the overall directory structure is to leap right in and create a new Rails project.
Your project in this chapter will be to create a simple diary app, similar to a blog (or weblog). The resulting application will let you view your diary and add, delete, or edit specific entries.
The basic feature set of being able to create, read, update, and delete items is known as CRUD which is a common structure used in web application. For example, a photo gallery site allows you to add, view, edit, and delete photos, which are all CRUD actions. Therefore, the mechanics of developing a basic diary tool are easily transferable to developing most other types of web applications.
CRUD is an acronym to refer to the concept of a system that allows the creation, reading, updating, and deletion of discrete items.
The Rails Command-Line Tool
By default, SQLite will be specified as the database type in the database.yml file generated in the preceding code. If you’re going to be using MySQL, however, use rails mydiary -d mysql instead. Try rails -h if you want to see more of the available command-line options.
A lot of files and directories are produced, but don’t feel overwhelmed! You won’t even use many of them in this chapter, as they are for more advanced cases that aren’t relevant to the very basic web application development we’re looking at. In most cases, Rails provides sane defaults anyway, so you don’t need to change a lot of files unless you’re doing something special. Nonetheless, we’ll take a look at what these directories are for in the following section.
Files and Directories Within a Rails Application
In this section, we’re going to go through the directories and files created by rails and look at what they’re for. Don’t become overwhelmed by this section. If there’s something you don’t understand, keep going, as most of the new terms and concepts mentioned here are explained as we use them throughout this chapter.
app: Contains most of the Ruby source code and output templates directly associated with the application. It contains several other folders that I’ll cover next.
app/assets: A place to store image and CSS files that can be compiled down to more efficient “packaged” versions later.
app/javascript: A place to store JavaScript files. JavaScript is in a separate folder from other assets due to Rails 6 adding Webpacker support. Webpacker provides a lot of powerful feature needed for modern JavaScript development. Read more about Webpacker here: https://github.com/rails/webpacker.
app/channel: Contains files for ActionCable. ActionCable is framework that allows Rails to work with websockets.
app/mailers: Contains code to handle emails. For example, the code for the welcome email would be stored here.
app/controllers: Contains the controller files. In an empty project, only application_controller.rb exists. application_controller.rb is an application-wide controller where you can define methods that other controllers will inherit.
app/helpers: Contains helper files—Ruby source code files that provide methods that you can use from views.
app/models: Contains a file for each model in the application. In an empty project, no models are yet defined, so this directory is empty.
app/views: Contains the output templates (views) for the application. Typically, each controller has its own folder under app/views, with templates located in those folders. There’s also a layouts folder that Rails uses to store generic application-wide templates.
bin: Contains app-tailored scripts that you run from the terminal, for example, rails and bundle.
config: An important folder that contains configuration files for the application. For example, database.yml is a YAML file with information about the database(s) that the application will use.
db: A folder to be used for database dumps, backups, and migrations.
lib: Contains third-party libraries and Rake tasks. Plugins have largely superseded the features offered by libraries that were once placed into lib.
log: Contains log files relating to the operation of the application.
node_modules: Contains JavaScript libraries and dependencies managed by Webpacker. Webpacker will use npm or Yarn to download libraries and store them here.
public: Contains non-dynamic files that are accessible under your application’s URL scheme, for example, JavaScript libraries (in public/javascripts), images (in public/ images), and CSS style sheets (in public/stylesheets). This folder also includes several “dispatch” scripts and an .htaccess file that can be used in certain situations to run your application (such as when/if you choose to use CGI or FastCGI execution methods—neither of which are recommended).
test: Contains the test subsystems for a Rails application. This folder is covered in more detail later in this chapter in the “Testing” section.
tmp: Temporary storage area for data created and used by your Rails application (including cache and session files).
I’ll briefly mention some of these folders again throughout the rest of the chapter as you create files within them to get your basic application working.
Database Configuration
Earlier I said that Rails applications are generally database dependent. With this in mind, at this stage it’s necessary to create a database for your application on your database server.
You could develop an app that has no need to permanently store data or operates without a database, but this would be atypical.
By default, your Rails application will use an SQLite database, and it will generate this for itself when you first run your database’s migrations (covered later). If you are using any other database engine, however, the technique you’ll use to create a database for your application will vary with database type and how you have your database server installed.
Database configuration settings are stored in database.yml. Since we are using SQLite, it’s not necessary to change these settings at all, but it’s worth looking at them nonetheless.
Ignoring the comments, you’ll notice three main sections in database.yml, called “development,” “test,” and “production.” These sections represent the three different environments your application can run under. For example, while developing, you want your application to return verbose error messages and automatically detect changes you make to the code. In production (better thought of as being a “deployment” environment), you want speed, caching, and non-verbose error messages. The test environment is provided so that testing can occur on a different database away from your regular data. The “development” section is used to configure your local development environment.
database.yml tells Rails how to access the database associated with the application, so it’s essential that the details are correct. If not, you’ll get error messages when you try to run your eventual application (though, thankfully, these errors will often tend to give you some great clues as to how to fix the problem).
Using Scaffolding
A Rails application without any models is not a working application at all. Any application you build will need at least one model. In our case, we’re first going to focus on the concept of “entries” in our virtual diary.
Rails comes with a concept called scaffolding that will generate default (but fully working) code that will do the database and code work necessary to create a model, a controller for that model, and some default views to interact with that model’s data. It’s possible to do this in gradual steps, or even entirely by hand, but scaffolding enables you to get up and running a lot more quickly.
Think of the Rails generator we used earlier to generate all of the files essential for a Rails project. Scaffolding is the next logical step up from that. Instead of creating the files necessary for a Rails project, scaffolding creates some of the code (including a database migration to create the database table for the model) and views necessary to represent a single model within your application.
You can then build your own extra views and controller methods off of this basic scaffolding. It’s designed to give you a jump-start without making you code everything from scratch (although you can code from scratch if you want to, particularly if your ambitions differ wildly from what the scaffolding provides).
In Rails, models and database tables typically have a direct relationship. If you have a model called Entry, this will by default be related to the database table called entries. Rails takes care of the pluralization between model class names and database table names.
For our diary application, entries will initially solely consist of a title and some content. There are other attributes (or “columns” in the database sense) that Rails will add by default to the table, such as id (a unique numeric identifier). A directive is also added into the default migration code to create timestamp columns: created_at (a timestamp of when the row/associated object was created) and updated_at (a timestamp of when the row/associated object was amended last). Because of this automation, it is only necessary to specify the two custom, additional attributes to the scaffold generator to get things going.
The scaffolding generator has done a lot of work for us! The generator has created some view files (in app/views/entries) to enable us to see our entries, create new entries, and edit them. It has also produced an “entries” controller (in app/controllers), some dummy tests (in test/*), and a database migration (in db/migrate; note that the migration’s filename starts with a timestamp, so it will vary).
But what is a database migration, and why does it matter?
Database Migrations
I’ve mentioned before that in Rails, models and database tables are directly related. It is necessary, therefore, for the table relating to a Rails model to exist within the database.
Migrations provide a Ruby-based way to define database tables. Instead of doing the SQL yourself, you specify what tables, columns, and indexes you want to exist and run the migration, and Rails’ ActiveRecord library does the hard work for you. Even better, you can have multiple migrations for the same table, so that if you decide to add a column to a table later, you create a new migration and specify that you’d like to add a new column.
Migrations are considered desirable because they provide a programmatic way to both upgrade and downgrade databases. Since migrations are normal source code, it’s also possible to put them into your source code management system and share them between multiple developers, if you wish. Migrations provide abstraction and mechanization to make organizing database changes associated with a Rails application easy.
A single migration is defined in a single file as a class that inherits from ActiveRecord::Migration and it creates the entries table using the create_table method, which is supplied with a symbol representing the table name (:entries) and a code block within where the attributes/columns can be defined.
In this case, a string column called title and a text column called content are created. “Timestamp” columns are also created. At the time of writing, these are created_at and updated_at; they store the date and time of when a row was created and when it was last amended, respectively.
The difference between a string column and a text column is that, classically, string columns are for storing short (often fixed-length) textual strings, whereas text columns can store both short strings and very long blocks of text.
The output verifies that the CreateEntries migration was run, and now the entries table exists (with the specified columns) within the database associated with your application. In essence, you now have a Rails application that’s ready to be used!
There’s a lot more to migrations than this section has scope to cover. Luckily, the Rails documentation team has a great guide specifically about migrations, how they work, and how you can create and customize your own. You can find the migrations guide at https://guides.rubyonrails.org/migrations.html.
Rake tasks are administrative tasks associated with your application that are managed by the Rake tool. Rake, meaning “Ruby Make,” is a tool that you can use to process and trigger actions to perform upon Ruby projects and code, and it’s used commonly within Rails projects to do things such as start unit tests and perform migrations.
With Rails 6, there are 67 tasks by default. To save space, they aren’t listed here, but it’s worth looking through the list to get a feel for what tasks are available.
Running the Basic, Scaffolded App
At this point, the application sits there doing nothing. This is because it’s waiting to serve HTTP requests (such as from your web browser).
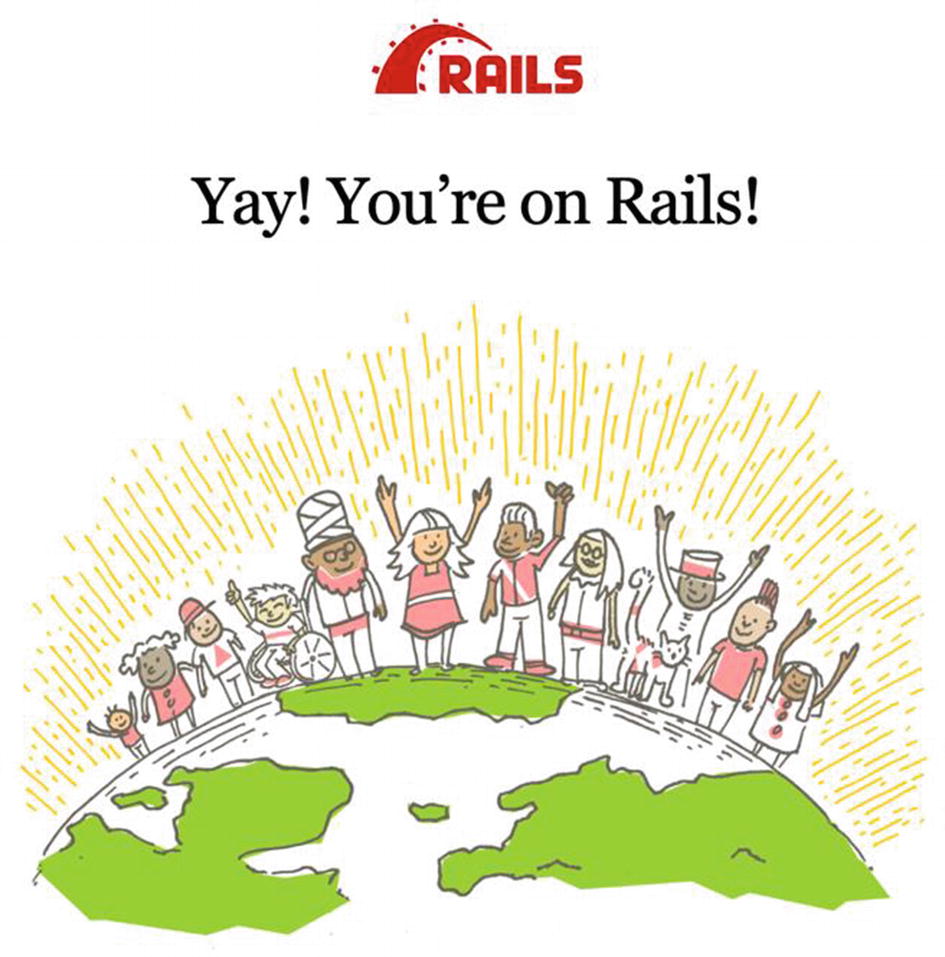
The default Rails application index.html page
The page you’re seeing is the index.html file from the public folder. This is because if no action is found within a Rails application that associates with the URL you’re loading from your web browser, a Rails application should return a file from the public folder—if any file matches—or an error message. Because the default page to load on a web server is usually index.html, public/index.html is returned.
When you generated the scaffolding for the Entry model, a controller called entries was created, as app/controllers/entries_controller.rb. By default, you access controller methods in a Rails application using a URL in the format of http://[hostname]/[controller]/[action].
Don’t worry about this too much, but for completeness, even though http://[hostname]/ [controller]/[action] is a default, it can be superseded. As entries has been created as a scaffolded resource, you can also use http://[hostname]/entries/[id] as an alternative to http://[hostname]/ entries/show/[id], since routes have been automatically created to route requests to certain methods based on the HTTP verb (GET, PUT, POST, or DELETE) used—for example, a DELETE HTTP request can automatically route to the destroy action where applicable.

The basic list or index view of the entries scaffolding
The list of entries in Figure 13-3 is noticeably bare. This is because your entries table has no data in it. The column headings for your table are obvious, though (Title and Content), and a New Entry link is available.
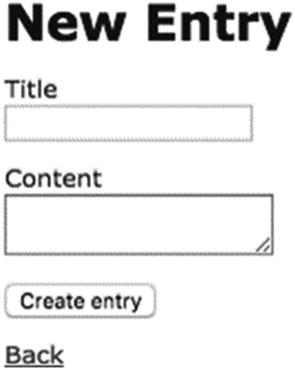
The new method of the entries controller, used to create new entries
From this point, you can create new entries, return to the list, edit those entries (the form looks similar to that in Figure 13-4), and delete entries. That covers all the CRUD functions!
With scaffolding, you get a basic but complete data-driven web application with a few lines at the command prompt. However, next you need to look at what the scaffolding generator actually generated and learn how to customize the models, controllers, and views to create the specific application that you want. This experience will be particularly valuable if you choose to pursue Rails development further.
Controllers and Views
In the last section, you put together a basic web application that allowed you to create, edit, list, and delete diary entries. You used scaffolding, which let you put a whole working application together with no direct coding effort required. In this section, you’re going to look at what the scaffolding generated, how it works, and how you can extend the application a little.
Controller Actions
This code shows that Ruby controllers are implemented as classes that inherit from ApplicationController (found in app/controllers/application_controller.rb), which in turn inherits from a core Rails class, ActionController::Base.
This code is simple for what it does. It collects all of the Entry objects (represented by rows in the entries table) within the database using @entries = Entry.all.
Entry is the model class and models inherit from ApplicationRecord which inherits from ActiveRecord::Base, which provides methods suitable to navigate and find data in the associated table for that model. Therefore, Entry.all returns all rows (as objects) from the entries table and places them as an array into @entries.
Following on from that, Rails automatically knows to render the correct template for displaying the entries. Let's take a look at how that works now.
Views and Embedded Ruby (ERB)
If you’re familiar with both Ruby and HTML, you’ll note that this view is basically HTML with Ruby embedded in it (with the Ruby located between <% and %> tags). In Ruby and Rails parlance, this is called an ERB template.
The file extension of ERB templates is .erb. Those that are HTML-based typically use the dual extension of .html.erb in Rails. This naming convention allows you to have many erb files with the same root name but for different response types.
This view code results in the main, dynamic part of the page being rendered: the actual list of entries. There are a few key things to note. This whole section is a loop over each element of @entries (using @entries’ each method with a code block). You should recall that your controller code placed Entry objects from the database into the @entries array, so the view code iterates over each element (or each entry). Next, two table columns (using the <td> HTML tag) show the current entry’s title and content, respectively. This is achieved using the <%= entry.title %> and <%= entry.content %> blocks. Expressions within <%= and %> tags are interpreted and then substituted into the final HTML output.
Whereas the general Ruby code in the view is located within <% and %> tags, Ruby code that results in something to be rendered in the document (i.e., shown on the web page) is included within <%= and %> tags (as in the earlier <%= entry.title %> column).
The link_to method accepts the text to use for the link, and then it accepts parameters that specify where the link should go.
In the <%= link_to 'Show', entry %> case, link_to assumes that since it has been passed an entry object, you want to link to the page that will show only that entry—specifically /entries/[id of entry].
In the second example, <%= link_to 'Edit', edit_entry_path(entry) %>, the edit_entry_path shortcut method is used (with the entry object as a parameter) to provide the hash of parameters to link to /entries/[id of entry]/edit.
The last example, <%= link_to 'Destroy', entry, method: :delete, data: { confirm: 'Are you sure?' } %>, provides the entry object, as with the “show” version, but the HTTP DELETE method is specified using the method argument, so link_to is smart enough to realize you want to direct the link to the destroy method of the entries controller in this case.
Separate from these shortcuts, however, let’s look at how the parameters of link_to can be manipulated directly to get the results you want.
It’s important to understand how these examples work, as many elements of views rendered by Rails will contain patterns such as these, whether for generating links, including images, or creating forms to post data back to your application.
The simple answer is you can! Stylistically, however, Rails developers prefer to let Rails’ helper methods (such as link_to) do the work of putting together fragments of HTML that might need to change in the future. For example, in the future you might choose to change the “entries” part of the URLs to “entry” for some reason or another, and with Rails you could make changes to the application’s routing to do this. The links generated by helpers such as link_to would then automatically reflect the new conventions, whereas if you coded them with HTML, as previously, you’d have a lot of searching and replacing to do in your views!
Models and Relationships
So far, your application only has a single model, Entry, that relates to diary entries. However, one major benefit the ActiveRecord library provides is the ability to relate models easily to one another. For example, you could create another model called User that relates to different people who can post diary entries in your system.
The full depth of ActiveRecord and model relationships (also known as associations) can and does take up entire books, so is beyond the scope of this introduction, but in this section, we’ll look at a basic example of how ActiveRecord models can relate to one another.
Columns in the database become attributes that you can get and set on the objects, and you can then save those objects back to the database with the object’s save method.
ActiveRecord was designed to allow an almost natural language mechanism of defining model relationships. In our Entry model, we say that Entry objects “belong_to” User objects. In the User model, we say that a User object “has_many” associated Entry objects.
The only thing you need to set up, other than the relationship itself, is a column in the entries table that enables the relationship to work. You need to store the id of the associated user with each Entry object, so you need to add an integer column to entries called user_id. You could do this by creating a new migration and using a directive such as add_column :entries, :user_id, or :integer or by adding the column manually with SQL (through another client).
ActiveRecord also supports many-to-many relationships. For example, consider the relationship between fictional Student and Class models. Students can be associated with more than one class at a time, and each class can contain many students. With ActiveRecord, you can define these relationships using a join table and a has_and_belongs_to_many relationship, or through an intermediary model such as Enrollment, which defines the links between Students and Classes using has_many with a :through parameter.
It’s worth pointing out that a model called Class wouldn’t be allowed in Rails, because there’s already a class called Class built into Ruby. Beware of reserved words and using names that are already used elsewhere!
The variety of relationships possible are documented in the official Ruby on Rails documentation at https://guides.rubyonrails.org/association_basics.html.
Sessions and Filters
A useful feature provided by Rails applications is support for sessions. When a web browser makes a request to your application, Rails silently sends back a cookie containing a unique identifier for that browser. Whenever that browser makes further requests, it sends back the cookie with the unique identifier, so the application always knows when a certain previous visitor is making another request. You can use the session’s ability to store information that’s specific to a particular visitor for use on future requests.
Sessions are commonly used on websites for features such as shopping carts or keeping track of what pages you’ve visited. For example, if you add an item to your cart at an ecommerce site, the item chosen is stored in a data store associated with your session’s ID. When you come to check out, your session ID is used to look up data specific to your session in the session system’s data store and find out what you have in your cart.
To demonstrate basic session storage in your Rails application, you’ll count and show a user how many times he or she has accessed actions within your application. To do this, you need to have some way of performing this logic on each request made to the application. You could add logic to every controller action, but an easier way is to use a filter method called before_action.
before_action is a method you can use at the controller class level to define that a method (or, indeed, many methods) should be executed before the method for the controller action of the current request. Filters make it possible to perform generic activities before every request (or before requests to certain groups of methods or certain controllers).
A common use for filters within Rails is to make sure visitors are authenticated and authorized to visit certain controllers and perform certain actions. If you have a controller class called AdminController, you might want to add a before_action that ensures a visitor is logged in to the site as an admin user before you let him or her use the potentially dangerous actions within!
In this example, you’ll use before_action to perform some logic before every request to the application. To do this, you’ll add some code to app/controllers/application_controller.rb so that every controller in your application (although there is only one in this case, entries) will be subjected to the filter.
You use before_action with a symbol as a parameter, where the symbol represents the count_requests_in_session method.
Learn more about filters at https://guides.rubyonrails.org/action_controller_overview.html#filters.
Within the count_requests_in_session method, a hash provided by Rails called session is used. Automatically, session is always a data store associated with the current session, so anything you write to it or read from it is always associated with the current session.
If you now load http://localhost:3000/entries, you’ll see 1 at the top of the page. Reload the page, and the number increases for each reload. Sessions in action!
Other Features
Although you’ve managed to create a basic working Rails application so far, I’ve only covered the bare essentials. In this section, I’ll quickly cover a few key areas that you’ll want to know about before exploring Rails further independently.
Layouts
In Rails, layouts are special, generic wrapper templates that multiple views can use. Instead of repeating the HTML header and footer code within every view, you can simply embed each view’s output into a layout instead. By default, if there’s a file with the same base name as the current controller in app/views/layouts, it’s used as a layout.
This layout includes the basic HTML header and footer items, but also uses some special Rails code to include style sheets (with the stylesheet_link_tag method), JavaScript, and more that the page relies on.
The <%= yield %> code yields the rendering process to the view for the current action, so the contents of the current view are rendered at that location.
This would then use app/views/layouts/some_other_layout.html.erb for the layout of that action’s view.
You can learn more about layouts at https://guides.rubyonrails.org/layouts_and_rendering.html.
Where to Go Next: References, Books, and Example Apps
Rails has been in popular use since the end of 2004, and it has attracted the interest of thousands of developers, many of whom blog about the framework or release the source of their own Rails applications for free. You can also look to some large-scale Rails applications for inspiration.
The best way to learn Rails, beyond the basics, is to keep up with the new features being added to the framework as it is being developed, to read the source code of other people’s applications, and to experiment. Rails isn’t something that you can master quickly.
This section provides links to several useful references, books, and example applications you can investigate.
Reference Sites and Tutorials
Official Ruby on Rails API (https://api.rubyonrails.org/): The official documentation for the Ruby on Rails framework. Almost every class and method provided by Rails is documented.
Ruby on Rails guides (https://guides.rubyonrails.org/): A useful set of guides for Ruby on Rails written by prominent community members. They’re very well written and kept up to date with the latest version of Rails.
Getting Started with Rails (https://guides.rubyonrails.org/getting_started.html): A beautifully written introduction to Rails that covers much of the same ground as this chapter. The benefit of this guide, however, is that it will be kept up to date with the latest version of Rails, which may be useful to you in case there are major changes.
Rails Books
There are several books that will walk you through Rails from start to finish, from setting up and looking at scaffolded apps (as in this chapter) to building complete apps with multiple models and customized views that are deployed on the Web.
Agile Web Development with Rails 4, by Sam Ruby, Dave Thomas, and David Heinemeier Hansson (Pragmatic Bookshelf, 2013): Many Rails developers consider Agile Web Development with Rails to be the canonical Rails tutorial book, particularly as Rails’ creator David Heinemeier Hansson has always been involved in its development. Its latest edition came out in September 2013, and it covers Rails 4.0 specifically, although much of it will continue to be relevant now.
The Rails Tutorial, by Michael Hartl: In the past few years, this has essentially become the Rails tutorial. It’s a paid-for ebook and set of screencasts, but you can also read the material on the Web for free. It's superb and walks you through the entire process of building a complete Rails app. I strongly recommend you move onto it after reading this book. It's available at http://railstutorial.org/.
Sinatra: Lightweight, Simple Web Applications
Sinatra calls itself a “DSL for quickly creating web applications.” It’s not a framework in the typical sense. It’s a library that offers HTTP deployment functionality. In essence, however, it’s a very lightweight web application framework that lets you either add HTTP functionality to existing apps or build new ones from scratch as simply as possible.
Sinatra was initially developed solely by Blake Mizerany and first appeared in 2007, but it was not until early 2009 that its popularity exploded, and now there are many developers responsible for it.
You can visit the project’s homepage at http://sinatrarb.com/ for further instructions.
The Extreme Simplicity of Sinatra
Unlike Rails, there’s no enforcement of concepts like MVC or REST in Sinatra. Sinatra is very “at the bare metal” in terms of its functionality. You can write an entire app in a single Ruby file if you wish, or, alternatively, you can develop lots of classes, sprawl your app out over hundreds of files, and really go to town. Sinatra is permissive of almost any development style and offers no Rails-like formula or constraints.
A HTTP server will start on your local machine on port 4567. You can try to access it at http://localhost:4567/, where upon you should see “Hello, world!” returned.
Other than the necessities of loading Sinatra, the only command is get, which has a single parameter referring to the path ("/") on which to serve the result of the attached code block (which merely returns the string “Hello, world!” in this case).
You can make a Sinatra app run on a different port by specifying a -p [PORT] option on the command line (e.g., ruby sinatra1.rb -p 1234). You can see other command-line functions by using the -h option.
When comparing Sinatra with Rails, it’s notable that this app is a single file with only a few lines of code. There’s no large framework of ancillary code and there’s no database. This has its pros and cons, depending on what you’re trying to develop. Loading a database library works the same way in a Sinatra app as in a regular Ruby app, if you choose to do so. You might also choose to use PStore or CSV, as we did in Chapter 9. The key point is that it’s entirely up to you. Sinatra is completely flexible!
General URL Routing and Parameter Matching
For brevity, I’m omitting the requires in the examples from here on.
This time we’ve used a special format to denote a named parameter in the URL. These parameters are then made available to the code block in the params hash (parameters work in a similar way in Rails).
If we ran the last example and made a request for /add/5/6, then 5 would end up in params[:a] and 6 would end up in params[:b], which enables us to add them together and return the result to the HTTP client.
Sinatra also has support for wildcard and regular expression parameters. These are beyond the scope of this introduction, but basic examples can be found in Sinatra’s README document at www.sinatrarb.com/intro.html.
If you visit http://localhost:4567/, fill in the text field, and click the Go! button, your web browser will issue a POST HTTP request back to the same URL, and the second method in the example will be executed.
Views, Templates, and Static Files
As with Rails, views make up the part of web applications that users see and interact with in their browsers. In the basic examples in the previous section, we simply returned strings containing HTML from the Sinatra routing methods (get, post, put, and delete). Luckily, you’re not consigned to this style, and Sinatra provides some handy shortcuts for making views a lot easier to work with.
Inline and In-File Templates
You can learn more about ERB in Chapter 16.
Notice that in the first example in this section, the @people variable is defined within a before code block. before blocks are designed to be used for code that is to be executed before every request. Anything that occurs within a before block will be in the same object scope as the processing of the request (as in the get block). Therefore, the before block was used, in this case, to provide a simple data structure for the ERB template to use.
If you were familiar with the Haml, Builder, or Sass templating systems, you could use those in a similar way to render HTML, XML, and CSS, respectively.
For brevity, the before block is not shown in this example.
This example works in exactly the same way as the one prior, except that the template has been moved into a special data area after the main Ruby source code.
In Ruby, if the _END_ delimiter is used, then any text coming after it is not processed as Ruby code but as input to the application if the application so chooses to read it. Sinatra can use this functionality to support placing named templates into the source code file itself.
Templates used in this way are prefixed with @@ [name] so that the template can then be referenced by the template rendering commands (erb in this case) by using the symbol representing the name of the template (e.g., erb :index).
Layouts
Similarly to Rails, Sinatra supports layouts for generic templating. For example, complete HTML files tend to have full <html> and <head> definitions, titles, references to style sheets, JavaScript, and so forth. You don’t want to code this into every individual template, so instead you can concoct a layout that wraps around your views.
This application has two templates: layout and index. When the index template is rendered, erb will notice that there’s a template called layout and render that first, only yielding to the index template when it encounters the yield method. This results in a page that contains all of layout’s HTML, but with index’s specific HTML embedded within.
External Templates and Layouts
Having templates and layouts within your source code file can result in a very small, easy-to-understand application, but once your application reaches a certain size, it can become cumbersome—not only to read, but to maintain!
Luckily, you can place templates (including layouts) into external files that Sinatra will load when it comes to render time.
If no in-file template called index is defined, Sinatra will look for the file index.erb in the views directory (or whatever directory you set). Similarly, if you were using the sass, haml, or builder methods, they would be looking for their own extensions.
The layout situation is very much the same. With the previous line of code, Sinatra would be looking for the mylayout.erb file.
Static Files
Most web applications will rely on static files, often in rendering views. Static files include things like JavaScript files, images, or style sheets. Rather than define templates for these things or serve them programmatically, Sinatra can serve them directly for you.
When a request comes in to the Sinatra app for, say, /images/box.gif, Sinatra will first look to see if public/images/box.gif exists before dispatching the request to your application. If the file exists, it will be served up directly. If not, the request will make its way into your app, where it will either be caught with a route or generate an error.
Request Flow Control
So far we’ve looked at how to make a Sinatra app return content for requests made to specific URLs, but we haven’t looked at any flow control.
What if you wanted to only show a page in a certain situation or wanted to redirect someone somewhere else if other conditions are present? What if you needed to raise an error? We’ll look at these situations in this section.
Redirection
Your app is a regular Sinatra app with all of the templates within the source file. The index template features a form that asks for a password that is then sent to the /secretdata action through an HTTP POST request. The “secret data” is then rendered.
Now you’re using Ruby’s regular if construct to see if the password parameter is not equal to 'xyzzy', and if not, you redirect back to the index URL (/).
Halting
In the last section, we looked at a basic “secret data” app that prevents access to a certain page unless the correct password is supplied. We’ll use the context of that example again to explore halting and passing in this section.
Assume that your app is for another computer program to use, rather than web browser–equipped humans. Redirecting to the front page when the password is wrong is not particularly illustrative to an automated client, and typically you’d return an HTTP error code and message instead. In the case of a wrong password, you’d typically return a 403-status code and a “Forbidden” message.
Learn more about HTTP status codes and messages at https://en.wikipedia.org/wiki/List_of_HTTP_status_codes.
In this case, you’ve replaced the redirect with a call to the halt method. If you want to set an HTTP status code and return a message, you pass it an array with those items respectively. Alternatively, you could pass an HTTP status code, although it’s better to return a message too in case a human is accessing your app and doesn’t know what 403 really means!
Error Handling
If you ran this application, every request you made to it would result in the HTML in the not_found block being returned because no routes are defined to handle requests to any URL. Note that you could define an external (on internal) view and render it in the typical way with the erb method instead, if you wished.
The set :show_exceptions, false directive is included because, when you’re in development mode, Sinatra shows you a helpful “exception” page by default which overrides what you do in error blocks.
If you ran this application and accessed http://127.0.0.1:4567/divide/40/10, you’d be given “4” as a response. Try http://127.0.0.1:4567/divide/10/0, however, and you’ll be cheekily redirected to a Wikipedia page all about the perils of dividing a number by zero! This is probably not how you’d want to treat your real-life users, but the point is made.
In a way, the error block has worked in a similar way to the rescue block when handling Ruby exceptions.
Head back to the “Exceptions and Error Handling” section of Chapter 8 if you need a rescue refresher!
Like rescue, Sinatra’s error blocks can also be defined to only respond to certain types of exceptions, whether regular Ruby exceptions or ones of your own creation. A single exception’s class or an array of exception classes can be provided as a parameter before the associated code block.
Summary
In this chapter, we looked at how to develop some very basic web applications using Rails and Sinatra. Rails in particular gives you a lot of power out of the box and enables you to develop a fully working, database-driven web application in a short period of time. Sinatra, on the other hand, shows you how simple it can be to put smaller web apps together.
We’ve merely scratched the surface in this chapter, as Rails is a large and complex framework (though simple to use, it has many details that are complex for advanced usage). Entire books larger than this one have been written about Rails, so this chapter merely provides a taste. You can use the references in the previous section to learn more about the framework, and you can investigate the selection of Apress books available about Rails (see www.apress.com). Sinatra also goes a lot deeper than we’ve been able to scratch here.
Larger frameworks like Rails can seem complex initially, but the complexity of the directory structure and default files created by the rails tool are only there to make your job as a developer easier by providing a familiar structure and separation of concerns. Once you’re familiar with the layout and the tools Rails makes available, developing web applications is a simple, organized process.
Ruby on Rails: A Ruby-based web application development framework developed by David Heinemeier Hansson. See Chapter 5 for the history behind Ruby on Rails.
Framework: A set of libraries and tools that can be used as a foundation for developing applications.
Models: Classes that represent forms of data used by the application and that contain the logic to manipulate and retrieve that data.
Views: Templates and HTML code (more accurately, code that includes both HTML and embedded Ruby code) that produce the pages that users of the web application will see. Views can output data as HTML for web browsers, XML, RSS, and other formats.
Controllers: Classes that process user input and control what data is sent to the views to output. Controllers contain the logic that binds together models, data, and views.
Actions: Methods contained within controllers that are accessed when requests for specific URLs are made on the parent web application.
CRUD (create, read, update, delete): The four basic actions you can perform upon discrete items and that are common to most web applications. In Rails, these operations can correspond to the PUT, GET, POST, and DELETE HTTP verbs.
ActiveRecord: A library that abstracts databases, rows, columns, and SQL into standard Ruby syntax using classes and objects. It’s a major part of the Ruby on Rails framework.
Routing: The process of translating a URL into the desired controller and action by using routing patterns.
Session: A process by which a unique ID is given to a new user of an application, and this unique ID is given back and forth on each further request, thereby making it possible to track that user.
Plugins: Libraries for the Ruby on Rails framework that “plug in” to your applications. Plugins can override Rails’ default behaviors or extend the framework with new features you can easily use from your application, such as authentication systems. Plugins are installed on a per-application basis rather than for the Rails framework as a whole.
Sinatra: A lightweight framework (or library) for developing web-facing applications in Ruby without significant amounts of ancillary code. A Sinatra app can be represented in a few lines of code. Its official website is at http://sinatrarb.com/.
In this chapter, we looked at developing web applications under an organized framework, and in the next chapter, we’ll look at using Internet protocols more directly. You can combine the techniques covered in Chapter 14 with your Rails applications so that they can communicate with other services available online, such as email, FTP, and data from other websites.