In the previous chapters, we took a break from learning Python basics and we learned all about Turtle and using it to draw straight lines, shapes that are formed with straight lines, circles, curves, and even text. We finished the chapter with a bunch of cool and colorful mini projects.
In this chapter, we’ll go back to the basics of Python and learn about strings, what they are, how to create them, how to manipulate them using various pre-defined functions available in Python, and getting direct inputs from the users of your programs to make your projects more dynamic. As usual, we’ll finish the chapter with some mini projects, but we’ll use Turtle to make our projects colorful now.
What are strings?
Strings…strings…strings. Such a grown-up word for something so simple. Strings are just letters and number, strung together. Sentences, phrases, and words – they are all strings. Single letters can also be strings.

Do you remember the print statement? When we first started using the print() function, we wrote something within quotes inside the bracket. Was it ‘Hello there!’? Yes indeed.
That was a string. Print statements usually have strings inside of them. But that’s not where it ends. You can store strings in variables as well, just like you do with your numbers.
Now that you know what strings are, let’s learn how to create them next! This is going to be a longer than average chapter, so buckle up! I promise all the exercises and fun projects will make up for the length. ![]()
Let’s create some strings
We successfully printed our string. Yay!
Look at that! Even though “a” has a number, 1234, since it was placed inside quotes, Python automatically considered it a string.
I want lines and lines of strings!
All’s well and good with strings as long as you stick to creating single-line strings. What if we need multiple lines? We can’t keep creating a separate print statement for each new string line. That’s what we did in our very first mini project, where we printed out Susan Smith’s introduction, remember? That was very inconvenient!
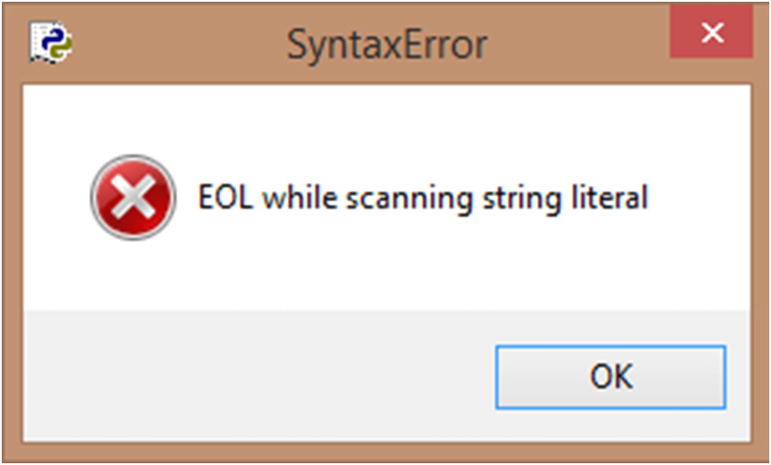
Multi-line string with double quotes – error
Uh oh. I can’t even run the code. I immediately get a popup with the preceding error. What we wrote previously is not acceptable code at all. So, how can we create multiple lines of string? Do you remember multi-line comments in Chapter 3? We used three single quotes, without space before the comment, and the same, after the comment, and that created a multi-line comment.
I have a confession to make. That syntax is actually the syntax of a multi-line string. We just borrowed it to create a multi-line comment because a multi-line string that hasn’t been stored in a variable and just stands as it is would be ignored by Python, so it technically acts a comment (though it is not).
Simple and neat, don’t you think? ![]() Yes!
Yes!
My string has quotes! :O

Single and double quotes in the same string – error
Bummer. ☹
Yes! ![]()
But what if my string has both single and double quotes? Maybe a string like the following one:
“That’s my Teddy”, said Susan.
I can’t just interchange double quotes for single quotes in the preceding string. I need a way to tell Python that the single quote in “That’s” is actually a part of the string and not a part of the code. We have something called an escape character in Python, which is just a backslash, “”. You can use that before the quote that’s part of a string (either a single or double quote), and Python will ignore it while running your code.
Yes, it works!
Let’s join two or more strings
When we used the “+” symbol with two or more numbers, they were added together. Would you like to see what would happen if you do the same with strings? Okay!
Oh, look at that. It just put the string inside str1 after the string inside str2. That’s interesting. Addition didn’t take place, even though we used the addition operator.
In fact, there is a name for this string operation. It’s called string concatenation . When you use “+” on two or more strings, you add them together, yes, but not in the traditional sense. You just merge them together, in the order they are added in.
Now, that looks right. So, as you can see, you can concatenate more than two strings, and they can either be inside variables or as is (within quotes). Even a space is a string, if placed inside quotes.
Concatenation in print()
Does it look a bit complicated? Not to worry. I’ve wrapped the first part of the string, “Susan says”, with a comma, a space, and a double quote at the end in single quotes. The next part of the string is whatever is inside the variable “a”, so I concatenated the two strings. The final part of the string is the closing double quote which is also wrapped inside a single quote. Alternatively, I could have just used double quotes throughout and used the escape character to distinguish the string’s double quotes.
Nicely done!
Empty string
In the preceding example, the variable “a” is storing an empty string. If you print that out, you’d get nothing in the output (not even a space). Try and see! ![]()
Accessing characters in strings

String index chart
As you can see in Figure 8-3, the positive indices start from 0 and increase in value toward the left. The negative indices start from the last position at –1. The space has an index, and so does the exclamation point. It isn’t just for the letters/numbers.
Okay, that’s all well and good, but how do we access these indices? Simple! Type the name of the string and open and close square brackets, and type in the relevant index within the brackets, and you’re good to go.
As you can see, the indices start from 0, and the last one is the length of the string subtracted by 1. Spaces in a string also take up indices.
Perfect!
Yup, that’s right.
Negative indices
It works perfectly!
So, the first character would be at a[–12], and the last character would be at a[–1].
Slicing a part of a string
You can extract a part of a string and not just a single character with your indices. That’s called slicing.
Yup, we got it!
Notice how we’ve given –4 (fourth last character) first, which will be included. But –1 would not be included, am I right? That’s how the syntax works, and that’s the last index.
Ah well, it doesn’t work. We’re missing a “!”. ☹
Perfect!
String methods – magic with strings!
Just like with numbers (Chapter 5), you have plenty of pre-defined methods that’ll help you play with numbers. Some of them look magical! You’ll see.
There’s a complete list of Python string methods and explanation of what they do in the Python official docs. Here’s the link: https://docs.python.org/2.5/lib/string-methods.html.
You can refer to the preceding doc in the future. I’ll try to cover most of the important methods, though I can’t cover every single one as that would just make the chapter too long. Don’t worry though. Once you learn a few, you’ll be able to decipher how the rest work.
Alright, let’s get started!
Why don’t we start with something simple? The len() method is used to find the length of the string.
Count the number of characters in the string (including the space) and you’ll notice that its length is indeed 12.
Capital and small
Alright, now let’s look at the other methods. The “capitalize()” method capitalizes the first word in the string. It doesn’t change the original string. It just creates a copy that you can either assign to a new variable or print.
The syntax is like this: string.capitalize().
See, the capitalization did not affect the original string.
Did you notice how some of the letters were already small? Those just go unchanged with this method.
Misc methods
Using the count method, you can return the number of times a word or letter or phrase appears in a string.
The syntax is string.count('word').
This method is case sensitive, just like the rest of the methods in Python, so if you want “word”, don’t type it as “Word”.
Whoo! ![]()
No spaces at all!
There are left and ride side versions of the same method. The rstrip() method only strips the whitespaces in the right side of the string. The lstrip() method does the same for the left side of the string. Why don’t you try them out and see if they work right?
See, it’s Ronny now!
Count the characters, including the spaces, and you’ll notice that the first occurrence of “coding” starts at the position 8 (and hence 7 with respect to Python strings).
Oops, the result was a –1.
The index() method does exactly what the find() method does. The only difference is that it returns an error if the phrase is not found, and not –1. Why don’t you try to do the same with index()?
With the split method, you can literally split a string into a list. We’ll be looking at what lists are in a future lesson. For now, just know that lists hold multiple values within them, separated by commas.
That’s a list and it holds our string, separated by word.
True? False?
Before I move further with the methods, I want to teach you the concept of true and false in Python, or any programming language, really. It’s quite simple. If something is true, then your program will return “True”. If a condition is false, then you’ll get “False”. That’s it.
For example, let’s say I want to see if my string has the words “best friend” in it. I really want to know if Barky is Ronny’s best friend or not.
But as you know, Python is case sensitive. So, “best friend” is not the same as “Best friend” or any other versions. So use the words as is, okay?
When you run the preceding code, you’ll get True.
you’ll get False because ‘Coding’ isn’t in the string ‘Python is fun’.
Similarly, you can test for a lot of other strings in your string.
will return False, because most of the words have just letters and not letters and numbers.
The isalpha() method returns true if every single character in the string is an alphabet (no number or special characters at all). The isnumeric() method returns true if every single character in the string is a number (no alphabet or special characters).
Islower() returns true if all the characters are small. Isupper() returns true if every character is capitalized.
I want you to use these methods while giving different possibilities and explore how they truly work. Deal?
You can refer to the link I gave in the “String methods – magic with strings!” section to get the rest of the methods and use them in your experiments too. Have fun! :P
Hey, I know what you’re thinking.
“Oh man, that’s a lot of methods. How would I ever remember them all?”
Well, why should you? I’ll let you in on a biggg secret…Shhhhhh
Programmers don’t try to memorize syntaxes when they start out. That’s what Google’s for. They just create a lot. They solve a lot of puzzles, create fun projects, and Google for syntaxes when they get stuck. Over time, the syntaxes just get stuck in their head because they’ve used them so much.
So, forget about memorizing. Use this book as a reference. Solve the puzzles, create the mini projects with your twist, and take the big projects to the next level, and by the time you’re done with them all, you’ll be a master of Python. Just have fun. ![]()
String formatting
The print statement is boring and limiting. ☹ You can’t format it the way you want, and if you try, you’ll drown in a mess of quotes. But more than that, you can’t print numbers (even if they’re in variables) with strings! :O
So now, I want to print the following statement: 4 + 5 = 9, and I want to print it using the variable names and not the actual values, to keep things dynamic. I can maybe change the value of a variable, and my print statement will automatically change too.
The preceding code should ideally result in this:
The answer is: 4 + 5 = 9
Essentially, what the error says is you can only concatenate a string (anything within quotes) with a string, and the variables that contain numbers (without quotes) within them are not strings.
Not only was that statement very hard and confusing for me to create, it simply didn’t work.
That’s where formatting comes in. You can format the way your print statements are written. Just place {} (without space) where your variables come in, and you can fill them later using the format method.
Let’s say I want to print ‘This is an apple’, where the value ‘apple’ comes from the variable a.
Very simple, wasn’t it? You don’t have to mess around with spaces and quotes anymore, whoohoo!
Did you notice how I have the variables inside the format, separated by commas?
Indices start with 0 in Python, remember?
YES! Easy and neat, just the way it should be. ![]()
Getting input from the users (start automation)
So far, we’ve just been fixing the values of our variables. That’s so boring! I want automation. That’s what programming is all about, isn’t it?
I want to give a different number every time I run my addition program, a different string every time I want to print a message. That’s what an input is. A user or the person who runs the program gives values that can be used in the program to get a result. Those values are called inputs.
In Python, you can use the input() method to get inputs. Pretty straightforward, isn’t it?
When you run a program, it’ll ask you for the value, and wait until you give the same. That is called prompting.
I’ve prompted the user to enter a message, and I’ve received the same inside the variable “message”. Then I’ve printed it out. Simple.
The program has stopped at this stage because it’s waiting for my message.
It works perfectly! My message was printed out in the format I wanted.
String to int or float conversion
We looked at inputs and how we can dynamically get values and use them in our program. Isn’t calculation one of the best ways to use dynamic values? I want a different number every time I perform an addition operation.
Everything looks good in the preceding code snippet. It should work, right? Wrong.
My program prompted me for the two numbers, and I entered them. All good till now. But then, things went wonky with the addition.
Why?
You haven’t entered numbers at all. When you give values to an input, your program considers it as a string, not a number. So, what happened here is string concatenation, and not addition.
How do we make Python look at our inputs as numbers? You need to convert them, of course! Remember how we converted different types of numbers? Similarly, you can convert a string to either an integer using the int() method or a floating-point number using the float() method.
Phew! It works now.
Mini project – take Turtle text to the next level!
- 1.Let’s set up our Turtle first:import turtles = turtle.getscreen()t = turtle.Turtle()
- 2.
Next, let’s get create a variable name that gets the user’s name as input:
- 3.
We won’t have to convert this string in any way, since we’re just going to concatenate it with another string. Let’s create our customized greeting on Turtle now. Before we do that, let’s create the exact string we want to print and assign it to a variable “greeting”.
- 4.Now, let’s set a pen color of, maybe, Dark Violet? And let’s also move the pen to the position –250,0 so it draws in the center of the screen.t.pencolor('DarkViolet')t.penup()t.goto(-250,0)t.pendown()
- 5.Finally, let’s create our text.t.write(greeting,font=('Georgia',45,'normal','bold','italic'))
I’ve placed the variable “greeting” with the text we need in place of the actual text, and I’ve also set the font style as ‘Georgia’ and size as 45, and I’ve made the text bold and italic. I’ve omitted the move property, so it’s going to be “false” by default (no arrow below the text).
- 6.Finally, let’s hide our turtles:t.hideturtle()turtle.hideturtle()
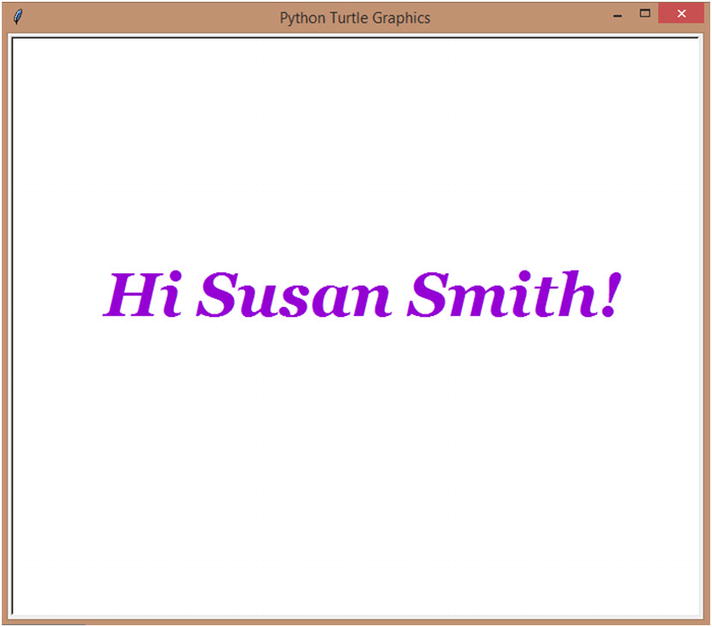
Colorful greeting
We have our greeting, and it looks pretty too! ![]()
Mini project – shout at the screen
We’re going to do what the title says. Let’s shout at the screen, shall we? Oh wait…or is the screen going to shout at us? Either way, let’s do some shouting! Whoo!

The concept is simple. We’re going to get a string input from the user. The message is going to be “Enter what’s on your mind in less than 3 words”. Less than three words so our text can be displayed in a big enough font in one line. In the later chapters, you’ll learn the tools needed to get as many words of input as you want, and make sure you print them all by making space, so don’t worry about that right now.
- 1.To start, let’s set up the Turtle package:import turtles = turtle.getscreen()t = turtle.Turtle()
- 2.Then, let’s get the input:message = input("Enter what's on your mind in 3 words or less: ")
- 3.
Finally, let’s format the message we want to shout! Our “message” is probably in small letters. How do we convert every single letter in our message to uppercase? Yes! The upper() method. Let’s use that, and tag on three exclamation points at the end, to make our message more dramatic!
- 4.Now, I’m going to move the pen to –250,0 and change the color of the pen to Red, because nothing says shouting more than Red.
 t.pencolor('Red')t.penup()t.goto(-250,0)t.pendown()
 - 5.
Now, on to the main part of the program. Let’s create our Turtle text. I’m going to use the ‘Arial Black’ font for this. The size of the font is going to be 45, but I’m going to stop at making the text bold. No italics this time.
- 6.Finally, let’s hide the turtles.t.hideturtle()turtle.hideturtle()
Enter what’s on your mind in three words or less: What is this?

Shout at the screen
Yes! Success!
Mini project – reverse your name
I’m going to teach you something fun while solving this project. So far, we’ve seen all kinds of ways in which we can manipulate our strings. Why don’t we look at one more before we end this chapter?
Did you know that you can reverse your string? Yes, that’s right! Complete reversal, with just one teeny tiny line of code. Would you like to try?
- 1.Let’s set up Turtle, as usual.import turtles = turtle.getscreen()t = turtle.Turtle()
- 2.
And get the user’s name and place it in the variable “name”.
- 3.
Now comes the interesting part! We’re going to format the string we want displayed as usual. We’ve created a variable “reverse” to store the string. But how do we reverse? Remember how we used to use square brackets to access separate characters, extract parts of the string, and so on? Also, do you remember negative indices? There you go!
If you use the following syntax, you can reverse your string: string[::–1]. So, that’s a double colon, followed by a –1. Simple as that!

- 4.Finally, let’s change the color of the pen to ‘Gold’, shift position to –250,0, and draw the reversed string on screen.t.pencolor('Gold')t.penup()t.goto(-250,0)t.pendown()t.write(reverse,font=('Georgia',45,'normal','bold'))t.hideturtle()turtle.hideturtle()

Reverse your name
Hehe, her name was reversed, alright. :P
Mini project – colorful and dynamic Math
In the numbers chapter, we had to resort to doing boring calculations with pre-defined numbers and no colors! ☹
So, I thought we could have some real fun with numbers before we move on to the next chapter. Shall we?
- 1.Let’s set up Turtle first.import turtles = turtle.getscreen()t = turtle.Turtle()
- 2.Then, let’s get the inputs for the first and second numbers we’re going to use in our operations. But there’s an issue! We can’t use them as it is. They are in string formats, remember? So, let’s convert them to integers and assign them back to the same variables.num1 = input("Enter the first number: ")num1 = int(num1)num2 = input("Enter the second number: ")num2 = int(num2)
- 3.Now, let’s do the addition. We’re going to create a variable called display which is going to hold all the formatted strings of the four operations.#Additionadd = num1 + num2display = "{} + {} = {}".format(num1,num2,add)
- 4.Once formatted, let’s position our pen at –150,150 so our drawing is aligned to the middle of the screen. Then, let’s change the color of the pen to “Red” and draw the text.t.penup()t.goto(-150,150)t.pendown()t.pencolor("Red")t.write(display,font=("Georgia",40,"normal","bold"))
- 5.Do the same for subtraction now, except that the position is going to be –150,50 now and the color is going to be “Blue”.#Subtractionsub = num1 - num2display = "{} - {} = {}".format(num1,num2,add)t.penup()t.goto(-150,50)t.pendown()t.pencolor("Blue")t.write(display,font=("Georgia",40,"normal","bold"))
- 6.For multiplication, the position is going to be –150,–50 and the color is going to be “Green”.#Multiplicationmul = num1 * num2display = "{} * {} = {}".format(num1,num2,add)t.penup()t.goto(-150,-50)t.pendown()t.pencolor("Green")t.write(display,font=("Georgia",40,"normal","bold"))
- 7.For division, the position is going to be –150,–150 and the color is going to be “Violet”.#Divisiondiv = num1 / num2display = "{} / {} = {}".format(num1,num2,add)t.penup()t.goto(-150,-150)t.pendown()t.pencolor("Violet")t.write(display,font=("Georgia",40,"normal","bold"))
- 8.Finally, let’s hide the turtles.t.hideturtle()turtle.hideturtle()
- 9.Now, let’s run the program. It asks for inputs first. Our inputs are going to be 10 and 5.= RESTART: C:UsersaarthiAppDataLocalProgramsPythonPython38-32strings.pyEnter the first number: 10Enter the second number: 5

Colorful and dynamic Math
Beautiful! ![]()
Summary
In this chapter, we looked at strings, what they are, creating single-line, multi-line, and empty strings, creating strings with quotes, concatenating two or more strings, accessing characters in strings, extracting parts of a string, string slicing, how to manipulate strings in different ways, and getting inputs from users and using them in our program.
In the next chapter, let’s look at how we can command our program to do whatever we want. We’re going to look at “if” statements, creating multiple options with “if else” and “if elif else” statements, and a lot more. It’s going to be fun! ![]()