After making our application mobile-friendly in a previous chapter with the media query hooks’ help, we are now ready to deploy our front-end application.
We are going to deploy our app in two different ways.
First, we will use Netlify to build, deploy, and host our static site or app. Developers love Netlify because of its drag-and-drop interface that allows for continuous integration and delivery from GitHub or Bitbucket. In this instance, we will be deploying to Netlify using GitHub.
Our next deployment strategy is with the use of a popular container technology called Docker. One of the most significant advantages of using Docker is to package our applications in “containers.” Hence, our application becomes “portable” for any systems running the Windows OS or the Linux OS.
Keep in mind that we are just using a fake local server (using an external CLI tool that runs in a terminal to create a fake server), so we don’t really have a back-end code to compile for the back-end service. It means that the local server or localhost that we have been using will not work with Netlify or Docker.
However, we will still be able to see the application live. Our goal here is to learn how to deploy our front-end application, not the back end, specifically using Netlify and Docker.
Updating the Build Script in package.json
Now, let’s start setting up the tools we need before we can start deploying our app. The first one up is GitHub.
GitHub
Before we begin, let’s talk about GitHub and what it is used for.
To understand what GitHub is all about, you should know Git, which is an open source version control system. The versioning system allows us to store files efficiently, collaborate more effectively with other developers, make changes, and upload the newest revision.
So what is GitHub? Git is a command-line tool, but the “Hub” in GitHub is where all things come together for everyone as far as Git is concerned and where developers store their projects and other files. To deploy to Netlify, there are some requirements we need to do. We can do several ways, but we would go with the most straightforward path through our GitHub.

GitHub website
You can save all your sample codes or sample projects in your GitHub account; no need to keep them locally in your machine.
Go to your project app and save it in your GitHub account.
Initialize Repository or Publish to GitHub

Commit the GitHub private repository
Next, go to your GitHub account to check if your project has been saved in your private repository. After confirming it, head off to www.netlify.com and create an account if you don’t have one yet.
Netlify

Netlify website

Login options for Netlify

Adding new site

Choose GitHub for continuous deployment

Search for your repo
Search for the name of your repository.

Deploy site page

First step: Deploying the site

Site successfully deployed

App on Netlify
Now that the app has been deployed, click the free domain name that Netlify has given you. Yes, it’s free, but you cannot customize or change it, although there are paid options wherein you can customize your URL.
Docker
First, let’s discuss what Docker is. Simply, it is a tool to enable developers to create, deploy, and run apps through containers. In containers, we can package up our application with all its parts – from libraries to dependencies – and then deploy it in one package.
Next, let’s try Docker.

Installing Docker Desktop on Windows. Source: https://docs.docker.com/docker-for-windows/install/

Get Docker button. Source: https://hub.docker.com/editions/community/docker-ce-desktop-windows
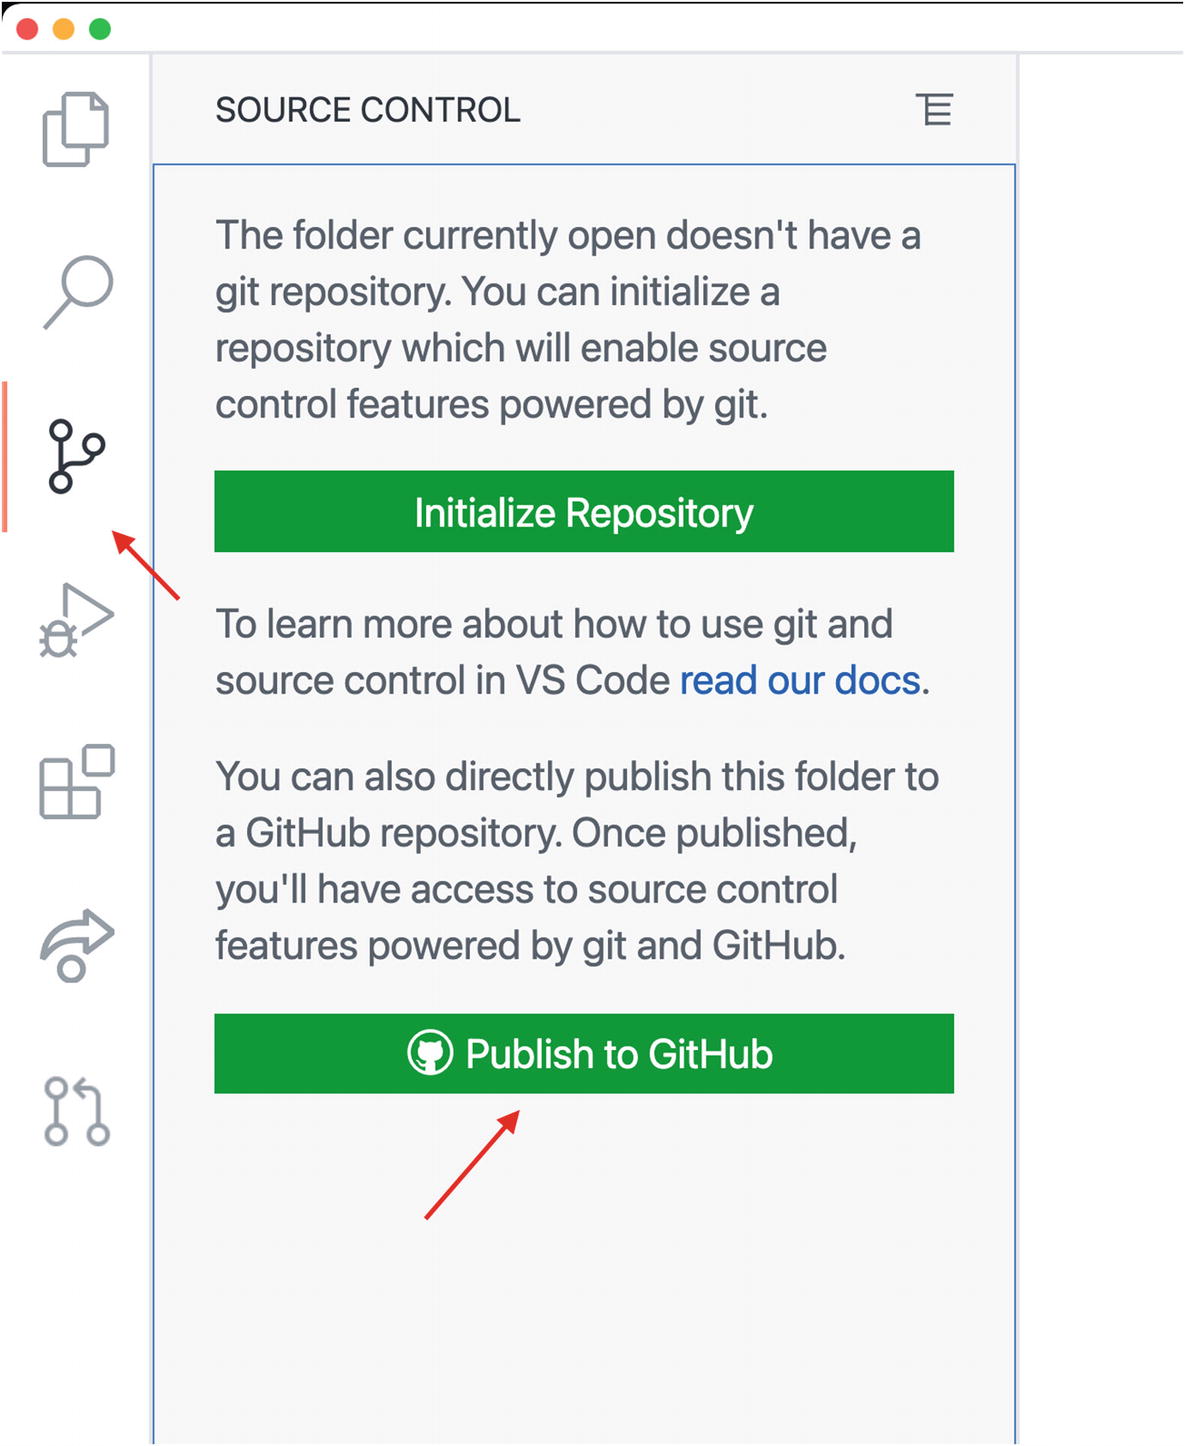
For Mac, the installation process is pretty much the same.
Installing Docker Desktop on Mac. Source: https://docs.docker.com/docker-for-mac/install/

Get Docker Desktop on Mac

Installing Docker Engine on Ubuntu. Source: https://docs.docker.com/engine/install/ubuntu/
The only difference between Ubuntu and the other two, Mac and Windows, is that Ubuntu does not have a Docker client. A Docker client is the GUI or UI for Docker for managing your containers.

Docker client dashboard
Docker Ignore

Docker ignore file
We are ignoring or not committing the cypress for the tests and the Node modules.
NGINX Config
After that, we need to create the NGINX server configuration. We need the NGINX server to run inside Docker and serve the React application to the browser.
But what is NGINX? Pronounced like “engine-ex,” NGINX is a free, open source, high-performance HTTP or web server that also acts as a reverse proxy, email proxy, and load balancer.
Essentially, it offers low memory usage, load balancing, and high concurrency with its async and event-driven approach, which allows for the processing of many requests at the same time.
NGINX Config
Dockerfile
Dockerfile
In Listing 18-3, we are using the Alpine version 15 to build Docker images and other small, container-like uses. The WORKDIR (working directory) is like “cdying” or going to the cd directory inside the Docker container.
We are also specifying the ENV PATH. We are copying the package.json and the package-lock.son and dump them in Docker. This is being done in the COPY.
The left side (package.json) is part of your repository, while the right side is part of Docker. We are merely copying the package.json and package-lock.json and dumping them to the root file ./ of Docker.
RUN npm install
This is not being run inside your directory but in the Docker container’s app directory. The app directory is the same root directory where we dumped a copy of the package.json and package-lock.json files.
Copy . ./
Note the space also between the dot and the dot slash. The first dot pertains to your application’s whole repository being copied and then pasted to the ./ or the app directory.
If you’re going to ask me why we’re copying the whole application, why do we need to copy the package.json and package-lock.json early on?
It’s because we need to npm run it first, and another reason has something to do with the optimization of the application.
Docker creates layers for each command such as COPY, ADD, RUN, etc. As per the current configuration, Docker does not need to npm install or rebuild all layers, including the package.json. Doing so will take a lot of time and resources whenever there are changes in our source code, which could happen frequently.
npm install will only be executed if there are changes in the package.json, such as removing or adding something.
Meanwhile, in Stage 2, note the three parameters in the COPY, the first two parameters being copied or dumped into the third or last parameter.
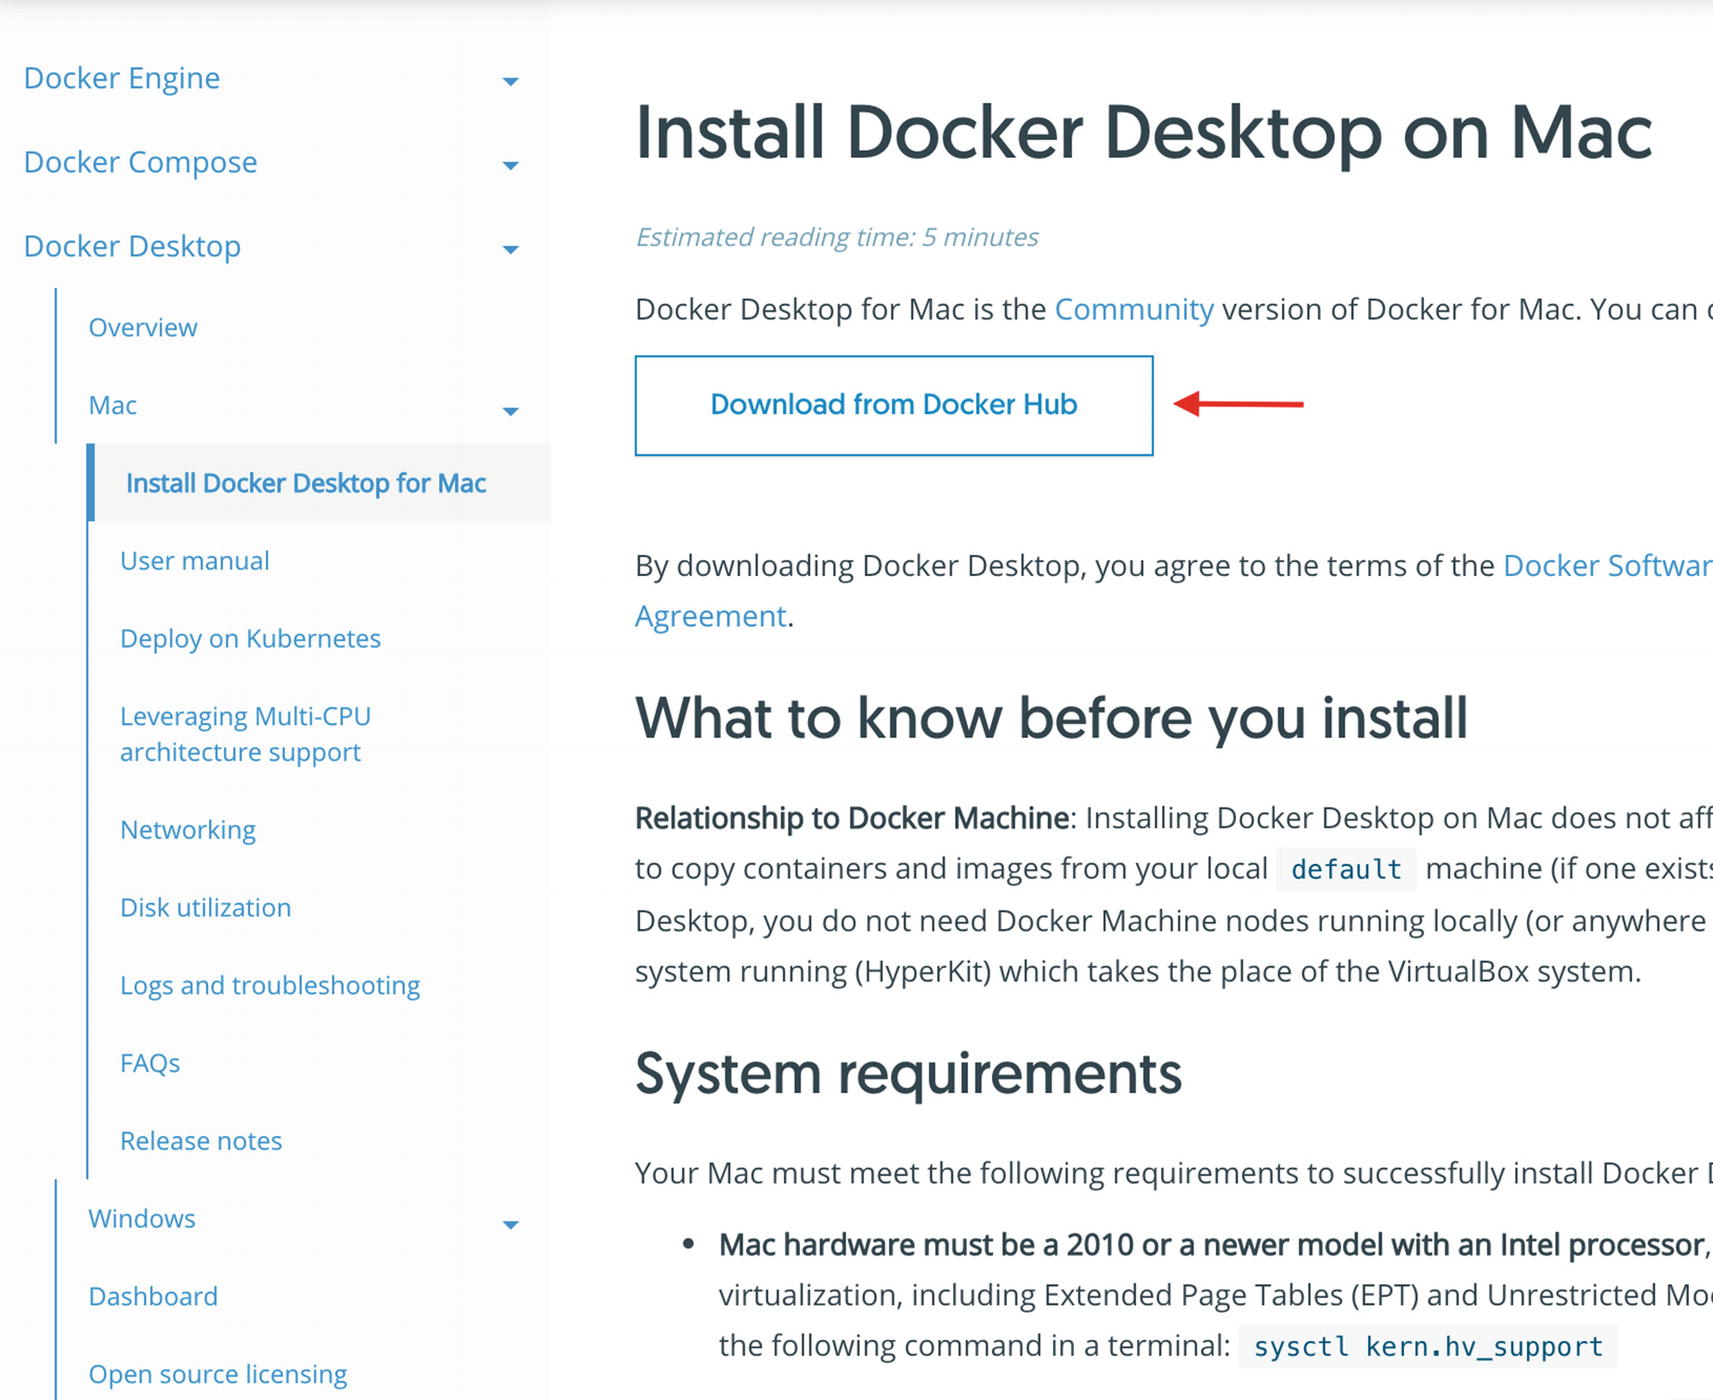
Docker Hub
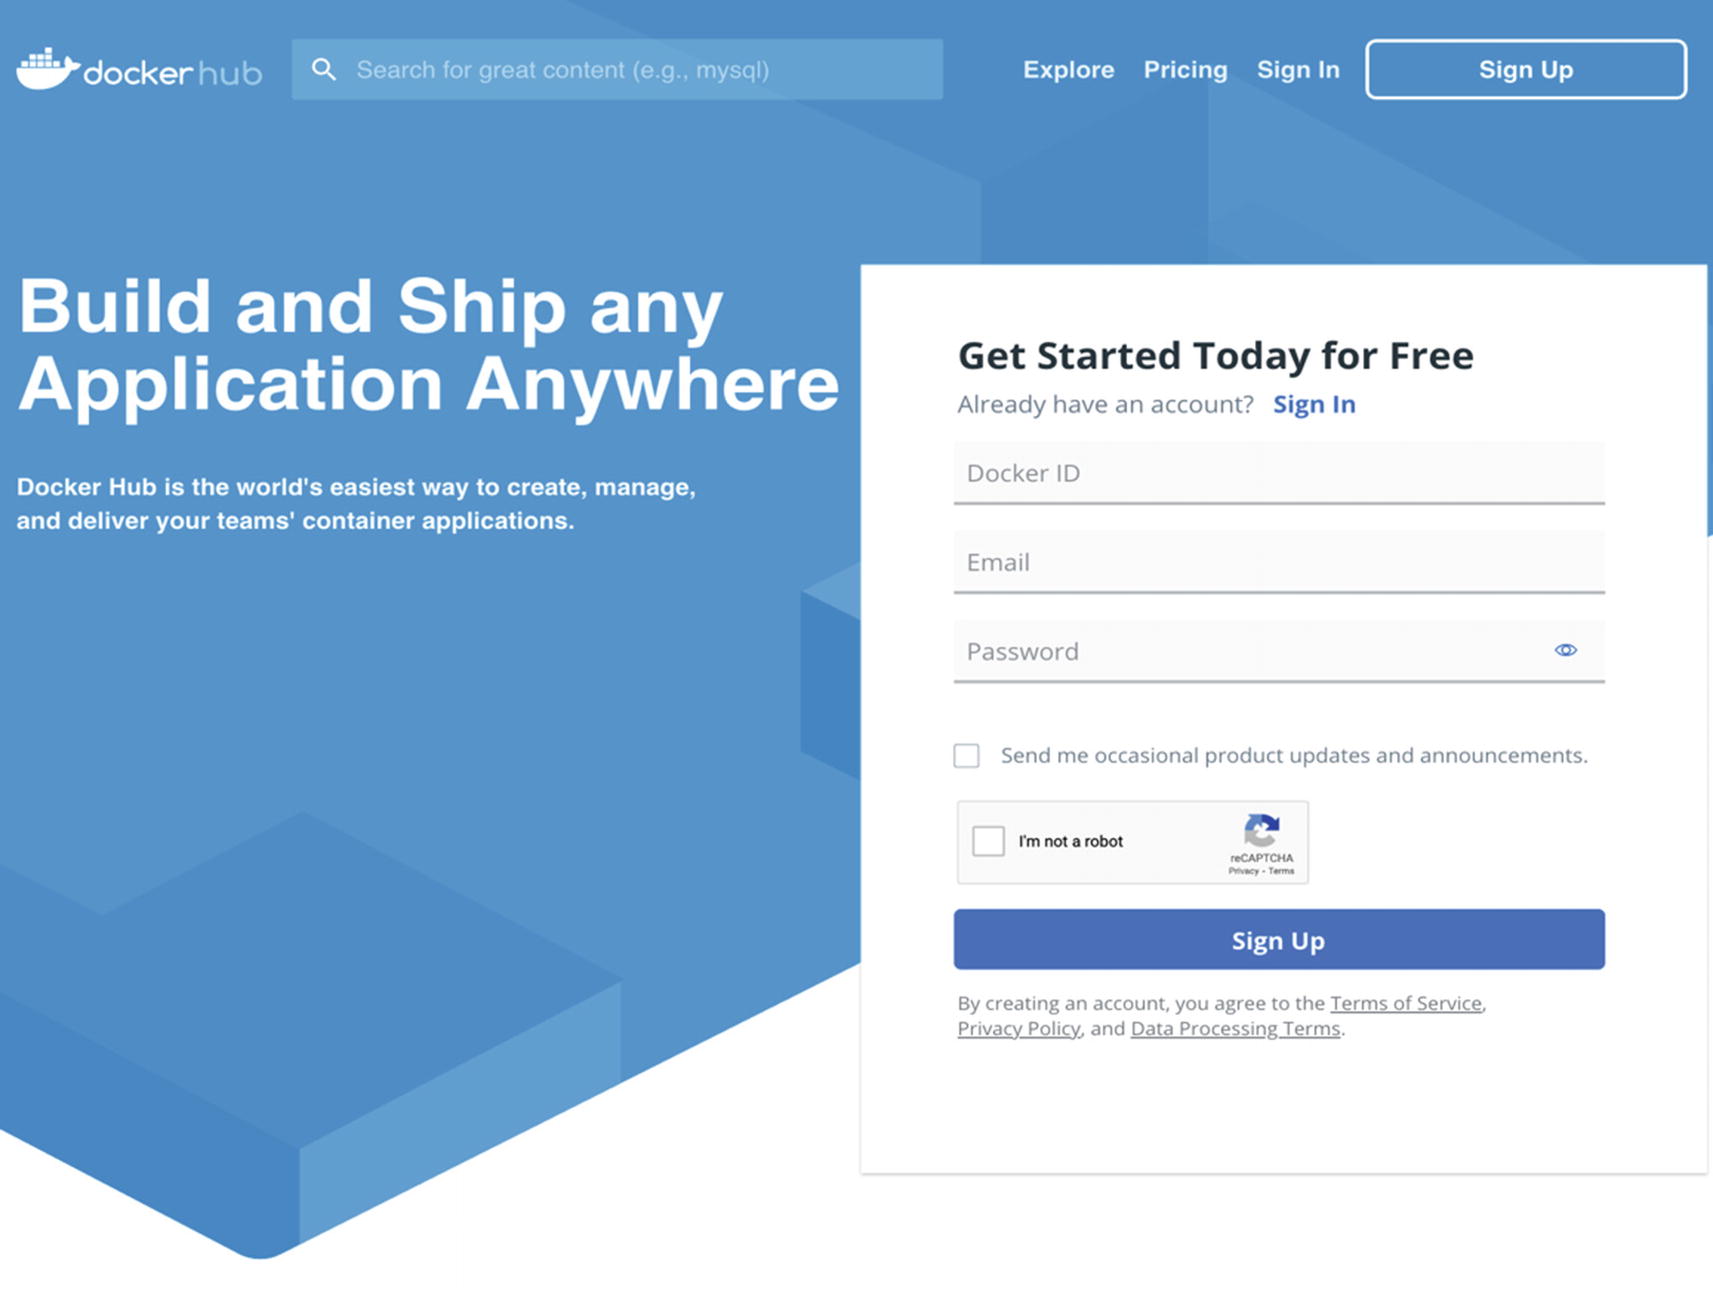
Docker Hub Sign Up/Login page. Source: https://hub.docker.com/
Docker Commands
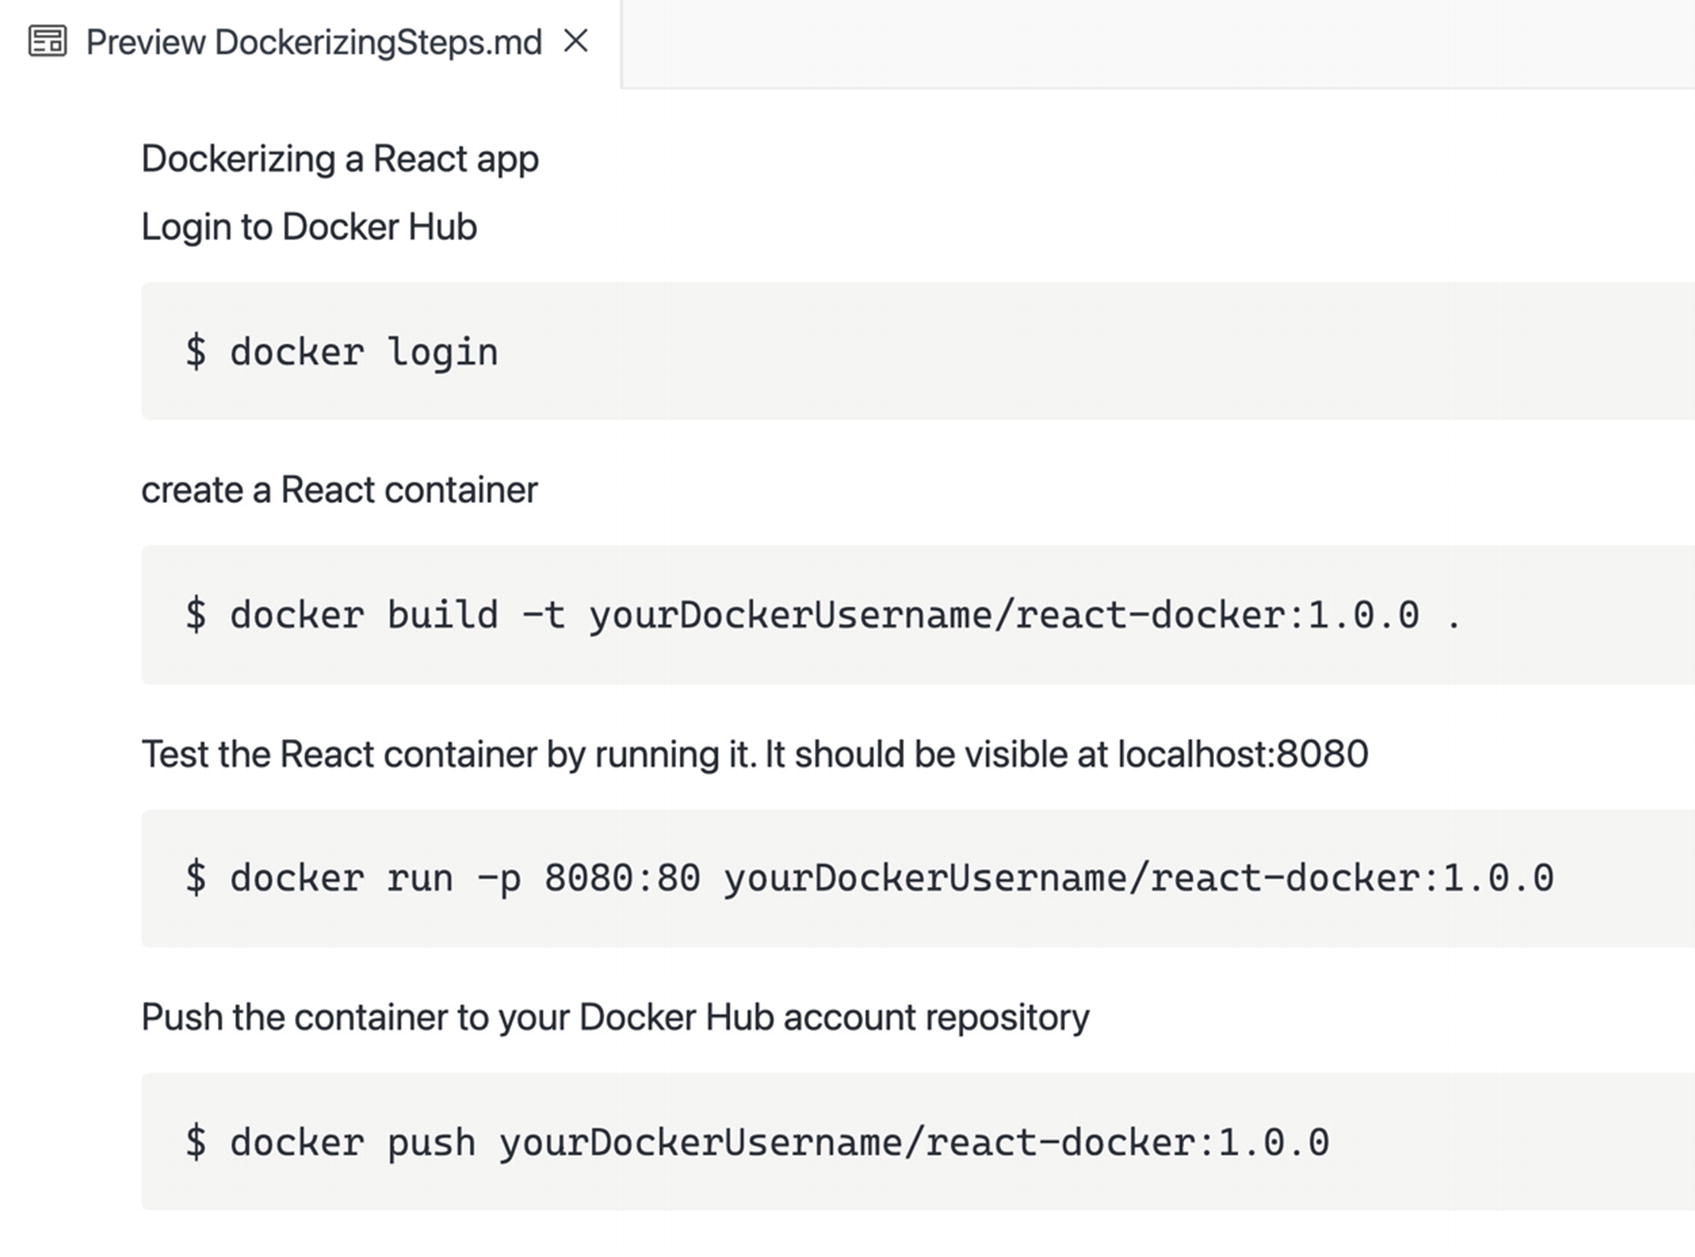
Docker commands

Docker build

Docker run
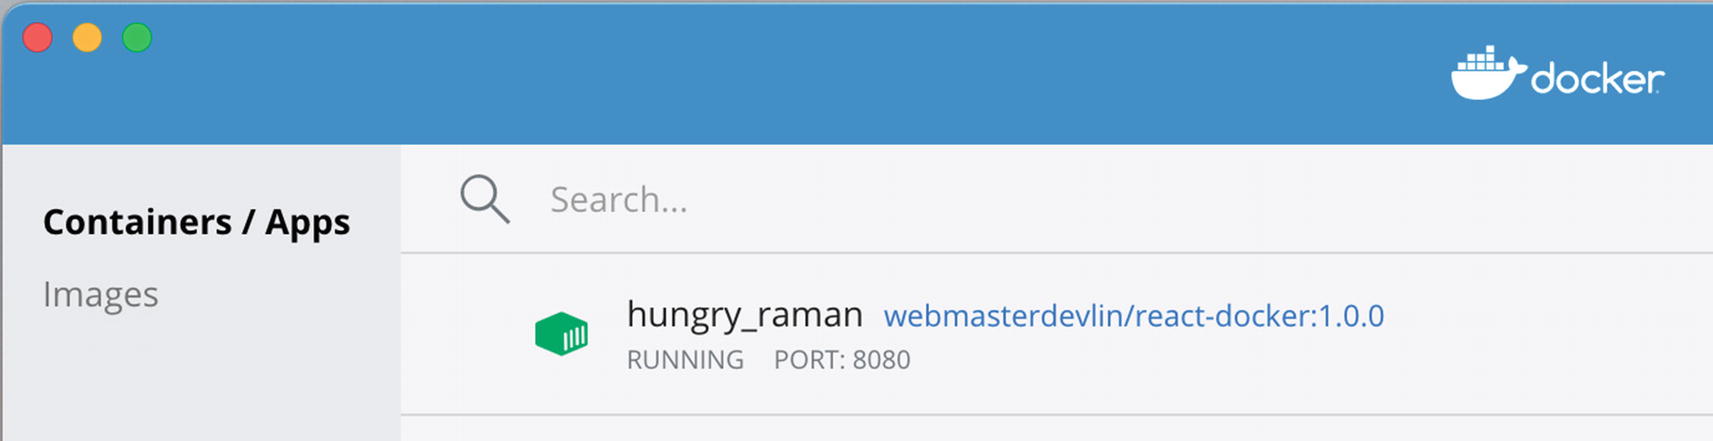
Containers in Docker client dashboard

Running on port 8080
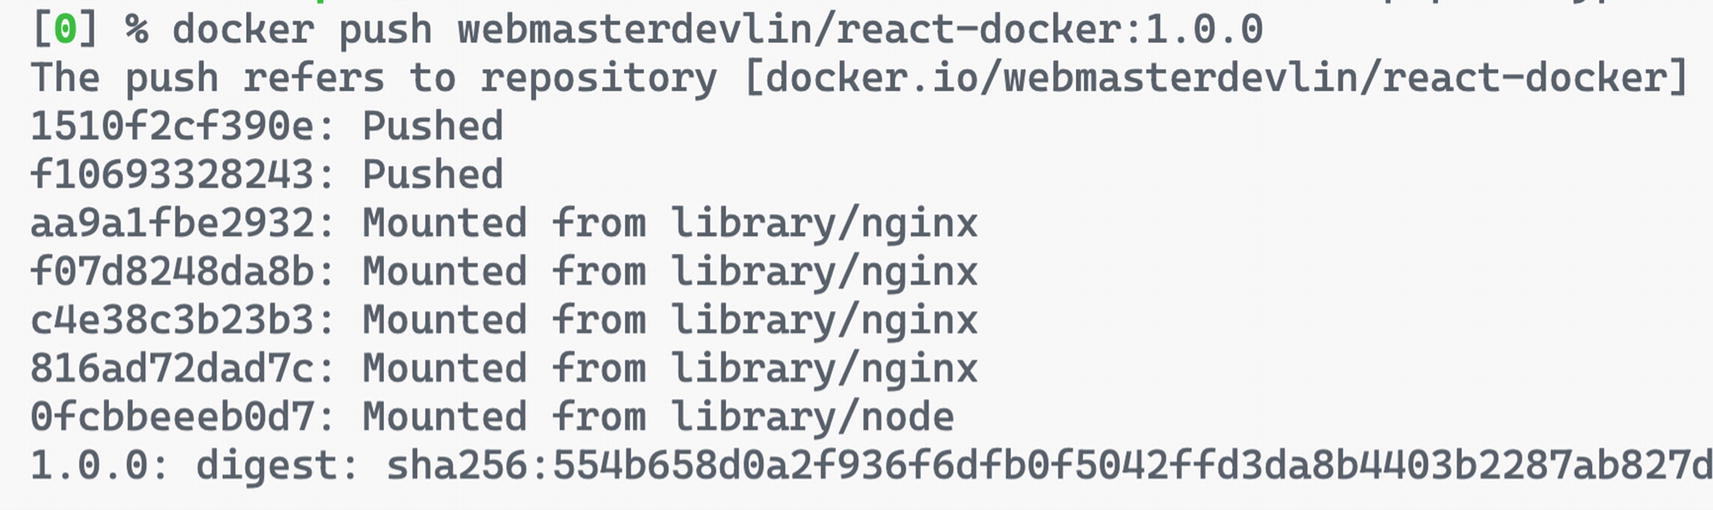
Docker push
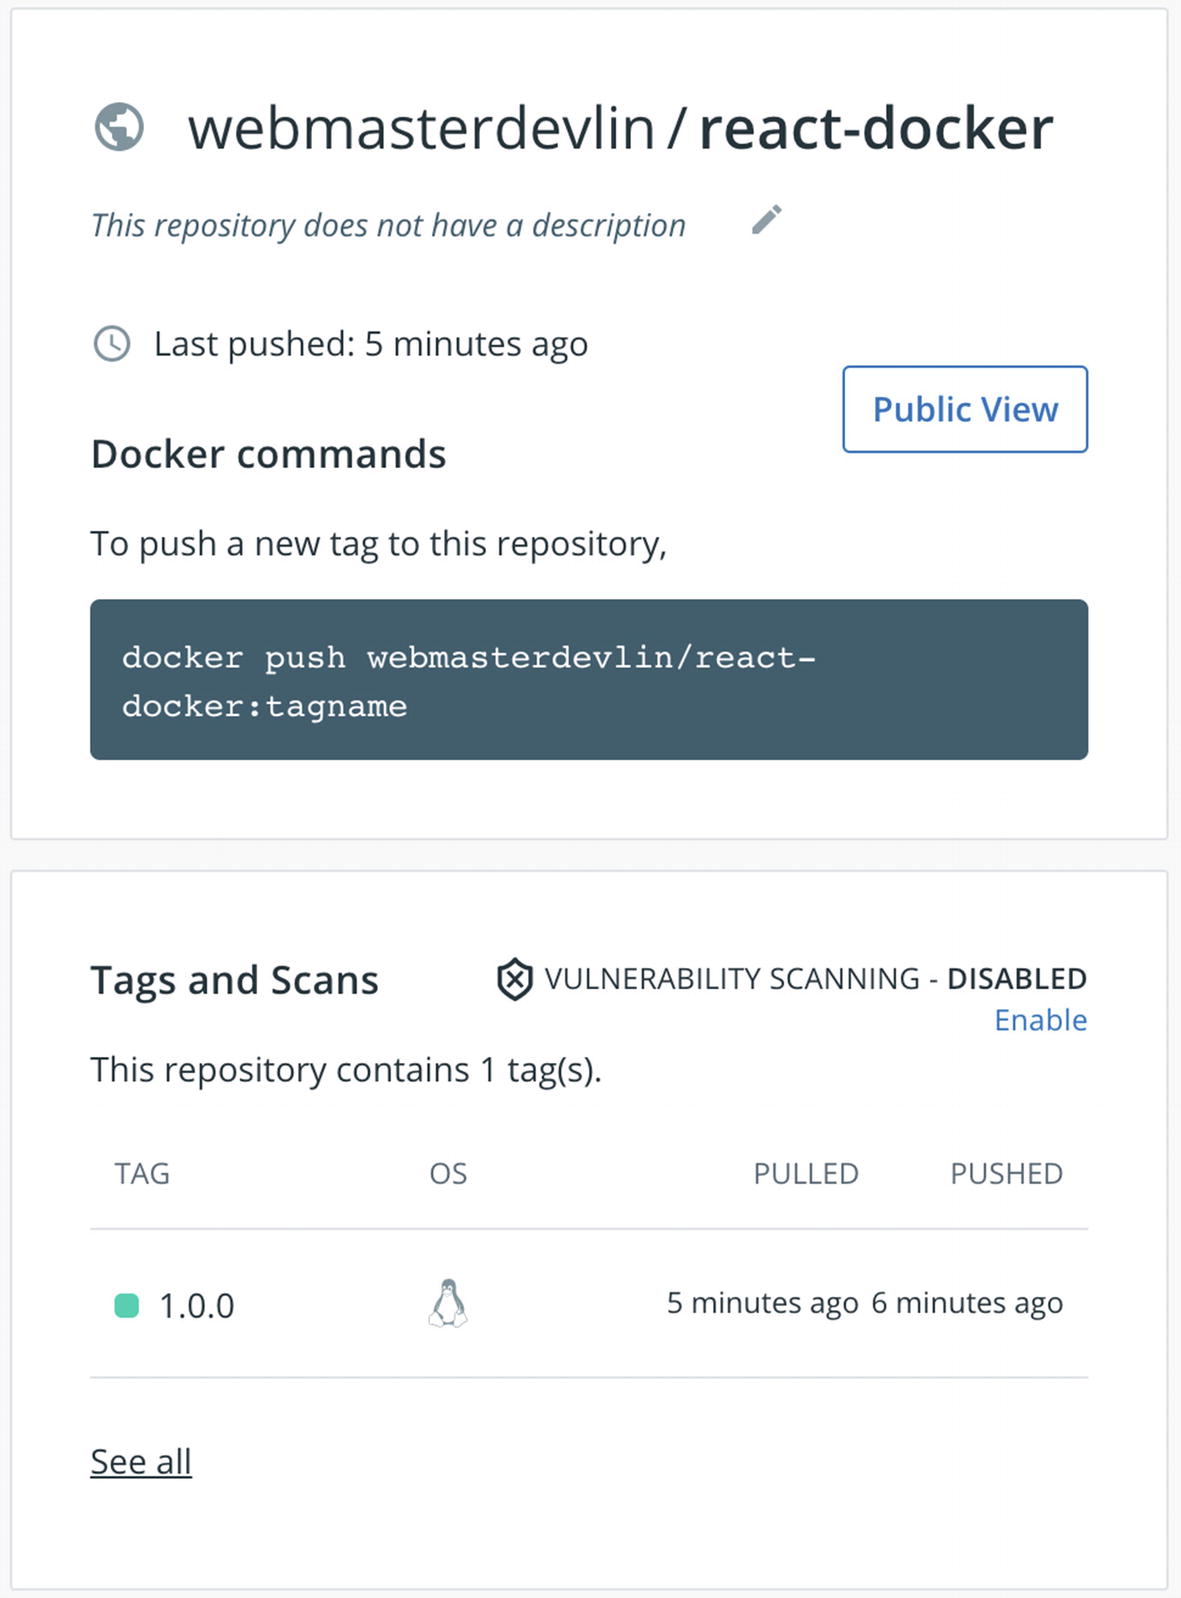
Docker Hub after a successful deployment
You can download or deploy it anywhere you want, for example, in Kubernetes, Azure, or AWS using their services or instances for containers.
If you want to know more about Kubernetes, you can go to their website: https://kubernetes.io/.
If you want to know more about Azure, you can go to their website: https://azure.microsoft.com/.
If you want to know more about AWS, you can go to their website: https://aws.amazon.com/.
Summary
That’s it for the deployment process of our application in Netlify and Docker. Netlify is perfect for static websites, and we’ve seen how easy it is to connect Netlify with our GitHub repository to pull the source code and allow us to do continuous integration and deployment.
Deploying our app to Docker containers, on the other hand, is the way to go if we need to run our application on any Linux machine. Also, keep in mind that Docker is open source, so anyone can contribute and extend it to meet their requirements, such as adding features and so on.
The next chapter is just a bonus chapter wherein we get an idea of ways to reuse our React learnings and expand to other related platforms and frameworks the concepts and skills we have learned while building our project application.