Functional testing for JavaScript-heavy interfaces
Unit testing for the Django REST Framework
In this chapter, we add tests to our application. In the first part, we cover functional testing for user interfaces with Cypress. In the second part, we move to unit testing in Django.
Note
This chapter assumes you are in the repo root decoupled-dj, with the Python virtual environment active.
Introduction to Functional Testing
More often than not, testing in software development is an afterthought, something overlooked as a waste of time that slows down development.
This is especially true of functional testing for user interfaces, where the amount of JavaScript interactions to test increases day by day. This feeling probably comes from the memory of tools like Selenium for Python, which unfortunately are notably slow and hard to use for testing JavaScript interfaces. However, the situation has changed substantially in recent years, with a new breed of JavaScript tooling that eases the burden of testing single-page applications. These tools make it easy to write tests for the interface from the user point of view. Functional tests are also a great way to catch regressions in the UI, that is, bugs introduced by accidents during development in an unrelated feature which used to work well before changes. In the next sections, we cover Cypress, a test runner for JavaScript.
Getting Started with Cypress
Cypress is a JavaScript package available on NPM that can be pulled in our projects. In a project with a single JavaScript frontend that needs to be tested, you can install Cypress in the root project folder of the React/Vue.js app.
In our case, since we might have more than one JavaScript application to test, we can install Cypress in the root project folder decoupled-dj. To start, initialize a package.json with the following command:
npm init -y
Next up, install Cypress:
npm i cypress --save-dev
Once you’re done, you can start Cypress the first time with the following command:
./node_modules/.bin/cypress open
This command will open a window and create a new folder named cypress in the root project folder. A number of subfolders are created as well, as shown in the following directory listing:
cypress
├── fixtures
├── integration
├── plugins
└── support
For the scope of this chapter we can safely ignore these folders, except integration. We will place our tests there. With Cypress in place, we can move to writing our first test in the next sections.
Understanding Functional Testing for the Billing App
Remember the billing app from Chapter 6? It’s now time to write functional tests for it.
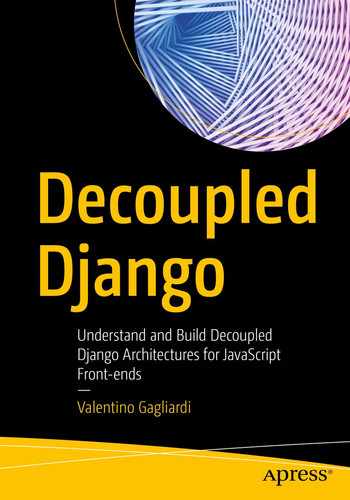
This app has a form where the user can fill in fields to create a new invoice and then click on Create Invoice to create the new entity on the backend. Figure 9-1 shows the final form from Chapter 6.
Let’s not forget that we want to test the interface from the user point of view in a functional test. With a nice fluent syntax, Cypress allows us to interact with elements just like a user would do, step by step. How do we know how and what to test? Writing a functional test should come naturally. We need to imagine how a user would interact with the interface, write selectors for each HTML element we want to test, and then verify that the element behaves correctly or that it changes in response to user interaction. In the case of our form, we can identify the following steps. The user should:
Select a client for the invoice
Compile at least one invoice line with quantity, description, and price
Pick a date for the invoice
Pick a due date for the invoice
Submit the form by clicking on Create Invoice
All these steps must be translated into Cypress logic, which is essentially just JavaScript. In the next section, we write our first test for the <select> element of the form.
Creating the First Test
In the first iteration of our test, we interact with two pieces of the interface. In particular, we:
Target the form
Interact with the select
In Cypress, these two steps translate into method calls, which look almost like plain English. To start, create a new test in cypress/integration/Billing.spec.js with the code shown in Listing 9-1.
cypress/integration/Billing.spec.js - A First Test Skeleton in Cypress
Let’s break down these instructions:
context() encloses the whole test and gives it a cohesive organization
describe() encloses a single aspect of our test, often used in conjunction with context()
it() is the actual test block
cy.visit() navigates to the app home page
cy is Cypress itself, which offers a number of methods for selecting and interacting with elements
cy.get("form") selects the first form in the interface
within() tells Cypress to run each subsequent command from inside the previous selected element
cy.get("select") selects the <select> element inside the form
cy.get("select").select("Juliana - [email protected]") picks the <option> element whose value is "Juliana - [email protected]" from the select
Note
Since our interface is rather simple, we won’t focus too much on advanced selectors and best practices. The reader is encouraged to read the Cypress documentation to learn more about advanced techniques.
What stands out from this code is the expressiveness of each statement. With fluent, descriptive methods, we can target and interact with HTML elements the same way as we would expect from our users. In theory, our test is ready to run, but there’s a problem. The <select> needs data from the network. This data comes from the Vue component’s mounted() method, as shown in Listing 9-2.
...
mounted() {
fetch("/billing/api/clients/")
.then(response => {
if (!response.ok) throw Error(response.statusText);
return response.json();
})
.then(json => {
this.users = json;
});
}
...
Listing 9-2
billing/vue_spa/src/components/InvoiceCreate.vue - The Form’s Mounted Method
In fact, if we launch the Vue.js app, we’ll see the following error in the console:
Proxy error: Could not proxy request /billing/api/clients/ from localhost:8080 to http://localhost:8000
This comes from Vue.js development server, which we instructed to proxy all network requests to the Django REST API in development. Without running Django in another terminal, we can’t really test anything. This is where Cypress network interception comes into play. It turns out that we can intercept the network call and reply to it directly from Cypress. To do so, we need to adjust our test by adding a new command called cy.intercept(), before cy.visit(), as shown in Listing 9-3.
cypress/integration/Billing.spec.js - Adding Network Interception to the Test
From this snippet, we can see that cy.intercept() takes:
The HTTP method to intercept
The path to intercept
An object used as a response stub
In this test we intercept the network request coming from the Vue component, we stop it before it reaches the backend, and we reply with a static response body. By doing so, we can avoid touching the backend altogether. Now, to test things out, we can run the test suite. From the decoupled-dj folder where we installed Cypress, we run the testing runner with the following command:
./node_modules/.bin/cypress open
Note
For convenience, it’s best to create an e2e script in package.json to alias cypress open.
This will open a new window from where we can choose which test to run, as shown in Figure 9-2.
Figure 9-2
Cypress welcome page
By clicking on the spec file Billing.spec.js, we can run the test, but before doing so we need to start the Vue.js app. From another terminal, move into billing/vue_spa and run the following command:
npm run serve
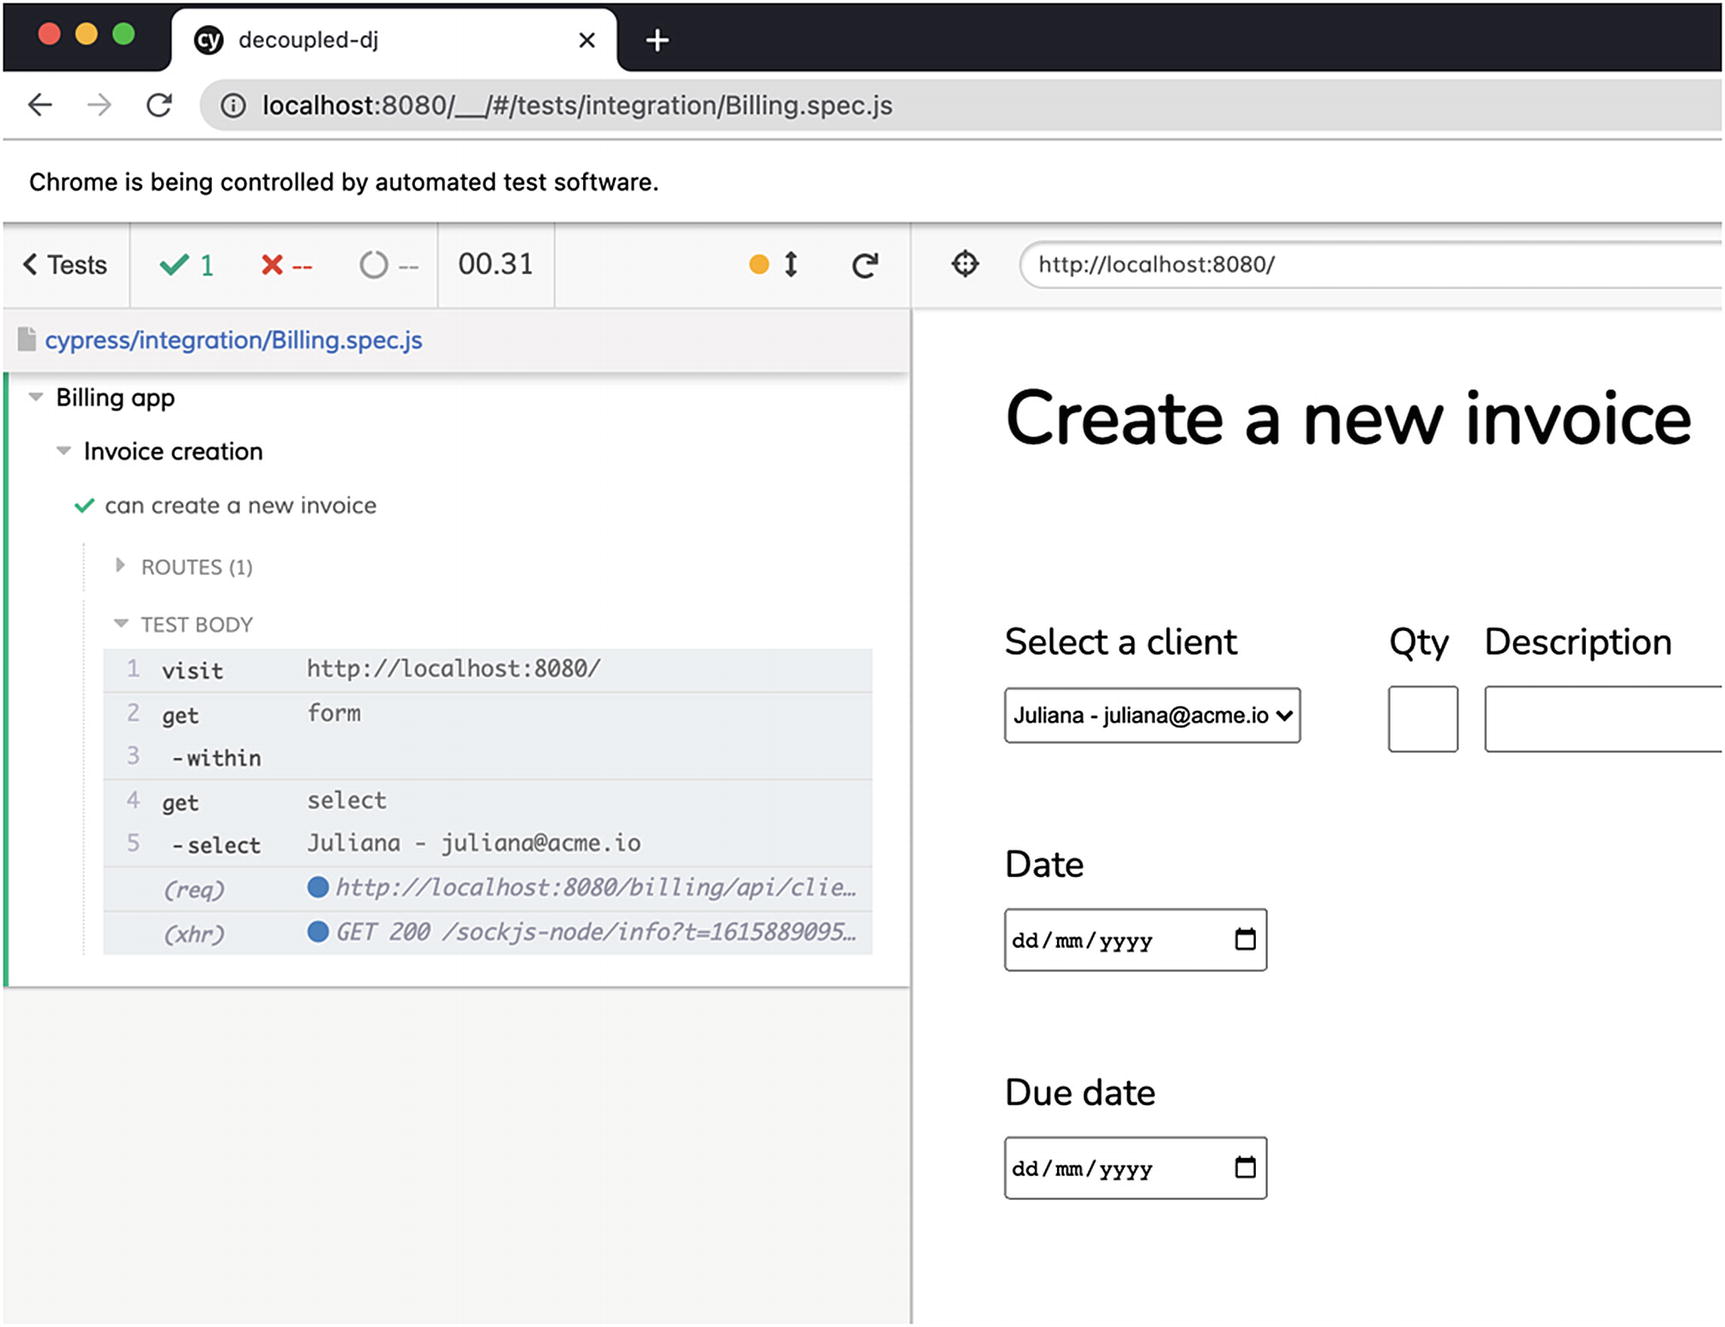
Once done we can reload the test and let Cypress do the job. The test runner will go over every command in the test block, just like a real user would do. When the test finishes we should see all green, which is a sign that the test is passing. Figure 9-3 shows the test window.
Figure 9-3
A first passing test
Network interception in Cypress is really convenient for working without a backend. The backend team can share the expected API request and responses with the frontend team through documentation, with actual JavaScript objects, or with JSON fixtures. On the other side, frontend developers can build the UI without having to run Django locally. In the next section we finish the test for our form by testing form inputs.
Filling and Submitting the Form
In order to submit the form, Cypress needs to fill all the required fields.
To do so, we employ a set of Cypress methods for form interaction:
type() to type into input fields
submit() to trigger the submit event on our form
With type() we can not only type into form fields, but also interact with date inputs. This is really handy since our form has two inputs of type date. For example, to select and type into a date input with Cypress, we can use the following command:
cy.get("input[name=date]").type("2021-03-15");
Here, we target the input with the appropriate selector and use type() to fill the field. This method works well with any kind of form input. For text inputs, it’s a matter of targeting the CSS selector and type into it. When two or more inputs of the same type exist on the page, Cypress needs to know which one to target. If we are only interested in the first element found on the page, we can use the following instructions:
cy.get("input[type=number]").first().type("1");
Here we say to Cypress to select only the first input number on the page. What if we wanted to interact with two or more elements of the same kind instead? As a quick workaround, we can use .eq() to target the element by index. The index starts at 0, much like JavaScript arrays:
In this example, we instruct Cypress to target two inputs of type number on the page. With this knowledge in hand, and with an eye on the HTML form structure of our app, we can add the code shown in Listing 9-4 to our previous test.
cypress/integration/Billing.spec.js - Filling the Form with Cypress
Here we fill all the required inputs, the two dates, the description for the invoice, and the price. Finally, we submit the form. While this test passes, Vue.js isn’t that happy because it cannot route the POST request to /billing/api/invoices/. In the console, we can see the following error:
Proxy error: Could not proxy request /billing/api/invoices/ from localhost:8080 to http://localhost:8000
This is another situation where Cypress interception can help. Before submitting the form, let’s declare another interception, this time for /billing/api/invoices. Also, let’s assert that the API call is triggered by the frontend; see Listing 9-5.
...
cy.intercept("POST", "/billing/api/invoices", {
statusCode: 201,
body: {},
}).as("createInvoice");
cy.get("form").submit();
cy.wait("@createInvoice");
...
Listing 9-5
cypress/integration/Billing.spec.js - Adding Another Network Interception to the Test
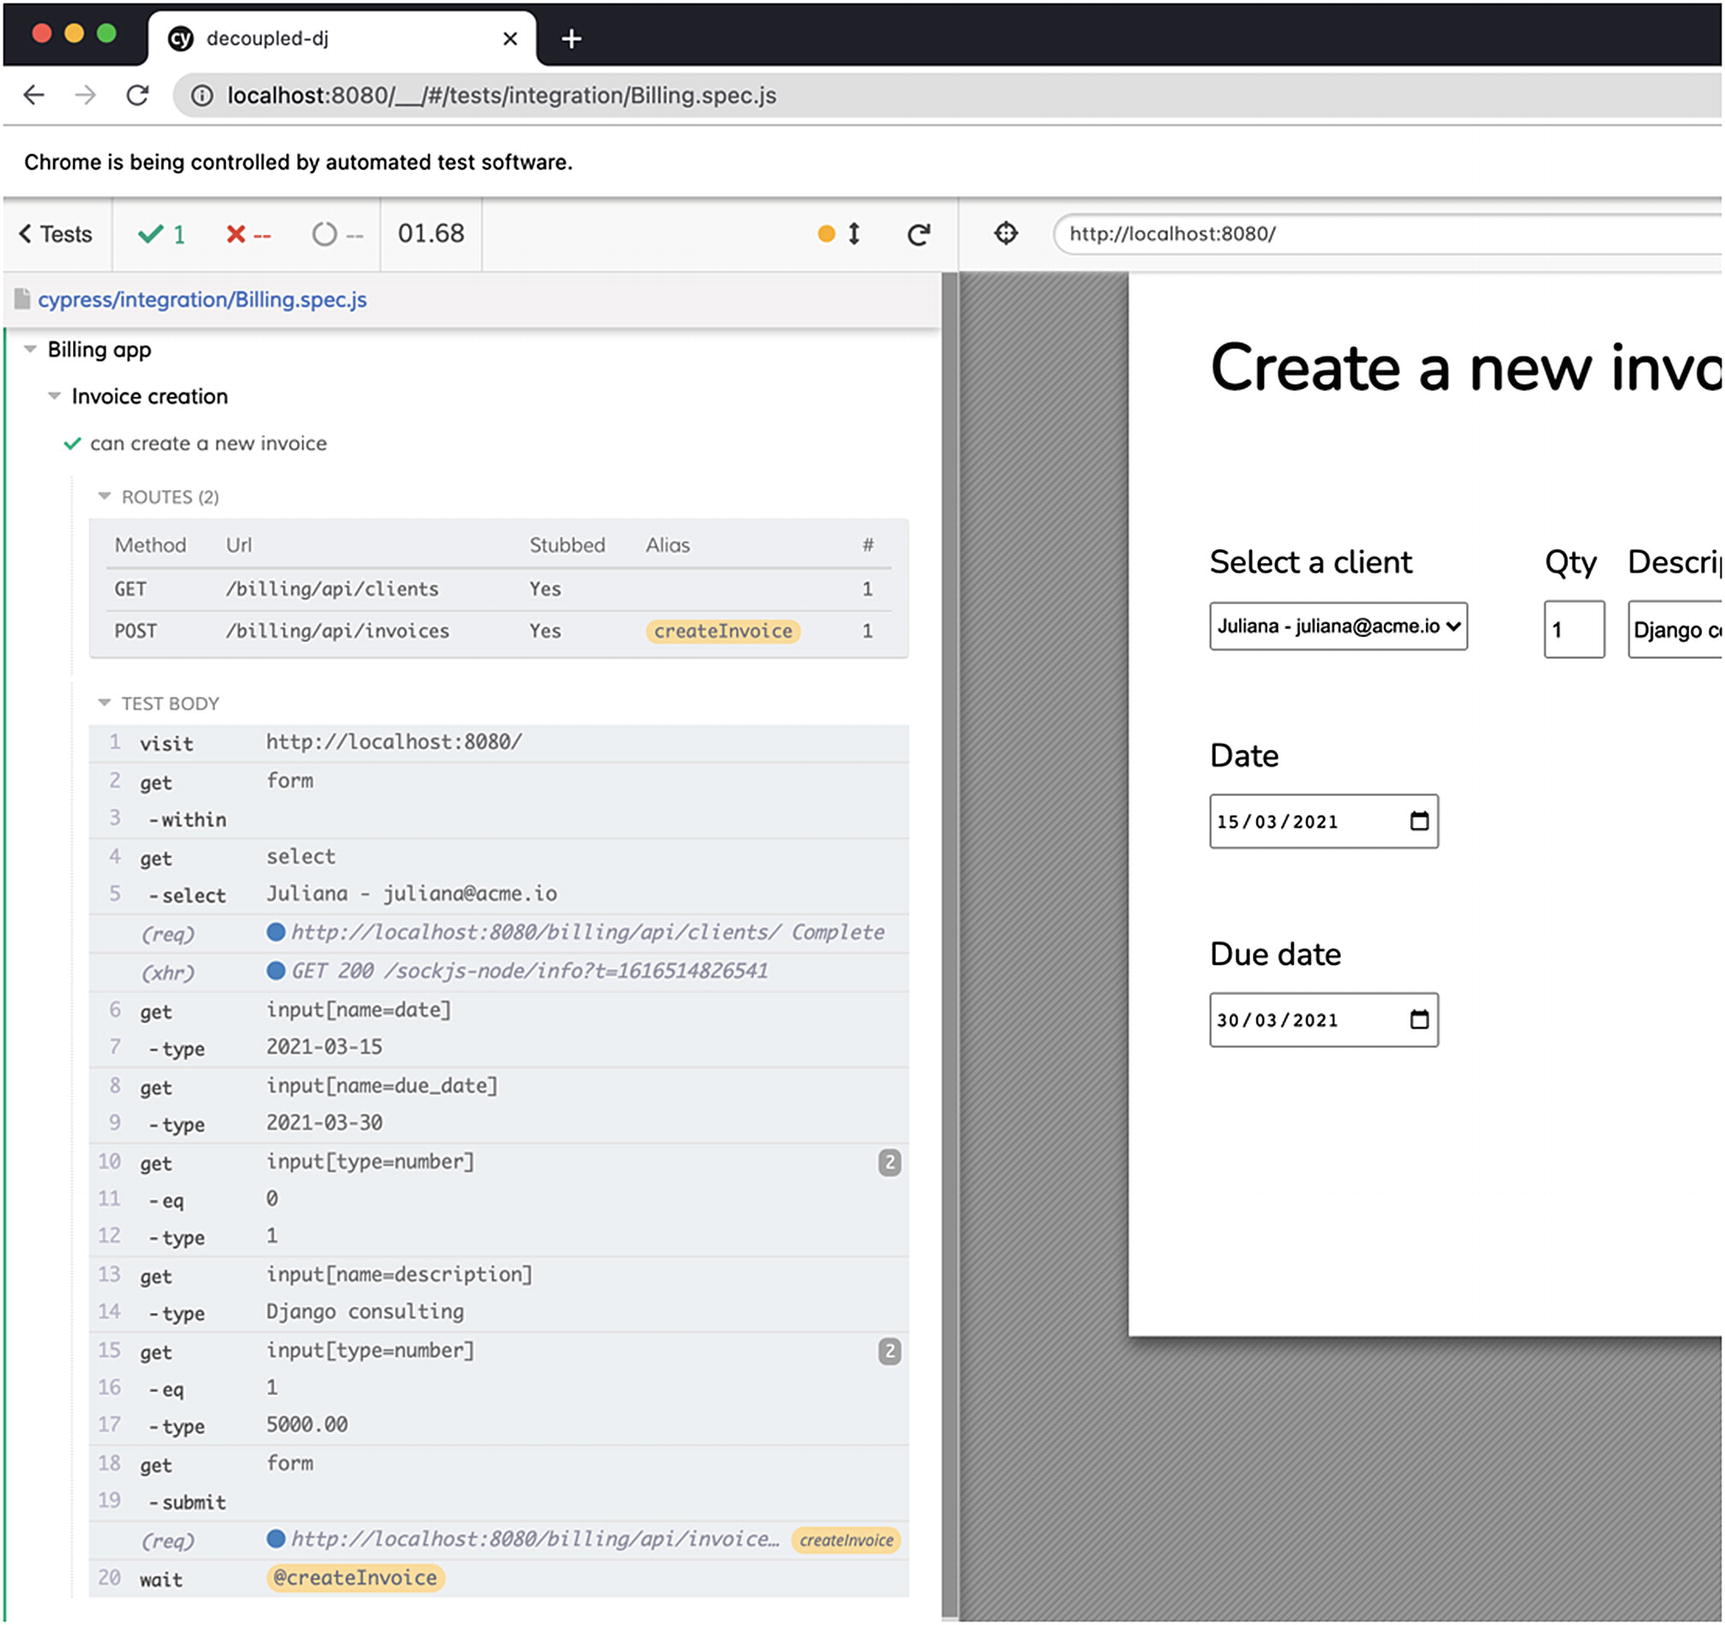
The new instructions here are as() and cy.wait(). With as(), we can alias Cypress selections, and in this case also our network intercept. With cy.wait() instead, we can wait for the network call to happen and effectively test that the frontend is making the actual API call to the backend. With this test in place we can run again Cypress, which should now give us all green, as shown in Figure 9-4.
Figure 9-4
A full test suite for our invoice form
This concludes functional testing for the client-facing side of our app. Although limited in scope, this test helps illustrate the Cypress fundamentals. The test we wrote so far targets Vue.js without considering Django. To make our functional tests as close possible to the real world, we would also need to test the JavaScript frontend served from within Django. This is left as an exercise for the user at the end of the chapter. Let’s now focus on the backend. Our REST API needs testing as well.
Introduction to Unit Testing
In contrast to functional testing, unit testing aims at ensuring that single units of code such as functions or classes work as expected.
In this chapter we don’t cover unit testing for JavaScript because we already saw functional testing with Cypress, and to properly address unit testing for React and Vue.js, another chapter would not be enough. Instead, we see how to apply unit testing to the Django backend. Functional testing is an invaluable tool for checking the functionality of the UI from the user point of view. Unit testing instead ensures that our Django backend and its REST API provide the right data for our JavaScript frontend. Functional testing and unit testing are not mutually exclusive. A project should have both types of tests in place in order to be considered robust and resilient to changes. In the next section, we see how to test the Django REST Framework with Django testing tools.
Unit Testing in the Django REST Framework
Out of the box, Django makes it possible to have excellent code coverage right from the beginning. Code coverage is the measure of how much code is covered by tests. Django is a battery included framework, and it comes with a robust set of tools, like API views and a fantastic ORM, which are already tested by Django contributors and core developers. However, these tests aren’t enough.
When building a project, we need to make sure that views, models, serializers, and any custom Python class or function are properly tested. Luckily, Django has us covered with a set of handy tools for unit and integration testing, like the TestCase class. The Django REST Framework adds some custom tooling on top of this, including:
APISimpleTestCase for testing the API without database support
APITestCase for testing the API along with database support
Writing a unit test for a DRF view is not so different from writing a test for a traditional Django view. The example in Listing 9-6 illustrates the minimal test structure for getting started.
from rest_framework.test import APITestCase
from rest_framework.status import HTTP_403_FORBIDDEN
In this example, we subclass APITestCase to declare a new test suite. Inside this class we can see a class method named setUpTestData(), which is useful for initializing data for our test. Next up we declare our first test as a class method: test_anon_cannot_list_clients() is our first test. Inside this block, we call the API view with self.client.get(), the testing HTTP client. Then, we check that the response code we get from the view is what we expect, a 403 Forbidden in this case, since the user is not authenticated. In the next sections, we write tests for our REST views by following the example’s structure.
Django Settings for Testing
Before getting started, let’s configure our Django project for testing. More often than not, we will need to slightly change some setting in testing, and for this reason it is convenient to create a split setting for the testing environment. To do so, create a new file in decoupled_dj/settings/testing.py with the content shown in Listing 9-7.
from .base import * # noqa
Listing 9-7
decoupled_dj/settings/testing.py - Split Settings for Testing
As of now, this file doesn’t do anything other than import the base settings, but this ensures that we can override any configuration if needed.
Installing the Dependencies and Configuring Requirements for Testing
We are now ready to install the dependencies for testing.
For our project, we will use two convenient libraries: pytest and pytest-django. Used together they can simplify how we run tests. For instance, when used with pytest-django, pytest can autodiscover our tests, so we don’t need to add imports to our __init__.py files. We will also use model-bakery, which can ease the burden of model creation in our tests. To install these libraries, run the following command:
pip install pytest pytest-django model-bakery
Next up, create a requirements file for testing in requirements/testing.txt and add the lines shown in Listing 9-8.
-r ./base.txt
model-bakery==1.2.1
pytest==6.2.2
pytest-django==4.1.0
Listing 9-8
requirements/testing.txt - Requirements for Testing
This concludes our setup. We are now ready to write tests!
Outlining Tests for the Billing REST API
When writing tests, understanding what to test in a project is the most challenging task, especially for beginners.
It is easy to get lost in the testing implementation details and internal code, but really, it shouldn’t be that complicated. When deciding what to test, you need to focus on one thing: the expected output from your system. In the case of our Django apps, we are exposing REST endpoints. This means we need to look at how this system is used and test these boundaries accordingly. After identifying the surface of the system, tests for the internal logic will come naturally. Let’s now see what needs to be tested in our billing app. The Vue frontend from Chapter 5 invokes the following endpoints:
/billing/api/clients/
/billing/api/invoices/
Incidentally, these are the same endpoints that we stubbed in Cypress with cy.intercept(). This time we need to cover them with a unit test in Django, rather than with a functional test with Cypress. But let’s step back for a moment and think about our tests. In Chapter 6, we added authentication and permissions check to our REST API. Only an authenticated admin user can invoke the API. This means we need to take authentication into account and test that we don’t forget to enforce authentication by allowing anonymous users to sneak into our API. By intuition, we need to write the following tests:
As an anonymous user, I cannot access the client list
As an admin user, I can access the client list
As an anonymous user, I cannot create a new invoice
As an admin user, I can create a new invoice
Let’s write these tests in the next section.
Testing the Billing REST API
To start, create a new Python package named tests in billing.
In this folder create a new file called test_api.py. In this file, we are going to place our test class, with the same structure we saw in the previous example. We also add all the test methods to our class, as outlined in the previous section. Listing 9-9 shows the backbone of this test.
from rest_framework.test import APITestCase
from rest_framework.status import HTTP_403_FORBIDDEN, HTTP_200_OK, HTTP_201_CREATED
billing/tests/test_api.py - Test Case for the Billing API
This test is far from being complete. Tests for the anonymous user look fine, but we can’t say the same for admin because we are not authenticated in our tests yet. To create an admin user (a staff user for Django) in our tests, we can use baker() from model-bakery in setUpTestData(), and then the force_login() method on the test client, as in Listing 9-10.
from rest_framework.test import APITestCase
from rest_framework.status import HTTP_403_FORBIDDEN, HTTP_200_OK, HTTP_201_CREATED
If everything goes well, we should see the following output in the console:
billing/tests/test_api.py ... [100%]
============= 3 passed in 0.94s ==========
Our tests are passing! We can now add one last case to our test: as an admin user, I can create a new invoice. To do so, we create a new method in the class. In this method, we log in as admin and make a POST request to the API, by providing a request body. Let’s not forget that, to create an invoice, we must also pass a list of item lines. This can be done in the request body. The following listing shows the complete test method, where we also create a user before the request body. This user is later associated with the invoice, as shown in Listing 9-11.
billing/tests/test_api.py - Testing Invoice Creation as an Admin
This concludes our unit test for the billing app REST API. Alongside a functional test, we covered the whole spectrum of communication between the backend and frontend.
Our functional test with Cypress does not take into account that Vue.js is served from a Django view in production. So far, we tested the Vue.js app in isolation. Write a functional test against the Django view that’s serving the app.
Exercise 9-2: Testing the Blog App
Now that you learned how to structure and write tests with Cypress and Django, write a set of functional tests for the Next.js app. Write unit tests for the blog REST API as well.
Summary
Testing is often an art of intuition in identifying and covering all the possible corner cases. This chapter outlined tools and techniques for:
Functional testing with Cypress
Unit testing in Django, using the DRF’s testing tools
In the next chapter, we move to the next big topic: authentication.