The last chapter introduced xUnit and unittest. In this chapter, you will explore yet another unit-testing API for Python, called nose. Its tagline is nose extends unittest to make testing easier.
You can use nose’s API to write and run automated tests. You can also use nose to run tests written in other frameworks like unittest. This chapter also explores the next actively developed and maintained iteration of nose, nose2.
Introduction to nose
nose is not part of Python’s standard library. You have to install it in order to use it. The next section shows how to install it on Python 3.
Installing nose on Linux Distributions
The easiest way to install nose on a Linux computer is to install it using Python’s package manager pip. Pip stands for pip installs packages. It’s a recursive acronym. If pip is not installed on your Linux computer, you can install it by using a system package manager. On any Debian/Ubuntu or derivative computer, install pip with the following command:
sudo apt-get install python3-pip
On Fedora/CentOS and derivatives, run the following commands (assuming you have Python 3.5 installed on the OS) to install pip:
sudo yum install python35-setuptools
sudo easy_install pip
Once pip is installed, you can install nose with the following command:
sudo pip3 install nose
Installing nose on macOS and Windows
pip is preinstalled with Python 3 on macOS and Windows. Install nose with the following command:
pip3 install nose
Verifying the Installation
Once nose is installed, run the following command to verify the installation:
nosetests -V
It will show output as follows:
nosetests version 1.3.7
On Windows, this command may return error, so you can use the following command alternatively:
python -m nose -V
Getting Started with nose
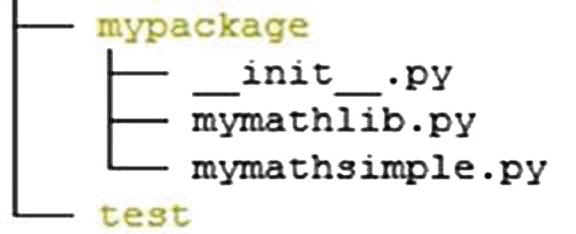
To get started with nose, follow the same path of exploration that you followed with unittest. Create a directory called chapter04 in the code directory and copy the mypackage directory from the chapter03 directory to code. You will need it later. Create a directory called test too. After all this, the chapter04 directory structure should look like the structure shown in Figure 4-1.
Figure 4-1
The chapter04 directory structure
Save all the code examples to the test directory only.
A Simple nose Test Case
A very simple nosetest case is demonstrated in Listing 4-1.
def test_case01():
assert 'aaa'.upper() == 'AAA'
Listing 4-1
test_module01.py
In Listing 4-1, test_case01() is the test function. assert is Python’s built-in keyword and it works like the assert methods in unittest. If you compare this code with the simplest test case in the unittest framework, you will notice that you do not have to extend the test from any parent class. This makes the test code cleaner and less cluttered.
If you try to run it with the following commands, it will not yield any output:
python3 test_module01.py
python3 test_module01.py -v
This is because you have not included a test-runner in the code.
You can run it by using the -m command-line option for Python, as follows:
Using the nosetests command is the simplest way to run test modules. Due to the simplicity and convenience of the coding and invocation style, we will use nosetests to run tests until we introduce and explain nose2. If the command returns an error in Windows, you can invoke the nose module with the Python interpreter.
Getting Help
Use the following commands to get help and documentation about nose:
nosetests -h
python3 -m nose -h
Organizing the Test Code
In the previous chapter, you learned how to organize the development and testing code of the project in separate directories. You will follow the same standard in this and the next chapter too. First create a test module to test the development code in mypackage. Save the code shown in Listing 4-2 in the test directory.
from mypackage.mymathlib import *
class TestClass01:
def test_case01(self):
print("In test_case01()")
assert mymathlib().add(2, 5) == 7
Listing 4-2
test_module02.py
Listing 4-2 creates a test class called TestClass01. As discussed earlier, you do not have to extend it from a parent class. The line containing assert checks if the statement mymathlib().add(2, 5) == 7 is true or false to mark the test method as PASS or FAIL.
Also, create an init.py file with the code in Listing 4-3 placed in the test directory.
all = ["test_module01", "test_module02"]
Listing 4-3
init.py
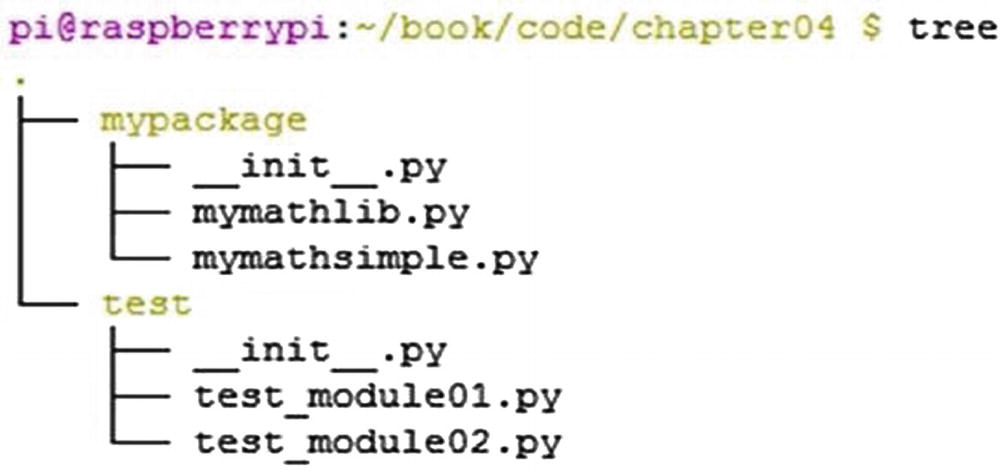
After this, the chapter04 directory structure will resemble Figure 4-2.
Figure 4-2
The chapter04 directory structure
The test package is ready now. You can run the tests from the chapter04 directory as follows:
You learned about test discovery in an earlier chapter. nose also supports the test discovery process. In fact, test discovery in nose is even simpler than in unittest. You do not have to use the discover subcommand for test discovery. You just need to navigate to the project directory (chapter04 in this case) and run the nosetests command, as follows:
nosetests
You can also invoke this process in verbose mode:
nosetests -v
The output is as follows:
test.test_module01.test_case01 ... ok test.test_module02.TestClass01.test_case01 ... ok
Ran 2 tests in 0.328s
OK
As you can see in the output, nosetests automatically discovers the test package and runs all its test modules.
Fixtures for Classes, Modules, and Methods
nose provides xUnit-style fixtures that behave in similar way as the fixtures in unittest. Even the names of the fixtures are same. Consider the code in Listing 4-4.
from mypackage.mymathlib import *
math_obj = 0
def setUpModule():
"""called once, before anything else in this module"""
print("In setUpModule()...")
global math_obj
math_obj = mymathlib()
def tearDownModule():
"""called once, after everything else in this module"""
print("In tearDownModule()...")
global math_obj del math_obj
class TestClass02:
@classmethod
def setUpClass(cls):
"""called once, before any test in the class"""
print("In setUpClass()...")
def setUp(self):
"""called before every test method"""
print("
In setUp()...")
def test_case01(self):
print("In test_case01()")
assert math_obj.add(2, 5) == 7
def test_case02(self):
print("In test_case02()")
def tearDown(self):
"""called after every test method"""
print("In tearDown()...")
@classmethod
def tearDownClass(cls):
"""called once, after all tests, if setUpClass() successful"""
print ("
In tearDownClass()...")
Listing 4-4
test_module03.py
If you run the code in Listing 4-4 with the following command:
nosetests test_module03.py -v
The output will be as follows:
test.test_module03.TestClass02.test_case01 ... ok test.test_module03.TestClass02.test_case02 ... ok
In order to get more details about the test execution, you need to add the -s option to the command line, which allows any stdout output to be printed in the command line immediately.
From now on, the examples will add the -s option to the nosetests command while executing the tests.
Fixtures for Functions
Before you get started with the fixtures for functions, you must understand the difference between a function and a method in Python. A function is a named piece of code that performs an operation and a method is a function with an extra parameter that’s the object on which it runs. A function is not associated with a class. A method is always associated with a class.
"""called once, before anything else in this module"""
print("
In setUpModule()...")
def tearDownModule():
"""called once, after everything else in this module"""
print("
In tearDownModule()...")
def setup_function():
"""setup_function(): use it with @with_setup() decorator"""
print("
setup_function()...")
def teardown_function():
"""teardown_function(): use it with @with_setup() decorator"""
print("
teardown_function()...")
def test_case01():
print("In test_case01()...")
def test_case02():
print("In test_case02()...")
@with_setup(setup_function, teardown_function)
def test_case03():
print("In test_case03()...")
Listing 4-5
test_module04.py
In the code in Listing 4-5, test_case01(), test_case02(), test_case03(), setup_ function(), and teardown_function() are the functions. They are not associated with a class. You have to use the @with_setup() decorator, which is imported from nose.tools, to assign setup_function() and teardown_function() as fixtures of test_case03(). nose recognizes test_case01(), test_case02(), and test_case03() as test functions because the names begin with test_. setup_function() and teardown_function() are recognized as fixtures of test_case03(), due to the @with_setup() decorator.
The test_case01() and test_case02() functions do not have any fixtures assigned to them.
Let’s run this code with the following command:
nosetests test_module04.py -vs
The output is as follows:
In setUpModule()...
test.test_module04.test_case01 ... In test_case01()...
ok
test.test_module04.test_case02 ... In test_case02()...
As you can see in the output, setup_function() and teardown_function() run before and after test_case03(), respectively. unittest does not have a provision for the fixtures at the test function level. Actually, unittest does not support the concept of standalone test functions, as everything has to be extended from the TestCase class and a function cannot be extended.
It’s not mandatory that you name the function-level fixtures setup_function() and teardown_function(). You can name them anything you want (except, of course, for Python 3’s reserved keywords). They will be executed before and after the test function as long as you use them in the @with_setup() decorator.
Fixtures for Packages
unittest does not have a provision for package-level fixtures. Package fixtures are executed when the test package or part of the test package is invoked. Change the contents of the init.py file in the test directory to the code shown in Listing 4-6.
all = ["test_module01", "test_module02", "test_module03", "test_module04"]
def setUpPackage():
print("In setUpPackage()...")
def tearDownPackage():
print("In tearDownPackage()...")
Listing 4-6
init.py
If you run a module in this package now, the package-level fixtures will run before beginning any test and after the entire test in the package. Run the following command:
This table lists the alternate names of the nose fixtures.
Fixture
Alternative Name(s)
setUpPackage
setup, setUp, or setup_package
tearDownPackage
teardown, tearDown, or teardown_package
setUpModule
setup, setUp, or setup_module
tearDownModule
teardown, tearDown, or teardown_module
setUpClass
setupClass, setup_class, setupAll, or setUpAll
tearDownClass
teardownClass, teardown_class, teardownAll, or tearDownAll
setUp (class method fixtures)
setup
tearDown (class method fixtures)
Teardown
assert_equals( )
Until now, you have been using Python’s built-in keyword assert to check the actual results against expected values. nose has its own assert_equals() method for this. The code in Listing 4-7 demonstrates the use of assert_equals() and assert.
Both test cases failed due to incorrect test inputs. Note the difference between the logs printed by these test methods. In test_case02(), you get more information about the cause of the failure, as you are using nose’s assert_equals() method.
Testing Tools
nose.tools has a few methods and decorators that come in very handy when you’re automating tests. This section looks at a few of those testing tools.
ok_ and eq_
ok_ and eq_ are shorthand for assert and assert_equals(), respectively. They also come with a parameter for an error message when the test case fails. The code in Listing 4-8 demonstrates this.
from nose.tools import ok_, eq_
def test_case01():
ok_(2+2 == 4, msg="Test Case Failure...")
def test_case02():
eq_(2+2, 4, msg="Test Case Failure...")
def test_case03():
ok_(2+2 == 5, msg="Test Case Failure...")
def test_case04():
eq_(2+2, 5, msg="Test Case Failure...")
Listing 4-8
test_module06.py
The following shows the output of the code in Listing 4-8.
In setUpPackage()... test.test_module06.test_case01 ... ok test.test_module06.test_case02 ... ok test.test_module06.test_case03 ... FAIL test.test_module06.test_case04 ... FAIL
When you use the raises decorator before the test, it must raise one of the exceptions mentioned in the list of exceptions associated with the @raises() decorator. Listing 4-9 demonstrates this idea.
from nose.tools import raises
@raises(TypeError, ValueError)
def test_case01():
raise TypeError("This test passes")
@raises(Exception)
def test_case02():
pass
Listing 4-9
test_module07.py
The output is as follows:
In setUpPackage()...
test.test_module07.test_case01 ... ok test.test_module07.test_case02 ... FAIL
As you can see, test_case02() fails, as it does not raise an exception when it is supposed to. You can cleverly use this to write negative test cases.
The @timed( ) decorator
If you are using a timed decorator with the test, the test must finish within the time mentioned in the @timed() decorator to pass. The code in Listing 4-10 demonstrates this idea.
from nose.tools import timed
import time
@timed(.1)
def test_case01():
time.sleep(.2)
Listing 4-10
test_module10.py
This test fails, as it takes more time to finish the execution of the test than is allotted in the @timed() decorator. The output of execution is as follows:
It is the collection or group of related tests that can be executed or scheduled to be executed together.
Report Generation
Let’s look at the various ways to generate comprehensible reports using nose.
Creating an XML Report
nose has a built-in feature for generating XML reports. These are xUnit-style formatted reports. You have to use --with-xunit to generate the report. The report is generated in the current working directory.
nose does not have a built-in provision for HTML reports. You have to install a plugin for that. Run the following command to install the HTML output plugin:
sudo pip3 install nose-htmloutput
Once the plugin is installed, you can run the following command to execute the test:
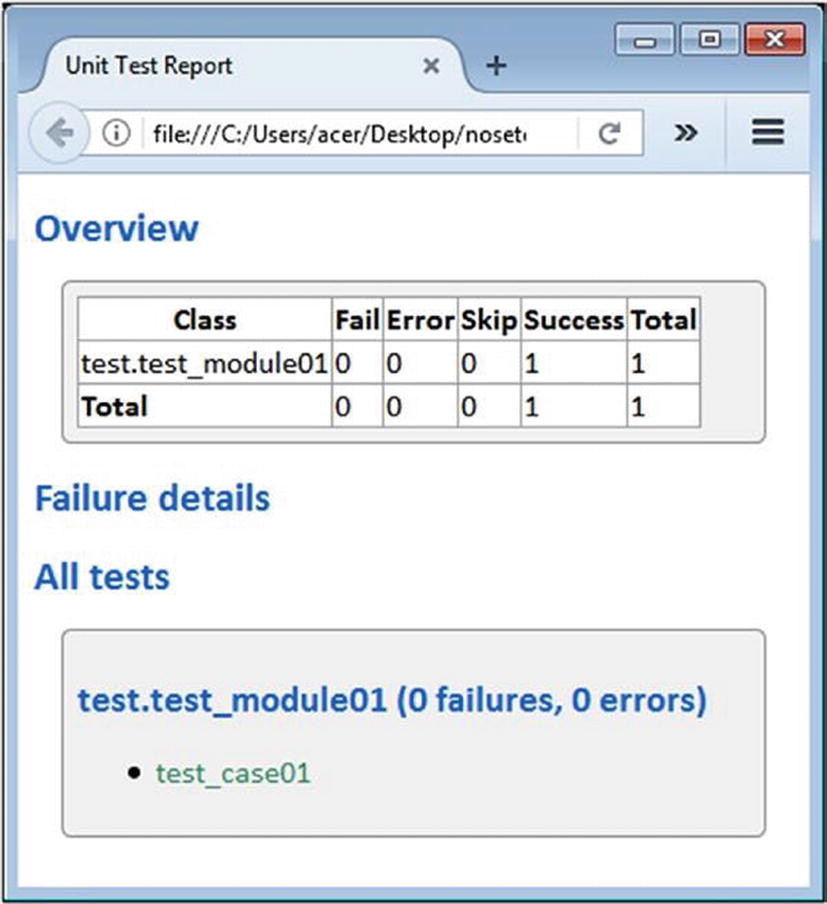
The plugin saves the output in the current location in a file called nosetests.html.
Figure 4-3 shows a snapshot of the nosetests.html file, opened in a web browser.
Figure 4-3
The nosetests.html file
Creating Color Output in the Console
Until now, you saw methods that generate formatted output files. While running nosetest, you must have observed that the console output is monochrome (white text on a dark background and vice versa). The plugin called rednose is used to create colored console output. You can install that plugin using the following command:
sudo pip3 install rednose
Once the plugin is installed, run the following command:
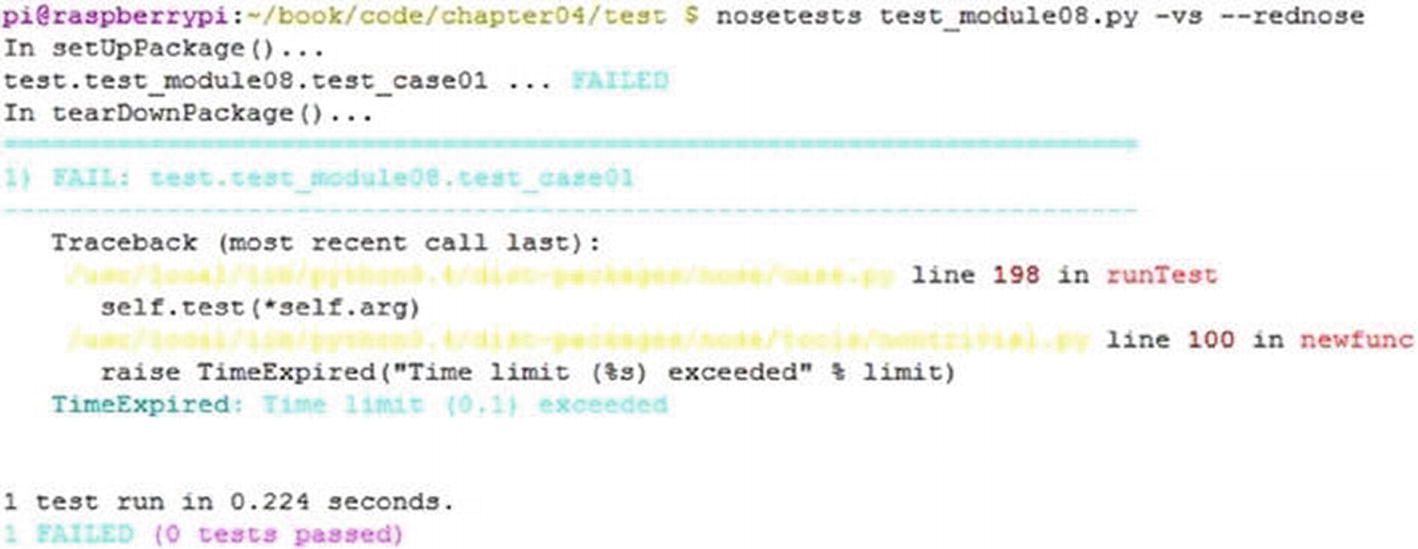
nosetests test_module08.py -vs --rednose
Figure 4-4 shows a screenshot of the output, although you won’t see it in color here, due to the grayscale nature of the published book.
Figure 4-4
A rednose demo
Running unittest Tests from nose
In the beginning of the chapter, you read that you can run unittest tests with nose. Let’s try that now. Navigate to the chapter03 directory. Run the following command to discover and execute all of the unittest tests automatically:
nosetests -v
This is the output:
test_case01 (test.test_module01.TestClass01) ... ok
test_case02 (test.test_module01.TestClass01) ... ok
test_case01 (test.test_module02.TestClass02) ... ok
test_case02 (test.test_module02.TestClass02) ... ok
test_case01 (test.test_module03.TestClass03) ... ok
test_case02 (test.test_module03.TestClass03) ... ok
Here is a summary of the advantages of nose over unittest:
Unlike unittest, nose does not require you to extend test cases from a parent class. This results in less code.
Using nose, you can write test functions. This is not possible in unittest.
nose has more fixtures than unittest. In addition to the regular unittest fixtures, nose has package- and function-level fixtures.
nose has alternate names for fixtures.
nose.tools offers many features for automating test cases.
Test discovery is simpler in nose than in unittest, as nose does not need a Python interpreter with the discover subcommand.
nose can recognize and run unittest tests easily.
Disadvantages of nose
The only and biggest disadvantage of nose is that it is not under active development and has been in maintenance mode for the past several years. It will likely cease without a new person or team to take over its maintenance. If you’re planning to start a project and are looking for a suitable automation framework for Python 3, you should use pytest, nose2, or plain unittest.
You might be wondering why I even spent time covering nose if it is not being actively developed. The reason is that learning a more advanced framework like nose helps you understand the limitations of unittest. Also, if you are working with an older project that uses nose as the test automation and/or unit-testing framework, it will help you understand your tests.
Using nose2
nose2 is the next generation of testing for Python. It is based on the plugins branch of unittest2.
nose2 aims to improve on nose in the following ways:
It provides a better plugin API.
It is easier for users to configure.
It simplifies internal interfaces and processes.
It supports Python 2 and 3 from the same codebase.
It encourages greater community involvement in its development.
Unlike nose, it is under active development.
nose2 can be installed conveniently using the following command:
sudo pip3 install nose2
Once installed, nose2 can be invoked by running nose2 at the command prompt.
It can be used to auto-discover and run the unittest and nose test modules. Run the nose2 -h command at the command prompt to get help with the various nose2 command-line options.
The following are the important differences between nose and nose2:
Python versions
nose supports Python version 2.4 and above. nose2 supports pypy, 2.6, 2.7, 3.2, 3.3, 3.4, and 3.5. nose2 does not support all the versions, as it is not possible to support all the Python versions in a single codebase.
Test loading
nose loads and executes test modules one by one, which is called lazy loading. On the contrary, nose2 loads all the modules first and then executes them all at once.
Test discovery
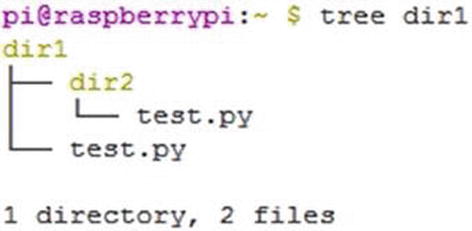
Because of the difference between the test loading techniques, nose2 does not support all the project layouts. The layout shown in Figure 4-5 is supported by nose. However, it will not be loaded correctly by nose2. nose can distinguish between ./dir1/test.py and ./dir1/dir2/test.py.
Figure 4-5
nose2 unsupported test layout
You can run tests with nose2 as follows:
nose2 -v
You can also parameterize tests, as shown in Listing 4-12.
You can directly launch the test script from any IDE without specifying the nose2 module by modifying the code, as shown in Listing 4-13.
from nose2.tools import params
@params("Test1234", "1234Test", "Dino Candy")
def test_starts_with(value):
assert value.startswith('Test')
if __name__ == '__main__':
import nose2
nose2.main()
Listing 4-13
test_module20.py
You can launch it directly from any IDE like IDLE and it will produce the same results.
Exercise 4-1
Check if the codebase in your organization is using unittest, nose, or nose2. Consult with the owners of the codebase and plan a migration from these frameworks to a better and more flexible unit-testing framework.
Conclusion
In this chapter, you learned about the advanced unit-testing framework, nose. Unfortunately, it is not being developed actively so you need to use nose2 as a test-runner for nose tests. In the next chapter, you learn about and explore an advanced test automation framework called py.test.