Chapter 3. Building Your First Dapp
Enough with the theory, let’s get to building. I’m going to assume that you have built at least one software application before. Building a dapp isn’t that much more difficult than building a regular app. The added complexity comes from having to think in a decentralized way and not having as many mature libraries at your disposal as a regular app developer does.
This chapter will take you through the process of building a decentralized Twitter clone from source. We’ll cover the following:
-
The Go language
-
Decentralized architecture and the IPFS distributed data store
-
Kerala, an IPFS interface
-
Coinprism, a colored coins wallet service
-
Mikro, a decentralized messaging app with an internal economy.
Go
We’ll be using Go for our dapp. Go has garnered a lot of interest from backend developers for its simple callback-hell-free syntax, fast computational time, and concurrency friendly “go-routines.” Erlang and Rust are two others that claim to be superior to Go, and perhaps they are in some ways, but unlike Go, their libraries are in a very, very early stage of development.
JavaScript is also pretty popular these days, and with the advent of Node.js, JavaScript developers are no longer limited to frontend roles. They can create and maintain the entire web stack with one language (and, of course, HTML/CSS). JavaScript is the language of the Web and JavaScript developers can use a wide variety of JavaScript frameworks to build their web apps. Although JavaScript is great, it has its weaknesses. Concurrency is nontrivial to implement and it has confusing value constructors. Go makes up for these and is built for more distributed-type systems.
I’ve developed web apps built by using Go and web apps built by using JavaScript. Both languages have their pros and cons, but I have to admit that I’ve found Go to be the most efficient for building dapps. Google created Go because it needed a language that could handle the Google-scale concurrent computation of large datasets as fast and efficiently as possible. Go was the answer to that problem, and its use internally at Google has increased significantly since its first release.
Go has the power and speedy compile time of C and the elegance and brevity of Ruby. It was built for distributed systems, and that’s why I keep coming back to it when I think about building dapps. The fact that IPFS was built using Go is also a plus because you can integrate distributed file storage into your app without compatibility barriers. There are many Go-based web frameworks to choose from: Martini, Goji, Gorilla, and even Go’s standard net/http package. I like keeping my dependency stack as lightweight as possible so I build with net/http, my go-to, and I only reach for other web app libraries as they become necessary.
Centralized Architecture
There are three paradigms that are commonplace when building a standard server-client–based web app. Let’s discuss them a bit.
REST
The server-client model is relatively simple and has become the de facto way to exchange data across the Web. REST, or Representational State Transfer, is a set of guidelines and best practices for creating scalable web apps usually based on the server-client model. REST is a named practice (just like AJAX), not a technology in itself. It encourages use of capabilities that have long been inherent in the HTTP protocol, but seldom used. The user can just point his browser to the URL (Uniform Resource Locator) and by doing so he is sending an HTTP request. Each HTTP request has information in the form of parameters that the server can use to decide what kind of HTTP response to send back to the client who issued the request.
CRUD
CRUD stands for Create-Read-Update-Delete. These are the basic operations to be done in a data repository. You directly handle records or data objects; apart from these operations, the records are passive entities. Typically, it’s just database tables and records. Whereas REST interacts with a working system, CRUD manipulates data in the system. Typically developers would use a database like MongoDB or MySQL to perform CRUD actions on their data.
MVC
MVC stands for Model-View-Controller, and it’s currently the most popular software programming paradigm. Models manage core behaviors and data of the app. Views render the user interface for the app. Controllers receive user input and make the necessary calls to model objects and the view to perform certain actions.
Decentralized Architecture: Introduction to IPFS
So, what happens to CRUD and REST in a decentralized architecture? They become one and the same. This is because data will live in a decentralized network of computers owned by no one, as is the case with IPFS. Performing operations or handling requests on data locally is the same as doing it remotely. You and everyone else are the server and the client. This sounds more complicated than it actually is. IPFS is my decentralized storage solution of choice because it has gotten farther than any of the competitors in the space and synthesizes great ideas from years of research in the space with proven practices.
When you build your dapp, it won’t run on a server; rather, it will run locally on all your users’ computers. We still haven’t solved decentralized computation, and uploading the compute to a centralized virtual machine (VM) like Heroku would defeat the purpose of decentralization, so the right way to deploy a dapp is as a downloadable binary. Users can download it to their desktops and then access the dapp using either a web browser or directly within a client interface—for example, Spotify or Skype.
Dapps will require data storage in some form or another and as such they will double as IPFS-distributed file storage nodes. An alternative would be to just use a third-party IPFS node on a server to store the data, but then that cloud provider would be a central point of failure. Inevitably someone is going to buy some Amazon EC2 space, host a node there, and offer IPFS-node-as-a-service to make it easier for beginners to get started with using it. The data would be replicated from there as people request files on a case-by-case basis. An IPFS cloud node would also be great for mobile dapps, given that running an IPFS node takes a good chunk of processing power, and that correlates to losing a good chunk of battery life for laptop users.
Nodes can be incentivized by uploaders to store data by being paid in dollars or a cryptocurrency. IPFS creator Juan Benet published a paper for a currency called FileCoin to do just that, but work on it still hasn’t begun and thus cannot benefit us yet. In the meantime, the floor is open for anyone to create incentive schemes for data storage alongside IPFS so that nodes don’t need to be online to have their data available for use. The more decentralized, the better. Even if an IPFS node server was taken down, if the data were useful at all, there would be copies stored by everyone who requested it. Such is the beauty of IPFS and why the creator refers to it as the permanent web. You could potentially also pay the server to “pin” your data. Someone might not want your data now, but eventually they will. As long as someone wants your data, it will live on.
A mobile app would be cool to build, but for this demo tutorial I’m going to focus on writing a desktop dapp because IPFS still doesn’t have a solid Swift/ObjC or Android wrapper.
Let’s look at two key commands in IPFS:
-
ADD - Add data to IPFS
-
CAT - Read data from IPFS
Notice how there is no delete command. IPFS is the permanent Web! After you add data to the network, unless you are the only one hosting the data, there is no way for you to delete the data you’ve added. This is because other nodes will have a copy of the data as soon as they access it. Also notice how there is no update command, because IPFS has Git’s methodology built in. When you update a file, the file itself isn’t deleted, it’s versioned. You can create a merkleDAG for that file such that the latest hash is the latest version of the file. All older versions still exist, and you can still access them if you desire.
When you add data to IPFS, you are essentially just broadcasting to the network that you have the data; you aren’t actually sending it to someone’s computer. That only happens when someone requests the data. And because the data lives on the network, manipulation is a result of commands to the network, as well.
IPNS (the naming layer on top of IPFS) gives the appearance that updating and deleting are possible through mutable names. With IPNS you can publish a DAG of data under your immutable peer ID, and then whenever someone resolves your peer ID, she can retrieve the DAG hash. IPNS can only store a single DAG entry per peerID, so if you want to update or delete data, you can just publish a new DAG to your peerID. We’ll get into implementation details of this later in this chapter.
What about MVC architecture?
Well, it’s still there. What? No wildly novel methodology for structuring my code? Nope, models stay the same, controllers use IPFS for data storage and retrieval, and views are just HTML/CSS/JavaScript.
What about smart contracts? What role do they play?
In a dapp, there are certain elements that need consensus via smart contracts that would usually require a server. Usernames are a great example, as are financial actions such as escrow and property ownership. Smart contracts are technically “models,” and you can feed data into them via transactions, but they are not the de facto “model” in MVC architecture. They can work alongside your existing models but their utility really applies in specific scenarios. These will come up on a case-by-case basis, and we’ll learn how to build smart contracts later on in the book. The saying goes that we need smart models, thin controllers, and dumb views.
Eris Industries has a framework for building dapps called the Decerver. It has a whole lot of literature on its website explaining how to use it and all of the different and revolutionary methodologies it is implementing to help make dapp creation easier. It says that the models are the smart contracts, but the problem is that smart contracts are pay-to-play and should be orthogonal to model creation. It’s an unnecessary complexity. MVC still applies in a decentralized app and your controller will speak to blockchains and DHTs instead of servers.
What Are We Building?
For our first app, we’re going to build a decentralized version of Twitter. The bitswap mechanism of IPFS would mean all the nearest nodes could just pull the data from the node hosting it locally. Decentralized Twitter would be a useful tool to have, but this isn’t the first time it’s been done. A Brazilian developer named Miguel Freitas created a Twitter dapp called Twister a few years ago. Alas, Twister was plagued by a variety of security bugs that spammers took hold of, and Freitas was forced to implement rough fixes using the only tools he had. The patches are rough because they employ techniques like making the new user complete a proof-of-work to verify her identity after signing up, which was done to prevent Sybil attacks. This creates a high barrier to entry for new users who just want to try the system without having to dedicate computing power to prove themselves a good actor. Twister is also relatively difficult to install and setup.
We can benefit from a new version of a Twitter dapp because we’re going to utilize new technologies like IPFS and Bitcoin. We’ll call the dapp Mikro, and it’s a great first dapp to work on because it’s like an MVP for dapps. The data is relatively simple and straightforward: you are a user and you output microposts. You can discover new users and see their microposts.
Setup
Let’s set up our Go environment. I’m all about reducing complexity where it’s not necessary. Luckily, Go has package installers for Linux and Mac OS X. (Sorry, Windows users, we’re going to focus on Unix-based systems).
The great thing about these package installers is that they will automatically install the Go distribution to usr/local/go and set our path variables. Path variables are one of those “gotchas” in software configuration. They link your libraries to Terminal keywords you can use to call them. If it didn’t set our path variables, we would have to set them ourselves, like so:
exportGOROOT=$HOME/goexportPATH=$PATH:$GOROOT/bin
In this example, $HOME is where we’ve installed Go (usr/local/).
After you’ve installed Go, let’s test it to ensure that everything is working. In the src/ folder, create a new folder called tests/, and inside that folder create a file called helloworld.go. Type in the following in Terminal to begin editing the file:
'nanohelloworld.go'
Add the following code snippet to the file and save it:
packagemainimport"fmt"funcmain(){fmt.Printf("hello, world ")}
Then, run it with the Go tool:
$gorunhello.go
If the console displays hello, world!, this means that Go has installed properly.
Great—now we want to install our dependencies. First and foremost, let’s install IPFS. Go makes it relatively straightforward to install dependencies directly from its source on the Web. To install IPFS, type this into your console:
goget-dgithub.com/ipfs/go-ipfs
After installation, Source your bash:
Source~/.bashrc
Dependencies that are installed via the go get command are fetched and built for you. They are stored in the src folder of your Go root folder. If you cd into your src folder, you’ll find another folder called github.com. Go will slice the URLs that you pull libraries from such that each component of a URL becomes its own folder. So inside of the github.com folder, there will be a jbenet folder. Inside of that will be a go-ipfs folder, and so on. This is useful because if you pull a lot of dependencies from a single source, Go will automatically sort them for you in their respective folders. So all of your GitHub dependencies go in your github folder, with the names of the GitHub users you are forking from getting their own folder name.
To begin using IPFS, you need to initialize its config files on your system, as follows:
'ipfsinit'
This will take a few seconds; it’s adding bootstrapped (hardcoded) peers to your configuration and giving your node an identity key-pair to identify as a peer to the network when you add or pin a file.
When you type ipfs into your Terminal after init completes, you should get the following prompt:
ipfs-globalp2pmerkle-dagfilesystemipfs[<flags>]<command>[<arg>]...Basiccommands:initInitializeipfslocalconfigurationadd<path>Addanobjecttoipfscat<ref>Showipfsobjectdatals<ref>ListlinksfromanobjectToolcommands:configManageconfigurationupdateDownloadandapplygo-ipfsupdatesversionShowipfsversioninformationcommandsListallavailablecommandsidShowinfoaboutipfspeersAdvancedCommands:daemonStartalong-runningdaemonprocessmountMountanipfsread-onlymountpointserveServeaninterfacetoipfsdiagdiagnosticsPlumbingcommands:blockInteractwithrawblocksinthedatastoreobjectInteractwithrawdagnodesUse'ipfs<command>--help'tolearnmoreabouteachcommand.
These are all the commands in IPFS, and it means your installation was successful.
Now try to add something to IPFS:
ipfsaddhello
It should return something that looks kind of like this:
#QmT78zSuBmuS4z925WZfrqQ1qHaJ56DQaTfyMUF7F8ff5o
This is the hash of the data you just added. That data still lives on your computer, but now there is a content address associated with it, and anyone who has that address can retrieve the file directly from your computer as long as you’re online. As soon as he retrieves it, he will have the data as well. From there, people who want the data will pull it in bits from both your and their computer. The more peers who store the data, the faster the download will be, just like BitTorrent. Unlike BitTorrent, IPFS has the added benefits of versioning and a naming system built in.
Now that you’ve added some data to IPFS, let’s try CATing it back:
ipfscat<thathash>
This should pull and display hello in the console. It’s pulling it directly from your computer.
The next dependency is Kerala. Kerala is a little wrapper I wrote around IPFS and Colored Coins to help us create decentralized Twitter, although it’s general purpose so you can use it for other dapps as well. Kerala makes it easy for you to add data to IPFS to form a MerkleDAG. You can install it with the following command in Terminal:
goget-ugithub.com/llSourcell/go-kerala/kerala
Here’s an example of how easy it is to add and retrieve data from IPFS:
//Start a nodenode,err:=kerala.StartNode()iferr!=nil{panic(err)}//Add your text to IPFS (Creates MerkleDAG)varuserInput=r.Form["sometext"]Key,err:=kerala.AddString(node,userInput[0])//Get all your text from IPFS (Retrieves MerkleDAG)tweetArray,_:=kerala.GetStrings(node)
The first snippet of code starts a node, so your dapp doubles as an IPFS client. It starts up the daemon, so you broadcast yourself as a peer to the network. The second snippet of code lets you add text to IPFS. You can add any kind of data to IPFS: video, images, data structures. But for this example we are going to use the AddString method to simply add a string to IPFS. What the wrapper does is every time you add a string, it creates a new hash for that string. Then, it links that hash to the previous hash. The link is an abstract term but essentially what it means is if you request the hash of the latest string, it will also subsequently get the hashes of all linked strings.
The links from a data structure that IPFS labels as a MerkleDAG. It’s a directed acyclic tree graph that you can use to relate data. This is a great use for a Twitter dapp; every time you tweet, the wrapper will just link it up with your previous hash and store that new hash locally in a text file on your computer called output.html. Only you know that hash’s key and can access that data but you will be sharing it with other people on the network.
The last snippet of text essentially performs an “ipfs cat” on the hash associated with your peerID (using IPNS) and stores it in an array for you to use and display in your view.
You’ll also use a lightweight dependency called httprouter that helps making web apps easier. You can install it by using the following commands in Terminal:
goget–ugithub.com/julienschmidt/httprouter
Now that you have all of our dependencies installed, you can go ahead and download the dapp we’re going to be building from source. I’ve taken the liberty of writing the app beforehand—there is just too much code to ask you to write from scratch in one go—so it would be best if I walk you through the dapp in a detailed way after you download it, build it, and run it. In the console, type the following:
goget–ugithub.com/llSourcell/dapp
For your reference, these are all of the imports the dapp uses. All of them except for IPFS, Kerala, and httprouter are a part of the standard Go library:
import("net/http""github.com/julienschmidt/httprouter""github.com/ipfs/go-ipfs/""path""html/template""fmt""log""github.com/llSourcell/kerala")
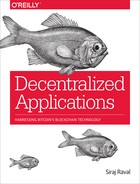
cd into the dapp folder in your Go workspace, and then, after running ' go install . '. In that directory, type ' go run app.go ' to run the app. Go to localhost:8080 and you should see your profile page show up. It will look something like that shown in Figure 3-1.
There won’t be any posts, because you haven’t added any. (The graphic shows my profile page after I added a series of posts.) Now, submit four or five different tweets via the text field. After each submission, return to the home page and refresh to view them. The app consists of a home page that doubles as your profile page. It shows all of your posts. The app also has a discover page to help you find other users and their profiles. Let’s call this demo app Mikro.

Figure 3-1. My screen
Routing
Let’s take a look at the routes first. The app is using a generic thin lightweight routing library (httprouter) built on top of Go’s native net/http package to make routing simple. Recall that in standard web apps the GET and POST methods are used frequently to relate page loads to data requests or sends. The same thing is happening in the routes, and the data actions (IPFS CAT and ADD) are happening alongside them.
In the main method of app.go, you’ll find the routes:
//[2] Define routesrouter:=httprouter.New()//Route 1 Home (profile)router.GET("/",TextInput(node))//Route 2 Discover pagerouter.GET("/discover",displayUsers(node))//Route 3 Other user profilesrouter.GET("/profile/:name",TextInput(node))//Route 4 Add text to IPFSrouter.POST("/textsubmitted",addTexttoIPFS(node))//[3] link resourcesrouter.ServeFiles("/resources/*filepath",http.Dir("resources"))http.Handle("/resources/",http.StripPrefix("/resources/",http.FileServer(http.Dir("resources"))))http.Handle("/",router)//[4] Start serverfmt.Println("serving at 8080")log.Fatal(http.ListenAndServe(":8080",router))
Start off by initializing the router as a struct:
router:=httprouter.New()
As an aside, Go isn’t exactly an object-oriented programming (OOP) language in the traditional sense like most other languages. It follows a model similar to OOP, but it is different. Structs are Go’s version of Objects. Structs have fields and methods and they feel like objects. But in regular OOP, we use the class keyword to define objects. This helps with inheritance, but Go is designed without inheritance. Although this might seem like a bad feature at first, it’s actually a pretty good thing. Inheritance can get messy when you have lots of classes and different interfaces and implementations extending each other down a hierarchy. Instead Go uses subtyping (is-a) and object composition (has-a) to define relationships between structs and interfaces.
Our first route defines the method we call when the user goes to the page localhost:8080/. It’s the page you first saw when you started up the app for the first time. Route 2 is the discover page. The discover page lets you see all peers on the network that are currently online and using the app. Route 3 is a model URL. Notice the :name keyword after /profile/. It’s used to load any user’s profile; when you replace name with a user ID, the URL will load the profile model with the specified user’s ID information. The user ID in this case would be the IPFS NodeID that’s created when you start the IPFS daemon. Every IPFS node gets its own Node ID, and because your Mikro instance is an IPFS node, you will have one, too. Route 4 adds text to IPFS as a POST. Whenever the user submits a post, it is added to IPFS via this route. [3] and [4] are configuration lines for linking the server to its resources and starting it up at port 8080 of localhost.
Data Storage and Retrieval
Notice the “start the node” code at the very top of the main method:
node,err:=kerala.StartNode()iferr!=nil{panic(err)}
That’s all it takes for your instance of the app to be a part of the IPFS network.
After you submitted your first five posts to the network, you saw each of them appear in the posts table underneath the “submit text” button, one by one. You just added your first data to the dapp! Remember, adding data to IPFS doesn’t mean it’s split into a million pieces and now lives on a bunch of different people’s computers and no matter what happens, government or otherwise, no one can ever take it down. What you’ve done is broadcasted to the network that you own the data you’ve submitted. It’s local, it’s stored on your computer. If you go offline, so does the data.
This is the problem that some dapps like Twister had: You need to stay online at all times. But the great thing about IPFS is that it aims for permanence and makes it possible to reach a stage of data permanence. Whenever others in the Mikro dapp see your tweet, they will store a copy of it, as well. And this happens recursively throughout the network. The more people that CAT your data, the more places it’s stored.
We’re going to need that IPFS node struct throughout the app. All CRUD/REST actions are based on it. One option is to create a global var; it’s certainly an easy way to start, but creating globals is bad practice, particularly because it makes debugging a nightmare at scale. Instead, we’ll create a type and pass the variable into each method call in the routes:
typeIPFSHandlerstruct{node*core.IpfsNode}
We’ll wrap the required router function with another function so that we can pass the node in as a variable. Let’s look at the code that adds the data to the network:
funcaddTexttoIPFS(node*core.IpfsNode)httprouter.Handle{returnfunc(whttp.ResponseWriter,r*http.Request,pshttprouter.Params){r.ParseForm()fmt.Println("input text is:",r.Form["sometext"])varuserInput=r.Form["sometext"]Key,err:=kerala.AddString(node,userInput[0])iferr!=nil{panic(err)}}}
We start off by parsing the form to get the input text as a string, and then add it to the IPFS network using the Kerala library’s AddString method, with the node as one parameter, and the string as the other. We’re going to get a key back as a return parameter. We then print it out. The key is the hash of the data we just submitted. And that’s it; that’s how you add data to the network. Now, let’s see how you can read and display data from the network onto your profile page.
When you first start the app, it goes to the home directory at “/” and the TextInput(node) method is called. Like the previous function, we wrap it in a proper http method so that we can also pass in the node as a variable:
funcTextInput(node*core.IpfsNode)httprouter.Handle{returnfunc(whttp.ResponseWriter,r*http.Request,pshttprouter.Params){
Next, let’s parse the URL to see if it has a nodeID (that is, peerID) in it. This method is the same method for other user profiles and your profile. We want to differentiate what we will do based on whether there is a userID in the URL:
varuserID=ps.ByName("name")
This will tell us if there is a name. If there isn’t a name (that means it’s your home profile), Kerala will pull the merkleDAG hash from our own nodeID using the IPNS resolving strategy. If there is a name, Kerala will get the DAG associated with the name by resolving it. The DAG is an acyclic directed graph, so every time a hash is added to it, it points backward in time to all previous hashes. Does that mean a user’s identity is constantly changing? No—that’s what’s great about IPNS. Kerala utilizes both IPNS and IPFS to work seamlessly together. It will associate the HEAD node of a particular DAG with a particular peerID, republishing to IPNS as necessary when new data is added.
We have two possible cases here that are codified. The first case is if the URL doesn’t contain a peerID. This means that it’s the home page, and we should be pulling your tweets:
ifuserID==""{pointsTo,err:=kerala.GetDAG(node,node.Identity.Pretty())tweetArray,err:=kerala.GetStrings(node,"")iferr!=nil{panic(err)}
In this case, we resolve your DAG hash from your peerID. Then, we CAT all your tweets from that hash.
If the tweet array is nil, we’ll just nil to the frontend:
iftweetArray==nil{fmt.Println("tweetarray is nil")demoheader:=DemoPage{"Decentralized Twitter","SR",nil,true,balance}
If we have tweets, we’ll go ahead and send those to the frontend:
else{fmt.Println("tweetarray is not nil")demoheader:=DemoPage{"Decentralized Twitter","SR",tweetArray,true,balance}
The other case is if the URL does contain a peerID. This means that we’re trying to view someone else’s profile.
We’ll go ahead and attempt to resolve that person’s peerID:
pointsTo,err:=kerala.GetDAG(node,userID)
If it resolves, we do exactly what we did before, extract tweets from the DAG and send them to the frontend. If it doesn’t resolve, that means the user hasn’t published any tweets to Mikro, so we’ll just return nil, and a blank profile page will show up.
Passing and Displaying Data to the Frontend
Let’s take a look at the template model we have for our profile at index.html.
We start out with reference calls to Twitter Bootstrap and jQuery, two popular frameworks for building simple web apps quickly:
<linkrel="stylesheet"href="http://maxcdn.bootstrapcdn.com/bootstrap/3.2.0/css/bootstrap.min.css"><scriptsrc="https://ajax.googleapis.com/ajax/libs/jquery/1.11.1/jquery.min.js"></script><scriptsrc="http://maxcdn.bootstrapcdn.com/bootstrap/3.2.0/js/bootstrap.min.js"></script>
After we have imported our dependencies, we add in a navbar. After adding in our navbar, we add in our two main divs: the submit div and the post table div:
<center><divid="submitform"><formaction="/textsubmitted"method="post"><inputtype="text"name="sometext"><inputtype="submit"value="submittext"></form></div></center><br><divid="posts"><formname="tableForm"><bodyonload="insertTable();"><divid="wrapper"align="center"></div></form></div>
Our submit div creates a standard text input and submits it by referencing the /textsubmitted URL via POST method. After a user clicks the submit input button, it will go to the URL with the string as a parameter and it will call the method we discussed earlier, addTexttoIPFS.
We’re going to put our posts in an HTML table to keep them organized. Because posts are dynamically added, our table must be dynamically sized and resized with each new post. We’ll use JavaScript to achieve this:
functioninsertTable({vararr=[{{range.Tweet}}{{.}},{{end}}];console.log(arr.length);varnum_cols=1;varwidth=100;varalignright="<td style='text-align: right'>"vartheader="<table id='table1' width = ' "+width+"% '>";vartbody="";for(varj=0;j<num_cols;j++){theader+="<th text-align='left'><font face='verdana'>My Posts"+" </font></th>";}varstr1="{{ index .Tweet 1}}";for(vari=0;i<arr.length;i++){tbody+="<tr>";tbody+="<td>";tbody+="<b>"+arr[i]+"</b>";tbody+="</td>";tbody+="</tr>";}vartfooter="</table>";varendalignright="</td>"document.getElementById('wrapper').innerHTML=alignright+theader+tbody+tfooter+endalignright;}
We use the {{ }} brackets to reference the data (tweets) we passed in from the frontend via the Demoheader struct:
vararr=[{{range.Tweet}}{{.}},{{end}}];
We then get the size of that array through JavaScript’s native len method. We use that size as the upper bound of our for-loop and iterate through the array. Before the array iteration loop, we go ahead and create HTML headers for the table that are static. Next, for each element in the array we’re going to create a new table object. Inside of each table row is going to be a post. Then, we end it by combing the static elements with the dynamically created elements in the loop with the line:
document.getElementById('wrapper').innerHTML=alignright+theader+tbody+tfooter+endalignright;
At the bottom of the fill inside of the style tags, you’ll find some of the styling I’ve added. Notice how it’s completely plain because this is just a demo to get you up to the basics of creating a dapp, not Design 101.
Let’s move on to the discover page. The home page lets you see your own tweets, and the profile/:name URL lets you see the home page of every user on the network. How do we find these users? With the discover page, of course! Most social apps have some sort of discover page, and Mikro is no different. When you click the discover button on the navbar, you will see a list of peers that looks something like this:
AllpeersQmW3ssBgGLANKNKXiRxcQMmxg3FPd3tSwu2Dt96DBLbjBZQmRzjtZsTqL1bMdoJDwsC6ZnDX1PW1vTiav1xewHYAPJNTQmaCpDMGvV2BGHeYERUEnRQAwe3N8SzbUtfsmvsqQLuvuJQmepsDPxWtLDuKvEoafkpJxGij4kMax11uTH7WnKqD25DqQmUy5jHXui2KzZRC3ofzHKYGmJVqAJTCsRRo2EZ6Wzwee7
Peers are identified by their default peerID generated by IPFS. Let’s examine how we got them in app.go. Notice how the method displayUsers is called when the user routes to /discover. Our first step is to get all the peers from IPFS:
//get peerspeers:=node.Peerstore.Peers()data:=make([]string,len(peers))fori:=rangedata{// assuming little endiandata[i]=peer.IDB58Encode(peers[i])}fmt.Println("the peers are %s",data)
We pull all the peers from the peerstore; internally, this is the IPFS swarm peers command. Next, we create an array the length of peers and iterate through it. We use the method IDB58Encode to encode the peers to a pretty string that we can parse and store each one of them in the data array. Then, we pass the array back to the frontend of the discover.html page. The discover.html page is very similar to the user home page. It’s just a dynamically sized HTML table that fills in all the posts for the specified peer. The only difference is that it passes in the peer list array instead of the post’s array:
vararr=[{{range.Allpeers}}{{.}},{{end}}];
Dapp Economics
Now comes the fun part. Let’s turn this little dapp into its own micro economy. Recall the discussion of ideal forms of money in Chapter 3. Colored coins is currently the best solution for issuing assets within your dapp. You don’t want to have to deal with the pain and annoyance of bootstrapping a blockchain just so you can have your own appcoin. It’s not worth it when the Bitcoin blockchain already exists with its 500-plus supercomputer computing power worth of Sybil resistance. Although Counterparty offers a valuable solution, it introduces a new currency to the mold, unnecessarily complicating things, and doesn’t offer modularity of features. With colored coins, we can create an asset on the Bitcoin blockchain that is owned by no one and fluctuate in value with the value of the dapp itself.
So, how do we create our own set of colored coins? I’ve found the website Coinprism to be the easiest current solution. Coinprism is an online colored coins wallet. You can create your own account and you’ll be taken to the main wallet page. Creating a colored coin requires a fee of 0.0001 BTC. This is currently a necessary evil, until some service comes along and takes on the fee, kind of like Onename did for Namecoin identities. I went ahead and transferred 0.0005 BTC from coinbase to my colored coin wallet.
Then, you go to Addresses and Transactions → Create a New Color Address. The website will prompt you to create an address, as shown in Figure 3-2.

Figure 3-2. Create an address
Name your coin; most usually end with the word “coin,” but it’s not mandatory. Your coin could even double as the name of your app. like the WhatsApp competitor Gems. I chose a regular address because I don’t want to deal with offline storage. Next, transfer coins from your main address to the new address. Now with this new address, you can issue colored coins to yourself. Your main address will store both Bitcoins and colored coins. The fee is 0.001 BTC, and you can choose an arbitrary number of shares to be associated with the colored coins. I chose 100,000 (as shown in Figure 3-3), but you can choose a million if you’d like. It’s better to err on the bigger side of numbers so that you’ll have enough coins to go around if your dapp gets really big.

Figure 3-3. Issue colored coins
When the transaction has been completed, the new address will have all X shares of dapp coins you’ve just created, as demonstrated in Figure 3-4.
After you’ve finished that step, you should see your new currency on your wallet home page, next to your Bitcoin amount. Congrats! You now own all of the assets you’ve just created. Think of them as shares in your dapp startup. You can give them away to whomever you want, and as the valuation of your startup increases, so will the valuation of your shares. No more waiting for IPOs to become a public company.
These assets remove the barriers to entry for users to benefit and profit from using your dapp. It will incentivize users to grow the network as necessary to continue to gain assets to access scarce resources in the network; in this case, those scarce resources would be posts.

Figure 3-4. Your wallet
So how do we structure our Mikro economy? Do we charge users to make a post? We could, but to whom would the money go? Most likely, it would go to whatever nodes offer a third-party storage solution for our (encrypted) data. But for now, because we don’t have a system like that yet in IPFS, we will make it free to post, pay to view. That means a user can make as many posts as he likes for free, but to view other users’ posts, he’ll need to pay the author of the post a small, preset amount of coins. That way, users will be paid for outputting data to the network, and they can use the money they earn to either view other tweets, or spend it on outside expenses.
Kerala isn’t just a wrapper for IPFS, it also makes sending transactions easy with just a single function call. Recall that in the TextInput method called on all profile pages, that if a profile page is loaded that has posts and belongs to another user, this function is called:
hash:=kerala.Pay("1000","1HihKUXo6UEjJzm4DZ9oQFPu2uVc9YK9Wh","akSjSW57xhGp86K6JFXXroACfRCw7SPv637","10","AHthB6AQHaSS9VffkfMqTKTxVV43Dgst36","L1jftH241t2rhQSTrru9Vd2QumX4VuGsPhVfSPvibc4TYU4aGdaa")
This function pays the user profile page that you are viewing a set amount to view all of the user’s posts and returns the transaction hash for your records.
The parameters of the pay method are as follows:
Pay(feestring,from_addressstring,to_addressstring,amountstring,asset_idstring,private_keystring)(string)
fee string-
This is the required fee to send a transaction.
from_address-
This is your asset address.
to_address-
This is asset address of the user whose post you want to read.
amount string-
This is how much you want user A to pay user B to access user B’s posts.
asset_id string-
This the ID of the asset that the dapp owner has created.
Right now, all cryptocurrency-related data is dealing with the test version of the Coinprism API. When you are ready for production, you can change this to the production version of the API, and the docs on Coinprism make it simple. (You just switch out the test URL to the production URL in Kerala.)
The pay method creates a transaction, takes the unsigned response, and calculates its hex value. Then, it signs the hex value and pushes it to the network. The returned value is the hash of the transaction that you can verify on the Bitcoin blockchain. Sending cryptocurrency transactions is more painful than it should be to do from scratch, so I thought abstracting it all to one method would be useful.
There is one more method called GenerateAddress. For your dapp, you can set it so GenerateAddress is called when a user first runs the app so that he has his own asset address from which to send and receive funds.
Remaining Problems
There are still some issues not implemented in this demo, but all of them are possible and the dapp will likely be updated over time. I welcome any contributions.
Private Networks
You’ll notice that in this demo dapp, there are no friends. You have a profile, can discover other users, and see their posts after paying them, but you can’t “friend” them in the traditional sense of a social network. Friending someone requires data encryption. The idea is that your DAG is encrypted with a public-private keypair, and only those nodes that you trust on the network can gain access to your private keypair to unlock and view your data. If you unfriend someone, the app can generate a new public-private keypair and rebroadcast the private key to all of your remaining friends. This way, the old friend won’t still have access to your data. So where is this functionality? It’s called IPFS Keystore, and it’s still under development. By the time you get this book, it will most likely be done, and will be a simple matter of implementing a few extra lines of code. You can find the specification at https://github.com/ipfs/specs/tree/master/keystore.
Human-Readable Names
The peerIDs on the discover page are not very pretty. They’re unique, but they’re not human readable. Recall earlier in the book that we mentioned Namecoin as the technology completing Zooko’s Triangle and letting you create decentralized, human-readable, and secure names. Because peerIDs are already unique, you can prompt users to register a human-readable name on the Namecoin blockchain and then associate their peerID with their Namecoin name. Whenever you view data authored by a user, the app can verify that user’s identity by verifying on the Namecoin blockchain whether the user’s peerID sent the registration transaction for their Namecoin identity. An alternative is to create a web-of-trust within the app like a reputation system. Of course, the easiest alternative is to use a name shortening service (a centralized namespace), but it would introduce a central point of failure. My preferred method is Namecoin.
Showing Only Peers on Mikro, Not IPFS in General
The discover page shows all peers on the IPFS network instead of just peers who are using Mikro. As IPNS matures, this will become easier to accomplish, but we can set a file like app.config in our IPNS namespace and users looking for others can just iterate through the network and check whether each node has a Mikro-specific signature in our file. If they do, the node will be listed on the discovery page.
Tamper-Free Payments
In our code, we made a payment to a user via the Pay() method in Kerala before pulling the user’s data from IPFS. What if a bad user just removed that little Pay() snippet from the source code before accessing the node’s data? It’s entirely possible to do. Each user can have a listener running that waits for a payment to occur to their asset address. If a payment occurs, then and only then does the client send the payment sender a copy of the user’s private key to access her data. To get the asset address of another user, your dapp could store it as the first entry in its own publicly accessible DAG.
Where do smart contracts play into all this? Namecoin has its own smart contracts for name registration built in. Since Ethereum’s inception, Bitcoin’s core developers have learned a lot of lessons and made the scripting language more complete to allow for a wide range of applications, and this is one of them. Ethereum made some great research contributions to blockchain technology, but the unfortunate truth for them is that when it comes to decentralized apps, most often global consensus just isn’t necessary and proves to be too expensive.
Blockchains are really good at dealing with financial assets, but computation and storage are out of the question. An example of when you would use a smart contract is as a third-party escrow service. Funds would live on the blockchain until the deal was complete and would receive notice to be released to the specified address. This dapp didn’t require use of one, but we’ll see use cases later on.
And that’s it! You have just built and run your first dapp from source. Feel free to use it as a starting point to build your own profitable, open source startup.