4
Air and Water
Chapter Contents
Air, Hot Air, and the Power of Steam
Water Chemistry and How It Affects Your Baking
You Must Choose Your Flour, but Choose Wisely
The Science of Crispy, Chewy Cookies
Recipes
Seeded Crackers and Easy Flatbreads
Savory Baked Seitan with Spicy String Beans
Spicy Holiday Gingerbread Cookies
Patent-Violating Chocolate Chip Cookies
My Favorite Cake: Chocolate Port Cake
ONE NEEDS TO UNDERSTAND MORE THAN TIME AND TEMPERATURE TO UNDERSTAND BAKING: AIR AND WATER ARE ALSO KEY VARIABLES. While few of us would list air and water as ingredients, they’re critical to baked goods. Both breads and cakes rely on air and moisture for their texture, flavor, and appearance. Yeast adds lift and flavor to breads; baking powder and baking soda generate carbon dioxide to give cakes their rise. Air bubbles in whisked egg whites lift soufflés, lighten macaroons, and elevate angel food cakes. And what makes one chocolate chip cookie chewy and another crispy is only the difference of a few percentage points of water present in it after it’s baked.
Unlike cooking, in which the chemical composition is locked from the start—chefs can’t change the types of proteins in a fillet of salmon—baking requires a well-balanced ratio of ingredients to create gas and trap air. Achieving this balance is sometimes about precise measurements at the beginning; other times it’s about careful attention to the look and feel of a dough as it develops. If you’re an intuitive cook—winging it and adapting recipes on the fly—you’ll probably enjoy making bread. On the other hand, if you’re a methodical cook—one who enjoys precision and prefers a tidy environment—or you like to express affection though food, then baking cakes, pastries, and cookies will likely be your thing. Either way, the science behind both is fascinating.
In this chapter, we’ll start with a short examination of air, water, and flour and then cover the different ingredients used for generating air in both savory and sweet dishes: biological (yeast and bacteria), chemical (baking powder and baking soda), and mechanical (egg whites, egg yolks, and whipped cream).

Air, Hot Air, and the Power of Steam
If the ancient Greeks wrote cooking magazines, they probably would have listed fire, earth, water, and air as ingredients. Aristotle and other philosophers of his day considered these four classical elements to be fundamentally indivisible. Their proof? Adding water to fire didn’t create more of either but instead created a new “structure” they called steam.
While the ancient Greeks had a rather simplistic understanding of the science, they were on to something with their ideas about water and fire: the properties of air do change with temperature. As the temperature of air goes up, so does the potential amount of water in it. This is subtle but important: air—mostly nitrogen and oxygen, normally only 0.5 to 1% water vapor—can hold more water vapor as it heats up, if there is a source of water.
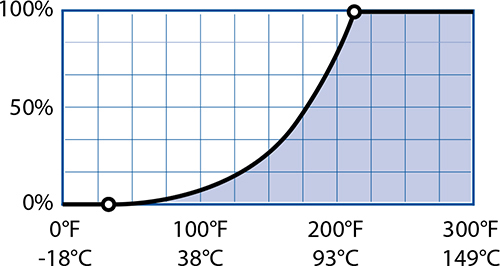
Maximum Percentage of Water Vapor by Temperature:
Hot, humid weather means more water vapor heating up your food as it bakes.
Water vapor matters in cooking because of what it does when it cools down. Technically, steam isn’t the same thing as water vapor. In science, steam refers to water droplets suspended in air while water vapor is invisible. I’ll use the science definition when talking about science. As temperature drops, the maximum percentage of water vapor in air also drops. At some point there will be too much water vapor dissolved in cooling air, causing it to condense (that point is called the dew point). You probably normally think of condensation as something that happens on a glass of iced tea on a hot summer day, but it happens in your oven too! A cold ball of cookie dough going into a hot oven will cause the air around it to cool and the water vapor in that air to condense.
Water vapor gives off an immense amount of heat when it condenses. The more water vapor there is in your oven, the stronger a thermal punch your cool cookie dough or cake batter is going to take from condensation and the quicker it’s going to heat up. A hot, dry oven will take longer to cook food than an oven at the same temperature but full of water vapor. Steam is powerful!
When you put a batch of cookies in your oven, hot air heats the cookie dough in two ways: convection and condensation (see page 143 for definitions). Convection is easy enough to imagine: hot oven air circulates over the surface of cold food, warming it up. (If your oven has a “convection” setting, that means it has a fan inside blowing air around, circulating that air faster. Using convection mode causes foods to cook faster and dry out faster, which is great for crispy pastries and crunchy breads but not so great for steamed buns or custards.)
Professional chefs often use combi steamers—ovens that control both humidity and temperature. Perhaps this will be standard for home ovens someday; until then, most of us are stuck with squirt bottles and pans full of water.
Condensation is tricky to understand because we don’t normally think about water vapor in our recipes (when’s the last time you saw a recipe that says set oven to 50% humidity?!). Changes in your kitchen’s humidity will change how foods cook from one day to the next, speeding up or slowing down how quickly they heat.
There’s no universal perfect humidity. To get a thick crunchy crust on rustic bread or crispy skin on roasted chicken, the surface needs to dry out, so you need a drier oven, at least toward the end of cooking. (Maillard reactions don’t happen when liquid water is around; see page 213.) If you’re making dinner rolls—breads with soft, lighter-colored surfaces—you’ll want a more humid oven. For steamed buns you need an even more humid cooking environment, like a steamer or rice cooker.
Adding humidity is easy enough: as your oven heats, add a baking pan of water on a lower shelf and keep it topped off. Or use a spray bottle and mist your oven before putting your dish in, taking care not to spray the light bulb (it can shatter!). Removing humidity is tougher: using an air conditioner or dehumidifier in the kitchen is your best bet.
Think about the culture and the climate in which a recipe originated. The original bakers wouldn’t be fighting against their environment; they would have adapted recipes and the desired outcome to suit their climate.
Humidity is more important for foods that involve yeast. Yeast and the enzymes it relies on are all temperature sensitive: yeast generates carbon dioxide most rapidly at around 90–95°F/32–35°C. Enzymatic reactions that the yeast relies on speed up as temperature increases, but at some point the enzymes denature and promptly stop working. (Most enzymes are proteins created by an organism and are used to break down other substances; like all proteins, they “cook” too.) Oven spring—the additional rise that dough undergoes when it first goes in the oven—depends on how quickly the surface of the bread dries out, how much sugar the enzymes produce, and how quickly the dough heats up (and thus how long the yeast survives).
The second major issue you’ll face in baking is the weather. Wintertime means lower humidity and colder indoor air temperatures, slowing down the time it takes for yeast to work (try letting the dough rise on top of your fridge or near a radiator). Summer weather brings higher humidity, leading to the chance that cakes won’t develop a strong enough “exoskeleton” and will fall (try using less water). Or it might rain one day (100% humidity, at least at room temperature), but a week later the air might drop down to 50% humidity. That’s twice the difference in the amount of water vapor and a major difference in how quickly things heat up without any change in room or oven temperatures. Careful attention to humidity, rise time, and room temperature can solve baking mysteries.
Have you checked your oven? If not, see the sidebar “The Two Things You Should Do to Your Oven RIGHT NOW” on page 35.
The other reason air is so critical in baking is the physical volume it takes up inside the food. Air expands as it heats up. Because most baked goods “set” with heat, the more air there is to expand, the more space it will take after baking, assuming egg proteins on the inside or flour starches on the outside set enough to create the necessary scaffolding to support everything after cooling.
How air gets into your batters and doughs will end up taking the rest of this chapter to explain. Recipes that use rising agents—anything that generates gas (yeast, baking soda)—rely on them to generate volume with small bubbles, almost always carbon dioxide. Anything without a rising agent, such as popovers, meringues, and soufflés, can rise only by either the expansion of already-present gas or water evaporating into gas. Regardless of the source, understanding and controlling air is an important part of the science of great baking.
Whether you’re camping in Colorado or baking in the Swiss Alps, the lower air pressure from being at elevation can cause all sorts of headaches: too-coarse crumbs, fallen cakes, and of course sunburn from enjoying the gorgeous terrain. Here are two key points:

Boiling point of water by altitude
Air bubbles in doughs and batters will expand more—potentially too much. Using yeast? Decrease the fermentation time. Chemical leaveners should be cut back by 10–25%; egg whites should be whisked to a slightly less stiff point. For doughs, making them sturdier will help avoid big internal air pockets; see the tips on increasing gluten on page 249 to figure out how to adjust your recipe.
Water will evaporate faster, leading to drier baked goods and more evaporative cooling. If your foods aren’t browning well, bump the heat up by 15–25°F/ 10–15°C to compensate for the increase in evaporative cooling. For batters, compensate by adding a ~10% quantity of water based on the volume of the liquid ingredients.
Adding salt to water raises the boiling point —fully saturated saltwater boils about 4°F / 2°C higher. It also increases the temperature of steam coming off of the water! If you’re at altitude and steaming something, adding salt to the water will bump the temperature up a few degrees.
A popover is a quick roll that rises entirely by water expanding as it turns into a gas. You can make savory versions by adding grated cheese and herbs, but my favorite is based on what my mom made when I was growing up: buttery popovers with a spoonful of strawberry or apricot jam, served for weekend breakfast.
Popovers are hollow. They’re unlike almost any other baked good—a descendant of Yorkshire pudding and cousin of Dutch baby pancakes. As the batter cooks, the top surface sets before the interior does, and as the interior cooks, water boils off into water vapor that is trapped by the top surface.
Traditionally, these are made in specialized popover cups, which are narrow, slightly sloped cups that have some heft to them, giving them good heat retention. Using muffin tins or ramekins works just as well.
Whisk together in a mixing bowl or blend in a blender:
1½ |
cups (355 mL) whole milk |
3 |
large (150g) eggs |
1½ |
cups (210g) flour (try half all-purpose, half bread to up the gluten content) |
1 |
tablespoon (15g) melted butter |
½ |
teaspoon (3g) salt |
Preheat both the oven and the popover cups or muffin tin at 425°F / 220°C.
Heavily grease the popover cups or muffin tins with butter: melt a few tablespoons of butter and put a teaspoonful in the bottom of each cup. Fill each cup about 1/3 to ½ full with batter and bake. After 15 minutes, drop the temperature to 350°F / 180°C and continue baking until the outside is set and golden-dark brown, about another 20 minutes.
Serve at once with jam and butter.
Notes
• If you have a real sweet tooth (or kids) try adding sugar and cinnamon, or butter and maple syrup.
• Don’t peek while these are baking! Opening the oven door will drop the air temperature, causing the popovers to drop in temperature and lose some of the water vapor that’s critical to their rise.
• Curious how the choice of flour affects the inside and crust of the popover? Try making two batches, one with low-gluten flour and the second with a higher-gluten flour. Fill half the cups with one batter and the other half with the second batter. Bake them at the same time and see what happens!

The hollow interior of popovers makes them perfect vessels for butter and jam.
Water Chemistry and How It Affects Your Baking
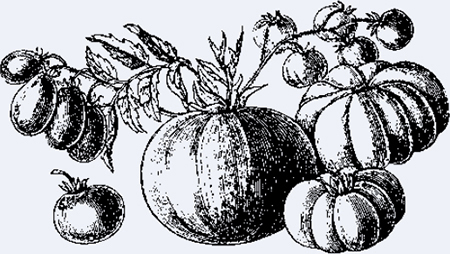
Water is wonderfully weird. There’s lots of trivia about water, some of it obvious (it expands in volume somewhere between 1,600 and 1,700 times when converted to gas, hence the lift it gives in some baking) and some of it brain-smashingly amazing (you can tell the rough latitude a tomato was grown at by examining its water composition).
Tap water isn’t just H2O. Among other stuff, trace amounts of minerals, additives such as chlorine, and dissolved gases can all come pouring out of the faucet and into your doughs and batters. When it comes to yeast and gluten formation (which we’ll cover in the next section), those trace minerals and anything that changes the pH of water will make a difference. You might find that a recipe that works perfectly fine in one location will need tweaking when made elsewhere, due to differences in the water alone!
First, let’s talk about trace minerals. Trace minerals in water—primarily calcium (Ca2+) and magnesium (Mg2+)—occur naturally in water, being absorbed as the water passes through calcium- and magnesium-containing rock such as limestone and dolomite. Our bodies need these minerals; they’ve been present in water since time immemorial. The water supplies in different regions vary, with different ratios and different amounts of dissolved trace minerals, and those changes impact food. (There’s some thought that the different types of teas in the UK evolved from how differences in water supplies changed their flavor. For example, Scotland gets most of its water from surface sources such as rainwater while Southeast England gets most of its water from aquifers, leading to different levels of trace minerals that will interact with compounds in the tea.)
The term water hardness refers to the concentrations of dissolved trace minerals in water, soft water being a low concentration and hard water being high. There’s no exact scale for water hardness because temperature, combinations of minerals, and pH all change how these minerals interact with other things (especially gluten). Researchers generally use parts per million (ppm) of calcium as a measure, so we’ll go with that. As the quantity of calcium increases, water is said to be harder, presumably because the minerals literally “harden” things.

If you’ve ever encountered scale buildup on faucets—the bane of household cleaning—it may be calcium carbonate or calcium stearate. Calcium from hard water can combine with carbon dioxide in the air or with stearic acid from soap; vinegar, being ~5% acetic acid, will dissolve it.
Because hard water has more calcium (and generally more magnesium), it makes gluten tougher, less elastic (elasticity is the ability to spring back into shape), and less able to stretch, all three of which will lead to denser baked goods. Depending upon how hard your water is, you may need to adjust recipes to compensate accordingly.
Water treated with sodium carbonate? Your water will have more dissolved sodium in it and you may need to use less salt to compensate for flavor and texture problems.
Water treated with chlorine? Leave a pitcher of it out overnight for the chlorine to dissipate, lest it interfere with yeast.
If your water is too hard—you’ll know because yeast-based goods won’t ferment as well, breads will come out denser, and vegetables and beans will cook “tough”—try using filtered water as a first attempt. No water filter? Try boiling your water, which will remove any dissolved carbon dioxide and in turn cause calcium carbonate to precipitate out. If neither option works, and your recipe allows for it, see if cutting down on the salt or adding an acid—a squirt of lemon juice (citric acid), a tiny pinch of vitamin C powder (ascorbic acid), or some vinegar (acetic acid)—fixes it.
Range (calcium parts per million) |
Problems |
Fixes |
<60 ppm: Soft water |
Soft, sticky doughs; |
Increase salt |
60–120 ppm: Moderately hard water |
Potentially tough |
Filter water |
>120 ppm: Hard water |
Doughs not rising; toughness |
Increase yeast; add acid; decrease salt; filter water |
Water that’s too soft can produce sticky doughs and present problems for yeast, which, like us, needs minerals to grow and reproduce. If you know you’re adding the right amount of water based on ratios, try adding a modest amount of salt. Too much salt, though, and you’ll land on the “too tough” side of hardness, plus your bread will end up tasting salty!
What about the pH of your water?
If you have alkaline water (pH above 7—also usually hard, but not necessarily) and are baking with yeast, you’ll need to add an acidic ingredient to compensate. Baked goods that rely on yeast need water with a pH below 7, because yeast uses sugar as an energy source and sugar is created from starch by pH-sensitive enzymes (e.g., amylase in flour). Likewise, if your recipe is generating bubbles of carbon dioxide by using baking soda as a base and you have alkaline water, you may need to cut back on the baking soda; otherwise, you might have unreacted baking soda in your final baked goods along with its unpleasant, soapy taste.
You shouldn’t have to deal with water that’s too acidic: the United States EPA (Environmental Protection Agency) recommends a pH of tap water between 6.5 and 8.5. For most of us, the pH of our water isn’t an issue in baking, but it can be for those with especially hard water, which is usually basic.
(PS: Debates about how much salt you should cook beans with often overlook water differences: some ~15% of cooks have too-soft water; then there’s the pH of the water. More salt makes beans cook quicker; more acidic water slows down their cooking. Mushy beans are related to too-long cooking time; flatulence occurs with some beans that are not presoaked and are cooked too briefly. Speaking of boiling salty water, it’s true that salt raises the boiling point, but by so little that that’s not why it can change cooking times. It’s the chemical changes, not the physical changes, that can do that.)

Where you live determines how much gluten will form in your bread dough.
MODIFIED VERSION OF MAP BY US GEOLOGICAL SURVEY, DEPARTMENT OF THE INTERIOR/USGS.
It’s elements, my dear Watson. Isotopomers, to be specific. Most of us—including Watson—think of a glass of water as being H2O, maybe along with some trace elements, dissolved gases, and the like. H2O means two hydrogen atoms bonded with an oxygen atom (in water’s case, it’s a covalent bond, which we’ll discuss on page 196). What “H2O” doesn’t say is what isotopes of those atoms are present.
Oxygen, as an element, is an atom that has eight protons, thus its atomic number and place on the periodic table of elements. Oxygen normally also has eight neutrons—that’s just the fewest neutrons it takes to create a stable nucleus—so chemists don’t bother writing out the expanded version, 16O (the 16 comes from the number of protons and neutrons, and 16O is read “oxygen 16”).
99.73% of the time, the O in H2O is 16O, as in H216O. But what about the other 0.27%? In addition to 16O, oxygen has two other stable isotopes: 17O and 18O, with 9 and 10 neutrons, respectively. Hydrogen happens to come in three isotopes as well—no neutrons, one neutron, two neutrons—the first two of which are stable. (Don’t ask about the third one—it had too much to drink.) That “simple” glass of H2O quickly becomes a complex mixture.
Given how complicated water is, it’s a wonder supermarkets can manage to label tomatoes with the same SKU number and keep them as consistent as they do. Speaking of tomatoes: the lighter variants of water evaporate more quickly than the heavier ones (more neutrons, more weight). Because evaporation is higher nearer the equator, the ratios of the six isotopomers in soil skew toward the lighter variants. With the right equipment (a mass spectrometer), Sherlock could analyze the water composition of a tomato to tell roughly what climate it was grown in. Add in analysis of trace minerals and, after correlating that with geographical variations in soil composition, he’d probably be able to nail the country of origin down, too. Even Holmes’s nemesis, Professor Moriarty, would be impressed.

Water chemistry impacts a lot more than how gluten forms. Adding salt to water changes not just its boiling point but also its freezing point—this is known as freezing-point depression. Different concentrations of salt will depress the freezing point by different amounts. If you can calibrate an oven using the chemistry of sugar (see page 36), why not calibrate your freezer with the chemistry of salt water?
Sure, using a thermometer to check the temperature of your freezer is easier, but how do you know if your thermometer is accurate? Fahrenheit—as in Daniel Fahrenheit, the German physicist—originally defined 0°F as the temperature based on a mixture of ice, water, and ammonium chloride (a salt, like sodium chloride). And besides, this is more fun, and shows some neat stuff about how dissolving something in water changes the way the water behaves.
• Digital scale (optional, but strongly preferred)
• If no scale, ½ cup measuring cup and teaspoon
• 6 disposable cups
• Pen or pencil to write on cups
• Table salt
• Pitcher of water
• And, obviously, a freezer
Label the cups 0%, 5%, 10%, 15%, 20%, and 25% to record the concentration of salt in each sample.
Using the scale, add 100 grams of water to each cup. If you don’t have a scale, use ½ cup water (118g), or if you have measuring cups in mL, use those to measure out 100 mL of water.
Make the saltwater solutions by adding the correct amount. For a 20% solution with 100 grams of water, you should add 25 grams of salt, because a 20% solution of salt in water is 80% water, 20% salt. So, with 100 grams water ÷ 0.80, the total solution weight will be 125 grams.
• If you don’t have a scale: 1 teaspoon of standard table salt weighs 5.7 grams, so to make a 20% solution with ½ cup of water (118g), you’d need:
1 118 grams ÷ 0.80 = 147.5 grams total weight...
2 147.5 – 118 = 29.5 grams of salt...
3 29.5 grams of salt ÷ 5.7 grams salt in a teaspoon = 5 1/4 teaspoons of standard table salt per ½ cup of water for a 20% solution
• For 5% solution in ½ cup of water, it’s about 1 teaspoon; 10% is 2 1/3; 15% is 3 2/3; 20% is 5¼; and 25% is 7.
Place cups in freezer and wait for them to completely cool down, ideally a day.
How cold should your freezer be?
The FDA recommends that freezers be set to 0°F/–18°C: cold enough to halt the growth of spoilage bacteria and food pathogens but not so cold as to turn ice cream into bricks or potentially give us frostbite from eating things like frozen peppermint patties.
Once the saltwater solutions have equalized to the temperature of your freezer, check which ones are liquid and which have frozen water.
You’ll notice that one or two of the cups are partially frozen, with a layer of ice on top and slushy water below. Freezing salt water doesn’t create frozen salt water. It creates ice—the solid phase of water—and more concentrated salt water, thus driving the freezing point of the remaining liquid lower. (Making clear ice also involves the separation of solutes from solvents, but that’s a story for another book.)
Using the chart shown here, find the temperate range between your least concentrated sample that had any frozen water (your freezer is at least that cold) and the one that remained entirely liquid (your freezer is at least that warm).
If it’s your 10% solution, then your freezer is colder than 14° F/–6 °C.
Why do you think the chart stops just before 25%? (It stops at 23.3% concentration of salt, which freezes at –6 °F / –21.1 °C.)
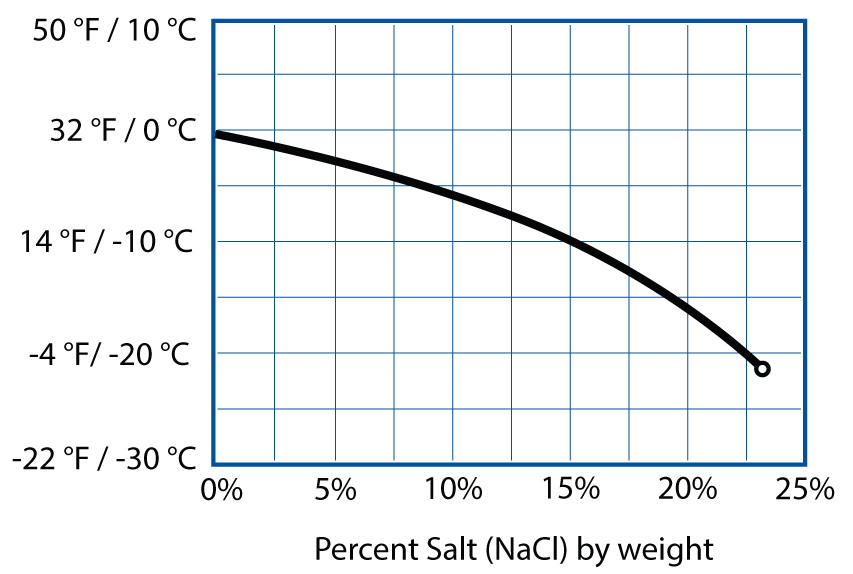
Freezing point of salt water by concentration of salt.
For a follow-up experiment, repeat the process with 1% intervals between the concentration that remained liquid and the one that had frozen water.
Table salt is rarely pure NaCl. Trace elements exist naturally in sea salt, and manufacturers often add in iodine and anti-caking agents (something added to prevent the salt from forming clumps, e.g., sodium silicoaluminate or sodium ferrocyanide). While the additives don’t impact the taste of the salt, their presence does change the chemistry, meaning that the salt measurements for this lab may be off by about ~1%. Details, details...
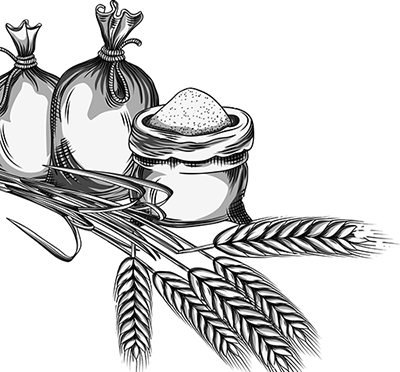
You Must Choose Your Flour, but Choose Wisely
Light, fluffy foods like bread need two things: air and something to trap that air. This might seem obvious, but without some way of holding on to air while cooking, croissants would be as flat as pie crust. This is where your choice of flour comes in.
Flour is, most generically speaking, ground-up “stuff”: usually grain, usually wheat. Flours made from other grains—rice, buckwheat, corn/maize—are also commonly used, and flours made from seeds and nuts give us even more choices, like almond flour, chickpea flour, and amaranth flour.
Wheat flour, as an ingredient, has many properties that professional and industrial bakers need to consider, but the selection of flours available to the home baker is generally limited to a handful based on commodity crops, with the main differences being how much gluten can be formed. Hopefully soon we’ll see a renaissance in wheat flour, just as we have with other ingredients such as apples and coffee beans. (Although, seriously, how many varieties of apples do we need?) Until then, most of us are stuck with just a handful of choices, so here is some wisdom that can aid you in choosing and working with flour, lest your breads turn to dust and blow away (“he chose...poorly,” as the line goes).
Most wheat flour sold in the United States is AP (short for all-purpose) flour, named such because it’s generally suited for most baking tasks. AP flour is made from the endosperm of the wheat grain and creates about 10–12% gluten (by weight) when worked. When you read “flour” in a recipe, this is what you should use. In parts of Europe, flour is classified by ash content, a measure of mineral content. Ash content is determined by which parts and ratios of the kernel are used. Using only the endosperm yields a lower ash content and whiter flour—e.g. Italian “00” (“doppio zero”)—and being more refined is generally ground finer. While there’s no guarantee that a “00” flour will be lower in protein or more finely ground than a higher ash one, most “00” flours are similar to finely ground AP flour.
Wheat allergies and gluten sensitivity are different things—someone can be allergic to proteins in wheat but have no issue with gluten in other flours, and vice versa. If you’re cooking for someone with a wheat allergy, see page 450. For gluten sensitivities, use ingredients that don’t form gluten, such as rice, buckwheat, corn, or quinoa.
You’ll sometimes see recipes call for whole wheat flour or cake or pastry flour instead. With whole wheat flour, the wheat grain’s bran and germ are milled along with the endosperm, so the flour has more fiber (bran!) and creates less gluten (the proteins for gluten come primarily from the endosperm). Cake and pastry flours are similar to AP flour but form less gluten, either because they use softer wheats that have less protein or because of chemical processing (bleaching) that changes the flour.
Gluten gets a lot of attention in baking because it’s what creates structure in baked goods. Gluten is created when two proteins—glutenin and gliadin in the case of wheat—come into contact with each other to form what chemists call crosslinks: bonds between molecules that hold them together. In the kitchen, bakers create this crosslinking by adding water and then mixing, but instead of talking about crosslinks, they speak of “developing the gluten.” During mixing, the two proteins bind together with water, and the resulting gluten molecules in turn stick together to form an elastic, stretchy membrane. That membrane traps air bubbles from ingredients like yeast, baking soda, and even water to give baked goods their height and springy texture.
Understanding how to control gluten formation will vastly improve your baked goods. Do you want a chewy texture? Do you want something with lift and rebound when it’s pressed? Then you’ll need to develop enough gluten to provide the necessary texture and elasticity. If you’re trying to create a fluffy pancake, crumbly cake, or crispy cookie, you’ll want to decrease the amount of gluten, either by reducing the amount of gluten-forming proteins or by adding ingredients that disrupt that gluten, such as butter, egg yolks, and sugar.
Let’s start with the easy part: controlling the amount of gluten by changing the amount of protein. Wheat is the most common source of gluten and creates the highest percentage of it. Different strains of wheat have different concentrations of glutenin and gliadin proteins, based on the growing climate, so varying the source of wheat will vary the amount of protein in its flour. Other grains, like rye and barley, have the necessary proteins but in smaller quantities. Flours made from corn, rice, buckwheat, and quinoa won’t form any gluten.
Phyllo dough—also spelled filo dough—is an unleavened dough used in pastries like baklava. It’s made by mixing flour and water and repeatedly folding and rolling to develop gluten. It’s also paper-thin: the sheets I checked were 0.0065” / 0.175 mm thick. Phyllo dough remains flexible while moist, but becomes brittle when dry. Take care to not let it dry out when working with it and use a spray bottle of water to moisten it if necessary.

Changing the cultivar of wheat, changing the way the flour is milled, or blending in nonwheat flours will change how much gluten exists that will trap air. If you’re used to working with AP flour, substituting whole wheat flour or flours from other grains will reduce the amount of gluten and give you a flatter (possibly still tasty!) loaf. Switching to bread flour (start with 50% by weight and add a little more water) will increase the amount of gluten, resulting in a higher loaf.
What if you want the flavor of a certain type of flour (say, whole wheat flour or buckwheat) but need more gluten? You can add wheat gluten, wheat flour that has had bran and starch removed, yielding a 70%+ gluten content. If you want to swap out AP flour for whole wheat flour, replace 10% of the flour (by weight) with wheat gluten to add back the right quantity of gluten. (If substituting whole wheat flour for regular flour, you’ll also want to use extra water—the bran and germ will absorb it—or decrease the amount of flour; either way, let the dough rest twice as long.)
Choosing the right types of flours is the easy way of controlling how much gluten exists in your baked goods. Use wheat flours higher in the necessary proteins to create more; use softer wheat flours or other types to reduce it. The other way is more complicated but sometimes necessary: prevent the glutenin and gliadin from forming crosslinks, or break those crosslinks after they form.

Gluten levels of various grains and common flours. Besides wheat, both barley and rye form noticeable amounts of gluten, although rye also contains substances that interfere with its ability to form gluten.
Why biscuits are Southern food and Wonder Bread came from the Midwest
Colder climates favor flour cultivars with more glutenin and gliadin proteins. Flour in, say, France won’t be identical to that grown in the US, and different regions will differ, too. Where your flour comes from will change its properties. Since different mills use different flours, try baking with a couple of different brands.

Consider the following tips for managing gluten levels:
Use fats and sugar to reduce gluten formation.
Cookies crumble and cakes are tender because of fat and sugar, both of which prevent gluten from forming. Oil, butter, and egg yolks all add fat to doughs, preventing crosslinking, while sugar is hygroscopic and snaps up the water before gluten does. If your baked goods aren’t coming out with a desirable crumbly texture, one possible fix is to increase the fats (hence “one egg plus one egg yolk”) or sugar (if not too sweet).
Use mechanical agitation and rest time to develop gluten.
Mechanical agitation (a.k.a. kneading) physically rams proteins together, increasing the odds that they’ll form gluten. Letting dough sit also develops gluten by giving wheat’s glutenin and gliadin proteins time to combine as the dough subtly moves. This is why the no-knead bread recipe on page 261 works.
Don’t overmix.
Too much kneading weakens gluten. Mixing a batter or dough initially develops gluten by bringing the necessary proteins together, but after a few minutes, enzymes in the flour will cause the gluten to break down.
Ever wonder why some recipes tell you to mix “just until incorporated” (muffins) and others say “mix for a few minutes” (breads and dinner rolls)? Researchers use Farinograph charts to check dough viscosity over time as it’s mixed, and one look at such a chart explains it all. It takes about a minute of mixing for a flour-and-water dough to have formed enough gluten to give a chewy, breadlike texture. Mixing less than that will avoid that texture—good in muffins, not so good in breads. On the other extreme, mixing for more than a few minutes will cause enzymes in the flour to break down the gluten, deteriorating below the magic “500 Brabender Unit” threshold. (Brabender Units are an arbitrary measure of viscosity.) These one-minute and five-minute rules will vary depending upon your dough and ingredients, but they’re good rules of thumb.

Brabender Units versus time (in minutes) shows the viscosity of a dough as it’s mixed.
Pay attention to water.
Quantity matters: you need enough water for gluten to form, but add too much and the proteins won’t bump into each other. In bread dough, aim for about a 0.60:0.65 ratio of water to flour (about 30–35% water by weight); more than that, and you’ll get large, irregular holes, which can be nice in rustic bread, but not sandwich bread. Flours with more gluten will absorb a little more water, so adjust the amount of water accordingly. Due to evaporative cooling, batters with too much water will end up with surface issues and stall out, leading to cakes that fall after baking; if you see that, cut back on wet ingredients. You’ll face similar issues if the humidity is too high, so reduce wet ingredients in this case too.
Ingredients like sugar, flour, and salt all absorb atmospheric moisture, so changes in humidity will change the amount of water they bring to the recipe. Ideally, buy and store them in airtight containers; otherwise, on humid days, reserve a fifth or so of your liquid ingredients and add in what’s necessary to achieve consistency.
Pay attention to minerals and salt.
Gluten also needs some amount of calcium or magnesium from dissolved minerals in water; you can counterbalance too much or too little by adjusting the amount of salt in your dough. As for salt, there’s some wiggle room, but in breads, try to keep salt at between 1% and 2% of the total weight for optimal lift. Finally, be mindful of high pH levels: if your water is alkaline, add an acid (vitamin C, lemon juice, vinegar). (See page 240 for more on how water impacts your baking.)

Loaf volume (cc) by percent salt (NaCl).
My dad occasionally made these “1-2-3” crepes—named for the ratio of ingredients—before sending us off to school. (Why don’t we make these sorts of things before heading off to work?!)
Eggs, not flour, provide the structure for crepes, so try using different flours. In France, it’s common to use buckwheat flour in savory crepes (which are also, incidentally, gluten free). The buckwheat flour adds a wonderful robust flavor.
Whisk until entirely mixed, about 30 seconds:
1 |
cup (240 mL) milk (preferably whole milk) |
2 |
large (100g) eggs |
1/3 |
cup (45g) flour |
|
Pinch of salt |
Let rest for at least 15 minutes, preferably longer.
Start with a nonstick frying pan over medium-high heat and preheat for about a minute, until a drop of water sizzles when dropped onto it.
Butter: Grab a cold stick of butter with the wrapper partially pulled back and, using the wrapper as a handle, spread a small amount of butter around the pan.
Wipe down: Use a paper towel to wipe the butter over the surface of the pan. The pan should look dry; you want a super-thin coating of butter.
Pour: Pour in the batter with one hand while holding the pan in the air with the other and swirling it so that the batter spreads over the surface: use ¼ cup / 60 mL of batter for a 10” / 25 cm pan, adjusting as necessary to just coat the bottom evenly. Check the heat of the pan. It should be hot enough that the batter develops a lacelike quality—little holes all over the crepe—as the water in the batter boils and tunnels up through the batter. If lace holes aren’t forming, turn up the heat.

Flip: Wait until the crepe begins to brown around the edges, then use a spatula to push down the edge all around the circumference. This will release and lift the edge of the crepe. Flip the crepe using the spatula, or do what I do: grab the lifted edge with your fingers and flip it by hand. Let the crepe cook on the second side for half a minute or so.
Flip again: This will leave the better-looking side on the outside of the finished crepe.
Add fillings: You can cook eggs or melt cheese by leaving the pan on the heat during this step (add the filling directly on top of the cooked crepe); otherwise, transfer the crepe to a plate and then fill. After adding fillings, either fold the crepe in half and half again, or roll it up like a cigar.
Some suggestions for fillings:
• Cheese, eggs, and ham
• Cream cheese, dill, and lox
• Roasted vegetables and goat cheese
• Powdered sugar and lemon juice
• Bananas and chocolate spread
• Fresh fruit with ricotta
• Pie filling with whipped cream
Milling flour is a lot easier than you might imagine: snag some wheat berries—which are just hulled wheat kernels, with bran, germ, and endosperm still intact—from your local health food store or farmers’ market, run them through a mill, and you’ve got fresh flour.

Why bother? Well, for one, the taste is fresher, because volatile compounds in the wheat won’t have had time to break down. You also get a lot more control over both the grind size and types of grain being used. Then there are the health aspects. In most commercial whole wheat flours the germ is heat processed to prevent it from going rancid, but this processing also affects some of the fats in the flour.
On the downside, freshly milled flour won’t develop gluten as well as aged flour. This is probably fine for a rustic loaf of bread, but not so good if you’re trying to make whole wheat pasta (where the gluten holds it together). Of course, you can always add in some gluten flour to boost the gluten levels back up or use a dough enhancer, but that robs the appeal of “from scratch,” at least for me.
You have a couple of options for mills. If you have a stand mixer, check to see if the manufacturer makes a mill attachment. If you do spring for one, be forewarned that it can put quite a strain on the mixer. Set it to low speed and run your grain through in two passes, doing a first pass to a coarse grind before doing a fine grind. If you don’t have a stand mixer, or don’t mind the higher cost and dedicated counter space requirement, look online for wheat grinders.
You can run other grains, such as rice and barley, through a mill as well. Too-moist grains and higher-fat items like almonds or cocoa nibs are a no-go, though: they’ll gum up the grinder. (Try using a high-powered blender for those.)
One more thing: don’t expect to be able to mill things like cake flour. Cake flour has the bran and germ removed; plus, it’s often bleached with chlorine gas to mature it. Maturing—the process by which flour is aged—would eventually happen naturally due to oxidation, but chlorine treatment speeds it up. It also modifies the starch in the flour so that it can absorb more water during gelation (see page 408 for more on gelation of starches) and weakens the proteins in the flour, reducing the amount of gluten that can be formed. Additionally, chlorination lowers the temperature of gelation, so batters that include solids—nuts, fruits, chocolate chips—perform better because there’s less time for the solids to sink before the starches are able to gel up around them. Doing things all the way from scratch is fun, but it’s also limiting.

Wheat berries.

First pass: coarse grind.

Second pass: fine grind.
If you want a culinary experimental journey, start with the idea of “three parts flour, one part water” baked in a hot oven for 10 minutes, iterate half a dozen times, and you’ll end up rediscovering what the Ancient Egyptians first made: flatbread. Making crackers and flatbread is easier than you think. Way easier.
Crackers and their untrimmed version, flatbreads, are sometimes leavened—pita and saltine crackers, for example, use yeast—while other times unleavened. Unleavened versions take minutes to mix and minutes to bake, hence their religious symbolism in Judaism’s Passover and Christianity’s Eucharist. Regardless of symbolism, they’re quick to make: 20 minutes, start to finish.
You’ll find these crackers to be crisper than their leavened counterparts—treat them as vehicles for toppings.
In a bowl, measure out:
1 |
cup (140g) bread flour |
1/3 |
cup (80 mL) water |
½ |
teaspoon (3g) table salt (don’t use coarse salt; it won’t mix in well) |
2 |
teaspoons (10 mL) olive oil |
2–4 |
tablespoons seeds and herbs (optional; try equal parts poppy seeds and sesame seeds) |
Using a spoon, mix to form a “shaggy” dough. It will be quite dry. Pick it up with your hands and knead it for a minute or two. Divide in half, setting half aside for a second batch.
On a lightly floured cutting board, roll the dough out into a strip about 6 inches (15 cm) wide, and as long as possible. You want the dough to be rolled out as thinly as possible; aim for about an eighth of an inch (a few millimeters). If your crackers come out tough, roll them thinner!
Using a knife, trim the dough into squares or strips—or leave untrimmed for a large, flatbread-style cracker.
Prick the dough with fork tines (this prevents pockets of air from billowing up the crackers), then transfer to a baking sheet.
Bake at 400°F / 200°C for 10–12 minutes, until light brown. If your crackers come out chewy, bake a few minutes longer.
Notes
• If the seeds and herbs toast well, then they’ll work well in crackers. Try sesame seeds, sunflower seeds, poppy seeds, fennel seeds, ground black pepper, rosemary, and all their combinations.
• I can’t resist adding a non sequitur here: in technology, a cracker is someone who illicitly breaks into systems, while a hacker is someone who “thinks like a geek” and creatively uses things outside their original purpose.

• 1 cup (140g) all-purpose flour
• 1 cup (140g) bread flour (optional, but nice to compare to all-purpose flour)
• 1 cup (140g) cake or pastry flour
• 3 small bowls (one for each flour sample)
• Pitcher of water
• Spoon
• Digital scale
We’ve talked about how to make your own flour (see page 252) and how important gluten is in baking (see page 246), but how do researchers figure out how much gluten is in different varieties of flour? Try this simple experiment to separate out and “see” how much gluten is in various types of flour.
Even though wheat flour is primarily used for its proteins and starches, it’s worth stepping back and looking at what else is hanging out in that bag in your pantry:
Starch: 65–77%
Protein: 8–13%
Water: ~12%
Fiber: 3–12%
Fat: ~1%
Ash: ~1%
The two main compounds in wheat flour are starch and protein (primarily glutenin and gliadin). There’s a range of percentages because warmer growing climates lead to lower levels of protein and higher levels of starch. Fiber is similar to starch in that both are carbohydrates—saccharides to biochemists—but our bodies don’t have a mechanism to digest all forms of saccharides; those that we can’t digest get classified as fiber (sometimes called nonstarch polysaccharides). As for ash, this is the broad term given to trace elements and minerals such as calcium, iron, and salt.
Measure equal quantities of the flours into each bowl. Add just enough water (about 1/4 cup / 60g) to each bowl so that, using the spoon, you can stir the flour into a wet, sticky ball.
Pour more water into the bowls, covering the balls, and let rest for at least 30 minutes (overnight is fine, too). This rest period allows the gluten to develop (in baking, this process is called the autolyse technique).
After the balls have soaked, rinse the starches out by pinching and kneading them in your hands under the water. You’ll notice the water gets extremely cloudy; this is from the starches washing out. If your bowls are small, change the water out for fresh water as needed, or do this step under slowly running tap water. Keep working the flour for a few minutes until it has a very elastic quality to it. This is the gluten.
Weigh the gluten that you’ve separated out and compare their weights. Your gluten balls will weigh more than the percentage gluten of the flour because of the water they absorbed.

What’s the percentage difference of weight between the different gluten balls? (Even though the weight includes absorbed water, the ratio of weight between gluten balls will still line up.)
How does this compare with what you’d expect, based on the difference in gluten ratios between different types of flours? For example, because bread flour is ~13% gluten and pastry flour is ~8% gluten, roughly speaking, you’d expect that a gluten ball made from bread flour would weigh 1.62 times (13 ÷ 8) as much as one made from pastry flour.
What do you think will happen if you do this with other types of flour, especially those used in gluten-free cooking, such as buckwheat flour? If you use whole wheat flour, you’ll notice gritty, brown stuff. Why is that?
Baking the balls of gluten at a low temperature (250°F / 120°C) for a few hours will dry them out, leaving you with just the gluten. Divide the weight of the baked gluten balls by the weight of the flour you started with to get a good approximation of the gluten percentage.
You can drop a gluten ball into a glass of rubbing alcohol to separate out the glutenin and gliadin proteins. The gliadin will form long, thin, sticky strands, and the glutenin will resemble something like tough rubber.

All-purpose flour

Bread flour

Whole wheat flour
Seitan, high in plant proteins from gluten and thus a staple in vegetarian and vegan meals, is worth a place in every chef’s extended repertoire. It’s made using gluten from flour (see page 254 to learn how to make your own gluten). You can make many different textures and flavors of seitan by varying the amount of water, adjusting the seasoning, and changing the cooking method. Baking will lead to firmer seitan; steaming and boiling lead to softer textures. Try this savory baked seitan—high in umami, making it taste almost meatlike—as an introduction to making your own “mock meat.”
Mix together in a large bowl:
¾ |
cup (180 mL) water |
2 |
tablespoons (30 mL) soy sauce |
1 |
teaspoon (5g) tomato paste |
½ |
teaspoon (5g) garlic paste, or 1 clove mashed and finely diced |
Add, and use a spoon to mix to a thick, elastic dough:
1 1/3 |
cup (160g) gluten flour (also called “vital wheat flour”) |
Coat a baking dish with a thin layer of olive oil. Shape the dough into a flat patty and place into the baking dish. Cover with foil and bake at 325°F / 160°C for 60–75 minutes, until the outside is partly brown. (Cut in half to check; if you see a “wet” center, it’s not done. If you’re not sure, or if you want to experiment with the texture, set aside a piece, cook the rest longer, and compare. Personally, I think overcooked is better than undercooked on this one.)
While the seitan is baking, prepare the string beans.
In a small pan, bring 1 quart (~1 liter) water and 2 tablespoons (35g) salt to a full boil.
Set out a frying pan with a thin layer of olive oil and add ½ teaspoon (0.5g) crushed red pepper flakes.
Snap the stems off of 2 handfuls (200g) fresh green beans and remove any fibrous “strings,” if you’re using an heirloom variety. Add them to the boiling salt water. After 2–3 minutes, depending on how firm you like your green beans, fetch them out with tongs or strain the pot, and then transfer them to the frying pan. Flip the heat under the frying pan to high and briefly sauté for another 2–3 minutes. Add the juice from one small lemon and toss to coat.
To serve, slice the seitan into strips and plate with the string beans.
Error Tolerances in Baking
In pastries and cakes, the error tolerance in measurement—the amount you can be off by and still have good results—is much tighter than in many breads and savory dishes. Even small changes in the ratios between flour, water, sugar, and fat will cause large changes in how some baked goods turn out.
Without enough water, glutenin and gliadin won’t properly form gluten, which is good for scones, biscuits, and pie shells but bad for higher-gluten goods like bread. But too much water also creates problems: bread will end up with large air pockets and cakes won’t set correctly and will collapse in on themselves.
Likewise, if you add less shortening than intended for something like a cookie or pie crust, more gluten can form and give you a tougher pie shell. If you use too much shortening, though, doughs won’t rise as much and will turn out short; that’s how shortbread got its name.
Consider the ingredients for the following two double-crust pie dough recipes.
Joy of Cooking |
Martha Stewart’s Pies & Tarts |
||||||
Baker's % |
Weight |
Volume |
Ingredient |
Baker's % |
Weight |
Volume |
Ingredient |
100% |
240g |
1 3/4 cups |
flour |
100% |
300g |
2 1/8 cups |
flour |
60% |
145g |
2/3 cup |
shortening |
– |
– |
– |
(no shortening) |
11.25% |
27g |
2 tablespoons |
butter |
76% |
227g |
1 cup |
butter |
25% |
59g |
1/4 cup |
water |
19.7% |
59g |
1/4 cup |
water |
0.8% |
2g |
1/2 teaspoon |
salt |
2% |
6g |
1/2 tablespoon |
salt |
– |
– |
– |
(no sugar) |
2% |
6g |
1/2 tablespoon |
sugar |
The numbers in the first and fifth columns are “baker’s percentages,” which normalize the quantities relative to the quantity of flour. Among other things, this makes it easy to compare differences between recipes.
Comparing these two recipes, you can see that the ratio of flour to fats ranges from 1:0.71 to 1:0.76, and the Joy of Cooking version calls for a higher percentage of water.
However, butter isn’t the same thing as shortening. Butter is about 13–19% water and ~1% milk solids; shortening is only fat. With this in mind, look at the recipes again. The Martha Stewart version has 76g of butter (per 100g of flour), for about 64g of fat. Joy of Cooking’s version, with shortening and butter, has 69g of fat per 100g of flour. The quantity of water is also roughly equal between the two once the water present in the butter is factored in.
If you’re following a recipe that doesn’t give a weight for flour, you’ll need to guess how many grams of flour per cup the writer intended. If the recipe came from the US, try using 140 grams as a starting guess; if it’s of European origin, try 125 grams.
When following recipes with tight error tolerances—usually pastries, rarely breads—always use a digital weight scale. This one change in your approach to baking will have the biggest impact on how things turn out.
There are two types of pie doughs: flaky and mealy. Working the fat into the flour until it is pea-sized and using more water will result in a flakier dough well suited to prebaked pie shells; working it until it has a cornmeal-like texture will result in a more water-resistant, mealy, crumbly dough that’s better suited for uses where it is filled with ingredients when baked.
This recipe makes enough dough to cover both the top and bottom of a pie, called a double crust. If making an open pie, this’ll make two pie bottoms—you can save one in the fridge for a few days.
Following the quantities for either recipe on page 258, measure the flour, salt, and optional sugar into a mixing bowl or the bowl of a food processor. Cut the butter into small cubes (½” / 1 cm) and add. If using shortening, add that as well.
If your kitchen is warm, chill the bowl in the freezer for 15 minutes to buy some thermal insurance. You don’t want the butter to melt as you work; that would create a less flaky, tougher pie shell.
If you have a food processor, pulse the ingredients in 2-second bursts while slowly pouring in the water, adding just enough water for the dough to combine. Continue pulsing the dough until the ingredients hold together.
If you don’t have a food processor, use the backside of two forks, one in each hand (or a pastry cutter, if you have one!) to break up the butter into the flour, adding water as necessary until the ingredients are combined.

No rolling pin? A wine bottle or even a tall, straight glass will work in a pinch. Cover the dough with plastic wrap and roll away.
Once the dough is at a coarse sand- or pebblelike consistency, dump it out onto a floured cutting board, divide it into two roughly equal piles, and press them into two round discs, one for the bottom of the pie and the other for the top.
Using a rolling pin, roll a disc of dough out into a sheet, and then fold it over on itself and roll it out again, repeating a few times until the dough has been compressed and holds together. Transfer to a pie tin and fill per pie recipe.
Prebaked Pie Shell
Some pies, such as lemon meringue pie (see recipe on page 411), call for the pie shell to be prebaked. To prebake a pie shell, also called blind baking, roll out the dough and transfer it to your pie tin or mold, line with a sheet of parchment paper, and fill with pie weights. (You can use rice or beans; the parchment paper will prevent them from sticking to the dough or flavoring it.) Don’t skip filling the pie shell with weights! They prevent the dough from sliding down the edges of the pie tin during baking.
I hate the taste of uncooked flour; it burns the back of the mouth. If you’re not sure whether your pie dough is done, err on the side of leaving it in longer.
In a preheated oven set to 425°F / 220°C, bake the pie shell for 15 minutes. Remove pie weights and bake for another 10–15 minutes, until the shell is golden brown.

Parchment paper filled with dried beans or rice will prevent the sides of a pie shell from sliding down while baking.
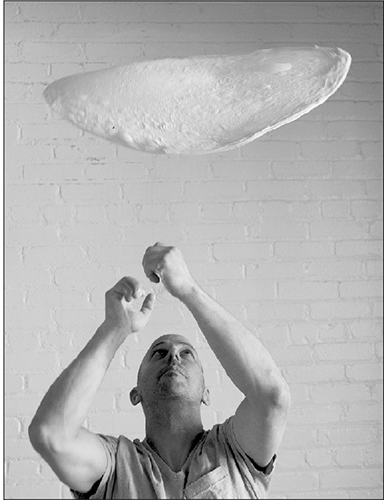
PHOTO CREDIT: SQUIRE FOX
Jim Lahey is widely known for popularizing the “no-knead” bread method, which he chronicled in his book, My Bread: The Revolutionary No-Work No-Knead Method (W. W. Norton, 2009). He received the James Beard Foundation’s Award for Outstanding Baker in 2015.
What brought you into baking?
Visiting Italy in my youth, I was exposed to food. All the ideas I had about good food were shaken to the core by this seemingly insular country that had region-by-region great food traditions. When I was able to eat this amazing, good-enough-on-its-own bread, it lit a fire in me and got me excited about figuring out how to make it. The breads of Rome at that time were amazing; there still were an enormous number of older practitioners of baking. Whereas today, most of the bakers in Rome rely on refrigeration to get a decent end result. I’m of the nonrefrigeration school.
How would you compare American and Italian culture in terms of their approaches to food and baking?
We’re an extremely heterogeneous society with different cultures and different traditions. We have foods that aren’t necessarily based on a particular tradition. If you looked at the gazillion locally produced “artisanal” foods or the popularity of different cultures’ cuisines, we are a bunch of “other.” I grew up with Italian neighbors sharing their family meatball recipe, so I’ve got my memory of making meatballs with my Irish-American mom. We have hamburgers in the States, but who owns the hamburger?
It’s amazing how much food has changed in the last few decades.
Part of it is the Internet and part of it is global travel. If you want to see how a loaf of bread is shaped, you can go online and watch thousands of videos. Granted, watching a video without some reference to what it’s supposed to be like doesn’t mean you’re going to succeed at making a loaf of bread.
Let’s talk about bread. What do you mean that you’re part of the nonrefrigeration school?
Well, obviously we need some form of cooling to store and ferment foods. I prefer, in my practice of making bread, not to refrigerate the dough after it’s been mixed so it’s not taking up valuable real estate in the refrigerator.
So it’s more pragmatic, as opposed to the way it changes the flavor of the dough?
Yeah. It’s true if you hold the dough at a colder temperature during the various stages of fermentation, you’re going to coax out certain flavor profiles that you might miss at room temperature. Refrigeration gives you the convenience of being able to get it right more often than not, but you’re not really learning about how things ferment. I view the act of making bread as a practice, like yoga or a martial art. If you’re making bread and you’re doing it at room temperature, you have a working knowledge; an intuitive sense of what temperature range the dough needs to stay within.
The wonderful convenience of dry yeast and of the no-knead method is that it just doesn’t matter whether you have that knowledge. What you gain from practicing it is the first step of understanding the power of fermentation.
Your no-knead bread that Mark Bittman wrote about in the New York Times got so many people into their kitchens to make bread.
It was magical because they didn’t have to have this notion of what that archetypal loaf of bread is, of what you might see made in the Mediterranean countryside.
Let’s talk about the variables in baking bread that someone at home might be missing.
Temperature plays a significant role. I see it with how much yeast I need to use and the length of time. I currently don’t have great heating in my bakery. In wintertime, for a batch of bread which involves yeast, I might have to put as much as 6 grams in for every kilo of flour. In the summertime, and this is all on the same formula, I can use a quarter of a gram!
There’s also change of insular properties of the dough. When you make dough, it’s not a liquid and it’s not a solid; it’s a viscous mass somewhere between a solid and a liquid. It has particular properties, a certain stickiness, cohesion, viscosity. But as it begins to ferment and become a sponge, its insular properties change dramatically. In winter, if you’re doing a large batch of dough, like 30 kilos, you’ll notice a 10 to 15 degree [5 to 8°C] difference from the outside of the blob to the center of the blob. I have to forecast what the weather is going to be in order to chart the course of the fermentation!
What differences, in your experience, would you expect to see between no-knead and kneaded bread?
If there’s any pigmentation in the wheat, a no-knead dough will retain the pigmentation. So you will actually see a crumb that’s maybe yellow or pinkish or brownish, depending on the type of wheat you use. If you knead the dough mechanically, the introduction of oxygen through the kneading process will create a lighter color from a bleaching effect. If you do a side by side of kneaded dough and an unkneaded dough, you can see it pretty clearly. Texturally, a no-knead bread has a looser, less defined crumb structure.
Since no-knead bread relies on time for the gluten to form, can one split the difference between no-knead and standard kneading for some sort of “low-knead” bread?
If you look at French baking, after you combine the ingredients together, it refers to this idea. The dough has been allowed to absorb water and smell and begins to awaken, and you introduce the salt as a functional conditioner for the dough. Éric Kayser has long promoted the low-knead method, where the dough isn’t kneaded intensively.
There’s a lot of mumbo-jumbo mythology around what people think. At the end of the day, we’re going to look at the end product as eaters. If you go to any supermarket, it’s not like they have particular strains of wheat. They have stacks of wheat and you don’t know where the grains came from, nor do you know the mills.
I always say: it’s not the wheat that makes great bread, it’s the knowledge of the baker. You can have the best wheat in the world and still make very low-quality bread. And you can have what one might consider the worst commercial flour in the world and be fantasizing that there’s some little farm, “it makes me think of the hillsides in France.”
Yeast
We’ve talked about how flour and water create gluten, and how wonderful gluten is for trapping air, but how do we actually get the air in there to begin with? Biologically based leaveners—primarily yeast, but also bacteria for salt-rising breads—are surely the oldest method for generating air. Presumably, a prehistoric baker first discovered that a bowl of flour and water left out overnight (much to the annoyance of whoever was washing the dishes) would ferment. Bread was so critical in the Roman Empire that a representative of the baker’s guild had a seat in the senate. Agriculture has been involved in politics for a long, long time. Using yeast in baking goes back even further.
There’s nothing magical about the strains of yeast we use, other than someone taking notice of their flavor and thinking, “Hey, this one tastes pretty good; I think I’ll hang on to it!” Friendship bread—the “chain letter” of yeast—has been passed around for decades.
Yeast is a single-celled fungus that consumes sugar and other sources of carbon and creates carbon dioxide, ethanol, and other byproduct compounds. All three of these make yeast useful: carbon dioxide gives lift, ethanol sterilizes and preserves beverages, and the byproducts give sourdough breads their distinctive flavors. Over the years we’ve “domesticated” many strains of yeast by selective breeding: Saccharomyces cerevisiae—more simply called baker’s yeast—is used in baking; other strains are useful in beer production (usually Saccharomyces pastorianus, named after Louis Pasteur—lucky guy).
Before domestication of yeast, bread makers would have relied on any ambient yeasts present in their environment, saving and sharing successful strains. Not that the “roulette gambling method” of picking your yeast is recommended when you’re working in your kitchen—leaving a bowl of unseeded dough out has a decent chance of ending up poorly, with a foul strain of yeast generating unpleasant-tasting sulfur and phenol compounds, or possibly worse. This is why you should add a starter strain: providing a particular strain ensures that it will dominate any other yeasts that might be present in the environment. (If your breads rise too quickly—you’ll know by loaves failing to rise and being porous—cut back on the amount of starter you use.)
Like any living critter, yeast prefers to live in a particular temperature zone, with different strains preferring different temperatures. Baker’s yeast works best at room temperature (55–75°F / 13–24°C). Other strains used in cooking, primarily for brewing (lagers and steam beers), prefer cellarlike environments of around 32–55° F / 0–13°C. Regardless of where your culinary adventures take you, keep in mind the temperature range that the yeast you’re using likes. Too cold, and the yeast will slumber and hardly rise; too hot, and it’ll die.
If you notice that your doughs aren’t rising as expected, give your yeast this quick health check:
Measure out 2 teaspoons (10g) of the yeast and 1 teaspoon (4g) of sugar into a glass and add ½ cup (120 mL) of lukewarm water (100–105°F / 38–40°C).
Stir and let rest for 2–3 minutes.
After the yeast rests, you should see small bubbles forming on the surface. If you don’t, your yeast is dead—time to head to the store.
In baking, this is called proofing (not to be confused with bench proofing, or allowing the shaped loaf to rest before baking). If you’re using active yeast, you should always proof the yeast in order to soften the hard shell around the yeast granules.
When proofing yeast, use lukewarm water. If the water is below 100°F / 38°C, an amino acid called glutathione will leak out from the cell walls and make your dough sticky.
Don’t be worried about too-hot tap water killing your yeast, unless your tap water is hotter than it’s supposed to be! Yeast actually dies somewhere above 130°F / 55°C, so too-hot water from the tap shouldn’t kill the yeast; it just slows it down. You can confirm this by proofing your yeast with your hottest tap water; it’ll just take a little longer for the yeast to do its thing.
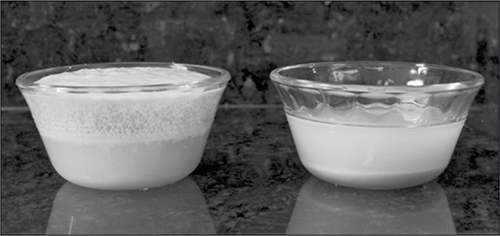
Proofed yeast will bubble up and foam (left); dead yeast will separate out and not foam (right).
The Quest for Great Pizza
How can a book called Cooking for Geeks not have a spread on pizza? Regardless of whether or not you identify as a geek, pizza is as much fun to make as it is to eat. You should learn to make it. Really. The stuff you can get delivered to your door is far, far inferior to what you can make at home. There’s a time for a tomatoey, cheesy slice of pizza—usually around 2 a.m. on a weekend. The rest of the time, though? A well-lived life includes relishing the nuances of great, homemade pizza.
First, the pizza dough. While you can buy pizza dough at your grocery store, I get better results when I make dough from scratch, and this is the way my dad taught me. I’m so keen on making your own pizza dough that I’ve included two different recipes: a simple no-knead version on page 271, and the yeast-free recipe on page 286 for the impatient (trust me, I understand).

Second, the oven. Oven temperature determines how the pizza’s crust will set up. Place your baking stone on a middle rack, and then preheat your oven to 375°F / 190°C for a doughier crust or at least 450°F / 230°C for a crispier one. (See page 370 for high-heat pizzas.)
Par-bake your dough. Par-baking isn’t part of most pizza recipes, but I’m a fan. By cooking the dough first, you avoid the risks of soggy dough and burned toppings.
1 Sprinkle a large cutting board with flour.
2 Take 1 pound (450g) of the dough and form it into a ball using your hands, kneading and folding it. The dough should be just slightly sticky, but not so much that it actually remains stuck to your hands. If it’s too sticky, dredge the dough in flour.
3 Continue to work the dough until it reaches a firm consistency and has good elasticity when stretched.
4 Work the dough into a flat, round disc, and then roll it into a circle or rectangle.
5 Transfer the pizza dough to the oven, carefully picking it up and laying it onto the baking stone (use a pizza peel or sturdy sheet of clean cardboard if needed).
6 Let the pizza bake for 3–5 minutes, until the dough has set. If the dough puffs up in one place, use a chef’s knife to poke a small hole in the bubble and then use the flat side of the knife blade to push the puffed portion back down.
7 Remove the par-baked pizza from the oven and set it back onto your cutting board.
Toppings. Add sauce and toppings. Choosing these is the art of pizza: it is a blank canvas upon which you can paint whatever flavors you’re craving. Some general thoughts:
• You can’t go wrong with a thin layer of tomato sauce and some slices of good mozzarella, topping it with basil leaves after baking.
• If you’re out of tomato sauce, anything from a thin coating of olive oil to a white cheese sauce will work (see Béchamel Sauce on page 105).
• For toppings such as onions and sausage, sauté them before placing them on the pizza. Cooking the dough and toppings separately removes all the headache of trying to get everything to cook at the same time, leaving just three goals: melting the cheese (assuming you’re using some) to fuse the ingredients together, browning the edge of the crust, and browning the top surface of the toppings.
Cooking. Finish cooking by transferring the dressed pizza into the oven and baking it until the pizza has begun to turn golden brown, about 8–12 minutes. When in doubt, overcook it: a beautifully browned crust (I didn’t say blackened) looks and tastes great.

PHOTO USED BY PERMISSION OF JEFF VARASANO
Jeff Varasano moved from New York to Georgia, where a lack of New York–style pizza drove him to years of experimenting—to the point where he clipped the lock on his oven so that he could bake pizza in a super-hot oven set to its cleaning cycle (see page 370). He eventually quit his job as a C++ programmer and opened Varasano’s Pizzeria in Atlanta.
How did you go from C++ programming to making pizza?
I moved from New York to Atlanta. Like a lot of people transplanted from the Northeast, I started to seek out the best pizza. A lot of places claim to be like New York, and you go there and you’re like, “Hmm, have these guys ever been to New York?” So I started to bake at home. At first I would just call up all of my friends and say, “Look, I’m making pizza tonight. It’s going to be pretty terrible, but why don’t you come try it?” And it really was pretty bad.
I started experimenting. I did all the flours. I experimented with different methods of heating my oven. I tried to do it on the grill. I tried to wrap my oven in aluminum foil to keep all the heat in. Then I moved to a new house and I had an oven with a cleaning cycle. I didn’t really know what a cleaning cycle was. I had never had an oven with a cleaning cycle, but I ran it and I realized that it was basically just incinerating the contents. It was like, “Aha, I’ve got to get in there!” So that’s where the whole idea of clipping the lock came from.
I threw up this website (now at http://www.varasanos.com/PizzaRecipe.htm). I really didn’t think too much about it. For a year and a half the counter was at about 3,000 and in a day it jumped from 3,000 to 11,000 and crashed my server. I realized that people were pounding that page and pretty much from that day forward I started to get email. That’s what started me down the whole tunnel of thinking about giving up the software stuff and going into pizza.
In the process of learning how to do your pizza, what turned out to matter more than you expected, and on the other side, what turned out to matter less?
Well, clearly what mattered less was the flour. Everyone is looking for the piece of equipment or secret ingredient that they can buy which will all of a sudden transform their pizza into something great. It’s not that. This is one of the things I realized early on. There is no magic bullet. If you look at the top five pizzerias on my list, you’ll see they use five different ovens: gas, wood burning, coal burning, electric, and believe it or not, an oil burning oven. Not only do they use different fuels, they’re different shapes, they’re different temperatures; some bake their pizza for two minutes, some seven. So what is it then? The answer is that it’s an art; it’s everything all together at that one moment. That’s what I realized, learning the basics and the fundamentals, you come into style and artistry and that’s much more difficult to define. It’s not going to be a single secret.
A lot of geeks who are learning to cook get hung up on the very small details and miss the big picture of just getting in there and trying something and playing with it.
Yeah. I’ve always been an experimenter. But I’ve always had sort of a different way of approaching problems. I don’t make very many assumptions about the way things should be done. Most people assume that knowing how things should be done is the best way, so they keep struggling within a very small circle, whereas I have a tendency to just try a much wider variety of things that may work and may not work.
So when you get stuck on one of these problems even though you’re working in a wider circle, how do you go about getting unstuck?
That’s an interesting question. Let me deviate from that slightly and then I’ll come back. Most people are familiar with the scientific method, which is holding everything exactly the same and changing this one thing. This reminds me of people trying to do one side of the Rubik’s Cube. Most of the good methods don’t involve getting any side. That’s the last thing you do. So people get stuck because they don’t want to toss in the towel on the progress they think they’ve made so far. So if you want to make it past one level, you may have to scrap your whole methodology and just start over. And you see that with pizzas.
Art begins where engineering ends. Engineering is about taking what’s known and carrying it to its logical conclusion. So what do you do when you have exploited everything you know, but you want to go to the next level? At that point, you have to start opening your mind up to completely random ways of thinking through something. That might involve taking multiple steps at a time. It might be that you don’t abandon one thing, but you have to abandon five things.
As an example using pizza, as soon as I switch flour, I can’t just keep the same hydration because if I change the flour then I may also have to change the water, or the dough may have a different consistency. Well, guess what, when I increase the hydration then the heat penetration into the dough is going to be slower because more of that water has to boil off. So now all of a sudden I might have to change the oven temperature, too. I’d love to conduct a controlled experiment that would conclude that Flour B is better than Flour A, holding all other variables constant. But in the real world such a test is somewhat meaningless. This is why it’s an art.
This makes a lot of sense. I think a lot of geeks out there would say that this would be a multivariate approach to finding one of these optimal points of pizza recipes and techniques.
That’s right. And you have to work on the underlying forces and begin to understand them independently, but in the end the results are not going to be a set of independent things, they’re going to be a set of interdependent things.
In the first stage of working a problem or trying to master a skill, you find that everything seems totally dependent and that’s when you have the least power. The next stage is to make things independent and to break things down and classify them. The whole idea is to segment things into finer and finer individual techniques. The ultimate stage is learning how to reconnect all of those parts that you separated out and now reorganize them into something where the pieces are interdependent rather than a collection of things that are independent.
I am at the middle stage myself, so I don’t quite see how all the pieces fit together. For example, if we don’t leave the heater on in the restaurant, then the dough warms up overnight at a different rate than it did a couple of days ago. I think, well, there really doesn’t seem to be that much difference but I know there was that two-degree difference, so I’ll correct for it. I’ll think I’m back where I started, but I am not. And then sometimes you don’t even know what’s different and then you just literally scratch your head. In a year it will be obvious what was different.
Can you give me an example?
One of the ingredients I had given pretty minimal thought to—and didn’t realize how important it was—was oregano. I have a little herb garden in front of my house and I grow some oregano. I didn’t like the strain I had. One day I found a better sample in an abandoned herb garden. I dug it up and I put it in my front yard and used it. So now I’m ready to launch the restaurant and I’m going to all my suppliers looking for oregano. Thirty-three oreganos later, I’m still sitting here saying none of them tastes like the one that I grew in my garden.
You don’t realize that there is a difference to be worked on, but that’s when you’re caught with your guard down. The oregano that I really, really like is a year away from production quantity so now I’m experimenting; maybe there’s a better way to dry the oreganos that I have. If I get a fresh one, maybe I can dry it differently and maybe the drying process will give me something closer to what I want. So now I’ve gone down the tunnel trying five, six, or seven ways of drying it—heated drying using a dehydration machine that blows a fan and a little bit of heat over it using dehumidifiers and all these different things.
So it sounds like your method for overcoming this is to try a lot of different things?
It really is, and you know it’s funny because I like to say, well, how do you know? I tried everything and a lot of people think, wow, it’s amazing you figured this out! People think there is some sort of secret magic, but the problem is that when you get to the end of what’s known, when you get to the end of engineering, you’re left with hunch and trial and error, but those carry you much further than people often give them credit for.
There’s a lot more to making great pizza than the dough—see page 267 for ideas on how to use this dough. This makes enough dough for one medium-sized pizza with the crust rolled thin. You’ll probably want to multiply these quantities by the number of people you’re cooking for.
Weigh into a large bowl or container:
1 1/3 |
cups (185g) flour |
1 |
teaspoon (6g) salt |
1 |
tablespoon (9g) instant yeast |
Using a spoon, mix together so that the salt and yeast are thoroughly distributed. Add:
½ |
cup (120 mL) water |
Mix in the water using the spoon so that the flour and water are incorporated.
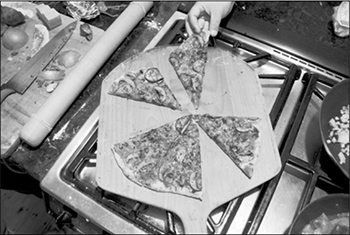
Cover the bowl or container with plastic wrap and let it rest on the counter for six hours, preferably longer. When ready, transfer the dough to a floured cutting board and gently stretch the dough out, pushing it into either a rectangular or circular pizza shape from the center. For a more rustic crust, leave the edge thicker and handle it minimally to leave more air pockets in the dough. For a thinner crust, roll the dough out. Follow standard pizza making instructions from this point on.
You can mix the ingredients together at breakfast time, before running off to your day job or wherever, and the dough will be ready by the time you get home. It’s the same principle as the no-knead bread (see page 261): the glutenin and gliadin proteins will slowly crosslink on their own.
Note
• If you want to experiment, order some sourdough yeast culture (which is actually a culture of both the well-known sourdough strain of yeast and the bacteria Lactobacillus). The ratio of yeast to bacteria in the dough will impact the flavor. You can control that ratio by letting the dough mature for some amount of time in the fridge, where yeast will multiply but bacteria won’t, and some amount of time at room temperature, where the bacteria will contribute flavors.
Bacteria
Bacteria are used in all sorts of food—yogurt, kimchi, cheese, chocolate—and bacteria can generate gas, so it’s not that far of a leap to wonder how to create bacteria-leavened foods. Alas, using bacteria as a leavening agent is downright rare.
The only recipe I’m aware of is salt-rising bread, possibly named from the use of a mound of warm salt to keep a bowl warm overnight in cooler climates. Salt-rising bread used to be popular in some Midwestern communities and was literally prized: the Iowa State Agricultural Society awarded one Mrs. M. L. Harding of Des Moines $5 for her salt-rising bread in 1889. (The last state fair I went to featured deep-fried Twinkies slathered in strawberry jam for $5—how times have changed!)
Leavening relies on the bacteria Clostridium perfringens to generate hydrogen for lift. While the idea of flammable bread is oddly appealing, the problem for me is C. perfringens: it’s the same bacteria that causes millions of cases of foodborne illnesses annually. To be fair, there are multiple strains of C. perfringens, and no illnesses have been linked to salt-rising bread. Researchers checked a few samples for relevant toxins and found nothing, attributing the lack of toxins to the particular strain, but also noted “the very real possibility” that other batches could contain the wrong strain. If you do want to give it a try, search online for Harold McGee’s article “The Disquieting Delights of Salt-Rising Bread.”
Of course, bacteria show up elsewhere in baking bread all the time: lactobacillus is what gives sourdough bread its distinctive flavor, with different species creating different flavors based on the byproducts they generate during fermentation. Lactobacillus has other benefits, too: it reduces the potential for mold growth in the baked loaf and improves the nutritional aspects.
Making sourdough bread is easy enough: add sourdough starter and water to whatever flour you like, and knead away. Making the sourdough starter, though, takes longer. Sourdough starter—sometimes called mother dough—is commonly created by gambling on the wild bacteria and yeast in your environment. Mix equal parts by weight of water and flour in an open container, cover with cheesecloth or a towel to keep flies out while allowing air to flow, stir twice daily, start feeding a few tablespoons of flour and water after a few days. After a week, you should have something that smells like sourdough; if not, try again. This “wild fermentation” method usually works, and I greatly respect the tradition and culture (pardon the pun) that it comes from and the practitioners who use it.
Sourdough Starter
There is a small chance that the strain of bacteria that settles into a wild starter won’t be safe—it needs to produce enough acetic acid to drive the pH low enough to prevent other bacteria from cohabitating. Using good strains of Lactobacillus and commercial yeast removes that risk.
Mix together 2 cups (500 mL) lukewarm water, 1 teaspoon (5g) yeast, 1 tablespoon (12g) sugar, and ¼ cup (60g) plain yogurt (with live cultures) and then knead in 2 cups (280g) of bread flour. Stir a few times daily, following the wild fermentation method.
Baking Soda
While yeast allows for the creation of many delicious foods, it has two potential drawbacks: time and flavor. Commercial bakers with high volumes and those of us with limited time to play in the kitchen can’t always afford to wait for yeast to do its thing. Then there are the flavors and aromas generated by yeast, which clash with the flavors in something like a chocolate cake. The simplest answer to these problems is baking soda:
A bicarbonate (HCO3–) that’s bound with a sodium atom (related compounds use potassium or ammonium to similar effect). When added to water, the bicarbonate dissolves and is able to react with acids to generate CO2.
Anyone who’s done the science fair project of using vinegar and baking soda to make a volcano can tell you that the mixture generates a whole lot of gas really quickly (along with a whole lot of mess). But in the kitchen, baking soda remains one of the bigger mysteries for bakers. How is it different from baking powder? How do you know which one to use?
The standard answer goes something like: “Baking soda reacts with acids, so use it only when your ingredients are acidic.” As simple explanations go, this covers most of the cases in cooking. But baking soda is more complicated—it also reacts with itself under heat—and worthy of a brief digression into the chemistry. I promise this’ll be short.
The baking soda you buy in the store is a specific chemical: sodium bicarbonate, NaHCO3. Without something for sodium bicarbonate to dissolve into, it’s an inert white powder. Upon getting wet—any moisture from any ingredient will do—the sodium bicarbonate dissolves, meaning that the sodium ions are free to run around separately from the bicarbonate ions.
The sodium in sodium bicarbonate is just there to transport the bicarbonate to your food. It does make the food slightly saltier, incidentally, which is why industrial food manufacturers will sometimes use things like potassium bicarbonate: potassium is good for you, and this avoids the sodium for people on a low-sodium diet.
This is where the alkaline and basic nature of things comes in. Most of us are familiar with the pH scale (the H stands for hydrogen; it’s unclear what the p stands for; “power” and “potential” are the best guesses). The pH scale is a measure of the amount of available hydrogen ions in a solution. Chemicals that affect the number of hydrogen ions can be classified in one of two ways:
Acids (pH below 7)
Proton donors—chemicals that increase the number of hydronium ions (H3O+; the hydrogen binds with a water molecule) in the solution
Bases (pH above 7)
Proton receivers—chemicals that bind with hydronium ions, reducing their available concentration in a solution
Baking soda’s bicarbonate ion has an interesting property called amphotericity: it can react with either an acid or a base. In the kitchen, very few things have a basic pH—egg whites, maybe your tap water in some situations, and that’s pretty much it—so you can safely ignore baking soda’s ability to react with bases and just think of it as something that reacts with acids.
In a glass of pure water with a spoonful or two of baking soda, there’s not much for the bicarbonate ions to interact with, so they just float around and taste generally nasty. But if you were to add a spoonful of vinegar—which contains acetic acid—to that glass, the bicarbonate ions would react with the acetic acid and generate carbon dioxide. Depending upon the amount of bicarbonate you started with, after you added the vinegar to the glass it would be in one of three states (none of which involves being half full or half empty):
• Bicarbonate ions still available; no acetic acid ions available
• No bicarbonate ions available; acetic acid ions still available
• Neither bicarbonate nor acetic acid ions freely available
Baking soda doesn’t need an acid to generate carbon dioxide; heat will do it, too. Boil some water and toss in a spoonful of baking soda. The sodium bicarbonate will break down and foam up.
In baking, it’s this last state—a neutral balance—that you want to reach. Too much baking soda can leave food with a soapy, yucky taste. Not enough baking soda will leave food slightly acidic (which is okay) but miss out on possible lift (which is probably not okay—your food will be flat). To get the “just right” state, I’ll repeat one of my favorite quotes: “Dosage matters!”
Obviously, we don’t bake “baking soda and water”; take a sip of baking soda in water sometime if you wonder why. Baking soda is usually called for in recipes that also use more acidic ingredients: fruit juices, buttermilk, molasses. Sugar and flour are slightly acidic, but not enough to normally merit much baking soda. (We’ll get to baking powder in the next section.) If you make substitutions in a recipe—say, you don’t have buttermilk so you use regular milk in its place—pay attention to the corresponding change in pH. In the case of buttermilk, you’d need to add one tablespoon (15 mL) of white vinegar or lemon juice for every cup (240 mL) of milk (and reduce the amount of milk by a tablespoon); this will provide the acids necessary for the baking soda to react with. Of course, you’ll be missing the pleasantly tangy flavor of the buttermilk, but at least you won’t be eating flat waffles!
How much baking soda to use depends on the pH of the ingredients in your dish. Short of testing the pH (see http://cookingforgeeks.com/book/ph-tester/), experimentation is the easiest way to work out the ideal ratio: increase the amount of baking soda in your recipe until you get the desired lift or can taste the baking soda. If you’re still not getting enough lift at this point, switch to adding baking powder. This balancing act between acids and baking soda isn’t a problem with baking powder; the ratio of acids to bicarbonate in the powder is preset by the manufacturer, as we’ll see in the next section.

Knowing the pH of your ingredients will help you understand when to use baking soda.
Why do some recipes call for sifting ingredients?
Sifting used to be necessary to remove husks, bugs, and whatever else ended up in flour, but those days are long gone. And weighing ingredients removes the need to deal with density differences. Sifting does aerate flour and quickly mixes in other dry ingredients, both of which can be done more easily by whisking. If you do need to sift—say, to really mix cocoa powder and flour—you can use a strainer over a bowl.
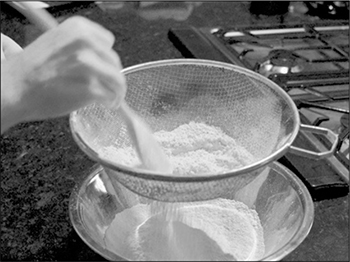
You’re probably expecting a cute explanation about baking soda and vinegar, but that would be first base: sodium bicarbonate is a base (saturated in water, it has a pH of 8.3), and every fifth grader knows that combining baking soda with white vinegar (~5% acetic acid) causes an acid-base reaction that generates carbon dioxide, sodium acetate, and water.
The thing you might not know about baking soda is that it also reacts with itself. When baking soda gets hot enough, it’ll undergo thermal decomposition, which means exactly what it sounds like: breaking down under heat. In the case of sodium bicarbonate, it decomposes to carbon dioxide, water, and sodium carbonate (a second base). But how hot is hot enough? That’s what we’re going to investigate.
• Baking soda (sodium bicarbonate): about 2/3 cup (150g)
• Aluminum foil
• Felt-tip marker to label the aluminum foil
optional, but handy
• Digital scale with 1 gram precision or better
optional, but this experiment is easier with a scale
We’re going to bake baking soda at five different temperatures to measure how the weight changes. In science lab lingo, the independent variables we’re looking at are the weight of baking soda, temperature, and time, and the dependent variable is the change in weight.
Make five aluminum foil “sample containers”:
Tear the aluminum foil into 5” × 5” (12 cm × 12 cm) squares.
Fold the edges of each square up, making a miniature pan that’s about 4” / 10 cm square and ½” / 1 cm high.
Using the marker, label the five sample containers with the temperatures listed in the data table. You can do just two of these, if you like. Or you can add in more temperatures, in which case I’d suggest trying anything between 170°F / ~80°C and 500°F / 260°C.
Record the weights of the empty sample containers—they should be just about 1 gram—so that you can subtract the weight of the sample containers after baking the samples.
Weigh out 30 grams of baking soda into each of the sample containers. (After you put the sample container on the scale, hit the “tare” button to zero out the weight.) Record the exact weight of baking soda you measured in the data table. If you don’t have a digital scale, use 6½ teaspoons of baking soda, which is about 30 grams.
Bake the baking soda! Set your oven to one of the temperatures, wait for the oven to heat, and then bake the sample on a cookie sheet for exactly 15 minutes. Remove the sample from the oven, allow it to cool for a few minutes, and then weigh the sample.
Feel free to split this step up between a couple of people, each person taking a different temperature in the range between 200°F / 90°C and 400°F / 200°C, and reporting back the next day.
How does the weight change based on temperature? Plot your data, showing the percentage change by temperature. (I’ll start you out with 150°F / 65°C: 0% change in weight.)
As temperature goes up, what do you notice about the percent change?

Oven temperature |
150°F / 65°C |
200°F / 95°C |
250°F / 125°C |
300°F / 155°C |
350°F / 175°C |
400°F / 205°C |
Weight of empty sample container |
1.01g |
|||||
Weight of baking soda (or teaspoons of baking soda) before baking |
30.09g |
|||||
Weight of sample container (or teaspoons of baking soda) after baking |
31.10g |
|||||
If weighing: weight of baking soda after baking (subtract the empty weight from the after-baking weight) |
30.09g |
|||||
Percentage change of weight (if using teaspoons, record the percentage change in number of teaspoons) |
0% |
Given time, yeast and bacteria generate flavors that we often find pleasant. But what about those times when you’re craving that taste right now—or at least, sometime this morning? You can take a shortcut by using buttermilk, which has already been munched on by bacteria.
Whisk together to combine thoroughly:
2 |
cups (280g) bread flour |
5 |
tablespoons (60g) sugar |
1½ |
teaspoons (7g) baking soda |
1 |
teaspoon (5g) salt |
In a separate bowl, melt:
½ |
cup (115g) butter |
In the same bowl as the butter, add and whisk together:
2½ |
cups (610g) buttermilk (lukewarm; this will keep the butter melted) |
2 |
large (100g) eggs |
Mix the wet ingredients into the dry, stirring with a whisk or spoon to combine. Cook on a griddle or nonstick frying pan set over medium heat (if you have an IR thermometer, 325–350°F / 160–175°C) until golden brown, about 2 minutes per side.

Notes
• Normally, you can make a buttermilk substitute by adding 1 tablespoon (15g) of vinegar or lemon juice to 1 scant cup (240g) of milk. This will adjust the pH to be roughly the same as that of a cup of buttermilk, but it will not create the same texture or thickness, so don’t use that substitute for this recipe. If you don’t have buttermilk, use regular milk and substitute baking powder for half of the baking soda.
• You don’t need to butter the griddle or pan before cooking these—there is enough butter in the batter that the pancakes are self-lubricating—but if you do feel the need, wipe any excess butter out of the pan before cooking the pancakes. If you have any dots of oil on the surface, they’ll interfere with the Maillard browning reactions.
• Pull the buttermilk and eggs out of the fridge an hour or so before you’re ready to use them, to allow them to come up to room temperature. If you’re in a rush, you can double-duty a microwave-safe mixing bowl: melt the butter in it, add the buttermilk, and then nuke it for 30 seconds to raise the temperature of the buttermilk.
Try using this batter for buttermilk fried chicken. Slice cooked chicken into bite-sized pieces, dredge them in cornstarch, dip them in this batter, and then deep-fry them in vegetable oil at 375°F / 190°C. The starch will help the batter adhere to the chicken. (No cornstarch? Use flour.) For the ideal texture, cook the chicken sous vide, as described in “Sous Vide Cooking” on page 320.
Chemical leaveners aren’t always used to create light, fluffy foods. Even dense items need some air to keep them enjoyable.
In a bowl, mix together with a wooden spoon or electric beater:
½ |
cup (100g) sugar |
6 |
tablespoons (80g) butter, softened but not melted |
½ |
cup (170g) molasses |
1 |
tablespoon (17g) minced ginger (or ginger paste) |
In a separate bowl, whisk together:
3¼ |
cups (455g) flour |
4 |
teaspoons (12g) ginger powder |
1 |
teaspoon (5g) baking soda |
2 |
teaspoons (3g) cinnamon |
1 |
teaspoon (1g) allspice |
½ |
teaspoon (2g) salt |
½ |
teaspoon (2g) ground black pepper |
Sift the dry ingredients into the bowl with the sugar/butter mixture. (I use a strainer as a sifter.) Work the dry and wet ingredients together using a spoon or, if you don’t mind, your hands. The dough will get to a crumbly, sandlike texture. Add ½ cup (120g) water and continue mixing until the dough forms a ball.
Turn out the dough onto a cutting board coated with a few tablespoons of flour. Using a rolling pin, roll out the dough until it is about ¼” / 0.6 cm thick. Cut it into shapes using a cookie cutter or a paring knife and bake them on a cookie sheet in an oven set to 400°F / 200°C until cooked, about 8 minutes. The cookies should be slightly puffed up and dry, but not overly dry.

Baking gingerbread cookies is, of course, a great holiday activity with kids.
Gingerbread Cookie Frosting
In a microwave-safe bowl, mix together with a fork or electric beaters:
3 |
tablespoons (40g) butter, softened but not melted |
1 |
cup (120g) powdered sugar |
1 |
tablespoon (15g) milk |
1 |
teaspoon (4g) vanilla extract |
Add food coloring if desired. Microwave the frosting for 15–30 seconds—long enough to melt it, but not so long that it boils. This will give you a frosting that you can then quickly dip the cookies into and that will set into a nice, thin coating that adheres well to the cookies.

I have a thing against cake mixes. Sure, commercial mixes produce very consistent results—they use additives and stabilizers exactly calibrated to give the right amount of gluten and balanced for taste—but even for a quick birthday cake, you can make a truly homemade one that actually tastes like chocolate without much more work.
Cakes are commonly made using a two-stage method, in which dry ingredients are weighed out and whisked in one bowl, wet ingredients are whisked in a second bowl, and then the two are combined. In the streamline method, all ingredients are mixed in the same bowl: first dry (to make sure the ingredients are thoroughly blended), then wet, then eggs.
In a large bowl or the large bowl of a mixer, measure out:
2¼ |
cups (450g) sugar |
2 |
cups (280g) pastry or cake flour (all-purpose flour is okay, too) |
¾ |
cup (70g) cocoa powder (unsweetened) |
2 |
teaspoons (10g) baking soda |
½ |
teaspoon (2g) salt |
Whisk together the dry ingredients, and then add to the same bowl, whisking to combine thoroughly (about a minute):
1½ |
cups (360g) buttermilk—in a pinch, substitute 1 2/5 cup (336g) milk and 1½ tablespoons (24g) vinegar or lemon juice |
1 |
cup (218g) canola oil |
1 |
teaspoon (5g) vanilla extract |
Add and whisk to combine:
3 |
large (150g) eggs |
Prepare two 9” / 22 cm or three 8” / 20 cm round cake pans by lining the bottom with parchment paper. Yes, you really need to do this; otherwise, the cakes will stick and tear when you try to remove them. Spray the paper and pan sides with nonstick spray or coat with butter, and then dust with either flour or cocoa powder.
Don’t worry about the parchment paper covering every last millimeter of the bottom of the cake pan. Cut a square of parchment paper, and fold it in half, then in quarters, and then in eighths. Snip the top off the folded paper, unfold your octagon, and place it in the pan.
Divide the batter into the cake pans. If you have a scale, use it to keep the weights of the pans the same; this way, the cakes will be roughly the same height.
Bake batter in an oven preheated to 350°F / 180°C until a toothpick comes out clean, about 30 minutes. Allow the cakes to cool before turning out and frosting. If your cakes sink in the middle, either your batter has too much moisture (see the baking tips on page 249) or your oven is too cold (see the lab on oven calibration on page 36).
Even professional bakers use toothpicks to check doneness. For brownies, check that a toothpick inserted 1” / 2.5 cm deep comes out clean; for cakes, push the toothpick in all the way.
Notes
• When placing the cake pans in the oven, put them on a wire rack in the middle of the oven. If you keep a pizza or baking stone in your oven (which I always recommend), don’t set the cakes directly on the stone; put them on a rack above the stone.
• Like buttermilk, baking cocoa powder is acidic! Dutch process cocoa powder, however, is alkalinized—that is, it has had its pH level adjusted, changing it from a pH of around 5.5 to a pH of between 6.0 and 8.0, depending upon the manufacturer. Don’t just blindly substitute Dutch process cocoa powder for straight-up cocoa powder; some of the baking soda will need to be switched out for baking powder.

Chocolate Espresso Ganache Frosting
In a saucepan over medium heat, heat 1 cup (240g) of heavy cream until it just begins to simmer. Remove from heat and add:
2 |
tablespoons (30g) butter |
1 |
tablespoon (5g) espresso powder (optional, but delicious) |
11½ |
ounces (325g) finely chopped bittersweet chocolate (use semisweet chocolate if you prefer your cakes on the sweeter side) |
|
Pinch of salt |
Allow ingredients to rest until the chocolate and butter have melted, about 5 minutes. Whisk to thoroughly combine.
To frost the cake, you can pour the still-warm ganache over the cooled cake, allowing it to run down the sides. This can get messy; on the plus side, it’s a great excuse for eating half the ganache.
To create a more traditional frosting, allow the ganache to set in the fridge, about 30 minutes, and then use an electric beater or mixer to beat it until it’s light and fluffy. Coat the top of each layer of the cake with the whipped ganache and stack them, leaving the sides exposed.
Notes
• Make sure your cake is cool before frosting it; otherwise, the hot cake will melt the ganache.
• For a tangier frosting, substitute buttermilk for half of the heavy cream. If you’re feeling inspired, try adding anything you think would work in a truffle. Cinnamon is easy to imagine, but why not cayenne pepper or lavender? Or infuse the cream with Earl Grey tea?
The Science of Crispy, Chewy Cookies
One of the biggest advantages that home bakers have is time. Commercial products are made at least half a day in advance, usually longer, so manufacturers have to come up with clever tricks to mimic what happens in your kitchen. What if we could learn those manufacturing tricks and try them ourselves?
A freshly baked cookie—“just like Mom used to make!”—is crispy on the outside and chewy in the middle. Some enterprising researchers at UC Davis proved this by building an oven inside of their MRI machine and then baking cookies in it, using the MRI to scan what happened to the water inside the dough as it baked. (I’d love to see the grant application for that one.)
A dozen cookies and MRIs later, the researchers had proof: the edge of the cookie definitely dries out—and to a remarkable extent—during baking. After a day or two, however, the moisture evens back out and the cookies revert to having a uniform ductile, soft texture, losing that fresh-baked quality. (And a week later, the sugars recrystallize—that’s how the cookie crumbles!)
Crispy-chewy chocolate chip cookies are incredibly hard to make, at least commercially. But good luck calling up and asking the elves making cookies at any of the large commercial manufacturers for tips: these sorts of things are trade secrets, with stories of industrial espionage that spy novelists and Jason Bourne would appreciate. Luckily for us there is one place where industry has to spill its secrets: patents. And in this case, US Patent #4,455,333 (http://cookingforgeeks.com/book/cookie-patent/) has the answers.

Each patent includes a background description written to set the stage for the invention, and those descriptions can be a great source for a clear summary of “how things work.” From reading a few cookie-related patents, you’ll quickly learn that soft cookies have a water concentration of 6% and higher, while crispy cookies are drier. This makes sense—moisture is a key variable in texture. So how can you control the moisture in your cookies?
Check out the ingredients listed on packaged crispy cookies as compared to the same brand’s packaged chewy cookies. In the brand I checked, cornstarch and molasses show up only in the chewy ones.
Crispy cookies are actually the easier of the two to make: create a dough that holds less water, or bake your dough longer, and the final product will be drier. To make chewy cookies, you have to formulate the dough so that it holds on to more water as it bakes, but you can’t just add more water into cookie dough (that’s what causes cookies to flatten out and results in burnt, feathered edges). Here are the common ways of making cookies chewier:
Substitute glucose/fructose-based sugars for sucrose. In baking, sugars dissolve in water from eggs and butter. As the dough heats up, the sugar water forms a syrup, but—this is the key!—different types of sugars will absorb different amounts of water (the solutions saturate at different points). Sucrose molecules, being roughly twice the size of fructose and glucose molecules, don’t create a solution with as much water, cup for cup. This means a dough that uses simpler sugars will hold on to more water. Lots of white sugar (sucrose)? You’ll get crispy cookies. More brown sugar (sucrose, glucose, and fructose)? You’ll have chewier cookies. Corn syrup? You’ll get even chewier cookies (it’s 100% glucose—high-fructose corn syrup is different from what you buy at the store). Glucose and fructose sugars are monosaccharides—the simplest form of sugar—and will keep more moisture in the cookie, so any source of those will work.
Everyone has an opinion about how gooey, chewy, or crispy a cookie should be. I’ve had one person insist on eating almost-raw “6-minute cookies”—baked at 350°F / 180°C for 6 minutes—while serious milk-dunkers wouldn’t consider anything less than a 15-minute cookie acceptable.
As a rough rule of thumb, for a ½-ounce (14g) cookie baked at 350°F / 180°C:
• 7–9 minutes: gooey
• 10–12 minutes: chewy
• 13–15+ minutes: crispy
If your cookies aren’t coming out the way you like, in terms of gooey-chewy-crispy, change how long you’re baking them. Using the same dough, crispy cookies will take about 25–30% longer to bake than chewy cookies.
If you want really crispy, thoroughly golden brown cookies, drop the temperature to 275°F / 140°C and bake for about 30 minutes.
Add cornstarch. Cornstarch doesn’t dissolve in cold water, but as it heats up it will gelatinize, absorbing water, and prevent that water from leaving the cookie as it bakes. (Speaking of patents, there’s one that adds a ground-up gel, something sort of like Jell-O, into the dough—yet another clever trick for chewy cookies.)
Use bread flour. Gluten, too, will increase chewiness, as its elastic nature means that the baked good won’t fracture and break. Using a higher-gluten flour will modestly aid you, although it’s not common in chewy dough recipes; there’s a lot of sugar and fat in the dough to get in the way. Melting butter affects this variable: the water from the butter, when melted, will help with gluten formation (see page 249 for more on controlling gluten).
Bake them for less time. In addition to making dough that holds on to water better, there’s another obvious trick for making chewier cookies: don’t bake the cookies as long! (Chilling the dough is a related tactic, but you could just bake them for less time.) I looked at the baking times listed for the first six recipes I found online for “chewy chocolate chip cookie recipe”; the average bake time was 12 minutes, 20 seconds. “Crispy chocolate chip cookie recipe”? 14 minutes, 55 seconds—a full 2½ minutes longer! (The average temperatures were only a few degrees off, essentially equivalent.)
In reality, chewy versus crispy cookies ends up being a balancing act of all of these tricks, along with subtler tactics, such as tweaking the dough’s pH or, depending upon the type of cookie, including humectants such as raisins, which hold on to water.
Fortunately for us, that patent (#4,455,333) has expired, so the only trouble you’ll run into with these cookies is people fighting over who gets to eat the last one!
The average chewy cookie recipe bakes for 12½ minutes; crispy cookie recipes usually bake for 15 minutes. Making a cookie that’s extra-crispy on the outside and extra-chewy in the middle can’t be done by changing the baking time, because...well, physics. The trick to these “crispy on the outside, chewy in the middle” cookies is to make two different doughs! This idea came to me after reading about a patent from the 1980s that uses the same technique.
Set out two bowls. Label one “crispy” and the other “chewy.” In each bowl, measure out:
¼ |
cup (30g) rolled oats |
1 |
cup (140g) flour |
½ |
teaspoon (2g) baking soda |
½ |
teaspoon (2g) salt |
¼ |
teaspoon (1g) cinnamon |
Then, to just the “chewy” bowl, add:
1½ |
tablespoon (12g) cornstarch |
Using a whisk, mix the dry ingredients in each bowl to blend them.
Set out two more bowls, and also label them “crispy” and “chewy.” In the new “crispy” bowl, add:
½ |
cup (113g) unsalted butter (or better yet, shortening) |
1/8 |
cup (25g) light brown sugar |
½ |
cup (100g) white sugar |
In the empty “chewy” bowl, add:
½ |
cup (113g) unsalted butter |
½ |
cup (100g) light brown sugar |
¼ |
cup (88g) light corn syrup |
Using a hand or stand mixer, cream until incorporated and smooth each of the sugar-butter mixtures.
To each of the sugar-butter bowls, add:
1 |
teaspoon (4g) vanilla extract |
½ |
teaspoon (2g) lemon juice |
1 |
large (50g) egg |
Blend until fully incorporated. Add the dry ingredients, making sure to add the right dry ingredients into the right wet ingredients. Blend again to fully incorporate. To each bowl, add and then stir to combine:
1½ |
cups (250g) bittersweet chocolate chips |
¾ |
cup (75g) chopped walnuts |
Now, for the patent-violating part: smashing the two doughs together in a way that puts the crispy dough on the outside of the cookie and the chewy dough in the middle.
Drop a scoop of the crispy dough onto a lined cookie sheet.

Using the back of the scoop or spoon, smash the cookie ball in the center to make a cookie dough crater, just like making a well in mashed potatoes for gravy.

Drop a scoop of the chewy dough inside the crater.
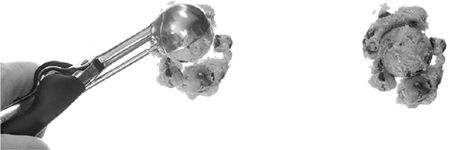
Mush the two doughs together.

If you like, add a pinch of very coarse sea salt on top of each cookie before baking.
Bake at 350°F / 180°C for 10–12 minutes, taking care to not overcook them; otherwise, the chewy center will come out crispy!
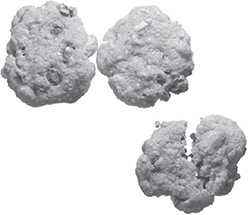
Notes
• If you’re familiar with refrigerator cookies, instead of following the two-scoop method, you can form a log with the chewy dough in the center, wrapped by the crispy dough. This takes more work, but gives a more uniform edge on the cookie.
• If you don’t have corn syrup and you’re itching to try this right now, honey is a potential substitute: at 38% fructose, 31% glucose, it’s remarkably similar to corn syrup in that both are monosaccharides (sucrose is a disaccharide). Of course, honey will bring its own flavor and color to the cookie, but that might be interesting, depending upon the type of cookie you make. Crispy-chewy oatmeal cookies, anyone?
What happens if you flatten a ball of cookie dough before baking it? Or use fridge- or room-temperature dough? Play, experiment, and see what happens!
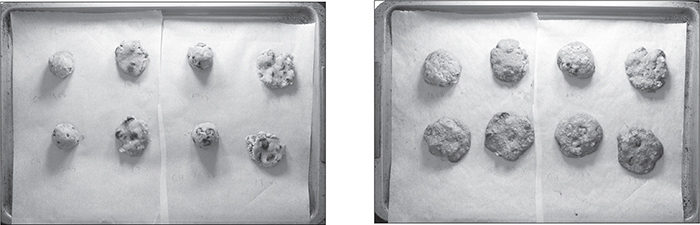
For my cookie recipe, flattening the dough made a size difference only for the crispy dough version. Using fridge- versus room-temperature dough didn’t make a difference in size but did change the texture.
Baking Powder
Baking powder solves the “balancing act” problem I wrote about when describing baking soda. By including acids alongside baking soda, baking powder eliminates the need to balance the ratio of acidic ingredients:
A self-contained leavening system that generates carbon dioxide in the presence of water, baking powders by definition contain a baking soda and acids that react with the baking soda.
Because the acids are mixed into baking powder, the types and quantity can be optimized. Baking powder, at its simplest, can be made with just one type of bicarbonate and one type of acid. Baking powders are typically fancier than this, though. Different acids have different rates of reaction and different reaction temperatures, so using multiple types of acid creates a baking powder that’s essentially time-released. This isn’t just clever marketing: in baked goods, if the CO2-generating reaction occurs too slowly, you’ll end up with a dense, flat product. And if those reactions happen too quickly, the food won’t have time to properly set to hold on to the gas, resulting in outcomes like collapsed cakes.
Baking Powder Substitute
Mix 2 parts cream of tartar to 1 part baking soda. Cream of tartar—potassium hydrogen tartrate—will dissolve in water, freeing tartaric acid (C4H6O6) to react with the sodium bicarbonate.
Double-acting baking powder—the stuff you’ll find at the grocery store—uses both slow- and fast-acting acids to help prevent these types of problems. Fast-acting acids, such as tartaric acid (in cream of tartar) and monocalcium phosphate monohydrate, can work at room temperature; slow-acting acids, such as sodium aluminum sulfate, need heat and time to release CO2.
As long as the ratio of ingredients in your baked products is roughly correct and you’re baking within an acceptable temperature range, baking powder is unlikely to be the culprit in failed baking experiments. The different acids used can impart a taste—some people find that baking powder made with sodium aluminum sulfate tastes more bitter—so if you’re experiencing an “off” taste, check the ingredients list and choose another product accordingly. If you’re seeing unexpected results with a commercial baking powder, check whether your ingredients are highly acidic. Acidity impacts baking powder; more acidic ingredients in a recipe will require less baking powder. If that doesn’t turn up any suspects, check how long it has been since the baking powder was opened. Even though commercial baking powders contain cornstarch, which absorbs moisture to extend the shelf life, the chemicals in baking powder will eventually react with each other. Standard shelf life is about six months after opening.
Yeast-Free Pizza Dough
This quick-rising pizza dough is especially handy if someone has a yeast allergy or if you’re craving pizza in the next hour. Whisk 3–4 cups (420–560g) of flour with 1 teaspoon (6g) of salt and 2 teaspoons (10g) of baking powder. Add 1 cup (240g) of water and knead to create a dough that has roughly a 66–75% hydration level. Let rest for 15 minutes before using.
There are two broad types of cake batters: high-ratio cakes (those that have more sugar and water than flour—or by some definitions, just a lot of sugar) and low-ratio cakes (which tend to have coarser crumbs). For high-ratio cakes, there should be more sugar than flour (by weight) and more eggs than fats (again, by weight), and the liquid mass (eggs, milk, water) should be heavier than the sugar.
Consider this pumpkin cake, which is a high-ratio cake. (245g of pumpkin contains 220g of water—you can look these sorts of values up in the USDA National Nutrient Database, available online at http://ndb.nal.usda.gov/.)
In a mixing bowl, measure out and then mix with an electric mixer to thoroughly combine:
1 |
cup (245g) pumpkin (canned, or roast and purée your own) |
1 |
cup (200g) sugar |
¾ |
cup (160g) canola oil |
2 |
large (100g) eggs |
1½ |
cups (210g) flour |
¼ |
cup (40g) raisins |
2 |
teaspoons (5g) cinnamon |
1 |
teaspoon (5g) baking powder |
½ |
teaspoon (2g) baking soda |
½ |
teaspoon (3g) salt |
½ |
teaspoon (2g) vanilla extract |
Transfer batter to a greased cake pan or springform pan and bake in an oven preheated to 350°F / 175°C until a toothpick comes out dry, about 25–30 minutes.
Notes
• Try adding dried pears soaked in brandy. You can also hold back some of the raisins and sprinkle them on top.
• One nice thing about high-ratio cakes is that they don’t have much gluten, so they won’t turn out like bread, even with excessive beating. With a total weight of 920 grams, of which only roughly 20 grams is gluten, there just isn’t enough gluten present in this cake to give it a breadlike texture. There’s also a fair amount of both sugar and fats to interfere with gluten development.

If you’re making a quick cake like this pumpkin cake as the finale to an informal dinner party, try serving it directly on a single plate or even a cutting board. Besides lending a pleasant casual feel, this’ll mean fewer dishes to wash!
Tim O’Reilly (founder of O’Reilly Media and publisher of this book) made these scones for me at his home when I interviewed him for the first edition. What Tim didn’t know was that it was my first time ever interviewing someone, so I have fond memories of his kindness that warm August day whenever I make these scones. Makes about one dozen scones.
In a bowl, measure out:
2½–3 |
cups (350–420g) flour (experiment to see how much you prefer) |
½ |
cup (115g) butter, chilled |
Using a pastry blender or two knives, cut the butter into the flour. When done, the butter and flour should look like small pebbles or peas.
Add and whisk to combine:
3 |
tablespoons (36g) sugar |
4 |
teaspoons (20g) baking powder |
½ |
teaspoon (3g) salt |
(At this point, you can freeze the dough for later use.)
In the center of the dough, make a “well” and add:
½–1 |
cup (50–100g) currants (or raisins, if you prefer) |
½–1 |
cup (130–260g) milk (or soy milk; goat’s milk is also great) |
Stir dough until you get just shy of a gooey consistency. Start with only ½ cup (130g) of milk, adding more as necessary until the dough begins to hang together. If it gets very sticky, you’ve put in a bit too much milk. You can add more flour if you’ve gone in with less flour to begin with, but it’s better to bake them sticky than to add more than a total of 3 cups of flour—the stickiness is just a problem for shaping them, since the dough sticks to your fingers; too much flour, and they can become tough.
Prepare a baking sheet by lining it with parchment paper or a Silpat (nonstick silicone baking mat). If you don’t have either, lightly grease a baking sheet. (You can just rub it with the paper from the stick of butter.) Using your hands, shape the dough into small lumps and space them evenly on the baking sheet.
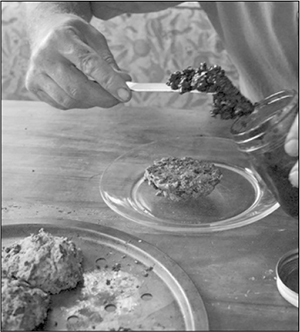
Crumbly scones? Flip the scone over and jam the bottom side of it instead of trying to slice it open.
Bake at 425°F / 220°C until the tops are browned, about 10–12 minutes.
Serve with jam, and, if you’re feeling piggy, with Devonshire cream (whipped cream works, too, from one of those aerosol cans, so you can just put a spot of it on).
Notes
• You can use a cheese grater to grate the butter into the flour. Chill the butter for a few minutes so it’s easier to handle.
• Tim freezes the partially mixed dough, adding the milk and currants to the dough after it’s pulled out from the freezer. (The frozen dough has an almost sandlike consistency, so you can pull out as much or as little as you want.) The benefit of the frozen dough is that you can bake scones a few at a time, adding just enough milk to bring the cold dough to a sticky consistency. This makes for a great quick treat, especially if you are the type who has unexpected guests occasionally. It’s also in the spirit of learning to cook like a pro: nothing goes to waste this way, and it’s efficient!
Egg Whites
Whisked egg whites are the Styrofoam of the culinary world: besides acting as space fillers in cakes, waffles, and soufflés and as insulators in desserts like lemon meringue pie, when overcooked, they taste kind of like Styrofoam, too. All metaphors aside, egg whites are much more forgiving than many cooks realize. With a little attention spent on understanding the chemistry and a bit of experimentation, you can easily master egg white foams.
Whisked egg whites work by trapping air within a liquid, creating a foam: a mixture of a solid or liquid surrounding a dispersion of gas; that is, the gas (usually air) is dispersed through the liquid or solid, not in a single big cavity. Bread is a solid foam; whipped egg whites are a liquid foam.
Unlike yeast, baking soda, or baking powder, all of which rely on the chemical makeup of the food, egg whites hold on to air based on their physical properties. You can’t just add mechanical leaveners—typically whisked egg whites, but as we’ll see later, also egg yolks and whipped cream—to a dish without considering the impact of the moisture or fat that they also add. Adding these types of ingredients can throw off the ratios between flour and water or between sugar and fats.
The key to understanding egg whites is to understand how foams themselves work. Whisking egg whites turns them into a light, airy foam by trapping air bubbles in a mesh of denatured proteins. Since regions of the proteins that make up egg whites are hydrophobic—literally, “water fearing”—they normally curl up and form tight little balls to avoid interacting with the water. But when whisked, those regions of the proteins are slammed against air bubbles and unfold, and as more and more proteins are knocked against an air bubble, they form a layer around the bubble and essentially trap it in the liquid, creating a foam that’s stable.
There are a few things that can go wrong in whisking egg whites: fats interfering with their formation; overwhisking leading to their breakdown; or leaving them to sit too long, which allows water in the foam to drag proteins away as it drains out. These issues won’t impact some uses of egg whites. If you’re adding whites into waffle batter, for example, any water weeping out from whisked whites will be absorbed by the batter. But in meringues, that water will form a puddle around the cookie as it bakes—not good.
Oils, especially from egg yolks or any trace oils in the whisking bowl, prevent egg whites from being whisked into as stable a foam because they’re also able to interact with the hydrophobic sections of the proteins. While many recipes admonish you to not get a drop of yolk in your whites, a very small amount won’t ruin egg whites’ ability to foam—but it can change how stable they are before being set by baking. (There’s an old paper that says one drop of yolk decreases the potential volume of a foam made from a single large egg white from 135 mL to 40 mL—perhaps true in some industrial applications, but when I tried it in my kitchen, nothing close to that decrease happened.)
When whisking, take care to not overwhisk. Doing so will cause the formation of smaller and smaller air bubbles, which will decrease the flexibility and elasticity of the foam and cause it to become more unstable. Egg whites whisked to dry peaks—billowy, almost cloudlike shapes on a whisk—won’t expand as much in baked goods; taken too far, they’ll become brittle.
There are some culinary tricks for increasing the stability of egg white foams. Some recipes call for adding sugar or cream of tartar early in the whisking process. These ingredients don’t interfere with the formation of protein-based foams because they don’t interact with the hydrophobic sections. Small amounts of acids will even help stabilize the foam and aid in baking by increasing the temperature at which the egg white proteins set, allowing for more air expansion.
When it comes to working whisked egg whites into other ingredients, like a batter, fold them in using a flat spatula, putting part of the foamed egg white on top of the batter and then cutting through the mixture and turning up the heavier batter on top of the whisked whites. Once the egg whites are foamed up, it takes quite a bit of effort to get them to break down. Exposing the whites to fats before whisking can be a problem, but once the eggs are whisked, they’re much more resilient. Try whisking an egg white to soft peak stage, then adding ½ teaspoon (3g) olive oil and continuing to whisk. It might surprise you how long it takes before the oil starts to noticeably interact with the foam, and even then, the foam remains mostly stable.
Making the Most of Whisked Egg Whites
Whisked egg whites trap air bubbles inside a tangled net of egg white proteins to create an egg white foam, but the way those proteins are tangled and how the whites are used in cooking changes how much volume the whisked egg whites can provide.
The physics of egg white foams is fascinating. Foams are colloids, mixtures of different substances. We’ll cover these more later (see page 379), but for now, just know there are two types: liquid-air foams and solid-air foams. Bread is a solid-air foam; whisked egg white is a liquid-air one. It’s the liquid in egg white foams that presents the challenges of great whisked egg whites.
Egg white foams have two variables: capacity (how much air the foam can hold) and stability (how much the volume decreases over time). Capacity and stability are primarily determined by the size of the air bubbles, the viscosity of the liquid, and how thick or thin the walls between adjacent air bubbles are. How you control these things is another matter.
Acids and cream of tartar
Just as the pH of egg whites changes how easily boiled eggs peel (see page 193), it also changes the volume of egg white foams. Older eggs won’t foam up as much. Adding an acid fixes this, but decreases the foam’s stability. Cream of tartar is commonly used because of its mild taste (try licking a finger lightly dusted with some; it’ll taste only mildly sour after a few seconds); other acids, like citric acid via lemon juice, also work but can impart too strong of a taste. Any time a recipe depends on whisked egg whites for volume and you’re stuck with older eggs, add a pinch of cream of tartar—1/8 teaspoon (0.5g) per egg white.
Sugar
The liquid in the foam structure slowly drains down due to gravity, so anything that slows that drainage increases the stability. Adding sugar makes liquids more viscous but also increases how long it takes to whisk whites to optimal volume. If you’re using whisked whites in a recipe that calls for sugar, try splitting the sugar between the components.
Water
Adding more water to egg whites decreases viscosity, so it’s no surprise that adding it will decrease stability. However, adding water—up to ~40% by weight—will increase capacity, which can be useful in quickly cooked recipes.
Choice of bowl
Fats interfere with the development of egg white foams, leading to a smaller capacity to hold air. Because different materials retain fats differently, what you whisk your whites in can change the results.
Avoid plastic bowls. Plastic is chemically similar enough to lipids that they stick to it and are impossible to completely wash away. Whisking egg whites in a plastic bowl reduces their volume because of this oil lingering in the bowl. (Of course, it’s fine to whip cream in a plastic bowl; more fat isn’t going to interfere with its fat-based foam structure.)
Stainless steel and glass bowls are fine to use. They won’t hold on to problematic fats, assuming you’ve washed them well. Some metals, like copper, will react with proteins in the egg white—in a good way!—leading to a more stable foam. (The same chemistry that makes stainless steel stainless also means it won’t give off any metal ions.) It’s not a subtle effect: when I whisk egg whites in a copper bowl, they’re definitely easier to work with. It’s not copper specifically: zinc and iron can have a similar effect, although reportedly lead to a red tint. In theory any noble metal, even very unreactive ones like silver and gold, should react with the sulfur in the egg whites. (Harold McGee investigated this with silver and found good results; I have yet to find someone who’s tried it in a gold or rhodium bowl.) Copper bowls are expensive, but if you find you’re whipping up egg whites a lot, it’s probably worth breaking down and spending the money on one. (If you have a gold bowl, my mailing address is...)
If you’re trying to whisk air into food to create a foam, such as whipped cream or whipped egg whites, whisk—by hand!—in an up-and-down circular motion, catching and trapping air. If you’re trying to mix ingredients together without necessarily adding air, whisk in a flat circular motion. This is especially important for dishes like scrambled eggs where incorporating air reduces the quality. Also, when whisking, avoid tiny little stirring motions. Get in there like you mean it and whisk some air in there!
It depends on the recipe. If it calls for soft peaks, the foam should still be supple and pliable, but shouldn’t slide off the whisk. If it calls for firm peaks, the foam should hold and set its shape; stiff peaks look the same but should be firmer and glossier than firm peaks. Overwhisking will give you dry peaks that look like fluffy clouds and won’t rise as well. I prefer whisking egg whites and whipped cream by hand. Why? I’m less likely to accidentally overdo it.

No Peak Foamy stage is the ideal time to add cream of tartar.

Soft Peak Best time to add sugar.

Stiff Peak Good for hard meringues.
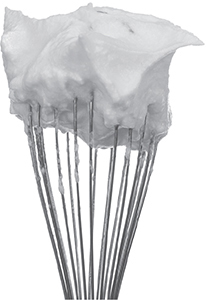
Dry Peak Overwhisked; won’t rise as well.
There are two general forms of meringues: those in which the sugar is directly added as the egg whites are whisked (French meringue), and those in which the sugar is dissolved into a syrup before being whisked into the egg whites (Swiss and Italian meringue—we’ll cover Italian here, but they’re similar). The French version tends to be drier (sugar is hydroscopic, sucking the moisture out of the whites—this is why it increases viscosity) and also grittier, and has the benefit of being faster to make. The Italian version has a smoother, almost creamy texture; it’s great for use as a topping on desserts!
Note that meringues use raw egg whites. You’ll want to bake the meringue if you’re concerned about Salmonella. The Italian version, even with hot sugar syrup, only reaches ~115°F / 45°C when being made. Heat-pasteurized egg whites don’t whisk well: the pasteurization denatures one of the protein complexes supporting the foam structure. Extended whisking time can produce a workable foam; hopefully pressure-pasteurized egg whites will become commercially available someday.
French Meringue
In a clean bowl, whisk 3 egg whites to soft peak stage.
Add ¾ cup (150g) sugar—preferably superfine—one tablespoon at a time, while continuously whisking. If using regular sugar, you’ll need to whisk longer to make sure the sugar is entirely dissolved. To check, roll a little bit of the meringue between two fingers (it shouldn’t feel gritty).
Italian Meringue
Create a simple syrup by heating ½ cup (100g) sugar and ¼ cup (60g) water to 240°F / 115°C in a saucepan. Set aside.
In a clean bowl, whisk 3 egg whites to soft peak stage. Slowly pour in sugar syrup while whisking continuously, which will prevent the hot syrup from cooking the whites.

Egg whites, when whisked and combined with sugar, turn into a sweet, airy mixture that can be baked as is or folded into heavier bases, bringing a lightness and sweetness to them. French meringue cookies are nothing more than egg whites and sugar that have spent a little time in the oven. The sugar isn’t just for taste, though; it helps stabilize the egg white foam by increasing the viscosity of the water in the foam, slowing down how quickly it can drain out. This same effect roughly doubles the amount of whisking time needed for the egg whites to reach the same volume as ones not adulterated with sugar. The other benefit of sugar is a meringue that’s better able to support the weight of anything added into the foam.
To make meringue cookies, start with either the French or Italian Meringue recipe. Optionally, fold into the meringue whatever ingredients you’d like—ground almonds, chocolate chips, dried fruit, cocoa powder.
Using a spoon or piping bag, portion the meringue onto a cookie sheet lined with parchment paper. (No piping bag? Put a small plastic bag in a mug, fold the edges of the bag over the lip of the mug, fill the bag, and then remove it from the mug and snip a small corner off.)
Macaroon versus macaron?
Macaroon is the English spelling for the French word macaron. In English, macaron has come to mean a meringue cookie sandwich with a filling. Macaroon is used for the denser versions with heavier ingredients folded in—typically coconut in the United States, and chocolate and dried fruit elsewhere.
Coconut macaroons are made by starting with the meringue recipe and adding in coconut. Try adding 2 cups (160g) of sweetened coconut flakes and spooning the mixture onto a lined cookie sheet.
Preheat an oven to 275 F / 140 C; or, if you want your macaroons slightly browned, 325 F / 160 C. Bake the macaroons for 20–30 minutes. until they freely come off the parchment paper.

No piping bag? No problem. Put your filling in a large resealable bag and snip off one of the corners.
If you grew up with a brother or sister, you’re undoubtedly familiar with the technique for avoiding fights when splitting food: one person divides it, and the other person chooses. (“You can halve your cake, and eat it, too!”) But what to do if you have more than one brother or sister?
There is a solution, but it’s a bit more involved. Here’s the algorithm for cutting a round cake for N people. It’s not perfect—don’t use this for negotiating land divisions after minor land wars—but when it comes to a table of kids and a large chocolate cake, it’ll probably work. (If you find yourself cutting cake for hardcore math geeks, however, I suggest reading up on the literature. Start with “An Envy-Free Cake Division Protocol” by Brams and Taylor [The American Mathematical Monthly, 1995] and plan to be at it for a while.)
Only one person actually does any cake cutting, and that person can either be a cake eater or just a referee. Start with the cake in front of you, along with a knife and N plates. Proceed as follows:
Make a first cut in the cake, as normal.
Explain that you’re going to hold the knife above the cake and slowly move it in a clockwise direction, just like someone thinking about how big the next slice should be. Anyone—including the person cutting the cake—can say “stop” at any point to declare that he or she wants a piece that size, at which point, that’s where you’ll cut the first slice.
Again, slowly move the knife above the cake until someone calls stop.
Slice the cake and hand the person who called stop the new slice. Repeat steps 3 and 4 with the remaining cake eaters. (To be clear, anyone who calls stop is now out of the negotiation and doesn’t get to call it again.)
When you’re down to the last person, cut the cake wherever he or she likes, which may leave a leftover piece.
One of the nice things about this protocol (a protocol is similar to an algorithm, but allows for accepting user input after being started) is that it allows people who for whatever crazy reason want small slices to get one, and gets them out of the way at the beginning, meaning if somebody else wants a larger slice than an equal N division would allow, that person gets more cake and can eat it, too.
If someone is being greedy and wants a too-big piece, that person will end up getting the last slice—which will normally be the largest slice. If two or more people end up being greedy and never call stop, though, they could allow you to reach the end of the cake, in which case I suggest eating the remaining part yourself. There’s no guarantee that this protocol will satisfy everyone—just that the honest actors are protected from the dishonest ones.
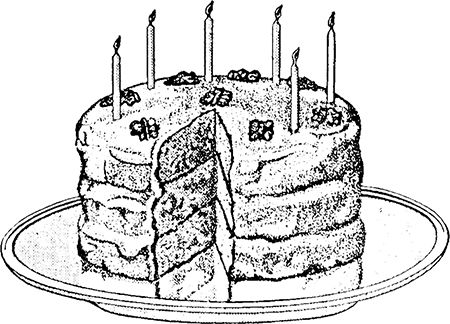
Egg Yolks
If Eskimos have N words for describing snow, the French and Italians have N+1 words for describing dishes involving egg yolks. Egg yolks are used in almost all cultures for many purposes, from sticking bread crumbs to fish to adding a shiny gloss to baked goods. What might not be evident is that egg yolks, just like egg whites, can also be used to create airy foams by trapping air bubbles.
Egg yolks are much more complex than egg whites: they’re ~51% water, ~16% protein, ~32% fat, and ~1% carbohydrates, while egg whites are only protein (~11%) and water. In their natural state, egg yolks are an emulsion: a mixture of two liquids that are immiscible—that is, unable to mix (think oil and water). Mayonnaise is the classical culinary example. In egg yolks, the fats and water are held in suspension by some of the proteins, which act as emulsifiers—compounds that can hold immiscible liquids in suspension. For more on the chemistry of emulsions, see page 429.
Like egg white foams, egg yolk foams trap air with denatured proteins that form a mesh around air bubbles. Whisking yolks won’t form a foam, though; to denature the proteins in the yolk you’ll need to use heat. The optimal temperature for egg yolk foam creation is 162°F / 72°C. Temperatures hotter than that cause the proteins to coagulate, leading to a loss of air and affecting the texture.
You’re probably wondering what soufflé is doing in the section on egg yolks, right? After all, it’s the egg whites that famously give soufflés their rise. I have a confession to make: I make my fruit-based dessert soufflés by making zabaglione. (I am so never going to win a James Beard award.)
Preheat your oven to 375°F / 190°C. Prepare a 1 quart / 1 liter soufflé bowl—which will hold enough soufflé for two or three people—by buttering the inside and then coating it with sugar (toss in a few spoonfuls, then rotate the dish back and forth to coat the side walls).
Fresh strawberries, raspberries, and white peaches work exceptionally well; wet fruits such as pears can work, but the water may separate while cooking, so start with berries. Rinse and dry the fruit. If using strawberries, hull them; if using peaches or other stone fruits, peel them, quarter them, and remove the pits. Reserve about ½ cup—a small handful—of the fruit for placing on top of the cooked soufflé. Prepare a second handful of fruit, again about ½ cup, for cooking by slicing it into small pieces; cut strawberries into eighths and peaches into very thin slices. (Raspberries will fall apart on their own.)
Start by making a zabaglione: whisk 3 egg yolks with ¼ cup (50g) sugar over low heat and add ¼ cup (50g) of kirsch—cherry-flavored brandy—instead of Marsala. (Save the egg whites for whisking.) After adding the kirsch, add the fruit that’s been sliced into small pieces and stir, thoroughly mashing in the fruit. You don’t need to actually cook the egg yolks until they set; you’re just looking to stir and whisk them until you have a frothy, warm, soft foam. Set aside while preparing the egg whites.
Whisk the egg whites to soft peak stage, adding a pinch of salt for taste. Fold the egg whites into the fruit base and transfer the mixture to the soufflé bowl. Bake in the oven until the soufflé has risen and the top is browned, about 15–20 minutes. Remove and place the soufflé dish on a wooden cutting board. Dust the soufflé with powdered sugar, place the reserved fruit on top (slice strawberries or peaches into thin slivers), and serve at once. If you’re in informal company, it’s easiest to just set the soufflé in the center of the table and hand everyone a fork to dig in.
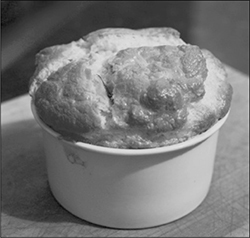
You can use this same technique with the white wine and cheese sauce from the previous page to make a savory soufflé.
Whipped Cream
Unlike eggs, in which proteins provide the structure for foam, cream relies on fats to provide the structure for a foam when whipped. During whisking, fat globules in the cream lose their outer membranes, exposing hydrophobic portions of the molecules—you’re literally stripping off part of the surface of each microscopic bubble of fat. These exposed parts of the fat globules can then either bind with other fat globules (butter!) or pack around an air bubble by aligning the stripped region with the air, creating a dense air-filled foam once enough of them have been aggregated together.
Another technique for “whipping” cream is to pressurize it with gas and then spray it. If you’ve ever used a can of whipped cream from the grocery store, you’re “making” whipped cream this way. The gas dissolves into the liquid and then, upon spraying, rapidly bubbles out of saturation, foaming up the cream. From a structural point of view, whipped cream created this way is entirely different from foams created by whisking. Instead of a 3D mesh of surfactants holding on to the air bubbles—the “stripped regions” of the fat globules—the air bubbles from canned whipped cream are essentially just in suspension. Whipped cream from a can will fill about twice the volume, per weight, as whisked whipped cream, but it’s also less stable and will collapse—the fat globules from the pressurized can presumably are intact. We’ll cover other uses of pressure-created foams using cream whippers on page 313.
When working with whipped cream, keep in mind that the fats provide the structure. If the cream gets too warm, the fats will melt, so be sure to chill your bowl and the cream before whisking.
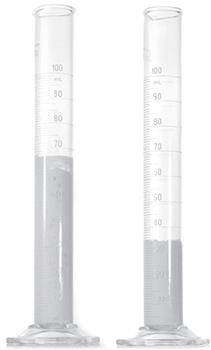
Whipped cream from a can foams up to twice the volume (15 mL expands to 67 mL) as hand-whisked cream (15 mL expands to 34 mL), but also collapses over time.
Whipping high-quality cream increases its volume by about 80%, while whipped egg whites can expand by over 600%!

Percentage of fat in dairy products. If the cream doesn’t have enough fat, there won’t be enough fat globules to create a stable foam.
You can whisk up whipped cream by hand in less time than it takes to get an electric mixer out. Start with a cold bowl (chill it in the freezer for a few minutes, ideally), add either heavy cream or whipping cream, and whisk until the cream holds its shape.
To make Chantilly cream—sweetened whipped cream—add 1 tablespoon (12g) sugar and 1 teaspoon (4g) vanilla extract per 1 cup of heavy whipping cream.
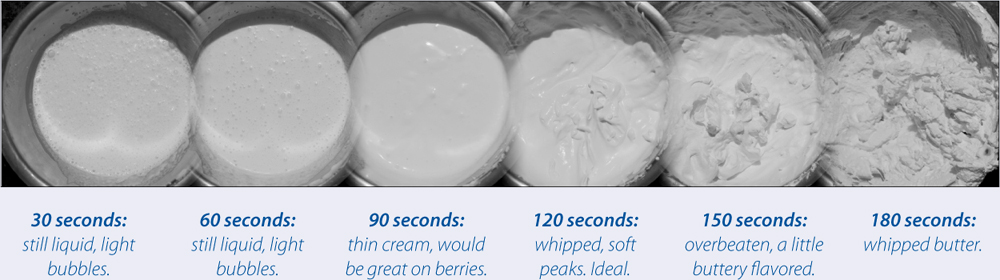

PHOTO OF DAVID LEBOVITZ USED BY PERMISSION OF PIA STERN
David Lebovitz has written several well-received books on desserts and was formerly a pastry chef at the renowned Chez Panisse in Berkeley, California, for over a decade. His website is at http://www.davidlebovitz.com.
What was working at Alice Waters’s Chez Panisse like for you?
Chez Panisse is a great place to work. Money is no object when it comes to sourcing ingredients, and it’s a great training ground for cooks. The restaurant really supports the owners and the other cooks, who are very, very interested in producing good food. Once you’re in that environment, it’s hard to leave. You go somewhere else and you’re working with a bunch of line cooks that just care about who won the game last night and how fast they can cook the steaks on the grill so they can get out and go drink beer.
The whole idea of Chez Panisse is to find good ingredients and do as little to them as possible. When we had beautiful fruit, we would often just serve a bowl of fruit or a fruit tart with ice cream; or if we had really good chocolate, we would make a chocolate cake, but it wasn’t a cake that was highly decorated, it didn’t have a lot of technical swoops and things. Chez Panisse is all about flavor. A lot of the fancy stuff doesn’t taste good, so we were more concerned with flavor.
I had dinner last night at a fancy restaurant. They brought this chocolate mousse and there was tapenade on the side. Someone was, like, “Olives: it would be really cool on the plate!” But if someone tasted it? Disgusting. I just wanted to go into the kitchen and say, “Have you guys tasted this food? Because it’s stupid.”
You had worked at Chez Panisse for years before taking culinary training. What surprises did you run across in that culinary training?
I wasn’t expecting things not to taste good. I took a course in making cakes in France, and I thought, “We’re going to make cakes that are delicious.” It actually was making mousses with gelatin and with fruit purées from the freezer, and everything was like sponge cake, gelatinized fruit purée, and decorations. It was interesting, and I learned something, but those skills don’t even translate to what I do. Even if you use fresh fruit, it’s just not the best way to use it. I’m an ingredients-based cook.
I did go to chocolate school and that was great; I learned a lot about chocolate, how to work with it, how to manipulate it. Once again, I’m more interested in finding wonderful hazelnuts and in rolling them in chocolate, rather than opening up a can of hazelnut paste and making chocolates out of it.
What would you recommend to somebody who wants to learn how to bake?
The best thing they can do is just bake. The thing about baking is it’s very recipe-oriented. If you want to learn to make a pound cake, you just make a recipe, and the longer you go, the more you see how things work, how you can change things. You can add an egg yolk to make things richer or substitute sour cream for the milk in the recipe.
A lot of bakers are very precise, and we do have a reputation, especially in the professional world. A chef once said to me, “Why are you guys all so weird?” There are a lot of strange people in the pastry world, because we are very precise, we do like to go in our own little world, and we’re very analytical people in general. We think a lot about things, whereas a line cook, it’s a lot of brawn; it’s big, bold flavors; it’s roasting meat; it’s frying vegetables; it’s grilling. Those are ways of coaxing flavor out, but pastry is a much more delicate thing, it demands a lot more care, a lot more softer skills.
When you’re working on a pastry, how do you go about getting unstuck when it’s just not coming out the way you want it to?
If you knew how to get out of that, you wouldn’t be in there in the first place. I develop recipes and write books, so I’ll be making things, I’ll make them over and over again, and if I’m really stumped, I have a decent network of people who can help me. I might write to a friend who is a bakery cooking professor and say, “I’m trying to make persimmon pie; have you ever made it?” and he’ll be like, “Oh, persimmons have a chemical in there that prevents this from happening, and try doing this...” Also, a lot of baking is science. If I make a cake and I want it to be moister and higher, I just have to sit down with my calculator and work it out.
How do you know what the formula is for working it out?
There are printed formulas, which some bakers use. But I’m not so good with math. Michael Ruhlman wrote a wonderful book on ratios, but my brain isn’t wired to think that way. So I just make things a million times, until I get it right.
So yours is a much more try-it-and-see approach, as opposed to sitting down and trying to figure out the optimal formula?
Yeah.
A lot of people are very analytical about cooking, and they want to know how things work. It’s a different method. It’s like a lot of Europeans wonder why Americans won’t give up their measuring cups and spoons, which is a terrible way to cook. It’s inaccurate and leads to people doing all sorts of weird things. Americans like to hold measuring cups and spoons; it makes us feel good, so we’re not going to give them up. Cooking is a visceral thing; a lot of people like to overanalyze recipes. They’re like, “Can I make this cake without the quarter teaspoon of vanilla extract?” and I’m like, “Okay, well, think about it, what do you think?” A lot of people don’t know, because they’re overanalyzing the recipe. They’re not stupid, it’s just that they’re not, I don’t know what... It’s like, “If I let 5% of the air out of my tire, can I still drive?” “Yes. Better if it’s full.”
Why do you think Americans overanalyze recipes?
I think that Americans are in this weird space where they want to be told what to do. They want an authority to tell them that this is the recipe, don’t change it, rather than say, “Wait a minute, look at the facts!” A recipe might say bake a chicken for an hour, and someone will write and say they baked it for an hour, and it was too dry. Well, your chicken was probably four pounds instead of six. There’s only so much stuff you can put in a recipe.
[My] website was started in 1999, when my first book came out, because I thought—famous last words—I thought it would be a good way for people to get in touch with me in case they had problems with the recipes. You don’t want people saying the recipes don’t work; you’d rather have them write to you and say, “I made this cake and it didn’t work; what did I do wrong?”
I have a recipe—actually, it’s in the oven right now—for a cake that has one egg in the whole cake; that’s the only fat in it. Some woman wrote me—she’s trying to eat less fat—what could she replace the egg with? I’m like, one egg yolk? That’s 5 grams of fat for 12 servings. Somebody actually asked that, and then I wonder how these people go to the bank every day, get their driver’s license, pay bills, write a check, and work. What’s going through their minds?
I’m not quite sure I follow you there.
Those kinds of things seem like common sense to me. Somebody who is concerned about eating an eighth or a twelfth of an egg yolk because they’re on a low-fat diet? I don’t understand that thinking. It’s like saying, “I don’t like chocolate; how can I make these chocolate chip cookies without chocolate?” It’s like, sorry, that’s what it is.
What do you think of people who really feel like they need to have the most up-to-date technical equipment and toys?
Well, that’s an American thing. I go back to America and everyone has wine refrigerators, and they’re filled with Kendall Jackson Chardonnay. If you have good wine, you don’t put it in one of those refrigerators, because they have compressors that shake, which is bad for wine. Unless you have a very good wine refrigerator that doesn’t shake, you’re better off without it. It’s funny to see people who have wok burners and wine refrigerators and all that stuff in their house. A lot of people want to have the illusion of cooking; they want to have all these bottles of olive oil wrapped up on the counter in baskets and things, but on the other hand, do they really need all that stuff?
It sounds like one piece of advice you would give to somebody is to not obsess over equipment?
Yes. You don’t need every saucepan in the world, you need like three. For me, having a mixer is very important; for me, having an ice cream machine is important. But you don’t need a panini grill; you can use your skillet and just put a weight on top of it, something like a can of tomatoes, and there you have it.