
Chapter 21. iMovie for iOS Music, Narration, and Sound
Professional sound mixing can be incredibly complicated. And while iMovie for iOS doesn’t have a comprehensive sound tool—it’s missing powerful tools like an equalizer, automatic ducking, and audio effects—it does let you do the most important types of audio editing, like fading audio, adjusting volume levels, and adding narration.
Two Kinds of Audio
Every piece of audio you add to your project can live in two places in the timeline: the foreground or the background. It might seem like a strange distinction at first (why not just have all the audio in the foreground?), but there’s a reason:
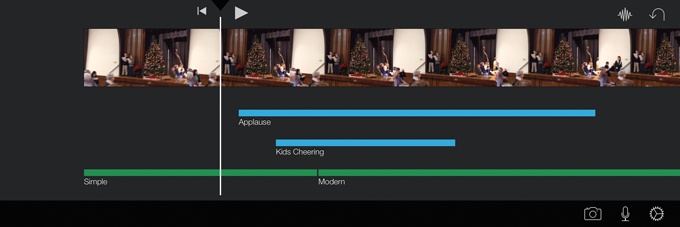
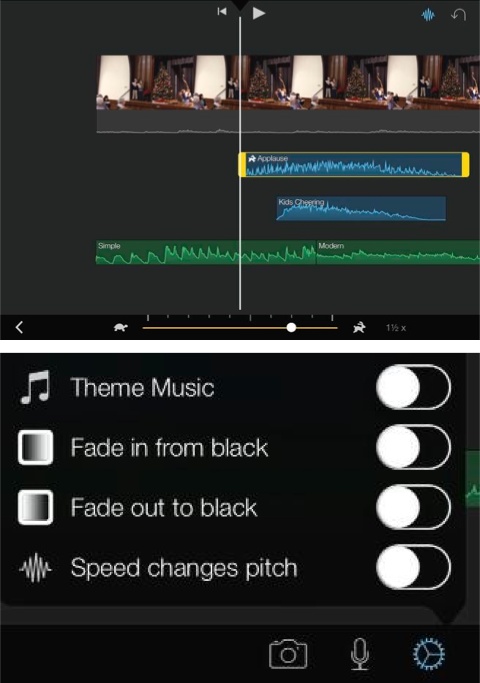
Foreground audio clips, which appear as light-blue stripes under the video clips in your timeline (Figure 21-1), work just as they do in other video editing programs. You can drag them around and place them where you want, so they start and end at just the right moment in your movie. As you edit the video clips in your project, a detached foreground audio clip stays anchored to the spot where you left it. If you have multiple foreground audio clips, you can position them so they overlap one another. You can even make foreground audio play past the end of your video.
Background. Background audio appears as a green stripe under your video clips (Figure 21-2). It’s the perfect place for sound that you don’t want to manage or line up to a specific spot, like background music. iMovie automatically plays background audio from the very beginning of your movie. If your clips end, so does the background track. You can’t overlap background audio, so if you put multiple clips in the background, iMovie plays them sequentially. (You can reorder them by dragging them, however.)
Tip
When you use theme music in the background, iMovie automatically repeats it so that it plays through your entire movie.
In summary, foreground audio is for sounds you need to position in a particular spot in your movie. Background audio is the kind you want to set and forget, allowing iMovie to manage when it starts and ends so you don’t have to.
Swap Foreground and Background Audio
There aren’t any rules limiting what kind of audio can go in the foreground and what kind can go in the background, so feel free to switch a clip from one to the other to suit your needs. To swap a foreground (or background) clip, tap it and then choose Background (or Foreground) from the toolbar. iMovie makes the change.
Add Audio to Your Project
All the audio you add to a project comes from the same location in iMovie: the Media screen, which you get to by tapping the Add Media button (on an iPad held on its side instead of upright, the media screen sits in the top-right corner). You used this same button when you added video clips to your project.
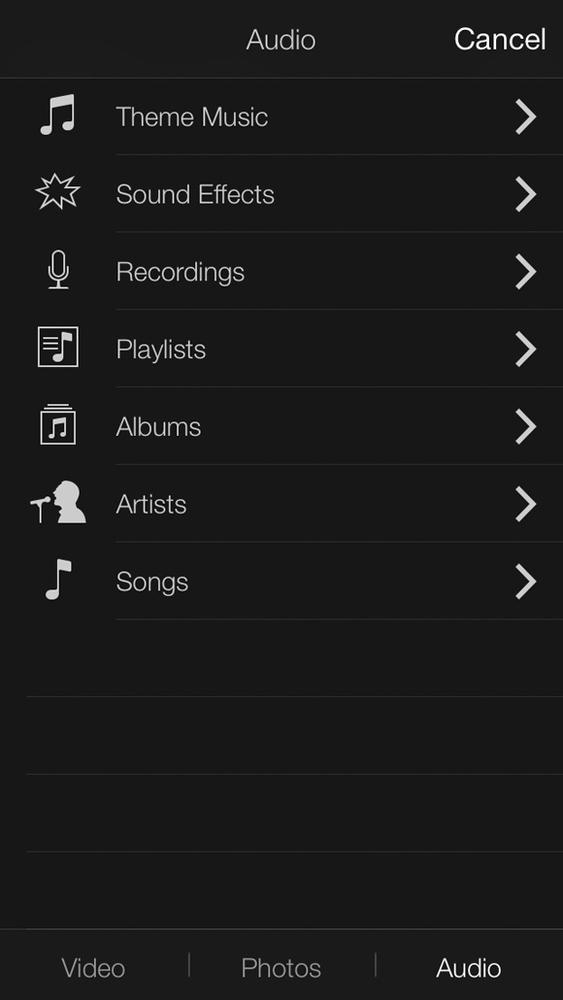
Tap Add Media and then choose Audio. iMovie shows you a list of sound types (Figure 21-2). Theme Music lists all the little, minute-long jingles Apple recorded to go along with your movie’s theme. Sound Effects offers dozens of cool and useful sounds that augment a movie, like footsteps or a ticking clock. (Foley artists create sound effects to round out a movie’s audio after the film has been shot. Quite a bit of the audio you hear in movies isn’t recorded by the camera; it’s recorded and added later, by foley artists.)
Tip
Your movie’s theme music is designed to go with your project’s theme, but you can use any theme music you want by choosing it from the Media screen.
The remaining four choices—Playlists, Albums, Artists, and Songs—are just four ways to get at the music library on your device. Whether you buy your music straight from iTunes or sync it to your iDevice using iTunes on your computer, you can import any of your music into your movie (except copy-protected music you bought before 2009, when Apple still used copy protection on songs you bought; iMovie marks those songs as “unavailable.”)
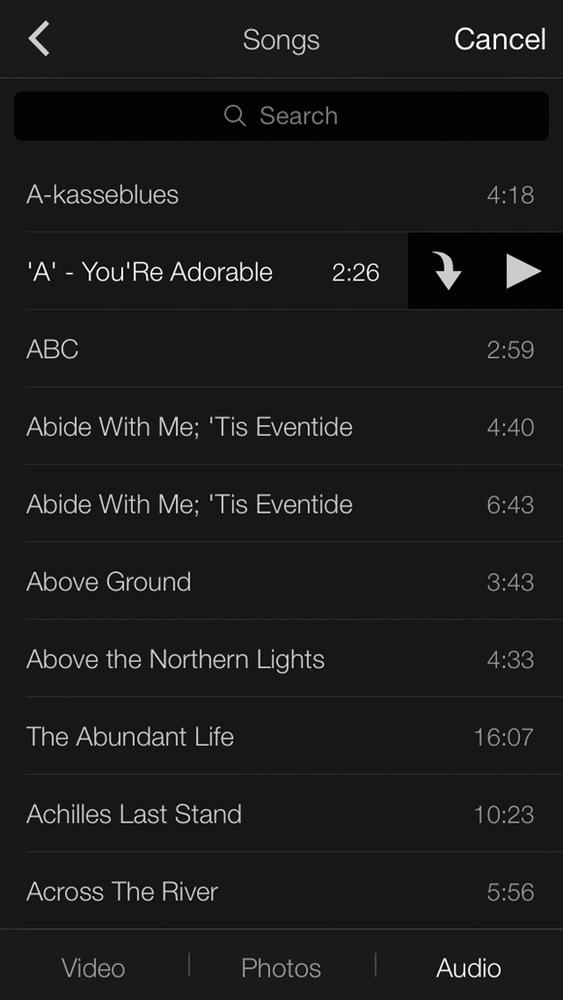
Use the handy search box at the top of your Songs list to find a tune quickly.
Once you have the clip you want, tap it and two buttons appear
(Figure 21-3). The
first one, an arrow pointing down, adds the audio to your project. The
second one, ![]() , previews it for you.
, previews it for you.
Note
When you add an audio clip to your project, iMovie assumes that you want it added as background audio if it’s a music file, and foreground audio if it’s a sound effect. If that’s not the case, you can move the clip after it lands in your timeline.
Adjust Timing
Once you add an audio clip to your project, you may want to change either its length or even its speed. In iMovie, you can do both.
Tip
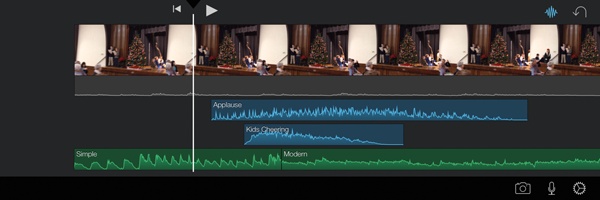
Before you make any audio adjustments in iMovie on the iPad, tap the squiggly button shown in Figure 21-4 to display the clip’s waveform.
Trim Audio
To change the length of an audio clip, tap it once so the yellow border appears. Now you can drag either end to trim away the beginning or end of the audio. Once you let go, the clip is shorter.
Some useful advice for trimming audio:
Spread two fingers outward in the timeline to zoom in on the clip (Split Clips) so you can fine-tune the trim.
Keep the Undo button handy. Because iMovie on the iPhone doesn’t display a clip’s waveform (Adjust Timing), there’s a fair amount of guesswork required to trim a clip to the right spot. (The iPad version shows you the waveform when you tap the waveform button shown in Figure 21-4.)
If you trim to the wrong place, never fear. You can use the same yellow handles to add audio back in. You can’t add more audio than was there originally, but you can add back anything you trimmed off.
Speed Changes
To speed up or slow down an audio clip, tap the clip and then choose Speed from the toolbar. iMovie shows you a speed slider (Figure 21-5). Drag it left to slow down the audio, and right to speed it up. When you change the speed of a clip, a little tortoise or hare icon appears next to it.
Also, iMovie has a really cool ability to change the speed
of a clip without changing its pitch. Normally, when you speed up
audio, its pitch goes up, too, and when you slow it down, the
pitch goes down. You can tell iMovie to preserve the pitch from
the Project Settings menu—hit ![]() and then tap off the “Speed changes pitch”
switch.
and then tap off the “Speed changes pitch”
switch.
Add Narration
It probably won’t be long before we see an Oscar-nominated documentary that was shot and edited almost entirely on an iPhone. When that happens, the filmmaker may end up using iMovie’s built-in narration tool. Maybe that’ll be you.
What makes this tool so handy is that you can film a shot and then narrate it later with as many takes as you need to get it right. Each time you record a narration, iMovie adds it as a foreground audio clip, which you can always delete to try again.
The Narration Tool
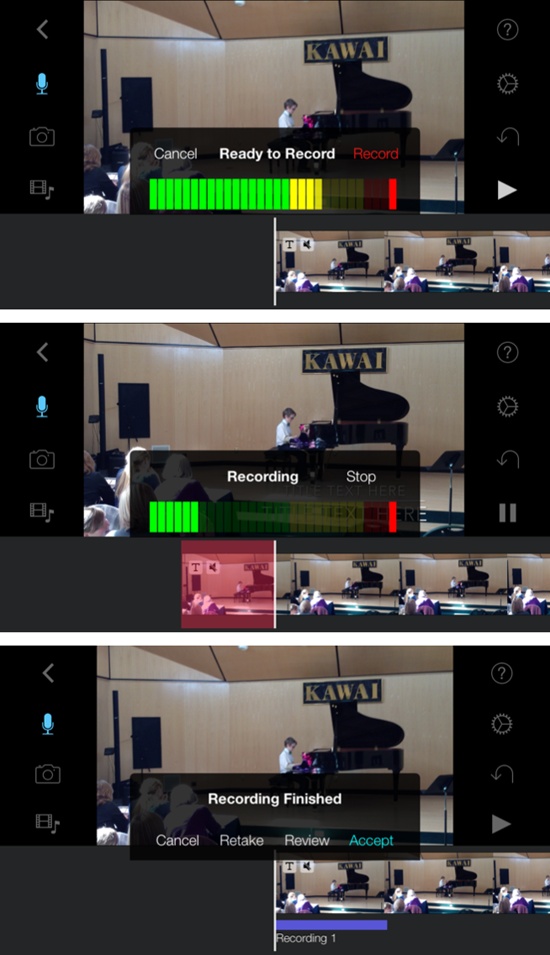
To narrate a movie, tap the microphone button in the timeline toolbar (highlighted in red in Figure 21-6). iMovie shows you a sound meter with Cancel and Record buttons (Figure 21-6, top). Tap Record and iMovie gives you a 3-second countdown before it starts recording. As it records, the storyboard turns red to mark your progress through the film (Figure 21-6, middle). Tap Stop to end your recording. iMovie asks you to make one of four decisions (Figure 21-6, bottom): cancel the recording, re-record it, review it (play it back to hear how it sounds), or accept it.
When you accept a narration, iMovie adds it as foreground audio, marking it with a lavender stripe. You can reposition it, trim it, change its speed, adjust its volume, and switch it to background audio.
Detach Audio from Video
To continue your documentary training, you need to learn how to do cutaways, where you switch from an interviewee’s headshot to a shot of what she’s describing, all while her voice keeps narrating.
To do a cutaway, you need to detach the audio from the video you recorded. Then you keep the audio track in place while you replace the video track.
iMovie offers two ways to detach audio from a video clip:
From a clip in your project. If you already added the video clip to your project on an iPad, select it, tap the Audio button in the toolbar, and then tap Detach. For iPhones, select the clip, tap Audio, tap the second “dot” in the toolbar, and then tap Detach.
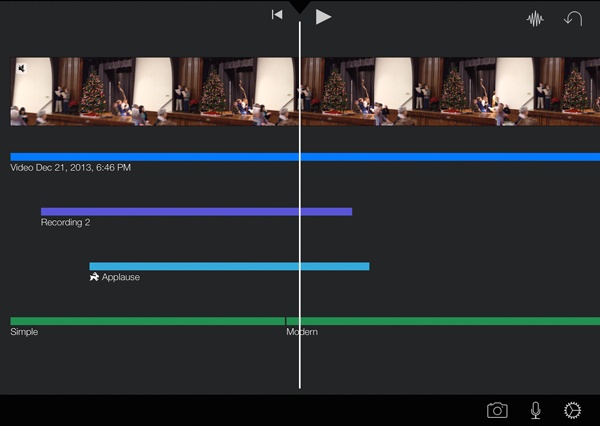
From a video clip in your library. Instead of adding a video clip from your library and then detaching its audio, you can add just the sound from a clip. Use the Add Media button to go to the Media screen, and then select the clip. You may need to tap the
 button to see the “Add audio” button—it
looks like a waveform with a + sign in it (see Figure 21-7). When you
tap it, iMovie inserts just the audio as a foreground
clip.
button to see the “Add audio” button—it
looks like a waveform with a + sign in it (see Figure 21-7). When you
tap it, iMovie inserts just the audio as a foreground
clip.

The resulting audio stripe in your timeline is vibrant blue (see Figure 21-8). Trim the clip, move it, and adjust its speed or volume to your heart’s content.
Adjust Audio Levels
You might have a background song in your movie that’s so loud that there’s nothing background about it. Or there may be a moment when your annoying brother was yelling at your sister, and you’d rather not draw attention to it. In this and other cases, you need to adjust the audio volume levels.
Volume
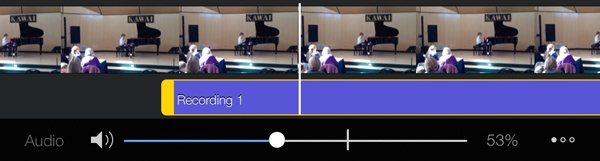
To change the volume of a clip, select it and, if it’s a video clip, choose Audio from the toolbar. iMovie shows you a volume slider (Figure 21-9). Drag it to the left for a quieter clip and to the right for a louder one.
Tip
You can’t change the volume of just part of a clip, like you can on the Mac. In iMovie for iOS, you have to split the clip and then change the volume of the split part.
Unfortunately, there’s no ducking feature in iMovie for iOS (Ducking), so you need to be vigilant about adjusting the volume levels for different parts of your project.
Fade Audio
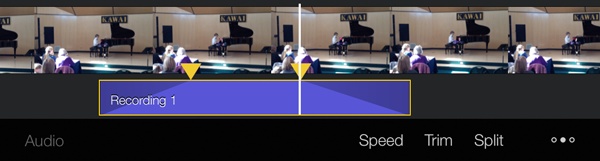
To make audio slowly fade in or out, select a standalone audio clip or detach the audio from a video clip and select the detached clip. Either way, the clip sports a yellow edit border. Choose Fade from the toolbar. iMovie replaces the yellow trim handles (Detach Audio from Video) with yellow arrows at either end of the clip (Figure 21-10). As you drag the arrows, you lengthen or shorten the fade in (or out) of the audio. (You can’t overlap the front and end fades.) You can come back and adjust the fade anytime.
Split Audio
Just as breaking up a video clip can help with various editing tricks, so can splitting an audio clip. For example, you might want to pause a song for dramatic effect. When the song starts playing again, you want it to pick up where it left off. In a case like that, you want to split the clip.
Choose the audio clip and position the playhead where you want the split to occur. Choose Split from the toolbar and iMovie chops the clip in two. Now you can reposition the second part so that it picks up at the right moment in your movie.