
Chapter 28. Integrating with Satellite 6 During Provisioning
It is a relatively common requirement to register newly provisioned Red Hat Enterprise Linux virtual machines directly with Satellite 6 as part of the provisioning process. This ensures that the resultant VM is patched and up to date, and is configured by Puppet according to a server role.
This chapter describes the steps involved in adapting the provisioning workflow so that Red Hat virtual machines are automatically registered with Satellite 6 as part of the provisioning operation. We’ll be preparing the Satellite environment slightly for the automation, and we’ll call the Satellite RESTful API to perform some of the integration steps. This is a relatively simple use case that demonstrates the capability of CloudForms to integrate with our wider enterprise.
Hosts and Content Hosts
Registering a new system with Satellite 6.1 currently requires two operations. We need to create a Satellite host entry, which registers the server as a configuration management client, manageable by Puppet. We also need to use subscription_manager to activate the server as a content host, which associates one or more Red Hat subscriptions with the server and makes software package repository content available.
The Satellite 6 Host Entry
A host entry in Satellite 6 requires certain parameters:
-
Hostname
-
Host’s MAC address
-
Location
-
Organizaton
-
Puppet environment
-
Architecture
-
Operating system
-
Media
-
Partition table
-
Domain
-
Root password
We can, however, define a host group in Satellite, containing defaults for several of these parameters. When we create the host entry, we can specify a host group as a configuration template.
Non-CloudForms Preparation
We need to do some preparation of our environment. To keep the example simple, we’ll allow for provisioning Red Hat Enterprise Linux 6 and 7 servers (both x86_64), but we’ll create a single generic host group and activation key for each operating system version.
Creating the Host Groups in Satellite 6
We’ll create two host groups in Satellite 6: Generic_RHEL6_Servers and Generic_RHEL7_Servers (see Figure 28-1).
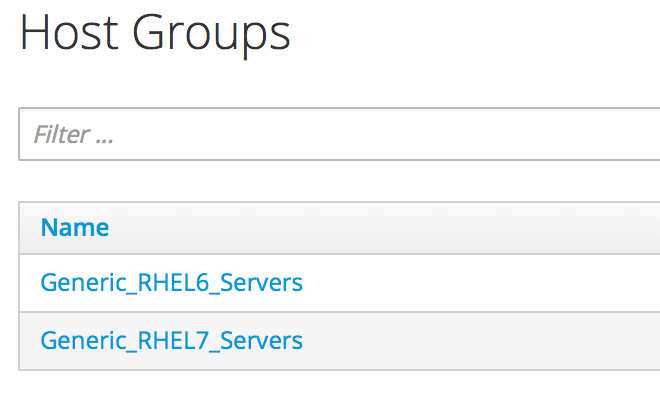
Figure 28-1. Preparation of two Satellite 6 host groups
These host groups will define defaults for:
-
Puppet environment
-
Architecture
-
Operating system
-
Media
-
Partition table
-
Domain
-
Root password
The host group will also install the motd and ntp Puppet modules.
Creating the Activation Keys in Satellite 6
When a newly provisioned system registers with Satellite as a content host, it can include an activation key name as an argument to subscription_manager.
We’ll create two activation keys in Satellite 6: RHEL6-Generic and RHEL7-Generic (see Figure 28-2).

Figure 28-2. Preparation of two Satellite 6 activation keys
These activation keys will define defaults for:
-
Content view and lifecycle environment (Production)
-
Red Hat subscriptions
-
Repository content sets
Adding an SSH Key to the VMware Template
We’re going to be using Ansible from the CloudForms server to set the new VM’s hostname, register the new VM with Satellite, and install and run Puppet. We need to copy root’s public key from the CloudForms server to the VMware template and add it to /root/.ssh/authorized_keys.
Installing and Configuring Ansible on the CloudForms Appliance
For convenience we’ll install Ansible from the EPEL repository. We need to add the rhel-7-server-optional-rpms repository, and then the EPEL installation RPM on the CloudForms appliances with the Automation Engine role set:
subscription-manager repos --enable=rhel-7-server-optional-rpms
rpm -ivh https://dl.fedoraproject.org/pub/epel/epel-release-latest-7.noarch.rpm
Warning
Installing extra packages from the EPEL repository may leave your CloudForms installation unstable and unsupported by Red Hat.
Now we can install Ansible:
yum -y install ansible
Loaded plugins: product-id, search-disabled-repos, subscription-manager
Resolving Dependencies
--> Running transaction check
---> Package ansible.noarch 0:1.9.4-1.el7 will be installed
--> Processing Dependency: sshpass for package: ansible-1.9.4-1.el7.noarch
--> Processing Dependency: python-paramiko for package: ansible-1.9.4-1.el7.no...
--> Processing Dependency: python-keyczar for package: ansible-1.9.4-1.el7.noa...
--> Processing Dependency: python-jinja2 for package: ansible-1.9.4-1.el7.noarch
--> Processing Dependency: python-httplib2 for package: ansible-1.9.4-1.el7.no...
--> Running transaction check
---> Package python-httplib2.noarch 0:0.7.7-3.el7 will be installed
---> Package python-jinja2.noarch 0:2.7.2-2.el7 will be installed
--> Processing Dependency: python-babel >= 0.8 for package: python-jinja2-2.7....
--> Processing Dependency: python-markupsafe for package: python-jinja2-2.7.2-...
---> Package python-keyczar.noarch 0:0.71c-2.el7 will be installed
--> Processing Dependency: python-crypto for package: python-keyczar-0.71c-2.e...
---> Package python-paramiko.noarch 0:1.15.1-1.el7 will be installed
--> Processing Dependency: python-ecdsa for package: python-paramiko-1.15.1-1....
---> Package sshpass.x86_64 0:1.05-5.el7 will be installed
--> Running transaction check
---> Package python-babel.noarch 0:0.9.6-8.el7 will be installed
---> Package python-ecdsa.noarch 0:0.11-3.el7 will be installed
---> Package python-markupsafe.x86_64 0:0.11-10.el7 will be installed
---> Package python2-crypto.x86_64 0:2.6.1-9.el7 will be installed
--> Processing Dependency: libtomcrypt.so.0()(64bit) for package: python2-cry...
--> Running transaction check
---> Package libtomcrypt.x86_64 0:1.17-23.el7 will be installed
--> Processing Dependency: libtommath >= 0.42.0 for package: libtomcrypt-1.17-...
--> Processing Dependency: libtommath.so.0()(64bit) for package: libtomcrypt-1...
--> Running transaction check
---> Package libtommath.x86_64 0:0.42.0-4.el7 will be installed
--> Finished Dependency Resolution
...
We probably want to disable the EPEL repo after installing this to ensure that we don’t accidentally pull anything else down from it:
sed -i -e 's/enabled=1/enabled=0/' /etc/yum.repos.d/epel.repo
Uncomment host_key_checking in /etc/ansible/ansible.cfg:
# uncomment this to disable SSH key host checking
host_key_checking = False
Modifying the CloudForms Provisioning Workflow
We need to make two additions to the VMProvision_VM state machine. The first is to add a RegisterSatellite state to register the new VM with Satellite 6 as a host. The second is to add an ActivateSatellite state to create the Ansible playbook and initiate the subscription-manager activation of the new system as a content host.
Both of these states must be added at some point after the VM has been provisioned. The registration must include the MAC address of the new VM, and the activation uses Ansible to connect via ssh to the running VM.
Figure 28-3 shows the new states added.

Figure 28-3. RegisterSatellite and ActivateSatellite states added to the VM provision state machine
RegisterSatellite
Our new RegisterSatellite instance schema can store some more defaults. In this case we’ll create per-organization/location instances, so that we can store the organization name and location in the schema (see Figure 28-4).

Figure 28-4. RegisterSatellite instance schema
The register_satellite method can access these in the usual way, from $evm.object:
servername=$evm.object['servername']username=$evm.object['username']password=$evm.object.decrypt('password')organization=$evm.object['organization']location=$evm.object['location']
We need to ensure that we register only Linux VMs with Satellite, and we can select a host group by testing the VM operating_system object’s product_name attribute (we’re only provisioning RHEL 6 or 7, both x86_64):
...prov=$evm.root['miq_provision']template=prov.sourcevm=prov.destinationiftemplate.platform=="linux"## Pick a host group based on the operating system being provisioned#ifvm.operating_system.product_name=='Red Hat Enterprise Linux 6 (64-bit)'hostgroup='Generic_RHEL6_Servers'elsifvm.operating_system.product_name=='Red Hat Enterprise Linux 7 (64-bit)'hostgroup='Generic_RHEL7_Servers'elseraise"Unrecognised Operating System Name"end...
Note
In a more advanced example we could present a selection of host groups to register with in a service dialog drop-down list (see Chapter 38).
We’ll be creating the new host entry using the Satellite API, and this requires us to use the internal Satellite ID for each parameter, rather than a name. We define a generic query_id method and call it three times to retrieve the IDs for the location, organization, and host group:
defquery_id(uri,field,content)url=URI.escape("#{@uri_base}/#{uri}?search=#{field}="#{content}"")request=RestClient::Request.new(method::get,url:url,headers:@headers,verify_ssl:OpenSSL::SSL::VERIFY_NONE)id=nilrest_result=request.executejson_parse=JSON.parse(rest_result)subtotal=json_parse['subtotal'].to_iifsubtotal==1id=json_parse['results'][0]['id'].to_selsifsubtotal.zero?$evm.log(:error,"Query to#{url}failed, no result")id=-1elsifsubtotal>1$evm.log(:error,"Query to#{url}returned multiple results")id=-1else$evm.log(:error,"Query to#{url}failed, unknown condition")id=-1endidend...$evm.log(:info,"Getting hostgroup id for '#{hostgroup}' from Satellite")hostgroup_id=query_id("hostgroups","name",hostgroup)raise"Cannot determine hostgroup id for '#{hostgroup}'"ifhostgroup_id==-1$evm.log(:info,"hostgroup_id:#{hostgroup_id}")
Finally, we create the host record. We specify the :build parameter as false because we don’t want Satellite to provision the VM:
## Create the host record#hostinfo={:name=>vm.name,:mac=>vm.mac_addresses[0],:hostgroup_id=>hostgroup_id,:location_id=>location_id,:organization_id=>organization_id,:build=>'false'}$evm.log(:info,"Creating host record in Satellite")uri="#{@uri_base}/hosts"request=RestClient::Request.new(method::post,url:uri,headers:@headers,verify_ssl:OpenSSL::SSL::VERIFY_NONE,payload:{host:hostinfo}.to_json)rest_result=request.execute
ActivateSatellite
Our new ActivateSatellite instance schema can also store some defaults. In this case we’ll create per-organization instances, and we’ll store the organization name in the schema (see Figure 28-5).

Figure 28-5. ActivateSatellite instance schema
Once again we check that the system being provisioned is running Linux and select the activation key based on the operating system version:
iftemplate.platform=="linux"## Pick an activation key based on the operating system being provisioned#ifvm.operating_system.product_name=='Red Hat Enterprise Linux 6 (64-bit)'activationkey='RHEL6-Generic'elsifvm.operating_system.product_name=='Red Hat Enterprise Linux 7 (64-bit)'activationkey='RHEL7-Generic'elseraise"Unrecognised Operating System Name"end
We need to check that the VM is booted and has an IP address:
ifvm.ipaddresses.length.zero?$evm.log(:info,"VM doesnt have an IP address yet - retrying in 1 minute")$evm.root['ae_result']='retry'$evm.root['ae_retry_interval']='1.minute'exitMIQ_OKendip_address=vm.ipaddresses[0]
For this example, we’ll be connecting to the newly provisioned VM by IP address rather than hostname, so we have to add the new IP address to /etc/ansible/hosts if it doesn’t already exist:
unlessFile.foreach('/etc/ansible/hosts').grep(/#{Regexp.escape(ip_address)}/).any?open('/etc/ansible/hosts','a')do|f|f.puts"#{ip_address}"f.closeendend
We need to remove the hosts key for that IP address if it already exists:
cmd = "ssh-keygen -R #{ip_address}"
`#{cmd}`
We create a temporary file and write the Ansible playbook to it:
tempfile=Tempfile.new('ansible-')playbook=[]this_host={}this_host['hosts']=[]this_host['hosts']="#{ip_address}"this_host['tasks']<<{'name'=>'Set hostname','hostname'=>"name=#{vm.name}"}this_host['tasks']=[]this_host['tasks']<<{'name'=>'Install Cert','command'=>"/usr/bin/yum -y localinstallhttp://#{servername}/pub/katello-ca-consumer-latest.noarch.rpm"}this_host['tasks']<<{'name'=>'Register with Satellite','command'=>"/usr/sbin/subscription-manager register--org#{organization}--activationkey#{activationkey}",'register'=>'registered'}this_host['tasks']<<{'name'=>'Enable Repositories','command'=>"subscription-manager repos--enable=rhel-*-satellite-tools-*-rpms",'when'=>'registered|success'}this_host['tasks']<<{'name'=>'Install Katello Agent','yum'=>'pkg=katello-agent state=latest','when'=>'registered|success','notify'=>['Enable Katello Agent','Start Katello Agent']}this_host['tasks']<<{'name'=>'Install Puppet','yum'=>'pkg=puppet state=latest','when'=>'registered|success','register'=>'puppet_installed','notify'=>['Enable Puppet']}this_host['tasks']<<{'name'=>'Configure Puppet Agent','command'=>"/usr/bin/puppet config set server#{servername}--section agent",'when'=>'puppet_installed|success'}this_host['tasks']<<{'name'=>'Run Puppet Test','command'=>'/usr/bin/puppet agent --test --noop--onetime --waitforcert 60','when'=>'puppet_installed|success'}this_host['tasks']<<{'name'=>'Start Puppet','service'=>'name=puppet state=started'}this_host['tasks']<<{'name'=>'Update all packages','command'=>'/usr/bin/yum -y update'}this_host['handlers']=[]this_host['handlers']<<{'name'=>'Enable Katello Agent','service'=>'name=goferd enabled=yes'}this_host['handlers']<<{'name'=>'Start Katello Agent','service'=>'name=goferd state=started'}this_host['handlers']<<{'name'=>'Enable Puppet','service'=>'name=puppet enabled=yes'}playbook<<this_hosttempfile.write("#{playbook.to_yaml}")tempfile.close
Finally, we run ansible-playbook:
cmd="ansible-playbook -s#{tempfile.path}"ansible_results=`#{cmd}`$evm.log(:info,"Finished ansible-playbook, results:#{ansible_results}")tempfile.unlink
The full scripts are available on GitHub.
Testing the Integration: Provisioning a New VM
First we check that we have no hosts with test in their name in our Satellite (see Figure 28-6).

Figure 28-6. The number of “test” hosts in Satellite before provisioning
We’ll provision a RHEL 6 virtual machine and call it rhel6test (see Figure 28-7).

Figure 28-7. Provisioning a new virtual machine called rhel6test
Once the VM has finished cloning, we see the output from register_satellite in automation.log:
<AEMethod register_satellite> Getting hostgroup id for 'Generic_RHEL6_Servers'
                                                                   from Satellite
<AEMethod register_satellite> hostgroup_id: 3
<AEMethod register_satellite> Getting location id for 'Winchester' from Satellite
<AEMethod register_satellite> location_id: 4
<AEMethod register_satellite> Getting organization id for 'Bit63' from Satellite
<AEMethod register_satellite> organization_id: 3
<AEMethod register_satellite> Creating host record in Satellite with the
          following details: {:name=>"rhel6test", :mac=>"00:50:56:b8:51:da",
                              :hostgroup_id=>"3", :location_id=>"4",
                              :organization_id=>"3", :build=>"false"}
<AEMethod register_satellite> return code => 200
In Satellite we see the new host entry, but the N icon indicates that no reports have been received from it yet (see Figure 28-8).

Figure 28-8. Newly added host record
Soon afterward we see the output from activate_satellite in automation.log:
activate_satellite> VM doesnt have an IP address yet - retrying in 1 minute
...
activate_satellite> IP Address is: 192.168.1.185
activate_satellite> Running ansible-playbook using /tmp/ansible-20151026-26705...
<AEMethod activate_satellite> Finished ansible-playbook, results:
PLAY [192.168.1.185] **********************************************************

GATHERING FACTS ***************************************************************
ok: [192.168.1.185]

TASK: [Set hostname] **********************************************************
changed: [192.168.1.185]

TASK: [Install Cert] **********************************************************
changed: [192.168.1.185]

TASK: [Register with Satellite] ***********************************************
changed: [192.168.1.185]

TASK: [Enable Repositories] ***************************************************
changed: [192.168.1.185]

TASK: [Install Katello Agent] *************************************************
changed: [192.168.1.185]

TASK: [Install Puppet] ********************************************************
changed: [192.168.1.185]

TASK: [Configure Puppet Agent] ************************************************
changed: [192.168.1.185]

TASK: [Run Puppet Test] *******************************************************
changed: [192.168.1.185]

TASK: [Start Puppet] **********************************************************
changed: [192.168.1.185]

TASK: [Update all packages] ***************************************************
changed: [192.168.1.185]

NOTIFIED: [Enable Katello Agent] **********************************************
ok: [192.168.1.185]

NOTIFIED: [Start Katello Agent] ***********************************************
ok: [192.168.1.185]

NOTIFIED: [Enable Puppet] *****************************************************
changed: [192.168.1.185]

PLAY RECAP ********************************************************************
192.168.1.185              : ok=14   changed=11   unreachable=0    failed=0
In Satellite we now see the new content host entry, showing that all packages have been updated (see Figure 28-9).

Figure 28-9. Newly added content host record
We also see that the new host record is shown as active, showing that the Puppet agent is connecting to the Puppet Master (see Figure 28-10).

Figure 28-10. Host record activated
Summary
This chapter has shown how we can integrate our virtual machine provisioning workflow with our wider enterprise, in this case by registering new VMs with a Satellite 6 server. The example is deliberately simple in having only one host group and activation key per operating system version, but hopefully this simplicity conveys the relative ease of integration.
If we prefer to provision our new virtual machine by PXE boot/kickstart, we simply pass any additional parameters that are required for the kickstart in the hostinfo hash and set the key :build to be true, as follows:
hostinfo={:name=>vm.name,:mac=>vm.mac_addresses[0],:hostgroup_id=>hostgroup_id,:location_id=>location_id,:organization_id=>organization_id,:operatingsystem_id=>operatingsystem_id,:architecture_id=>architecture_id,:domain_id=>domain_id,:subnet_id=>subnet_id,:root_pass=>root_password,:ip=>ip_address,:disk=>partition_layout,:build=>'true'}
In this example we’ve also installed Ansible directly onto our CloudForms appliance. At the time of writing it seems likely that a future version of CloudForms will have a dedicated Ansible provider, thereby rendering this step unnecessary.