Chapter 2. Getting Data into Google Cloud
This chapter is meant to focus on getting data into Google Cloud for our cloud native application. However, it would benefit everyone to cover how you get data out of Google Cloud in the context of our application. Our data, as you remember from our use case, will be external to Google Cloud is the raw audio files from our call center. You need to process these audio files in near real-time so our users have access to the metrics collected from our pipeline. You have many storage choices, but due to the nature of our data and since you’re working with an application that is sensitive to latency the best choice is Cloud Storage. Google Cloud provides the following storage options:
-
Zonal standard persistent disk and zonal SSD persistent disk
-
Regional standard persistent disk and regional SSD persistent disk
-
Local SSD for high-performance local block storage
-
Cloud Storage buckets: Object storage.
-
Filestore: High-performance file storage
There are a few choices for storage, but which would you choose for storing the audio files? Let’s review the requirements:
-
Our call center processes 5,000 calls a day
-
Each call is an average of 30 minutes long
-
Each file is an average of 57 MB in size
5,000 * 57 = 285 GB
You will need approximately 8.5 TB per month of storage and approximately 102 TB per year. You can eliminate persistent disks as they have limits that would impact scalability, see Table 2-1..
| Storage Type | Zonal standard persistent disks |
Regional standard persistent disks |
Zonal SSD persistent disks |
Regional SSD persistent disks |
Local SSDs |
Cloud Storage buckets |
| Minimum capacity per disk | 10 GB | 200 GB | 10 GB | 10 GB | 375 GB | n/a |
| Maximum capacity per disk | 64 TB | 64 TB | 64 TB | 64 TB | 375 GB | n/a |
| Capacity increment | 1 GB | 1 GB | 1 GB | 1 GB | 375 GB | n/a |
| Maximum capacity per instance | 257 TB | 257 TB | 257 TB | 257 TB | 3 TB | Almost infinite |
As you can see from the list, we are somewhat limited with persistent disks. Even if we choose to use zonal standard persistent disks and create an instance to store the audio files, our costs would be quite high. At the same time we start to move away from our cloud native approach as now we would need to manage a compute instance, attached persistent disks and we would need a way to monitor the storage for events as file creation to trigger a cloud function. Cost analysis:
-
Zonal Standard Persistent Disks
Disk One 64 TB: Total Estimated Cost: USD $2,621.44 per 1 month
Disk Two 64 TB: Total Estimated Cost: USD $2,621.44 per 1 month
Approximate Total per Month for 128 TB, USD $5,242 per 1 month
-
Cloud Storage Bucket
Approximate Total per Month for 128 TB, USD $2,621.44 per 1 month
This cost analysis doesn’t account for the storage operations per month on the cloud storage or the compute instance cost for mounting the standard persistent disks. These numbers for storage are set for one year, but what happens at year two, three, etc. Our persistent disk solution becomes complicated and expensive hence it makes the most sense to go the route of cloud storage buckets.
You might be wondering, what are storage operations in Cloud Storage. An operation is an action that makes changes to or retrieves information about buckets and objects. Cloud Storage operations are divided into three categories: Class A, Class B, and free. Table 2-2 was cited from the Google Cloud Storage documentation at https://cloud.google.com/storage/pricing#price-tables; I would recommend visiting the documentation to confirm Class A, B and Free operations have not changed since the publication of this book.
| API or Feature | Class A Operations | Class B Operations | Free Operations |
| JSON API | storage.*.insert storage.*.patch storage.*.update storage.*.setIamPolicy storage.buckets.list storage.buckets.lockRetentionPolicy storage.notifications.delete storage.objects.compose storage.objects.copy storage.objects.list storage.objects.rewrite storage.objects.watchAll storage.projects.hmacKeys.create storage.projects.hmacKeys.list storage.*AccessControls.delete |
storage.*.get storage.*.getIamPolicy storage.*.testIamPermissions storage.*AccessControls.list storage.notifications.list Each object notification |
storage.channels.stop storage.buckets.delete storage.objects.delete storage.projects.hmacKeys.delete |
| XML API | GET Service GET Bucket PUT POST |
GET Bucket GET Object HEAD |
DELETE |
Let’s take a step back, and cover file storage, block storage, and object storage.
File Storage
File storage stores data in a hierarchical structure. The data is saved in files and folders, and it is presented identically whether from the system serving the view or from the system retrieving data view. File storage is accessed traditionally via the Network File System protocol or Server Message Block protocol.
Block Storage
Block storage is presented as either Storage Area Networks or locally attached disks. Block storage is usually mounted on an operating system as if the block device was locally attached storage. Once mounted locally, the user can create a file system to be used by the operating system: application or databases.
Object-Based Storage
Object-based storage is accessible programmatically versus block storage which can only be accessed via an operating system. Object-based storage is also flat in nature; it does not have the hierarchical structure of file systems. Cloud Storage has no notion of folders, a folder is an object that happens to have “/” character in its name. Each object contains the data as well as the associated metadata which is distributed across multiple hardware systems to provide scalability and reliability.
Options for Getting Data to Cloud Storage
Note
You can practice along now or at a later time using Qwiklabs. The Qwiklabs Quest for this book is located at:
The Cloud Console to manage cloud storage is a great option to perform management tasks. Typical management tasks include:
-
Creating and deleting buckets
-
Uploading, downloading, and deleting objects
-
Managing Identity and Access Management policies such as allowing allUsers access to a bucket that provides public access to an object
As we covered, object-based storage uses a flat namespace to store your data. The key functionality of the Cloud Console interface is that it translates this flat namespace to replicate a folder hierarchy. Cloud Storage has no notion of folders.

Figure 2-1. Console Storage Folder Screenshot
Figure 2-1 is a screenshot that displays a bucket called sample-42892, a folder called folder, and a file within this folder called image.png. As mentioned, a file and a folder is an object and it’s contained within a flat namespace. Figure 2-2 and Figure 2-3 are screenshots of the gsutil command-line replicating the screenshot in Figure 2-1.

Figure 2-2.
Figure 2-2 Command Line Usage of gsutil

Figure 2-3. Command Line Usage of gsutil
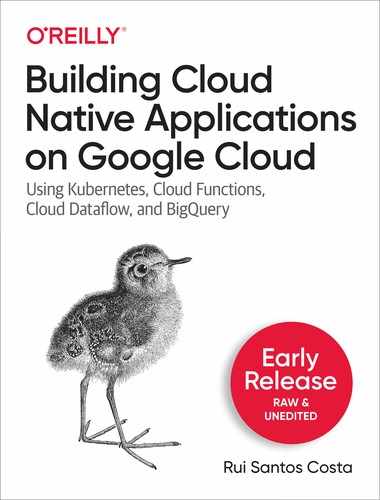
Review Figure 2-2 and 2-3. What is different between the two? Not much except their content-type. gsutil displays a hierarchical file structure but the underlying Cloud Storage is a flare namespace. To the service, the object gs://sample-42892/folder/image.png is just an object that happens to have “/” character in its name. There is no “folder” directory; just a single object with the given name. If we try to run gsutil stat gs://sample-42892/folder, what would happen? It would fail, since we did not include “/” in the name, see Figure 2-4.
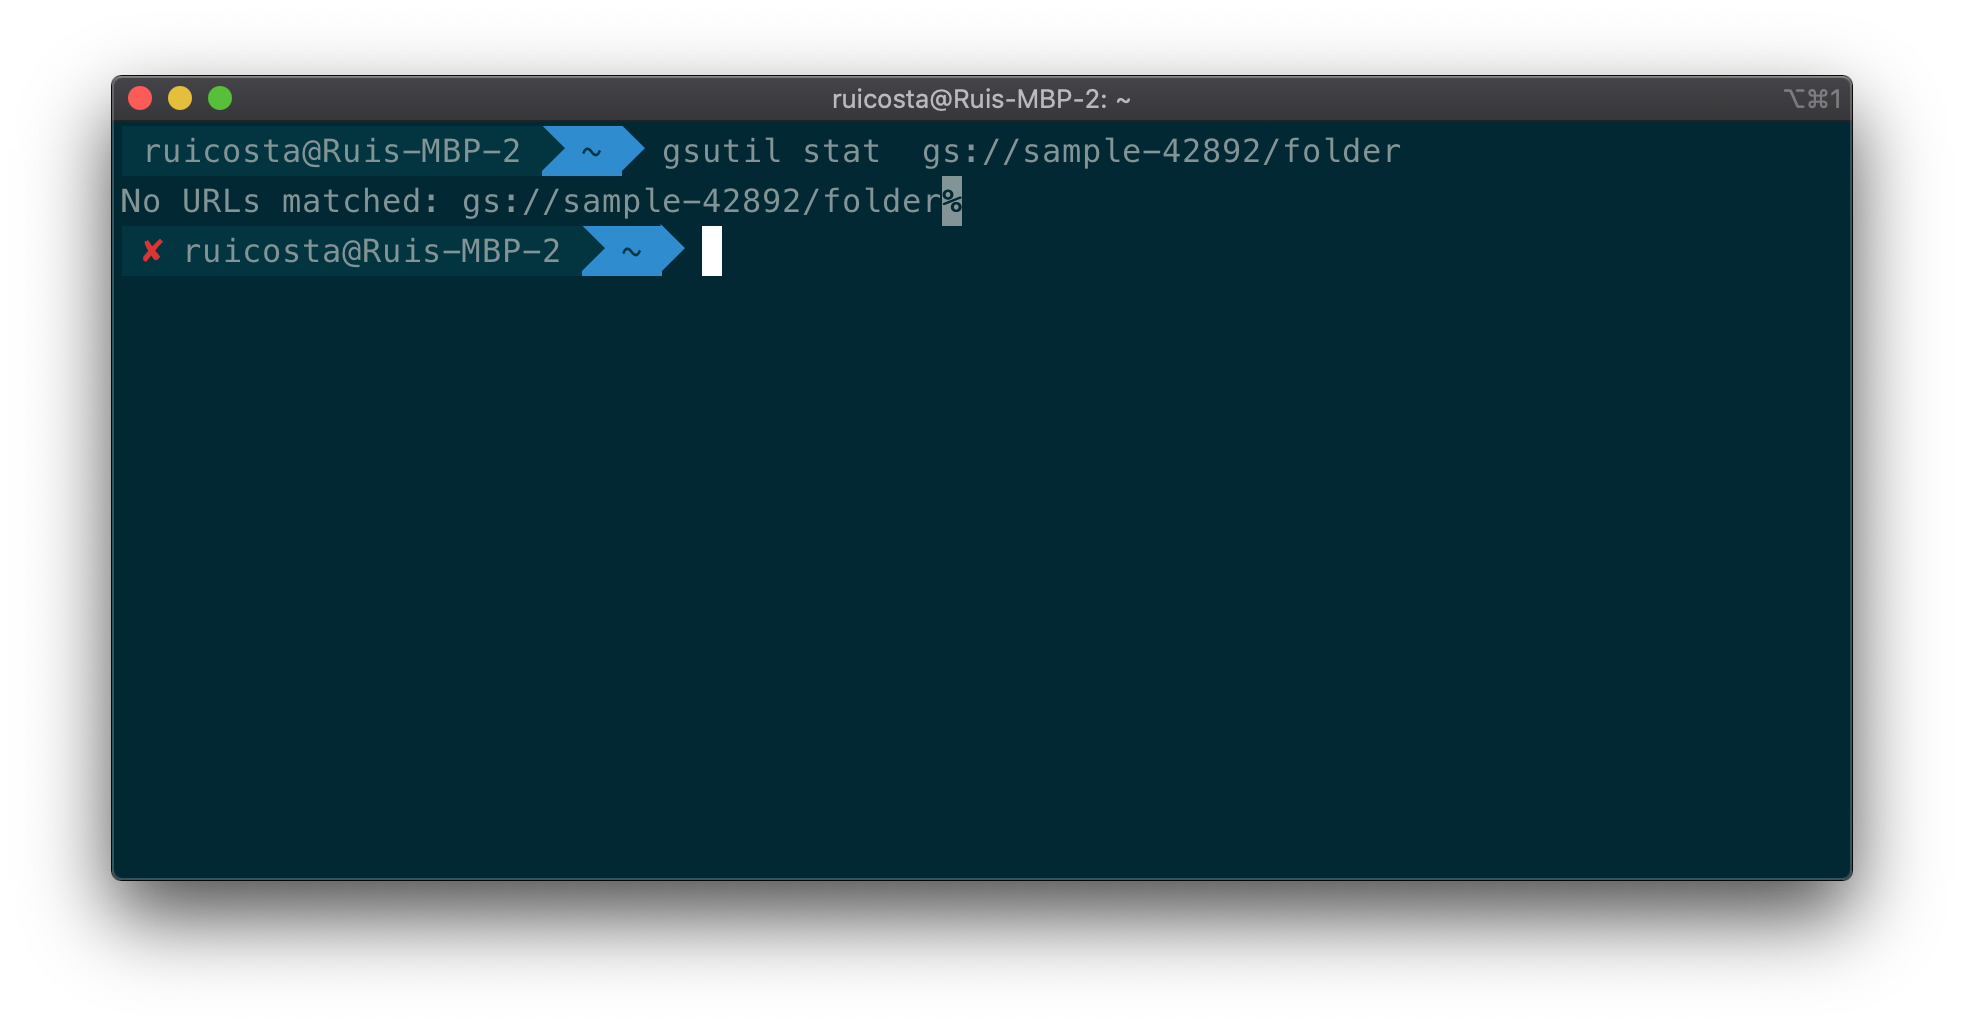
Figure 2-4. Command Line Usage of gsutil
Create a Bucket in the Cloud Console
To create a bucket:
-
Open the Cloud Storage browser in the Google Cloud Console.
-
Click Create bucket
-
Enter your bucket information and click Continue :
Enter a unique Name for your bucket
Choose Region for Location type
Choose Standard for default storage class
Choose Uniform for Access control
Click Create

Figure 2-5. Congratulations you created your first bucket!
Upload a File in the Cloud Console
In the Cloud Storage browser, click on the name of the bucket that you created.
-
Click the Upload files button in the tab.
In the file dialog, navigate to a file that you want to upload and select it.

Figure 2-6. After the upload completes, you should see the file name and information about the file.
Download the file in the Cloud Console
To download the image from your bucket:
Click the drop-down menu associated with the file.
The drop-down menu appears as three vertical dots to the far right.
-
Click Download.

Figure 2-7. That is it, you have created a bucket, uploaded a file, and downloaded it!
Using the gsutil Tool
The gsutil is a Python application that lets you access Cloud Storage from the command line. You can use gsutil to do a wide range of management tasks including:
-
Creating and deleting buckets.
-
Uploading, downloading, and deleting objects.
-
Listing buckets and objects.
-
Moving, copying, and renaming objects.
-
Editing object and bucket Access Control Lists (ACL).
ACLs allow you to set restrictions such as reading, writing or deleting objects.
You will need to install the gsutil if you choose to run it locally on your desktop. You can visit the following link to learn how to install the gsutil application: https://cloud.google.com/storage/docs/gsutil_install
Create a Bucket with gsutil
Run the following command to create a bucket, keeping in mind the following flags:
-
-p: Set the project id for your new bucket
-
-c: Set the default storage class of your bucket
-
-l: Set the location of your bucket. For example, US-EAST1.
-
-b: Enable uniform bucket-level access for your bucket.
gsutil mb gs://[BUCKET_NAME]/
Upload a File with gsutil
The following command will upload a file to the respective bucket location.
gsutil cp [LOCAL_OBJECT_LOCATION] gs://[DESTINATION_BUCKET_NAME]/
Download the File with gsutil
The following command will download the object from the location set in the command line to the local location specified.
gsutil cp gs://[BUCKET_NAME]/[OBJECT_NAME] [SAVE_TO_LOCAL_LOCATION]
Note
You will notice we did not use the -p flag, which states which project to create the bucket. You can avoid using the -p flag if you have your default project set with gcloud as follows:
gcloud config set project PROJECT
Using Client Libraries
To integrate the ability to perform management tasks as well as user tasks within your application you will need to use client libraries. Google Cloud provides client libraries for C++, C#, Go, Java, Node.js, PHP, Python, and Ruby. Our framework will leverage the client libraries for Node.js. When an audio file is uploaded to Cloud Storage it will trigger the google.storage.object.finalize event which executes our cloud function, see Figure 2-8 as a reference.

Figure 2-8. Cloud Storage Object Trigger
Follow Along with Instructions using Client Libraries
Note
You can practice along now on your local workstation or at a later time using Qwiklabs. The Qwiklabs Quest for this book is located at:
To follow along within your own Google Cloud Project, follow the directions below.
-
Create a Cloud Platform project
-
Enable billing for your project
-
Enable the Google Cloud Storage API
-
Set up authentication with a service account so you can access the API from your local workstation
In the Cloud Console, go to the IAM & Admin > Service Accounts
From the Service account list, select New service account.
In the Service account name field, enter a name.
From the Role list, select Project > Owner.
-
In a production environment, you would want to go with the least privilege, and you do not want to assign a service account Project Owner.
-
Click Create. A JSON file that contains your key downloads to your computer.
We will use this JSON to authorize our sample code access to the Cloud Storage API.
Create a Bucket
The below code provides a sample of how to use the Node.js cloud storage client library to create a bucket. It will create a bucket in the location that the developer defines. In this code snippet, the bucket name is defined as “my-bucket” (Line 1).
const bucketName = 'my-bucket';
// Imports the Google Cloud client library
const {Storage} = require('@google-cloud/storage');
// Creates the client
const storage = new Storage();
async function createBucket() {
 const [bucket] = await storage.createBucket(bucketName, {
   location: 'US-CENTRAL1',
   regional: true,
 });
 console.log(`Bucket ${bucket.name} created.`);
}
createBucket().catch(console.error);
Starting on line 7, you will notice the second argument is an object that contains metadata that we are passing to the storage client which tells the storage client to create our bucket in the respective location. You can also pass the object as follows:
const bucketName = 'my-bucket';
// Imports the Google Cloud client library
const {Storage} = require('@google-cloud/storage');
// Creates the client
const storage = new Storage();
const metadata = {
 location: 'US-CENTRAL1',
 regional: true
};
async function createBucket() {
 const [bucket] = await storage.createBucket(bucketName, metadata);
 console.log(`Bucket ${bucket.name} created.`);
}
createBucket().catch(console.error);
In this code block, we create a variable line 6 to hold the parameters we want to pass to the storage client. Line 11 now includes the metadata object created on line 6 which will be passed to our create bucket request. Below is a table of the metadata options you can use during the create bucket request.
| Name | Type | Description |
| archive | boolean | Storage class as Archive |
| coldline | boolean | Storage class as Coldline |
| dra | boolean | Storage class as Durable Reduced Availability. |
| multiRegional | boolean | Storage class as Multi-Regional. |
| nearline | boolean | Storage class as Nearline. |
| regional | boolean | Storage class as Regional. |
| standard | boolean | Specify the storage class as Standard. |
One important option when creating the bucket is choosing the class as well as if it will be multiRegional. Let’s review the storage classes available for Google Cloud as this will be an important choice from a cost perspective and will also make sure you’re choosing the appropriate class for your data access profile.
The table below was taken from the Google Cloud storage documentation. I would recommend checking the Google Cloud documentation to confirm none of the SLAs have changed since the published date of the book.
| Storage Class | Minimum storage duration | SLA |
| Standard Storage | None | >99.99% in multi-regions and dual-regions 99.99% in regions |
| Nearline Storage | 30 days | 99.95% in multi-regions and dual-regions 99.9% in regions |
| Coldline Storage | 90 days | 99.95% in multi-regions and dual-regions 99.9% in regions |
| Archive Storage | 365 days | 99.95% in multi-regions and dual-regions 99.9% in regions |
The minimum storage duration is a key metric to consider when choosing the class. Note, all classes perform the same from a latency perspective; what you need to consider is the access profile. In our framework, our files will be accessed fairly often because we’re providing users the ability to play the audio file. Due to its access profile, the standard class for our framework meets our requirements and will be the most effective. Google Cloud will charge you an early delete fee if the file is deleted before it has been stored for the duration of the class.
Note
For example, suppose you store 1,000 GB of Coldline Storage data in the US multi-region. If you add the data on day 1 and then remove it on day 60, you are charged $14 ($0.007/GB/mo. * 1,000 GB * 2 mo.) for storage from day 1 to 60, and then $7 ($0.007/GB/mo. * 1,000 GB * 1 mo.) for 30 days of early deletion from day 61 to 90. Cited from Google Cloud Storage documentation: https://cloud.google.com/storage/pricing#archival-pricing
Let’s go ahead and create our first bucket using Node.js.
-
On your local workstation, git clone the following repository:
https://gitlab.com/building-cloud-native-applications-google-cloud/chapter-two.git -
From the cloned repository, go to the chapter-two folder.
-
Open the createBucket.js file in your favorite editor.
-
On line 6, replace the “key.json” with the service account key you downloaded.
-
On line 7, replace “ruicosta-blog” with your project id.
-
On the terminal within this folder, run npm install
-
On the terminal, run node createBucket.js
-
On successful execution, it should look like Figure 2-6

Figure 2-9. Code Screenshot for createBucket.js
You can go to the Google Cloud Storage console and your newly created bucket should be listed. Congratulations! You programmatically created your first bucket.
Create a Bucket with Bucket Locks
A bucket lock allows you to create a retention policy that locks the data preventing it from being deleted or overwritten. You can also lock a retention policy. Once it is locked you cannot unlock it; you will only be able to increase the retention period. See the warning in Figure 2-10 from the Cloud Console. This is warning you that if you lock the retention policy which is set for 5 days, you will lose the ability to shorten or remove it. If you want to delete the objects or the bucket itself, you can only do so after the 5 days have expired.

Figure 2-10. Locking the Cloud Storage Policy
If you attempt to delete objects younger than the retention period it will result in a PERMISSION_DENIED error.
Let’s programmatically create a retention policy for 6 months. Objects in this bucket will not be able to be overwritten or deleted. Review line 5. This is the location you can set the duration of the bucket lock.
// Imports the Google Cloud client library
const {Storage} = require('@google-cloud/storage');
// Creates a client from a Google service account key.
const storage = new Storage({
 keyFilename: "key.json",
 projectId: "ruicosta-blog"
});
const retentionPeriod = 15780000; // 6 months.
const bucketName = 'rui-costa-bucket-name-2020-01';
async function createBucket() {
 await storage
 .createBucket(bucketName)
 .setRetentionPeriod(retentionPeriod);
 console.log(`Bucket ${bucketName} created.`);
}
createBucket().catch(console.error);
To run the code snippet locally on your desktop follow these steps:
-
If you cloned the repo before, you can skip this step: On your local workstation git clone the following repository:
https://gitlab.com/building-cloud-native-applications-google-cloud/chapter-two.git -
From the cloned repository, go to the chapter-two folder.
-
Open the createBucketLock.js file in your favorite editor.
-
On line 5 replace the “key.json” with the service account key you downloaded.
-
On line 6 replace “ruicosta-blog” with your project id.
-
If you run npm install in a previous step within this folder you can skip this step: On the terminal within this folder run npm install
-
On the terminal run node createBucketLock.js
-
On successful execution, it should look like Figure 2-11
Figure 2-11. Code Screenshot for createBucketLock.js
You created a new bucket with a retention lock period of 6 months. If you try to upload a new file to the bucket and delete the uploaded file you will receive an error message.
List Buckets
Let’s now list the buckets we programmatically created. This is a useful command as it allows you to list all the buckets in your project, which can allow you to perform actions like Data Loss Prevention. We can loop through all the buckets and objects, then scan them for PII information with the Google Cloud Data Loss Prevention API. Line 12 we use a forEach() which calls the provided callback function once for each element in an array. Each element in the array is our list of buckets within our project.
// Imports the Google Cloud client library
const {Storage} = require('@google-cloud/storage');
// Creates a client
const storage = new Storage({
 keyFilename: "key.json",
 projectId: "ruicosta-blog"
});
async function listBuckets() {
 // Lists all buckets in the current project
 const [buckets] = await storage.getBuckets();
 console.log('Buckets:');
 buckets.forEach(bucket => {
   console.log(bucket.name);
 });
}
listBuckets().catch(console.error);
To run the code snippet locally on your desktop follow these steps:
-
If you cloned the repo before, you can skip this step: On your local workstation git clone the following repository:
https://gitlab.com/building-cloud-native-applications-google-cloud/chapter-two.git -
From the cloned repository, go to the chapter-two folder.
-
Open the listBuckets.js file in your favorite editor.
-
On line 5 replace the “key.json” with the service account key you downloaded.
-
On line 6 replace “ruicosta-blog” with your project id.
-
If you run npm install in a previous step within this folder you can skip this step: On the terminal within this folder run npm install
-
On the terminal run node listBuckets.js
-
On successful execution, it should look like Figure 2-12

Figure 2-12. Code Screenshot for listBuckes.js
Upload a File
We created a bucket. Now, getting objects to the bucket is the funniest part. In the code snippet below we will upload a file called “rui_costa.jpg” to cloud storage within the bucket named “rui-costa-bucket-name-2020”.
const bucketName = 'rui-costa-bucket-name-2020';
const filename = 'rui_costa.jpg';
// Imports the Google Cloud client library
const {Storage} = require('@google-cloud/storage');
// Creates a client
const storage = new Storage({
   keyFilename: 'key.json',
   projectId: 'ruicosta-blog'
 });
async function uploadFile() {
 // Uploads a local file to the bucket
 await storage.bucket(bucketName).upload(filename, {
   metadata: {
     cacheControl: 'public, max-age=31536000',
   },
 });
 console.log(`${filename} uploaded to ${bucketName}.`);
}
uploadFile().catch(console.error);
To run the code snippet locally on your desktop follow these steps:
-
If you cloned the repo before, you can skip this step: On your local workstation git clone the following repository:
https://gitlab.com/building-cloud-native-applications-google-cloud/chapter-two.git -
From the cloned repository, go to the chapter-two folder.
-
Open the uploadFile.js file in your favorite editor.
-
On line 1 replace with your bucket name
-
On line 2 replace with the file you want to upload
-
On line 7 replace the “key.json” with the service account key you downloaded.
-
On line 8 replace “ruicosta-blog” with your project id.
-
If you run npm install in a previous step within this folder you can skip this step: On the terminal within this folder run npm install
-
On the terminal run node uploadFile.js
-
On successful execution, it should look like Figure 2-10

Figure 2-13. Code Screenshot for uploadFile.js
That was easy! We now programmatically uploaded a file to our bucket.
Download the File
Another option you might need is getting data out of Cloud Storage. We created buckets and uploaded a file but how can we download this file now? The code snippet below will download the file you just uploaded to the local location you define. On line 3 you can change the name of the file that will be saved locally so as to not overwrite the existing file we uploaded.
const bucketName = 'rui-costa-bucket-name-2020';
const srcFilename = 'rui_costa.jpg';
const destFilename = 'download_rui_costa.jpg';
// Imports the Google Cloud client library
const {Storage} = require('@google-cloud/storage');
// Creates a client
const storage = new Storage({
   keyFilename: 'key.json',
   projectId: 'ruicosta-blog'
 });
async function downloadFile() {
 const options = {
   destination: destFilename,
 };
 // Downloads the file
 await storage.bucket(bucketName).file(srcFilename).download(options);
 console.log(
   `gs://${bucketName}/${srcFilename} downloaded to ${destFilename}.`
 );
}
downloadFile().catch(console.error);
To run the code snippet locally on your desktop follow these steps:
-
If you cloned the repo before, you can skip this step. Otherwise, on your local workstation git clone the following repository: https://gitlab.com/building-cloud-native-applications-google-cloud/chapter-two.git
-
From the cloned repository, go to the Chapter 2 folder.
-
Open the downloadFile.js file in your favorite editor.
-
On line 1 replace with your bucket name
-
On line 2 replace with the file you want to download
-
On line 3 replace with the name you want to save the download file locally
-
On line 8 replace the “key.json” with the service account key you downloaded.
-
On line 9 replace “ruicosta-blog” with your project id.
-
If you run npm install in a previous step within this folder you can skip this step: On the terminal within this folder run npm install
-
On the terminal run node downloadFile.js
-
On successful execution, it should look like Figure 2-14
Figure 2-14. Code Screenshot for downloadFile.js
Now we are having fun. We created a bucket, uploaded a file, and then downloaded the file! Congratulations.
Signed URL with Python
So far we have focused on the Node.js client library, but we can perform all the actions we have done thus far with other languages. Let’s say I wanted to send a file that was existing in Cloud Storage to an endpoint. One way we can accomplish this is via the signed URL method available to us. Example: We want to send a PDF file to the endpoint for the endpoint to convert the PDF to a PNG file. Below is a sample code that shows us how to use signed URLs in Python.
Signed URLs is a URL that provides access to users and applications for a limited time. The signed URL allows users to access the object without authentication. In our framework, we authenticate and authorize the user via Identity Aware Proxy. At this point we generate a signed URL for a limited time that allows the user to play the respective audio file which is an object with Cloud Storage.
Note
Anyone who possesses the signed URL will be able to perform actions on the object as reading the object within the defined period of time.
from google.cloud import storage
storage_client = storage.Client.from_service_account_json(service_acct)
bucket = storage_client.bucket(bucket_name)
for blob in bucket.list_blobs(prefix=str(prefix + "/")):
 if blob.name.endswith(".png"):
   url_lifetime = 3600  # Seconds in an hour
   serving_url = blob.generate_signed_url(expiration=url_lifetime, version='v4')
Let’s review the code snippet. On line 5, we have a for loop that iterates through the defined bucket name on line 3. For each object that ends with the extension of “.png” we generate a signed URL with the expiration time set to 3600 seconds. The signed URL could be passed as a parameter to an endpoint. Since the URL has the needed authentication and authorization for the object, the endpoint will not be required to authenticate for the set period of time. Google makes it pretty easy for us to generate signed URLs that allow users or applications to access our objects without requiring them to authenticate or authorize.
Uploading Audio Files for Our Framework
Now that we have a good understanding of the storage options available as well as practicing how to get data in and out of Google Cloud, let’s move on to how we will get data to our cloud-native application. For our initial prototype, we will use the gsutil command to upload audio files to Cloud Storage with the associated custom metadata. Objects stored on Cloud Storage have metadata associated with the respective object. The metadata provides information about the object. For example, the storage class is a key-value pair that tells which class the object belongs to. The key-value pair would look something like storageClass:STANDARD. There are two types of metadata that we can associate with objects:
-
Fixed-key metadata: Metadata whose keys are defined for you, but you are able to set the value.
-
Custom metadata: Metadata that you set via client libraries or the gsutil.
Within our framework metadata plays a key role. The following command is how we upload audio files within our framework to Cloud Storage.
gsutil -h x-goog-meta-callid:1234567 -h x-goog-meta-stereo:true -h x-goog-meta-pubsubtopicname:[TOPIC_NAME] -h x-goog-meta-year:2019 -h x-goog-meta-month:11 -h x-goog-meta-day:06 -h x-goog-meta-starttime:1116 cp [YOUR_FILE_NAME.wav] gs://[YOUR_UPLOADED_AUDIO_FILES_BUCKET_NAME]
This command will upload an audio file to the defined bucket with the following key-value pairs:
-
callid:1234567
-
stereo:true
-
pubsubtopicname:[TOPIC_NAME]
-
year:2019
-
month:11
-
day:06
-
starttime:1116
Keep in mind that adding custom metadata with gsutil, you must prefix your metadata key with x-goog-meta-. The x-goog-meta is not stored as part of the key, just the name after the x-goog-meta prefix. For example, our gsutil command has a custom metadata key of x-goog-meta-stereo, however, the x-goog-meta will not be stored, stereo will be used as the key name only.
As discussed, once the file is written to Cloud Storage it will trigger a Cloud Function. Below is a code snippet of the cloud function we will deploy.
let pubSubObj = {
 'fileid': uniqid.time(),
 'filename': `gs://${file.bucket}/${file.name}`,
 'callid': file.metadata.callid === undefined ? 'undefined' : file.metadata.callid,
 'date': Date(Date.now()),
 'year': file.metadata.year === undefined ? 'undefined' : file.metadata.year,
 'month': file.metadata.month === undefined ? 'undefined' : file.metadata.month,
 'day': file.metadata.day === undefined ? 'undefined' : file.metadata.day,
 'starttime': file.metadata.starttime === undefined ? 'undefined' : file.metadata.starttime,
 'duration': duration, //get value from fluent-ffmpeg
 'stereo': file.metadata.stereo === undefined ? 'undefined' : file.metadata.stereo,
};
This Javascript object will hold the key:value pairs from our custom metadata. Notice we are not referencing x-goog-meta when extracting the value. Again, we ignore the prefix even within our codebase.
Now that we have a good understanding of Cloud Storage as well as how the framework works with Cloud Storage, let’s move on to Cloud Functions. Cloud Functions plays an important role in our framework as it will be the first step to start the process of transcribing the audio files.
Cloud Functions
Google Cloud Functions is a serverless compute solution that allows you to run event-based applications. Cloud Functions allows you to write single-purpose functions which can be attached to events from your services. An example is how our framework will leverage cloud functions. Our function will be triggered by an event, and the event will trigger a Cloud Function once an object is written to the Cloud Storage bucket that the function is attached to.
Cloud Functions is a serverless offering from Google Cloud. It abstracts the compute infrastructure and allows you to focus on your code. You don’t have to worry about patching operating systems or provisioning resources. Cloud Functions scale automatically; they can scale from a single invocation to millions without intervention from the developer. For Cloud Storage, Cloud Functions supports the following trigger types:
-
google.storage.object.finalize
-
google.storage.object.delete
-
google.storage.object.archive
-
google.storage.object.metadataUpdate
Our framework will leverage the google.storage.object.finalize trigger type. This event is triggered when a new object is created or an existing object is overwritten in the bucket. Below is a code snippet from our Cloud Function.
exports.safLongRunJobFunc = (event, context, callback) => {
  const file = event;
  const topicName = file.metadata.pubsubtopicname;
  const audioPath = { uri: `gs://${file.bucket}/${file.name}` };
  const readFile = storage.bucket(file.bucket).file(file.name);
On line 1, the event parameter in the first argument is the storage event data that is delivered in the Cloud Storage object format. When our event is triggered Cloud Storage will expose this object that contains information about our object including the custom metadata you applied when you uploaded the file via the gsutil command. Below is the object values that are exposed to the cloud function:
{
  "kind": "storage#object",
  "id": string,
  "selfLink": string,
  "name": string,
  "bucket": string,
  "generation": long,
  "metageneration": long,
  "contentType": string,
  "timeCreated": datetime,
  "updated": datetime,
  "timeDeleted": datetime,
  "temporaryHold": boolean,
  "eventBasedHold": boolean,
  "retentionExpirationTime": datetime,
  "storageClass": string,
  "timeStorageClassUpdated": datetime,
  "size": unsigned long,
  "md5Hash": string,
  "mediaLink": string,
  "contentEncoding": string,
  "contentDisposition": string,
  "contentLanguage": string,
  "cacheControl": string,
  "metadata": {
    (key): string
  },
  "acl": [
    objectAccessControls Resource
  ],
  "owner": {
    "entity": string,
    "entityId": string
  },
  "crc32c": string,
  "componentCount": integer,
  "etag": string,
  "customerEncryption": {
    "encryptionAlgorithm": string,
    "keySha256": string
  },
  "kmsKeyName": string
}
From our code snippet, we extract the following values:
const topicName = file.metadata.pubsubtopicname;
const audioPath = { uri: `gs://${file.bucket}/${file.name}` };
const readFile = storage.bucket(file.bucket).file(file.name);
The topicName is a custom metadata that we applied on upload, -h x-goog-meta-pubsubtopicname:[TOPIC_NAME] and now we have access to it in our code.
Cloud Function Libraries
Cloud Functions provides you the ability to use external modules. The dependencies for our framework are managed with npm and defined in a file called package.json. This allows developers to be creative with their functions. Our framework leverages the following external modules:
const PubSub = require(`@google-cloud/pubsub`);
const storage = require('@google-cloud/storage')();
const speech = require('@google-cloud/speech').v1p1beta1;
const client = new speech.SpeechClient();
const uniqid = require('uniqid');
const ffmpeg = require('fluent-ffmpeg');
const ffmpegPath = require('@ffmpeg-installer/ffmpeg').path;
The fluent-ffmpeg and ffmpeg-installer/ffmpeg allow our function to check the codec and length of the audio file. When submitting a job to Speech-to-Text for transcription we need to configure the sampleRateHertz parameter. Using the external libraries, we extract this information and pass it to the Speech-to-Text API. We are using the long-running job method available from the Speech-to-Text API. When we submit an audio file to be transcribed for a long-running job we need to wait for the API to complete, this process can take minutes to hours. The formula used is n/2 for how long the API will take to complete. For this we need to wait a certain amount of time before we check to see if the API is done.
If we continuously poll the API we might hit a quota limit with Google Cloud. To avoid hitting a quota we only check the API for a completed job after the duration of the audio file divided by two is completed. Example: If the audio file is 1 hour long we will only check the API for completion after 30 minutes have passed. We will cover this in-depth in the Dataflow chapter as here we only submit the job to Speech-to-Text and receive the job name which then is sent as a key:value pair to Pub/Sub.
GitLab CI/CD and Cloud Functions
Let’s practice deploying a Cloud Function with GitLab CI/CD.
Note
You can practice along now on your local workstation or at a later time using Qwiklabs. The Qwiklabs Quest for this book is located at:
We leverage a core component of Cloud-native applications Continuous Integration (CI) and Continuous Delivery (CD) architecture to automate deployment tasks, and perform peer reviews prior to pushing the code to production. For our example we will leverage GitLab for Source Code Management and CI/CD.
For our first integration step with GitLab https://about.gitlab.com/, we will keep it simple and focus on getting our code developed and deployed faster. You will need a GitLab account to follow along. To authorize GitLab access to our Google Cloud project we will need to create a service account and assign the required roles. Always keeping in mind to work with least privilege methodology.
-
Open the IAM & Admin in the Google Cloud Console.

-
On the menu click Service Accounts

-
Click CREATE SERVICE ACCOUNT

-
Enter your Service account details:
Service Account Name
Service Account ID
Service Account Description
-
Click Create.
-
Assign the following roles to the Service Account
Cloud Functions Admin
Service Account User
-
Click Continue
-
Click Done
-
Locate the newly created Service Account, click on the actions icon and select create key.

-
Choose JSON and click CREATE. This will download the JSON file to your local workstation.
-
Head over to your GitLab Project, and under settings go to CI/CD
-
Click Expand Variables
-
Create two new variables labeled as:
PROJECT_ID
SERVICE_ACCOUNT
-
Enter your Google Cloud project id
-
Open the JSON file for the service account you downloaded before, copy and paste it’s content to the SERVICE_ACCOUNT key. It should look something like Figure 2-15:

Figure 2-15. GitLab Variables Screenshot
At this point you have created a service account and provided the service account details to your GitLab project which will allow GitLab CI/CD to deploy the Cloud Function to your Google Cloud project. To trigger a pipeline we will need to create a .gitlab-ci.yml file, this file defines the order of the pipeline. Below is our .gitlab-ci.yml file we will use to deploy our cloud function.
image: google/cloud-sdk:latest
deploy_production:
 stage: deploy
 only:
   - master
 script:
   - echo $SERVICE_ACCOUNT > ${HOME}/gcloud-service-key.json
   - gcloud auth activate-service-account --key-file ${HOME}/gcloud-service-key.json
   - gcloud --quiet --project $PROJECT_ID functions deploy safLongRunJobFunc --runtime=nodejs8 --trigger-event=google.storage.object.finalize --trigger-resource=audio-uploads-42892
Pipeline configuration begins with jobs. Jobs are the most fundamental element of a configuration file. In our configuration file our job name is deploy_production. You will notice in Figure 2-16, the name displayed for our job.

Figure 2-16. Screenshot of GitLab Pipeline
The script keyword is a required component of the configuration file. It is the shell script which is executed by the runner. Here we are authenticating gcloud with the service account created and assigned to the variable within GitLab. The next step is the deployment of Cloud Functions using the gcloud command. We are also using the google/cloud-sdk:latest docker image as it contains the gcloud command, allowing for a lightweight docker image during the deployment.
If you have not cloned the GitLab repository, go ahead and clone it to your local workstation. Open your favorite IDE, for this exercise I will be using Visual Code. Download or clone the following repository:
https://gitlab.com/building-cloud-native-applications-google-cloud/speech-analysis-framework.git
Copy the files in the saf-longrun-job-func folder to your GitLab repository local folder. For this you will need to have created a repository in GitLab and cloned the empty repository. It should look like Figure 2-17

Figure 2-17. Screenshot of the sample code for the Cloud Function
-
Create a new branch

Figure 2-18. Creating a Feature Branch in Visual Studio Code
-
Make a small change to the index.js file, commit the changes, and push the branch to the origin of your repository.
-
Back in GitLab console create a merge request

You should be able to see the merge request. At this point, the CI/CD pipeline will not be executed. Our pipeline will only be triggered when it is merged into the master branch. This allows reviewers to review the changes and accept the merge request. This was defined in our GitLab configuration file as:
only:
   - master
After reviewing the changes you can Merge the request.
-
Head over to the CI/CD and view the jobs, the job should now be running:

You have successfully created a GitLab pipeline that only executes when merged to the master branch. Developers can work off feature branches and only allowed users can merge the request to the master branch which will then execute the GitLab CI/CD pipeline which in our framework will deploy the source code to Google Cloud Function.
Cloud Native Checkpoint
Let’s revisit the considerations we listed for our cloud-native architecture and how we addressed each one with Cloud Storage and Cloud Functions.
-
Our application needs to be abstracted from the cloud infrastructure.
Here we are using Google Cloud Functions and Cloud Storage which abstracts us from having to manage operating systems, worrying about scalability, and allows us to focus on our application functionality. ✓
-
We need a method of Continuous Integration and Continuous Delivery.
Here we are using GitLab for CI/CD. We also are restricting merges to the master branch by approved users plus we only execute the CI/CD pipeline when the merge is accepted on the master branch. ✓
What are we missing? We will cover these topics in a later chapter:
-
Staging
-
Unit Testing
-
Rollbacks
-
-
Our application has to be able to scale up and scale down as needed.
Cloud Functions to the rescue. Google Cloud automatically manages and scales the functions, our function must be stateless meaning one function invocation should not rely on in-memory state set by a previous invocation. ✓
Cloud Storage automatically increases the IO capacity for a bucket by distributing the request load across multiple servers. ✓
-
Buckets have an initial IO capacity of around 1000 object write requests per second and 5000 object read requests per second.
-
-
How will our application manage failures?
We have not discussed this, but keeping in mind Cloud Functions are fully managed services provided by Google Cloud. Google Cloud will manage the infrastructure hosting our cloud functions, however, we still need to consider failures as bugs in our code. We will cover this in detail later, but this functionally will be provided by GitLab with rollback capabilities.
-
The application needs to be globally accessible.
At this point, we are only working with Cloud Storage and Cloud Functions. This is not the client-facing part of the application. However, we can build buckets and Cloud Functions in respective regions to be nearest the call center where the recordings are taking place. We will be covering this in-depth in an upcoming chapter.
-
Our framework needs to be based on a microservice architecture.
Not applicable yet, but it will. But you can consider our function as a micro-service since it is performing a single function. Our frontend as well as the endpoint will be deployed on Kubernetes which will be our orchestration software for our micro-services.
-
How will our application be secured?
Always trying to work with least privilege. In our framework, when we created the service account for GitLab we only provided the roles required for GitLab to deploy our function.
Closing Remarks
You covered quite a bit of ground in this chapter to start building the Framework. You learned how to work with Cloud Storage objects programmatically, via the command line and with the Cloud Console. You then moved on to create your first Cloud Function via the Cloud Console and dove deeper by using GitLab CI/CD to automate the deployment. Besides the automation you also learned how to perform peer reviews before allowing a feature branch to be merged to the master branch. This is a great first step with working with Cloud Native Applications. Will dive deeper in the following chapters on the building blocks of the Framework.