

1 First I establish the overall pose by drawing a long, curved arc from the parrot’s beak to its tail with an HB pencil. On this center line, I place the beak and build the head, chest, wings, and tail with ovals and tapering lines.
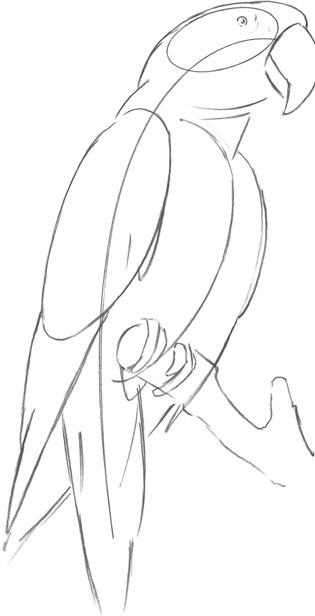
2 Now that the basic form of the body exists, I place the feet and add a perch to “ground” the parrot. I also draw the eye and refine the outline of the beak, defining the upper and bottom parts.
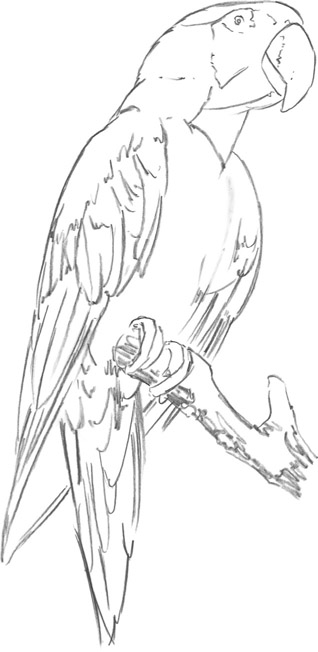
3 Next I erase any unnecessary guidelines. I give the perch some form by scribbling shadows along the lower and left edges. Then I continue to refine outlines, indicating the separations between the most pronounced feathers on a parrot’s body: the wing and tail feathers.
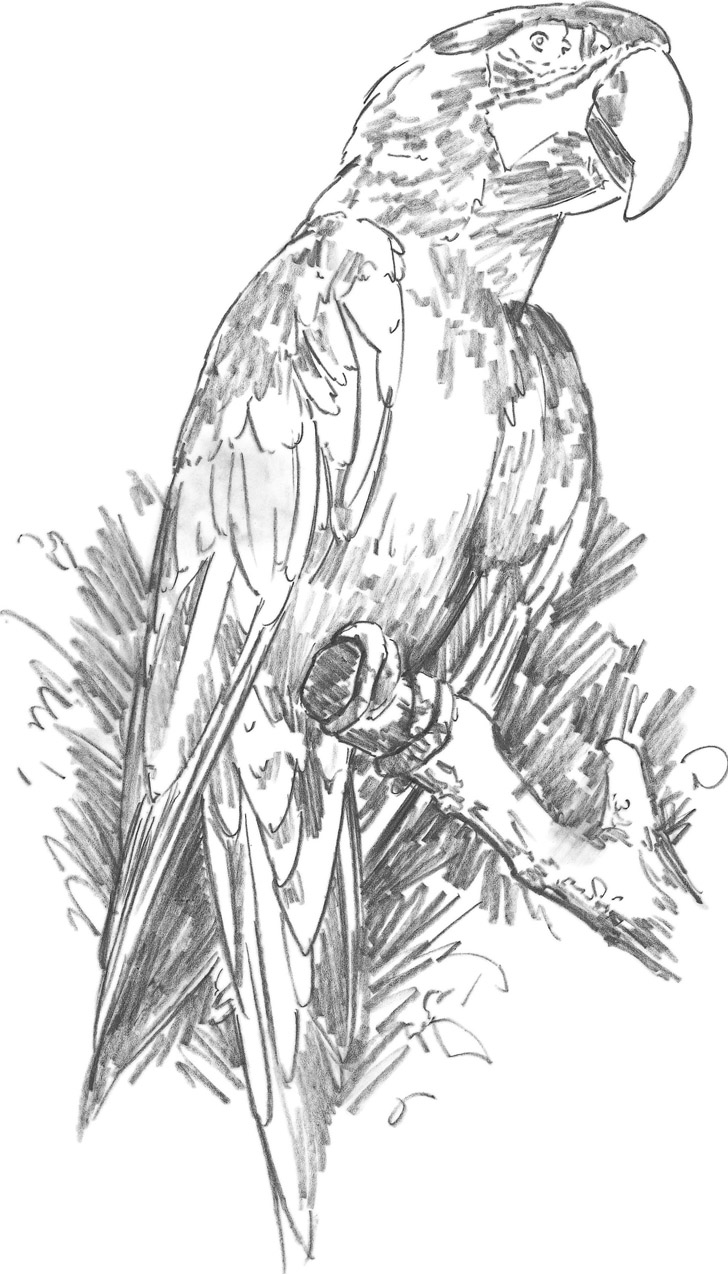
4 Parrots are known for their dramatic coloring, so I convey this with bold, broad pencil strokes. I shade mainly along the edges of the bird to build form, filling in some feathers with soft strokes and leaving others white. To make the bird stand out from the paper, I apply quick, expressive strokes that radiate from the bird’s body. I want the background to capture the liveliness of the bird’s character too, so I use free, loose strokes and scribbles to convey spontaneity and dynamism.
..................Content has been hidden....................
You can't read the all page of ebook, please click here login for view all page.