THE FIRST POTS I EVER SAW come out of a high-fire gas kiln made quite an impression on me. They were a dark stoneware, reduction fired, with iron-bearing glazes that produced wonderful, warm earth tones. They had a natural, organic look that suggested the geological origins of clay and glaze—an aesthetic popular in the 1970s. To me, these pots had the soft feel and muted tones of a pair of well-worn corduroy bellbottoms. I have since come to realize that high-fire possibilities extend beyond the Shinos, celadons, and tenmokus that first drew me to high-fire pottery. In this book, I have tried to include a full spectrum of possibilities. I made sure to include plenty of examples of classic glaze recipes, but have also included copper reds, titanium whites, and barium blues that are brightly colored and really pop. I have to say, some of the combinations are mind blowing! Ready to dive in? Let’s go!
Brenna McBroom
WHY HIGH FIRE?
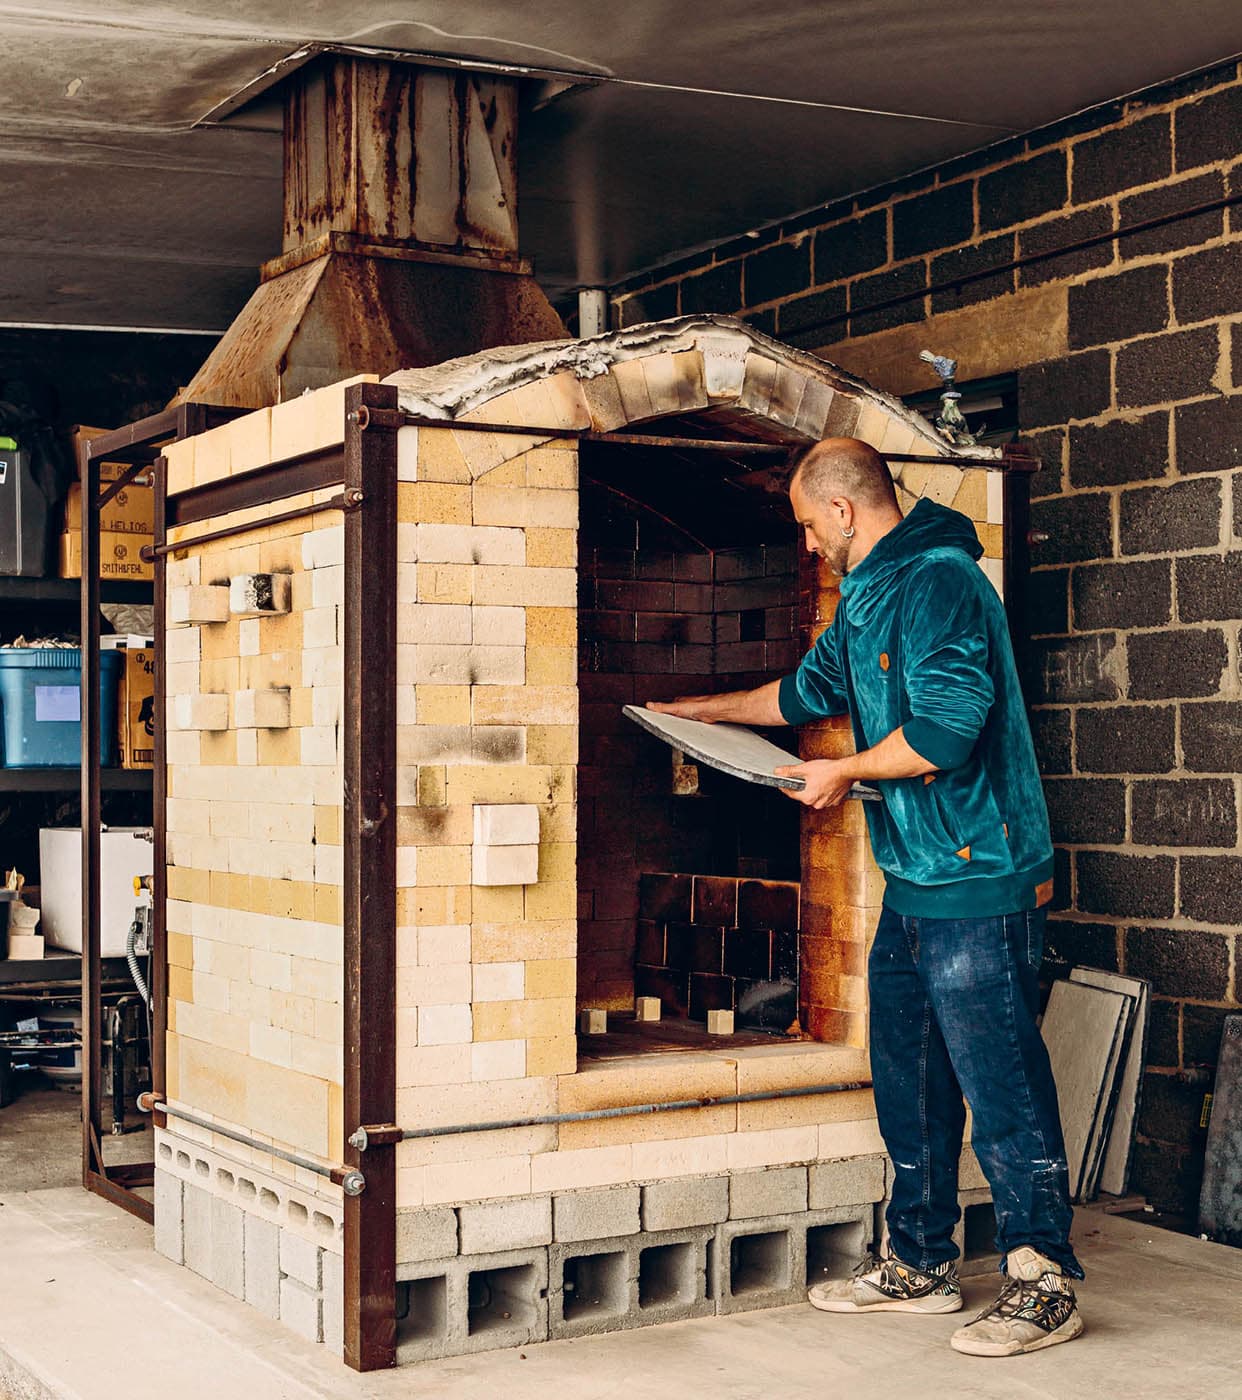
High-fire refers to a range of temperatures between cone 8 and 13, but is collectively referred to as “cone 10.” Stoneware vitrifies nicely at these temperatures making it an excellent choice for functional work, but be aware that it takes considerably more (usually fossil) fuel to reach these higher temperatures, therefore increasing the economic and environmental cost of the firing. On the flip side, many beautiful high-fire glazes can be made from the most economical of ceramic ingredients, which defrays some of that additional cost. Also, if you are interested in wood or salt firing, high fire is the place to look. Although you can fire a salt or wood kiln to a lower cone, these are most often fired to cone 9 or above. Salt and wood firing offer a unique aesthetic and culture for the clay artist to explore.
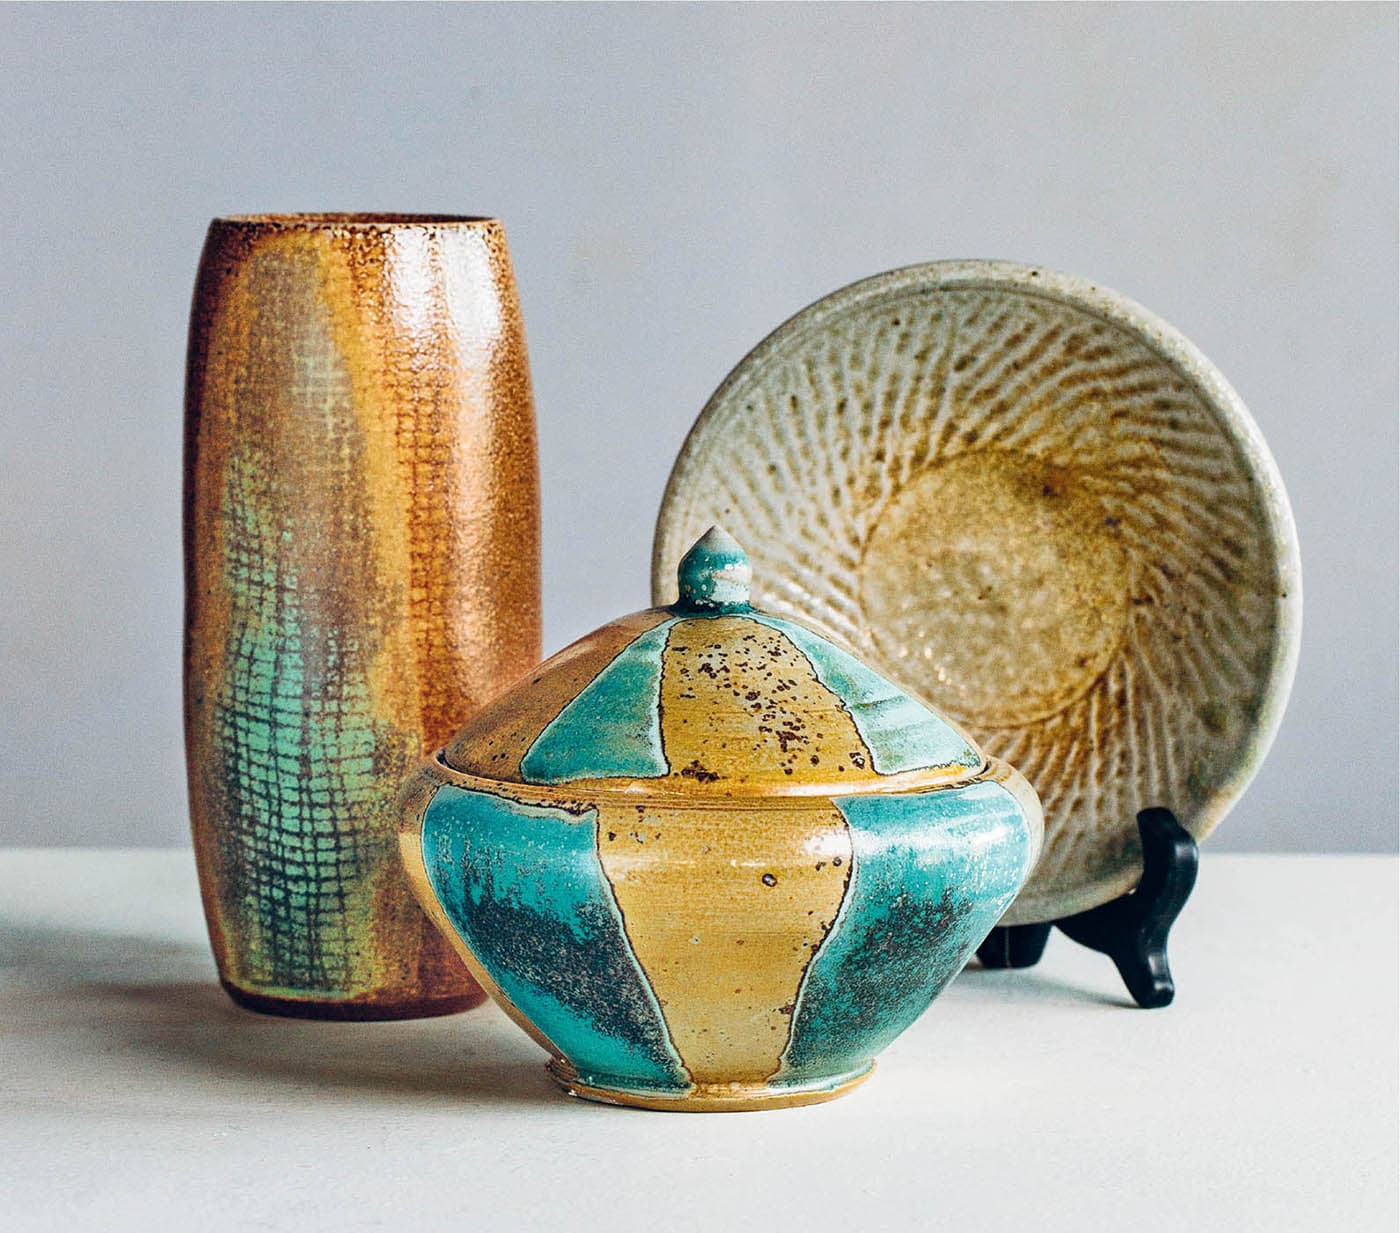
A collection of high-fire pots by Odyssey artists. Clockwise from top left: Gabriel Kline, Patty Robertson, Cayce Kolstad, Kelsey Sickmeyer, Shinara Taylor, and Patti Hughes
The Odyssey gas kiln waiting to be unloaded
REDUCTION, FIRE, AND COLOR
I’ve heard it said that there are two types of potters: mud potters and fire potters. Mud potters love the feel of clay gliding through their hands and spend as much time as possible digging, refining, wedging, forming, carving, and even burnishing their clay to a polished shine. For the mud potter, firing work is seen as a necessary part of the process to return to the dopamine-releasing pleasure of physically manipulating one of Earth’s most malleable materials. Fire potters, on the other hand, would heat up an empty kiln just to watch it glow.
I see clay artistry as more of a spectrum, with these two polarities representing a ceramic yin and yang. As artists, we all locate ourselves somewhere between the two. I appreciate the modern technology of the computerized electric kiln. I do the majority of my firing in electric kilns, although I have learned a few too many times not to rely on the computer. (Use witness cones! Fire to them. Make your friends fire to them. They’ll thank you later! See here for more information on witness cones.) Computerized electric kilns control much of the process using a thermocouple to measure temperature and calculate a specific rate of climb. A computerized kiln adjusts the intervals of electricity coursing through the elements based on the feedback from the thermocouple. For the mud potter, this can be a dream come true by helping minimize the time spent firing, thereby maximizing the time in the studio working with wet clay.
For the fire potter, perhaps more than for most, fire is a powerful and fascinating element—anyone who has spent time tending and staring into a campfire knows its capacity to mesmerize. Personally, I love the undeniable excitement of manipulating flame, that basic Promethean urge. I produce the majority of my work in electric kilns, but I also regularly fire to cone 10 in reduction, raku fire seasonally, and once or twice a year help out friends with large wood kilns. Wherever you identify more as a mud potter or a fire potter, it can be helpful to understand a few key principals of firing and how it affects our glazes.
OXYGEN AND OXIDES
Oxygen! In the form of the molecule O2, we breathe it into our lungs and it sustains life with every inhale. Similarly the oxygen present in our clay, glazes, and the atmosphere inside of the kiln breathes life into the work in the kiln. When we classify glazes as oxidation or reduction—and some work well under both conditions—what do we actually mean? Oxidation and reduction refer to the amount of oxygen present in the atmosphere inside of the kiln.
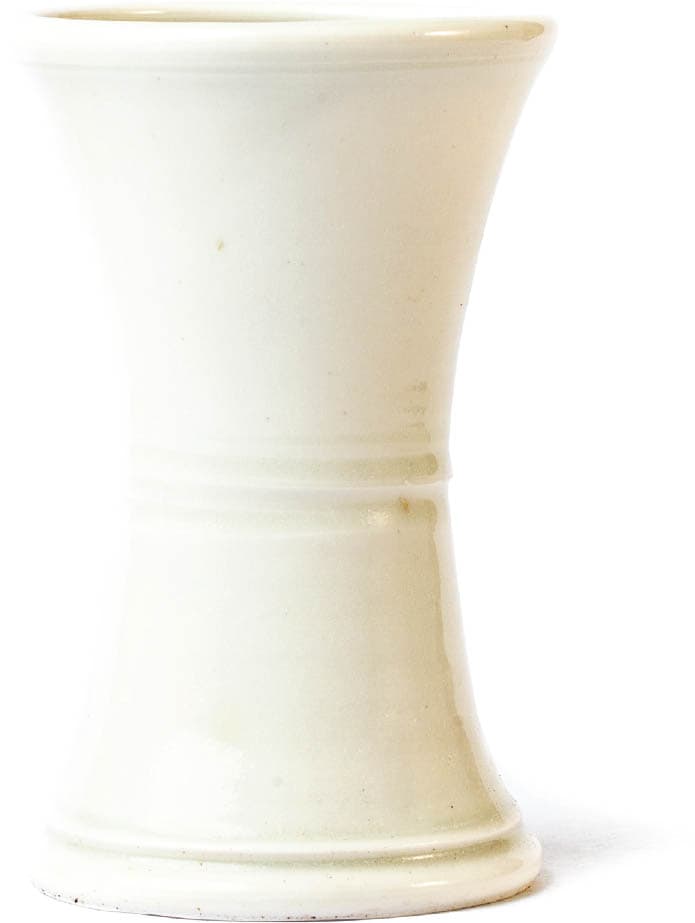
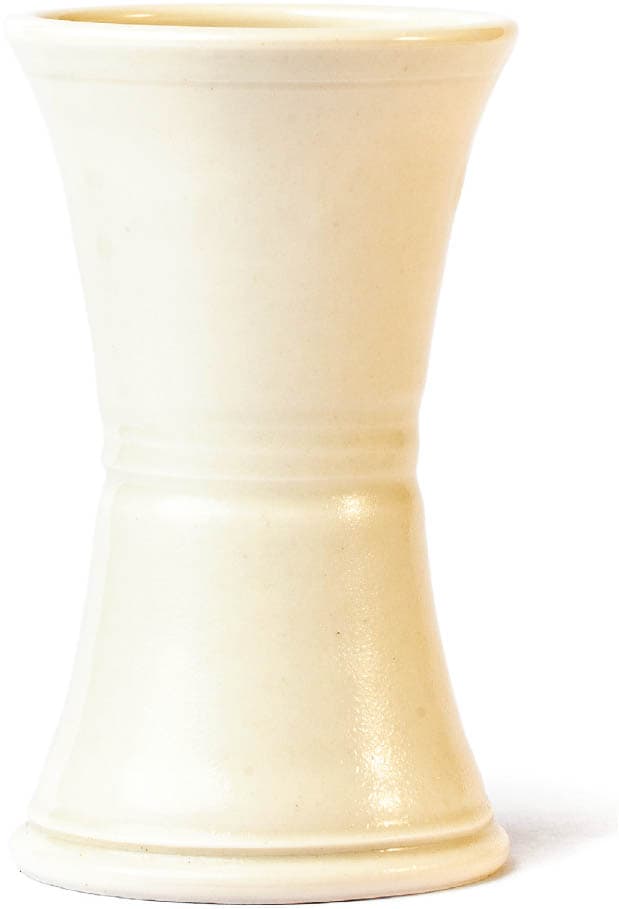
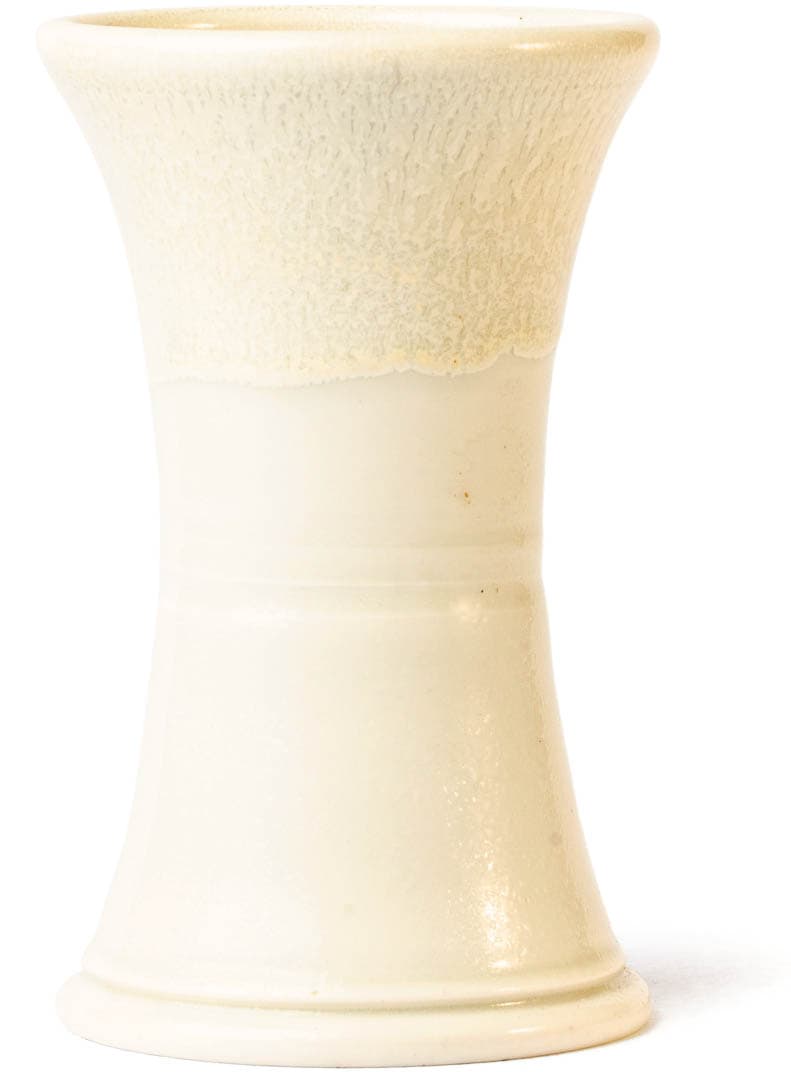
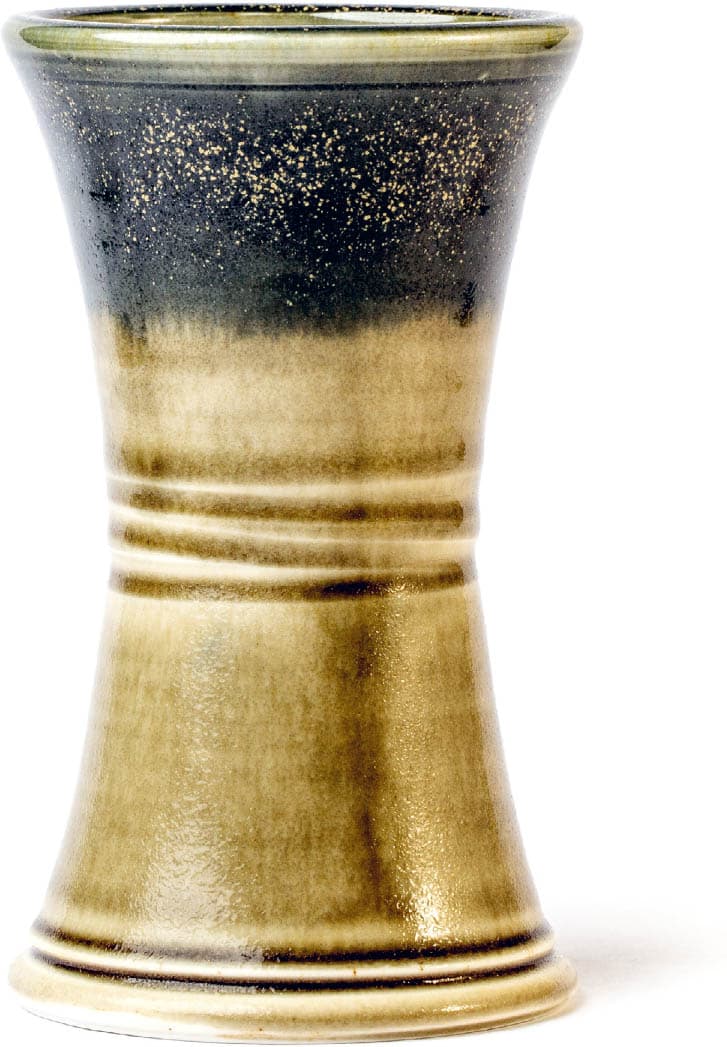
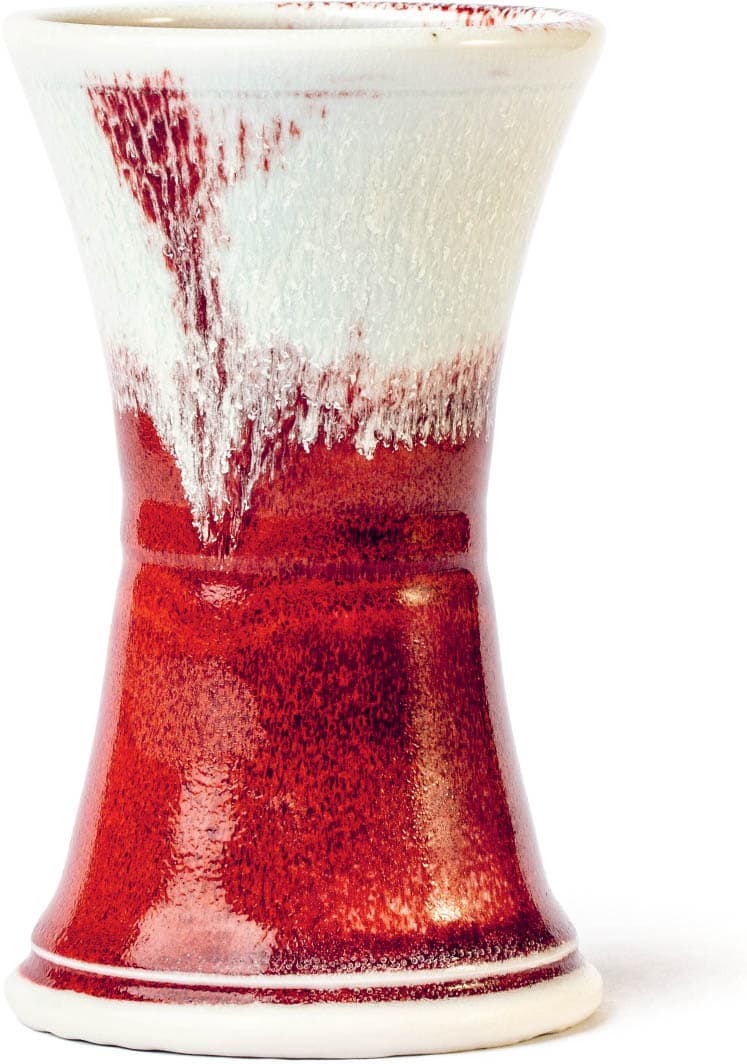
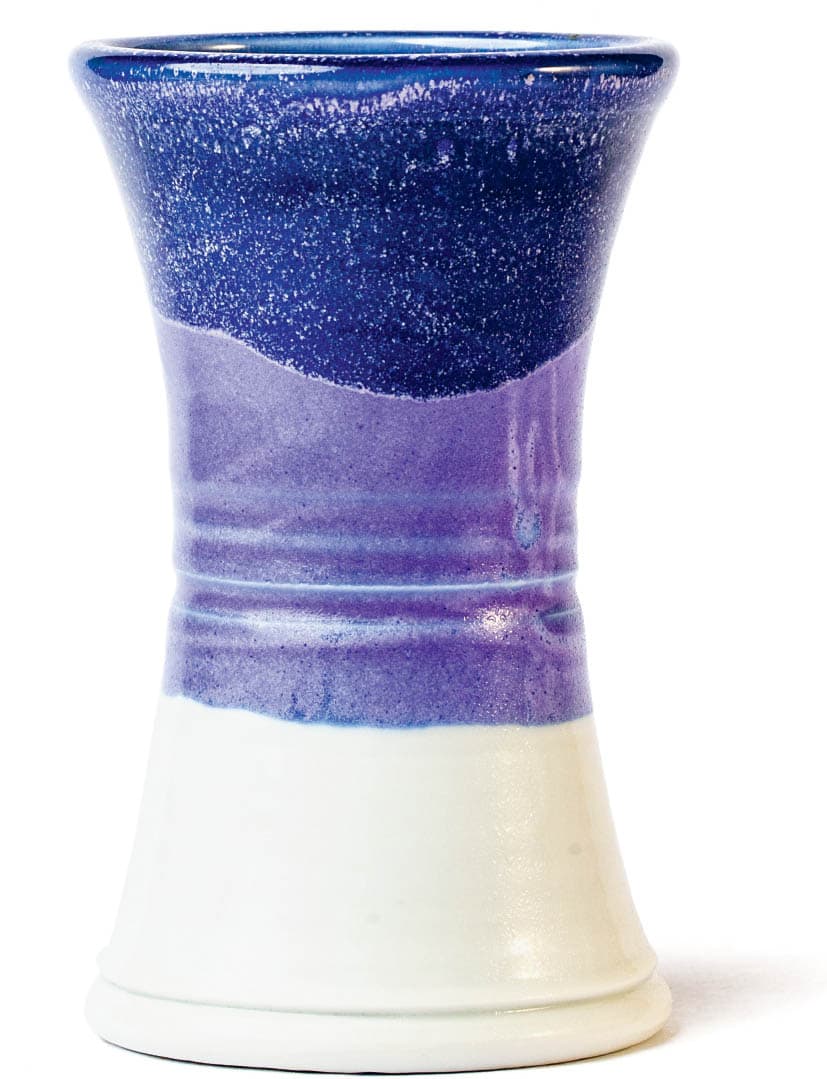
To better understand these concepts within the context of the glazes themselves, let’s start with the fuel being used to heat the pots inside the kiln. In the case of electric kilns, an electrical current is run through coiled metal elements and the resistance creates heat. Though there is no “live flame,” no combustion of fuel, this combustion often happens at a power plant that consumes fossil or nuclear fuels. With the increasing use of alternative fuels, however, it could also be solar, wind, or even tidal powered. The heat in an electric kiln does not rely on combustion within the kiln, and as such has little effect on the amount of oxygen in the atmosphere inside the kiln. With plenty of oxygen available, the atmosphere is said to be oxidizing. In an oxidizing atmosphere, the oxides in your glazes will yield a particular color response. Most glazes containing copper, for example, will yield pleasant blues, greens, and aquas, depending on the concentration and materials in the base glaze (see top image opposite).
TYPES OF REDUCTION
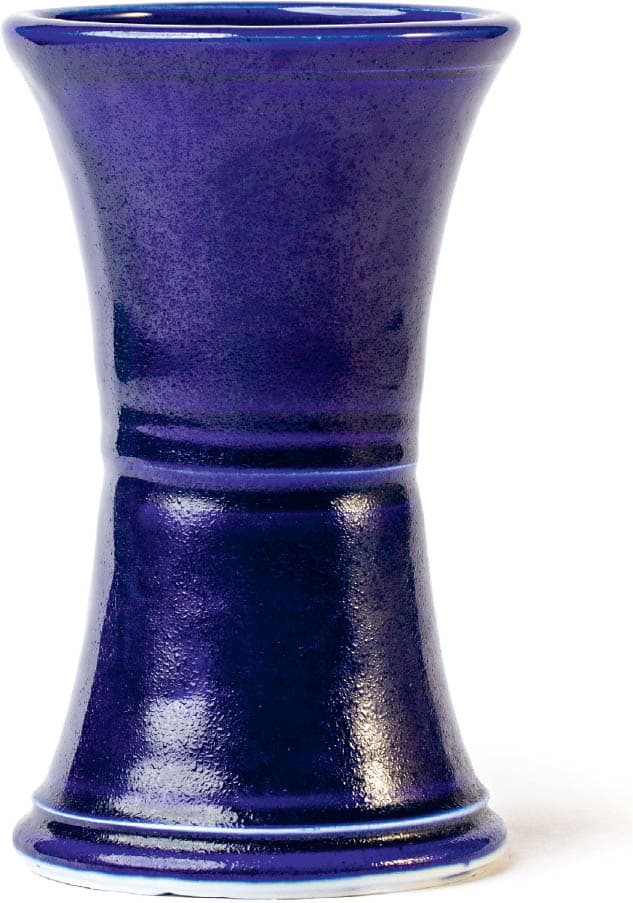
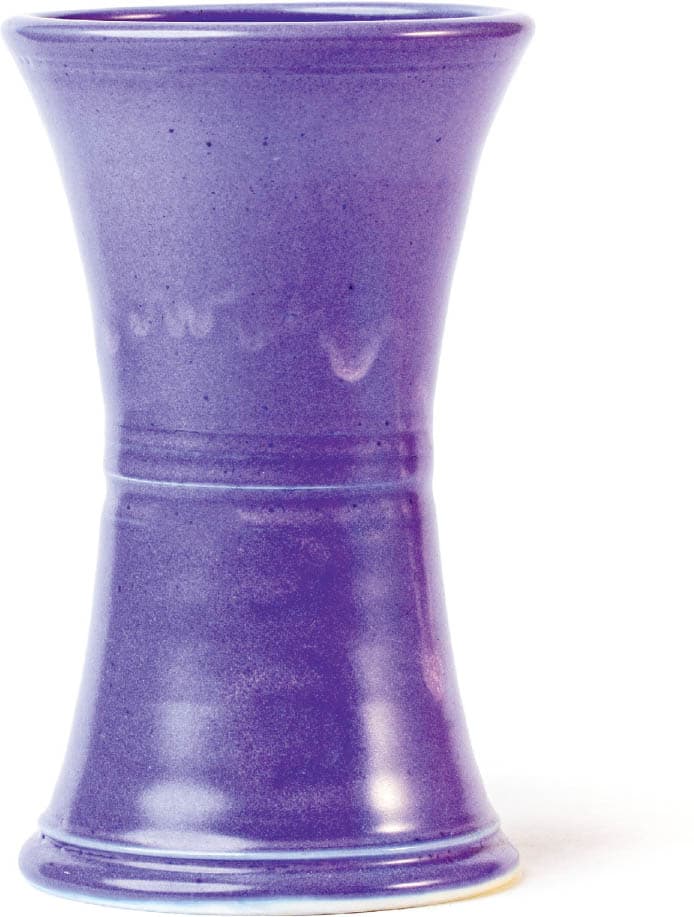
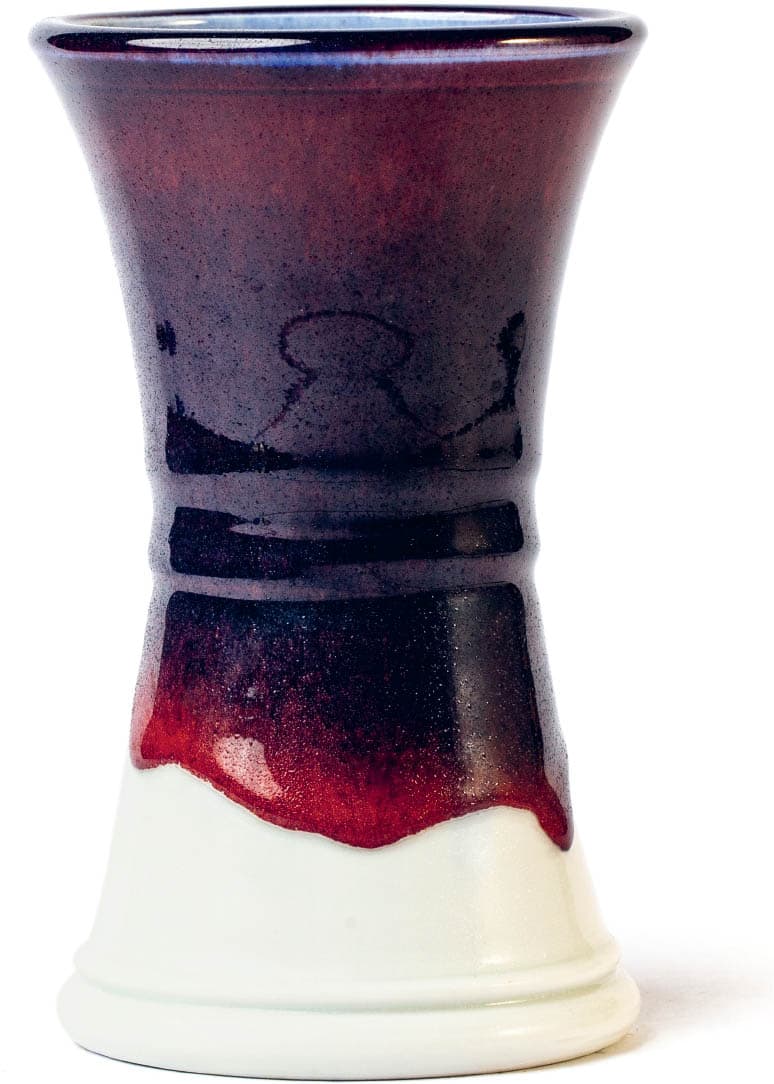
A kiln that uses combustion to heat can create a variety of different atmospheres. A live flame requires oxygen to continue to combust. If plenty of oxygen is flowing into the kiln, an oxidizing atmosphere can be maintained, similar to that in an electric kiln. However, if the damper of the kiln is pushed in to reduce air intake, you get incomplete burning and the result is carbon monoxide rather than carbon dioxide. This is called a reduction atmosphere. Carbon monoxide wants to become the more stable carbon dioxide and finds oxygen molecules wherever possible. Coloring oxides such as iron oxide or copper oxide readily give up oxygen and in doing so change states giving different color responses. The same copper oxide glaze that gave you blue-green in oxidation can give you sang de boeuf red in reduction. To control the volatile process, some potters will use an oxyprobe to assess the atmosphere inside the kiln. Because these cost around $1,000 (€730), many potters instead rely on visual cues, trial and error, and maintaining detailed kiln logs to gain control.
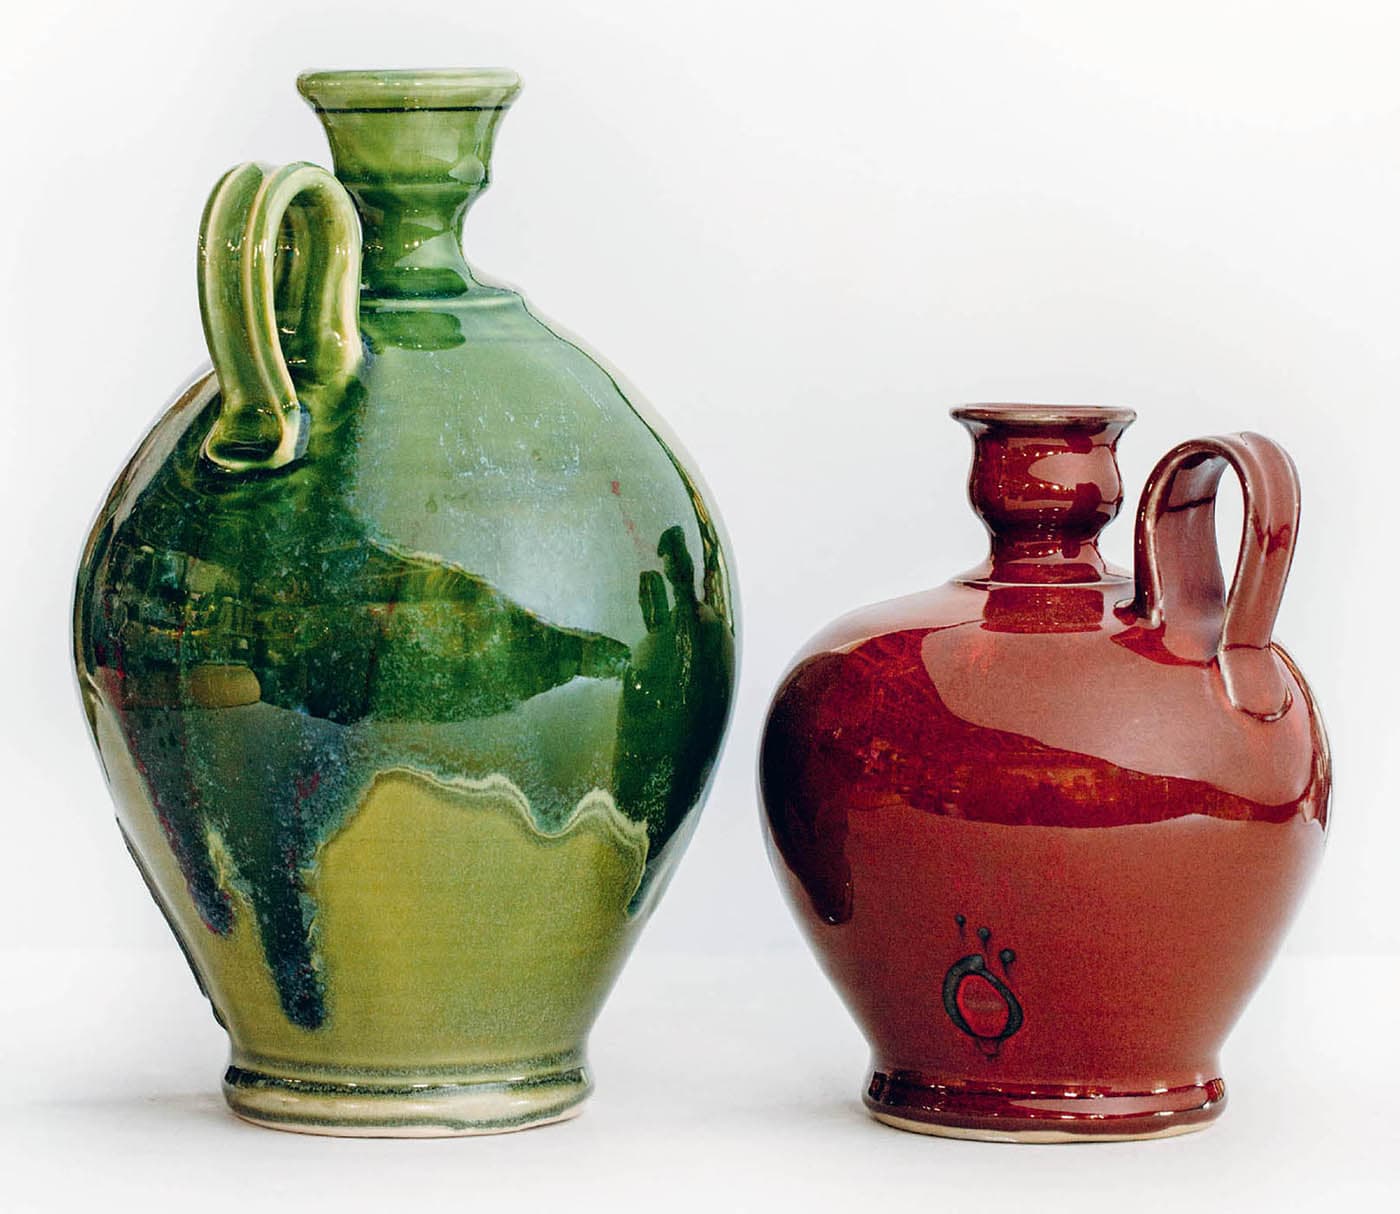
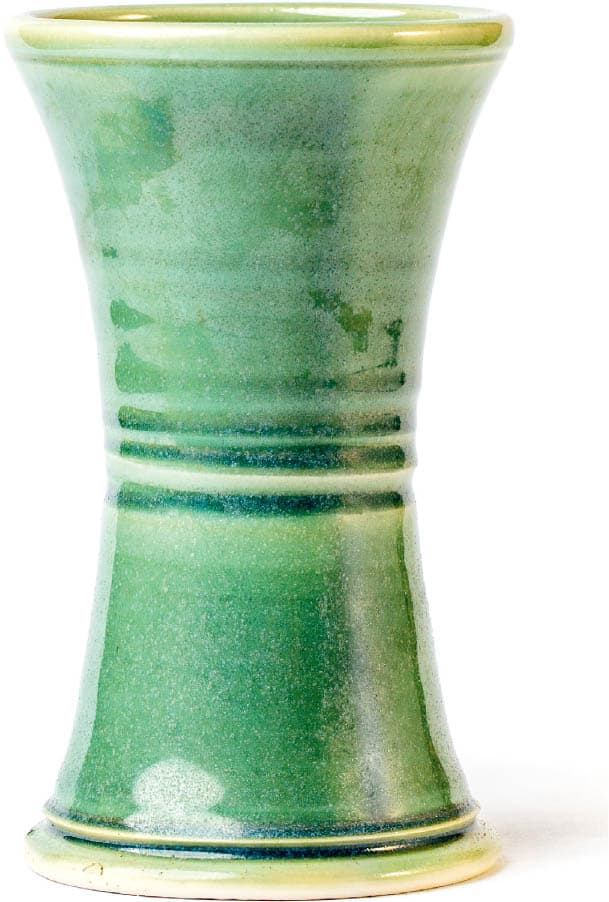
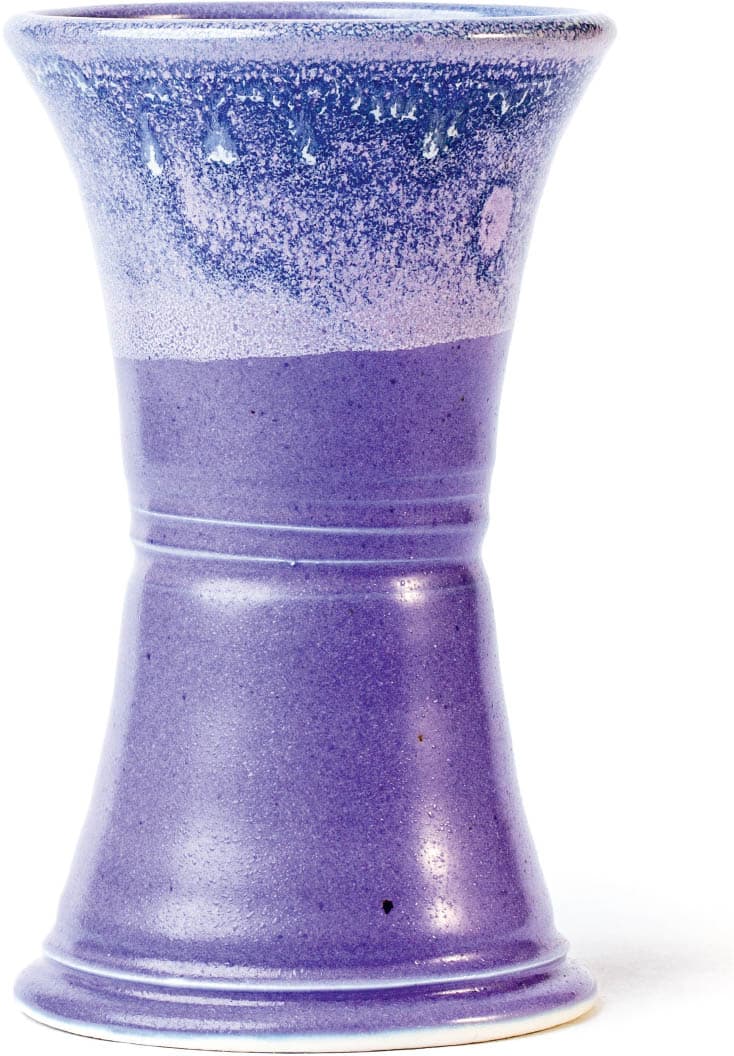
These pots show the difference in copper carbonate’s response to an oxidizing atmosphere (green) and a reducing atmosphere (red).
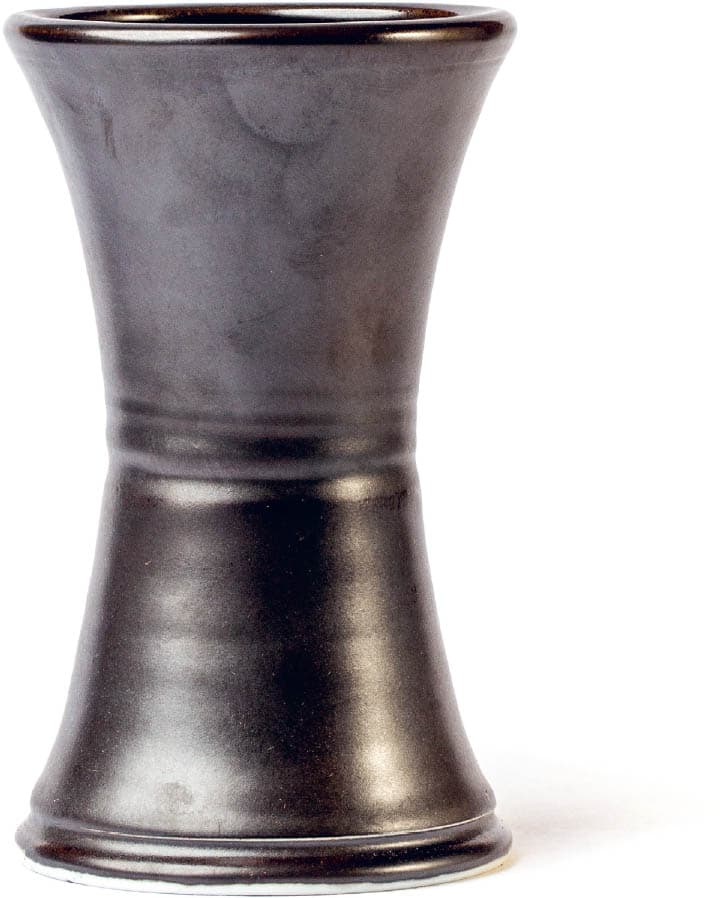
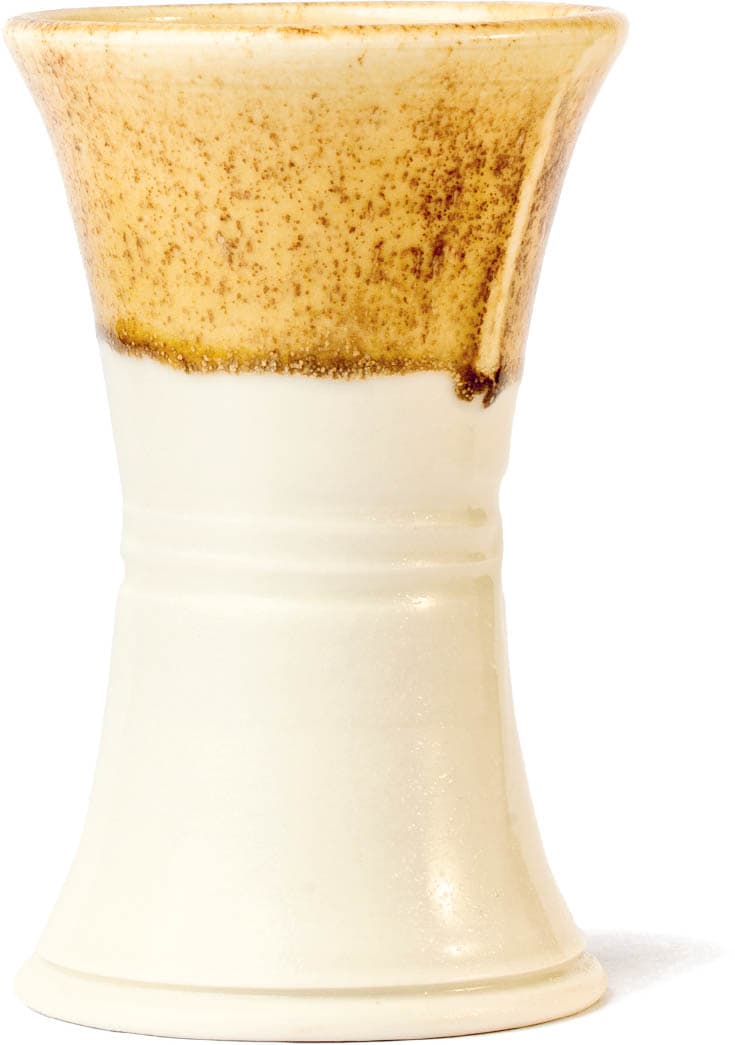
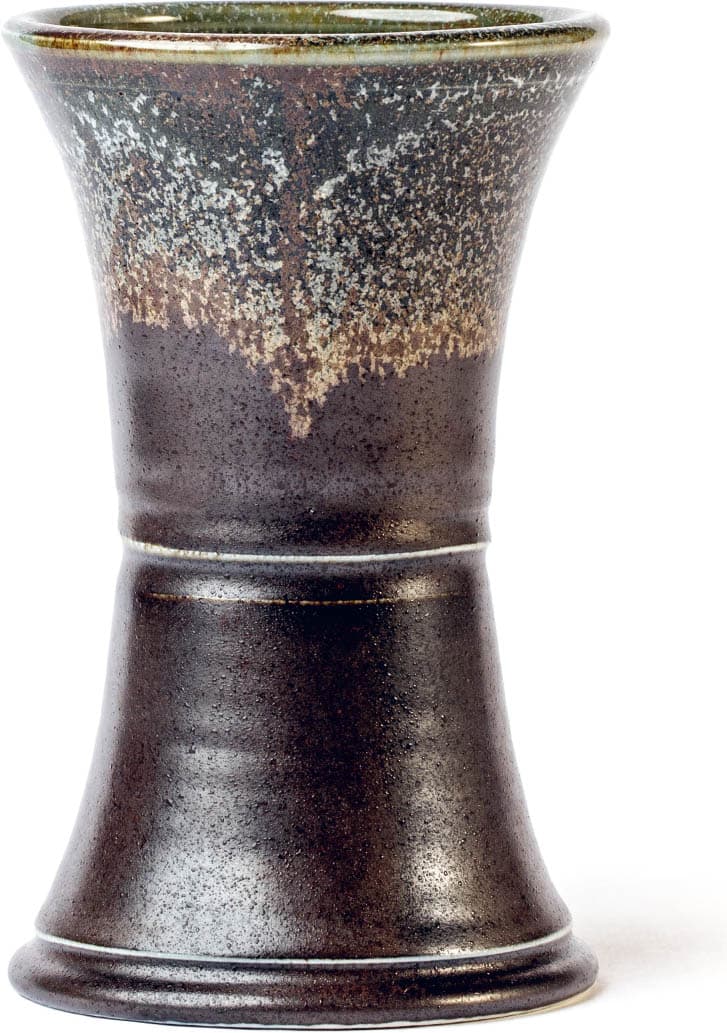
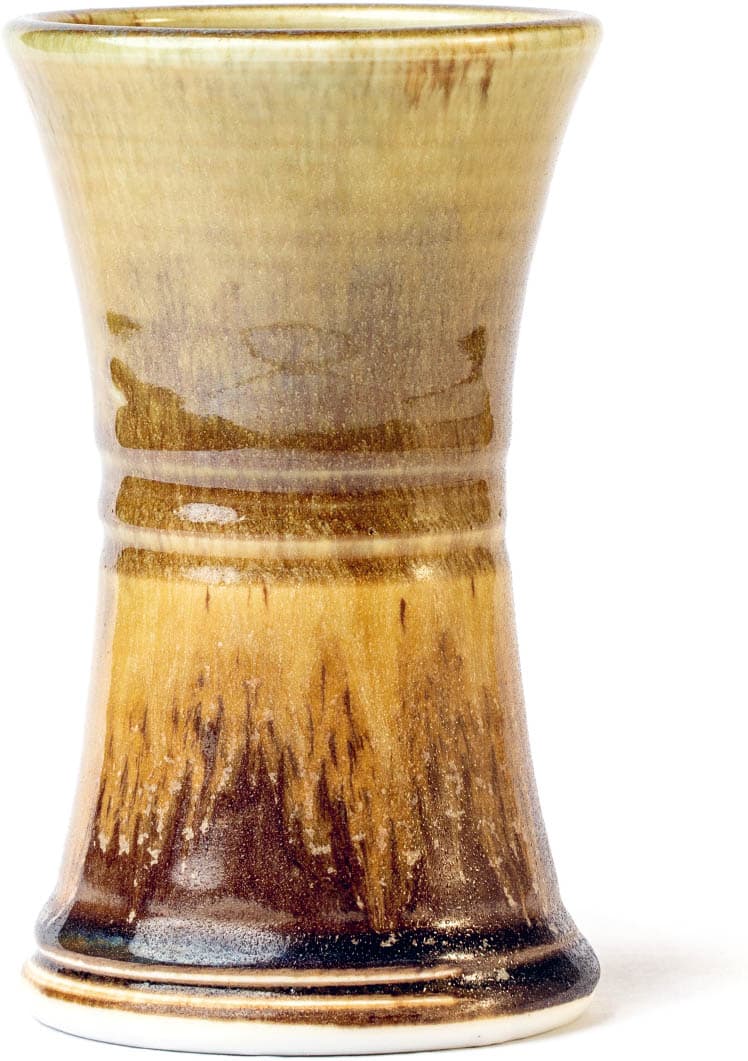
For most of our students, a “light” reduction is equivalent to a complete failure on the part of the kiln tech, as copper reds look salmon colored, Shinos are less dynamic, and the color of the clay body is too light (see image at right). Sometimes you’ll hear, “Oh, it was a bad firing. Completely under-reduced,” accompanied by a groan of disgust. There is often great pressure on kiln techs to fire work beautifully for everyone, so please be kind in the case of a less than desirable firing unless you are willing to learn the ropes and take on this responsibility yourself!
You can often quickly assess reduction by looking at the clay body: light reduction on the left, heavier reduction on the right.
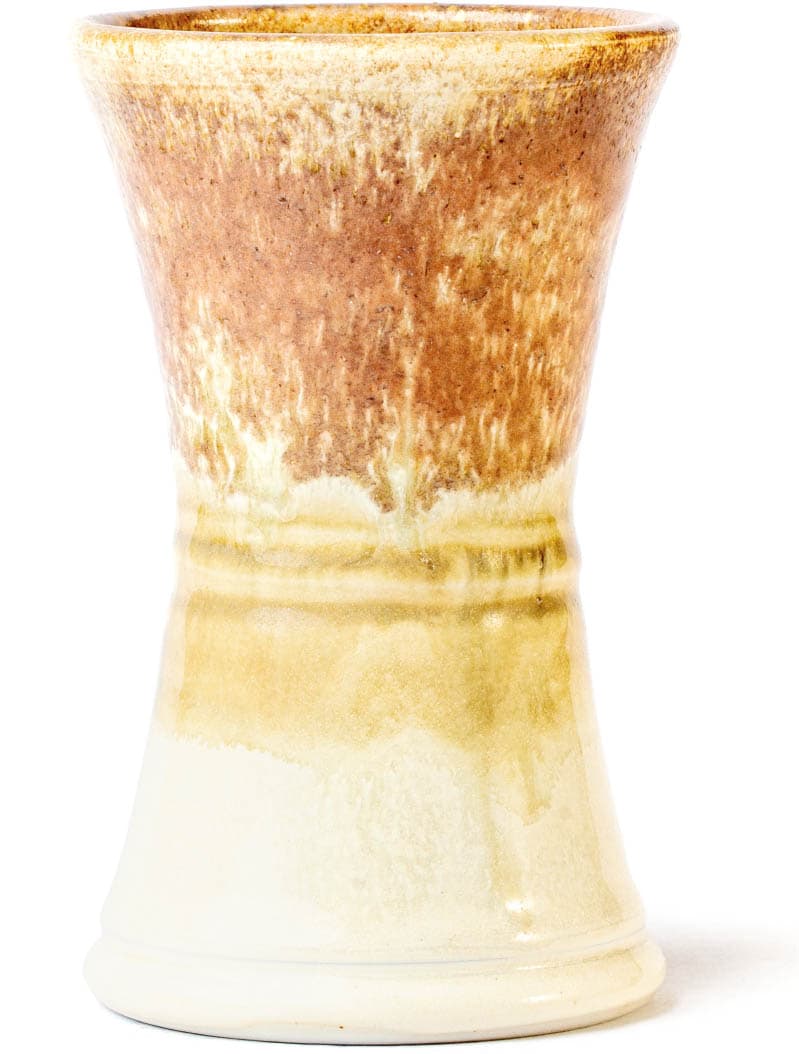
HIGH-FIRE GLAZE RECIPES
KOREAN CELADON
Cone: 9–10
Atmosphere: Reduction/Oxidation
Surface: Gloss
Color: Translucent Celadon/Grey
INGREDIENTS
AMOUNTS
Custer Feldspar
25.85%
Whiting
25.85%
OM-4 Ball Clay
20.69%
Silica
20.69%
EPK
6.72%
Bone Ash
0.20%
Total
100.00%
Also Add
Yellow Ochre 2.07%
Red Iron Oxide 1.55%
NOTES This is a classic recipe that works well over brushed and slipwork decoration. Korean celadon creates several interesting combinations with Emily’s Purple and Val’s Satin Black.
FRITZ ROSSMAN’S CLEAR
Cone: 10
Atmosphere: Oxidation/Reduction
Surface: Gloss
Color: Clear
INGREDIENTS
AMOUNTS
Petalite
47.00%
EPK
19.00%
Wollastonite
15.00%
Talc
8.00%
Silica
6.50%
Bone Ash
4.50%
Total
100.00%
NOTES Apply thin using SG 1300. It is very clear unless applied thickly. This is a nice modifier glaze to use on top of other glazes that will give you a darker, glossier version of the glaze below it. It’s also a good, stable liner glaze.
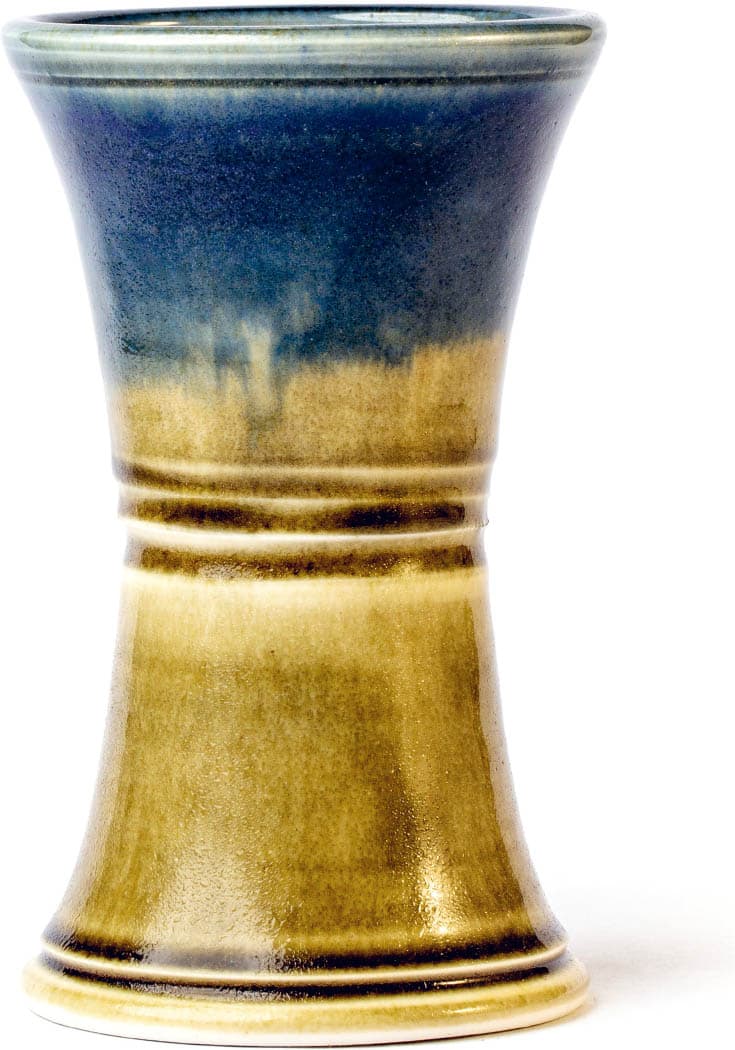
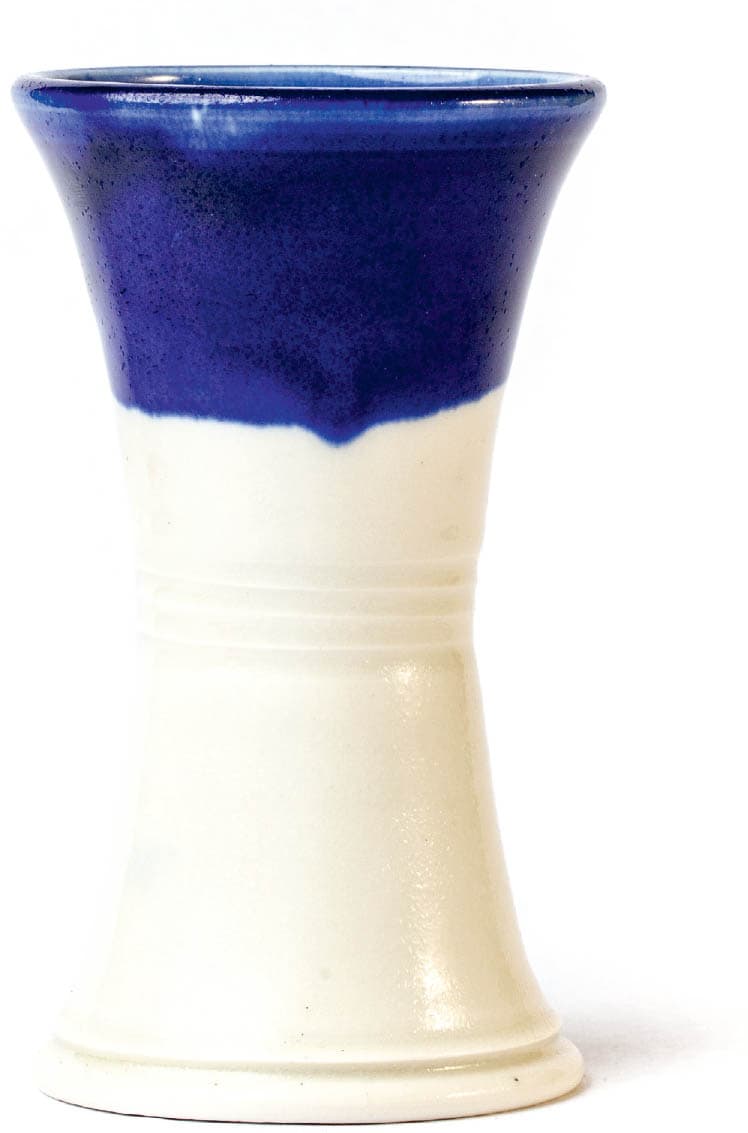
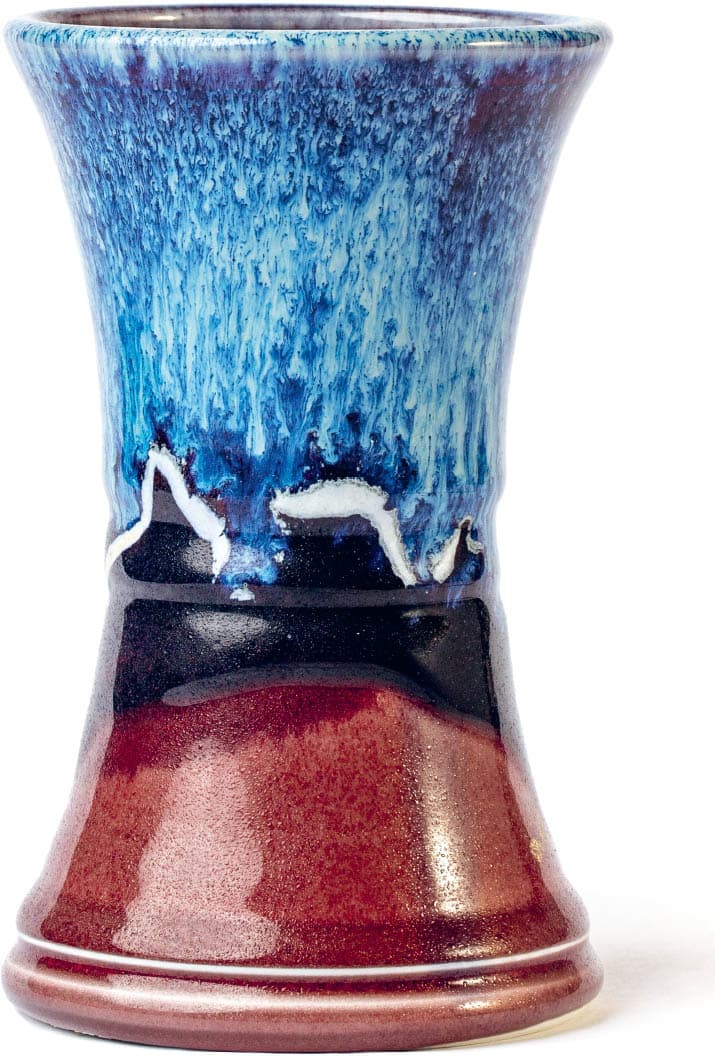
BLUE YING CHING
Cone: 10
Atmosphere: Reduction
Surface: Glossy
Color: Blue
INGREDIENTS
AMOUNTS
G-200 Feldspar
40.00%
Silica
30.00%
EPK
10.00%
Barium Carbonate
8.00%
Dolomite
7.00%
Whiting
5.00%
Total
100.00%
Also Add
Red Iron Oxide
1.50%
Cobalt Carbonate
3.00%
NOTES A deep blue with impact, Blue Ying Ching’s remarkable bright and smooth appearance captivates the eye. It combines in dynamic fashion with Yellow Salt and Cranberry.
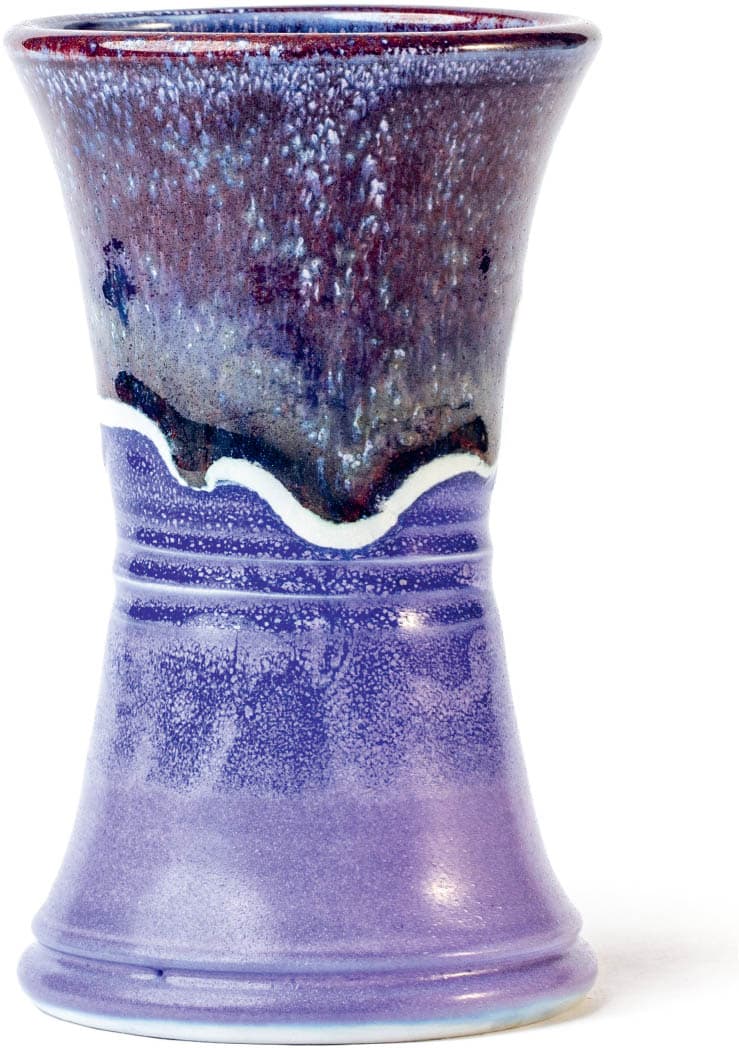
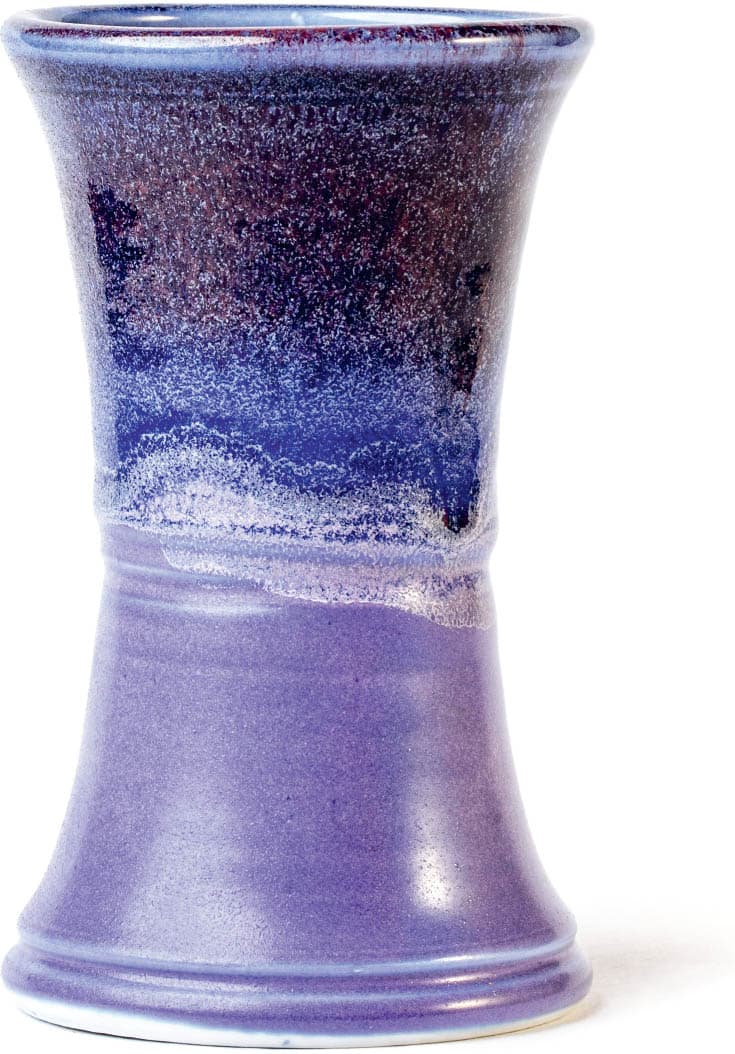
EMILY’S PURPLE
Cone: 10
Atmosphere: Reduction
Surface: Opaque Satin
Color: Purple
INGREDIENTS
AMOUNTS
Custer Feldspar
41.00%
Silica
20.00%
Talc
15.00%
Gerstley Borate
12.00%
Dolomite
7.00%
Ball Clay
5.00%
Total
100.00%
Also Add
Bentonite
2.00%
Cobalt Oxide
2.00%
Tin Oxide
2.00%
NOTES A pretty shade of lilac purple by itself over porcelain, Emily’s Purple really shines in combination, producing several other bright, variegated purples, as in the combinations with Yellow Salt, Blue Ying Ching, and Fritz Rossman’s Clear.
WHITE LINER
Cone: 10
Atmosphere: Oxidation/Reduction
Surface: Gloss
Color: White
INGREDIENTS
AMOUNTS
Custer Feldspar
55.00%
EPK
15.00%
Silica
15.00%
Whiting
10.00%
Talc
5.00%
Total
100.00%
NOTES This is a great, stable glaze that can hold its own on the outside of the pot, loves overglaze decoration, and acts as a fun modifier glaze on top of others. A good white liner is indispensable to the functional potter.
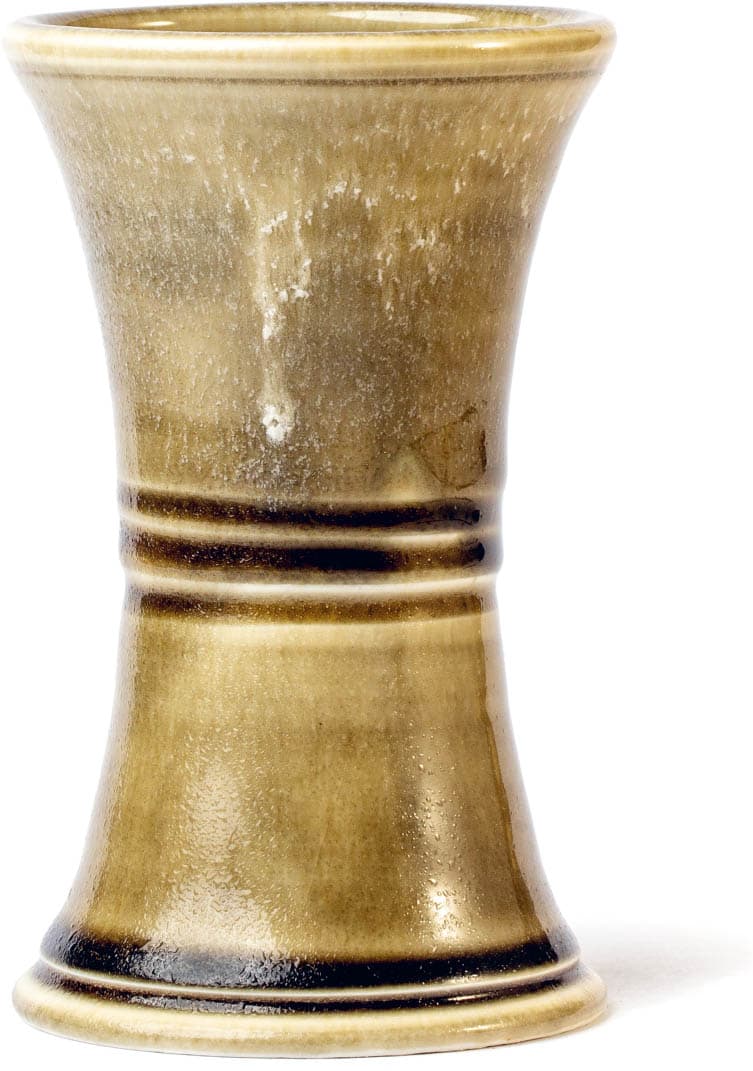
ILMENITE BROWN
Cone: 10
Atmosphere: Oxidation/Reduction
Surface: Satin Matte
Color: Brown
INGREDIENTS
AMOUNTS
Custer Feldspar
42.53%
Dolomite
22.99%
EPK
22.99%
Bone Ash
11.49%
Total
100.00%
Also Add
Manganese Dioxide
2.30%
Ilmenite
3.45%
NOTES This is a really beautiful glaze that uses manganese for color. The surface can vary from matte to satin with lovely variation.
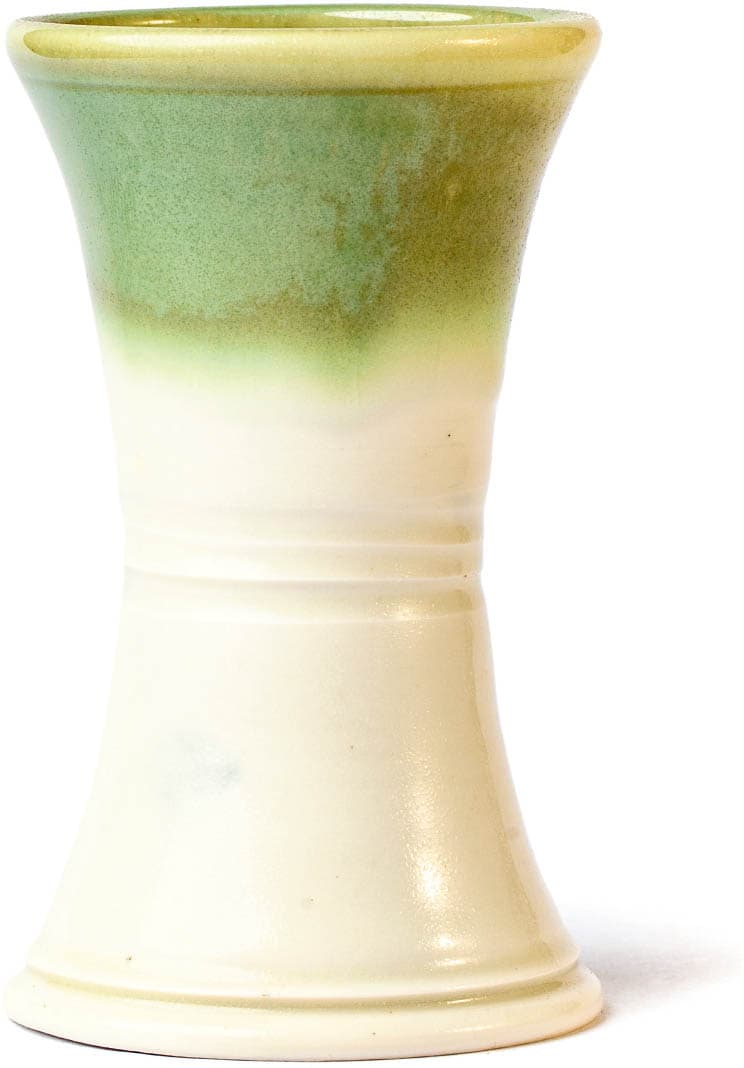
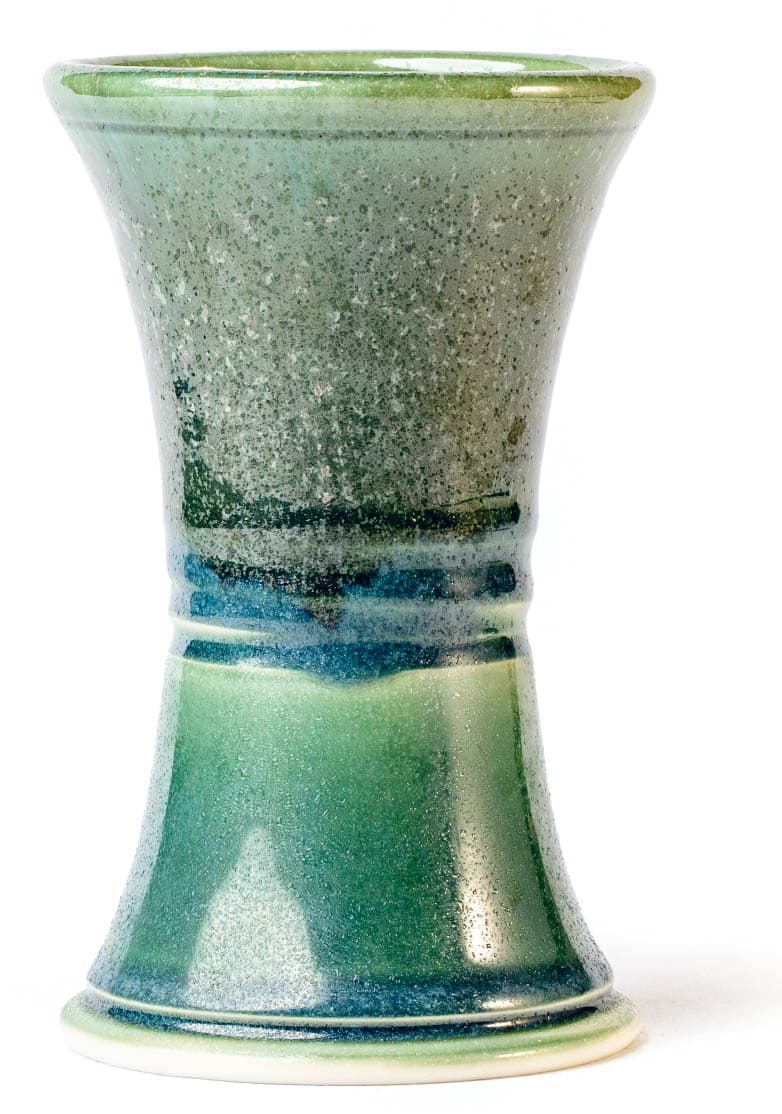
ORIBE
Cone: 9–10
Atmosphere: Reduction
Surface: Gloss
Color: Semiopaque Green
INGREDIENTS
AMOUNTS
Custer Feldspar
30.91%
Silica
25.32%
Whiting
22.36%
EPK
12.55%
Talc
7.81%
Bone Ash
1.05%
Total
100.00%
Also Add
Copper Carbonate
7.00%
NOTES Oribe works well in combinations, especially with Cranberry where the copper has a chance to shine, producing light green and red tones. Oribe can be very runny in combinations, so make sure to wad and use a cookie.
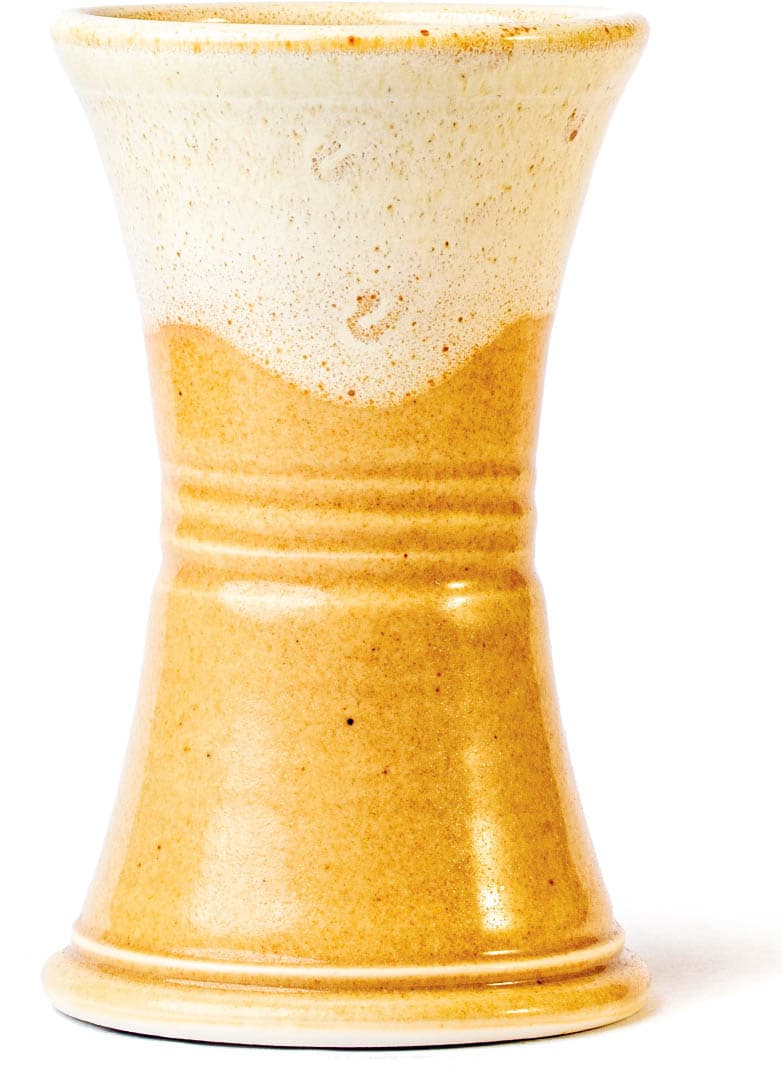
YELLOW SALT
Cone: 10–11
Atmosphere: Reduction/Salt/Soda
Surface: Glossy to Matte
Color: Opaque Light Yellow
INGREDIENTS
AMOUNTS
Nepheline Syenite
71.36%
Dolomite
23.78%
OM-4 Ball Clay
4.86%
Total
100.00%
Also Add
Zircopax
18.03%
Red Iron Oxide
1.13%
Bentonite
4.50%
Epsom salts (dissolved in water)
0.18%
NOTES A classic recipe, Yellow Salt provides a smooth, buttery surface, and it has some unique effects as a modifier glaze, as in the combination with Blue Ying Ching.
VAL’S SATIN BLACK GLAZE
Cone: 10
Atmosphere: Oxidation/Reduction
Surface: Semigloss
Color: Black
INGREDIENTS
AMOUNTS
Custer Feldspar
20.00%
Minspar
20.00%
Silica
20.00%
Dolomite
15.00%
Talc
13.00%
OM-4
10.00%
Whiting
2.00%
Total
100.00%
Also Add
Red Iron Oxide
9.00%
Cobalt Carbonate
3.00%
NOTES A glaze filled with powerful colorants, Val’s Satin Black Glaze will overpower many glazes put over top of it, but still can look quite nice in combination with either White Liner or Cranberry.
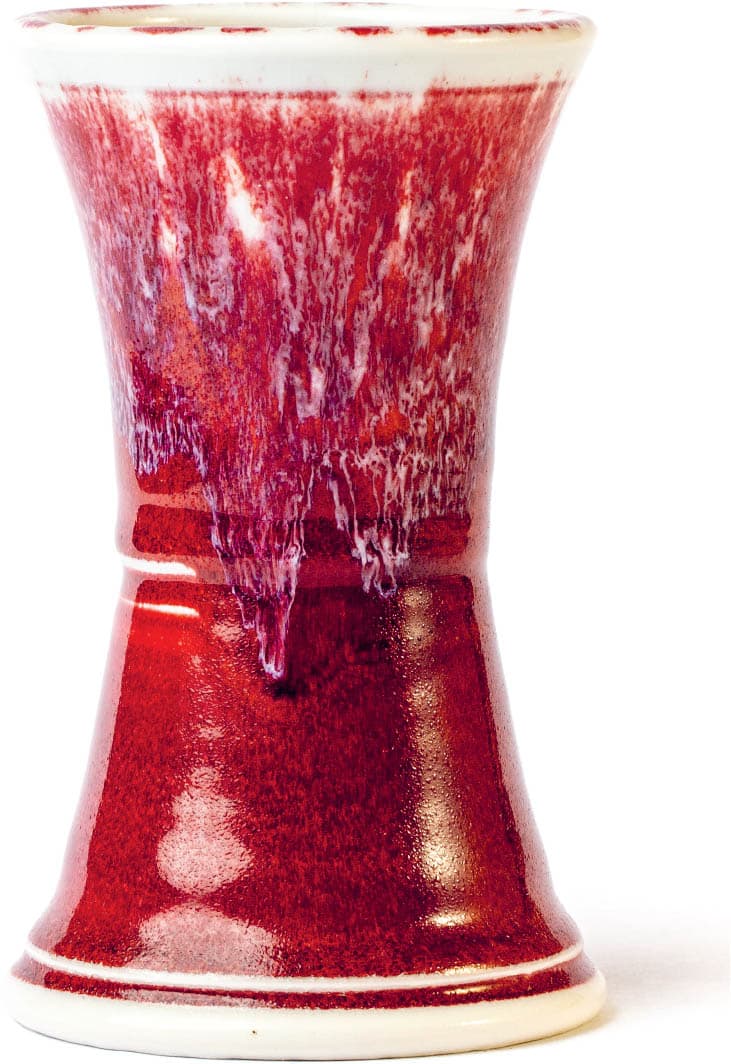
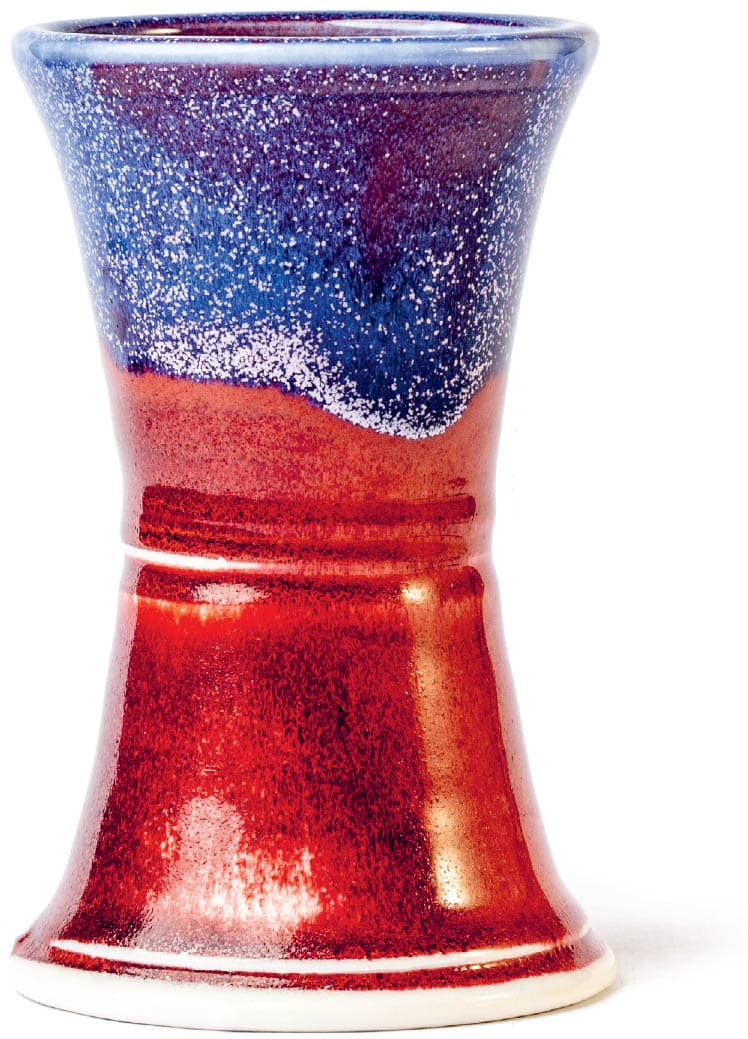
CRANBERRY
Cone: 10
Atmosphere: Reduction
Surface: Gloss
Color: Red
INGREDIENTS
AMOUNTS
Custer Feldspar
73.80%
Whiting
11.10%
Gerstley Borate
10.20%
Silica
4.90%
Also Add
Bentonite
1.00%
TinOxide
1.00%
Copper Carbonate
0.30%
NOTES Cranberry uses just a tiny bit of Copper Carbonate, 0.3%, and will burn out if you reduce too heavily. Apply thickly at SG 1550 and use a cookie, especially under combinations. This is a fantastic red.
REDART SHINO
Cone: 9–10
Atmosphere: Reduction/Oxidation
Surface: Opaque
Color: Buff to Red-Orange
INGREDIENTS
AMOUNTS
Nepheline Syenite
62.00%
OM-4 Ball Clay
17.00%
Redart Clay
9.00%
EPK
4.00%
Soda Ash
4.00%
Spodumene
4.00%
Total
100.00%
NOTES Mix soda ash last. The old adage goes “Shino first or expect the worst” as this messy example of Redart Shino over Korean Celadon attests. However, we did find nice combinations using Redart Shino on top of Blue Ying Ching and Ilmenite Brown.
THE JUICE
Cone: 10
Atmosphere: Oxidation/Reduction
Surface: Crystalline Matte
Color: Off-White
INGREDIENTS
AMOUNTS
Custer Feldspar
46.24%
Whiting
17.34%
#6 Tile Kaolin
13.88%
Strontium Carbonate
12.72%
Gerstley Borate
4.62%
Lithium Carbonate
4.62%
Zinc Oxide
0.58%
Total
100.00%
Also Add
Titanium Dioxide
17.34%
Bentonite
2.31%
NOTES Though not particularly attractive when used alone, this great modifier glaze works beautifully when layered on top of other glazes and can create some interesting effects, especially on top of Blue Ying Ching.
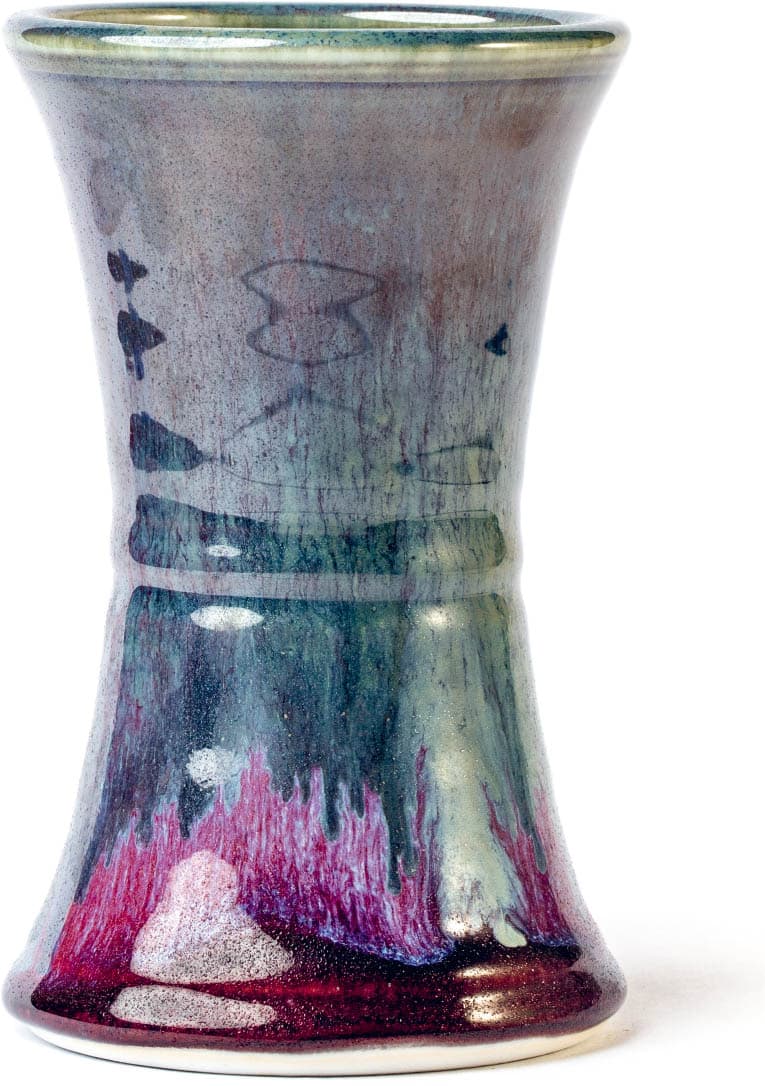
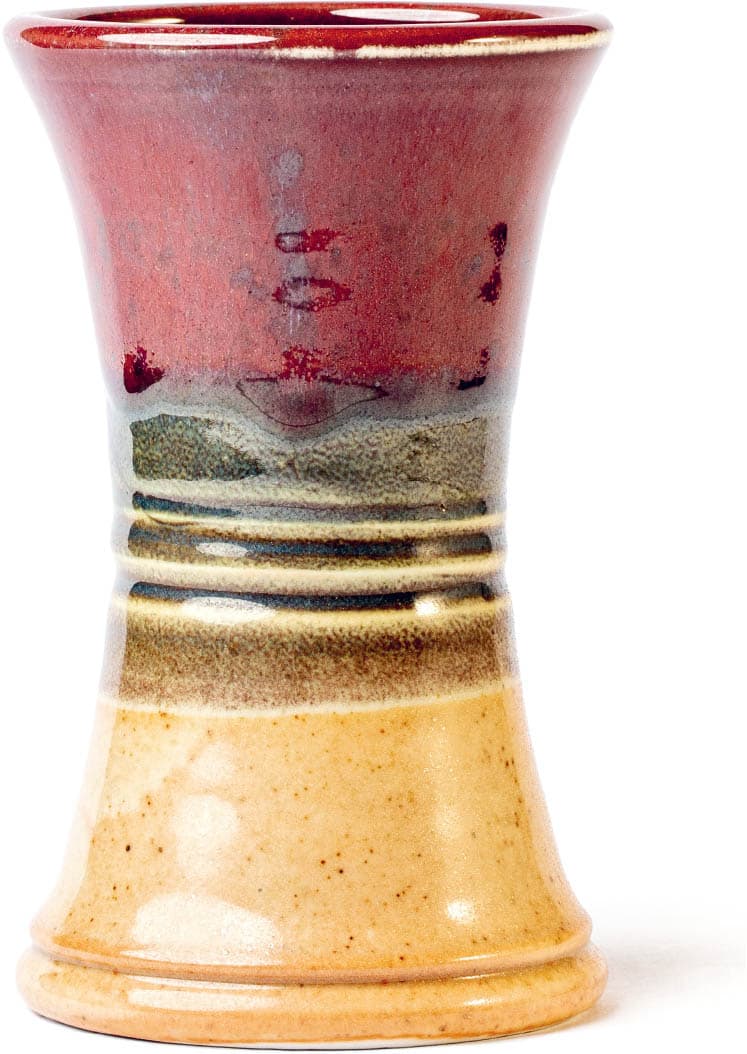
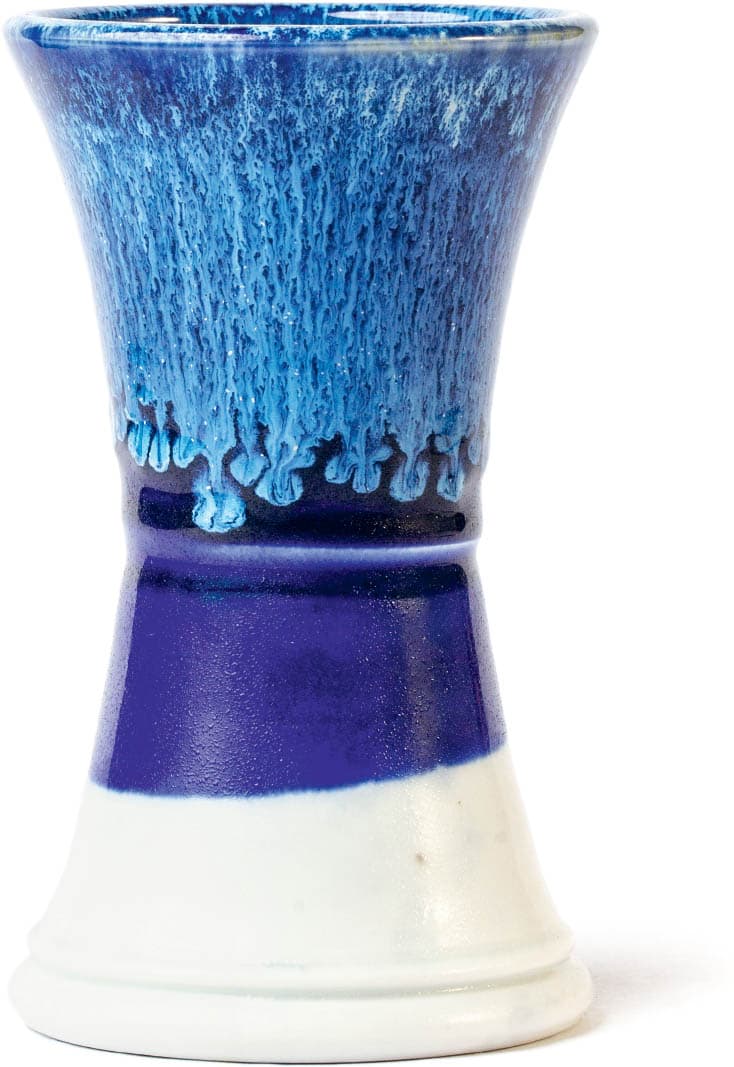
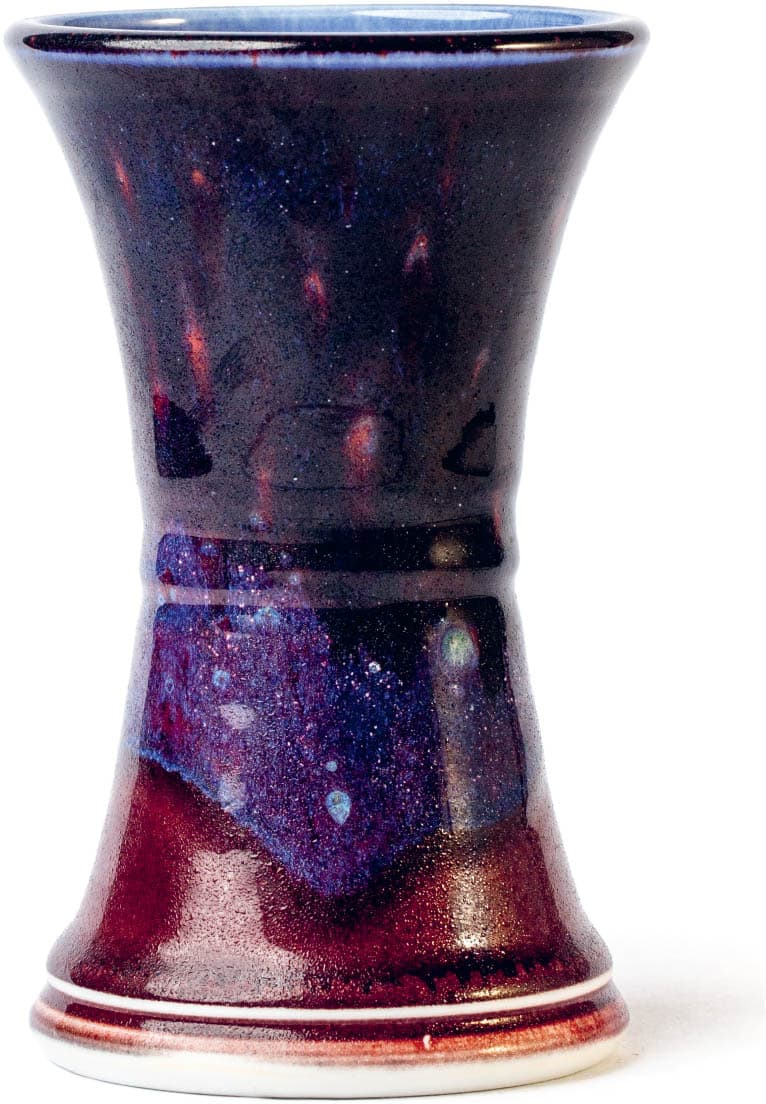
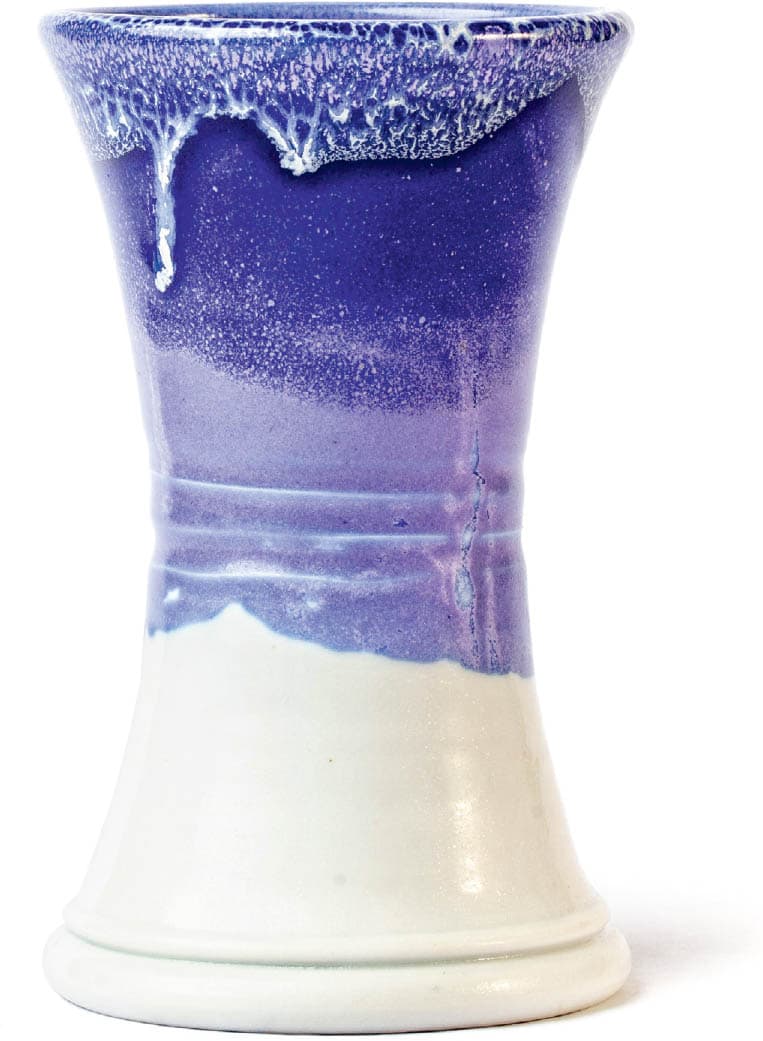
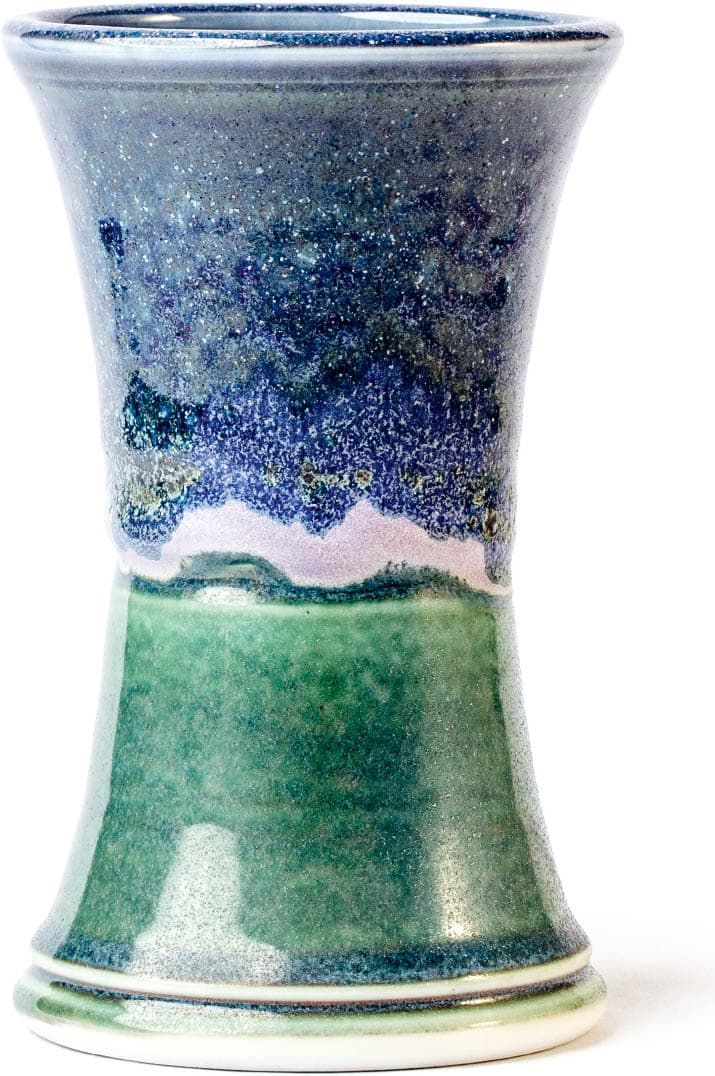
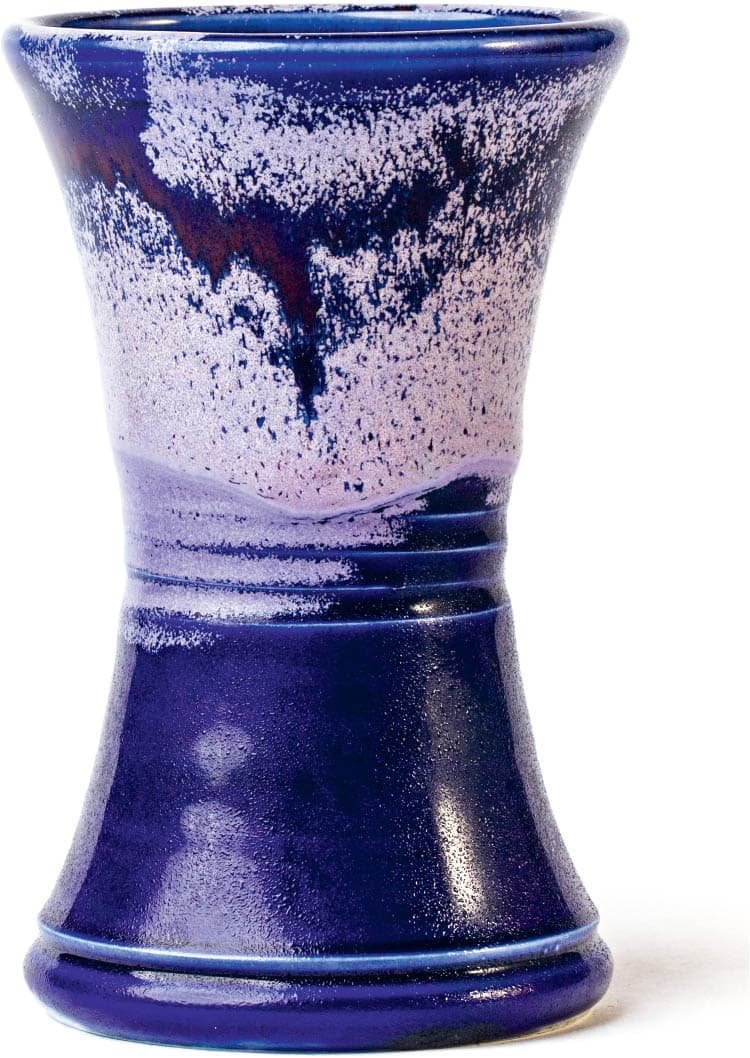
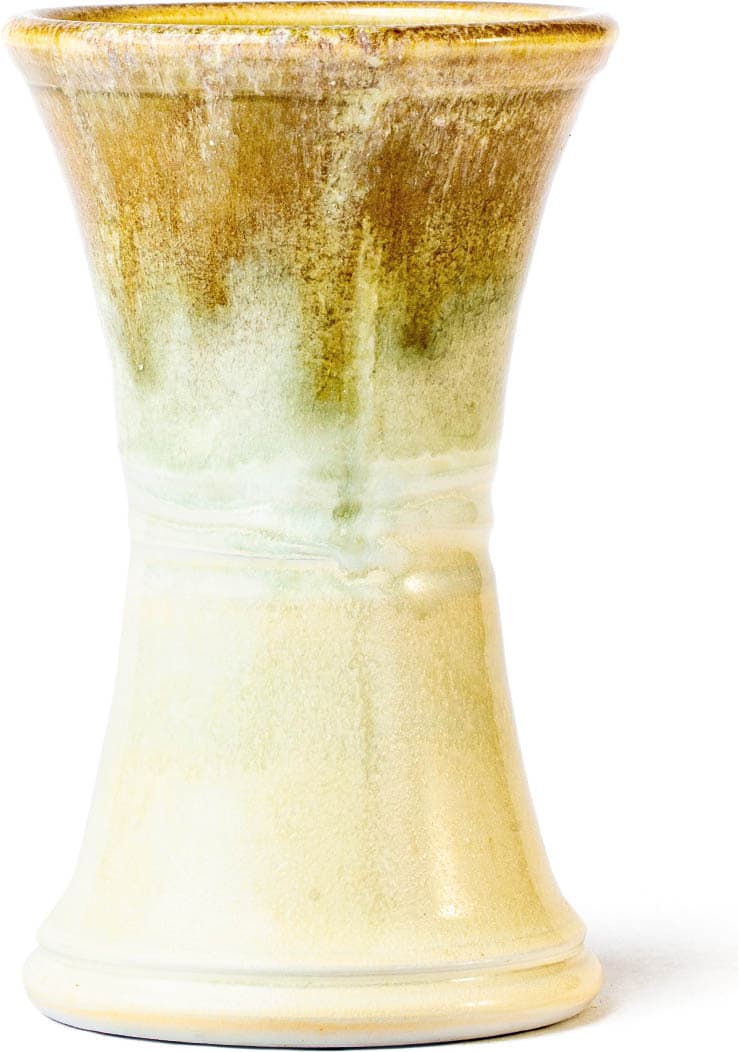
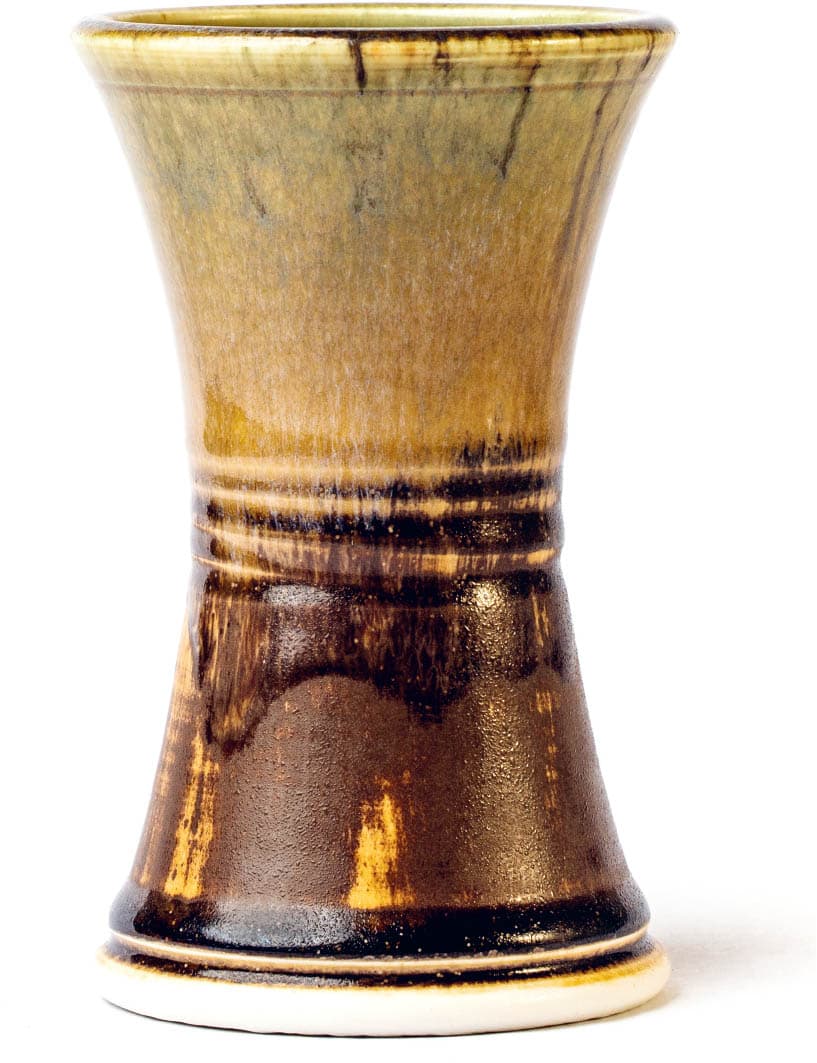
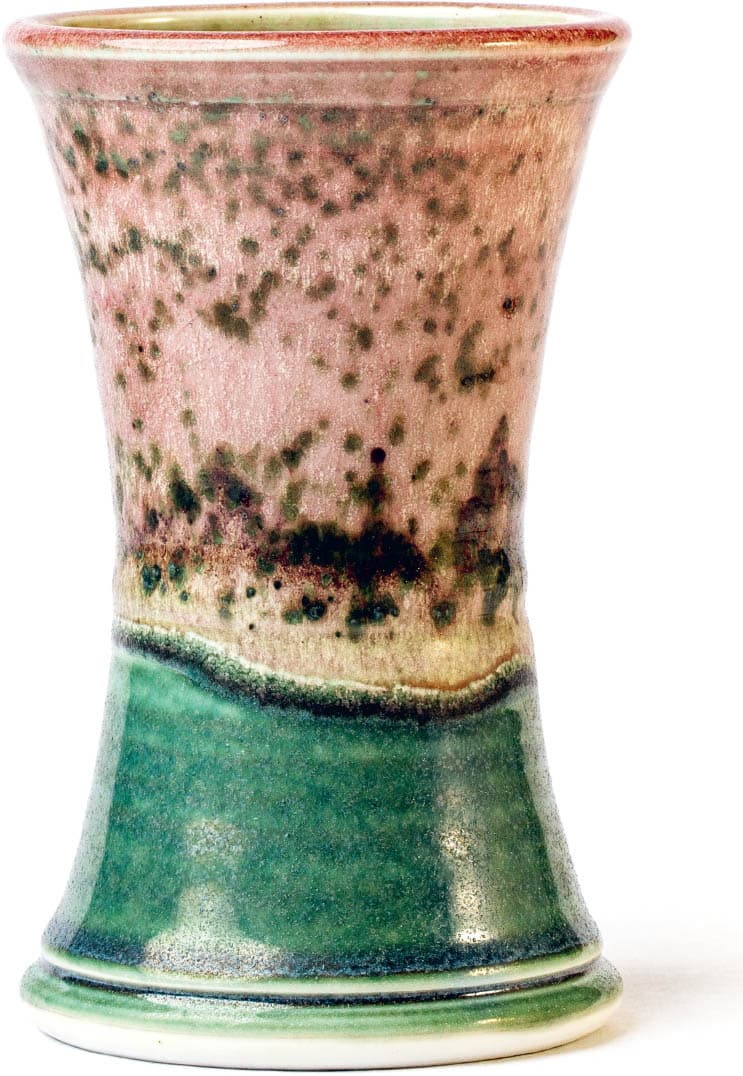
TWO-GLAZE COMBINATIONS
As with the previous chapter, for each glaze, I dipped each of the tiles for a two-second count in the same glaze. I then inverted the piece and dipped the top one-quarter of the tile in a different glaze.
Ilmenite Brown + Yellow Salt
Yellow Salt + Emily’s Purple
Redart Shino + Oribe
Cranberry + Fritz Rossman’s Clear
Korean Celadon + Blue Ying Ching
Fritz Rossman’s Clear + Oribe
Ilmenite Brown + White Liner
Fritz Rossman’s Clear + Emily’s Purple
Redart Shino + Yellow Salt
Val’s Satin Black + Cranberry
Emily’s Purple + Fritz Rossman’s Clear
Fritz Rossman’s Clear + Blue Ying Ching
Cranberry + Emily’s Purple
Oribe + Yellow Salt
Korean Celadon + Yellow Salt
Emily’s Purple + Yellow Salt
White Liner + Ilmenite Brown
Blue Ying Ching + Yellow Salt
Cranberry + Oribe
Val’s Satin Black + Yellow Salt
Ilmenite Brown + Redart Shino
Fritz Rossman’s Clear + Yellow Salt
Blue Ying Ching + Emily’s Purple
Fritz Rossman’s Clear + Val’s Satin Black
Yellow Salt + Ilmenite Brown
Emily’s Purple + Blue Ying Ching
Oribe + Val’s Satin Black
Korean Celadon + Val’s Satin Black
Yellow Salt + Oribe
Cranberry + Yellow Salt
THREE OR MORE GLAZE COMBINATIONS
For the three or more glaze combination tests, I dipped the entire tile in the first glaze for two seconds and let it dry. I then inverted the piece and dipped it into a second glaze for one second. The pieces were then given several hours to dry under a fan, at which point a third glaze was applied by inverting the pieces and glazing the top one-quarter of the tile for one second. Finally, for certain combinations, a fourth glaze was applied at the very lip of the pot by inverting the piece and dipping it in glaze for one second.
Yellow Salt + Emily’s Purple + Korean Celadon
Ilmenite Brown + Yellow Salt + Oribe
Cranberry + Blue Ying Ching + Yellow Salt + Oribe
While Liner + Cranberry + White Trailer + Oribe
Emily’s Purple + Fritz Rossman’s Clear + White Liner + Oribe
Val’s Satin Black + Cranberry + Yellow Salt
Redart Shino + Yellow Salt + Oribe
Fritz Rossman’s Clear + Oribe + Cranberry
Korean Celadon + Emily’s Purple + Yellow Salt
Yellow Salt + Oribe + Val’s Satin Black + Cranberry
Val’s Satin Black + Fritz Rossman’s Clear + The Juice
Korean Celadon + Blue Ying Ching + Yellow Salt
Red Art Shino + Korean Celadon + White Liner + Ilmenite Brown
Emily’s Purple + Yellow Salt + Cranberry
Oribe + Cranberry + Emily’s Purple + Fritz Rossman’s Clear
Yellow Salt + Ilmenite Brown + Redart Shino
Cranberry + Blue Ying Ching + White Trailer + The Juice
Ilmenite Brown + Oribe + Val’s Satin Black
Yellow Salt + Cranberry + Emily’s Purple
Ilmenite Brown + Fritz Rossman’s Clear + Yellow Salt
Oribe + Cranberry + Blue Ying Ching
Fritz Rossman’s Clear + Blue Ying Ching + Yellow Salt
Yellow Salt + Korean Celadon + Blue Ying Ching
Cranberry + Oribe + Val’s Satin Black + The Juice
Korean Celadon + Val’s Satin Black + The Juice
Redart Shino + Oribe + Cranberry
Fritz Rossman’s Clear + Blue Ying Ching + The Juice
Cranberry + Emily’s Purple + Blue Ying Ching
White Liner + Emily’s Purple + Blue Ying Ching + Yellow Salt
Oribe + Emily’s Purple + Yellow Salt
Ilmenite Brown + White Liner + Oribe + The Juice
Blue Ying Ching + Emily’s Purple + Cranberry
Yellow Salt + Korean Celadon + Ilmenite Brown
Ilmenite Brown + Oribe + Van Guilder Blue Ash
Cranberry + Oribe + The Juice
Oribe + Yellow Salt + Val’s Satin Black
White Liner + Ilmenite Brown + Oribe
Oribe + Yellow Salt + Cranberry
White Liner + Emily’s Purple + Korean Celadon
Yellow Salt + Korean Celadon + Emily’s Purple
Fritz Rossman’s Clear + Cranberry + Blue Ying Ching
HIGH-FIRE SALT AND WOOD
Though high-fire gas kilns, salt kilns, and wood-fire kilns are less common than their electric counterparts, these types of kilns create community around them. Often larger in size, ranging from 8 to as much as 300 cubic feet (0.2 to 8.5 m3) or more, these kilns can require long hours—and in some cases, teams of people working in groups—to manage a firing. An overnight shift on a wood kiln is a bonding experience, and many friendships have been forged through the common goal of bringing a fire-breathing dragon to life in order to vitrify clay and melt glaze. Firing these kilns can be demanding. It is hot, exhausting, and requires constant mindfulness of the flame and the body’s relationship to it. Here, the term “high on fire” comes to mind. For the fire potter, this is where she feels most alive.
The new Odyssey Salt Kiln after several firings
Bricks from the Old Salt Kiln repurposed in the kiln yard herb garden
The Odyssey Salt Kiln is one such kiln. The Old Salt Kiln, designed by a former Odyssey resident, stood for nearly a decade and saw more than 135 firings. Slowly the buildup of salt and soda on the interior walls of the kiln created a tension that caused the arch of the kiln to begin to sag, and for safety reasons it had to be dismantled. This is the natural life of a salt kiln, eventually falling in on itself. As a beloved but temperamental kiln, the bricks from the Old Salt Kiln now create the wall of our studio flower and herb garden (see photo above).
We began plans to rebuild immediately. We commissioned a new kiln design from master kiln builder Shane Mickey, who also advised us on the project. Over the course of the spring of 2019, we first raised the funds to buy the raw materials, including new burners. Then, on a series of successive Sundays, a volunteer crew of eight potters and resident artists poured the concrete slab, bricked the chimney and walls, installed new irons, and rebuilt a beautiful new arch. Building a kiln is an empowering experience and an excellent opportunity if you get the chance. You’ll get a deeper insight into the physics of firing, not to mention the connective human experience of building an arch. The first time you do it you feel as if your brain has expanded, as you participate in part of the evolution of our species and culture.
The kiln can take as few as several hours to load, or as much as three days in the case of the largest kilns! The door must be bricked up every time, and the firing involves the spraying of a soda ash solution directly into the hot kiln. Salt (and soda) firing is a dynamic process that must be treated with an eye on safety. You are working with a live flame, adding materials to that kiln that are both vaporizing and corrosive. The result from all this work, however, is an effect that cannot be achieved otherwise: that gorgeous orange peel texture on the raw clay (see photo at right). I have also always loved salt kiln glazed work, when the vaporized salt or soda has landed on the molten glaze in an atmospheric chemical interaction that changes the look of the glaze by giving it more depth.
Similarly, wood-fired pots have a certain mystical quality to them, having spent days in the path of an active flame, with wood ash traveling though the atmosphere of the kiln and landing on the surface of the pots to color them. Wood ash contains a high percentage of calcium oxide and also potassium oxide and trace elements of iron, manganese, zinc and copper oxides, all capable of affecting color and flux on the surface of your work. Pots placed unglazed in the wood kiln emerge colored like tobacco, bourbon, leather, or stone. It is as if these pieces had been excavated from an ancient archaeological site (see photo shown here).
Wood firing connects us with the history of ceramics, and where we came from as potters. Just as electric kilns and their computerized technology inform the final product, so too does salt and wood fire in their own unique ways. I hope you will have a chance to try all of these different firing methods in your travels. Though you may decide that you prefer one style of firing over another, this experimentation will help you orient yourself within the field.
These pots showcase the classic salt-fire look with its “orange peel” effect on the raw clay. By Odyssey artists (clockwise from top left) Patti Hughes, Patty Robertson, and Kristen Easters
FEATURED ARTIST
Gillan Doty Grabs the Dragon by the Tail
>Articulate, intellectual, and physically inexhaustible, Gillan Doty and his strongly thrown wood-fired vessels burst onto the Asheville ceramics scene in late 2017. Although you’ll often see him studying the history of ancient kilns, you’ll also find Gillan jogging up the steep hills outside of town. Gillan’s intellectual curiosity combined with the stamina gained from these aerobic excursions makes him a perfect personality to engage the quest of the modern wood-fire potter. Part ceramic historian and part endurance athlete, Gillan embodies the history and culture of wood firing. Honing his skills assisting the great Akira Satake and working on his own line of pots at Odyssey, Gillan strikes me as a medieval knight on a quest. Sworn to uphold and protect an ancient tradition, but seeking to tame rather than slay the dragon, Gillan operates in an interesting sphere between history and modernity.
Gillan’s work is all about maintaining control of the materials throughout his process. Gillan’s pots start with a clay body he mixes himself. He throws some very large, graceful pieces and assembles them on the wheel, but I also enjoy his slab-built plates, which I regularly use at lunch. The majority of his work is decorated with slips when leather hard and placed in the kiln unglazed to be decorated by the fire, but he also uses a traditional white Nuka glaze to great effect.
Wood firing is a labor of love and splinters, requiring endless hours of splitting, carrying, and stacking wood. The kiln itself can take several days to load before creating a fire inside it, carefully and attentively stoked, to maintain a rate of climb neither too fast nor too slow for 72 to 120 hours or more. Extreme care and coordination within the firing team is required for a successful firing. Once you unload the kiln, there remains much work to do, such as cleaning and sanding down the pots to an acceptable smoothness, followed by the dirty work of grinding kiln shelves and vacuuming wood ash out of the kiln. Another challenge is that the general public usually remains uneducated regarding wood firing. To the untrained eye, the subtly nuanced surfaces of the flame-kissed pots may simply seem to look “brown” or “old.”
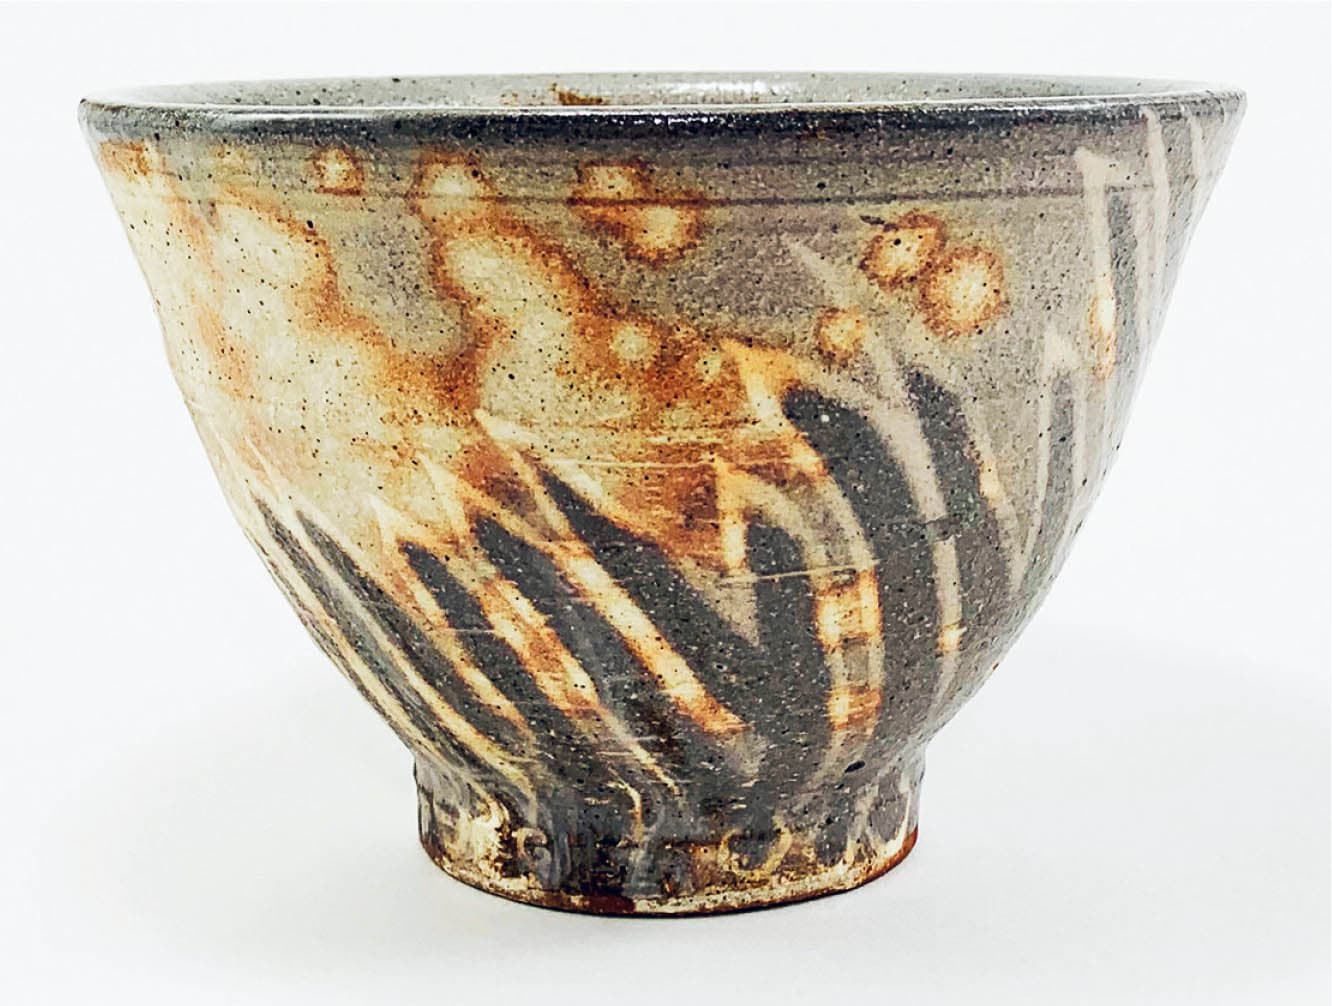
Bowl. Quick finger wipes through wet slip applied while leather hard climb the wall of this sturdy bowl.
Stately pair of wood-fired vases with tremendous ash runs
Mug. The path of the flame can be seen charging through the center of this mug. Combed slip provides tonal and textural variation.
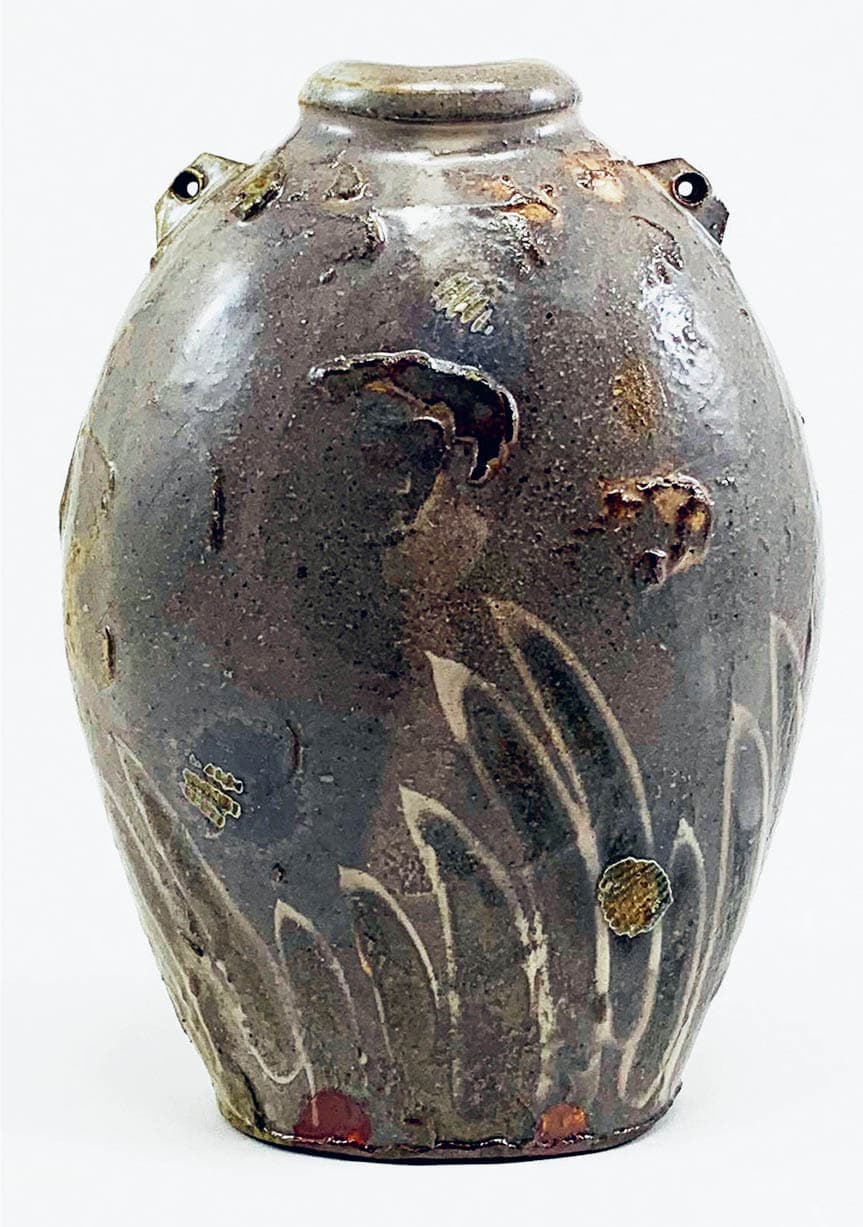
Oval Bottle. Heavy buildup of ash and the remnants of seashells (used to hold the piece horizontally during the firing) add unique visual interest to the front of this stoneware bottle.
So why would one undertake wood firing as a primary means for finishing one’s work? Perhaps for the same reason that Gillan runs up Town Mountain: while it takes work to get there, the view from the top is incredible. Wood-fired pottery, thankfully, has a dedicated community of collectors who understand the enormous effort required to work in this manner, and who are willing to spend more money for pots finished this way. Kiln openings in North Carolina are eventful, often starting early in the morning with a line of cars already waiting to take a look at the new wares. The most ardent collectors jockey for position to make sure they have a chance at their first choices. You’ll be served hot coffee and donuts in the morning and barbeque or something in season from the farmers’ markets for lunch. Pickers sit in a circle and improvise on blue-grass rhythms, and if you are lucky, someone with a double bass will show up to round out the sound. And in that moment, all of the hard work, the long nights of stoking, and even the splinters make perfect sense.