DESSERTS

◁ EASYGOING PIE CRUST
Having a really great pie crust recipe is an essential to every baker’s repertoire. This pie crust works great in both sweet and savory recipes.
1 3/4 cups (277 g) superfine brown rice flour, plus more for kneading and rolling
1/2 cup (60 g) cornstarch
1/2 cup (60 g) tapioca starch
1 teaspoon xanthan gum
1 teaspoon baking powder
2 1/2 tablespoons (45 g) sugar
1 cup plus 2 tablespoons (270 g) nondairy margarine, very cold
3 tablespoons (45 ml) apple cider vinegar
1/2 cup (120 ml) very cold water
In a large bowl, sift together 1 3/4 cups (277 g) of the flour, cornstarch, tapioca starch, xanthan, baking powder, and sugar. Using a pastry blender, cut in the margarine until the mixture is evenly crumbly. Make a well in the center. Add the vinegar and water, stirring together quickly with a fork.
Turn out the dough onto a lightly floured surface. Knead in about 1 to 2 tablespoons (7 to 14 g) additional flour, if necessary, until workable. (Do not overknead; a flip or two will do just fine.)
Using your hands, pat the dough into a disk. Chill the dough in the fridge for about 2 hours or in the freezer for 30 minutes, or until very cold.
Use as a crust in your favorite pie recipe following the recipe directions. The pie crust will be slightly sticky, especially as it returns to room temperature, so rolling between two sheets of parchment paper or waxed paper is a must.
If the crust needs to be prebaked, bake at 400°F (200°C, or gas mark 6) for about 10 to 15 minutes, or until lightly golden brown.
Yield: One deep-dish pie crust
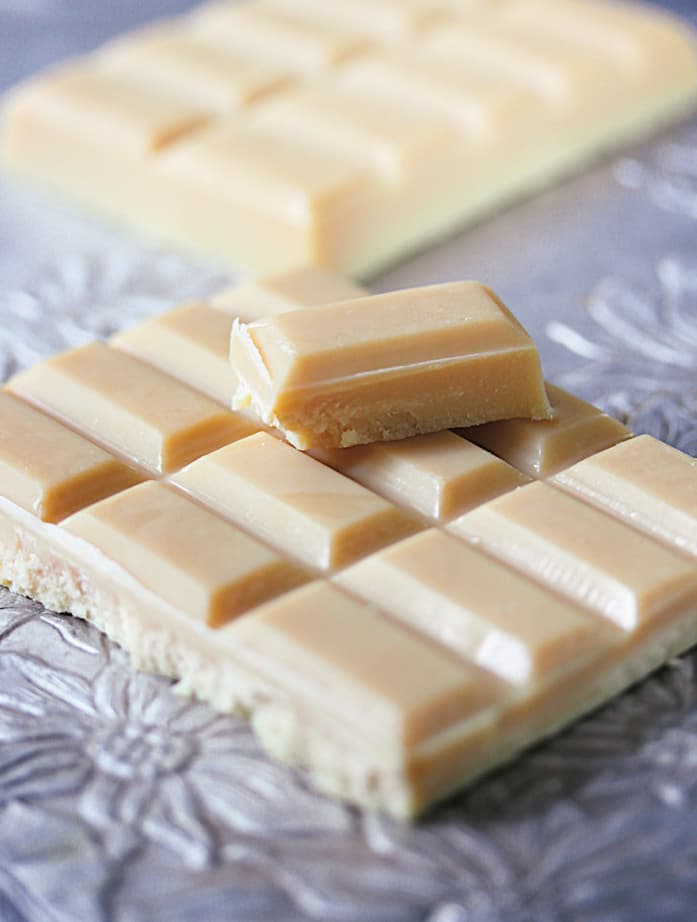
◁ WHITE CHOCOLATE BAKING BAR
This recipe yields a basic white chocolate bar that’s great for baking. Buy cocoa butter at natural foods stores or online. It is often sold in solid chunks and is very firm (just like a chocolate bar) at room temperature.
1/2 cup plus 2 tablespoons (90 g) confectioners’ sugar
3 tablespoons (24 g) soymilk powder
7 ounces (207 g) food-grade cocoa butter, chopped
1 teaspoon vanilla extract
In a small bowl, whisk together the sugar and soymilk powder until very well combined.
In the bowl of a double boiler, begin to melt the cocoa butter over medium-low heat, just until part of the mixture starts to become liquefied. Add 1 to 2 tablespoons of the sugar mixture to the melting cocoa butter. Using a wooden spoon, stir until it’s smooth and once again liquefied.
Repeat this process until all the sugar mixture has been incorporated with the cocoa butter. The mixture should be liquid once everything is combined. Once all the solid cocoa butter has melted, remove from the heat.
Quickly stir in the vanilla and then transfer the mixture to a large chocolate bar mold or a silicone baking dish. Chill in the fridge for 2 hours, or until firm, before using.
Store in an airtight container or plastic bag in the fridge to keep from melting or becoming soft. Use in your favorite recipes where white chocolate is called for. This baking bar keeps for up to 3 months if stored in the fridge.
Yield: 10 servings, 1 ounce (28 g) each

◁ APPLE CINNAMON BLINTZES
These tender crêpes, which are stuffed with a thick Cashew Cream and topped with warm cinnamon apples, are a sure-fire way to bring folks together over brunch.
FOR THE CRÊPES:
3 tablespoons (42 g) sugar
2/3 cup (87 g) cornstarch
1/3 cup (43 g) sorghum flour
1/3 cup (80 g) firm silken tofu
1 cup (240 ml) nondairy milk
1 teaspoon vanilla extract
1/2 teaspoon salt
FOR THE FILLING:
1 recipe Cashew Cream
FOR THE TOPPING:
3 Granny Smith apples, peeled, cored, and thinly sliced
Dash salt
1 teaspoon cinnamon
2 tablespoons (30 ml) plus 1/2 cup (120 ml) water, divided
2 tablespoons (28 g) sugar
1 teaspoon cornstarch mixed with 1 tablespoon (15 ml) cold water
To make the crêpes: In a blender, process all of the crêpes ingredients until smooth.
Transfer the mixture to a bowl. Cover and refrigerate for at least 1 hour and up to overnight.
To make the topping: In a medium bowl, combine the apples, salt, cinnamon, 2 tablespoons (30 ml) of the water, and sugar.
Transfer the mixture to a well-seasoned cast-iron or nonstick pan. Cover and cook over medium heat for 7 minutes, or until the apples are soft. Add the remaining 1/2 cup (120 ml) water and cornstarch slurry to the pan. Cook over medium heat for about 6 to 8 minutes, or until thick, stirring occasionally. Remove from the heat.
To prepare the crêpes: Heat a crêpe pan or skillet over medium-high heat. Evenly grease with about 1/2 teaspoon margarine or coconut oil. Pour 1/3 cup (80 g) of the batter into the hot pan and gently swirl the pan around in a circular motion to coat with a thin layer of batter. Cook for about 2 minutes. Using a flat, sturdy spatula, flip gently. (If they are done, they should be fairly easy to flip.) Cook the other side for approximately 1 minute, or until golden on both sides. Place each crêpe on a plate as they are cooked and cover to keep warm. Repeat with the remaining batter to make about 8 crêpes.
To assemble: Fill the middle of each crêpe with about 1/4 cup (50 g) of the Cashew Cream. Fold the crêpe over twice as you would fold a letter. Top with 1 to 2 tablespoons (15 to 30 g) of the apples. Serve warm.
Yield: 8 blintzes
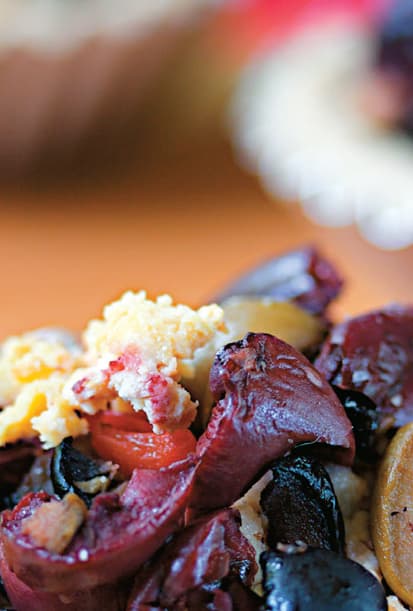
◁ OLIVE AND TOFU FETA TARTLETS
These salty, savory tartlets make a delicious brunch treat to share with friends and loved ones. They are best served warm from the oven.
FOR THE CRUST:
1 recipe Easygoing Pie Crust
FOR THE FILLING:
1 cup (145 g) raw cashews, soaked in 1 cup (235 ml) water for at least 1 hour
2 tablespoons (30 ml) water
1 tablespoon (7 g) flaxseed meal mixed with 2 tablespoons (30 ml) warm water
1 1/3 cups (300 g) Tofu Feta
1 1/2 cups (180 g) assorted coarsely chopped olives (Kalamata, green, black, or a mix), divided
To prepare the crust: Preheat the oven to 400°F (200°C, or gas mark 6).
Roll out the crust between 2 sheets of parchment paper or on top of a silicone mat until about 1/4 inch (6 mm) thick. Cut the dough into 2-inch (5 cm) squares and carefully press it into sixteen 2-inch (5-cm) tart pans or standard-size muffin cups. Use a flat metal spatula to help transfer the dough, if necessary. Bake for 10 to 12 minutes, or until light golden brown. Remove from the oven and reduce the temperature to 350°F (180°C, or gas mark 4).
To make the filling: Drain the cashews and combine with the water and prepared flaxseed meal in a food processor. Blend until smooth, scraping down the sides as necessary.
Stir the mixture together with the Tofu Feta and spoon 1 cup (120 g) of the olives and 1 cup (225 g) of the feta into the tart shells, dividing evenly among the cups. Using the back of a spoon, spread the mixture evenly to fill the tart shell. Top each with a sprinkling of the remaining 1/2 cup (60 g) chopped olives and 1/3 cup (68 g) tofu feta.
Bake for 30 minutes, or until the crust edges are golden brown and the olives on top soften and get crispy around the edges. Let the tarts cool for about 15 minutes and then gently remove from the pans. Serve slightly warm.
Yield: 16 tartlets

◁ VANILLA CREAM TARTLETS
These are best served freshly made.
FOR THE VANILLA-FLAVORED POWDERED SUGAR:
1 cup (120 g) confectioners’ sugar
1 split vanilla bean
FOR THE WHIPPED COCONUT CREAM:
2 cans (14 ounces, or 414 ml each) full-fat coconut milk
1/2 cup plus 2 tablespoons (75 g) confectioners’ sugar, sifted
FOR THE FILLING:
1/2 cup (60 g) Vanilla-Flavored Powdered Sugar, plus extra for garnishing
1 1/3 cups (192 g) Whipped Coconut Cream
1/2 cup plus 2 tablespoons (163 g) Cashew Almond Spread (—Fig and Nut Canapes)
Zest of 1/2 lemon
FOR THE CRUSTS AND GARNISH:
1 3/4 cups (210 g) whole wheat pastry flour
1/4 teaspoon salt
1/4 cup (60 ml) neutral-flavored oil
1/4 cup (60 ml) maple syrup
2 tablespoons (30 ml) cold water, as needed
1 package (6 ounces, or 170 g) fresh raspberries, rinsed and patted dry
1 package (4.4 ounces, or 125 g) fresh blueberries, rinsed, patted dry
Confectioners’ sugar
To make the Vanilla-Flavored Powdered Sugar: In an airtight container, combine the sugar and vanilla bean for 2 days.
To make the Whipped Coconut Cream: Let the cans settle at room temperature. Chill the cans in the fridge for at least 24 hours, along with the bowl used to whip the cream.
Scoop the hardened cream from the top of each can, and place it in the chilled bowl along with the sugar. Using an electric mixer with a whisk attachment, whisk for about 5 minutes, or until thickened. Refrigerate in an airtight container until ready to use, up to 2 days before serving
To make the filling: In a large bowl, gently fold the Vanilla-Flavored Powdered Sugar, Whipped Coconut Cream, Cashew Almond Spread, and zest to combine but gently so as not to remove the fluff from the whipped cream. Cover with plastic wrap, and store in the fridge for 2 hours or overnight to firm up.
To make the crusts: Preheat the oven to 350°F (180°C, or gas mark 4). Lightly coat twelve 3-inch (7.5 cm) tart pans with nonstick cooking spray.
In a medium bowl, stir the flour and salt together. Drizzle in the oil and syrup, stirring with a fork to create crumbs. Add the water 1 tablespoon (15 ml) at a time if needed, stirring until a dough forms. Gather the dough on a piece of parchment paper. Divide the dough into 12 equal portions, each about 1 ounce (30 g).
Using your hands, pat each portion down into a 2 1/2-inch (6 cm) circle. Place each circle into the prepared tart pan, and press down on the bottom and just halfway up the edges, about 1/2 inch (1.3 cm). Repeat with the remaining dough. Using a fork, prick the crust bottoms. Bake for 13 minutes, or until the crusts are light golden brown. Cool completely in the pans, and then remove from the pans before assembling.
Add 2 tablespoons (35 g) of filling per cooled crust. Place back into the fridge for 2 hours to set. Decorate with the berries before serving. Sift more confectioners’ sugar on top.
Yield: 12 tartlets
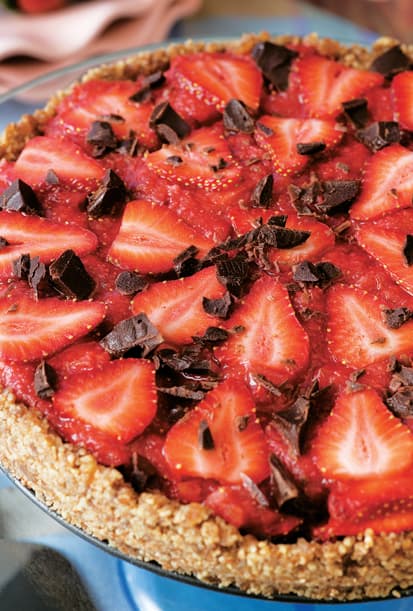
◁ NO-BAKE STRAWBERRY PIE WITH CHOCOLATE CHUNKS
This delicious, easy-to-prepare seasonal pie requires no baking and calls for the ripest, sweetest strawberries, which you can find at your local farmers’ market.
4 cups (680 g) ripe strawberries, sliced
1 prepared pie crust
1 cup (110 g) ripe strawberries, whole
5 pitted dates, soaked 10 minutes in warm water and drained
2 teaspoons lemon juice
Nondairy dark chocolate chunks
Arrange the sliced berries on top of the crust.
In a food processor, purée the whole berries with the dates and juice until smooth. Pour the mixture over the sliced strawberries. Arrange the chocolate on top of the sauce. Refrigerate for 1 hour before serving.
Yield: 8 to 12 servings
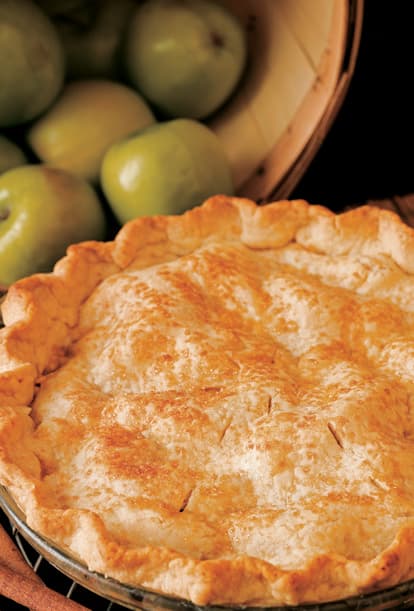
◁ APPLE PIE
Few things are as satisfying as making your own pie crust and filling it with crisp apples.
5 to 6 medium-large apples, peeled, cored, and sliced 1/4-inch thick (6 cups [90 g])
1/2 cup (100 g) granulated sugar, plus 2 teaspoons more
2 to 3 tablespoons (16 to 24 g) all-purpose flour
1 tablespoon (15 ml) lemon juice
3/4 teaspoon ground cinnamon
1/4 teaspoon ground nutmeg
Pinch salt
2 tablespoons (28 g) non-hydrogenated, nondairy butter, cut into small pieces
1/8 teaspoon ground cinnamon
Roll out the bottom piece of dough into a 13-inch (33-cm) round. Fit it into a 9-inch (23-cm) pie pan. Trim the overhanging dough to 3/4 inch (2 cm) all around. Roll out the dough for the top crust, fold it in half, and cover. Chill the dough in the fridge while you prepare the filling.
Preheat the oven to 425°F (220°C, or gas mark 7).
In a bowl, combine the apples, 1/2 cup (100 g) of the sugar, flour, juice, cinnamon, nutmeg, and salt. Let the mixture stand for 10 to 15 minutes, or until the apples soften slightly.
Pour the mixture into the bottom crust. Using the back of a spoon, gently level the filling. Dot the top with the butter. Brush the overhanging crust with cold water. Cover with the top crust, and tuck any excess pastry under the bottom crust.
Using your fingers, crimp the edges.
Using a sharp knife or skewer, make 5 slits from the center of the pie out toward the edge of the pie to allow the steam to escape. Sprinkle with the remaining 2 teaspoons sugar and cinnamon. Bake for 30 minutes.
Slip a baking sheet underneath the pie (to catch the juices), reduce the temperature to 350°F (180°C, or gas mark 4), and bake for 30 to 45 minutes, or until the fruit feels just tender when a knife is poked through a steam vent.
Remove the pie from the oven. On a wire rack, cool for 3 to 4 hours before cutting. (This allows the filling to thicken properly.)
Yield: 8 to 10 servings
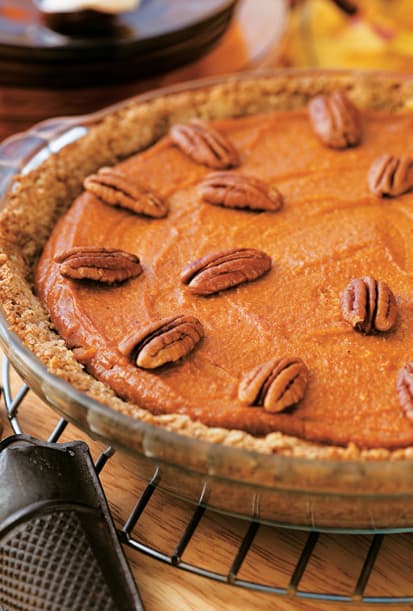
◁ PUMPKIN PIE
Make the filling and use your own favorite pie crust, a store-bought crust, or the fantastic Easygoing Pie Crust. Serve this pie chilled or at room temperature.
1 pie crust
16 pecan halves
12 ounces (340 g) silken tofu (firm)
2 cups (400 g) pumpkin purée
1/2 cup (170 g) maple syrup
1/2 cup (115 g) firmly packed light brown sugar
1/4 cup (32 g) cornstarch (or arrowroot powder)
1 1/2 teaspoons ground cinnamon
1/2 teaspoon salt
1/4 teaspoon freshly grated nutmeg
1/4 teaspoon ground ginger
1/8 teaspoon ground cloves
Preheat the oven to 350°F (180°C, or gas mark 4).
Prepare the pie crust or remove a store-bought crust from the freezer/refrigerator. (Thaw the crust if frozen.)
On a cookie sheet, toast the pecans for 7 to 10 minutes, or until the smell of nuts fills the kitchen.
In a food processor, blend the tofu, pumpkin, syrup, sugar, cornstarch, cinnamon, salt, nutmeg, ginger, and cloves until the mixture is completely smooth and creamy, scraping down the sides of the bowl a few times.
Pour the filling into the baked crust. Using a spatula, smooth the top. Bake for about 40 to 45 minutes, or until the crust is lightly browned and the outermost 1 inch (2.5 cm) of the filling is set. (Don’t worry if the center is still soft; it will continue to firm up as the pie cools.)
Transfer the pie to a wire rack. Gently press the pecans into the filling in 2 concentric circles (or any design you like). Cool to room temperature. Chill for 1 to 2 hours, or until set.
Yield: 8 servings
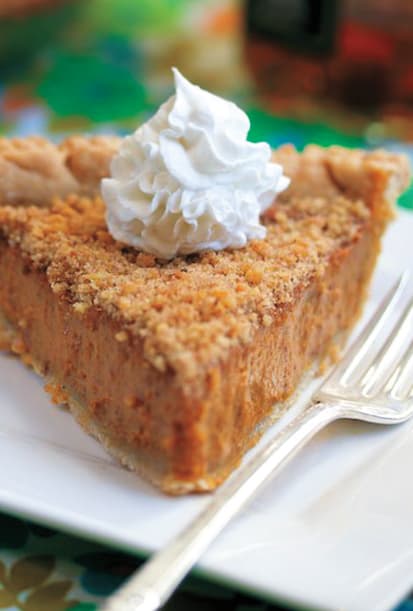
◁ MAPLE PUMPKIN PIE WITH CINNAMON WALNUT CRUST
This pie encapsulates both maple syrup’s flavor and sweetness that complements the pumpkin beautifully.
FOR THE CRUST:
2 cups (200 g) walnuts, ground
1/4 cup (60 g) packed brown sugar
1 cup (160 g) superfine brown rice flour
1 teaspoon cinnamon
1/4 cup (56 g) vegan margarine
1 tablespoon (12 g) ground chia seeds
1/4 cup (60 ml) cold water
FOR THE FILLING:
1/2 cup (120 g) brown sugar
1/2 cup (160 ml) maple syrup
1 teaspoon ground cinnamon
1 teaspoon fresh grated ginger
1/2 teaspoon ground cloves
3/4 teaspoon salt
1/2 cup (120 g) silken tofu
1/4 cup (40 g) superfine brown rice flour
1 1/2 cups (368 g) canned pumpkin purée
1/2 cup (120 ml) coconut milk
1/3 cup (40 g) finely crushed walnuts
Preheat the oven to 400°F (200°C, gas mark 6).
To make the crust: In a food processor, process all the crust ingredients for about 2 minutes, or just until crumbly, scraping down the sides as necessary.
Using the bottom of a glass, press the mixture into the bottom of an ungreased pie pan. Using a fork, poke holes in the crust. Bake for 10 minutes.
Increase the oven temperature to 425°F (220°C, gas mark 7).
In a food processor, purée all of the filling ingredients except for the walnuts until very smooth. Spread the mixture evenly into the prebaked crust. Bake the pie for 13 minutes. Reduce the heat to 350°F (180°C, gas mark 4) and bake for 45 to 50 minutes more.
Let cool completely, top with the walnuts.
Chill in the fridge overnight before cutting.
Yield: 1 standard-size pie (8 servings)

◁ FRUIT CRUMBLE COBBLER
You can use fresh, frozen, or canned fruit. If using frozen fruit, thaw it first and drain any excess liquid so you have 1 full cup (250 g) of thawed fruit.
1 cup (181 g) pineapple chunks
1 cup (180 g) mango chunks
1 cup (145 g) pitted cherries
1/2 cup (100 g) plus 3 tablespoons (38 g) evaporated cane juice, divided
1/2 cup (110 g) brown sugar, tightly packed, divided
1 1/4 teaspoons ground cinnamon, divided
1/8 teaspoon ground nutmeg
1 teaspoon lemon juice
2 teaspoons cornstarch
1 cup (125 g) all-purpose flour
1 teaspoon baking powder
1/2 teaspoon salt
6 tablespoons (90 ml) coconut oil, chilled until solid
1/4 cup (60 ml) boiling water
1/4 cup (30 g) shredded coconut
Preheat the oven to 425°F (220°C, or gas mark 7).
In a large bowl, combine the pineapple, mango, cherries, 1/4 cup (50 g) of the cane juice, 1/4 cup (55 g) of the brown sugar, 1/4 teaspoon of the cinnamon, the nutmeg, juice, and cornstarch. Toss to coat evenly and pour into a 9 × 9-inch (23 × 23 cm) glass baking dish or nine individual ramekins. Bake for 10 minutes.
Meanwhile, in a large bowl, combine the flour, 1/4 cup (50g) of the cane juice, the remaining 1/4 cup (55 g) brown sugar, baking powder, and salt.
Using your fingers, blend in the oil until the mixture resembles coarse meal. Stir in the water until just combined.
In a separate bowl, mix together the remaining 3 tablespoons (38 g) cane juice, the remaining 1 teaspoon cinnamon, and the coconut.
Remove the fruit from the oven. Drop spoonsful of biscuit topping over it.
Sprinkle the cobbler with the cane juice mixture. Bake for about 30 minutes, or until the topping is golden.
Yield: 9 servings

◁ BANANA BERRY COBBLER
Bananas add an unconventional spin on a timeless classic. This texture of this dessert is similar to a coffeecake on the top but with a sweet baked fruit layer on the bottom.
1/2 cup (112 g) plus 2 tablespoons (28 g) nondairy margarine, divided
1 cup (130 g) sorghum flour
1/2 cup (79 g) brown rice flour
1/2 cup (65 g) tapioca starch
1 teaspoon xanthan gum
1 tablespoon (15 g) baking powder
1 teaspoon salt
1/4 cup plus 2 tablespoons (90 g) packed brown sugar, divided
1 cup (235 ml) nondairy milk
1 teaspoon vanilla extract
3 or 4 bananas, sliced
2 cups (290 g) berries (blueberries, raspberries, and/or blackberries)
3 tablespoons (38 g) granulated sugar
2 teaspoons lemon juice
Preheat the oven to 350°F (180°C, or gas mark 4).
In an 11 × 7-inch (28 × 18 cm) baking dish, place 2 tablespoons (28 g) of the margarine Bake until the margarine melts. Remove the pan from the oven and tip it to coat the bottom.
In a large bowl, combine the flours, starch, xanthan, baking powder, and salt. Using 2 butter knives or a pastry cutter, cut in the remaining 1/2 cup (112 g) margarine until small crumb form. Stir in 1/4 cup (60 g) of the brown sugar until well mixed. Add the milk and vanilla, stirring until a thick batter forms.
In a separate bowl, toss the bananas, berries, granulated sugar, and juice. Spoon the fruit into the baking dish over the margarine.
Drop the batter by the spoonful over the bananas and berries to mostly cover the fruit. Sprinkle with the remaining 2 tablespoons (30 g) brown sugar.
Bake for 45 minutes, or until the fruit is bubbly and the top is golden brown. Let cool for about 15 minutes.
Yield: 12 servings
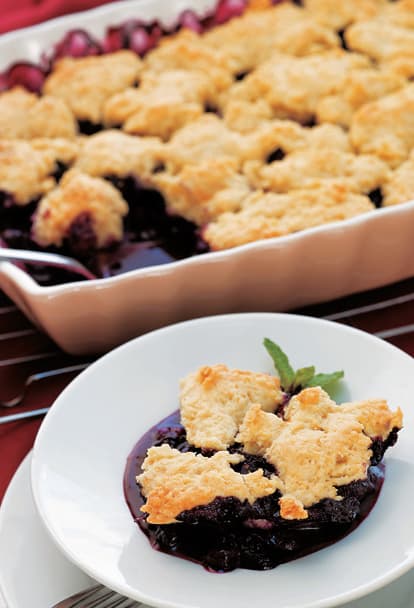
◁ BLUEBERRY COBBLER
This could easily be called Fruit Cobbler, as it invites the inclusion of any berry or fruit, such as apples or peaches.
FOR THE BISCUIT DOUGH:
1 1/3 cups (165 g) all-purpose flour
3 tablespoons (40 g) sugar, divided
1 1/2 teaspoons baking powder
1/2 teaspoon salt
5 tablespoons (70 g) non-hydrogenated, nondairy butter, melted
1/2 cup (120 ml) nondairy milk
1 to 2 tablespoons (15 to 30 ml) nondairy milk or 1 to 2 tablespoons (14 to 28 g) non-hydrogenated, nondairy butter
FOR THE FILLING:
4 to 5 cups (580 to 725 g) blueberries
1/2 cup (100 g) sugar
2 tablespoons (15 g) all-purpose flour
1 teaspoon grated lemon zest, optional
Preheat the oven to 375°F (190°C, or gas mark 5).
To make the biscuit dough: In a bowl, combine the flour, 2 tablespoons (26 g) of the sugar, the baking powder, and salt. Add the butter and 1/2 cup (120 ml) milk. Stir just until it forms a sticky dough.
To make the filling: In a large bowl, combine the berries with the sugar, flour, and zest, if using. Spread evenly in an 8 or 9-inch (20- or 23-cm) square baking dish.
Using a tablespoon, scoop the dough over the fruit. Either leave the dough in shapeless blobs on the fruit or spread it out.
Brush the top of the dough with the remaining 1 to 2 tablespoons milk or butter and the remaining 1 tablespoon sugar.
Bake for 45 to 50 minutes, or until the top is golden brown and the juices have thickened slightly. Let cool for 15 minutes.
Yield: 6 to 8 servings

◁ FALL FRUIT CRISP
You can use any autumn fruit in this delightful dessert that fills the home with an inviting fragrance. The flavor and sweetness of the fruit come through, while satisfying the sweet tooth.
FOR THE FILLING:
6 to 8 cups (900 to 1200 g) cored and sliced or chopped pears and/or apples
1 cup (145 g) blueberries, fresh or frozen, optional
1 cup (145 g) raisins, optional
Juice of 1 lemon
1/4 cup (85 g) maple syrup
1 teaspoon cinnamon
1/2 teaspoon allspice
FOR THE TOPPING:
1 cup (80 g) rolled oats, not quick-cooking
1 cup (150 g) chopped walnuts or pecans, toasted for 10 minutes
1/2 cup (62 g) whole wheat flour
1/2 cup (112 g) non-hydrogenated, nondairy butter
1/4 cup (55 g) firmly packed brown sugar
1 teaspoon cinnamon
1/4 teaspoon allspice
1/4 teaspoon nutmeg
1/4 teaspoon salt
1/2 teaspoon anise seeds, optional
Preheat the oven to 350°F (180°C, or gas mark 4).
To make the filling: In a medium bowl, combine the pears, blueberries if using, raisins if using, juice, syrup, cinnamon, and allspice. Pour into an ungreased 8- or 9-inch (20- or 23-cm) square baking pan at least 2 inches (5 cm) deep.
To make the topping: In a bowl, combine the oats, walnuts, flour, butter, sugar, cinnamon, allspice, nutmeg, salt, and anise seeds if using. The topping should be crumbly (and chunky from the walnuts) and have the texture of wet sand. If it’s too dry, add a little more butter or a few teaspoons of water. Evenly sprinkle the topping over the fruit mixture.
Bake for 35 to 45 minutes, or until the pears and apples are soft when pierced with a wooden pick.
Yield: 6 to 8 servings
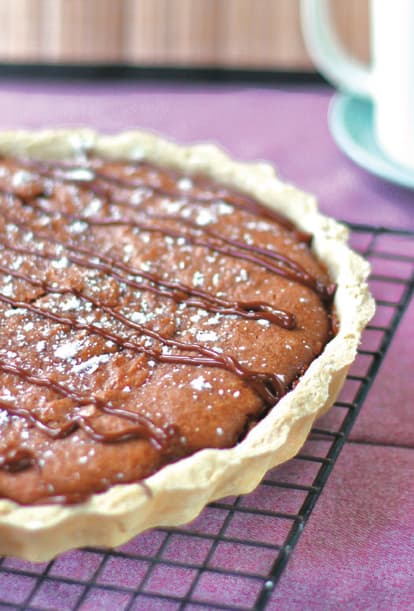
◁ CHOCOLATE MARZIPAN TART
This tastes like a brownie pie, but the almond flavor shines through delicately, making it undeniably all about the marzipan.
1 recipe Easygoing Pie Crust
3/4 cup (97 g) sorghum flour
1/4 cup (32 g) tapioca starch
1 teaspoon baking powder
1/8 teaspoon salt
2 tablespoons (28 g) nondairy margarine
8 ounces (227 g) nondairy almond paste or marzipan
1/3 cup (65 g) sugar
1 tablespoon (15 ml) vanilla extract
2 tablespoons (14 g) flaxseed meal mixed with 1/4 cup (60 ml) warm water
1/4 cup (60 ml) almond milk
1 cup (175 g) nondairy chocolate chips
Preheat the oven to 350°F (180°C, or gas mark 4). Lightly grease an 8-inch (20 cm) tart pan.
On a floured surface, roll out the pie crust until about 1/4-inch (6 mm) thick and about 14 inches (36 cm) in diameter. (You might want to do this a silicone mat because you can easily move the rolled-out dough and flip it into the tart pan.)
Transfer the dough to the prepared pan and press into the pan. Trim off the excess dough. Chill the crust in the fridge.
Meanwhile, in a food processor, blend the flour, starch, baking powder, salt, margarine, almond paste, sugar, vanilla, flaxseed mixture, and milk until smooth.
In a microwave or over a double boiler, melt the chocolate chips. Stir until smooth. Add to the food processor and process until blended. Spread the filling into the crust evenly.
Bake for 30 minutes, or until the crust is light golden brown around the edges and the filling puffs up and begins to crack. (It should look similar to what a brownie looks like when done.)
Yield: 8 servings
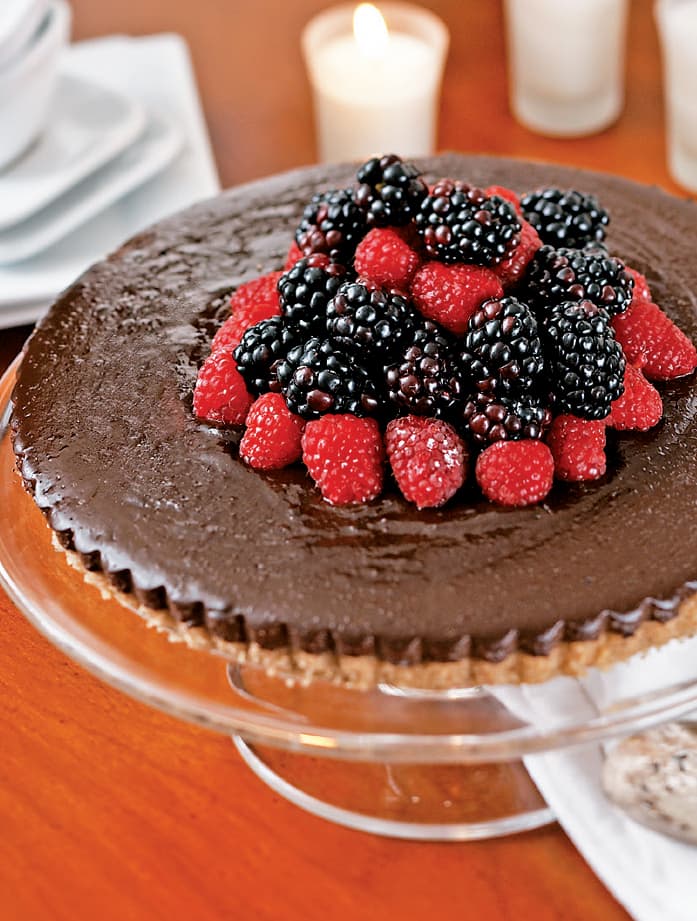
◁ FLOURLESS CHOCOLATE TART
This is a chocolatey treat that, despite its richness, isn’t overly sweet. It all depends on the type of chocolate you use.
1 cup (110 g) raw pecans
1 cup (120 g) raw walnuts
3/4 cup (150 g) granulated sugar
4 tablespoons (56 g) nondairy, non-hydrogenated butter, melted
16 ounces (455 g) nondairy semisweet or dark chocolate chips or bar
2 cups (470 ml) nondairy milk (soy, rice, almond, hazelnut, hemp, or oat)
2 tablespoons (16 g) kudzu (or cornstarch powder)
1/4 cup (60 ml) water
Sifted confectioners’ sugar
Preheat the oven to 375°F (190°C, or gas mark 5).
In a food processor, pulverize the pecans, walnuts, and granulated sugar. Add the butter and process until a thick batter forms.
Press the mixture into a 9- or 10-inch (23 or 25 cm) tart pan.
Bake for 10 minutes, or until the crust is golden brown.
Meanwhile, in a double boiler or microwave, melt the chocolate.
In a saucepan, heat the milk over medium heat until it is scalding hot but not boiling.
Meanwhile, in a bowl, combine the kudzu and water until the powder completely dissolves, creating your thickener.
Whisk the chocolate into the milk. Whisk in thickener, and stir well. Reduce the heat to low. Simmer for 10 minutes, stirring occasionally. (The chocolate mixture will slowly thicken.)
Pour the chocolate mixture into the tart shell.
Chill in the fridge for at least 2 hours or up to overnight.
Decorate by cutting out a stencil pattern and placing it over the tart. Dust some powdered sugar lightly over the top. Remove the stencil.
Yield: 6 to 8 servings

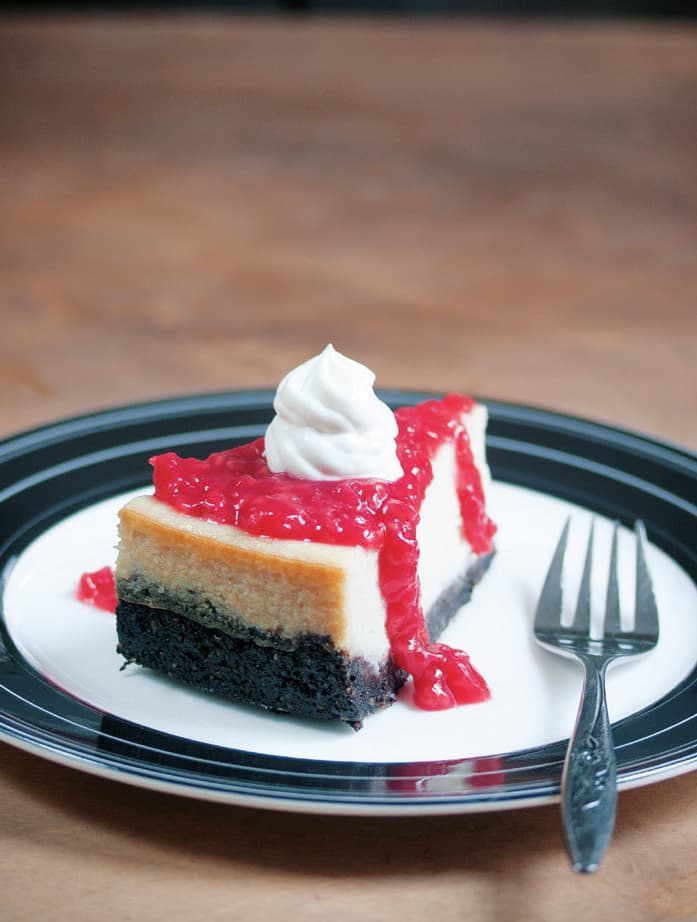
◁ CHOCOLATE HAZELNUT BROWNIE CHEESECAKE
Freezing, then thawing this dessert gives it a cheesecake consistency. Use an 8-inch (20.3 cm) springform pan. You can use a bigger size, but the smaller the pan, the taller the cheesecake. Serve this cold.
FOR THE CRUST:
1 cup (110 g) raw pecans
10 Medjool dates, pitted
1/2 cup (50 g) almond meal
1/2 cup (40 g) cocoa powder
FOR THE FILLING:
3 cups (330 g) raw cashews, soaked in water to cover for at least 2 hours, then drained
1 cup (235 ml) coconut oil, melted
1 cup (235 ml) water, plus more if needed
3/4 cup (180 ml) agave nectar (or maple syrup)
1 cup (240 g) nondairy Chocolate Hazelnut Spread, plus more for garnish (See here.)
1 teaspoon vanilla extract
To make the crust: In a food processor, pulse the pecans and dates until uniform and crumbly. Transfer the mixture to a medium bowl. Add the almond meal and cocoa powder. Stir to combine.
Press the crust into the bottom of a springform pan.
To make the filling: In a food processor, blend the cashews, oil, and water for about 5 minutes, or until very smooth. Add a touch more water if needed to get the cashews to blend well. Stir in the agave, 1 cup (240 g) of the chocolate hazelnut spread, and the vanilla.
Spread the filling evenly on top of the crust. Cover tightly with aluminum foil.
Chill in the freezer for at least 7 hours or up to overnight. Thaw in the fridge for a few hours. Garnish with a drizzle of melted chocolate hazelnut spread.
Yield: 12 servings

◁ LEMON CHEESECAKE
Cheesecakes are dessert classics that date back to ancient Greece. They’re versatile and handle any flavor you throw at them. In this case, lemons add light freshness.
4 1/2 teaspoons (20 g) Ener-G Egg Replacer (equivalent of 3 eggs)
6 tablespoons (90 ml) water
24 ounces (690 g) nondairy cream cheese, at room temperature
1 cup (200 g) granulated sugar
1/2 teaspoon vanilla
2 tablespoons (30 ml) lemon juice
1 tablespoon (5 g) lemon zest
1 prepared pie crust
Sliced strawberries
Preheat the oven to 350°F (180°C, or gas mark 4). Lightly oil a 9-inch (23-cm) springform pan.
In a food processor, whip the egg replacer and water together, until it’s thick and creamy. Beat in the cream cheese for about 30 seconds, or until creamy. Beat in the sugar, vanilla, juice, and zest.
Scrape the batter into the prepared crust, and smooth the top.
Bake for 50 to 55 minutes, or until the center barely jiggles when the pan is tapped. (It’s okay if it puffs up a bit and turns a golden brown on top.) Let cool in the pan on a rack for at least 1 hour, making sure it’s cooled completely before unmolding. Cover
Refrigerate for at least 2 hours and preferably 24 hours. Garnish with the strawberries.
Yield: 10 to 12 servings
◁ WHITE CHOCOLATE RASPBERRY CHEESECAKE WITH DARK CHOCOLATE CRUST
You can buy vegan white chocolate online from various retailers, many times not marked as vegan at all. Just look for a variety that doesn’t contain any milk, milk fat, or butterfat.
FOR THE TOPPING:
1 cup (125 g) raspberries
1/2 cup (100 g) sugar
1 teaspoon vanilla
2 teaspoons cornstarch whisked with 1/4 cup (60 ml) water
FOR THE CRUST:
2 cups (240 g) walnuts or pecans, ground
1/4 cup (24 g) plus 1 tablespoon (6 g) dark cocoa powder
1/4 cup (50 g) sugar
1/2 teaspoon salt
1 tablespoon (12 g) ground chia seeds mixed with 1/4 cup (60 ml) water
FOR THE FILLING:
3 tubs (8 ounces, or 225 g each) vegan cream cheese
1/4 cup (50 g) sugar
1 3/4 cups (300 g) vegan white chocolate, chips or chunks, melted
1 block (11 ounces, or 325 g) silken tofu, drained
7 tablespoons (70 g) superfine brown rice flour
1/4 cup (60 ml) lemon juice
1 teaspoon vanilla extract
To make the topping: In a small saucepan, cook the raspberries, sugar, and vanilla over medium heat for about 2 minutes, while mashing gently with a fork. Drizzle in the cornstarch slurry. Stir until thickened. Remove from the heat.
To make the crust: Preheat the oven to 400°F (200°C, gas mark 6).
In a medium bowl, combine all of the crust ingredients.
Press the mixture into an 8-inch (20 cm) springform pan. Using a fork, poke holes in the crust. Bake for 15 minutes. Remove from the oven and let cool.
To make the filling: Increase the oven temperature to 425°F (220°C, gas mark 7).
In a food processor, blend all of the filling ingredients for about 7 minutes, or until very smooth and absolutely no lumps remain.
Spread the filling evenly over the crust. Bake for 10 minutes.
Leave the cake in the oven and reduce the oven temperature to 250°F (120°C, gas mark 1/2).
Bake for 45 minutes without disturbing.
Remove from the oven, cover with topping (or leave it separate for serving). Cool for 2 hours at room temperature and then overnight in the fridge before cutting.
Yield: 16 servings
◁ CHOCOLATE CAKE
This chocolate cake might be the easiest cake in the world to prepare, and it’s incredibly versatile, lending itself to a layer cake or a Bundt cake.
1 1/2 cups (188 g) unbleached all-purpose flour
3/4 cup (150 g) granulated sugar
1/2 teaspoon salt
1 teaspoon baking soda
1/4 cup (30 g) unsweetened cocoa powder
1 1/2 teaspoons vanilla extract
1/3 cup (80 ml) canola oil
1 tablespoon (15 ml) white distilled vinegar
1 cup (235 ml) cold water
Frosting
Confectioners’ sugar, optional
Fresh raspberries, optional
Preheat the oven to 350°F (180°C, or gas mark 4). Lightly oil a Bundt pan, 9-inch (23-cm), springform pan, or muffin tins.
In a bowl, combine the flour, granulated sugar, salt, baking soda, and cocoa powder. Create a well in the center of the dry ingredients. Add the vanilla, oil, vinegar, and water. Mix until just combined. Pour into the prepared pan. Bake for 30 minutes, or until a wooden pick inserted into center comes out clean. If making cupcakes, check for doneness after 15 minutes.
Cool on a wire rack. To remove the cake from the pan, run a sharp knife around the inside of the pan to loosen the cake. Cool completely before frosting. Dust with sifted confectioners’ sugar and top with fresh raspberries, if using.
Yield: One 9-inch (23-cm) cake or 8 cupcakes

◁ RAW CHOCOLATE-CARROT CAKE
This creative raw dish combines the healthy fats found in raw cacao and cashews with the fat-soluble beta-carotene found in carrots. Raisins supply much of the sweetness.
FOR THE CAKE:
1/2 cup (55 g) grated apple, with a little salt and lemon juice on it
1 cup (110 g) grated carrot
1/2 cup (43 g) dried coconut flakes
1 cup (140 g) chopped cashews
1/2 teaspoon salt
1/2 cup (75 g) golden raisins
2 to 3 tablespoons (40 to 60 g) agave nectar (or other sweetener)
1/2 cup (48 g) raw cacao powder
1/2 cup (113 g) mashed banana
1 teaspoon ground ginger
1 teaspoon ground cinnamon
1/4 teaspoon ground cloves
FOR THE FROSTING:
1/2 cup (113 g) mashed banana
2 to 3 tablespoons (14 to 21 g) coconut powder
1 tablespoon (6 g) cacao powder
1 tablespoon (20 g) agave nectar (or other sweetener), optional
1 tablespoon (15 ml) lemon juice
1/4 teaspoon salt
1/4 teaspoon powdered mustard
To make the cake: In a food processor, grind all of the cake ingredients. Divide among 8 ramekins. (The serving size is a little more than 1/2 cup [115 g]).
To make the frosting: In a blender, process all of the frosting ingredients. Taste and adjust the seasonings. Frost the cakes and chill before serving.
Yield: 8 servings
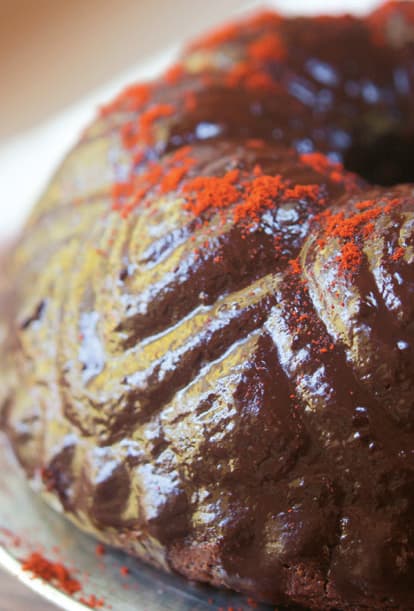
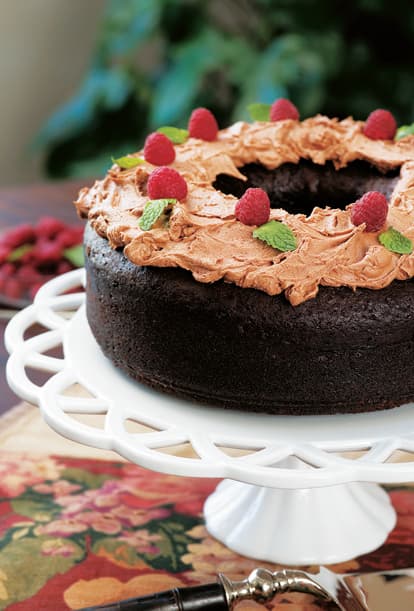
◁ DARK CHOCOLATE CHIPOTLE CAKE
Spicy, sweet, and spongy, this dessert makes a nice alternative to plain ol’ chocolate cake. Adjust the chipotle powder to your spiciness liking.
FOR THE CAKE:
3/4 cup (60 g) cocoa powder, plus more for dusting
2 cups (400 g) sugar
1 1/2 cups (350 g) nondairy margarine, melted
1 1/4 cups (162 g) sorghum flour
1/2 cup (65 g) tapioca starch
1/2 cup (65 g) cornstarch
2 teaspoons xanthan gum
1 teaspoon salt
2 teaspoons baking powder
1 1/2 teaspoons chipotle powder
1 cup (235 ml) nondairy milk
6 tablespoons (90 ml) apple cider vinegar
FOR THE CHOCOLATE GLAZE:
1 cup (120 g) confectioners’ sugar
1/4 cup (60 ml) nondairy milk
1/2 cup (40 g) cocoa powder
2 tablespoons (28 g) nondairy margarine, softened
To make the cake: Preheat the oven to 350°F (180°C, or gas mark 4). Grease a standard-size Bundt pan well and lightly dust it with cocoa powder.
In a large mixing bowl, combine the sugar, margarine, and 3/4 cup (60 g) of the cocoa.
In a separate bowl, combine the flour, starch, cornstarch, xanthan, salt, baking powder, and chipotle powder.
Alternate between adding the flour mixture and the milk to the sugar mixture, scraping the sides as necessary. Once it is well mixed, stir in the vinegar 1 tablespoon (15 ml) at a time.
Spread the cake batter evenly into the prepared pan.
Bake for 60 to 70 minutes, or until a knife inserted near the middle comes out clean. Because Bundt cake pans vary, check after 55 minutes to make sure it isn’t burning. Let cool completely on a wire rack.
To make the glaze: In a bowl, mix all the glaze ingredients together until super smooth.
When the cake has thoroughly cooled, gently remove it from the pan, place it on a wire rack over a piece of waxed paper, and pour on the chocolate glaze. Let the glaze harden before transferring to a clean cake plate and slicing.
Yield: 10 servings
◁ CHOCOLATE LOLLY CAKE
This is one confection that is almost exclusively eaten in New Zealand. It typically uses malt cookies and “lollies,” fruity candies resembling marshmallows that come in a variety of colors and flavors, but the stand-ins here bring a smile to kids’ faces just as easily.
4 cups (400 g) crushed (pulsed in food processor) gluten-free animal cookies
2 tablespoons (10 g) dark cocoa powder
1/2 cup (120 ml) coconut milk
1/2 cup (112 g) vegan margarine, melted
1/2 cup (88 g) nondairy chocolate chips
2 cups (175 g) vegan marshmallows, assorted colors if possible (such as Sweet and Sara brand)
2 cups (170 g) sweetened shredded coconut
In a large bowl, combine the cookies with the cocoa until smooth. Add the milk, margarine, chocolate, and marshmallows. Form into a loaf shape. Roll the loaf into the coconut to completely cover.
Freeze for 15 minutes, or until firm.
Transfer to the fridge for storage. Cut into 1-inch (2.5 cm) thick slices.
Yield: 1 lolly cake, or 20 servings
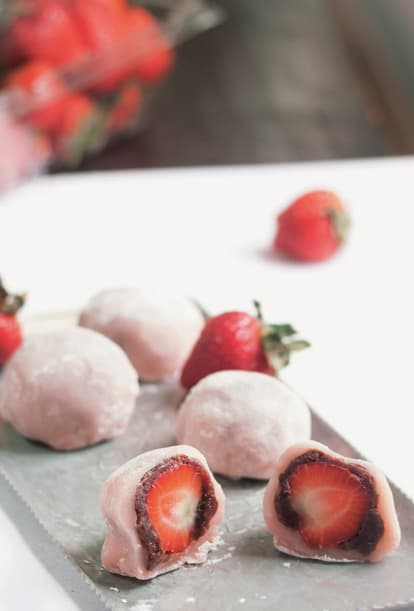
◁ STRAWBERRY MOCHI CAKE
Daifuku, a traditional Japanese confection made from glutinous sticky rice and usually stuffed with red bean paste, is a popular treat in Japan. You can buy these mochi-based treats in Asian groceries.
1 cup (204 g) mochiko (sweet white rice flour)
1 cup (235 ml) almond milk
1 teaspoon coconut oil
1/2 teaspoon apple cider vinegar
1 drop food coloring
Tapioca or potato starch, for dusting
1/2 cup (85 g) sweet red bean paste (anko)
12 small strawberries, greens removed
1/4 cup (50 g) sugar
In a microwavable bowl, whisk the mochiko, milk, oil, vinegar, and food coloring until smooth. Lightly cover with plastic wrap. Microwave on high for 6 minutes. Let the mixture cool just until you are able to handle it.
Dust your hands with starch. Place the mixture in between 2 pieces of plastic wrap. Roll it out until about 1/2 to 1/4-inch (1 cm to 6 mm) thick. Use a pizza cutter to cut into even squares, about 2-inches (5 cm) square.
Repeat with the bean paste: Dust your hands with starch, place the paste between 2 pieces of plastic wrap, and roll it out until thin, about 1/2 to 1/4-inch (1 cm to 6 mm) thick. Cut into squares.
Using starch-covered hands, cover a strawberry with the bean paste. Then place it in the middle of a square of mochi and gently pull up each corner of the square to cover the strawberry, twisting to seal with each corner until covered. Pat to smooth it into an even patty. If at any point it gets too sticky to handle, dust again gently with starch.
Refrigerate for up to 48 hours.
Yield: 12 pieces

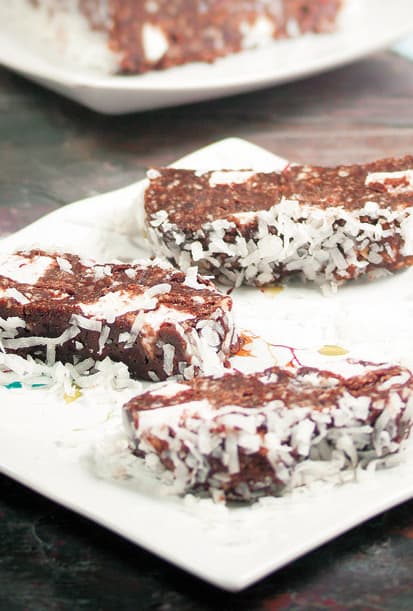
◁ LAMINGTON CAKES
The spongy interior of these little beauties matches perfectly with the soft exterior of the chocolate ganache and the chewy contrast of shredded coconut.
FOR THE CAKE:
1 cup (200 g) sugar
1 cup (160 g) superfine brown rice flour
3/4 cup (90 g) gram flour
1/4 cup (51 g) sweet white rice flour
1/4 cup (48 g) potato starch
1 teaspoon xanthan gum
2 teaspoons baking powder
1 teaspoon salt
2 tablespoons (24 g) ground chia seeds mixed with 1/2 cup (120 ml) water
1 cup (235 ml) almond milk, divided
1/4 cup (56 ml) coconut oil, softened
1 cup (235 ml) coconut milk
1 1/2 cups (263 g) nondairy chocolate chips
2 cups (160 g) shredded coconut
To make the cake: Preheat the oven to 350°F (180°C, gas mark 4). Line an 8 × 8-inch (20 × 20 cm) pan with parchment paper.
In a large bowl, whisk together the sugar, flours, starch, xanthan, baking powder, and salt until well blended.
In a separate bowl, combine half of the flour mixture with the chia seed mixture, 1/2 cup (60 ml) of the milk, and the oil. Mix well. Add the remaining flour mixture and the milk. Spread the batter in the prepared cake pan.
Bake for 35 minutes, or until the cake is spongy to the touch and light golden brown. Let cool completely and then cut into small squares.
To make the ganache: In a saucepan, warm the milk over medium heat for about 5 minutes, just until it plops, but is not boiling.
In a heat safe bowl, melt the chocolate in the warm milk. Stir to melt. Let rest for 15 minutes.
To assemble: Dip the cut cakes into the ganache. Let harden in the freezer for about 10 minutes, just until firmed up a bit. Roll in the coconut to coat. Return to the fridge to completely harden.
Yield: about 30 cakes

◁ PINEAPPLE UPSIDE-DOWN CAKE
A real crowd-pleaser, this cake—somewhat retro—is perfect for a 1950s or 1970s theme party.
9 tablespoons (126 g) nondairy, non-hydrogenated butter, melted, divided
3/4 cup (170 g) firmly packed light or dark brown sugar
3/4 cup (175 ml) unsweetened pineapple juice, divided
1 small pineapple, peeled, cored, and cut into rings (or 1 can sliced pineapple [20 ounces, or 560 g)]
1/4 cup (60 g) maraschino cherries, optional
1 1/2 cups (190 g) all-purpose flour
2 teaspoons (9 g) baking powder
1/2 teaspoon salt
1/2 cup (100 g) granulated sugar
1/4 cup (60 ml) nondairy milk (soy, rice, almond, hazelnut, hemp, or oat)
1 container (6 ounces, or 170 g) nondairy yogurt (vanilla or plain)
1/2 teaspoon vanilla extract
Preheat the oven to 400°F (200°C, or gas mark 6). Lightly oil a 9 × 13-inch (23 × 33 cm) cake pan.
In a bowl, mix 5 tablespoons (70 g) of the butter with the brown sugar and 1/4 cup (60 ml) of the juice. Place the mixture in the bottom of the prepared pan. Arrange the pineapple on top, in a decorative pattern. Fill the middle of each pineapple ring with a cherry, if using.
In a bowl, stir together the flour, baking powder, salt, and sugar. Create a well in the center of the dry ingredients. Add the remaining 1/2 cup (60 ml) pineapple juice, milk, yogurt, the remaining 4 tablespoons (56 g) butter, and the vanilla. Stir to combine, but do not overmix.
Pour the cake batter on top of the brown sugar and pineapple rings. (It may seem very wet, but it will all come together.)
Bake for 30 minutes, or until a wooden pick inserted into the center comes out clean. Let the cake cool in the pan for 10 minutes. Cover tightly with a serving dish and invert it so the pineapple rings are facing up.
Yield: 10 to 12 servings
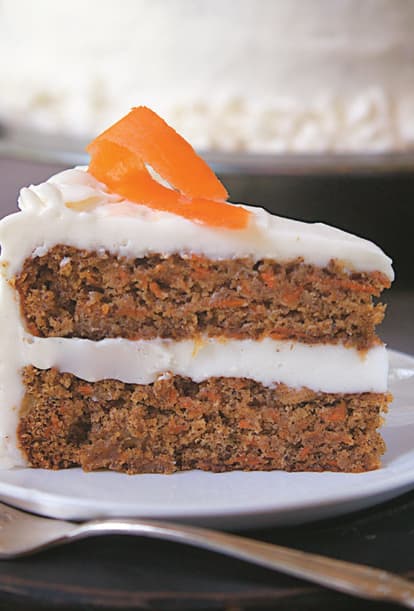
◁ PINEAPPLE CARROT CAKE
Carrot cake is a terrific special occasion cake. The pineapple provides an extra dose of moisture while not competing with the flavor and texture of the carrots.
FOR THE DRY INGREDIENTS:
1 1/4 cups (162 g) sorghum flour, plus more for dusting
3/4 cup (90 g) buckwheat flour
1/2 cup (65 g) potato starch
1 teaspoon xanthan gum
2 teaspoons baking soda
1 teaspoon baking powder
1 teaspoon salt
Dash of cardamom
1 teaspoon ground cinnamon
FOR THE WET INGREDIENTS:
1 3/4 cups (350 g) sugar
1/2 cup (112 g) nondairy margarine, melted
3 tablespoons (21 g) flaxseed meal mixed with 6 tablespoons (90 ml) warm water
1 teaspoon vanilla extract
2 1/2 cups (375 g) peeled and shredded carrots
1 cup (165 g) crushed pineapple, drained
1/2 cup (75 g) applesauce
FOR THE FROSTING:
1/2 cup (95 g) firm coconut oil
1/2 cup (115 g) nondairy cream cheese
4 to 5 cups (540 to 600 g) confectioners’ sugar
2 tablespoons (30 ml) almond milk
Preheat the oven to 350°F (180°C, or gas mark 4). Lightly grease and dust with sorghum flour two 9-inch (23 cm) cake pans or a 9 × 13-inch (23 × 33 cm) sheet cake pan.
To prepare the dry ingredients: In a large bowl, combine all of the dry ingredients and mix well.
To prepare the wet ingredients: In a separate bowl, mix together all of the wet ingredients until smooth. Add the wet ingredients to the dry. Mix thoroughly until you have a fairly thick batter.
Divide the batter evenly between the two cake pans. Bake on the middle rack of the oven for 30 minutes, or until a knife inserted into the middle comes out clean. If using a sheet cake pan, bake for about 5 minutes longer, or until a knife inserted into the middle comes out clean. Keep a watchful eye on the cake toward the last 5 minutes or so to check for doneness.
Let the cakes cool in the pans for about 20 minutes. Invert the cakes onto cooling racks. Let cool completely before frosting.
To make the frosting: In a bowl, combine all of the frosting ingredients and beat with an electric mixer.
Yield: 16 servings
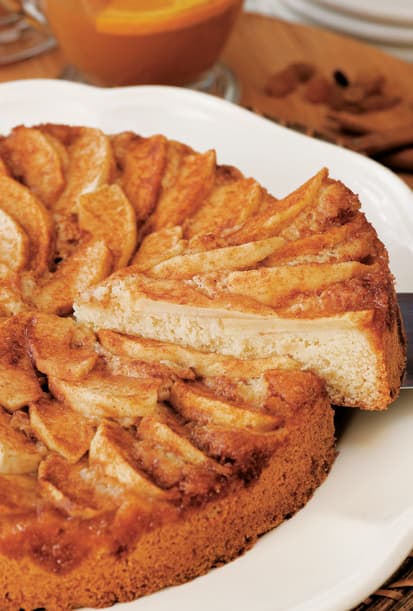
◁ GERMAN APPLE CAKE
The original version of this cake, which includes raw apples and no topping, is called “Apfelkuchen, sehr fein,” which translates loosely to “Apple cake, very delectable.”
FOR THE CAKE:
3 apples, peeled and cut into slices
1/2 cup (112 g) nondairy, non-hydrogenated butter
1/2 cup (100 g) granulated sugar
1/2 cup (125 g) unsweetened applesauce
2 tablespoons (30 ml) nondairy milk
1 1/2 cups (188 g) all-purpose flour
2 1/2 teaspoons baking powder
FOR THE TOPPING:
1/4 cup (60 g) firmly packed brown sugar
1/2 teaspoon cinnamon
1/2 teaspoon ground ginger
Preheat the oven to 350°F (180°C, or gas mark 4). Lightly grease a 9-inch (23-cm) springform pan.
To make the cake: In a saucepan, cook the apples in a little bit of water, just until they’re a little soft but not mushy.
In a bowl, using an electric hand mixer, cream together the butter and sugar. Add the applesauce and milk. Add the flour and baking powder. Stir until just combined.
Add the batter to the prepared pan. Arrange the apples in a circle on top of the cake.
To make the topping: In a bowl, mix together the sugar, cinnamon, and ginger. Sprinkle over the apples, covering the top of the cake.
Bake for 30 to 40 minutes, or until a wooden pick inserted into the center comes out clean. Let cool for 15 minutes before unmolding from the cake pan.
Yield: 8 to 10 slices
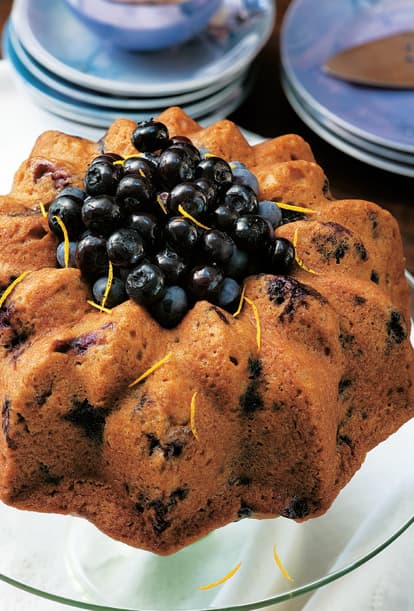
◁ BLUEBERRY ORANGE BUNDT CAKE
This is a lovely cake that cries out to be served at a tea party. You can also make Blueberry-Orange Muffins.
1 cup (145 g) blueberries, fresh or frozen
1/4 cup (115 g) silken tofu (soft or firm)
1/2 cup (120 ml) water
3/4 cup (175 ml) orange juice
1/2 cup (120 ml) canola oil
1 teaspoon lemon extract (or orange extract)
2 1/2 cups (315 g) all-purpose flour (or whole wheat pastry flour)
1 cup (200 g) granulated sugar
1 1/2 teaspoons baking soda
1/2 teaspoon salt
Zest from 2 oranges, optional
Preheat the oven to 350°F (180°C, or gas mark 4). Lightly oil a Bundt pan or muffin tins.
If using frozen blueberries, allow them to thaw slightly, about 15 minutes at room temperature.
In a blender, combine the tofu, water, juice, oil, and extract until smooth.
In a separate bowl, combine the flour, sugar, baking soda, salt, and zest, if using. Make a well in the center of the flour, pour the wet mixture into the center, and mix just until combined. Do not overstir. Fold in the blueberries (draining them a little if the frozen ones start to defrost).
Pour into the prepared pan. Bake for 45 to 50 minutes for a cake, 20 to 25 minutes for muffins, or until a wooden pick inserted into the center comes out clean. Let cool in the pan for 10 minutes. Invert and cool on a wire rack.
Yield: 1 Bundt cake or 12 muffins
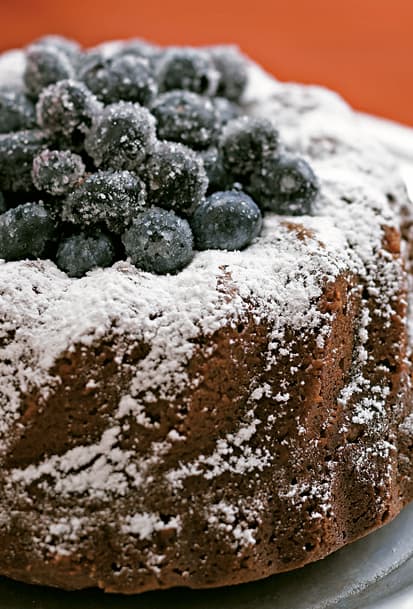
◁ BEET BUNDT CAKE
We use vegetables in other desserts (think carrot cake, zucchini bread, and pumpkin pie), so why not beets? No one would ever guess that the incredible moisture and beautiful color of this cake comes from an earthy root vegetable!
1/2 cup (120 ml) canola oil
1 1/2 cups (340 g) packed dark brown sugar
2 cups (450 g) puréed cooked (boiled or steamed) red beets (about 3 medium beets)
1/2 cup (90 g) nondairy semisweet chocolate chips, melted
1 teaspoon (5 ml) vanilla extract
2 cups (250 g) all-purpose flour
2 teaspoons (9 g) baking powder
1/4 teaspoon salt
Fresh blueberries, optional
Confectioners’ sugar
Preheat the oven to 375°F (190°C, or gas mark 5). Lightly oil a Bundt pan.
In a bowl, cream together the oil and brown sugar. Add the beets, chocolate, and vanilla. Mix well.
In a separate bowl, combine the flour, baking powder, and salt. Add the flour mixture to the beet mixture. Stir until just combined.
Pour into the prepared Bundt pan. Bake for 45 minutes, or until a wooden pick inserted near the center comes out clean.
Cool in the pan for 10 minutes before removing to a wire rack. Cool completely. Top with the blueberries, if using. Dust with confectioners’ sugar.
Yield: 16 servings

◁ RED VELVET CAKE WITH BUTTERCREAM FROSTING
Also known as devil’s food cake, this dessert is characteristically known for its deep reddish brown color.
FOR THE CAKE BATTER:
3 1/2 cups (440 g) all-purpose flour (or whole-wheat pastry flour)
1 1/2 cups (300 g) granulated sugar
2 teaspoons (9 g) baking soda
1 teaspoon (6 g) salt
2 teaspoons (9 g) cocoa powder
2 cups (470 ml) nondairy milk (soy, rice, almond, hazelnut, hemp, or oat)
2/3 cup (155 ml) canola oil
3 tablespoons (45 ml) red food coloring
2 tablespoons (30 ml) white vinegar
2 teaspoons (10 ml) vanilla extract
Ground pecans, optional
FOR THE BUTTERCREAM FROSTING:
1/2 cup (112 g) nondairy, non-hydrogenated butter, at room temperature
3 cups (300 g) confectioners’ sugar
1 1/2 teaspoons (8 ml) vanilla extract
2 tablespoons (30 ml) nondairy milk (soy, rice, almond, hazelnut, hemp, or oat, or water)
Assorted food colors, optional
Preheat the oven to 350°F (180°C, or gas mark 4). Lightly oil two 8-inch (20 cm) round cake pans.
To make the batter: In a large bowl, combine the flour, sugar, baking soda, salt, and cocoa. Create a well in the center. Add the milk, oil, food coloring, vinegar, and vanilla. Mix until thoroughly combined.
Divide the cake batter evenly between the prepared cake pans. Place the pans in the oven spaced evenly apart. Bake for about 35 minutes, rotating 45 degrees halfway through, or until the cakes pull away from the side of the pans and a wooden pick inserted into the center of each comes out clean.
Let the cakes cool for 10 minutes in the pans. Run a knife around the edges to loosen them from the sides. One at a time, invert the cakes onto a plate and then reinvert onto a cooling rack, rounded-sides up. Let the cakes cool completely.
To make the frosting: In a bowl, using an electric hand mixer, cream the butter until it is smooth and begins to fluff. With the mixer on low speed, add the sugar. Fluff for another few minutes. Add vanilla, milk, and food coloring, if using.
Once all of the ingredients are well combined, beat the frosting on high speed for 3 to 4 minutes, or until it’s light and fluffy. To achieve the desired consistency, add l or 2 tablespoons (15 to 20 ml) additional milk. Cover the icing with plastic wrap to prevent it from drying out until ready to use. Rewhip before using.
To frost the cake: Place one layer, rounded-side down, on a plate or cake stand. Using a palette knife or offset spatula, spread some frosting over top of cake. Carefully set other layer on top, rounded-side down, and repeat. Cover cake with remaining frosting. Sprinkle with pecans, if using.
Yield: 8 to 10 servings

◁ RUM PLANTAIN CAKE
This cake is a lot like a baked sticky pudding (think date or fig pudding) with an irresistible outer crust and notes of rum and sweetly ripened plantain.
1 cup (225 g) packed brown sugar
3 very ripe (blackened) plantains
1/3 cup (80 ml) melted coconut oil (or olive oil)
1 1/2 teaspoons vanilla extract
1/2 cup (120 ml) dark rum
1 cup (127 g) sorghum flour
1/2 cup (80 g) superfine brown rice flour
1/3 cup (68 g) sweet white rice flour
1 1/2 teaspoons xanthan gum
3 teaspoons (14 g) baking powder
1 teaspoon salt
1 cup (235 ml) + 2 tablespoons (28 ml) almond milk
3 tablespoons (45 ml) lime juice
Preheat the oven to 350°F (180°C, gas mark 4). Lightly grease and flour a standard-size tube pan.
In a large bowl, mash together the sugar, plantains, and oil. Stir in the vanilla and rum.
In a small separate bowl, whisk together the flours, xanthan, baking powder, and salt. Slowly add the flour mix into the plantains, alternating with the milk, adding a little at a time until all is well mixed. Once all the milk and flour have been added, stir in the juice.
Pour the batter into the prepared pan. Bake for about 1 hour and 25 minutes, or until the outside crust is thick and chewy but the middle is still soft. Let cool completely. Store in the refrigerator.
Yield: 12 servings

◁ CHILEAN-STYLE SWEET GINGER CAKE
This spongy and irresistible cake is studded with crystallized ginger and raisins, which make for a very sweet and sophisticated treat.
2/3 cup (150 g) vegan margarine
3/4 cup (150 g) sugar
1 teaspoon vanilla extract
2 to 3 teaspoons (3 to 8 g) fresh grated ginger
1/3 cup (30 g) tapioca flour
1/2 teaspoon salt
1 teaspoon xanthan gum
3 teaspoons (14 g) baking powder
2 cups (240 g) gram flour
1/4 cup (80 ml) agave
1 1/2 cups (355 ml) almond milk
1/2 cup (48 g) crystallized ginger
1/2 cup (75 g) raisins
Preheat the oven to 350°F (180°C, gas mark 4). Lightly grease and (gram) flour a medium metal tube or Bundt pan or six large muffin tins.
In a large bowl, cream together the margarine, sugar, and vanilla until smooth. Add the fresh ginger, tapioca flour, salt, xanthan, and baking powder. Add the gram flour, agave, and milk. Mix vigorously for about 2 minutes, or until smooth. Fold in the crystallized ginger and raisins until well mixed.
Spoon the batter into the prepared pan. Bake for 50 minutes, or until golden brown on the top and a wooden pick inserted into the middle of the cake comes out clean. Let cool completely before attempting to remove from the pan. Using a butter knife, loosen the cake gently and then invert to remove from the pan.
Yield: 1 standard Bundt cake or 6 large muffins

◁ PIÑA COLADA CUPCAKES
These cupcakes bring a taste of the Caribbean right to your kitchen with a pineapple cupcake base and an intensely flavorful coconut rum icing. Don’t forget the cocktail umbrellas!
FOR THE CUPCAKES:
3/4 cup (180 g) nondairy margarine, melted
1 cup (200 g) sugar
1/2 cup (80 g) crushed pineapple, well drained (Reserve the juice for the frosting.)
1 teaspoon baking powder
1/2 teaspoon salt
1 cup (130 g) sorghum flour
1/2 cup (65 g) cornstarch
1 teaspoon xanthan gum
1/4 cup (60 ml) light rum
1/4 cup (60 ml) nondairy milk
3 tablespoons (45 ml) apple cider vinegar
FOR THE FROSTING:
1/2 cup (95 g) coconut oil, at room temperature (firm)
2 tablespoons (30 g) nondairy margarine
2 1/4 cups (270 g) confectioners’ sugar, divided
2 tablespoons (30 ml) pineapple juice (Reserved from the canned pineapple in the cupcakes.)
1 teaspoon rum extract
2 teaspoons coconut extract
To make the cupcakes: Preheat the oven to 350°F (180°C, or gas mark 4). Grease or line 9 cups of a standard-size cupcake pan.
In a large bowl, combine the margarine, sugar, and pineapple.
In a separate bowl, combine the baking powder, salt, flour, cornstarch, and xanthan.
In a small bowl, combine the rum and milk.
Gradually add the flour mixture to the margarine mixture about 1/4 cup (30 g) at a time. After each addition of flour, add a little of the milk mixture. Repeat until all of the flour and liquid have been added. Mix vigorously until smooth. Add the vinegar 1 tablespoon (15 ml) at a time.
Divide the mixture among the cupcake liners. Bake for 25 minutes, or until a wooden pick inserted into the middle comes out clean. Let cool completely on a wire rack before frosting.
To make the frosting: In a bowl, using an electric mixer, beat the oil, margarine, and 1 cup (120 g) of the sugar until smooth. Add 1 cup (120 g) more of the sugar. Gradually add the juice, rum, and coconut. Whip on the highest speed until fluffy. Add the remaining 1/4 cup (30 g) sugar. Beat until stiff.
Using a pastry bag or a small plastic bag with a corner cut off, or with an offset spatula, pipe the frosting onto the cupcakes. Store the cupcakes in an airtight container in the fridge.
Yield: 9 cupcakes
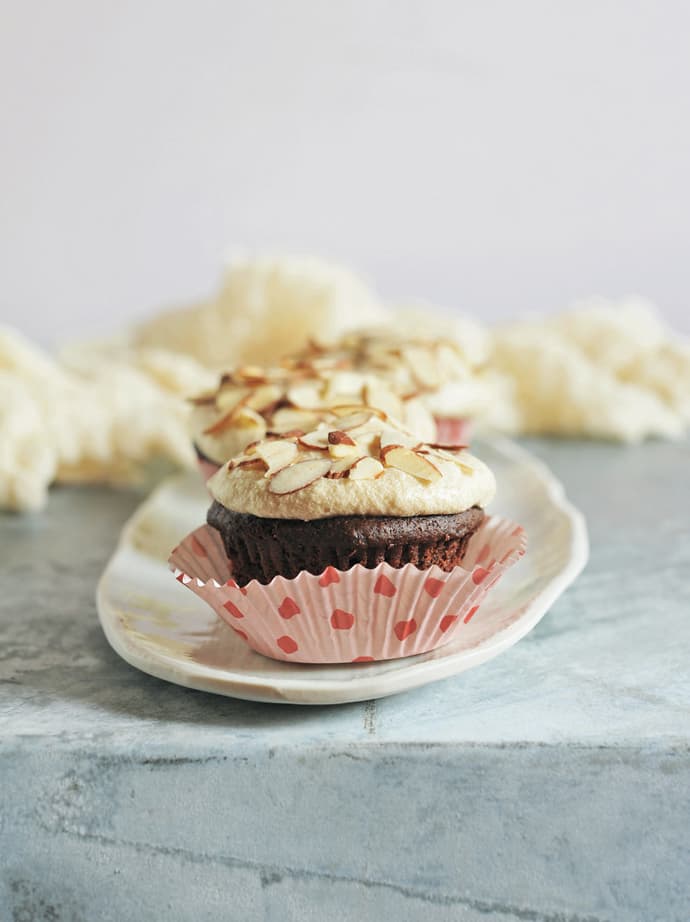
◁ AMARETTO CUPCAKES
There are hundreds upon hundreds of kid-friendly cupcake recipes out there. This is not one of them. This sophisticated cupcake is made for grown-ups! The cupcake itself has no added fat, so if you are watching your fat, you can make these without frosting, or try the Chocolate Ganache. (See here.) For a nice decorative touch, sprinkle the tops with sliced or slivered almonds
FOR THE CUPCAKES:
1 cup (235 ml) almond milk
2 tablespoons (30 ml) white vinegar
1/2 cup (120 ml) amaretto liqueur (such as DiSaronno)
1 teaspoon vanilla extract
1/2 cup (100 g) evaporated cane juice (or granulated sugar)
2 cups (250 g) all-purpose flour
1/2 cup (40 g) unsweetened cocoa powder
1 teaspoon baking soda
1/2 teaspoon baking powder
1/2 teaspoon salt
1/4 teaspoon ground cardamom
FOR THE FLUFFY ALMOND VANILLA FROSTING:
1/2 cup (112 g) nondairy butter
1 teaspoon vanilla extract
2 to 5 cups (240 to 600 g) powdered sugar, as desired
1/2 cup (120 ml) amaretto liqueur (such as DiSaronno)
To make the cupcakes: Preheat the oven to 350°F (180°C, or gas mark 4). Line a standard muffin tin with cupcake papers.
In a small bowl, mix the milk and vinegar. (It will curdle and become like buttermilk.) Stir in the amaretto, vanilla, and cane juice.
In a large bowl, sift together the flour, cocoa, baking soda, baking powder, salt, and cardamom.
Add the wet ingredients to the dry ingredients. Stir to combine. Don’t overmix.
Fill the cupcake papers three-quarters full with the batter. Bake on the center rack for 18 to 20 minutes, or until a wooden pick inserted in the center comes out clean. Remove from the oven, allow to cool enough to transfer to a cooling rack, and cool completely before frosting. (This step is important to prevent the bottoms of your cupcakes from getting soggy.)
To make the frosting: In a bowl, beat the butter and vanilla with an electric mixer until smooth. Add the sugar, 1 cup (120 g) at a time, until the desired consistency is reached. (For a thinner icing use 2 to 3 cups [240 to 360 g]; for a fluffy, pipeable frosting use 4 to 5 cups [480 to 600 g].) Add the liqueur 1 tablespoon (15 ml) at a time as needed to taste and for the desired consistency
Yield: 12 cupcakes
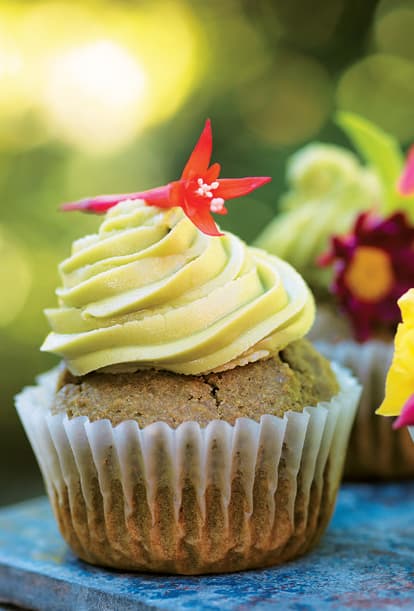
◁ GREEN TEA AND PISTACHIO CUPCAKES
The green color from the matcha tea is breathtaking, and these cupcakes are absolutely moist and magnificent.
FOR THE CUPCAKES:
2 cups (240 g) all-purpose flour (or whole wheat pastry flour)
1/2 to 3/4 cup (100 to 150 g) granulated sugar
2 tablespoons (18 g) plus 1 teaspoon powdered green tea (such as matcha)
1/2 teaspoon ground cinnamon
1 1/2 teaspoons baking powder
1/2 teaspoon salt
1 cup (235 ml) nondairy milk (such as almond, soy, rice, hazelnut, hemp, or oat)
1/3 cup (80 ml) canola oil
1 teaspoon pure vanilla extract
FOR THE GREEN TEA FROSTING:
1/2 cup (112 g) nondairy, non-hydrogenated butter
1 1/2 cups (150 g) confectioners’ sugar, sifted
1 teaspoon powdered green tea (such as matcha)
3 to 4 tablespoons (45 to 60 ml) nondairy milk (such as almond, soy, rice, hazelnut, hemp, or oat), divided
1/4 teaspoon pure vanilla extract
1/8 teaspoon almond extract
1/2 cup (63 g) coarsely ground pistachio nuts
To make the cupcakes: Preheat the oven to 350°F (180°C, or gas mark 4). Lightly oil a muffin tin or fill with cupcake liners.
In a large bowl, combine the flour, sugar, green tea, cinnamon, baking powder, and salt.
Create a well in the center of the dry ingredients. Pour in the milk, oil, and vanilla. Stir to combine, breaking up any large lumps and being careful not to overstir.
Distribute the batter among the 12 prepared muffin cups. Bake for 20 minutes, or until a wooden pick inserted into the center comes out clean. Let cool on a rack.
To make the frosting: Meanwhile, in a bowl, using an electric hand mixer, cream the butter until smooth. Add the sugar, green tea, 2 tablespoons (30 ml) of the milk, vanilla, and almond. Beat for a few minutes until the frosting is light and fluffy, adding l or 2 tablespoons (15 or 30 ml) additional milk, if needed.
Cover the icing with plastic wrap. Store it in the fridge for about 1 hour. If the icing gets too warm in the kitchen, it will be thin rather than fluffy. Store it in a covered container in the fridge for up to 2 weeks. Rewhip before using.
When ready to use, frost each cupcake and top with the pistachios.
Yield: 12 cupcakes
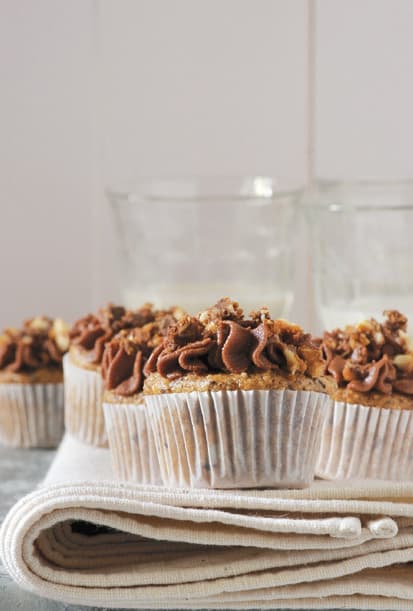
◁ FULL-O-NUTS MINI CUPCAKES
Do you remember the pretty famous (and not vegan) milk chocolate candies that have finely chopped hazelnuts in them? We’re told these tender, finger-friendly little cakes are reminiscent of the candies in question. If you’re not a fan of hazelnuts, you can make them with almonds instead. The longer these sit, the more their flavor develops.
FOR THE CREAM FILLING:
1/2 cup plus 1/3 cup (146 g) vegan semisweet chocolate chips, divided
1/2 cup (130 g) Cashew Almond Spread—Fig and Nut Canapes)
1/4 cup plus 2 tablespoons (75 g) coconut cream, scooped from the top of a chilled can of full-fat coconut milk
1/4 cup (30 g) vanilla-flavored powdered (—Vanilla cream tartlets) or regular powdered sugar
1/2 teaspoon pure almond extract
FOR THE CUPCAKES:
1/2 cup plus 2 tablespoons (150 g) vegan yogurt (plain or vanilla)
3/4 cup (144 g) evaporated cane juice
1/4 cup (60 ml) plain or vanilla nondairy milk
1/4 cup (60 ml) neutral-flavored oil
1/2 teaspoon salt
1 teaspoon vanilla extract
1 cup (120 g) whole wheat pastry flour
1 cup (120 g) shelled hazelnuts (or whole nonskinned almonds)
2 tablespoons (16 g) cornstarch
1 1/2 teaspoons baking powder
1/2 teaspoon baking soda
1/2 cup (88 g) chopped vegan chocolate
1 recipe cream filling
To make the cream filling: In a double boiler, melt 1/2 cup (88 g) of the chocolate chips over medium heat, stirring until smooth. (If you don’t have a double boiler, simply place a metal mixing bowl over a pot of simmering water.) Be careful not to get any of the water in the chocolate, or it will seize.
In a food processor, process the spread, coconut cream, sugar, almond, and chocolate until perfectly smooth and combined, scraping down the sides with a rubber spatula. Transfer to a medium bowl. Cover with a lid or plastic wrap. Refrigerate for 4 hours to thoroughly firm up.
To make the cupcakes: Preheat the oven to 350°F (180°C, or gas mark 4). Line 42 cups of two mini muffin pans with paper liners.
In a medium bowl, combine the yogurt, cane juice, milk, oil, salt, and vanilla.
In a food processor, process the flour and hazelnuts until the hazelnuts are very finely ground. Transfer to a large bowl, and combine with the cornstarch, baking powder, and baking soda. Pour the wet ingredients into the dry ingredients. Stir just until combined. Gently fold the chocolate into the batter.
Divide the batter among the lined cups, about 2 1/2 teaspoons per liner, filling the liners about two-thirds full. Do not overfill the liners. Bake for 18 to 22 minutes, or until the tops are lightly browned and spring back when touched.
Remove the cupcakes from the muffin pans. Let cool completely on a wire rack. Store in an airtight container at room temperature.
Spread or pipe a small amount of cream filling onto each cupcake
Yield: 42 mini cupcakes
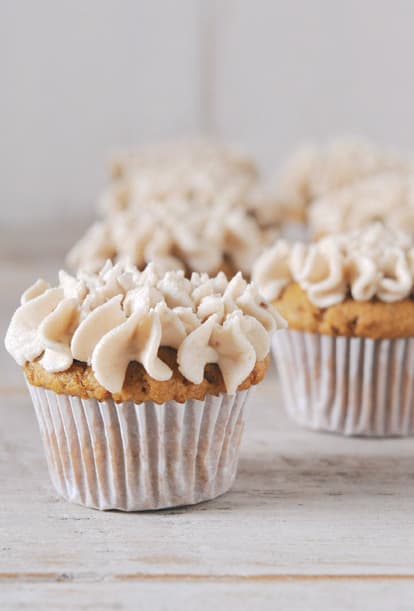
◁ MINI RUM RAISIN CUPCAKES
Hopefully, you’re not tired of the vegan cupcake revolution yet (imagine us looking at you in disbelief if you actually are), because we just couldn’t not include a few mini cupcake recipes to make the dessert chapter of this cookbook complete.
FOR THE CUPCAKES:
1/2 cup (80 g) raisins
1/2 cup (120 ml) dark rum
1/2 cup (120 ml) vegan milk
1/4 cup (60 ml) neutral-flavored oil
1/2 cup plus 2 tablespoons (120 g) Sucanat
1 1/2 teaspoons vanilla extract
2 cups (240 g) whole wheat pastry flour
1 teaspoon baking powder
1 teaspoon baking soda
1 teaspoon ground nutmeg
1/2 teaspoon fine sea salt
FOR THE FROSTING:
6 tablespoons (84 g) vegan butter, softened
6 tablespoons (78 g) vegan shortening
2 1/4 cups (270 g) powdered sugar
Generous 1/4 teaspoon maple extract (or 1/2 teaspoon pure vanilla extract and 1/4 teaspoon ground cinnamon)
1/8 teaspoon salt
To make the cupcakes: In a small saucepan, bring the raisins and rum to a boil. Remove from the heat immediately. (Or in a microwave safe bowl, heat for 30 seconds and remove from the oven.) Let stand for about 10 minutes so the raisins plump up and the mixture cools.
Preheat the oven to 325°F (170°C, or gas mark 3). Line 40 cups of two mini muffin pans with paper liners.
In a large bowl, combine the rum mixture, milk, oil, Sucanat, and vanilla.
Into a medium bowl, sift the flour, baking powder, baking soda, nutmeg, and salt. Add to the wet ingredients. Stir until just combined.
Fill each paper liner about two-thirds full. Bake for 12 to 14 minutes, or until a wooden pick inserted into the center comes out clean.
Place the cupcakes on a wire rack to cool completely before frosting.
To make the frosting: In a bowl, using an electric mixer, cream the butter and shortening. Slowly add the sugar, and beat until combined. Add the maple extract and salt. Beat for about 2 minutes, until fluffy.
Spread or pipe a small amount of frosting onto each cupcake.
Store the leftovers in an airtight container at room temperature for up to 2 days. Store the frosting leftovers in an airtight container in the refrigerator for up to 2 days. Allow to soften at room temperature to decorate the cupcakes just before serving.
Yield: 40 mini cupcakes

◁ COCONUT-GINGERED BLACK BEAN BROWNIES
These pressure cooker brownies are not very sweet, so consider serving them with your favorite vegan ice cream.
1 1/2 to 2 cups (300 to 400 g) dried black beans, soaked for 12 hours or overnight
6 tablespoons (90 ml) maple, date, or brown rice syrup, divided
1 (13.5-ounce, or 378 g) can light coconut milk
3/4 cup (184 g) no-sugar-added applesauce
2 teaspoons vanilla extract
1 tablespoon (8 g) freshly grated ginger (or 1 teaspoon ground ginger)
1/2 cup (60 g) cacao powder
1/2 cup (60 g) millet flour (or oat, quinoa, or sorghum flour)
2 tablespoons (20 g) chunks dark chocolate, chopped from a bar, divided
1/4 cup (30 g) chopped walnuts, divided
Preheat the oven to 350°F (180°C, or gas mark 4). Line a 9 × 9-inch (23 × 23 cm) baking dish with parchment paper.
Rinse and drain the beans. Add the beans, 2 tablespoons (30 ml) of the syrup, and the milk to the pressure cooker. Stir to combine. Cover and bring to pressure. Cook at high pressure for 12 minutes. Allow for a natural release. Remove the lid. If beans are not done, simmer uncovered for 5 to 10 minutes, or until cooked through.
Transfer the beans to a food processor fitted with an S blade. Process the applesauce, vanilla, ginger, and the remaining 4 tablespoons (60 ml) syrup until smooth. Add the cacao powder and flour. Blend until smooth, resembling cake batter. Add half of the dark chocolate and half of the walnuts. Quickly pulse (don’t blend) so the pieces are mixed in but still chunky.
Pour the batter into the prepared baking dish. Sprinkle the remaining half of the chocolate and walnut pieces on top. Bake for 40 to 50 minutes, or until a wooden pick inserted into the center comes out almost clean. (These brownies are fudgy, so the pick will still have some moist crumbs clinging to it.) If necessary, bake for 5 to 10 minutes longer.
Remove the brownies and the parchment paper from the baking dish. Let cool on a rack for 20 minutes.
Slice into squares.
Yield: 12 brownies
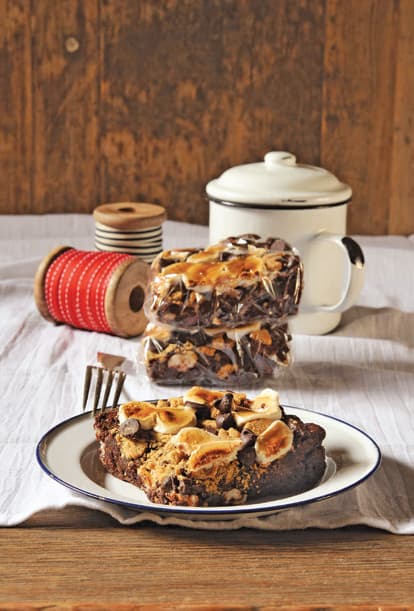
◁ S’MORE BROWNIES
Most graham crackers have honey in them. Unless you bake your own graham crackers, or have a good source for vegan ones, just use animal crackers instead.
1/4 cup (26 g) flaxseed meal
1/2 cup (120 ml) warm water
2 cups (250 g) all-purpose flour
1 cup (80 g) cocoa powder
1/2 teaspoon baking soda
1/2 teaspoon baking powder
1/4 teaspoon salt
1 cup (200 g) sugar
1/2 cup (120 ml) canola oil
1 banana, mashed
1 cup (235 ml) nondairy milk
1 teaspoon vanilla extract
2 cups (352 g) vegan chocolate chips
1 (10-ounce, or 283 g) package vegan marshmallows
1 cup (120 g) crushed vegan graham crackers, divided
Preheat the oven to 350°F (180°C, or gas mark 4). Coat a 9 × 13-inch (23 × 33 cm) baking dish with nonstick cooking spray.
In a small bowl, whisk together the flaxseed meal and warm water.
In a large bowl, sift together the flour, cocoa, baking soda, baking powder, and salt.
In a separate bowl, whisk together the sugar, oil, banana, milk, and vanilla until smooth. Add to the flour mixture and mix until well combined. Fold in the chocolate and half (5 ounces [142 g]) of the marshmallows.
Spread the mixture evenly into the prepared baking dish. Using the back of a spoon, smooth the top. Press the remaining marshmallows into the batter evenly across the top. Sprinkle the crackers evenly over the top.
Bake for 30 to 40 minutes, or until firm and the marshmallows are golden and browned.
(It’s hard to check for doneness with the wooden pick method, and all of the gooey goodness on top kind of makes it difficult to do the “dent” test, so you kinda have to jiggle the dish gently. It should be firm, not jiggly.
Allow to cool completely before cutting into squares.
Yield: 15 brownies
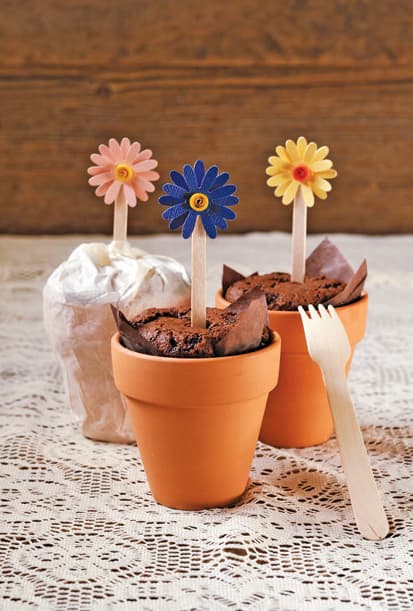
◁ “POT” BROWNIES
Sure, it’s a silly play on words, but it is a really cute way to make brownies!
Vegetable oil or melted shortening
1/2 cup (110 g) firmly packed brown sugar
1 1/2 cups (188 g) all-purpose flour
1/2 teaspoon baking soda
1/2 teaspoon baking powder
1/2 teaspoon salt
1/2 cup (40 g) unsweetened cocoa
1 cup (200 g) evaporated cane juice (or granulated sugar)
3/4 cup (180 ml) nondairy milk
1 cup (176 g) vegan semisweet chocolate chips
1/3 cup (80 ml) vegetable oil
1/3 cup (113 g) applesauce
2 teaspoons vanilla extract
Preheat the oven to 350°F (180°C, or gas mark 4). Prepare 8 unglazed 3-inch (7.5 cm) terra-cotta pots for baking. Remove any labels, rinse the pots in clean water, and allow them to dry. Do not wash with soap, because terra cotta is very porous and will absorb the detergent. Cut parchment paper or foil circles to fit into the bottom of the pot to cover the drainage hole. Brush the entire inside surface of the pots liberally with vegetable oil or melted shortening.
In a bowl, stir together the sugar, flour, baking soda, baking powder, salt, cocoa, and cane juice until well combined.
In a small saucepan, bring the milk to a boil. As soon as it begins to boil, add the chocolate and stir until completely melted. Remove from the heat and stir in the oil, applesauce, and vanilla.
Add the chocolate mixture to the dry ingredients. Stir until well combined.
Pour the batter into the prepared pots just under three-fourths full. Do not overfill or the brownies will spill over.
Place the pots on a baking sheet and bake for 55 to 60 minutes, or until a wooden pick inserted into the center comes out clean.
Allow to cool completely before packaging for gifts.
Yield: 8 pot brownies

◁ COCONUT BANANA FOUR-INGREDIENT BARS
Try out this recipe, and then experiment with your own healthy ingredients to put a personal twist on your bars! Just remember to keep things balanced, like this bar, with carbs (banana and dates), protein (walnuts), and a healthy fat (coconut butter). Dates help hold the bar together.
1 cup (80 g) dried banana chips
1 cup (178 g) chopped pitted dates
2 tablespoons (28 g) raw coconut butter
1 cup (100 g) raw walnuts
In a food processor, blend the banana chips, dates, and coconut for 1 to 2 minutes, or until blended.
Transfer the “batter” to a bowl.
In the food processor, pulse the walnuts until chopped.
Transfer the walnuts to the bowl with the dates and bananas. Fold all of the ingredients together evenly.
Place a piece of plastic wrap on a cutting board. Place the batter on top and cover it with another piece of plastic wrap. Using a rolling pin, flatten the batter into a 1/3-inch (1 cm) thick square.
Chill the batter in the fridge for at least 1 hour.
Unwrap the chilled bars and cut into 8 large bars or 16 small squares.
Store the bars wrapped in plastic wrap in an airtight container in the fridge or freezer.
Yield: 8 large bars or 16 small squares

◁ MANGO FRITTERS WITH COCONUT DIPPING SAUCE
You’ll need a deep fryer for these or a skilled hand at deep-frying in a pot. If that’s not too big of a concern, make these as soon as you can. You will not regret it.
FOR THE FRITTERS:
2 ripe mangoes
Vegetable oil
1/2 cup (88 g) yellow cornmeal
1/3 cup (42 g) plus 1/2 cup (65 g) potato starch, divided
1/2 cup (120 ml) almond milk
1/2 teaspoon salt
1 teaspoon ground cinnamon
Confectioners’ sugar
FOR THE DIPPING SAUCE:
1/2 cup (120 ml) crème de coco
1 tablespoon (15 ml) lime juice
Zest of 1 small lime
To make the fritters: Peel and remove the pits from the mangoes. Slice the fruit into strips about 1 inch (2.5 cm) wide.
Pour the oil into a deep fryer to a depth of 5 inches (13 cm) and bring to 360°F (182°C).
Meanwhile, in a small bowl, whisk together the cornmeal, 1/3 cup (42 g) of the starch, the milk, salt, and cinnamon to make a slightly thick batter.
Spread the remaining 1/2 cup (65 g) starch on a plate.
Line a plate with paper towels.
Dredge each piece of mango in the starch, and then immediately dip it into the batter to cover completely. Hold over the bowl to allow extra batter to drip from the mango pieces. Drop the mango immediately one by one into the hot oil. Fry for 4 minutes, or until golden brown. Using a skimmer, remove the mango from the hot oil and place on the prepared plate to drain. Repeat with the remaining fritters. Dust with the confectioners’ sugar. Let cool.
To make the dipping sauce: In a bowl, using an electric mixer, mix together the crème de coco, juice, and zest until fluffy.
Serve the fritters with the sauce.
Yield: 6 servings, 2 fritters each
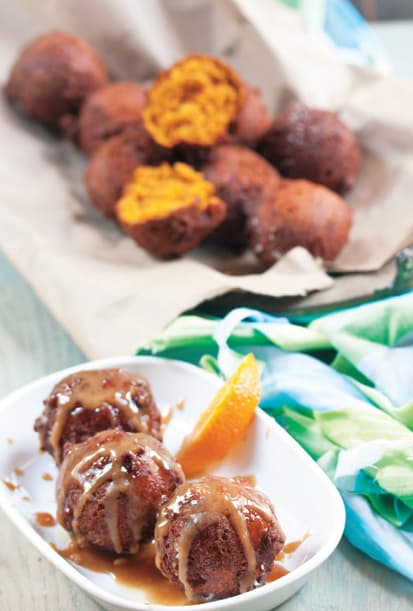
◁ PUMPKIN FRITTERS
Much like Chilean-style sopapillas, these fritters are inspired by the classic fritters of Latin American cuisine, which use pumpkin in their base. They are perfect with coffee or tea.
FOR THE PUMPKIN FRITTERS:
Vegetable oil
2 cups (490 g) puréed pumpkin
1 1/4 cups (150 g) gram flour
1/2 cup (64 g) cornstarch
3/4 cup (102 g) sorghum flour
1 teaspoon baking powder
1/2 teaspoon baking soda
1 teaspoon salt
FOR THE BROWN SUGAR SYRUP:
1/2 cup (115 g) packed brown sugar (or 1/2 cup [160 g] agave)
1 tablespoon (15 ml) orange juice
1 peeled orange slice
To make the Pumpkin Fritters: Preheat oil in a deep fryer to 360°F (182°C). Line a plate with paper towels.
In a large bowl, combine the pumpkin, gram flour, cornstarch, sorghum flour, baking powder, baking soda, and salt until a sticky batter forms.
Using an ice cream scoop, drop by 2-tablespoon (28 g) size balls into the heated oil. Let cook for 6 minutes, gently stirring to prevent them from sticking together.
Using a slotted spoon, remove the fritters from the oil. Drain them on the prepared plate.
To make the Brown Sugar Syrup: In a saucepan, warm the sugar, juice, and orange slice over low heat until the sugar is completely dissolved. Cook for 1 minute and then remove the orange slice.
Serve the Pumpkin Fritters with the Brown Sugar Syrup.
Yield: about 20 fritters

◁ CHERRY-APRICOT POCKET PIES
These flaky little pocket pies are the perfect treat to whip up when you’re craving a fruit-filled pastry, but pulling together an entire pie seems overwhelming.
FOR THE GLAZE:
1/2 cup (60 g) confectioners’ sugar
2 tablespoons (30 ml) nondairy milk
1 teaspoon corn syrup or agave nectar, plus more if needed
Vanilla extract (or other extract)
FOR THE FILLING:
2 cups (470 ml) water
1/3 cup (50 g) dried cherries
1 cup (150 g) chopped dried apricots
1/4 cup (50 g) plus 2 tablespoons (25 g) sugar, divided
1 1/2 tablespoons (12 g) cornstarch
2 teaspoons flaxseed meal
Dash of salt
1/4 teaspoon ground cinnamon
1 recipe Easygoing Pie Crust, chilled for at least 2 hours
Preheat the oven to 375°F (190°C, or gas mark 5).
To make the glaze: In a bowl, whisk the sugar and milk until smooth. Stir in the syrup until shiny. Add the vanilla.
To make the filling: In a medium saucepan, bring the water to a boil over high heat. Add the dried fruits and reduce the heat to medium. Cook for 5 to 7 minutes, or until the apricots are very soft but not mushy. Drain the fruit.
In a bowl, combine the fruit, 1/4 cup (50 g) of the sugar, the cornstarch, flaxseed, salt, and cinnamon.
Place the dough between 2 large pieces of parchment paper. Roll out to 1/4 inch (6 mm) thick. Using a large biscuit cutter or a small bowl (about 5 inches [13 cm] wide) turned upside down, cut out 6 circles of dough, gathering up the dough and rerolling as necessary.
Place about 2 tablespoons (30 g) of the filling onto half of each circle crust, leaving about a 1/2-inch (1.3 cm) edge around the filling. Fold the dough over the fruit filling, pressing together the edges to seal.
Using a fork, crimp the edges. Cut a few slits in the top of the crust. The dough will be slightly fragile, so handle with care. Sprinkle with the remaining 2 tablespoons (28 g) sugar. Place on an ungreased baking sheet.
Bake for about 28 minutes, or until lightly golden brown on the edges. Let cool. Drizzle with the glaze.
Yield: 6 pocket pies

◁ MANGO SAFFRON MOUSSE
This delicious mousse takes 5 minutes to put together, especially if you’re using frozen mangoes. Saffron and mango blend beautifully together, not only in terms of flavor but also in terms of color.
1 bag (10 ounces, or 280 g) frozen mangoes (or 1 small mango, cubed), thawed
1 box (12 ounces, or 340 g) organic silken tofu, firm or extra-firm
1/4 cup (50 g) sugar
3 drops saffron extract
In a blender, process the mangoes, tofu, sugar, and saffron until smooth.
Transfer to a container and refrigerate for at least 1 hour. This helps it set up but also provides the characteristic chill of a good mousse.
Yield: 3 cups (670 g)

◁ CHOCOLATE MOUSSE
You won’t miss the dairy in this quick, delicious, rich, and creamy mousse that’s also perfect as a pie filling.
1 cup (175 g) nondairy semisweet chocolate chips
12 ounces (340 g) silken tofu (soft or firm)
1/2 cup (120 ml) nondairy milk
1/2 teaspoon vanilla extract
Fresh berries for serving, optional
In a microwave-safe bowl, heat the chocolate in the microwave for 1 minute. Stir the chips and heat for 1 minute more. Stir again. (They should be melted. You can also melt the chocolate by creating your own double boiler. Place the chocolate in a small saucepan. Set this pan in a larger pot that’s filled with 1/4 to 1/2 cup [60 to 120 ml] water. Heat over medium heat on the stove and stir the chocolate in the small pot until it’s melted.)
In a blender, process the tofu, chocolate, milk, and vanilla until completely smooth, scraping down the sides and under the blade, if necessary.
Pour the mixture into serving bowls. Chill in the fridge for at least 1 hour. Add the berries just before serving, if using.
Yield: 6 servings
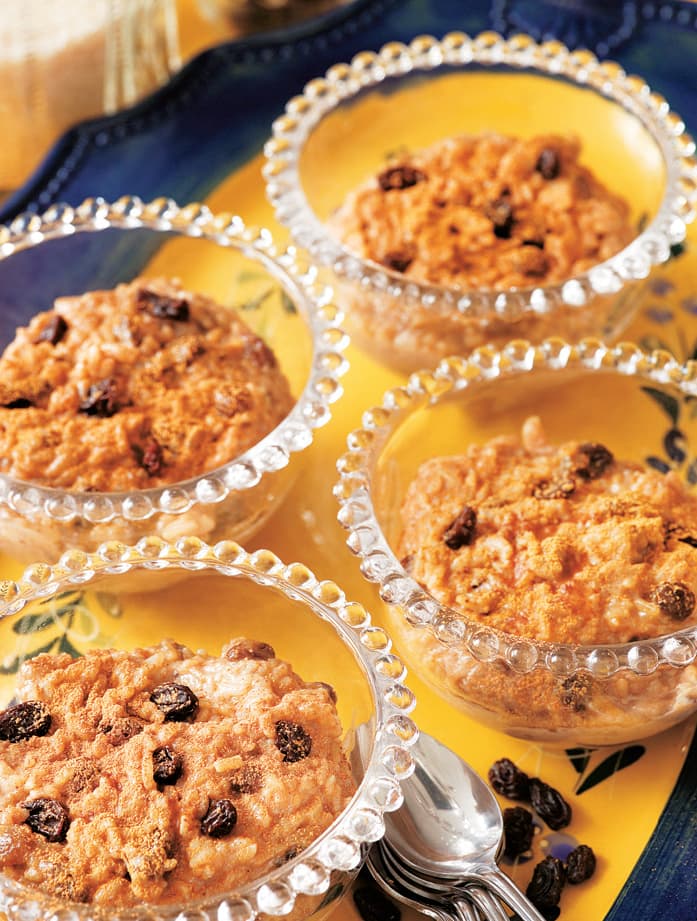
◁ RICE PUDDING
This is simplicity at its best. You can make it with any nondairy milk. If you’d like to be like the medieval Europeans, use almond milk, which was their top choice.
2 1/2 cups (590 ml) nondairy milk
1/3 cup (65 g) long- or short-grain white or brown rice
1/8 teaspoon salt
1/4 cup (50 g) sugar
1 teaspoon vanilla extract
1 teaspoon cinnamon, plus more for sprinkling
1/4 cup (35 g) raisins, optional
In a 3-quart (3.4-L) saucepan, combine the milk, rice, and salt. Place the saucepan over high heat and bring the mixture to a boil, watching so it doesn’t boil over. Reduce the heat to medium-low. Simmer for about 25 minutes, or until the rice is tender. Using a heatproof rubber spatula or wooden spoon, stir the rice frequently to prevent it from sticking to the bottom of the pan.
When the rice is tender, remove the saucepan from the heat. Add the sugar, vanilla, and the 1 teaspoon cinnamon. Return the saucepan to the heat. Cook for 5 to 10 minutes, or until the rice pudding thickens.
Remove from the heat. Add the raisins, if using. Spoon the pudding into serving bowls, sprinkle with cinnamon, and cover with plastic wrap. If you want a skin to form on the puddings, allow them to cool before covering with plastic wrap. Chill in the fridge for 1 to 2 hours.
Yield: 2 to 3 servings
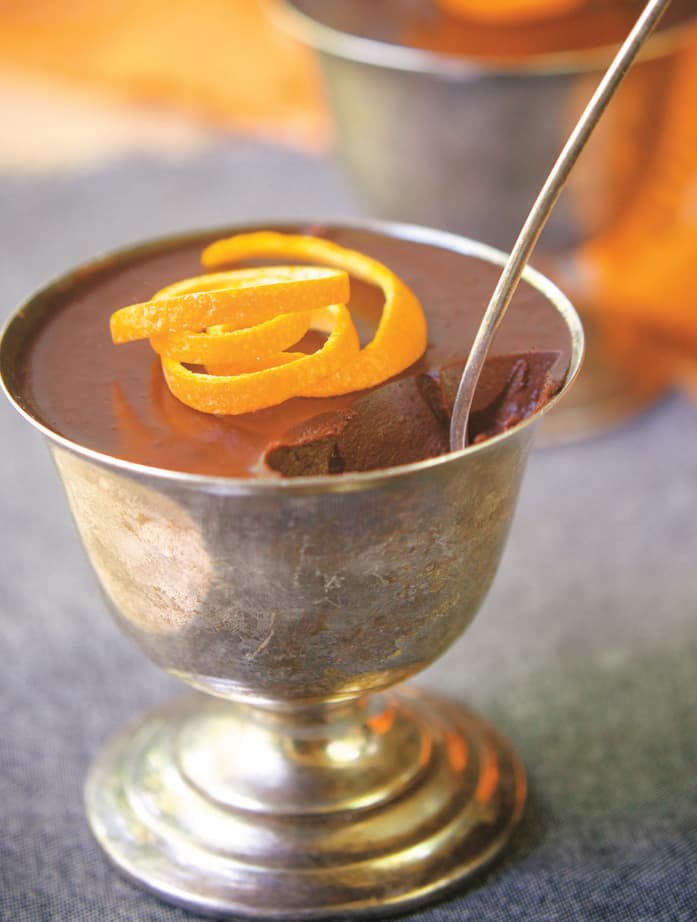
◁ DARK CHOCOLATE ORANGE CUSTARD
This is ridiculously easy, ridiculously rich, and oh so good. This custard is dense and delicious. It’s best reserved for an occasion when your taste buds deserve a little something special. This is best served cold.
1 tablespoon (6 g) orange zest
1 teaspoon vanilla extract
1 bag (12 ounces, or 340 g) nondairy chocolate chips
1 can (13.5 ounces, or 378 ml) coconut milk
In a large heat-safe bowl, combine the zest, extract, and chocolate.
In a small pan, bring the milk to a boil over medium heat. Pour the milk over the chocolate. Whisk together vigorously but carefully until smooth and uniform.
Transfer the mixture to 6 single-serving dishes and cover. Chill in the fridge for at least 3 hours, or until firm.
Yield: 6 servings
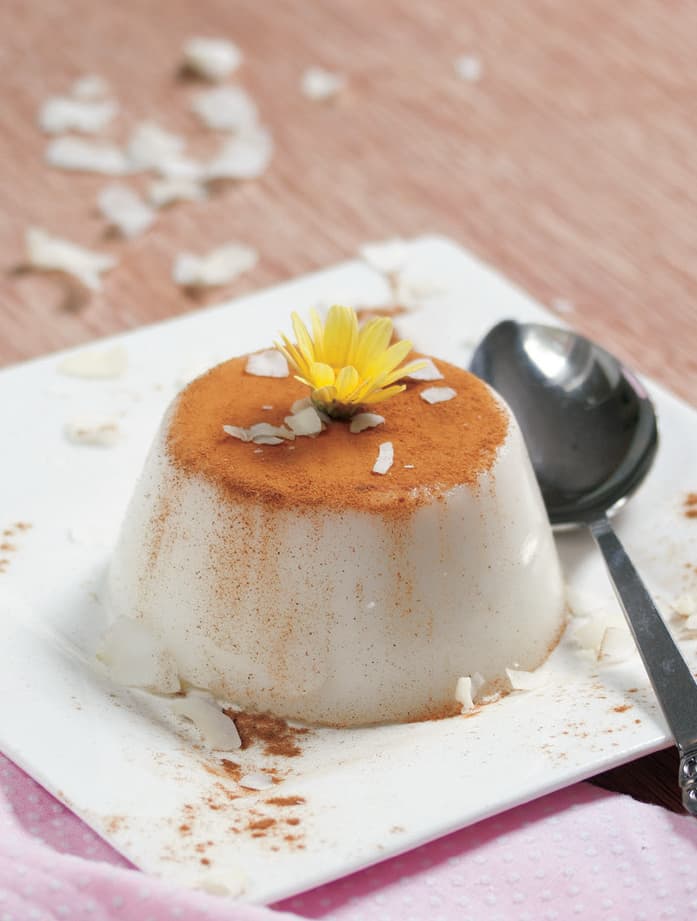
◁ COCONUT PUDDING
This creamy and slightly addictive coconut pudding is a classic dessert often eaten in Puerto Rico. You can place the easy and beautiful pudding in decorative molds, chill them overnight, and then invert them to capture intricate designs, although you can stick with the simple and very efficient large muffin pan, which generally fits 6 servings.
2 cans (13.5 ounces, or 400 ml each) coconut milk
2 cups (475 ml) water
2 cups (400 g) sugar
1 cup (128 g) cornstarch mixed with 1/2 cup (120 ml) water
1 teaspoon salt
1 teaspoon vanilla extract
1 tablespoon (15 g) equal amounts ground cloves, nutmeg, and cinnamon, mixed
Lightly grease 4 to 6 molds (large muffin tins work well) with coconut oil or nondairy margarine.
In a 2-quart (2 L) saucepan, combine the milk, water, and sugar. Cook over a little higher than medium heat for about 5 minutes, or until the mixture is hot. Add the cornstarch mixture, salt, and vanilla. Cook over medium heat for about 7 minutes, or until it thickens, stirring constantly with a whisk.
Pour the mixture into the prepared molds. Chill in the fridge overnight.
Invert onto a serving tray and dust with the cloves, nutmeg, and cinnamon mixture.
Yield: 4 large or 6 small servings
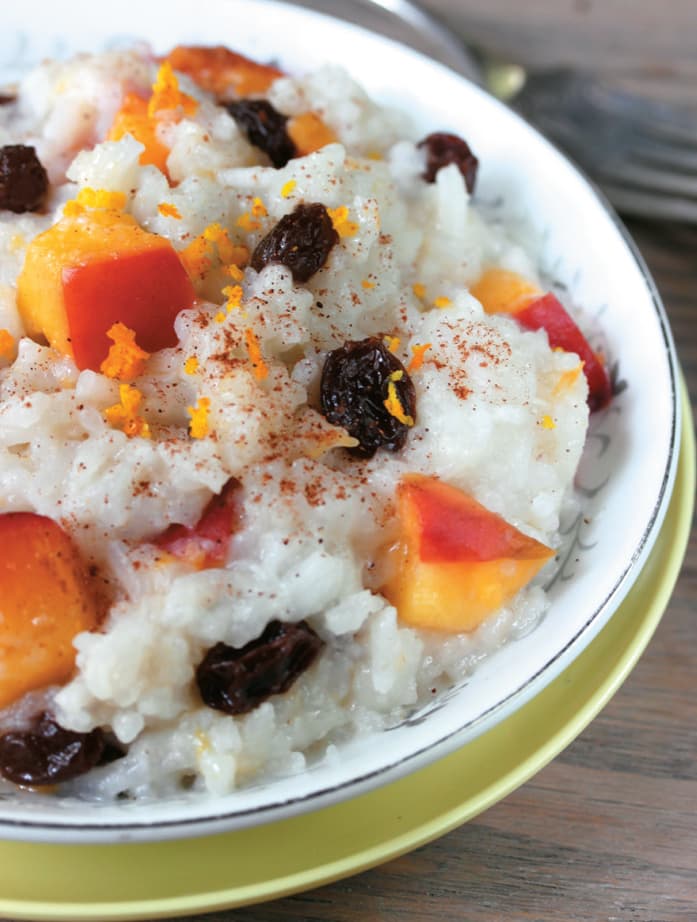
◁ COCONUT RICE WITH PEACHES AND RUM RAISINS
This recipe is a more exotic take on the average rice pudding with its extra-creamy texture and sweet and tart flavors of fruit laced throughout. For a non-boozy option, soak the raisins in 1/2 cup (120 ml) pineapple juice mixed with 2 teaspoons rum extract. Serve this hot or cold.
1/2 cup (120 ml) light rum
1 cup (145 g) raisins
2 cups (390 g) uncooked jasmine rice
4 cups (940 ml) water
1 can (13.5 ounces, or 378 ml) coconut milk
1 cup (200 g) sugar
Salt, to taste
2 or 3 ripe peaches, chopped
Ground cinnamon
The night before, in a small bowl, combine the rum and raisins. Cover. Chill in the fridge overnight.
In a 1 1/2-quart (1.4 L) saucepan, heat the rice, water, and milk over medium-high heat, stirring to combine. Bring the rice just to the beginning of a boil (not rolling). Reduce the heat to low and cover. Simmer for 20 to 25 minutes, or until all of the liquid has been absorbed and the rice is fluffy. Do not stir the rice while it is cooking and avoid lifting the lid more than absolutely necessary.
Once the rice is fully cooked, stir in the sugar. Season with salt.
In a small saucepan, cook the peaches and rum raisins with liquid over medium heat for about 2 minutes, or until the peaches are soft, stirring occasionally. Drain.
Gently stir the fruit into the rice. Sprinkle with a touch of cinnamon.
Yield: 8 servings

◁ FRUIT AND NUT RICE PUDDING
The ultimate comfort food, rice pudding is reimagined in the pressure cooker! Serve this pudding warm or chilled.
4 tablespoons (56 g) vegan butter
1 cup (190 g) Arborio rice
3 1/2 cups (822 ml) unsweetened vanilla almond milk
2 to 3 tablespoons (30 to 45 ml) maple, date, or brown rice syrup
1 teaspoon vanilla extract
1/2 teaspoon almond extract
1/4 teaspoon ground cinnamon, plus more for garnish
1/4 cup (35 g) golden raisins
1/4 cup (35 g) chopped dried apricots
1/2 cup (55 g) slivered almonds
In an uncovered pressure cooker heat the butter on medium. Add the rice and stir to cover. Stir in the milk. Cover and bring to pressure. Cook at high pressure for 7 minutes. Use a quick release.
Remove the cover and stir in the syrup, extracts, cinnamon, raisins, apricots, and almonds.
Sprinkle with more cinnamon.
Yield: 6 servings
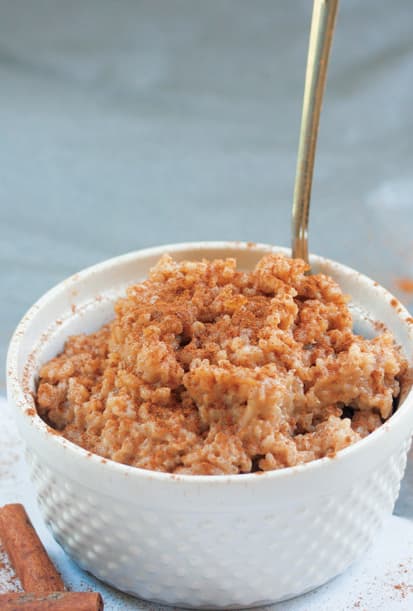
◁ BAMBARA PEANUT BUTTER RICE PUDDING
This easy and oh-so-peanutty dessert is a great way to use up any extra basmati rice you may have in your fridge. This porridge is a favorite for Central Africans, where they prepare it similarly using rice, peanut butter, and sugar.
2 cups (316 g) cooked jasmine rice, cold
1/4 cup (60 ml) coconut milk
1/4 cup (80 ml) agave or brown rice syrup, plus more for drizzling
1 teaspoon salt
1/2 cup (130 g) creamy natural peanut butter
1 cup (145 g) crushed peanuts
Cinnamon
In small saucepan, heat the rice, milk, agave, salt, and peanut butter over medium-low heat until warm and creamy. Garnish with more syrup. Top with peanuts and cinnamon.
Yield: 4 servings

◁ PINEAPPLE, MANGO, COCONUT, AND CHIA SEED PUDDING
This cool tropical treat is full of naturally sweet fruit goodness. It’s also packed full of omega-3 fatty acids from the chia. You’ll love the texture of the seeds.
2 to 3 cups (470 to 705 ml) canned coconut milk, divided
1 1/2 cups (280 g) frozen pineapple chunks, plus more for garnish, optional
1 1/2 cups (280 g) frozen mango chunks, plus more for garnish, optional
2 tablespoons (30 ml) lemon juice
1/2 cup (60 g) shredded coconut
1/2 cup (120 g) chia seeds
Zest of 1 lemon
Sweetener, to taste, optional
In a blender, purée 2 cups (470 ml) of the milk, the pineapple, mango, and juice until smooth. (It should be the consistency of a thin milkshake, not too thick.)
Pour the mixture into a bowl. Stir in the coconut, chia seeds, and zest. Cover and chill to thicken. Stir before serving. If needed, stir in extra milk to achieve desired consistency. Top with additional pineapple and mango chunks, if using. Sweeten, if desired.
Yield: 8 servings

◁ CHOCOLATE, COCONUT, AND CHIA PUDDING
This dessert is sweet and full of texture and healthy nutrients. From our beloved superfood coconut to the chia seeds, maple syrup, and raw cacao powder, it’s a powerhouse of a pudding! You can substitute unsweetened natural cocoa powder, if necessary. Serve chilled.
2 tablespoons (28 ml) maple syrup
1 to 2 teaspoons water
1 cup (235 ml) canned coconut milk
1 cup (235 ml) unsweetened vanilla-flavored almond milk
1/4 teaspoon ground cinnamon
1 tablespoon (15 g) unsweetened raw cacao powder
1/4 cup (50 g) chia seeds
In a medium bowl, combine the syrup and 1 teaspoon of the water. Whisk together to form a thin syrup. Add up to 1 additional teaspoon water, if necessary. Whisk in the coconut milk, almond milk, and cinnamon. Whisk in the cacao. Add the chia seeds and whisk them into the pudding mixture. Chill in the fridge for at least 4 hours and up to overnight to allow the pudding consistency to develop.
Yield: 2 servings

◁ CHOCOLATE CHIP COOKIES
When you make these cookies, don’t be surprised to hear “I’d never know this was vegan!” That’s the highest compliment for a vegan chef.
4 1/2 teaspoons Ener-G Egg Replacer (equivalent of 3 eggs)
6 tablespoons (90 ml) water 1 cup (225 g) nondairy, non-hydrogenated butter, softened
3/4 cup (150 g) granulated sugar
3/4 cup (170 g) firmly packed brown sugar
2 teaspoons vanilla extract
2 1/4 cups (280 g) all-purpose flour
1 teaspoon baking soda
1 teaspoon salt
1 to 2 cups (175 to 350 g) nondairy semisweet chocolate chips
1 cup (150 g) chopped nuts, optional
Preheat the oven to 375°F (190°C, or gas mark 5). Line a baking sheet with parchment paper.
In a food processor, whip the egg replacer and water together, until thick and creamy. (Blending it in a food processor or blender results in a better consistency than what you could get if you did it by hand.)
In a large bowl, cream the butter, granulated sugar, brown sugar, and vanilla. Add the egg replacer mixture to this wet mixture, and thoroughly combine.
In a separate bowl, combine the flour, baking soda, and salt. Gradually beat the flour mixture into the wet mixture until it begins to form a dough. When it is almost thoroughly combined, stir in the chips and nuts, if using.
Place spoonsful of the mixture onto the prepared baking sheet. Bake for 8 to 10 minutes, or until golden brown. Let cool on the baking sheet for 2 minutes. Remove to wire racks to cool completely.
Yield: 1 dozen cookies

◁ MEXICAN WEDDING COOKIES
These melt-in-your mouth cookies are called many names: Russian Tea Cakes, Mexican Wedding Cakes, Pecan Balls, Snowdrops, and Snowballs. They’re often baked during the winter holidays, but they’re also popular at weddings and other festive occasions.
1 cup (225 g) nondairy, non-hydrogenated butter
1/4 cup (50 g) granulated sugar
2 teaspoons vanilla extract
2 cups (250 g) all-purpose flour, sifted
2 cups (250 g) raw pecans, finely chopped
2 cups (200 g) confectioners’ sugar, sifted
Preheat the oven to 300°F (150°C, or gas mark 2). Line 3 cookie sheets with parchment paper.
In a bowl, using an electric hand mixer or by hand, cream the butter, granulated sugar, and vanilla for 1 to 2 minutes, or until light and fluffy. Add the flour, and mix until thoroughly combined. Add the nuts and mix for about 30 seconds, or until well blended.
Measure out generously rounded teaspoonfuls of dough and roll them into balls.
Place the balls about 1 inch (2.5 cm) apart on the prepared cookie sheets. Bake for about 30 minutes, or until they just begin to turn golden. To test for doneness, remove one cookie from the sheet and cut it in half. There should be no doughy strip in the center.
Place the confectioners’ sugar in a bowl.
Remove the cookies from the oven. Roll the cookies in the sugar while they are still warm, and then cool them on the cookie sheets.
Yield: 3 dozen cookies
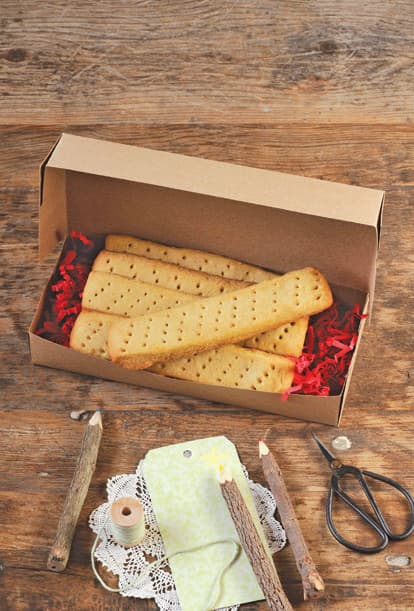
◁ SHORTBREAD FINGERS
Because the main flavor in these not-very-sweet cookies comes from nondairy butter, choose wisely. Some nondairy butters are not as yummy as others. Try Earth Balance Coconut Spread in these, but regular Earth Balance and Nucoa both work well, too.
1/2 cup (110 g) firmly packed brown sugar
1 cup (224 g) nondairy butter
1/4 teaspoon salt
2 1/4 cups (281 g) all-purpose flour, divided
Preheat the oven to 325°F (170°C, or gas mark 3). Line a baking sheet with parchment paper.
In a bowl, using an electric mixer, cream together the sugar and butter. Add the salt and mix to combine. Add 2 cups (250 g) of the flour and mix well. The mixture will be crumbly.
Turn the mixture out onto a floured work surface and knead for about 5 minutes, adding the remaining 1/4 cup (31 g) flour as needed to make a soft dough.
Roll out into a rectangle 5 × 12 inches (12.5 × 30 cm). Cut into twelve 1 × 5-inch (2.5 × 12.5 cm) fingers. Using a fork, prick the tops.
Arrange the fingers on the prepared baking sheet, spacing them 1 inch (2.5 cm) apart.
Bake for 20 to 25 minutes, or until golden. Allow to cool completely before removing from the baking sheet.
Yield: 12 fingers

◁ OATMEAL RAISIN COOKIES
The addition of the nutmeg makes these classics extra-special. Baked just right, they are moist and crispy at the same time and will fill your kitchen with a homey aroma. Rolled oats work best in these cookies, but you can use quick-cooking oats if that’s what you have on hand. The cookies will just be a little less chewy.
2 tablespoons (30 g) ground flaxseed (equivalent of 2 eggs)
6 tablespoons (90 ml) water
1 cup (225 g) nondairy, non-hydrogenated butter, softened
1 1/2 cups (340 g) firmly packed brown sugar
1/4 cup (50 g) granulated sugar
2 teaspoons vanilla extract
1 3/4 cups (220 g) all-purpose flour
1/2 cup (50 g) oat bran
3/4 teaspoon baking soda
3/4 teaspoon baking powder
1/2 teaspoon salt
1/2 teaspoon ground cinnamon
1/2 teaspoon ground nutmeg
3 cups (240 g) rolled oats
1 cup (145 g) raisins
Preheat the oven to 350°F (180°C, or gas mark 4). Lightly oil 3 cookie sheets or line them with parchment paper.
In a blender, whip the flaxseed and water until thick and creamy. The consistency will be somewhat gelatinous.
In a bowl, by hand or using an electric hand mixer, cream together the butter, sugars, vanilla, and flaxseed mixture until well blended.
In a separate bowl, thoroughly combine the flour, oat bran, baking soda, baking powder, salt, cinnamon, and nutmeg. Add to the butter mixture and mix until well blended and smooth. Stir in the oats and raisins until thoroughly combined.
Using a tablespoon, scoop up some dough and, with lightly greased hands, lightly press the cookies to form 1/2-inch-thick (1.3-cm) rounds. Bake for 12 to 15 minutes, or until the cookies are golden brown.
Remove from the oven and allow the cookies to firm up for a few minutes on the baking sheet. Transfer the cookies to a wire rack to cool.
Yield: 3 1/2 dozen cookies

◁ GAZELLE HORNS
The intoxicating flavor of almond dominates these filled cookies. Use plastic wrap to help roll the dough as thin as possible without tearing and cut off any excess dough from the tips once they have been rolled up or else you’ll have an uneven dough-to-filling ratio. You’re not going to want to miss out on this cookie’s almondy ambrosia, so don’t let the dough become too thick.
1 cup (160 g) superfine brown rice flour, plus 1 to 2 additional tablespoons (10 to 20 g) for kneading
1/4 cup (39 g) sweet white rice flour
1/2 cup (65 g) sorghum flour
1/2 cup (85 g) potato starch
2 teaspoons xanthan gum
1/4 cup (50 g) sugar
7 tablespoons (98 g) vegan margarine
1/2 cup (120 ml) ice-cold water
4 ounces (115 g) almond paste (Make sure it’s gluten free, such as Solo brand.)
1/3 cup (48 g) white sesame seeds
Preheat the oven to 400°F (200°C, gas mark 6).
In a large bowl, whisk together the flours, starch, xanthan, and sugar until well combined. Using a pastry blender, cut in the margarine until it’s evenly mixed into the dry ingredients. Form a well in the center of the flours.
Using a fork, stir in the water until a tacky dough is formed. Sprinkle the dough lightly with an additional 1 to 2 tablespoons (10 to 20 g) superfine brown rice flour. Knead until soft and pliable.
Chill the dough briefly in the fridge.
Between 2 sheets of plastic wrap, roll out the dough quite thin. Cut out a 4-inch (10 cm) square and place a small rounded cylinder of almond paste in the middle. Roll the dough up around the almond paste like a cigar and gently coax the dough into a half-moon shape around the filling. (This takes a bit of practice to get perfect, so don’t worry if yours look a little ragged around the edges the first time. They will still taste good!)
Using your fingertips, seal the dough.
In a small bowl, place the seeds. Press the tops of the rolled cookies into the seeds.
Place the cookies on an ungreased cookie sheet, about 1 inch (2.5 cm) apart. Bake for 25 minutes, or until the cookies are golden around the edges. Let cool completely.
Yield: 12 cookies

◁ ALMOND CRESCENTS
A simple almond-flavored, crescent-shaped shortbread cookie dusted with powdered sugar makes for an especially pleasing treat during the finger food–friendly holiday season. But these cookies taste so great, and the recipe is so straightforward, that you will probably make them all year long!
1/2 cup (60 g) almond meal
1 1/4 cups (150 g) whole wheat pastry flour
3 tablespoons (36 g) evaporated cane juice
1/4 teaspoon salt
1/4 cup (60 ml) light agave nectar or maple syrup
1/4 cup (56 g) solid coconut oil, melted
1 teaspoon almond extract
1/2 teaspoon vanilla extract
3 tablespoons (23 g) confectioners’ sugar
Preheat the oven to 325°F (170°C, or gas mark 3). Line a baking sheet with parchment paper.
In a food processor, pulse the almond meal, flour, cane juice, and salt. Add the agave nectar, oil, and extracts, pulsing to combine until a dough forms.
Place the dough on the prepared baking sheet. Knead it a couple of times. Using 1 packed tablespoon (20 g) of dough per cookie, form a log, then a small crescent shape, flattening it slightly so that the cookie bakes evenly. You can slightly wet your fingers with water to help make the shaping easier. Leave about 1 inch (2.5 cm) of space between the cookies.
Bake for 18 minutes, or until the cookies are golden brown around the edges and on the bottom. (Your nose will tell you when they’re just about ready to come out of the oven, so pay close attention.)
Carefully transfer the cookies to a wire rack to cool completely. Sift confectioners’ sugar over the cooled cookies.
Store leftovers in an airtight container at room temperature for up to 2 days.
Yield: 17 cookies
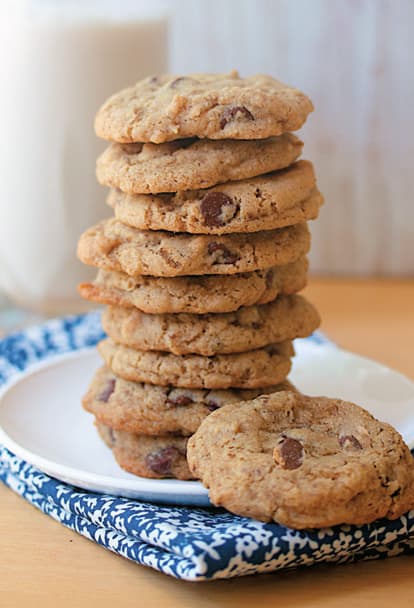
◁ SOULHAUS COOKIES
These chewy chocolate chippers are a delicious excuse to heat up your oven, and they will inevitably have a warming effect on your soul. Inspired by the classic Nestlé Tollhouse Cookie, these cookies alone make gluten-free vegan baking so very worth the extra flours required.
1 cup (225 g) nondairy margarine
3/4 cup (170 g) packed brown sugar
3/4 cup (150 g) granulated sugar
1 teaspoon salt
1 teaspoon baking soda
2 teaspoons vanilla extract
2 tablespoons (21 g) flaxseed meal mixed with 1/4 cup (60 ml) warm water
1 1/2 cups (195 g) sorghum flour
1 cup (158 g) brown rice flour
1/2 cup (65 g) tapioca starch
1 teaspoon xanthan gum
1 cup (175 g) nondairy chocolate chips
Preheat the oven to 375°F (190°C, or gas mark 5).
In a bowl, using an electric mixer, cream together the margarine, sugars, salt, baking soda, and vanilla. Stir in the prepared flaxseed meal.
In a separate, smaller bowl, combine the sorghum flour, brown rice flour, starch, and xanthan.
On low speed, gradually add the flour mixture to the sugar mixture until well combined. At first, your dough will be crumbly. Keep mixing (you may need to increase your speed a touch) until a soft cookie dough forms. Fold in the chocolate.
Chill the dough briefly in the freezer until cold.
Scoop about 1 tablespoon (15 g) of dough onto an ungreased baking sheet, leaving about 2 inches (2.5 cm) between each cookie. Chill extra dough in the fridge while waiting to bake.
Bake for 11 minutes and immediately remove them from the oven. The cookies will not look done at this point, but they are.
Cool completely on the baking sheet for up to 1 hour, or until the chocolate chips have returned to a firm state. (If you try to move them too soon, they will most definitely fall apart, so let them cool!)
Yield: 24 cookies
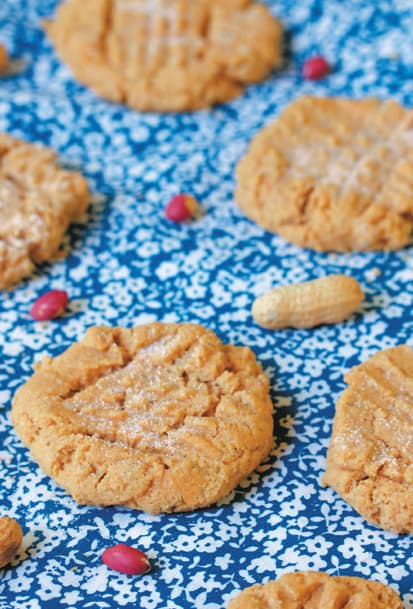
◁ PEANUT BUTTER COOKIES
Naturally flourless, these cookies pack in a whole lotta peanutty flavor, and they have a soft texture to boot! Be sure to let them cool completely before trying to pick them up, or they’ll most definitely crumble.
2 cups (500 g) smooth natural peanut butter
1 3/4 cups (350 g) sugar, plus extra for sprinkling
1 teaspoon salt
2 teaspoons baking soda
2 teaspoons vanilla extract
2 tablespoons (15 g) flaxseed meal mixed with 1/4 cup (60 ml) warm water
Preheat the oven to 350°F (180°C, or gas mark 4).
In a bowl, mix together the peanut butter, 1 3/4 cups (350 g) of the sugar, the salt, baking soda, and vanilla. Mix in the prepared flaxseed meal. Roll into 1-inch (2.5 cm) balls, place 2 inches (5 cm) apart on 2 ungreased baking sheets. Sprinkle the tops with the extra sugar.
Using a fork, flatten the cookies slightly to form a crisscross pattern.
Bake for 9 minutes, or until slightly golden brown on the edges. Let cool completely before removing from the baking sheets.
Yield: 20 cookies

◁ PEANUT BUTTER AND JELLY COOKIES
These cookies are perfect for a children’s party, a treat to send with your kids to school, or for those of us who still love this classic combination.
1/3 cup (75 g) nondairy, non-hydrogenated butter
1/2 cup (115 g) packed light brown sugar
1/2 cup (130 g) natural peanut butter (creamy or chunky)
2 tablespoons (30 ml) nondairy milk plus extra, if necessary (soy, rice, almond, hazelnut, hemp, or oat)
1 teaspoon (5 ml) vanilla extract
1 1/4 cups (160 g) all-purpose flour (or whole-wheat pastry flour)
3/4 teaspoon baking powder
2 to 3 tablespoons (40 to 60 g) strawberry (or any flavor you prefer) preserves or jam
Preheat the oven to 375°F (190°C, or gas mark 5). Line a baking sheet with parchment paper.
In a large bowl, beat the butter, sugar, peanut butter, milk, and vanilla until creamy.
In a small bowl, combine the flour and baking powder. Add the dry ingredients to the wet ingredients, and mix until combined.
Test the batter to make sure you can roll it into balls. If you need extra moisture, add a small amount (1 teaspoon [5 ml]) of nondairy milk.
Roll the batter into 1-inch (2.5 cm) balls. While holding a ball in one hand, use your other thumb to make a well in the center, flattening the ball but keeping it intact. Patch the ball as needed. (The sides may crack as you press into the center.) Place the flattened balls 2 inches (5 cm) apart on the prepared baking sheet.
Using a 1/4-teaspoon measuring spoon, fill the well in each cookie with the preserves.
Bake for 10 to 11 minutes. Remove the cookies from the oven, and let cool on the baking sheet for 2 minutes. Cool completely on a wire rack.
Yield: 2 to 2 1/2 dozen cookies

◁ SWEETHEART COOKIES
Because we love these cookies so much, we call them “sweetheart cookies.” We think you will agree.
1 cup (225 g) nondairy margarine
1 cup (200 g) sugar
2 tablespoons (14 g) flaxseed meal mixed with 1/4 cup (60 ml) warm water
1 1/2 teaspoons vanilla extract
1 1/4 cups (162 g) sorghum flour
3/4 cup (118 g) brown rice flour (Superfine is best, but not required.)
2/3 cup (86 g) potato starch
1 teaspoon xanthan gum
1 teaspoon baking powder
1/2 teaspoon sea salt
Preheat the oven to 400°F (200°C, or gas mark 6).
In a large bowl using an electric mixer, cream together the margarine and sugar until smooth. Add the prepared flaxseed meal and vanilla. Mix together gently.
In a separate bowl, sift together the sorghum flour, brown rice flour, starch, xanthan, baking powder, and salt. Gradually add the flour mixture to the margarine mixture and stir until all of the flour has been added. Mix vigorously (or on medium speed of an electric mixer) until the dough clumps together.
Drop the dough by rounded tablespoonsful (15 g) onto 2 ungreased cookie sheets about 2 inches (5 cm) apart. You should have 30 cookies.
Bake for 8 to 10 minutes, or until medium golden brown on the bottoms.
Transfer the cookies to a wire rack to cool completely.
Yield: 30 cookies
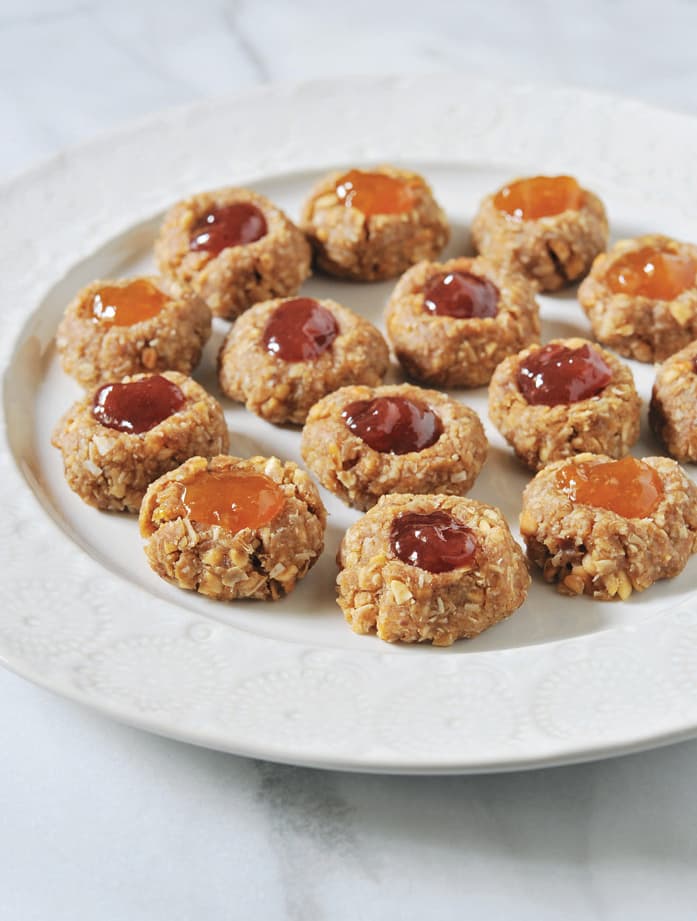
◁ NO-BAKE THUMBPRINT COOKIES
These cookies are easy to make, great for holidays, and absolutely delicious. Try a variety of different preserves each time you make them.
3/4 cup (110 g) pitted dates
Hot water
3 cups (245 g) rolled oats
1 1/2 cups (375 g) creamy almond butter (or peanut butter)
1/2 cup (40 g) shredded coconut
Zest of 1 orange
Juice of 1 orange
1/2 teaspoon ground cinnamon
1/8 teaspoon salt
3/4 cup (240 g) cherry or apricot fruit preserves
Line a rimmed baking sheet with parchment paper.
In a medium bowl, place the dates. Add hot water to the bowl until it just covers the dates. Set the bowl aside for 10 to 15 minutes to let dates become soft.
Meanwhile, in a food processor, pulse the oats until they are coarsely ground.
Transfer the oats to a large bowl.
In a blender, purée the dates and half of the soaking liquid until smooth. (If the dates aren’t blending easily, add more soaking water until it blends easily.)
To the bowl with the oats, add the dates, almond butter, coconut, zest, juice, cinnamon, and salt. Knead the mixture together to make a dough.
Take a small amount of dough and roll it into a ball. Place the ball onto the prepared baking sheet. Continued until you have rolled all of the dough.
Using your thumb, make an indentation in the middle of each dough ball to slightly flatten the dough and leave a well in the middle. Spoon a bit of the fruit preserves into each indentation. Chill the dough in the fridge for at least 1 hour.
Yield: about 2 dozen cookies
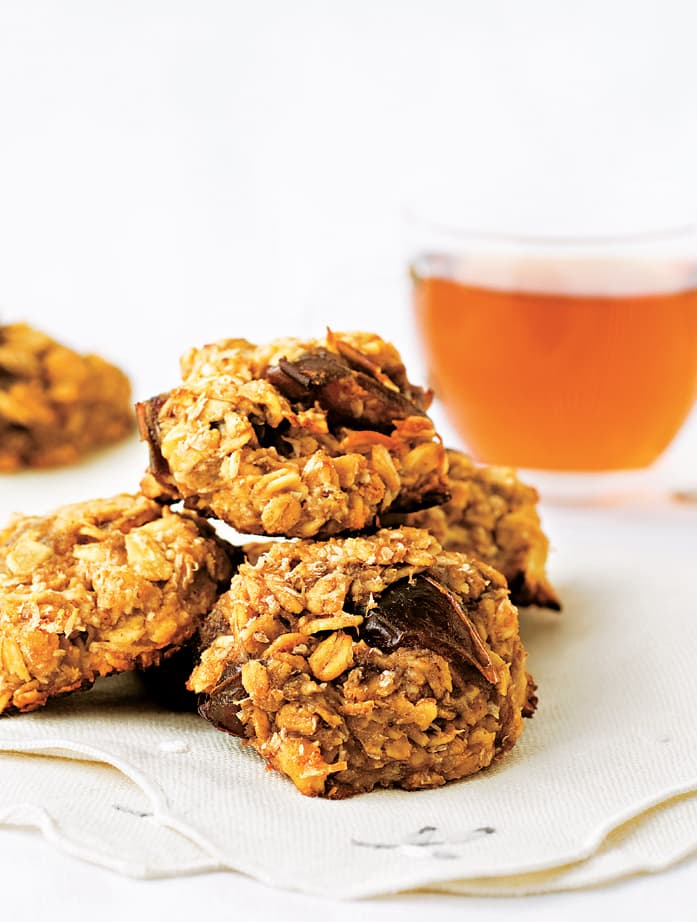
◁ BANANA OAT DATE COOKIES
Children and adults alike love this incredibly healthful, delicious, sugar-free cookie that can be put together in no time and nibbled throughout the day.
3 large ripe bananas
1 teaspoon vanilla extract
1/4 cup (60 ml) coconut butter or nondairy butter (such as Earth Balance), warmed until smooth
2 cups (160 g) rolled or quick-cooking oats
1/3 cup (23 g) unsweetened shredded coconut
1/2 teaspoon ground cinnamon
1/2 teaspoon salt
1 teaspoon baking powder
6 or 7 large dates, chopped (about 1/4 cup, or 38 g)
Preheat the oven to 350°F (180°C, or gas mark 4). Line 2 baking sheets with parchment paper.
In a large bowl, mash the bananas until smooth. (Alternatively, you may purée them in a blender.) Add the vanilla, coconut butter, oats, coconut, cinnamon, salt, and baking powder. Using your hands, mix until fully combined. Fold in the dates.
Drop dollops of the dough, each about 2 teaspoons in size, 1 inch (2.5 cm) apart, onto the prepared baking sheets. Press down a bit to flatten them to the desired size. (They won’t spread very much, so consider at this point what shape/size you want your finished cookies to be.) Bake for 15 minutes, or until the cookies are golden brown on the bottom.
Yield: 2 dozen cookies
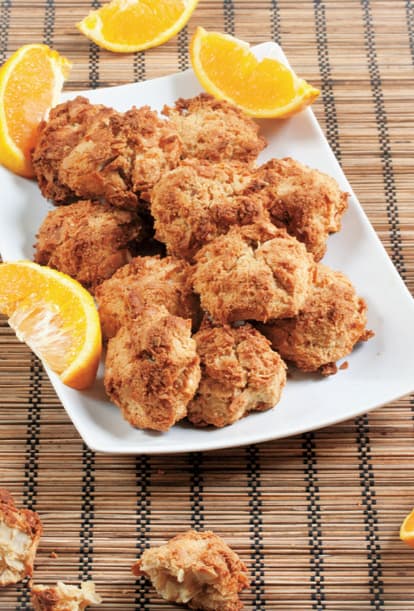
◁ SWEET COCONUT ORANGE COOKIES
These cookies resemble macaroons, but they also have the lovely addition of almond flavor, which adds a touch of sweetness and a lovely bite to the classic cookie.
2 cups (160 g) sweetened shredded coconut
1 cup (112 g) almond flour
1/2 cup (115 g) packed dark brown sugar
1/4 cup (60 ml) nondairy milk, plus more if needed
1 tablespoon (6 g) orange zest
Preheat the oven to 350°F (180°C, gas mark 4). Line a baking sheet with parchment paper.
In a large bowl, stir together the coconut, flour, sugar, milk, and zest until it comes together into a thick dough. At first it will seem crumbly, but the more you stir, the quicker it comes together. If needed, add a tablespoon (15 ml) or more milk to form the dough, but don’t add too much.
Divide the dough into 12 cookies and place them on the prepared baking sheet. Bake for 20 to 25 minutes, or until lightly golden brown on the edges. Let the cookies cool completely.
Yield: 12 cookies
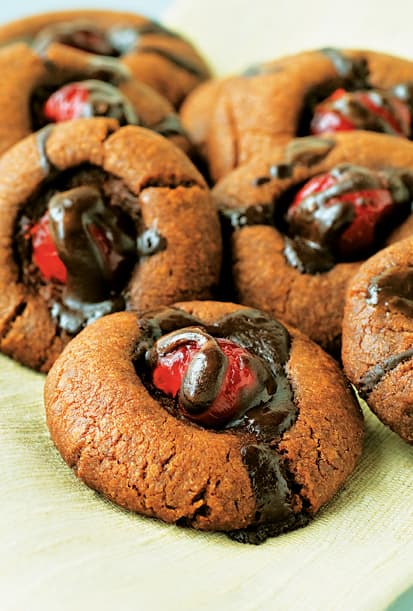
◁ CHOCOLATE CHERRY COOKIES
These cookies look as great as they taste.
1 tablespoon (7 g) ground flaxseed (equivalent of 1 egg)
3 tablespoons (30 ml) water
1/2 cup (112 g) nondairy butter, softened
1 cup (200 g) sugar
1 1/2 teaspoons vanilla extract
1 1/2 cups (180 g) all-purpose flour
1/2 cup (60 g) unsweetened cocoa powder
1/4 teaspoon baking soda
1/4 teaspoon baking powder
1/4 teaspoon salt
12 maraschino cherries, with juice
1/2 cup (88 g) nondairy chocolate chips (semisweet or dark)
1/4 cup (60 ml) nondairy milk (such as almond, soy, rice, hazelnut, hemp, or oat)
Preheat the oven to 350°F (180°C, or gas mark 4).
In a food processor, whip the flaxseed and water together for 1 to 2 minutes, or until thick and creamy. (You can do this by hand, but a food processor or blender does a quicker, better job.)
Transfer the “flax egg” to a medium bowl. Add the butter and sugar. Using an electric hand mixer, beat until the mixture is creamy and fluffy. Add the vanilla and mix well.
In a separate bowl, combine the flour, cocoa, baking soda, baking powder, and salt. Add the dry ingredients to the butter and sugar mixture. Using your hands, mix until just combined. (The batter might be too thick for the hand mixer.)
Roll the dough into twenty-four 1-inch (2.5 cm) balls. Place them 2 inches (5 cm) apart on 2 ungreased baking sheets.
Using your thumb, make an indentation in the center of each cookie.
Drain the cherries, reserving the juice. Remove the stems and cut the cherries in half. Place one cherry half into the indentation in each cookie.
In a small saucepan, heat the chocolate and milk over low heat, stirring, until the chocolate is melted. Stir in 4 teaspoons (20 ml) of the cherry juice. Spoon 1/2 to 1 teaspoon of the chocolate mixture over the top of each cherry, covering it completely.
Bake for 10 minutes, or until the cookies are firm to the touch and golden brown on the bottom. Transfer to a wire rack to cool.
Yield: 2 dozen cookies

◁ COOL LEMON COOKIES
These are reminiscent of the lemon coolers of years past. Sweet and tart and cool, these delicious little cookies are so yummy, you won’t mind the sugary mess on your fingers!
FOR THE COOKIES:
1/2 cup (60 g) confectioners’ sugar
1/2 cup (100 g) granulated sugar
1/3 cup (64 g) vegetable shortening
6 ounces (170 g) nondairy yogurt
1 teaspoon vanilla extract
1 teaspoon lemon extract
1/4 teaspoon salt
2 1/2 cups (313 g) all-purpose flour
1 1/2 teaspoons baking powder
1 teaspoon baking soda
FOR THE COATING:
1 cup (120 g) confectioners’ sugar
1 envelope (1/4 ounce, or 7 g) unsweetened lemonade drink mix powder, such as Kool-Aid
Preheat the oven to 325°F (170°C, or gas mark 3). Line 2 baking sheets with parchment paper.
To make the cookies: In a large bowl, combine the confectioners’ sugar, granulated sugar, shortening, yogurt, vanilla, lemon, and salt. Using an electric mixer, beat until creamy.
In a separate bowl, sift together the flour, baking powder, and baking soda. Slowly add to the sugar mixture and beat until smooth.
Drop spoonsful of about 1 ounce (28 g) of the dough onto the prepared baking sheets. Place 15 cookies evenly spaced on each baking sheet. Bake for 18 to 20 minutes, or until lightly browned.
To make the coating: Meanwhile, in a resealable plastic bag, place the sugar and drink mix. Shake to combine.
Remove the cookies from the oven. Let them cool on the baking sheets for about 5 minutes.
Place the cookies, about 4 or 5 at a time, in the bag. Shake to coat.
Yield: 30 cookies

◁ LEMON BARS
Think lemon meringue pie without the meringue! Who needs whipped egg whites anyway, when you can experience the sweet/tart lemon filling in a buttery shortbread crust?
FOR THE CRUST:
1/2 cup (112 g) non-hydrogenated, nondairy butter, at room temperature
1/4 cup (25 g) confectioners’ sugar
1 cup (125 g) all-purpose flour
FOR THE FILLING:
1/2 cup (112 g) silken tofu (soft or firm)
1 cup (200 g) granulated sugar
Zest of 2 lemons
1/3 cup (90 ml) lemon juice
2 tablespoons (8 g) all-purpose flour
1 tablespoon (8 g) cornstarch
Confectioners’ sugar, sifted
Preheat the oven to 350°F (180°C, or gas mark 4). Grease an 8 × 8-inch (20 × 20-cm) baking pan with nonstick cooking spray and sprinkle with a light dusting of all-purpose flour.
To make the crust: In a bowl, using an electric mixer, cream the butter and sugar until light and fluffy. Add the flour. Beat until the dough just comes together.
Press the dough into the bottom of the prepared pan. Bake for about 20 minutes, or until lightly browned. Remove from the oven and cool on a wire rack.
To make the filling: Meanwhile, in a food processor, blend the tofu for about 1 minute, or until creamy. Add the granulated sugar and blend until smooth. Add the zest, juice, flour, and cornstarch.
Pour the filling over the baked shortbread crust. Bake for about 20 minutes, or until the filling is set. Remove from the oven and cool on a wire rack.
Cut the bars into squares. Just before serving, dust with the sifted confectioners’ sugar. (Wait until you’re just about to serve the bars before you sprinkle them with the confectioners’ sugar. Otherwise, it will soak into the bars and you’ll miss out on that pretty presentation.)
The bars can be covered and stored in the refrigerator for up to 2 days.
Yield: 16 squares
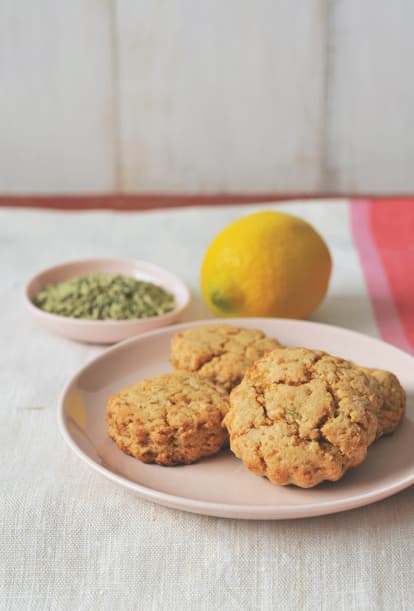
◁ LEMON-FENNEL SCONE BITES
These flaky, savory bites are so perfect when enjoyed straight from the oven that we feel they don’t need anything to accompany them. But if you really must, they will pair beautifully with any of our small plate vegetable recipes or with trays of vegan cheeses.
1 1/2 cups (180 g) whole wheat pastry flour
2 teaspoons baking powder
Generous 1/2 teaspoon salt
2 tablespoons (24 g) Sucanat
1/2 cup (128 g) tahini or other nut or seed butter
1/4 cup (60 ml) lemon juice
Zest of 1 lemon
2 small cloves garlic, minced
2 teaspoons fennel seeds
1/4 cup (60 ml) plain unsweetened vegan milk, plus more if needed
Preheat the oven to 400°F (200°C, or gas mark 6). Line a baking sheet with parchment paper.
In a food processor, combine the flour, baking powder, salt, and Sucanat. Add the tahini. Pulse a few times to combine. Add the juice, zest, garlic, and fennel seeds. Pulse a few times. Add the milk through the hole in the lid, 1 tablespoon (15 ml) at a time, while pulsing until a dough ball forms. The dough should be moist, but not too wet to handle. If it crumbles, pulse in a little more milk 1 teaspoon at a time.
Place the dough on another piece of parchment paper. Using your hands, pat it down to a little over 1/2-inch (1.3 cm) thickness. Avoid using a rolling pin, which would make for tough scones.
Using a 2-inch (5 cm) biscuit cutter, cut the dough into scones. Place them on the prepared baking sheet. Gather the scraps of dough and repeat the process to make approximately 16 scones and use all of the dough.
Bake for 12 to 14 minutes, or until golden brown around the edges on the bottom and light golden on top. Remove from the oven and let cool on a wire rack.
Store leftovers in an airtight container for up to 2 days. Toast leftovers slightly.
Yield: 16 small scones
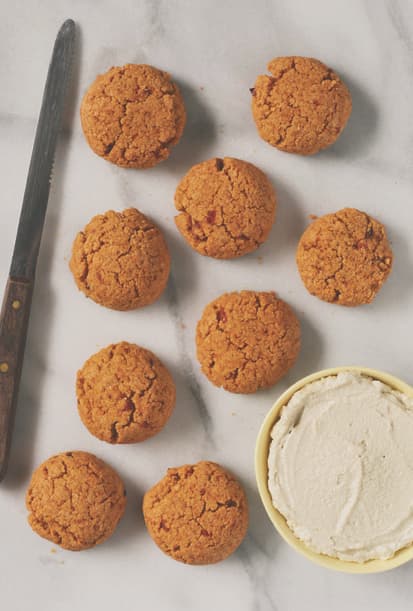
◁ MINI SAVORY SCONES
Although these scones may be on the smaller side, they sure pack a serious flavor punch! You might enjoy munching on them with a bowl of extra Cashew Almond Spread (—fig and nut canapés) on the side, sprinkled with a little extra salt.
2 cups (240 g) whole wheat pastry flour
1 tablespoon (12 g) baking powder
3/4 teaspoon salt
2 teaspoons mild to medium chili powder
2 teaspoons onion powder
3 large cloves garlic, minced
2 tablespoons (8 g) soft sun-dried tomato halves (not oil-packed)
1/2 cup (130 g) Cashew Almond Spread—fig and nut canapes)
2 tablespoons (30 ml) neutral-flavored oil
3 tablespoons (45 ml) unsweetened plain vegan milk, plus more if needed
Preheat the oven to 375°F (190°C, or gas mark 5). Line 2 baking sheets with parchment paper.
In a food processor, pulse the flour, baking powder, salt, chili powder, onion powder, garlic, and sun-dried tomatoes to mince the tomatoes and combine. Add the Cashew Almond Spread and oil and pulse to combine. Using a rubber spatula, scrape down the sides if needed. Add the milk and pulse to combine. The dough crumbs should hold together well when pinched. If the mixture is crumbly, add extra milk 1 teaspoon at a time, pulsing to combine.
Pack 1 tablespoon (20 g) with dough crumbs to make one scone. Place on the prepared sheets, and flatten just slightly. Repeat with the remaining dough to make about 27 scones.
Bake for 14 minutes, or until golden brown on the bottom. Transfer to a wire rack to cool.
Store leftovers in an airtight container for up to 2 days.
Yield: 27 mini scones

◁ LEMON BISCOTTI
This biscotti has a light lemony flavor, making it the perfect accompaniment to a hot mug of tea. These biscotti are somewhat softer than those found at your local coffeehouse. If you’d like an extra-crunchy cookie, bake them for 1 or 2 minutes longer than recommended on each side. These are best served a few hours after cooling.
1 cup (200 g) sugar
1/2 cup (120 ml) olive oil
3 tablespoons (45 ml) lemon juice
1 teaspoon vanilla extract
1 teaspoon lemon zest
3 tablespoons (45 ml) nondairy milk
3 tablespoons (21 g) flaxseed meal mixed with 6 tablespoons (90 ml) warm water
1 1/2 cups (195 g) sorghum flour
3/4 cup (96 g) brown rice flour
3/4 cup (96 g) potato starch
1/4 cup (32 g) tapioca starch
1 teaspoon xanthan gum
1 teaspoon salt
1 tablespoon (15 g) baking powder
Preheat the oven to 375°F (190°C, or gas mark 5). Line 2 baking sheets with parchment paper.
In a large bowl, stir together the sugar, oil, juice, vanilla, zest, milk, and flaxseed mixture.
In a separate bowl, sift together the sorghum flour, brown rice flour, potato starch, tapioca starch, xanthan, salt, and baking powder. Gradually add the flour mixture to the sugar mixture and combine until a stiff dough forms. If mixing by hand, you’ll have to knead it a bit to get it smooth. The dough will be slightly tacky when handling.
Divide the dough in half. On the prepared baking sheets, using slightly wet hands, shape the dough into 2 long ovals, each about 3 1/2 inches (9 cm)-wide, 9 inches (23 cm)-long, and 3/4 inch (2 cm) tall. Bake for 25 minutes. Remove from the oven and let cool for at least 20 minutes.
Once cooled, slice across the dough diagonally, cutting each log into approximately twelve 3/4-inch-wide × 4 1/2-inch-long (2 × 11.5 cm) cookies, varying slightly in length. Place each cookie on its side on the baking sheets. Bake for an additional 9 minutes. Flip and bake the other side for 9 to 11 minutes, or until golden brown on the edges. Let cool completely before serving.
Yield: 24 biscotti
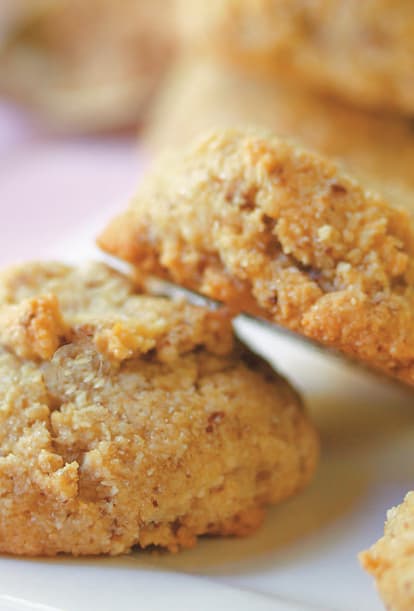
◁ BUTTERSCOTCH AMARETTI
The delicate flavors of almond and brown sugar come together to make a slightly chewy and crispy cookie that’s very hard to resist. Use almond meal made from blanched almonds, such as Bob’s Red Mill brand, with no skins in the ground mix, so you achieve a more uniform color.
3 tablespoons (21 g) flaxseed meal
6 tablespoons (90 ml) water
3 cups (300 g) almond meal
1/2 teaspoon salt
1 cup (200 g) granulated sugar
1/2 cup (115 g) packed light brown sugar
Preheat the oven to 300°F (150°C, or gas mark 2). Line 2 or 3 baking sheets with parchment paper.
In a medium bowl, mix together the flaxseed meal and water. Let rest for about 5 minutes, or until goopy.
In a large bowl, stir together the almond meal, salt, granulated sugar, and brown sugar until well combined. Slowly add the flaxseed mixture to the almond meal mixture. Using an electric mixer, beat vigorously until a slightly sticky dough forms. (You can do this by hand, but it takes a bit of elbow grease to bring the dough together.) The dough will be crumbly at first, but eventually it will come together into a clumpy dough.
Drop the dough by slightly rounded tablespoonfuls (15 g) onto the prepared baking sheets to make 36 cookies. Bake for 30 minutes, or until lightly golden brown around the edges.
Let cool on the baking sheets for a few minutes. Transfer to wire racks to cool completely.
Yield: 36 cookies

◁ RED WINE HOT FUDGE SAUCE
Hot fudge sauce for grown-ups! Hooray!
FOR THE SAUCE:
4 cups (700 g) vegan semisweet chocolate chips
2 cups (470 ml) Cabernet Sauvignon (or your favorite wed wine)
2 cups (400 g) sugar
1/4 cup (56 g) nondairy butter
1/2 cup (64 g) cornstarch mixed with 1/4 cup (60 ml) soy milk
2 tablespoons (30 ml) vanilla extract
4 teaspoons (20 ml) almond extract
FOR CANNING:
6 (8-ounce, or 235 ml) jars
6 rings and lids
Other “Canning Materials Needed”
In a saucepan, bring the chocolate, wine, sugar, and butter to a boil over medium heat. Boil for 3 minutes, stirring constantly. Add the cornstarch mixture. Stir until thickened.
Remove from the heat and continue to stir. Add the vanilla and almond. Stir until shiny and smooth.
Follow the canning instructions as outlined in “Canning Basics”. The processing time is 15 minutes. Any jars that didn’t seal need to be stored in the refrigerator and used within 1 week. Refrigerate after opening.
Yield: 6 (8-ounce, or 235 ml) jars
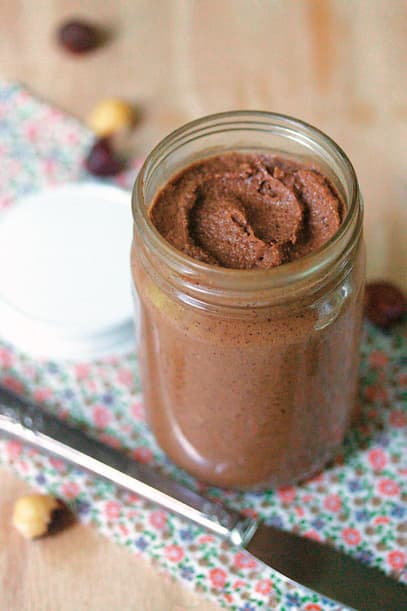
◁ CHOCOLATE HAZELNUT SPREAD
Inspired by Nutella, this vegan version leaves out the cow’s milk and focuses on the delicious combination of roasted hazelnuts and rich chocolate with a hint of sweetness.
2 cups (300 g) whole roasted hazelnuts, skinned
1/4 cup (50 g) superfine granulated sugar
1/4 cup (20 g) cocoa powder
1/4 teaspoon salt
1/4 cup (60 ml) nondairy milk, plus more if needed
In a food processor, blend the hazelnuts, sugar, cocoa powder, and salt until crumbly.
Slowly add the milk, about 1 tablespoon (15 ml) at a time, and blend until smooth. (Depending on how dry the hazelnuts are, you might need to add more or less milk.) Blend for about 5 minutes, or until very smooth.
Transfer the mixture to a sealed jar. Store in the fridge for up to 2 weeks.
Yield: 20 servings, about 1 tablespoon (15 g) each

◁ CHOCOLATE SALTED CARAMELS
A candy thermometer is extra helpful when making these fun, yet sophisticated, candies.
2 cups (470 ml) canned coconut milk
1/2 cup (90 g) semisweet chocolate
2 cups (400 g) sugar
1 cup (235 ml) light corn syrup
1/2 cup (112 g) nondairy margarine
1 tablespoon (15 ml) vanilla extract
Flaky sea salt, for topping
Line a 9 × 9-inch (23 × 23 cm) baking pan with parchment paper.
In a 2-quart (1.8 L) saucepan, bring the milk to a boil over medium heat. Stir in the chocolate until melted. Add the sugar and corn syrup and cook, stirring constantly, until the sugar is completely dissolved. Add the margarine and stir until the mixture comes to a boil.
Once the mixture boils, stop stirring! Let it boil over medium heat for about 35 minutes, without stirring, until it reaches 240°F (116°C) on a candy thermometer. If you don’t have a candy thermometer, dip the tip of a wooden spoon into the top of the bubbly mixture. When the syrup sticks to the spoon, it’s almost done.
When the candy comes to temperature, take a teaspoon of the syrup and quickly drop it into a very cold glass of water; if it’s ready, you’ll be left with what looks like a caramel. This is referred to as the “firmball” stage. It’s ready when the ball is firm enough to allow you to remove it from the glass with your fingers and will flatten if you give it a little squeeze.
When the mixture is at the right temperature, stir in the vanilla.
Pour the mixture into the prepared pan. Let cool at room temperature for a few minutes.
Transfer to the fridge for about 1 hour.
Once firm, cut the caramels into 40 pieces. Sprinkle with the sea salt. Wrap in waxed paper and store in the fridge.
Yield: 40 caramels
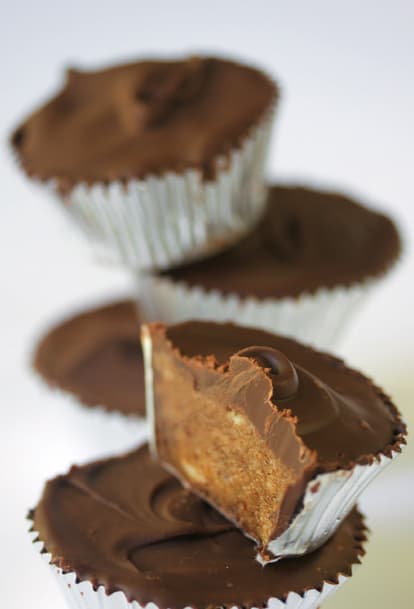
◁ ALMOND BUTTER CUPS
This recipe is slightly time-consuming, but that mostly lies in painting the cups with the melted chocolate. After that, it’s smooth sailing. If you’re a die-hard chocolate and almond fan, these little treats are well worth the effort. Serve these chilled.
1 bag (12 ounces, or 340 g) nondairy chocolate chips, divided
1 cup (250 g) smooth or crunchy unsalted almond butter
1 teaspoon vanilla extract
2 tablespoons (15 g) confectioners’ sugar
Dash or two of salt
2 tablespoons (30 ml) almond milk
Line 16 mini muffin cups with mini muffin liners.
In a double boiler, melt half of the chocolate over medium-low heat until smooth.
Drop about 1 teaspoon of chocolate into each mini muffin cup. Using the back of a spoon, smoosh the chocolate to coat the liners. Aim for making the chocolate about 1/8-inch (3 mm) thick.
Chill the chocolate-coated liners in the freezer for about 10 minutes, or until solid.
Meanwhile, in a small bowl, mix together the almond butter, vanilla, sugar, salt, and milk until smooth.
Once the chocolate shells are chilled, divide the almond butter mixture evenly among all 16 cups. Chill again in the freezer.
Meanwhile, in a double boiler, melt the remaining half of the chocolate over medium-low heat until smooth. Top the filled cups with a smooth layer of chocolate. Use the back of a spoon to spread the chocolate out to the edges of the paper liners.
Chill again in the freezer for 5 to 10 minutes, or until firm.
Store the cups in the fridge or freezer in an airtight container.
Yield: 16 candies

◁ MOCK TURTLES
This is a healthier version of “turtle” chocolates, with a very easy caramel made from Medjool dates.
20 Medjool dates, pitted
3 tablespoons (45 g) nondairy margarine
1 vanilla bean pod, split lengthwise and seeds scraped
40 whole pecan pieces
4 cups (700 g) nondairy chocolate chips
1 teaspoon coconut oil
Line a baking sheet with waxed paper.
In a food processor, pulse the dates, margarine, and scraped vanilla seeds until uniformly sticky. Scoop out 1 to 2 teaspoons of the mixture, shape into a patty, and place 2 or 3 pecans on top. Flip over so that the pecans are on the bottom. Place on the prepared baking sheet. Repeat with the remaining date mixture and pecans to form 20 candies.
In a double boiler, melt the chocolate over medium-low heat. Stir in the oil. Dip bottoms of the candies into the chocolate to coat evenly and return to the baking sheet. Drizzle the tops with the remaining melted chocolate.
Chill in the fridge for at least 2 hours, or until firm. Store in the fridge to prevent melting.
Yield: 20 candies
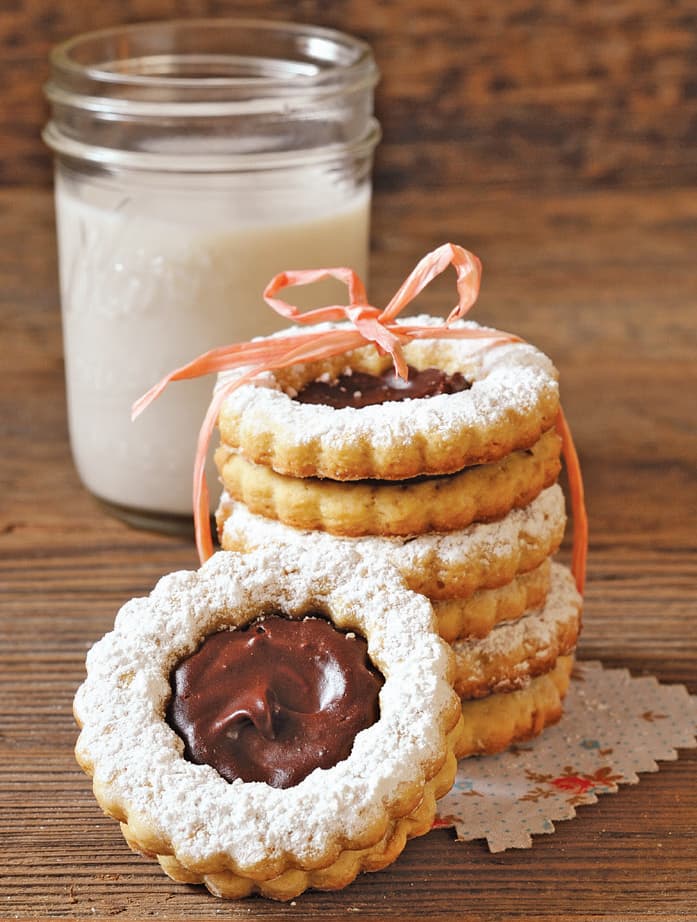
◁ ORANGE CHOCOLATE LINZERS
Specialty linzer cookie cutters are widely available at baking supply shops and online. If you don’t have one (or don’t want one) you can simply use graduated round cookie cutters, 2 inches (5 cm) for the outer circle and 1 inch (2.5 cm) for the inner circle.
FOR THE COOKIES:
1 2/3 cups (280 g) all-purpose flour
1/4 teaspoon baking powder
1/4 teaspoon salt
3/4 cup (150 g) evaporated cane juice (or granulated sugar)
1/2 cup (112 g) nondairy butter
1/4 cup (60 ml) orange juice
1 teaspoon vanilla extract
1 teaspoon orange extract
Confectioners’ sugar, for sprinkling
FOR THE GANACHE FILLING:
1/2 cup (120 ml) nondairy cream (full-fat coconut milk, MimicCreme, or soy or coconut creamer)
1 cup (176 g) vegan chocolate chips
1 tablespoon (15 ml) orange extract
To make the cookies: In a small bowl, sift together the flour, baking powder, and salt.
In a large bowl, beat together the evaporated cane juice, butter, orange juice, vanilla, and orange extract until well combined. The butter will separate; that is normal. Slowly add in the flour mixture and beat until well combined.
Turn out the dough onto a floured surface. Knead into a soft, smooth dough. Shape into a ball, wrap in plastic, and chill in the fridge for at least 2 hours, or until ready to bake.
Preheat the oven to 375°F (190°C, or gas mark 5). Line several baking sheets with parchment paper.
Remove the dough from the refrigerator. Divide the dough in half, so it is easier to work with. On a well-floured surface, roll out the dough until it is about 1/8 inch (3 mm) thick. Use a linzer cookie cutter or two circular cutters to cut 36 tops and 36 bottoms. Gather up the scraps and reroll the dough as needed.
Place the cookies on the prepared baking sheets. Bake for 8 to 10 minutes, or until golden on the bottom and browned on the edges.
Remove the cookies from the oven and transfer to a cooling rack to cool completely. Sprinkle the confectioners’ sugar all over the tops.
To make the filling: Meanwhile, in a small saucepot, heat the cream until it just begins to boil. Remove from the heat and stir in the chocolate and orange until completely melted, combined, and smooth.
When the cookies are cool, spread about 1 teaspoon of ganache onto a cookie bottom and place a cookie top on top. Return to the rack and allow the ganache to cool and stiffen completely.
Yield: 36 sandwich cookies
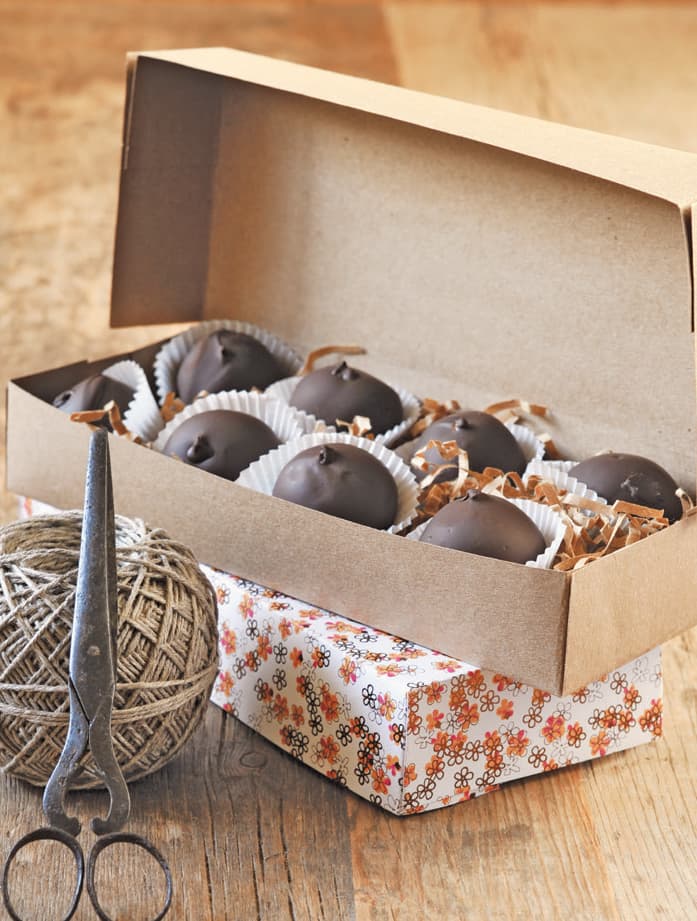
◁ PEANUT BUTTER BALLS
Who doesn’t love peanut butter and chocolate? These balls take a little more time to make, but the result is a delicious one.
1 cup (256 g) creamy peanut butter
1 cup (120 g) confectioners’ sugar
12 ounces (340 g) vegan chocolate chips
16 toothpicks
Line a baking sheet with waxed paper.
In a bowl, knead together the peanut butter and sugar until a smooth dough is formed with the consistency of playdough. Depending on the moisture content of the peanut butter, you might need a little more or a little less sugar.
Using about 1 tablespoon (21 g) of dough at a time, form it into 16 balls. Place the balls on the prepared baking sheet.
Stick a toothpick into each ball. Chill the balls in the freezer to harden. (This step makes it easier to dip them into the chocolate.)
Meanwhile, in a double boiler, melt the chocolate. Dip each ball into the chocolate to coat, and return it to the baking sheet.
Carefully remove the toothpicks. Using the flat side of a butter knife, carefully smooth over the hole where the toothpick was removed, adding a swirl design if desired. Let cool and harden.
Yield: 16 balls
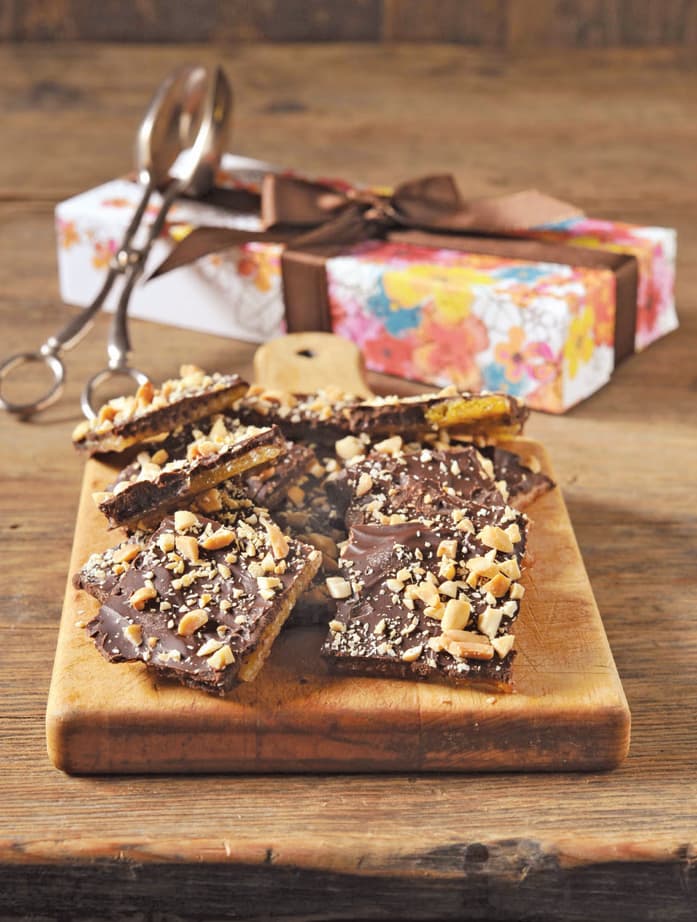
◁ SALTINE BUTTER TOFFEE
There’s just no way that anyone would ever suspect the vegan-ocity here. They are too buttery and delicious. Feel free to experiment and play with different toppings, such as sprinkles, crushed candy canes, or even coarse sea salt.
35 to 40 saltine crackers
1 cup (224 g) nondairy butter
1 cup (200 g) evaporated cane juice (or granulated sugar)
2 cups (352 g) vegan chocolate chips
1 cup (120 g) chopped nuts (Any nut will do!)
Preheat the oven to 350°F (180°C, or gas mark 4). Line a rimmed baking sheet with foil and spray lightly with nonstick cooking spray.
Place the crackers on the prepared baking sheet in a single layer.
In a saucepan, melt the butter and evaporated cane juice over medium heat, until completely dissolved. Pour the mixture evenly over the crackers.
Bake for 10 to 12 minutes, or until golden.
Carefully remove from the oven. Place on a flat surface, and immediately sprinkle the chocolate evenly all over the crackers. Using a spreader or butter knife, spread the chocolate evenly over the crackers as it melts. Sprinkle with the nuts.
Allow to cool and harden completely before breaking into pieces.
Yield: 35 to 40 pieces
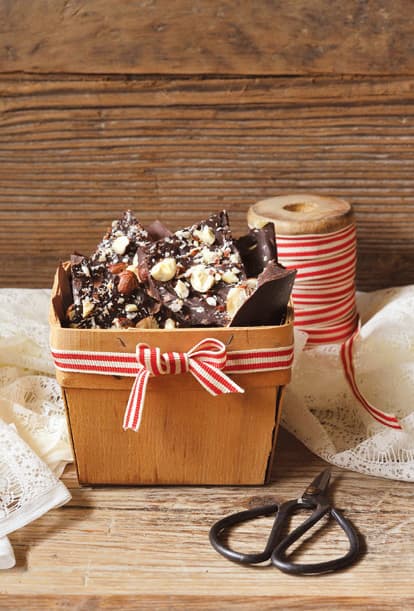
◁ CHOCOLATE BARK
Let’s face it, almost anything tastes fabulous when it’s mixed with chocolate. Bark lets you get creative with your mix-ins. Who knows, maybe you will come up with the next crazy food combo!
12 ounces (340 g) vegan chocolate chips
2 ounces (58 g) food-grade paraffin wax, such as Parowax, optional
1 tablespoon (15 ml) flavored extract from the list below
2 cups (250 g) crushed mix-ins, divided, such as
• Crushed pretzels and vanilla extract
• Crushed candy canes and peppermint extract
• Smoked almonds and liquid smoke
• Mixed nuts and almond extract
• Chopped-up marshmallows (Don’t mix with the chocolate, just arrange on the baking sheet and pour the chocolate over them, then sprinkle extra on top) and vanilla extract
• Crushed chocolate cookies (such as Oreos) and vanilla extract
• Homemade vegan bacon bits and liquid smoke
• Pumpkin seeds and 1 teaspoon chipotle powder
Line a rimmed baking sheet with parchment paper.
In a double boiler, melt the chocolate and wax, if using, over medium heat, stirring until smooth. (If you don’t have a double boiler, place a metal mixing bowl over a pot of water.) Take care not to get water in your melting chocolate.
If you aren’t using the wax, stir the extract into the chocolate before melting it. (If you add the extract to melted chocolate, it will cause it to seize.)
If you are using the wax, just before you are ready to pour the chocolate, stir in the extract.
Add half of the mix-ins and stir to combine.
Pour the chocolate evenly onto the prepared baking sheet. Sprinkle the remaining mix-ins evenly all over the top.
Allow to cool and harden completely. Break into pieces.
Yield: 24 ounces (672 g)

◁ VANILLA BEAN ICE CREAM
Creamy, rich, and wholeheartedly decadent, you’d never know this ice cream was made without dairy.
2 cans (13.5 ounces, or 378 ml each) full-fat coconut milk
1 1/2 cups (300 g) sugar
2 vanilla bean pods, split lengthwise and seeds scraped
3/4 teaspoon salt
In a saucepan, warm the milk, sugar, scraped vanilla seeds, and vanilla bean pods briefly over medium heat for about 2 minutes, or until the sugar has dissolved, stirring occasionally. Remove the pods from the mixture and add the salt.
Pour the mixture into a bowl.
Chill in the fridge for at least 30 minutes, or until cold.
Process in an ice cream maker according to the manufacturer’s instructions. Once it’s finished, place in a flexible airtight container and freeze for a few hours, or until firm enough to scoop.
Yield: 8 servings, 1/2 cup (100 g) each

◁ MANGO RUM ICE CREAM
This delicious tropical ice cream tastes a lot like a piña colada, without the pineapple. Instead, it featuring the tangy sweetness of mango. Because it uses alcohol, this is an adult-only indulgence.
2 large mangoes, peeled and pitted
1/4 cup (60 ml) rum, dark or light
1/2 cup (100 g) sugar
2 cans (13.5 ounces, or 400 ml each) full-fat coconut milk
Dash of salt
In a food processor, blend all of the ingredients together until smooth.
Transfer the mixture to an ice cream maker. Process the mixture according to the manufacturer’s instructions. Freeze it in a flexible, airtight container overnight.
Yield: 1 quart (1 L) ice cream
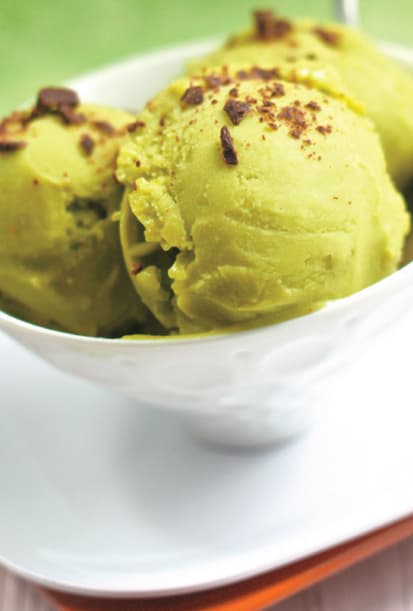
◁ AVOCADO GELATO
The texture of this gelato is great straight from the ice cream maker, but if you prefer a firmer consistency, place it in an airtight flexible plastic container and chill in the freezer for at least 6 hours.
1 can (13.5 ounces, or 378 ml) full-fat coconut milk
1 1/4 cups (250 g) sugar
3 ripe avocados, peeled, halved, and pitted
1 teaspoon vanilla extract
1 1/2 tablespoons (23 ml) lemon juice
1/2 teaspoon salt
In a small pan, heat the milk and sugar over medium heat just until the sugar has fully dissolved.
Remove from the heat.
Pour the mixture into a bowl. Chill in the fridge for about 25 minutes, or until cold
In a food processor, blend the avocados, milk mixture, vanilla, lemon juice, and salt until smooth.
Pour the mixture into an ice cream maker. Process according to the manufacturer’s instructions.
Yield: 14 servings, 1/2 cup (120 g) each

◁ WATERMELON GRANITA
Next to eating fresh watermelon, this might become favorite way of enjoying this juicy summer fruit. It’s pretty, it’s easy, and it contains lots of beta-carotene and lycopene.
1/3 cup (132 g) sugar
1/3 cup (80 ml) water
4 cups (560 g) seedless watermelon chunks, reserving the wedges for garnish
Juice of 1 lime
Mint leaves, for garnish
In a saucepan over high heat, make a simple syrup by heating the sugar and water over high heat, stirring until all of the sugar has dissolved. Let cool.
In a blender, purée the cooled sugar syrup, watermelon chunks, and juice until smooth.
Pour into a shallow, wide pan. Freeze for 1 hour.
Using a fork, rake the mixture. Freeze for another hour.
Using a fork, rake the mixture again. Freeze for 1 more hour. (The whole process takes about 3 hours.)
Rake before serving. Store in an airtight container in the freezer for up to 2 days.
Garnish with the watermelon wedges and mint leaves.
Yield: 4 servings
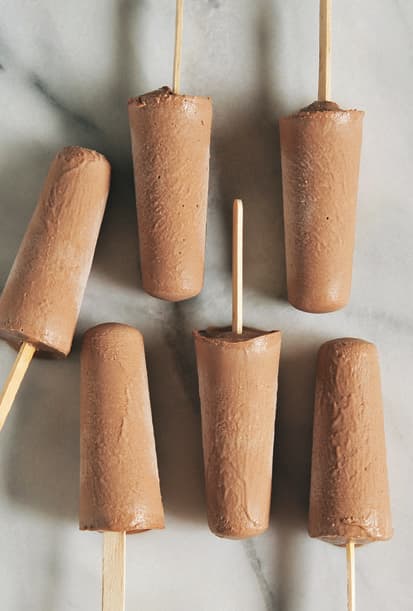
◁ FUDGY GOOD FROZEN TREATS
The only problem you’ll have with these treats is keeping them from being eaten too quickly! Because they don’t last very long, you may want to double or triple this recipe.
12 pitted dates
Hot water
2 tablespoons (32 g) peanut butter
2 tablespoons (10 g) unsweetened cocoa powder
1 package (340 g) firm, silken tofu
2 teaspoons vanilla extract, optional
1/4 cup (60 ml) unsweetened almond milk, optional
In blender, soak the dates in enough hot water to cover for 10 to 15 minutes, or until softened.
When the dates have softened, add the peanut butter, cocoa, tofu, and vanilla. Blend until smooth and creamy. If there isn’t enough liquid to blend, add the milk 1 tablespoon (15 ml) at a time, adding just enough to get the mixture to blend. (If you use too much milk alternative, the treats will be icy and not creamy when frozen.)
Pour the mixture into Popsicle molds and freeze.
Yield: 3 to 4 large or 6 small Popsicles

◁ GINGER-MANGO ICE LOLLIES
These treats are like frozen sunshine.
1/2 cup (120 ml) water
1/4 cup (48 g) evaporated cane juice
1/4 cup (48 g) Sucanat
3 to 4 tablespoons (18 to 24 g) peeled, sliced fresh ginger, or 1 to 1 1/2 teaspoons ground ginger, to taste
1 pound (454 g) fresh or frozen mango chunks (thawed if frozen)
1/2 cup (120 ml) orange juice
12 wooden ice lolly sticks
In a medium, heavy-bottomed saucepan, bring the water, evaporated cane juice, and Sucanat to a boil over medium-high heat. Lower the heat. Cook for about 2 minutes, or until the sugar crystals are dissolved, stirring occasionally. Add the ginger.
Remove from the heat. Steep the mixture for at least 30 minutes.
Pour the syrup through a fine-mesh sieve, directly into a blender. Discard the ginger slices. (If using ground ginger instead of fresh, add it alongside the sugars and water to boil; there’s no steeping time needed.) Let cool.
Add the mango and juice to the blender. Blend until perfectly smooth.
Pour a scant 1/4 cup (60 ml) of the mixture into twelve 2 1/4-ounce (67 ml) shot glasses, leaving a little under 1/4-inch (6 mm) space from the top to allow for expansion as the mixture freezes. Freeze for approximately 2 hours, or until the preparation is solid enough to hold the lolly stick upright.
Insert the sticks in the center of all lollies. Freeze overnight.
To release the lollies from their molds easily, run tepid water on the outside of the molds for a few seconds.
Store leftovers in an airtight container in the freezer for up to 2 weeks.
Yield: 3 cups (705 ml) mixture, 12 small lollies

◁ SESAME BERRY ICE CREAM SANDWICHES
In this sandwich, a pair of surprisingly caramel-like cookies surrounds a delicately flavored, pink-hued frozen concoction that will put all the other ice cream sandwiches you’ve ever had to shame.
FOR THE ICE CREAM:
1 cup (235 ml) full-fat coconut milk
8 ounces (227 g) drained firm silken tofu
3/4 cup (252 g) agave nectar
1 heaping cup (250 g) frozen raspberries, thawed
1 tablespoon (15 ml) rose water
1 teaspoon vanilla extract
FOR THE COOKIES:
3/4 cup (192 g) tahini
1/3 cup (105 g) agave nectar
1/2 cup (110 g) packed light brown sugar
2 teaspoons vanilla extract
1 cup (125 g) all-purpose flour
3 tablespoons (24 g) sesame seeds
1/4 teaspoon baking powder
1/2 teaspoon salt
Unsweetened plain nondairy milk, as needed
To make the ice cream: Freeze the tub of an ice cream maker for at least 24 hours.
In a blender, blend all of the ice cream ingredients until perfectly smooth.
Transfer the mixture to the frozen tub. Following the manufacturer’s instructions, prepare the ice cream until it is firm. Place in the freezer until ready to use to firm up even more.
To make the cookies: Preheat the oven to 325°F (170°C, or gas mark 3). Line two baking sheets with parchment paper.
In a large bowl, combine the tahini, agave, sugar, and vanilla.
In a separate bowl, combine the flour, sesame seeds, baking powder, and salt. Add on top of the wet ingredients, and stir until combined. The texture of the dough will vary depending on the thickness of the tahini. If it’s too dry, add just enough milk for the dough to be manageable and not crumbly.
Scoop out 2 tablespoons (50 g) dough per cookie, place it on the prepared baking sheets, six per sheet, and flatten slightly. (The cookies won’t spread too much, but there won’t be enough room for all of them on a single sheet.) Repeat to make 12 cookies. Bake for 12 to 14 minutes, or until golden brown. Let cool on the baking sheets for a couple of minutes.
Transfer the cookies to a wire rack to cool completely.
Place the cookies in the freezer for 1 hour before sandwiching with the ice cream.
To assemble the sandwiches: Let the ice cream sit at room temperature for about 15 minutes to soften. Place about 2 tablespoons (30 ml) ice cream between 2 cookies. Squeeze lightly to spread the ice cream to the edges. Wrap tightly in plastic and place the sandwiches on a plate.
Chill in the freezer for 30 minutes, or until the ice cream firms up.
Yield: 6 ice cream sandwiches, 1 quart (935 ml) ice cream
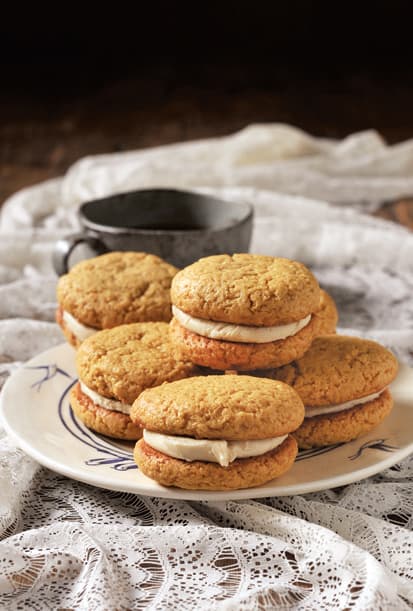
◁ MANGO BUTTER AND GINGER WHOOPIE PIES
These whoopie pies are perfect for autum.
FOR THE MANGO BUTTER:
2 cups (280 g) frozen mango chunks
2 tablespoons (30 ml) water
1 tablespoon (15 ml) lemon juice
1/4 cup (55 g) packed light brown sugar
FOR THE COOKIES:
1/3 cup (75 g) nondairy butter, at room temperature
3/4 cup (165 g) packed light brown sugar
3/4 cup (216 g) Mango Butter
2 tablespoons (16 g) cornstarch
1 1/2 teaspoons ground ginger
1/2 teaspoon salt
2 1/4 cups (281 g) all-purpose flour
1 teaspoon baking powder
1/2 teaspoon baking soda
FOR THE FROSTING:
2 tablespoons (24 g) vegan shortening
2 tablespoons (28 g) nondairy butter
1/4 teaspoon ground ginger
1 1/2 cups (180 g) confectioners’ sugar, sifted
1 tablespoon (15 ml) nondairy milk
1/2 teaspoon pure vanilla extract
To make the Mango Butter: In a medium saucepan, combine all of the Mango Butter ingredients. Bring the mixture to a boil. Lower the heat to medium. Cook for 8 minutes, or until the mango is tender enough to mash.
Transfer the mixture to a blender. Blend until perfectly smooth. Let cool completely.
To make the cookies: In a medium bowl, using an electric mixer, beat the butter and sugar until fluffy. Add the Mango Butter, cornstarch, ginger, and salt and beat until combined.
In another bowl, sift and combine the flour, baking powder, and baking soda. Add on top of the wet ingredients, and beat until just combined. The dough should be fluffy, but thick enough to be held in your hand.
Preheat the oven to 350°F (180°C, or gas mark 4). Line two baking sheets with parchment paper.
Scoop out 2 tablespoons (45 g) dough per cookie. Roll it between your hands and flatten slightly. Place 2 inches (5 cm) apart on the cookie sheets. Repeat to make 16 cookies.
Bake for 12 minutes, or until set.
Transfer the cookies to a wire rack to cool.
To make the frosting: In a bowl, using an electric mixer, cream the shortening and butter until smooth. Add the ginger and sugar. Mix on low speed, then beat until combined. Add the milk and vanilla. Mix on low speed until combined, then beat on medium speed for 2 minutes, or until fluffy, occasionally stopping to scrape the sides of the bowl with a rubber spatula.
To assemble the whoopie pies: Spread 1 generous tablespoon (30 g) frosting on the bottom of one cookie and top with another cookie, pressing down gently to spread the frosting.
Yield: 8 whoopie pies
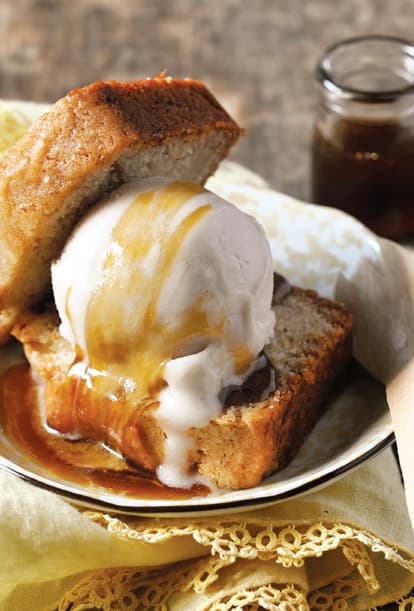
◁ BANANA FOSTER CAKE SANDWICHES
Over-the-top can be a good thing, as this particular treat proudly demonstrates.
FOR THE ICE CREAM:
1 recipe Vanilla Dipping Sauce Plum-tillas
FOR THE CAKES:
1 heaping cup (240 g) mashed ripe bananas
Scant 2/3 cup (120 g) sugar
1/3 cup (80 ml) light olive oil
1 tablespoon (8 g) arrowroot powder
1 teaspoon vanilla extract
1 1/2 cups (188 g) all-purpose flour
2 teaspoons baking powder
1/2 teaspoon salt
FOR THE CARAMEL:
2 tablespoons (28 g) nondairy butter
1/2 cup (110 g) packed brown sugar
Pinch of salt
1 tablespoon (15 ml) dark rum
1/4 cup plus 1 tablespoon (75 ml) unsweetened plain nondairy creamer, divided
2 teaspoons cornstarch
To make the ice cream: Freeze the tub of an ice cream
maker for at least 24 hours. Place the Vanilla Dipping Sauce in the frozen tub. Following the manufacturer’s instructions, prepare the ice cream until it is firm. Place the ice cream in the freezer.
To make the cakes: Preheat the oven to 350°F (180°C, or gas mark 4). Lightly coat two 5 3/4 × 3-inch (14 × 8-cm) loaf pans with nonstick cooking spray.
In a large bowl, combine the bananas, sugar, oil, arrowroot, and vanilla.
In a separate bowl, sift and combine the flour, baking powder, and salt. Add on top of the wet ingredients, and stir until just combined.
Divide the mixture between the prepared pans. Bake for 35 minutes, or until a wooden pick inserted into the center comes out clean.
Carefully remove the loaves from the pans. Let cool completely on a wire rack.
To make the caramel: In a medium saucepan, cook the butter, sugar, salt, rum, and 1/4 cup (60 ml) of the creamer over medium-high heat for about 3 minutes, or until the sugar dissolves.
In a small bowl, combine the remaining 1 tablespoon (15 ml) creamer with the cornstarch, stirring to form a paste. Add the paste to the syrup and cook for about 1 minute, or until slightly thickened. Remove from the heat and keep warm.
To assemble the sandwiches: Let the ice cream sit at room temperature for about 15 minutes to soften. Cut both mini loaves into 8 slices. Place about 3 tablespoons [45 ml]) ice cream on top. Drizzle warm caramel sauce over all. Top with another slice of cake.
Yield: 8 sandwiches, 12 ounces (355 ml) ice cream, 3/4 cup (180 ml) caramel
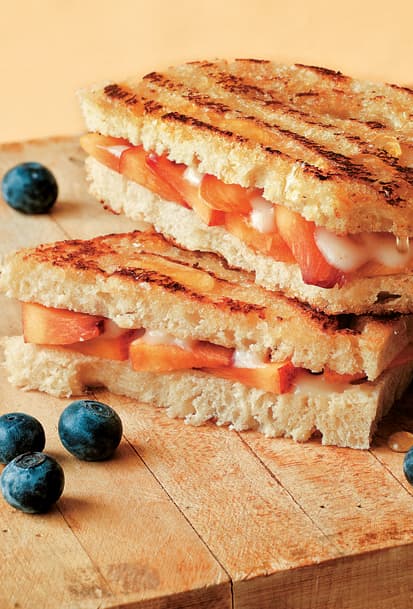
◁ NECTARINE AGAVE PANINI
Panini—hot pressed sandwiches—are not just for savory meals!
1 container (6 ounces, or 170 g) nondairy yogurt (plain, vanilla, or fruit-based)
2 tablespoons (40 g) agave nectar, plus more for drizzling
1/4 teaspoon vanilla extract
8 thin slices bread, crusts removed
2 ripe nectarines, peaches, or plums, unpeeled and thinly sliced
Ground cinnamon, for sprinkling
3 tablespoons (42 g) nondairy butter, divided, optional
Blueberries or raspberries, for garnish
Preheat a panini maker or use a sauté pan on the stove top.
In a small bowl, stir together the yogurt, agave, and vanilla until thoroughly combined.
Carefully spread about 1 tablespoon (15 ml) of the yogurt mixture on one side of each slice of bread. Arrange a layer of fruit over the yogurt, sprinkle on some cinnamon, and top with the remaining 4 slices of bread.
If using a panini maker, lightly coat the panini maker with nonstick cooking spray to ensure the sandwiches don’t stick. Place 1 or 2 sandwiches (depending on the size of your machine) in the panini maker, press down, and cook for 4 minutes. Repeat with the remaining sandwiches.
If using a sauté pan, melt 1 tablespoon (14 g) of the butter in the sauté pan over medium heat. Place 1 sandwich in the pan, place a flat heavy object on top, such as a cutting board, and cook for about 3 minutes on each side. Remove from the pan, transfer to a plate, and repeat with the remaining 2 tablespoons (28 g) butter and remaining 3 sandwiches.
Slice each sandwich in half on the diagonal, place on 4 dessert plates, drizzle with additional agave, and garnish with the berries.
Yield: 4 servings
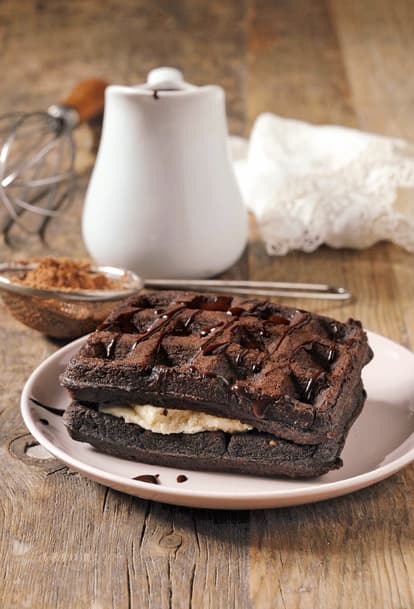
◁ OREO WAFFLEWICHES
Have you ever bitten into an Oreo cookie feeling that it’s too small for your demanding needs? Here’s the perfect excuse to have an Oreo cookie, made bigger and “wafflier.”
FOR THE WAFFLES:
1 cup (235 ml) plain, vanilla, or chocolate soymilk
1/3 cup (67 g) sugar
1/4 cup (56 g) nondairy butter, melted
1/4 teaspoon salt
1 teaspoon vanilla extract
1 cup (125 g) all-purpose flour
1/4 cup (20 g) Dutch-processed cocoa powder
1 teaspoon baking powder
1 1/2 tablespoons (12 g) cornstarch
FOR THE FROSTING:
2 tablespoons (24 g) vegan shortening
2 tablespoons (28 g) nondairy butter
1 1/2 cups (180 g) confectioners’ sugar, sifted
1 tablespoon (15 ml) nondairy milk
1/2 teaspoon vanilla extract
FOR THE TOPPING:
Vegan chocolate syrup, optional
To make the waffles: In a large bowl, combine the milk, sugar, butter, salt, and vanilla.
In a separate bowl, combine the flour, cocoa, baking powder, and cornstarch. Add on top of the wet ingredients. Whisk to combine and eliminate lumps, being careful not to overmix.
Coat the waffle iron with nonstick cooking spray. Cook the waffles according to the manufacturer’s instructions for about 6 minutes, or until the waffles look dry on the surface.
Repeat with the remaining batter to make 1 1/2 Belgian-size waffles or 2 or 3 standard-size waffles.
To get the crispness that Oreo cookies are known for, toast the waffles in a toaster oven. Let the waffles cool on a wire rack for about 20 minutes before frosting.
To make the frosting: In a bowl, using an electric mixer, cream the shortening and butter until smooth. Slowly add the sugar. Mix on low speed, and then beat until combined. Add the milk and vanilla. Beat on low speed until combined, and then beat on medium speed for 2 minutes, or until fluffy, occasionally stopping to scrape the sides of the bowl with a rubber spatula.
To assemble the wafflewiches: Break the waffles into quarters. Divide the frosting equally between half of the quarters, or to taste. Top with the remaining waffle quarters. Drizzle the chocolate syrup on top, if using.
Yield: 3 or 6 wafflewiches
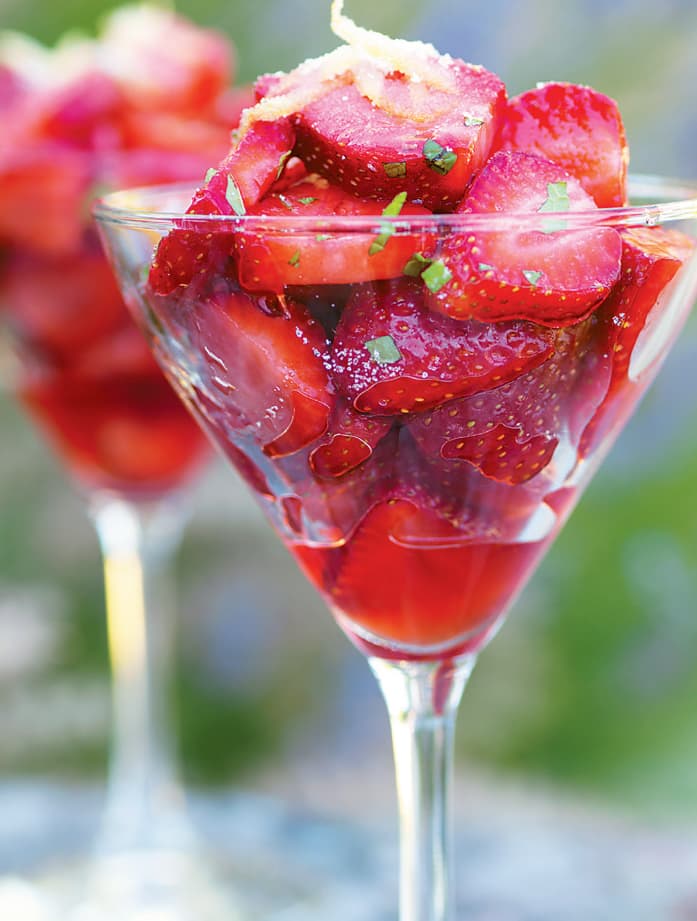
◁ STRAWBERRIES WITH LAVENDER SYRUP
This dish is a summer delight, especially if you get your strawberries and lavender from your backyard or from your local farmers’ market.
1/3 cup plus 1/2 cup (165 g) sugar, divided, or less, to taste
1 teaspoon grated lemon zest
1/2 cup (120 ml) water
2 tablespoons (40 g) agave nectar
2 teaspoons dried culinary lavender
3 pints (870 g) strawberries, sliced
5 mint leaves, finely minced
In a small bowl, combine 1/3 cup (65 g) of the sugar and the zest. Blend well and either use right away or store in the refrigerator in a covered container.
In a saucepan, bring the remaining 1/2 cup (100 g) sugar, the water, agave, and lavender to a boil over medium-high heat, stirring until the sugar dissolves. Reduce the heat to medium. Simmer for about 5 minutes, or until the lavender flavor is detectable.
Strain the syrup into a small bowl or store in a container, cover, and let stand at room temperature.
Reheat the syrup before using.
When ready to serve, place the strawberries in large serving bowl. Pour the warmed syrup over the berries and stir to coat. Divide the syrup-covered strawberries among 8 plates or bowls and sprinkle with the lemon sugar and mint.
Yield: 8 servings

◁ CARAMELIZED BANANAS WITH CHOCOLATE CHIPOTLE SAUCE
In a matter of minutes, you can serve this elegant sweet snack. If you’re not a fan of bananas, use pineapple chunks instead. We like using the pretzel sticks here because of the added bonus of dipping them directly into the chocolate, but you can use toothpicks.
2 tablespoons (28 g) vegan butter
1/4 cup (56 g) packed brown sugar
2 teaspoons maple syrup
Pinch ground nutmeg
Pinch salt
2 bananas, cut into 1-inch (2.5 cm) pieces (12 to 14 slices total)
1 tablespoon (11 g) vegan semisweet chocolate chips
1 tablespoon (15 ml) vegan milk
1 teaspoon vanilla extract
Pinch chipotle chile powder
12 to 14 thin pretzel sticks or toothpicks
6 or 7 strawberries, stems removed, sliced in half lengthwise if large
In a small skillet, melt the butter over medium heat. Add the sugar, syrup, nutmeg, and salt. Cook for 2 to 3 minutes, stirring, or until the mixture is bubbly and the sugar has dissolved.
Add the bananas. Cook for about 2 minutes, stirring gently to avoid breaking the bananas. The bananas should remain somewhat firm. Using a slotted spoon, remove the bananas to a plate.
Remove the skillet from the heat, and add the chocolate, milk, vanilla, and chile powder. Stir continuously until the chocolate is melted.
Pour the mixture into a shallow serving bowl. Using pretzel sticks or toothpicks, skewer a strawberry half, and then a banana slice. Continue until all the fruit is used. Serve the fruit with the Chocolate Chipotle Sauce
Yield: 12 to 14 skewers

◁ CHOCOLATE ALMOND BRITTLE
“Brittle” is a fitting name for this easy-to-make treat, because it resembles peanut brittle in its rough-hewn appearance and buttery flavor. It takes much less time to make, however, and it’s simply delicious.
1/2 cup (112 g) non-hydrogenated, nondairy butter, room temperature
1/2 cup (88 g) nondairy semisweet chocolate chips
4 ounces (115 g) graham crackers (about 6 rectangles)
1 1/4 cups (180 g) raw almonds, toasted and chopped
Lightly butter a 9-inch (23-cm) square or round cake pan.
In a medium saucepan, melt the butter and chocolate over low heat.
Meanwhile, break the crackers into small pieces, but not crumbs.
Once the butter and chocolate are melted, remove from the heat. Stir in the crackers, their crumbs, and the almonds. Spread the mixture into the prepared baking pan. Cover.
Chill in the fridge for at least 2 hours, or until set.
Store in an airtight container.
Yield: 10 servings
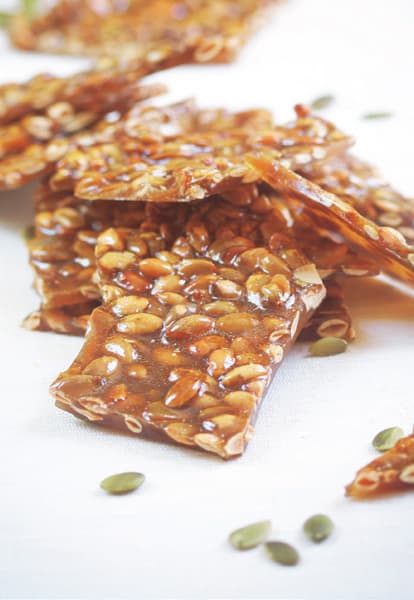
◁ PEPITA BRITTLE
This is the traditional method of making pepita brittle, which is unlike many nut brittles in that you allow the sugar to completely recrystallize while making the candy. Use a good-quality candy thermometer for easy candy making. This recipe has a very glassy sheen and distinctive crunch.
1 1/2 cups (300 g) granulated sugar
3/4 cup (175 ml) water
1/2 teaspoon salt
1/2 vanilla bean, scraped
1 cup (140 g) pepitas (pumpkin seeds)
Line a baking sheet with parchment paper.
In a 2.5-quart (2.4 L) saucepan, heat the sugar, water, salt, and vanilla bean over medium heat. Bring the mixture to 238°F (114°C), firm ball stage, checking with a candy thermometer, stirring often with a wooden spoon and washing down the sides of the pan with a silicone brush.
Once the candy mixture reaches the proper temperature, remove from the heat and stir in the pumpkin seeds. Return to the heat. Cook for about 7 minutes, or until the mixture crystallizes and gets very clumpy and then literally turn into green-tinged sugar. Cook, stirring constantly until the sugar completely remelts. Time it for about 5 minutes after the sugar crystallizes.
Pour onto the prepared baking sheet and quickly spread thin. (It hardens quickly.)
Let the candy cool for about 1 hour. Break it into small pieces once the candy is completely cool.
Yield: about 30 pieces candy
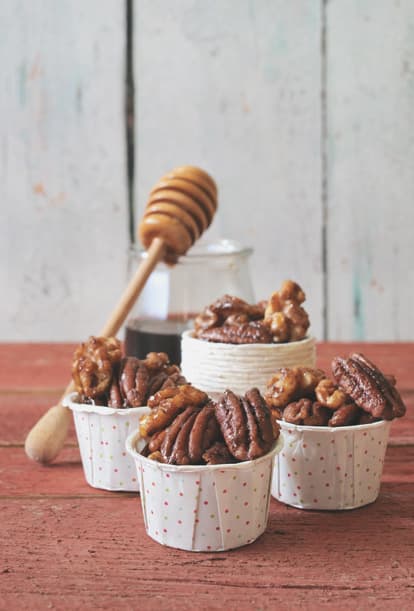
◁ CINNAMON-GLAZED NUTS
Perfectly spiced and not overly sweet, these walnuts are quick and easy and get rave reviews.
3 tablespoons (45 ml) maple syrup
2 tablespoons (28 g) packed brown sugar
1 tablespoon (15 ml) neutral-flavored oil
3/4 teaspoon ground cinnamon
1/2 teaspoon vanilla extract
Generous pinch ground allspice
Pinch salt
2 cups (227 g) walnut or pecan halves, or a mix of the two
Preheat the oven to 325°F (170°C, or gas mark 3). Line a large rimmed baking sheet with parchment paper. Lightly coat the paper with nonstick cooking spray.
In a medium bowl, stir together the syrup, sugar, oil, cinnamon, vanilla, allspice, and salt. Add the nuts, and stir to coat.
Spread the nuts on the prepared baking sheet in a single layer.
Bake for 15 to 17 minutes, or until the glaze is bubbly on the nuts.
Let cool on the baking sheet, stirring occasionally to coat the nuts with any glaze remaining on the parchment paper. Once the nuts have cooled completely, break them apart. Store in an airtight container at room temperature.
Yield: 2 cups (255 g) glazed nuts
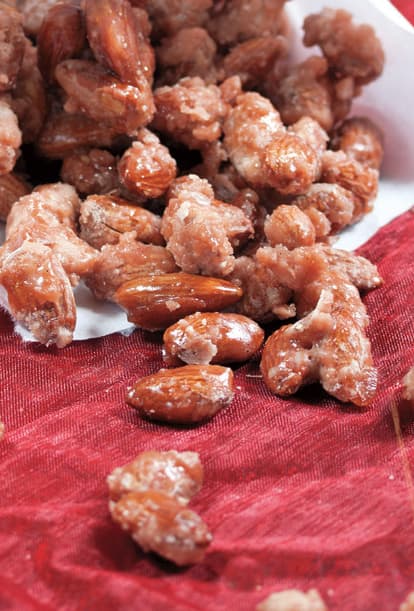
◁ SUGARED SPANISH ALMONDS
A popular treat in the streets of Spain, it’s hard to argue with the intoxicating flavor of these candies. These keep well if kept in an airtight container or loosely wrapped paper bag, but honestly, they won’t last very long.
1 1/2 cups (300 g) sugar
1/2 cup (120 ml) + 2 tablespoons (28 ml) water
Pinch salt
Half vanilla bean, scraped
2 1/2 cups (363 g) whole raw almonds
Line a baking sheet with waxed paper.
In 2-quart (2 L) saucepan, bring the sugar, water, salt, and vanilla bean to a boil over medium heat, stirring often with a wooden spoon. Once the mixture comes to a boil, add the almonds.
Set a timer for 16 minutes. Keep the mixture at a boil. Stirring continuously, let the syrup in the mix completely recrystallize into sugar granules. This should happen at around the 10-minute mark. Continue stirring, and by the time the 16 minutes is up, the sugar should have mostly turned back into a syrup to coat the almonds.
Remove from the heat just as the sugar turns back into a glaze and spread onto the prepared baking sheet. Separate into individual almonds. Let cool completely.
Yield: 3 cups (550 g) candied nuts

◁ BETTER BUCKEYES
Buckeyes are a tradition in Ohio, but we opted to update them. We reduced the amount of sugar, so ours aren’t cloyingly sweet, and added puffed rice cereal for a surprising crunch! While we were at it, we added a bit of cinnamon, too, because peanut butter loves cinnamon.
2 tablespoons (28 g) nondairy butter
1/2 cup (128 g) creamy peanut butter
1 teaspoon vanilla extract
1/2 cup (60 g) confectioners’ sugar, sifted
1/2 teaspoon ground cinnamon
1 tablespoon (15 ml) nondairy milk, if needed
3/4 cup (23 g) natural puffed rice cereal
3/4 cup (132 g) vegan semisweet chocolate chips
Kosher salt, to garnish
12 toothpicks
Line a rimmed baking sheet with wax paper.
In a bowl, using a hand mixer, cream the butter, peanut butter, and vanilla. Mix in the sugar and cinnamon. The mixture may be slightly crumbly. Add up to 1 tablespoon (15 ml) of the milk, if needed, to make an easy-to-form dough that’s the consistency of very thick frosting.
Using your hands, mix in the cereal.
Chill the mixture in the freezer for 15 to 45 minutes, or until the mixture is firm enough to shape easily.
Roll the dough into 12 balls, using 1 tablespoon (20 g) of dough per ball. Place the balls on the prepared baking sheet. Chill in the fridge.
Meanwhile, in a double boiler, melt the chocolate over simmering water, stirring constantly.
Remove the balls from the refrigerator. Stick a toothpick into a ball, and then dip the ball into the chocolate mixture to nearly cover, but still leaving a bit of the dough exposed to look like a buckeye. Return the ball to the baking sheet, and repeat with the remaining balls. Sprinkle each with salt.
Chill in the fridge for 30 minutes, or until the chocolate is set.
Store in the fridge in an airtight container for up to 1 week.
Yield: 12 buckeyes
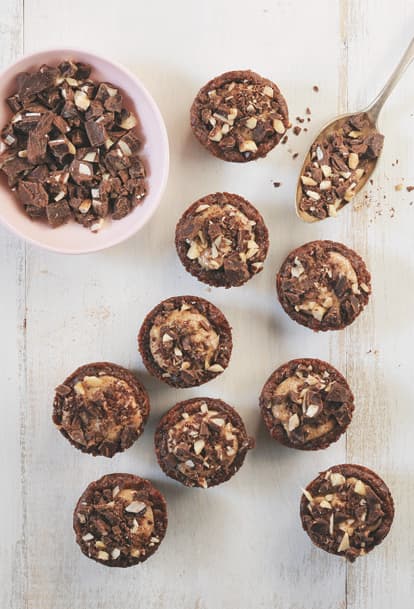
◁ BROWNIE NUT BUTTER CUPS
We’ve taken a look at the best thing ever (also known as peanut butter cups) and gone one step further, replacing the chocolate candy bottom with a mini brownie. You’ll realize what a brilliant idea it was when you get your fingers on (and sink your teeth into) the resulting chewy, goodness!
FOR THE BROWNIES:
4 ounces (113 g) vegan chocolate, chopped
3 tablespoons (42 g) solid coconut oil
1/2 cup (120 g) blended soft silken tofu or plain vegan yogurt
1 cup (200 g) light brown sugar, not packed
1/2 teaspoon salt
2 teaspoons vanilla extract
1 1/4 cups (150 g) whole wheat pastry flour
FOR THE FILLING:
3/4 cup (192 g) creamy natural almond or peanut butter, at room temperature
3 tablespoons (23 g) confectioners’ sugar
Pinch salt
2 ounces (57 g) vegan chocolate, chopped
To make the brownies: Preheat the oven to 350°F (180°C, or gas mark 4). Lightly coat thirty-four cups of two mini muffin pans with nonstick cooking spray.
In a microwave-safe bowl, heat the chocolate and oil in 1-minute increments, until the chocolate is melted and can be easily stirred. (Alternatively, place the chocolate and oil in a small saucepan and slowly warm over low heat until melted.)
In a medium bowl, combine the chocolate with the tofu, sugar, salt, and vanilla. Sift the flour on top. Stir until well combined. Place about 2 1/2 teaspoons batter in each cup, filling each cup two-thirds full.
Bake for 12 minutes, or until the brownies still look a little wet and will slightly collapse while cooling; this will create the indentation for the filling. If your brownies don’t collapse within a few minutes, use the curved back of a 1/2 teaspoon to indent. Let cool in the pans on a wire rack.
Chill in the fridge for 45 minutes, to easily remove from the pans.
To make the filling: Meanwhile, in a small bowl, combine the nut butter, sugar, and salt. If the nut butter is on the thin side, add a little extra sugar to thicken.
Remove the chilled cups from the pans, and place 1 teaspoon filling per indentation. Sprinkle a tiny handful of chocolate on top, pressing down slightly. Serve chilled.
Store leftovers in an airtight container in the refrigerator for up to 1 week.
Yield: 34 mini brownie cups

◁ BLACK FOREST JARS
This dessert is in a jar and needs to be eaten with a spoon.
1/2 cup (120 ml) nondairy milk
1/2 cup (96 g) evaporated cane juice
2 tablespoons (30 ml) neutral-flavored oil
1/2 teaspoon vanilla extract
1/2 teaspoon almond extract, divided
1/4 teaspoon salt
3/4 cup (90 g) whole wheat pastry flour
1/4 cup (20 g) unsweetened cocoa powder
1 teaspoon baking powder
1/2 teaspoon cornstarch
2 teaspoons Kirschwasser, optional
1 1/4 cups (295 ml) black cherry tea, steeped from 2 teabags, cooled
1/4 cup plus 2 tablespoons (120 g) cherry jam or chopped vegan maraschino cherries
1 1/2 cups plus 3 tablespoons (270 g) Whipped Coconut Cream
2 tablespoons (17 g) grated vegan chocolate
Preheat the oven to 350°F (180°C, or gas mark 4). Lightly coat eighteen cups of two standard muffin pans with nonstick cooking spray. Line a baking sheet with parchment paper.
In a large bowl, combine the milk, cane juice, oil, vanilla, 1/4 teaspoon of the almond extract, and the salt. Sift the flour, cocoa, baking powder, and cornstarch on top. Using an electric mixer, mix until perfectly smooth.
Place 1 generous tablespoon (18 g) of batter into each prepared muffin cup.
Bake for 6 to 8 minutes, until the top springs back when touched. Leave the oven on. Carefully remove the cakes from the pan. Let cool for 5 minutes.
Place the cakes on the prepared baking sheet. Bake for another 10 minutes; this will prepare the cakes for the tea-soaking. Place on a cooling rack.
Have ready six half-pint (8 ounces, or 235 ml) mason jars with a diameter of more than 2 1/2 inches (6 cm) (or same diameter as your muffin pan holes) so that the cakes fit easily.
Stir the Kirschwasser and remaining 1/4 teaspoon almond extract into the tea. Fully soak each cooled cake in the tea for about 10 seconds, only as you assemble the jars, letting the excess liquid drip back into the bowl.
Place a cake at the bottom of a jar. Top with 1 1/2 teaspoons jam. Top with 1 1/2 tablespoons (15 g) whipped cream. Top with another cake. Top with the same quantity of jam and the same quantity of whipped cream. Top with another cake. Top with whipped cream, spreading it evenly. Top with 1 teaspoon grated chocolate. Repeat with the remaining jars. Cover the jars with lids, and refrigerate overnight to let the flavors meld.
Serve chilled, and enjoy within 2 days of preparation. You can also freeze the jars for up to 3 months, thawing them in the refrigerator overnight before serving.
Yield: 6 jars
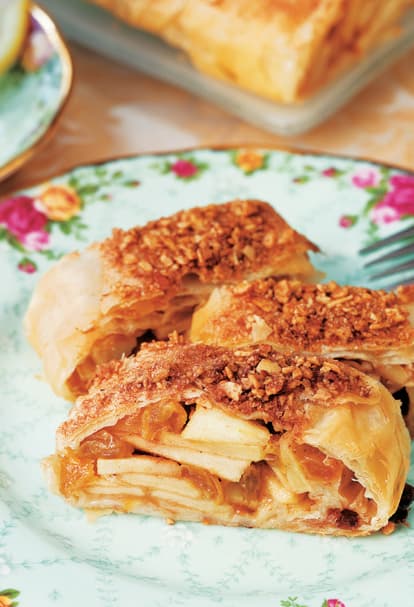
◁ APPLE STRUDEL (APFELSTRUDEL)
Working with phyllo dough is not as hard as some might think. The trick is to have all of your ingredients prepared in advance and to work quickly so the pastry sheets don’t dry out. Germans never eat their strudel cold but rather enjoy it lukewarm with vanilla sauce, which you can make by warming nondairy milk, cornstarch, and vanilla extract.
FOR THE FILLING AND PASTRY:
5 apples, peeled and sliced
1/2 cup (100 g) sugar
2 teaspoons ground cinnamon
1/4 cup (35 g) golden raisins
1/4 cup (27 g) slivered almonds, toasted, optional
1 tablespoon (8 g) all-purpose flour
Juice of 1 small lemon
6 to 8 sheets phyllo pastry
1/4 cup (55 g) nondairy, non-hydrogenated butter, melted
FOR THE TOPPING:
2 tablespoons (25 g) sugar
1 tablespoon (8 g) cinnamon
1/2 cup (65 g) ground almonds, toasted, optional
Preheat the oven to 400°F (200°C, or gas mark 6). Line a baking sheet with parchment paper.
To make the filling: In a bowl, mix together the apples, sugar, cinnamon, raisins, almonds if using, flour, and juice, stirring thoroughly to combine.
Place 1 sheet of phyllo on a clean work surface. (It should be placed so you are looking at it vertically.) Keep the remaining phyllo sheets covered with a damp cloth.
Brush the entire phyllo sheet with butter. Lay down another phyllo sheet directly on top of the buttered sheet and brush again with some melted butter. Repeat until you use all 6 or 8 sheets.
Spoon the apple filling across the lower third of the phyllo stack, leaving a 2-inch (5-cm) border along the bottom and sides. Roll the phyllo over once to begin creating a log, and then fold in the sides. Continue to roll gently until you have a compact log, ending seam side down.
Place the strudel seam side down on the prepared baking sheet, and brush the top with butter.
To make the topping: In a small bowl, combine the sugar, cinnamon, and almonds, if using. Sprinkle the mixture on the top of the strudel.
Bake for 20 minutes, or until golden brown. Allow to cool before slicing with a serrated knife.
Yield: 8 servings

◁ RUGELACH
These rich, sweet little pastries, a favorite in Jewish cuisine, have as many spellings (Rugulach, Rugalach, Rogelach, Rugalah) as they do filling options.
1 cup (225 g) non-hydrogenated, nondairy butter, cold
1 (8-ounce or 225-g) package nondairy cream cheese
2 cups (250 g) unbleached all-purpose flour
1/4 teaspoon salt
1/3 cup (77 g) nondairy sour cream
1/2 cup (100 g) granulated sugar
1 tablespoon (8 g) ground cinnamon
1 cup (150 g) finely chopped walnuts
1/2 cup (75 g) finely chopped raisins
1 cup (320 g) fruit jam or preserves (apricot, strawberry, raspberry)
Cut the butter and cream cheese into small pieces.
In the food processor, pulse together the flour, salt, butter, cream cheese, and sour cream until crumbly.
Shape the mixture into 4 equal disks. Wrap each disk and chill for at least 2 hours or up to 2 days.
When you’re ready to prepare the pastry, preheat the oven to 350°F (180°C, or gas mark 4). Line 2 cookie sheets with parchment paper. (You may use ungreased cookie sheets, but the jam mixture tends to ooze onto the sheet, making it difficult to clean.) In a bowl, combine the sugar, cinnamon, walnuts, and raisins. Set aside.
Lightly flour a work surface area, and roll each disk into a 9-inch (23-cm) round, keeping the other disks chilled until you’re ready to roll them. Spread each circle of dough with a light layer of the jam. Divide the sugar/nut filling among the disks, and press lightly into the jam. With a sharp knife or pizza cutter, cut each round into 12 wedges or triangles. Roll the wedges from the wide end to the narrow end, so you end up with a point on the outside of the cookie. Place on the prepared baking sheets with the point side down.
Bake in the center rack of the oven for 22 minutes, or until lightly golden. Cool on wire racks. Store in airtight containers. They also freeze very well for up to 2 months.
Yield: 3 dozen cookies

◁ CARAMEL POPCORN
Package this treat as a winter holiday gift for friends, neighbors, and coworkers. This is a tasty, easy-to-make, and easy-to-double recipe. You’ll never resort to store-bought again.
14 cups (1400 g) popped popcorn (air- or oil-popped)
1 cup (145 g) dry roasted peanuts, optional
1 cup (225 g) firmly packed light brown sugar
1/4 cup (75 g) light corn syrup
1/2 cup (55 g) non-hydrogenated, nondairy butter
1/2 teaspoon salt
1/4 teaspoon baking soda
1/2 teaspoon vanilla extract
Lightly grease a shallow pan, such as a roasting pan, jellyroll pan, or high-sided cookie sheet.
Place the popped popcorn in the pan. Add the peanuts, if using, to the popped corn. Set aside.
Preheat the oven to 250°F (120°C, or gas mark 1/2).
Combine the brown sugar, corn syrup, butter, and salt in a saucepan. Bring to a boil over medium heat, stirring enough to blend. Once the mixture begins to boil, boil for 5 minutes, stirring constantly.
Remove from the heat, and stir in the baking soda and vanilla. The mixture will be light and foamy. Immediately pour over the popcorn in the pan, and stir to coat. Don’t worry too much at this point about getting all of the popcorn coated.
Bake for 1 hour, removing the pan every 15 minutes and giving the popcorn and nuts a good stir. Line the countertop with waxed paper. Dump the popcorn out onto the waxed paper and separate the pieces. Allow to cool completely, then store in airtight containers or resealable bags. Package as gifts!
Yield: 14 servings

◁ DECADENT CHOCOLATE TRUFFLES
For a lighter treat after a heavy meal, these truffles will do the trick.
1 cup (145 g) raw almonds or walnuts
20 large (Medjool) dates, pitted
1 tablespoon (15 g) unsweetened cocoa powder
Zest from 1 medium orange
2 tablespoons (40 g) agave nectar
1/2 teaspoon ground cinnamon
1/4 teaspoon ground nutmeg
1/8 teaspoon salt
Cocoa powder, for rolling
Grind the almonds in a food processor until fine. Add the dates, cocoa powder, orange zest, agave nectar, cinnamon, nutmeg, and salt, and process until the mixture forms a ball.
If the mixture doesn’t stick together, add more agave nectar.
Form 30 small balls out of the mixture. Roll in the cocoa powder, and serve on a pretty candy dish. They also store well in the refrigerator and freezer.
Yield: 30 servings
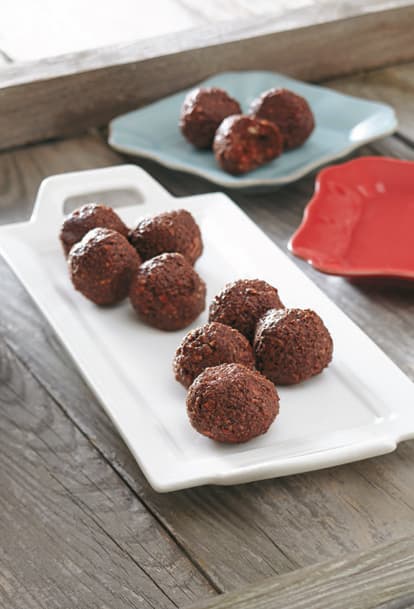
◁ COCONUT CACAO TRUFFLES
This dessert is raw, which helps keep the nutritional value of each nutrient high and mighty (in a good way!). Cacao is rich in heart healthy flavonols, which help to improve blood circulation. (If necessary, you may substitute unsweetened natural cocoa powder for the raw cacao powder.) Creamy coconut butter and raw nuts contain the antioxidant vitamin E. Antioxidants are important for helping to reduce aging and damage from free radicals, which can affect heart health. These truffles are one of our absolute favorite desserts, because they are quick to make, delicious, and satisfy any chocolate lover’s chocolate craving!
3/4 cup (180 g) raw unsweetened raw cacao powder
2 cups (290 g) raw almonds
1/4 cup (36 g) raw cashews
1/2 cup (120 ml) maple syrup
1/4 cup (60 ml) water
1 heaping tablespoon (14 g) coconut oil
Pinch of kosher salt
In a food processor or high-speed blender, combine all of the ingredients and blend until you have a thick batter.
Roll into small balls about 1 inch (2.5 cm) in diameter and place on a plate. Cover and keep in the freezer until ready to eat. The truffles will keep for up to 2 weeks in the freezer and are best served chilled.
Yield: 8 to 10 truffles

◁ CRUNCHY COCONUT PEANUT CANDY
This candy is similar to a brittle peanut butter fudge. It’s a quick and delicious treat to whip up because the sugar in the recipe only needs to cook a few minutes, much less than the long cooking times of other homemade candies.
2 1/3 cups (467 g) sugar
1/4 cup (60 ml) coconut milk
1 cup (85 g) shredded unsweetened coconut
1 1/2 cups (218 g) crushed peanuts
Prepare an 8x8-inch (20 × 20 cm) baking pan by lining it with parchment paper. Set it aside but keep it close to your cooking area so it will be handy as soon as the candy is fully cooked.
In a 2-quart (2 L) saucepan, over medium heat, warm up the sugar and coconut milk and continue to cook, stirring constantly, until the sugar has turned into a liquid, about 2 minutes. The sugar will still be grainy, but it should be able to flow.
Remove from heat and stir in the coconut and peanuts until well mixed and quickly transfer to the prepared pan. Press down firmly with a fork, or clean hands, to pack the sugar mixture into the mold. The mixture will be loose and crumbly at this time, but if well packed, it will come together nicely when cooled.
Let rest at least 1 hour until completely cooled. Invert the pan to remove the candy and then carefully cut into bite-size pieces.
Store in an airtight container for up to 1 week.
Yield: 20 pieces of candy
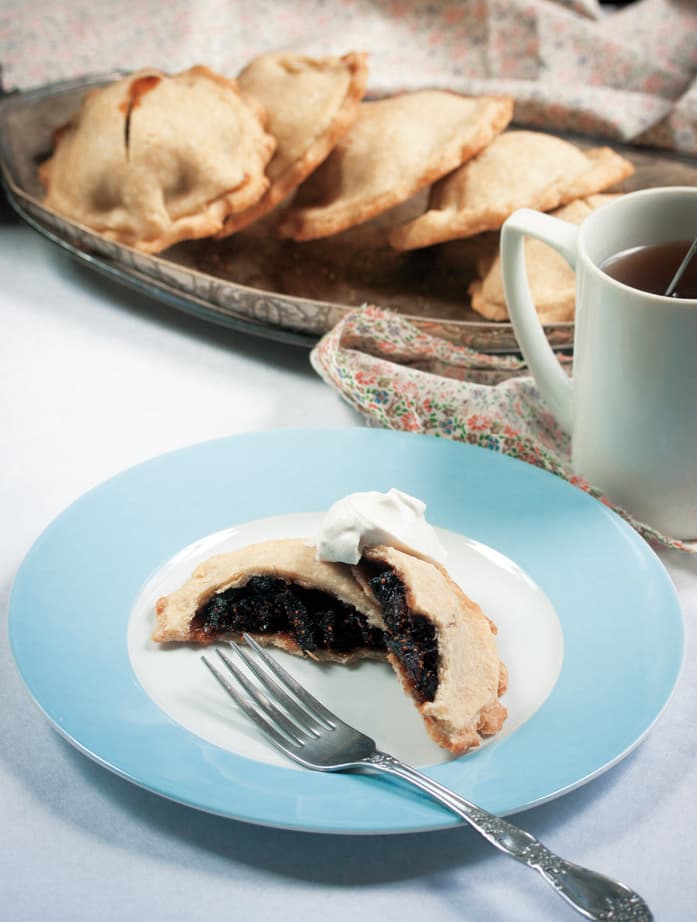
◁ FIG PASTRIES
This pastry is especially delicious when served with a fresh “sweetened cream,” which can be made by mixing together equal parts vegan cream cheese and vegan sour cream, a touch of sugar, and a little lemon zest.
FOR THE PASTRY:
1 1/2 cups (240 g) superfine brown rice flour
1/4 cup (51 g) sweet white rice flour
2 teaspoons xanthan gum
1/4 cup (50 g) granulated sugar
1/2 cup (112 g) cold vegan margarine, chopped into 1-inch (2.5 cm) square pieces
1/2 cup (120 ml) ice-cold water
FOR THE FILLING:
1 1/3 cup (200 g) dried mission figs
1/2 cup (115 g) packed dark brown sugar
2 teaspoons vegan margarine
Dash salt
2 dashes angostura bitters, optional
To make the pastry: In a large bowl, mix together the flours, xanthan gum, and sugar until well blended. Using a pastry blender, cut the margarine into the flour mixture until it forms coarse crumbs. Make a well in the center. Use a fork to slowly stir the ice-cold water into the flour mixture just until it comes together into a dough. Quickly knead the dough a couple of times to form a disk. Wrap in waxed paper and chill in the refrigerator until cold, about 1 hour. In the meantime, prepare the filling.
To make the filling: Dice the dried figs finely and combine with remaining filling ingredients. Smash using a large fork or potato masher, just so that the ingredients blend well.
Large chunks of fruit remaining in some spots are desirable.
To assemble: Preheat the oven to 375°F (190° C, gas mark 5). Once the dough is cold, divide in half and roll out between 2 sheets of plastic wrap on a flat surface, creating a rectangle that is about 1/4-inch (6 mm) thick from each half. Cut out 14 disks of dough, each about 2 inches (5 cm) in diameter (a small bowl works well as a cookie cutter here) for a total of 28 pieces of dough. Place about 1 heaping tablespoon (15 g) filling in the center of one circle and then cover with another circle of dough and crimp down the edges of the dough to seal.
Slice a slit into the tops of each pocket and bake on a parchment-covered cookie sheet for about 25 minutes or until lightly golden brown on edges. Serve warm or cold.
Yield: 14 pastries