
Chapter 5
Photography Rules and Conventions
If you’ve noticed, throughout the book so far we have really been talking about making decisions at every level— which shutter speed, where to focus, and so on. Good photography is all about thinking decisively and either following or ignoring photographic conventions (like stopping motion or freezing motion).
In fact, if you think about it, all art forms are just a tangible record of a series of decisions—where to put a blob of paint, striking a C-minor chord, choosing one word instead of another, or deciding to write about romance instead of crime.
One difference that separates trained photographers from snapshooters is that photographers are familiar with the conventions of art. These conventions are guidelines that have become hammered into the history of our culture and its images. They denote certain things because they are used over and over again in certain ways—yet they are powerful precisely because they are clichés.
Pro Tip
Now, to consult the rules of composition before making a picture is a little like consulting the law of gravitation before going for a walk. Such rules and laws are deduced from the accomplished fact; they are the products of reflection ...
—Edward Weston
All art forms have conventions. For example, rock and roll has the beat, the guitar riff, and the wail of the singer; poetry has iambic pentameter and the meter of the verse. The conventions of all art forms are the grammar and syntax of its language, and they are there to be used intelligently. They are also made to be broken, however.
Some Conventions of Composition
The following are conventions of composition to help provoke ideas of your own and get you to experiment. But remember, composition doesn’t make great photographs any more than good punctuation makes great writing.
In the history of art, there is a long-standing notion that there is an innate beauty and elegance to any rectangle proportioned 2×3. Remarkably, this is also the proportion of your camera’s frame. Coincidence? This also happens to be the proportion of the Parthenon’s façade. I think I am beginning to smell an international conspiracy.
Western art was built on this “golden rectangle,” so who am I to argue with the ancients? Look around you—in fact, look at the proportions of this very book—and you will see golden rectangles everywhere.

The golden rectangle.
The Rule of Thirds
Every book on photography has to include a section on the rule of thirds; it’s a rule.
The rule of thirds states that if you divide a golden rectangle into thirds, you get six more golden rectangles. By placing the subject of your image at the intersections of these new rectangles, the composition has more tension and interest. Once you get hip to the rule of thirds, you will see it everywhere in art, advertising, and cinematography.
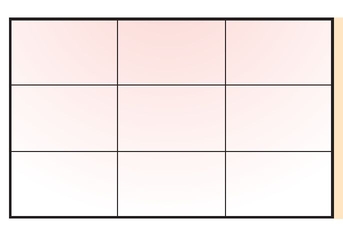
Division of the golden rectangle, resulting in the rule of thirds.
Oh, and have you noticed that most camera’s autofocus sensors are placed at intervals that correspond to the rule of thirds?

Photo shot using the rule of thirds.
The Spiral
The spiral convention is actually a continuation of the Rule of Thirds. In this particular spiral, the same mathematical formula is applied as if you were continuing the progression of dissecting the golden rectangle into ever-smaller rectangles.
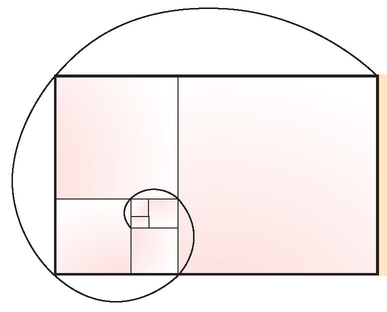
The fibonacci spiral.
For the math geeks out there, this is also known as the Fibonacci spiral because it is based on the Fibonacci sequence of numbers. If you look at the squares and rectangles that are the guides for creating the spiral, you will notice this pattern a lot in everyday life—especially in older office buildings.
Fibonacci (a.k.a. Leonardo of Pisa) was an influential mathematician of the middle ages. Although he did not discover the Fibonacci numbers, it was named in his honor.
The number sequence begins 0,1,1,2,3,5,8,13,21,34 and continues ad infinitum. In the sequence, any two numbers (in order) add up to the next number in the sequence 2+3=5, 5+8=13 and so on. The sequence is often found in nature; like the chambered nautilus sea shell, or the way trees shoot off limbs, limbs shoot off branches, branches shoot off twigs and twigs give rise to leaves. There’s a formula that applies the Fibonacci sequence to a method of tiling squares that results in an ever-expanding series of golden rectangles, on which the Fibonacci spiral can be drawn. The number sequence has held a special place in the hearts of mathematicians and artists as a possible hint, or even a proof, of a Divine Intelligence in the creation of the physical universe.
Diagonals, Zigzags, and S-Curves
Diagonals, zigzags, and S-curves are another variation on the rule of thirds because you are usually connecting two of the rectangles’ intersections with a diagonal.

The valleys and ridges beyond the skier form a series of zigzags which draw your eye to the main subject of interest.
An example of dynamic symmetry.
Dynamic Symmetry
This one gets a little trickier because symmetry is supposedly boring. Most photography books tell you to avoid putting the subject in the center of the frame.
But then there’s “dynamic symmetry.” Dynamic symmetry is a composition that looks symmetrical at first, but there is an element that causes it to be slightly unbalanced. This imbalance causes you to keep looking although the photograph seems simple.
Negative/Positive Space
The yin-yang of compositional devices, negative and positive space uses the edge of the photograph’s frame to create tension within the photograph.
To paraphrase an anonymous art teacher: “When you put a peanut in the bottom of a barrel, it’s a dot. When you put it in a matchbox, it’s sculpture.”
Negative space is “empty” or background space. Positive space is the area that contains the image the viewer is expected to identify.
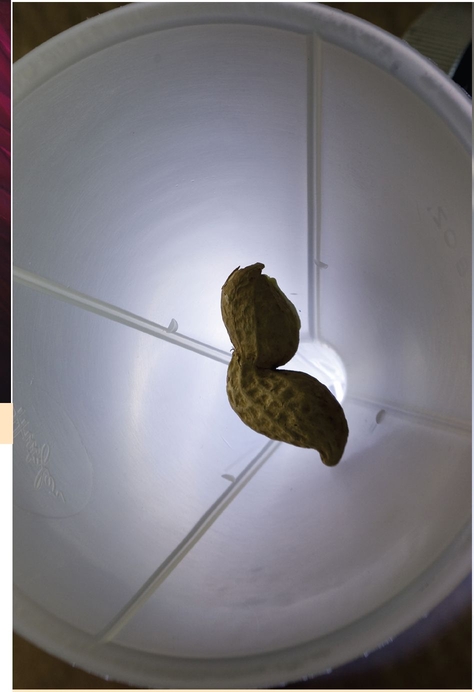
Use of negative and positive space to create interest.

Coming in close emphasizes the sinuous lines of the object in contrast to the straight edge of the frame.
The Dutch Angle/Lasso
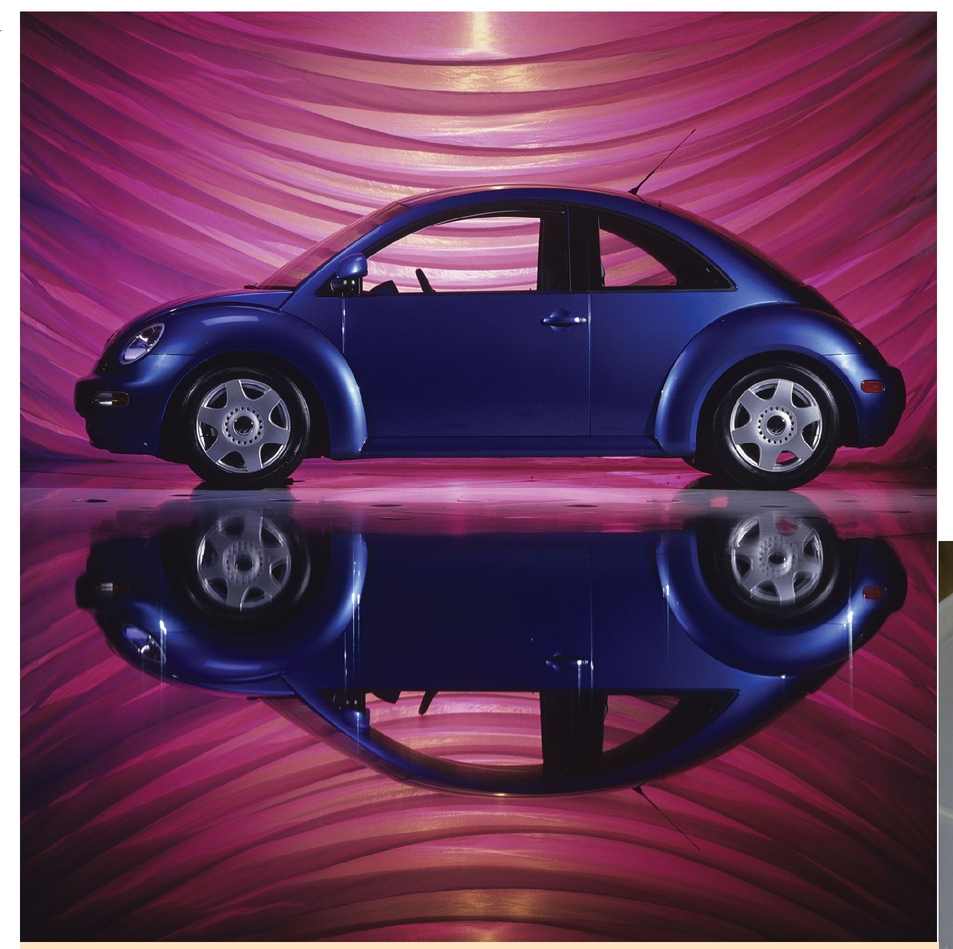
The Dutch angle is a device used a lot by cinematographers where the camera is cocked at an angle to create tension in the frame. It is often used to denote a time when the main character is mentally unbalanced. I’ve used it a lot in my automotive photography as a device to make a static car photographed in the studio seem more dynamic.
My own variation on the Dutch angle is the “lasso” (actually, my entire generation really stole it from the great photographer Garry Winogrand). In it, you simply “throw” the rectangle of the frame around all that you want the photograph to have in it without worrying about keeping the frame level.

Photograph shot using the Dutch angle device to emphasize the potential power and speed of a static car.
When you “lasso” a photograph, you are just trying to connect two different things in the frame to show their relationship. Photojournalists use this compositional device a lot to include as much content and energy as possible in each photograph.
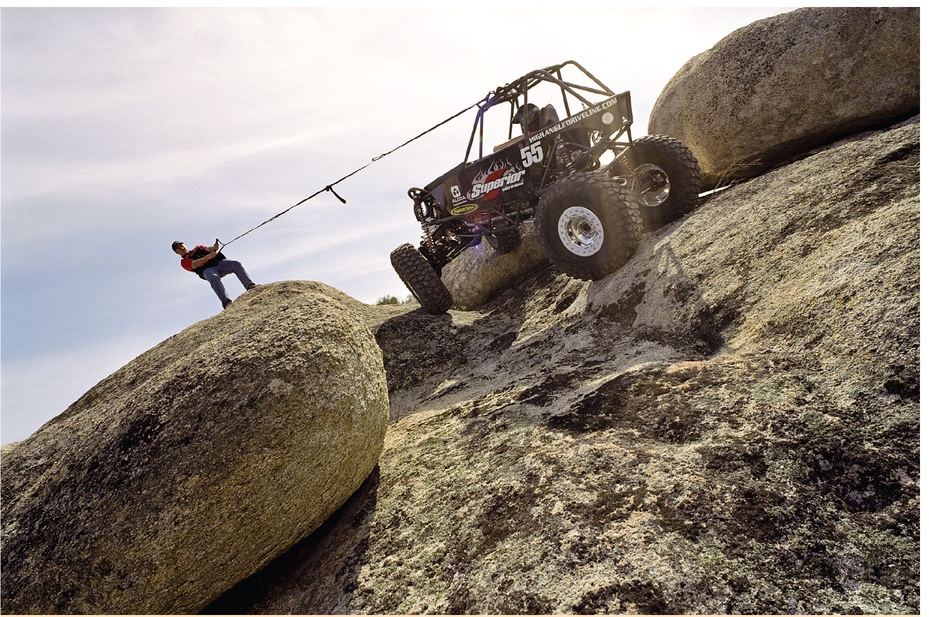
It’s a happy coincidence that this photograph looks like someone lassoing something.
Take a look at this photograph. We are actually looking straight up a sheer rock face that a specialized truck is climbing in a rock-crawling competition. The person holding the rope is helping guide the truck up the rock wall. (These vehicles can do amazing things.)
A photo as confusing as this would never have been accepted 40 years ago, but we have become accustomed to seeing these kinds of compositions in contemporary photographs and films. It’s another example of how our visual language is always evolving.
Photograph shot using the “frame within a frame” device.

This photo is a great example of how conventions have power. The child looks like he’s being threatened, and perhaps a fight is about to break out. The viewer’s reaction is a conditioned response because Hollywood uses this exact composition all the time for dramatic effect.
The Frame Within a Frame and the Dirty Frame
The “frame within a frame” convention uses one object to frame another.
The “dirty frame” is a term I might have made up. I’m not sure where it came from. But this convention is used a lot in cinematography where the main subject is framed by other objects or people (usually out of focus) for dramatic effect. It heightens the viewer’s feelings that he or she is a “fly on the wall” and is privy to a secret event.
Take a look at this photograph. Although the photo is completely candid, there is nothing “lucky” about it. The kids were playing happily, and I just watched for the right framing and expressions to illustrate the point. Sometimes knowing what you are looking for can help filter out all the clutter and make the hunt easier.
Watch the Background
It almost goes without saying that you need to watch the background in your shots—remembering that when you look through the camera, the lens is wide open and has limited depth of field. When you actually take the photo, the lens closes down to the working aperture. At very small apertures, the increase in depth of field might yield some unpleasant surprises in the final image (like this one, where the woman seems to be standing on the little boy’s head).
The interesting thing is that you probably already know the rules. As you went through the points I just made, I’ll bet at every single one you thought silently, “Oh yeah, I’ve seen that before.” Or if not, now you know more than you did about the rules of composition.
In the same way that our number system is based on how many fingers we have, the rules and conventions of composition are “hard-wired” in our culture and our collective psyche. You already know the rules because you see them all the time. What you probably haven’t been doing is practicing them and putting them together.
Pro Tip
What’s wrong with just putting your subject(s) in the middle of the frame? Absolutely nothing. Diane Arbus did it, and so did Richard Avedon and Walker Evans. In fact, I sometimes think this is the subtlest of all the devices because it places the attention on the actual thing you are looking at and less on you as the photographer. The key is to make sure the “thing itself” is interesting.
Composition is a tool, not an end.
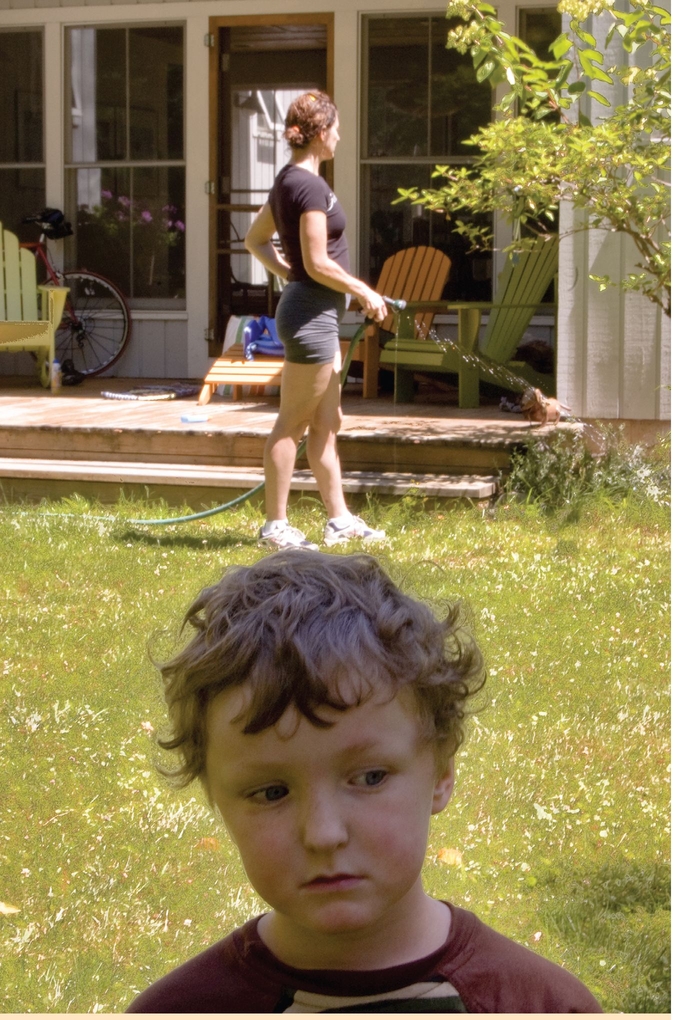
Keeping an eye on the background while shooting ensures that you don’t wind up with odd-looking photos like this one!
Talent vs. Practice
The word talent implies a special gift or aptitude, like a singer with perfect pitch or an athlete with a genetic gift that enables him or her to jump higher or run faster.
I’ve been fortunate to meet and know some of the greatest photographers in the world. I don’t think they are necessarily talented. They are just people who work very hard—people who get up before dawn to shoot, who live in the darkroom, who go to every exhibition and spend all their money on photography books. They eat, breathe, and sleep photography. Remarkably these are also the photographers who seem to be the most talented. When we speak of their talent, we actually denigrate their hard work and commitment.
Talent is exclusive and mysterious—kind of like you’re either born lucky or you aren’t. But practice is inclusive; anyone can practice and learn. Practice is what makes anyone better at anything.
Here are some everyday assignments to make practicing fun.
Practice the Rules
Make a copy of the list of compositional devices I outlined earlier. Carry it with you, and make a series of photographs that uses every one of them. Practice them over and over again, then practice some more. There are an infinite number of interesting images out there to photograph, so you can never get bored just practicing.
Break the Rules
The traditions of composition help you think about photographs and help the viewer interpret them. But sometimes the challenge is to make a photograph that breaks all the conventions and still works.
A photographer must first know the conventions before breaking them—hence the need to practice. Once the conventions are understood, breaking them is where you can breathe more of your own creative life into things you shoot.

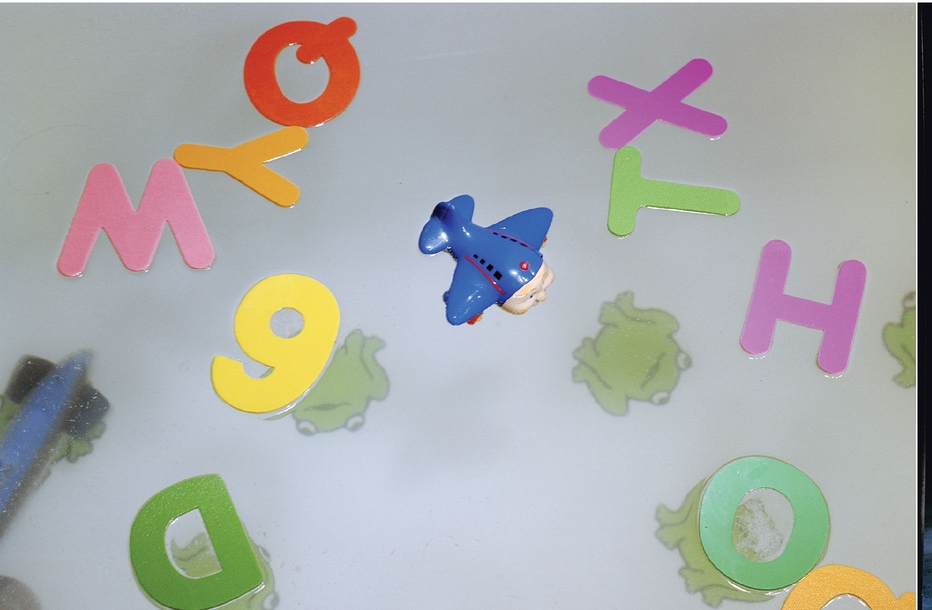
This photograph is pretty bad according to all the conventions of composition. The kid is in the middle of the frame; the seesaw behind him looks like an “x” growing out of his head; and the color is off. But who cares? Those are all the reasons why I like it. Bottom line: don’t be afraid to break the rules once you’ve learned them.
Move, Don’t Zoom!
In my time as a teacher, I have watched the popularity of kit zoom lenses grow. The problem with zoom lenses is that they make us lazy and actually encourage the point-and-shoot mentality. We compose by turning a dial instead of moving around the subject and figuring out ways to overcome the limitations of the lens by changing our own vantage point. Because of this, when I ask students what focal length they used, they seldom know.
Try to find a focal length you feel comfortable with on your zoom lens and then tape the zoom ring into that position. Spend a day moving yourself around instead of using the zoom as a convenient crutch. If something just doesn’t work, then go ahead and remove the tape and zoom the lens to a focal length that works. The exercise will make you more aware of when and why you use different focal lengths.
Invent Pressure and Goals
When a photographer is on assignment, there are a lot of other people (art directors, editors, and so on) who are depending on him or her. There are photographs we absolutely have to get (beautifully)—or careers (even besides our own) can be ruined.
Critiques at art schools can be brutal. When I was a student, it was common for students to be regularly reduced to tears during a critique either by the teacher or fellow students.
I’m not quite that brutal as a teacher (although my students might disagree), but the weekly pressure of an art school critique is an important incentive for a student to produce outstanding work. Teachers also cheer students on, and everyone in the class applauds each other’s successes. Of course, the pressure is really just a pretense. No one is going to die because a student didn’t make a good photograph, and a good photograph isn’t a cure for cancer. In essence, teachers and students agree to pretend that it really matters because the pretense of pressure makes them better photographers. As they say, “Pressure makes diamonds.”
The hardest part for photographers trying to learn on their own is a lack of pressure. So it might be helpful to invent some, like challenging yourself to make a really good photograph every week. Don’t just shoot an image and look at it on the screen of your computer. Shoot it many times, practicing all the conventions and breaking them, and then print what you’re most proud of. Put it somewhere you’ll see it every day. Better yet, put it someplace where other people will see it.
Putting a photo on the wall of your cubicle or your refrigerator is a great way to discover how good it really is. Good photographs have staying power; they are interesting every time you see them.
Reinvent the Everyday
This is a little game a lot of professional photographers play in order to keep themselves interested and sharp.
The idea is that you just pick any object or scene that is likely to come into your view at least once a day. The trick is that every time you see it, you must stop everything else you are doing and make a good photograph of the thing that is different from all of the other times you have photographed it.
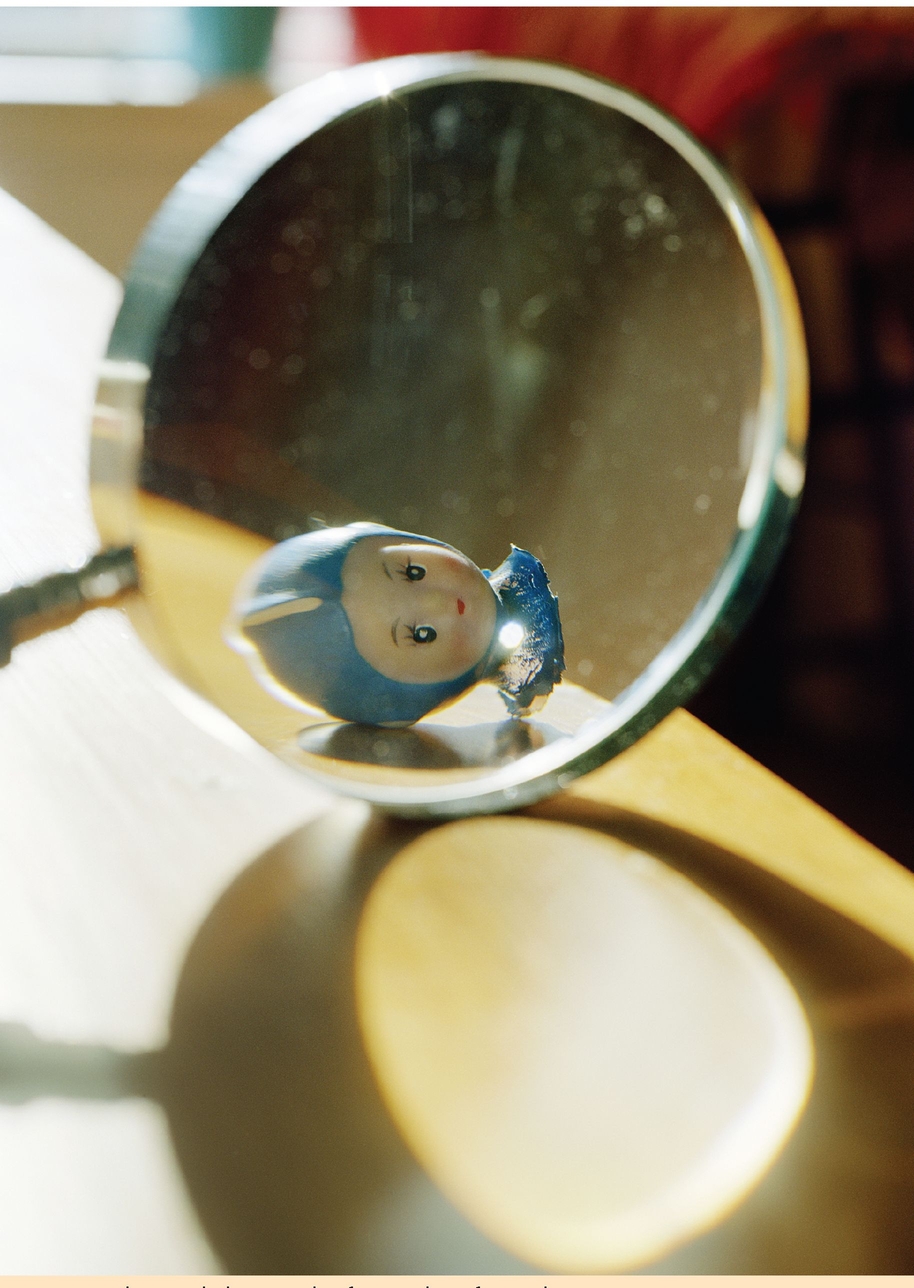
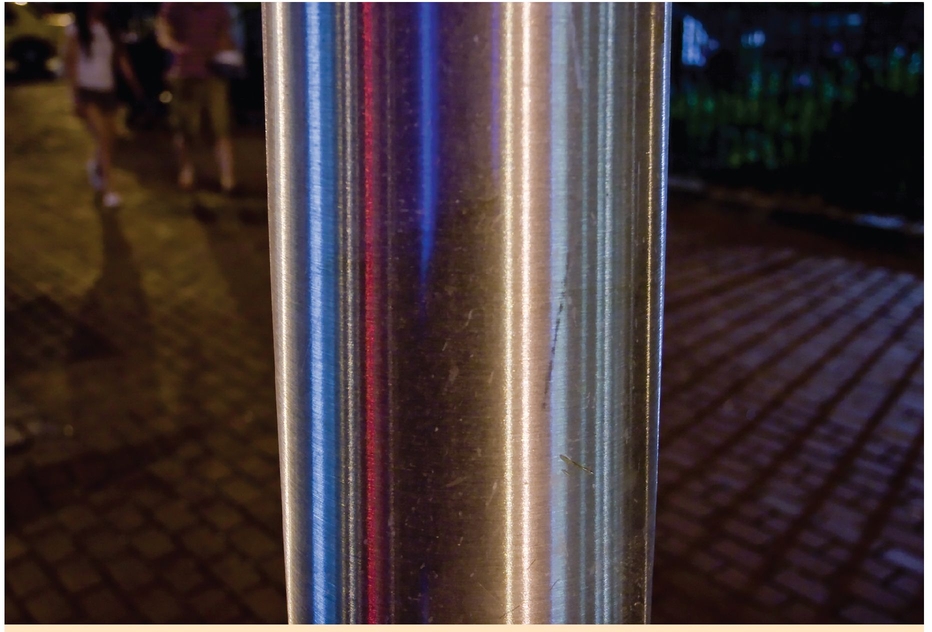
I have five things on my personal list. Some are just mundane, like this particular lamppost along my daily commute that I try to make new and interesting every time. The photographs of my son’s toys you see in this book started out as one of my everyday exercises, then evolved into a body of work that is actually exhibited in galleries.
Shooting a common scene every time you see it can produce some interesting results.
It doesn’t matter what you pick as long as you stop, look, and mak a photograph every time you come across it.
Try to make the objects you’re shooting look new and interesting every time you take a photograph.
Go Someplace New
A new place is always exciting. Get on the subway and take it where you’ve never gone before. Go to an amusement park alone and don’t ride anything just walk around and take pictures. Get in the car and drive with no destination. Let the world wash over your eyes like the surf, and just enjoy the pleasures of sight and translating some of these experiences on into photographs.
Nothing can invigorate a photographer like the adventure of finding new places—which become new worlds—to photograph.
Shoot Digital Endlessly
The big problem with digital cameras is that you look at the back of the camera and say, “I got it.” The creative process is effectively over the second you know you have it. When you’ve “got it,” you stop thinking.
The beauty of film was that we were never sure we had it, so we kept shooting and tried everything until we had exhausted every possibility we could think of. Even then, we still weren’t sure we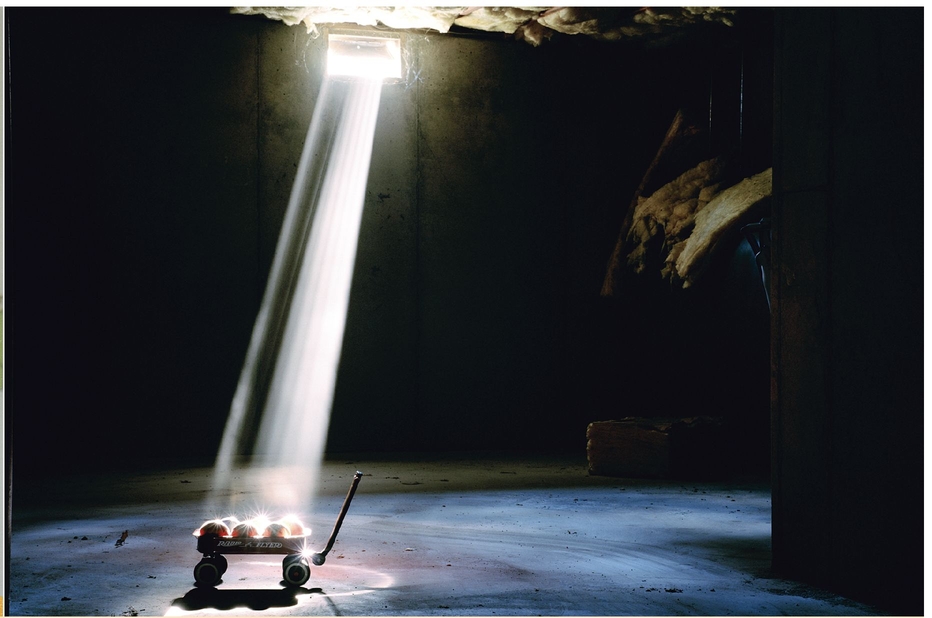 “had it.” The problem was that all of that experimentation was expensive unless you were on an assignment and someone else was buying the film.
You never know when a particular time of day may result in some interesting lighting or effect.
Digital cameras are the best learning tools in the history of photography. But they do, unfortunately, encourage a certain sloppiness and simplicity. The small screen is no place to edit your work.
Pro Tip
Which eye do you shoot with? Cameras are designed to be used with the right eye. If you shoot with your left eye (as I do), then you will have a hard time seeing the left side of the frame because your nose forces you to hold the camera awkwardly.
I happen to shoot with my left eye, and many of my students do as well. I often notice that in their work that left-eye photographers can be sloppy with composition on the left side of the frame. If you shoot with your left eye, make a conscious effort to look at the left side of your frame when you are composing photographs until it becomes second nature.
So cover the screen or turn off the display. Hoodman makes a great little screen protector that closes the screen but still allows you to look at the back by flipping it up (it also helps you view the screen in bright light).
Shoot as if you were shooting film—which means no checking your exposure on the screen and no flipping through the images in playback. Just shoot carefully and try to completely exhaust every possible combination you can think of. Then look at your work later on the computer screen.
The Least You Need to Know
• Learn all the basic conventions of photography so you can then learn how to break them
• Great photography requires lots of practice, even for those with a natural predisposition or talent for it.
• Go somewhere new to practice your photography, but also shoot images you see everyday.
• Practice with a digital camera as if you are using film— meaning no checking the results right away on the little screen.
..................Content has been hidden....................
You can't read the all page of ebook, please click here login for view all page.