
Contents
Create a Formula
A formula is an expression stored in a column that performs operations in order to insert values into that column. Formulas can perform mathematical operations, such as addition and multiplication, or they can compare column values or join values by referring to other areas in the same data table. Formulas can consist of any JMP Scripting Language (JSL) command. Once you insert a formula into a column, the column is locked: its values can be edited only by changing or removing the formula.
There are three basic steps to building a formula:
1. Open the Formula Editor by right-clicking the column name to which you want to apply the formula and selecting Formula.
or
Double-click the column name to which you want to apply the formula, select Formula from the Column Properties menu, and then click Edit Formula.
2. Select an empty formula element in the formula editing area by clicking it. (See Figure 7.2.)
Note: An element is selected when there is a red outline around it. All terms within the smallest nesting box relative to the place that you clicked become selected. The subsequent actions apply to those combined elements.
3. Add expressions, functions, and terms from the formula work panel. They are applied to the highlighted red box. The following sections in this chapter provide detailed instructions on how to add constants, elements, operators, and functions.
Figure 7.2 Building a Formula

See Use Basic Formula Editor Features, for an example of how to use the Formula Editor.
Reference Columns and Table Variables
You can create a formula that refers to values found in other parts of the data table, such as other columns and table variables.
When a formula uses values in other columns, the values in the column with that formula are dependent on the values in those other columns. Whenever a column that the formula refers to changes, the dependent column also changes. If you delete the referenced column, empty terms appear in the column containing the formula.
If you create a formula that refers to values found in table variables, those table variables must already exist in the data table. Table variables are character strings that are available to the entire table. Their names are displayed in the table panel at the left of the data table. (For details, see Use Table Variables in Enter and Edit Data.)
To build a formula that references values found in columns or table variables:
1. Open the Formula Editor by right-clicking a column name in the data table and selecting Formula.
2. Select a box in the formula editing area by clicking it. (It is selected when there is a red outline around it.)
3. Click the menu on the formula element browser and select either Table Columns or Table Variables. Highlight an element from that category’s list. The element is added to the selected box in the formula editing area.
For an example of referencing a column in a formula, see Use Basic Formula Editor Features.
Note: In a formula, when you reference a column using value labels, hover your mouse over the value label to see the actual data value.
Use Local Variables
You can create and use temporary numeric variables in expressions. You can use ordinary local variables or you can use parameters, which are special types of local variables. Local variables exist only for the evaluation of the formula in which they are defined. They appear in formulas as bold italic terms.
Local variables are most often used with Assignment functions, which can assign expressions to local variables that are used in a complex equation. (For details, see Assignment Functions in Formula Functions Reference.) This technique can sometimes simplify building an equation and improve the efficiency of its evaluation.
To build a formula that references values found in local variables:
Step 1: Create the Local Variable
1. Open the Formula Editor by right-clicking a column name in the data table and selecting Formula.
2. Select a box in the formula editing area by clicking it. (It is selected when there is a red outline around it.)
3. Click the menu on the formula element browser and select Local Variables from the formula element browser menu.
4. Click New Local Variable.
5. Type a name for the local variable. By default, local variables have the names t0, t1, and so on, and have missing values.
6. Assign a starting value, and click OK.
7. (Optional) To copy, edit, or delete a local variable, right-click (Ctrl-click on the Macintosh) its name and select Copy, Edit, or Delete.
Step 2: Insert a Local Variable into a Formula
1. Select a term in the formula editing area by clicking it. (It is selected when there is a red outline around it.)
2. Click the local variable name in the Local Variables list. It appears in the formula as a bold italic term.
Note: Another way to create local variables is to use the  button on the Formula Editor keypad, which automatically creates and displays local variables and places a semicolon after it. See Add Operators, for details.
See Use Local Variables in a Formula, for an example of referencing local variables in a formula.
Incorporate Parameters
Parameters are special types of local variables that are recognized as model parameters in some platforms, such as Nonlinear fitting. They can be used in formulas just as ordinary local variables can.
To view examples of parameters:
1. In the Sample Data folder that was installed when you installed JMP, open the Nonlinear Examples folder and then US Population.jmp.
2. Right-click the column name x-formula and select Formula.
3. Click the menu on the formula element browser and select Parameters.
Notes:
• After completing a nonlinear fit or after using the Reset button in the nonlinear control panel, the parameter’s value is the most recent value computed by the nonlinear platform.
• Each time the fitting algorithm takes a step, the updated parameter values are shown in the Nonlinear report.
• When you paste a formula with parameters into a column, the parameters are automatically created for that column unless it has existing parameters with the same names.
To build a formula that references values found in parameters:
Step 1: Create the Parameter
1. Open the Formula Editor by right-clicking a column name in the data table and selecting Formula.
2. Make sure a term is selected (a red highlight is around it in the formula editing area) in the formula editing area.
3. Click the menu on the formula element browser and select Parameters.
4. Click New Parameter.
5. Type a name for the parameter. By default, parameters have the names b0, b1, and so on, and have missing values.
6. Assign a starting value. It is important to enter this value when using a parameter in a model for the nonlinear platform. After completing a nonlinear fit, the parameter’s value is the most recent value computed by the nonlinear platform.
7. (Optional) To add several parameters (one for each level of a categorical variable, for example) at once, select Expand into categories, selecting column. Then select the column for which you want to expand the parameter.
8. Click OK.
9. (Optional) To copy, edit, or delete a parameter, right-click (Ctrl-click on the Macintosh) its name and select Copy, Edit, or Delete.
Step 2: Insert a Parameter into a Formula
1. Select a term in the formula editing area by clicking it. (It is selected when there is a red outline around it.)
2. Click the parameter name in the Parameters list. The parameter appears in the formula as bold type.
Insert Constants
Formulas can be simple assignments of numeric, character, or row state constants, or they can contain complex evaluations based on conditional clauses. Constants include commonly used numeric terms, such as e, pi, -1, 0, 1, and 2. There are two ways to add a constant value to a formula:
• Type them in manually using the keyboard
• Select them from the formula element browser, as shown in Figure 7.3.
Figure 7.3 The Formula Element Browser with Constants Selected

To add constants to a formula:
1. Open the Formula Editor by right-clicking a column name in the data table and selecting Formula.
2. Select a box in the formula editing area by clicking it. (It is selected when there is a red outline around it.)
3. Either type in a number or click the menu at the top of the formula element browser and select Constants, as shown in Figure 7.3. Then click a value in the list that appears: 0, 1, 2, -1, pi, e. The value appears in the outlined box.
4. Complete the remainder of the formula using the keypad and functions. (See Reference Columns and Table Variables, Add Operators, and Use Functions.)
Add Operators
You can add operators to a formula using the keypad, which contains buttons that help build formulas. It includes common operators (also referred to as functions).
Figure 7.4 The Keypad

To build a formula using keypad operators:
1. Open the Formula Editor by right-clicking a column name in the data table and selecting Formula.
2. Select a box in the formula editing area by clicking it. (It is selected when there is a red outline around it.) The operator performs its action on the area that is highlighted.
3. Select the column or variable that you want to use in your formula.
4. Click the keypad button(s).
Keypad Reference
Table 7.1 describes the keypad buttons.
|
Key
|
Name
|
Description
|
 |
Arithmetic buttons
|
Work as they normally do on a pocket calculator, providing addition, multiplication, subtraction, and division operators.
|
|
|
Insert
|
Inserts a new clause or function argument. First select the existing clause or argument that you want the new element to follow, and then click this button. The new clause appears and is selected. You can also insert a new clause or argument by typing a comma.
|
|
|
Delete
|
Deletes an element’s value, or deletes a clause. The delete button functions the same as the Delete key on the keyboard.
|
|
|
Exponent
|
Raises a given value to a specified power. It has an exponent of two by default.
|
|
|
Root
|
Calculates the specified root of the radicand. It has an implied index of two (a square root), which is not displayed.
|
|
|
Switch terms
|
Looks at the operator that is central to the selected expression and switches the expressions on either side of that operator.
|
|
|
Unary sign function
|
Inverts the sign of the argument. Apply the unary sign function to variable expressions or use it to enter negative constants.
|
|
|
Local variable
|
Creates and displays a local variable and assigns it the value of the selected expression. The local variable has the default name t0 in an expression and a semicolon after it. See Use Local Variables, for details about creating and inserting local variables. See Use Local Variables in a Formula, for an example.
|
|
|
Delete expression (peel)
|
Removes the outermost expression with the first argument. You can repeat this process to delete a formula term by term. See Use the Delete Expression Key, for an example.
|
Use Functions
You can add many types of functions to a formula. All of these functions are organized in the function browser. The browser groups collections of functions in lists organized both alphabetically (Functions (all)) and by topic (Functions (grouped). Use the function browser to specify the type of calculation that you want to perform on the elements in a formula.
To create a formula that contains a function:
1. Open the Formula Editor by right-clicking a column name in the data table and selecting Formula.
2. Select an expression in the formula editing area by clicking it. (It is selected when there is a red outline around it.) The function performs its action on the area that is highlighted.
3. Click the menu in the function browser to view the groups of functions.
4. Select a group of functions to view. See Table 7.2 for details.
The functions that belong to that group are then displayed in the list below the menu. The function groups are briefly described in the following list.
5. Click any function in the Functions list to apply it to the selected item. When you click some items, you reveal a submenu from which you should make a selection.
Note: Most functions give hints about appropriate arguments through gray words inserted in the boxes in the formula editing area. Functions also show a small caret in the argument area if additional arguments can be added.
6. Continue to build the formula by highlighting terms and clicking items in the formula element browser, keypad, or function browser.
|
Group
|
Functions Included
|
|
Functions (all)
|
Displays a list of all available functions in alphabetical order. For details about individual functions, see the Formula Functions Reference.
|
|
Functions (grouped)
|
Displays a list of all available functions grouped according to topic.
|
|
Row
|
Displays a list of functions that contains miscellaneous functions such as Lag, Dif, Subscript, Row, and NRow. See Row Functions in Row Functions.
|
|
Numeric
|
Displays a list of functions that are terms commonly used in formulas. See Numeric Functions in Numeric Functions.
|
|
Transcendental
|
Displays a list of functions that are functions such as natural log, common log, exponential, root, factorial, combinatorial, beta, and gamma. See Transcendental Functions in Transcendental Functions.
|
|
Trigonometric
|
Displays a list of functions that are the standard trigonometric functions: sine, cosine, tangent, inverse functions, and hyperbolic functions. See Trigonometric Functions in Trigonometric Functions.
|
|
Character
|
Displays a list of functions that operate on character arguments such as trimming, finding the length of a string, converting between numbers and characters. See Character Functions in Character Functions.
|
|
Comparison
|
Displays a list of functions that are the standard logical comparisons such as less than, less than or equal to, not equal to, and so on. See Comparison Functions in Comparison Functions.
|
|
Conditional
|
Displays a list of functions that are programming-like functions, such as If, Match, and Choose. See Conditional Functions in Conditional Functions.
|
|
Probability
|
Displays a list of functions that compute probabilities and quantiles for standard statistical distributions, such as normal, Student’s t, Chi-squared, and F-distributions. See Probability Functions in Probability Functions.
|
|
Discrete Probability
|
Displays a list of functions that compute discrete probabilities, such as Poisson, Gamma Poisson, and Hypergeometric. See Discrete Probability Functions in Discrete Probability Functions.
|
|
Statistical
|
Displays a list of functions that calculate standard statistical quantities such as the mean or standard deviation. See Statistical Functions in Statistical Functions.
|
|
Random
|
Displays a list of functions that generate random numbers based on predefined distributions such as the uniform, normal, Cauchy, and so on. There is also a function to randomize the order of table rows. See Random Functions in Random Functions.
|
|
Date Time
|
Displays a list of functions that require arguments with the date data type, which is interpreted as the number of seconds since January 1, 1904. Date Time functions return values such as day, week, or month of the year. They can also compute dates and can find data intervals. See Date Time Functions in Date Time Functions.
|
|
Row State
|
Displays a list of functions that assign or detect row state status of color, marker, label, hidden, excluded, or selected. See Row State Functions in Row State Functions.
|
|
Assignment
|
Displays a list of functions that place the value on the right side of the assignment operator into the variable on the left side of the operator. See Assignment Functions in Assignment Functions.
|
|
Parametric Model
|
Lets you construct a Linear, Interactions, or Full Quadratic model for columns that you choose. After choosing the type of model, a window appears that lets you select the variables from which to construct the model. Hold the CTRL key and click to select more than one. See Parametric Model Functions in Parametric Model Functions.
|
|
Finance
|
Lets you create formulas to calculate principal payments, interest rate, rate of return, and so on. See Finance Functions in Finance Functions.
|
Order Expressions in Formulas
As you build a formula, keep in mind that all functions have an order of precedence shown in the following table, where level one is the highest order of precedence. Expressions with a high order of precedence are evaluated before those at lower levels. When an expression has operators of equal precedence, it is evaluated from left to right. You can use parentheses to override other precedence rules when necessary because any expression within parentheses is always evaluated first. Terms have no order of precedence because they cannot be evaluated further. Table 7.3 shows the first six levels of the order of precedence.
|
Level 1
|
Parentheses
|
|
Level 2
|
Functions in the function browser lists, And, Or, Not
|
|
Level 3
|
*, ÷, Modulo
|
|
Level 4
|
+, -
|
|
Level 5
|
Comparisons: <, ≤, =, ≠, ≥, >, ≤ x <, < x ≤, < x <
|
|
Level 6
|
Logical Operators &, |, !
|
Note: When a function has an expression as its argument, the argument has a higher order of precedence than it would if enclosed in parentheses outside the function.
Build a Formula in Order of Precedence
It is best to build a formula starting with any expression that serves as an argument. This is because functions have a high order of precedence and are always grouped with their corresponding arguments. It is also a good idea to create expressions working from highest to lowest order of precedence when possible. If you need parentheses, be sure to type the open parenthesis before entering the expression to be enclosed.
For example, given a data table with the columns A, B, and C, use the following steps to compose the expression A(B + C). Note that this expression is not the same as A x B + C, which evaluates as (A x B) + C.
To enter the expression:
1. Select Table Columns from the formula element browser list.
2. Click column A in the Table Columns list. 
3. Click the multiplication button  in the Formula Editor keypad.
4. Type an open parenthesis: 
5. Click column B in the Table Columns list. 
6. Click the addition button  in the Formula Editor keypad.
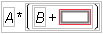
7. Click column C in the Table Columns list. 
Because the order of precedence determines which arguments are affected by each functions, it also affects the grouping of expressions. Select functions in the formula to verify how the order-of-precedence rules have been applied.
Structure Formulas for Efficient Evaluation
Usually, it is not necessary to structure formulas with efficient evaluation in mind. Most formulas evaluate almost instantaneously regardless of their structure. This is because statistical functions and constant expressions are evaluated only once when a column’s values are calculated.
However, when you are creating conditional expressions, keep in mind that Match evaluates faster and uses less memory than an equivalent Condition function, If. (Note that Match ignores trailing spaces and If does not.)
For example, using Big Class.jmp, you can predict a child’s height from his age as shown in Figure 7.5. There is a base height of 58.125 inches to which a quantity is added depending on the value of the age variable.
Figure 7.5 The Match Conditional Evaluates Faster Than the If Function

The Match conditional evaluates faster than the If function because the age variable is evaluated only once for each row in the data table. The If condition must evaluate the age variable at each If clause for each row until a clause evaluates as true.
Use Formula Editor Options
There are several options available to you as you create formulas. The following sections discuss each of these options.
Calculate Derivatives
The JMP Formula Editor can find and display the derivative of a function. The derivative is found with respect to the function argument (a single variable name) you highlight. Therefore, in order to differentiate with respect to x, x must be one of the arguments in the expression. The red triangle menu found above the keypad contains the Derivative command.
To calculate a derivative:
1. Enter a function.
2. Highlight a variable.
3. Select Derivative from the menu. Figure 7.6 shows the completion of these steps.
Figure 7.6 Using the Derivative Option

Simplify Complex Formulas
When the Formula Editor contains a complex formula, JMP can simplify it using various algebraic rules. It can find constant expressions, distribute multiplication over addition, combine terms, and more.
To simplify complex formulas:
1. Select a portion or all of the formula.
2. Click the red triangle menu above the keypad.
3. Select Simplify from the menu that appears, as shown in Figure 7.7.
Figure 7.7 Selecting Simplify (Left) Produces a Simplified Formula (Right)

Evaluate Formulas
By default, JMP evaluates each formula that you create. You can turn this evaluation off, or you can use it before you have finished creating a formula.
Suppress Evaluation
Turning off evaluation is a useful formula development mode for building complex formulas. You can turn off evaluation and build sections of a formula, and evaluate only to test it. In particular, you can close the Formula Editor and reopen it at a later time to continue building a formula without JMP evaluating it.
To suppress formula evaluation, click the red triangle menu above the keypad and select Suppress Eval. When evaluation is suppressed, the formula icon appears dimmed  .
.
Note the following:
• If the icon appears to the right of the red triangle menu in the Formula Editor, it indicates that formula evaluation is suppressed for that formula.
• If the icon appears beside the column name in the Columns panel, it indicates that the values in the column result from a formula. When formula evaluation is suppressed, this plus icon becomes gray. (For details, see Icons Representing Column Characteristics and Properties in Get Started.)
Note: The Apply button ignores the formula evaluation setting. Therefore, when formula evaluation is suppressed, clicking the Apply button overrides the suppression and evaluates the formula before it is applied to the column.
Ignore Errors
Once you construct a formula and click OK, JMP checks behind the formula for error and alerts you of any errors that it finds. An error message appears for each error and asks whether you want to ignore further errors.
Sometimes you might want to suppress error messages while a formula is under development. For example, you might want the evaluated values for some rows without seeing an error message for each row that causes errors.
To have JMP ignore any errors:
1. Create a formula.
2. Click the red triangle menu above the keypad and select Ignore Errors.
View a Formula’s Values from the Formula Editor
While in the Formula Editor, you can see the value of any expression within a formula with the Evaluate command. For column variables, you get the value at row 1. This is also true for parameters and expressions that evaluate to a constant value. To view values:
1. While in the Formula Editor, select the expression that you want to know about.
2. Right-click the selected expression.
3. Select Evaluate. The current value of the selected expression appears in a box until you move the cursor.
View a Formula in JSL
You have the option of entering or changing any part of a formula in text mode. Text mode displays the formula in JMP Scripting Language (JSL). The entire formula (or any of its terms) appears in text mode when you double-click the white space inside the boxed formula area. The elements of that box appear as plain text and you can then edit the formula as you would in any text editor.
Any element of a formula can be displayed as a scripting command and then edited. After editing formula scripting commands, click outside the formula to see its formatted form. For example, the text for the standardization of weight is (:weight – Col Mean(:weight)) / Col Std Dev(:weight). To enter an If statement in text form, add pairs of arguments for each If/Then clause in the statement, and a single last argument for the else clause if needed. In text form, the If statement in Figure 7.8 looks like this: If(:total!=0, (:count/:total)*100, 0).
Figure 7.8 An If Statement in Formula Mode

Edit Formulas
If you need to change a formula after you have exited the Formula Editor, right-click the column name in the data table and select Formula.
Correct Mistakes
If you make a mistake while entering a formula, hold down the CTRL key and press Z. This reverses the effect of the last (undo-able) command.
Other commands to help modify formulas include the following:
• Click the delete button ( ) on the Formula Editor keypad to remove the selected expression.
• Use the cut, copy, and paste keyboard shortcut commands or right-click a highlighted part of the formula and select Cut, Copy, or Paste from the menu.
• To rearrange terms or expressions, click to see the hand  grab the term. Drag to move formula pieces.
Select Expressions
Use the keyboard arrow keys to select expressions for editing. You can also use the arrow keys to view the formula’s order of precedence when either parentheses or the boxing option are not present. (See Hide and Show Boxing.)
Clicking an operator (+, –, *, ÷) in an expression selects the operator and its operands. A red box appears around the items. Once an operator is selected:
• The left and right arrow keys move the selection across other associative operators having equal precedence within the expression.
• The up arrow extends the current selection by adding the operand and operator of higher precedence to the selection.
• The down arrow reduces the current selection by removing an operand and operator from the selection.
Delete Functions
Deleting a function also deletes its arguments. Deleting a required argument or missing term from a function sometimes deletes the function as well. You can peel a function to delete it from its argument.
To peel a function from a single argument:
1. Select the function.
2. Click the peel button  in the Formula Editor keypad. Or, use the hand tool to drag the argument on top of its function.
Figure 7.9 Peeling an Argument

3. Complete formula changes.
4. Click Apply, and the new values fill the data table column automatically.
5. Once you have created a formula, you can change values in columns that are referenced by your formula. JMP automatically recalculates all affected values in the formula’s column.
Cut, Copy, and Paste
You can cut or copy any expression or an entire formula and paste it into another formula display. Use the cut, copy, and paste shortcut commands or right-click a highlighted part of the formula and select Cut, Copy, or Paste from the menu. The following aspects apply when you cut, copy, and paste a formula:
• When you paste it into another formula display, the formula appears in formatted form.
• The formula is saved on the clipboard as a JSL statement. Thus, if you copy it into other applications, it appears as a JMP Scripting Language (JSL) statement.
Note: Press the SHIFT key on your keyboard, and then click the red triangle to reveal a command called Copy As SAS Formula.
Click and Drag
You can drag any part of a formula that can be selected to any other location that can be selected.
To click and drag:
1. Place the arrow cursor inside an expression.
2. Click the expression. It is highlighted and the cursor changes to a hand cursor.
3. Drag across the formula. Destination expressions are highlighted.
4. Drag the selected expression to the new desired location. The selected expression is copied to the new location, where it replaces the existing expression.
Customize Formulas
There are several ways that you can customize formulas in the Formula Editor. The following sections describe how to change font size, show and hide boxing, change the orientation of the formula, and close arguments.
Change the Font Size
To incrementally increase or decrease the font used to display the formatted formula:
1. Click the red triangle menu above the keypad.
2. Select Larger Font or Smaller Font.
3. Repeat this process to further increase or decrease the font size.
Hide and Show Boxing
By default, JMP outlines specific terms within the formula. This is called boxing. Boxing is useful when you want to select and modify a specific portion of a formula, or need to determine the order of evaluation that takes place.
To turn boxing on or off:
1. Build a formula.
2. Click the red triangle menu above the keypad and select Show Boxing. When a check appears on the menu beside Show Boxing, the outline appears in the formula. When it does not, the outline does not appear.
Change a Formula’s Orientation
By default, JMP gauges the size of a formula and displays it in the Formula Editor in the best orientation (horizontally or vertically). However, if you create a long formula, you might want to display it in a different layout.
To change a formula’s orientation:
1. Build a formula.
2. Highlight an argument or formula.
3. Right-click what you have highlighted.
4. Select Orientation.
5. Select from the Orientation options: Best, Horizontal, or Vertical.
Open and Close Arguments
When a formula is too large to fit on the screen, you can close formulas and arguments.
To close an argument:
1. Build a formula.
2. Highlight an argument or formula.
3. Right-click what you have highlighted.
4. Select Close or Close Arguments from the menu that appears.
Examples and Tutorials
To better familiarize yourself with building formulas, review the following examples and tutorials.
Use Basic Formula Editor Features
The following example uses the Big Class.jmp sample data table to walk you through using the basic features of the Formula Editor. You can find Big Class.jmp in the Sample Data folder, which was installed when you installed JMP.
Big Class.jmp has a column called weight. Suppose you want a new column that computes standardized weight values.
To create this column using a formula to obtain its values:
1. Open Big Class.jmp.
2. Select Cols > New Column.
3. Type the new name, Standard Weight, in the box beside Column Name.
4. Select Formula from the Column Properties menu.
5. Click the empty formula element in the formula editing area to select it.
When you create a formula and Show Boxing is checked, the selected portion of the formula is outlined with a thin red line. See Hide and Show Boxing. All terms within the smallest nesting box relative to the place that you clicked become selected, and the subsequent action applies to those combined elements.
Next, enter the formula that standardizes the weight values.
1. While the initial missing term is selected, click weight in the formula element browser column selector list.
2. Click the minus button  in the Formula Editor keypad.
A new missing term appears after the minus sign as shown in Figure 7.10.
3. Click weight again.
4. Click the function browser menu, and select Statistical.
5. Select Col Mean from the Statistical list.
6. Select the entire expression.
The red box should now enclose the whole formula.
7. Click the division button  in the keypad.
The result gives a selected missing denominator for the whole expression.
8. Click weight again from the column selector list.
It becomes selected in the denominator.
9. Select Col Std Dev from the Statistical list.
The completed formula should look like that in Figure 7.10.
Figure 7.10 Building a Formula

10. Close the Formula Editor by clicking OK.
11. Close the Column Info window by clicking OK.
In the data table, the new Standard Weight column fills with values. When a weight value changes, the calculated Standard Weight value automatically recalculates.
Use Local Variables in a Formula
Suppose you want to compute the slope in a simple linear regression of y on x using the standard formula shown in Figure 7.11. One way to do this is to create two local variables, and name them XY and Xsqrd. (See Use Local Variables.) Then assign them to the numerator and the denominator calculations of the slope formula. Delimit each assignment with a semicolon, as shown in Figure 7.11. (Statements in the Formula Editor are actually JSL programming statements. Multiple statements in a formula must be separated by a semicolons.) The slope computation is simplified to XY divided by Xsqrd.
Figure 7.11 Local Variables in a Formula

Note: You can also create local variables using the button on the on-screen keypad. Clicking this button creates a local variable with a default name in an expression and places a semicolon after it. The default name is t1, and additional local variables are named t2, t3, and so on. You can change these default names by double-clicking and editing the name. However, you must be careful to rename each instance of the variable to avoid errors.
Use the Munger Function
The following examples show uses of the Munger function. In these examples, assume that there is a character column of names with “Veronica Layman” as one of its values. To simplify the examples, the literal name “Veronica Layman” is the search string instead of a column name.
For instructions on how to incorporate Character functions, such as Munger, into a formula, see Character Functions in Character Functions.
Insert Characters
This Munger example finds the blank between the first and last name, and inserts the middle initial “J.” The formula Munger("Veronica Layman", 1, " ", " J. ") inserts the middle initial J., and evaluates as Veronica J. Layman.
Double quotes are required by the Munger function for literal strings, including strings that consist of a blank or when leading or trailing blanks are part of a string.
Delete Characters
To delete one or more characters from a string:
1. Designate the characters to delete as the Find string in the Munger function.
2. Enter an empty Replace string: two quotation marks with nothing between them.
For example, the function, Munger("Veronica Layman", 1, "onic", "") removes the “onic” from Veronica and evaluates as Vera Layman.
Note: A Replace field with a null (no value) string enclosed in quotation marks is different from a Replace field with no value. If you delete the Replace string altogether, Munger shows the argument name (“Replace”) in the Formula Editor window and behaves as if that optional argument does not exist. The resulting data type can also change from character to numeric, depending on the value of the Find/Length argument.
Find the Position (Index) of a Value
When the Find/Length field contains characters, Munger behaves like an index function and returns the numeric position of the first instance of the search string if it exists. For example, Munger("Veronica Layman", 1, " ") searches for a single blank and finds it in position nine. If the search string is not found, Munger returns a zero. This use of Munger produces the same result as the Contains function, as shown in Character Functions in Character Functions.
Find a Substring
Munger can extract substrings. For example, to extract only the first name, Munger("Veronica Layman", 1, 8,) starts at position one and reads through position eight. The remaining characters are ignored because the replace argument is not defined. This yields “Veronica” and produces the same result as the Substring, as shown in Character Functions in Character Functions.
An alternative way to find a substring is with a start value, any negative find value, and a no replace argument. Munger("Veronica Layman", 9, –1,) returns “Layman”.
Use the Match Conditional Function
This example walks you through using the Match conditional function.
Suppose that you want a Match conditional for the nominal variable Type from the Hot Dogs.jmp sample data table.
1. In the Formula Editor, select Type from the Table Columns list.
2. Select Conditional from the Functions list.
3. Select Match.
4. Select Add Arguments from Data.
The values are automatically filled in. See Figure 7.12.
Note: Rather than complete step 2 through step 4, hold down the SHIFT key, select Conditional from the Functions list, and then select Match.
Figure 7.12 Automatically Filling a Match Conditional Statement

If you do not want the values filled in for you, select Do Not Add from the Match list instead of Add Arguments from Data.
Use the Delete Expression Key
Repeated clicks on the delete expression key produce the following sequence of steps.
|
1. Start with a formula.
|
 |
|
2. Select a formula element.
|
 |
|
3. Click the delete expression button (
|
 |
|
4. Click the delete expression again.
|
 |
|
5. Click the delete expression again.
|
 |
|
6. Click the delete expression again.
|
|
|
7. Click the delete expression again.
|
|
|
8. Click the delete expression again.
|
|
|
9. Click the delete expression again.
|
|
Keyboard Shortcuts
Table 7.4 describes the keyboard shortcuts that you can use in the Formula Editor.
|
Insert This Item
|
Using This Keyboard Shortcut
|
|
A missing element (•)
|
DELETE
|
|
Subscript
|
[
|
|
() set of parentheses
|
(
|
|
* (multiplication symbol)
|
* on keypad or keyboard
|
|
+
|
+ on keypad or keyboard
|
|
–
|
– on keypad or keyboard
|
|
÷
|
/ on keypad or keyboard
|
|
+/–
|
Hold down the SHIFT key and press the - (MINUS) key
|
|
And
|
&
|
|
Not
|
!
|
|
Or
|
|
|
|
Power
|
^
|
|
New argument
|
,
|
|
x<y
|
<
|
|
x==y
|
=
|
|
x>y
|
>
|
Glossary of Terms
Remember that:
• Functions always operate on selected expressions.
• Arguments are always grouped with functions.
• To find which expressions serve as a function’s arguments, select that function in the formula.
• The boxed groupings show how order-of-precedence rules apply and show which arguments are deleted when you delete a function. See Order Expressions in Formulas, for details.
Table 7.5 contains terms used for the parts of the formula itself.
|
Element
|
The name of a constant, table variable, table column, local variable, or parameter that appears in the element browser list.
|
 |
|
Argument
|
Any element or an entire expression (including mathematical operands) that is operated on by a function.
|
|
|
Term
|
Indivisible parts of an expression, such as constants and variables.
|
|
|
Expression
|
Any part of a formula that can be selected as a single unit, including terms, missing terms, and functions grouped with their arguments, as well as the entire formula.
|
 |
|
Clause
|
A complete segment in a conditional function.
|
 |
|
Function
|
A mathematical or logical operation that performs a specific action on one or more arguments. Functions include most items in the function browser list and all keypad operators. Functions always operate upon selected expressions, and arguments are always grouped with functions. To find which expressions serve as a function’s arguments, select that function in the formula. The boxed groupings also show how order-of-precedence rules apply and show which arguments are deleted when you delete a function.
|
|
|
Missing term
|
Any empty place holder for an expression, represented by an empty box.
|
|
|
Missing value
|
Excluded or null data consisting of the missing value mark (•) for numeric data or null character strings for character data.
|
 |
..................Content has been hidden....................
You can't read the all page of ebook, please click here login for view all page.