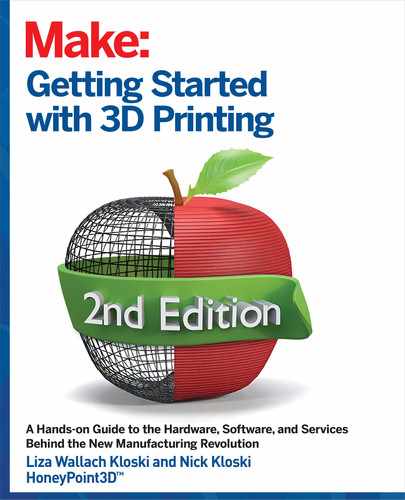

FIGURE 116: Properties and refinement areas are adjusted in the Sculpt tool
refinement areas Figure 11-6, and adjust the set-
tings to match the following.
IN THE PROPERTIES AREA:
Strength: 77
Size: 55
Depth: 0
Flow and Volumetric should be checked
IN THE REFINEMENT AREA:
Enable Refinement should be checked
Refine: 100
Reduce: 100
Smooth: 9
Always Use Inspector
Whether you get 3D models from the Internet or
create your own models, it is always a good idea
to run them through the Inspector tool to see if
there are any problems with it. Sometimes more
advanced repair is needed, but often the Inspec-
tor tool does a great job automatically!
Getting Started with 3D Printing 156
155 Chapter 11: Getting Started with Meshmixer
INTERIOR_3DPrinting_v21.indd 155INTERIOR_3DPrinting_v21.indd 155 4/14/2021 3:00:59 PM4/14/2021 3:00:59 PM
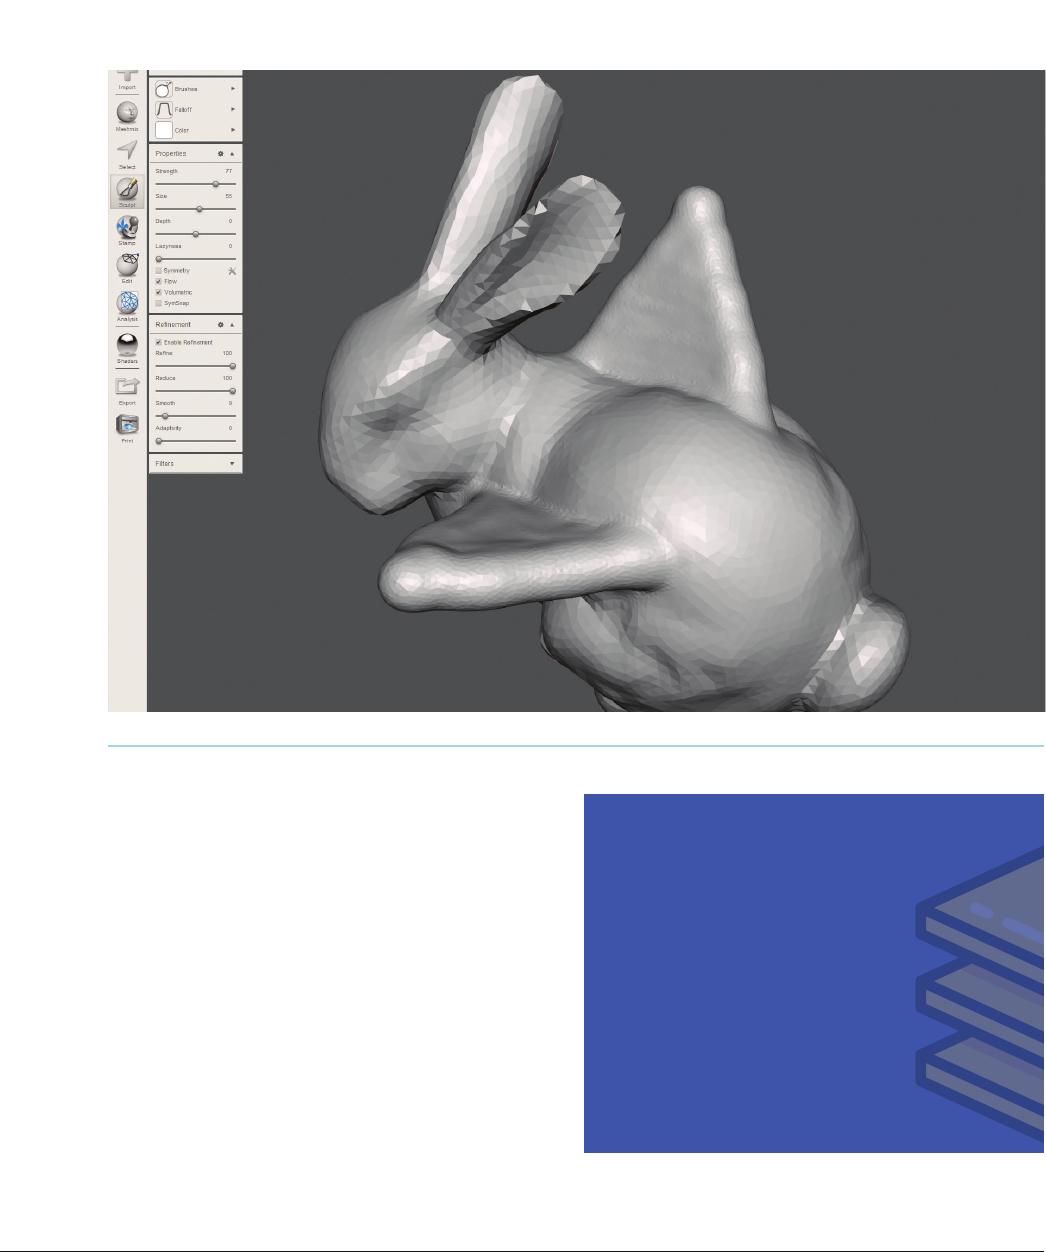
FIGURE 117: Both wings have been added to the bunny
Now, rotate your view so that you are looking at the
left shoulder of the bunny. Hold your left mouse
button down on the shoulder area, and while
keeping the left mouse button down, start moving
back and forth in a line as in #fig10_6. If you spend a
bit more time in the center than you do at the edges,
you will be slowly building up a wing on the bunny.
Once you have drawn one wing, rotate your view to
the other shoulder with the right mouse button, and
“draw” another wing so that your bunny can prop-
erly fly as shown in Figure 11-7.
ADDING SUPPORT STRUCTURES
We talked about the need for support structures in
A Note on Sculpting
Many sculpting commands (including the Draw
command) will build toward you, in other words
toward the viewpoint from which you are looking
at the model. So, as you are “drawing” the bunny’s
wing, it might seem as if nothing is happening…
but if you rotate around, you will see that the wing
is being “drawn” toward you.
Getting Started with 3D Printing 156
INTERIOR_3DPrinting_v21.indd 156INTERIOR_3DPrinting_v21.indd 156 4/14/2021 3:00:59 PM4/14/2021 3:00:59 PM

FIGURE 118: Adding support structures to the bunny
previous chapters, and Meshmixer is a truly unique program in its ability to help you successfully 3D print.
One standout feature of Meshmixer is the creation of support structures that will support overhanging
areas of your model so that they will not droop during 3D printing. Let’s create some of those support struc-
tures now:
ON THE LEFTHAND MENU, CLICK ANALYSIS → OVERHANGS.
Change the top option from Custom Settings to Ultimaker2. You will see that certain places on your model
have turned red, as shown in Figure 11-8. Those are the areas that qualify for the generation of support
structures, based on the settings you entered in the menu on the left. You can change these settings to what
works best once you learn the capabilities of your specific 3D printer. (The Ultimaker2 printer was chosen
for this example, but a different choice may be appropriate for your specific printer. You can always use one
of the prefigured settings as a starting point for your own printer’s needs.)
CLICK THE “[1] GENERATE SUPPORT” BUTTON.
You just told the program to create support structures to keep your model in place during the printing process.
Getting Started with 3D Printing 158
157 Chapter 11: Getting Started with Meshmixer
INTERIOR_3DPrinting_v21.indd 157INTERIOR_3DPrinting_v21.indd 157 4/14/2021 3:00:59 PM4/14/2021 3:00:59 PM

FIGURE 119: Support structures have been added to the bunny for the 3D printing process
Meshmixer will think about the support structure gen-
eration for a few seconds, and then support structures
will appear as shown in Figure 11-9!
As we mentioned before, these support structures can
be edited and removed at will, or regenerated after you
change your settings. For you, learning how well your
3D printer prints at specific angles and with specific
materials will be part of the learning curve.
CLICK “[2] CONVERT TO SOLID” TO LOCK IN THE
SUPPORT STRUCTURES AS ACTUAL 3D MODELS
THEMSELVES.
A menu will pop up, asking if you want to create a
“New Object” or “Replace Existing” object on the
FIGURE 1110: Replacing the existing object using the pop-up
menu
Getting Started with 3D Printing 158
INTERIOR_3DPrinting_v21.indd 158INTERIOR_3DPrinting_v21.indd 158 4/14/2021 3:00:59 PM4/14/2021 3:00:59 PM
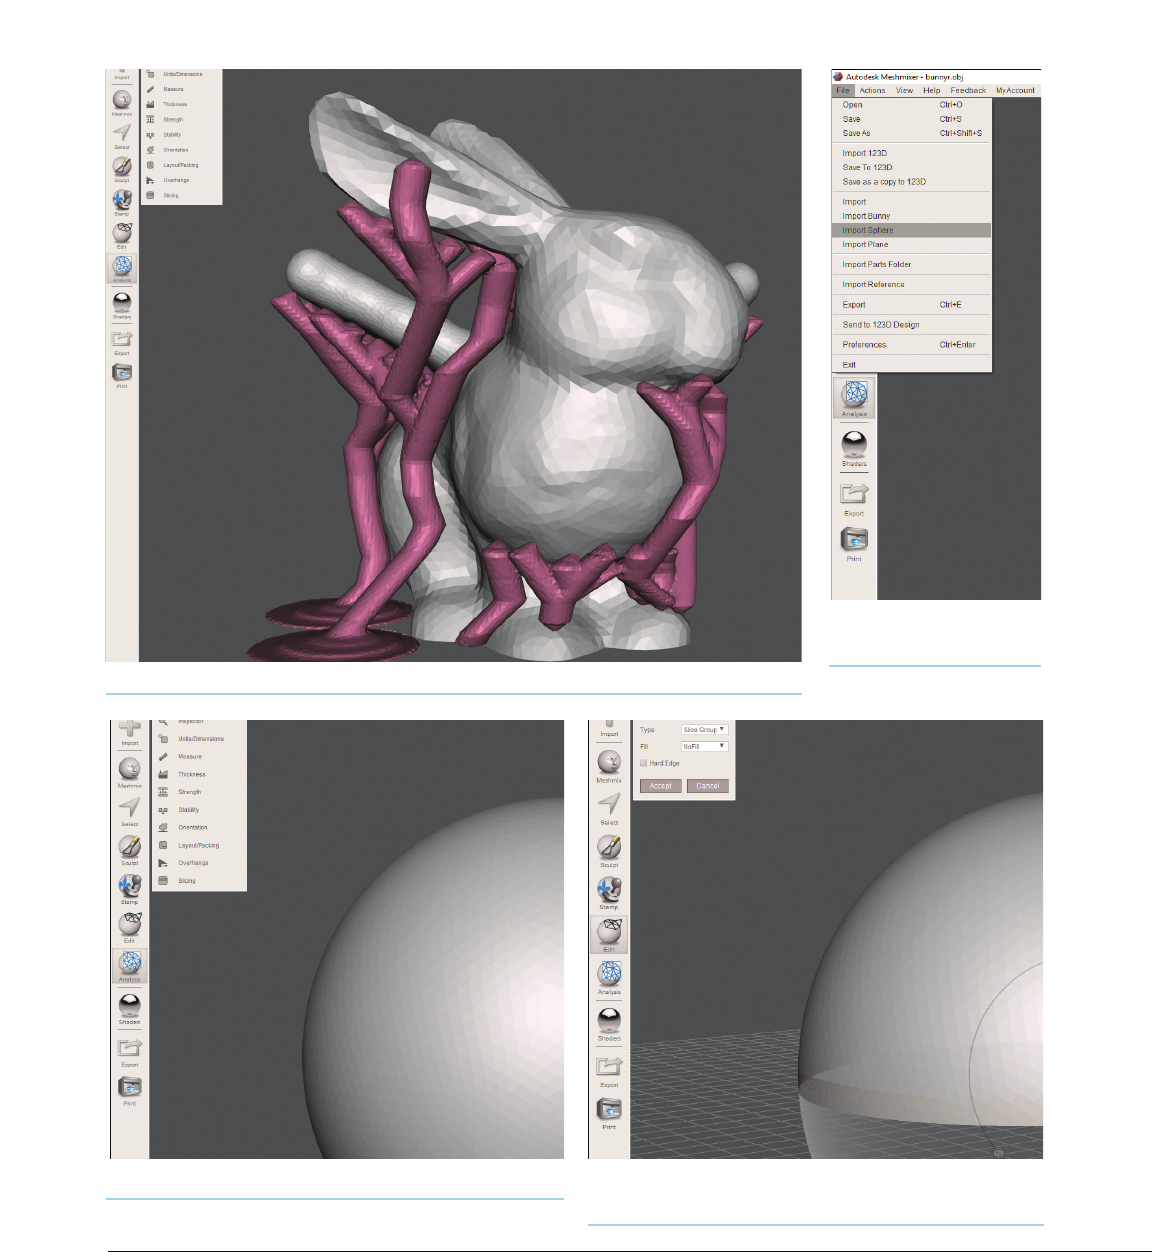
FIGURE 1111: Creating new support structures by changing the settings
FIGURE 1112: Creating a new
file by choosing Import Sphere
FIGURE 1113: Newly created sphere from File menu option FIGURE 1114: The Plane Cut pop-up window from the Edit menu
option
Getting Started with 3D Printing 160
159 Chapter 11: Getting Started with Meshmixer
INTERIOR_3DPrinting_v21.indd 159INTERIOR_3DPrinting_v21.indd 159 4/14/2021 3:01:00 PM4/14/2021 3:01:00 PM
..................Content has been hidden....................
You can't read the all page of ebook, please click here login for view all page.