
6
TECHNOLOGY FOR DIGITAL TEXTILE PRINTING
Digital inkjet printing is an increasingly important process within the industry, both as a mechanism for “sampling” printed designs and as a full production tool. Digital printing allows virtually any image quality to be printed but it does have its limitations, which are outlined within this chapter. However, it is important to recognize that it is printing processes themselves that have been responsible for many of the visual “languages” or styles that we see in textile design, and having an understanding of the technologies involved is key to appreciating this. This knowledge allows more control over the final result as well as the ability to create cuttingedge work. This chapter opens with a summary of the traditional technologies involved in textile printing, then examines digital textile printing in detail.
TRADITIONAL PRINT TECHNOLOGY
In order to understand the advantages of digital textile printing, it is important to comprehend the preceding technologies. Most traditional methods of printing textiles (as well as other media) are based on processes that use a template as a method for transferring a design onto the substrate. The techniques described here explain the basic categories of traditional textile printing techniques.
Relief Printing: a pattern is carved into wood or another material, as in woodblock printing.
Gravure or Intaglio: a process of incising marks into the surface, usually metal, as in copper plate printing.
Stenciling: a positive/negative process, as in rotary screen and hand silk-screen printing.
Heat Transfer: dye is transferred from paper to fabric using heat, as in sublimation printing.
Photoprinting: an image is broken down into four colors—cyan, magenta, yellow, and black (CMYK)—and printed out as a series of small dots, as in four-color process printing.
WOODBLOCK PRINTING
Block printing is an ancient method for printing images onto fabric. It is generally associated with woodblock printing, but blocks have also been made from terracotta or metal. An image is carved into the wood to create a relief of the design and then pressed into colorant. The ink that remains on the surface of the block is then transferred to fabric by pressure. The blocks can range from a simple small motif using only one color to complex and large-scale blocks that require stamina and skill on behalf of the printer. The blocks are registered by pin marks that the printer lines up with each repeat of the block. This was the main process for printing textiles in 19th-century England.
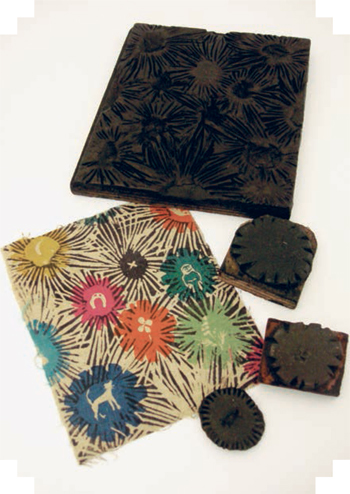
Woodblock prints on silk crêpe and linen (c. 1930–50) by Joyce Clissold, along with some of the original woodblocks used to make them.
GRAVURE PRINTING
Gravure printing is a method that first appeared in Europe in the mid-18th century. In this process, images are incised into a metal plate (usually copper) and dye is applied to the whole surface. The plate is then scraped, leaving the dye within the incised lines remaining. This allows the pattern to be transferred to the cloth by using pressure. Great skill in using linear marks and cross hatchings developed within the textile industry and the most famous examples became known as “toile de Jouy.” A distinct visual language emerged with this print process and it is often referenced in contemporary textile design today.
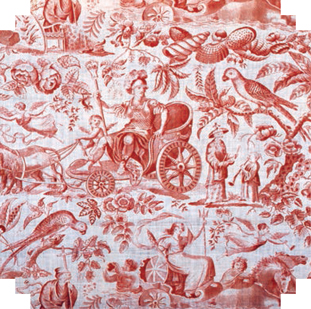
A gravure-printed toile de Jouy textile from the collection of the Victoria & Albert Museum, London.
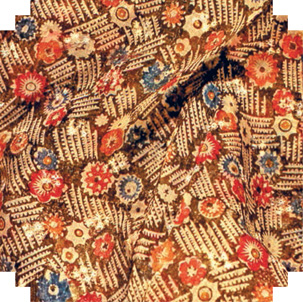
ENGRAVED ROLLER PRINTING
With increasing interest in mechanization in the 18th and 19th centuries, eventually the metal plate became a metal roller. This allowed the speed of printing to increase as well as new processes for transferring designs onto the metal, creating new design possibilities that allowed a fuller range of colors to be used. The ability to use halftone process or continuous tones or colors further enlarged the range of images that could be printed.
STENCILING
All screen printing works on the principle of a stencil and the use of positive and negative imagery. Stenciling involves isolating each color found in an image as a positive or negative shape, defined by color boundaries. Holes defined by the area for each shape are cut into a thin substrate such as a metal sheet or waxed paper, through which the colorant is applied; the other colors are masked out. In Japan stencils are still used to create the intricate designs that are printed onto kimonos.
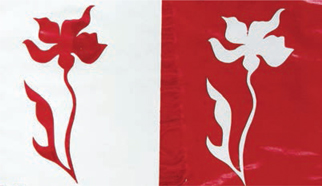
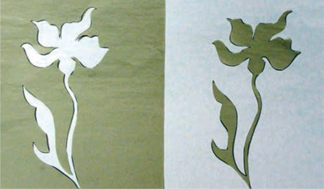
Examples of positive and negative paper stencils and their corresponding printed results.
HAND SCREEN PRINTING
A silk screen is made by stretching a fine, porous mesh over a frame. The design is then delineated by masking out areas of the design that will not be printed, leaving areas open for each color, through which the ink is pushed using a rubber squeegee. The image that has been transferred onto the screen may also be laid out as a repeat.
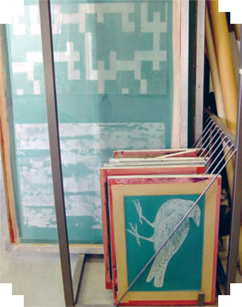
The use of photochemical processes as a technique for exposing a template onto a silk screen that has been coated with a light-sensitive emulsion has increased the range of effects that can be accurately reproduced. This technique involves copying the artwork onto transparent film (one per color), so that each color is isolated as a grayscale containing gradated tones from black to light gray, allowing one colorant to be reproduced as a series of shades. This transparency is then placed against the emulsion and the image is transferred as the emulsion is hardened in the nonimage areas by exposure to UV light. The unhardened emulsion in the areas to be printed is then washed out, opening up the pores in the screen through which the ink will pass.
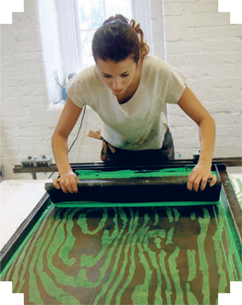
Most textile and fashion colleges provide students with studios equipped for silk-screen printing. The screen is moved systematically down the length of a piece of fabric to create a continuous design.
MECHANIZED FLATBED SILK-SCREEN PRINTING
The silk-screen printing process was first mechanized in 1954, when the flatbed process was introduced. Mechanized rollers feed the fabric under flat rectangular screens and the ink is applied using automated squeegees. More sophisticated flatbed printers are still used in print houses today, in the printing of luxury fabrics—the designs for which may contain up to 60 colors. Flatbed screen printing is much slower than rotary screen printing (see below). In the Lake Como region of Italy, famous for the superiority of its print houses, many companies use traditional printing technologies alongside digital techniques to produce some of the world’s most luxurious fabrics.
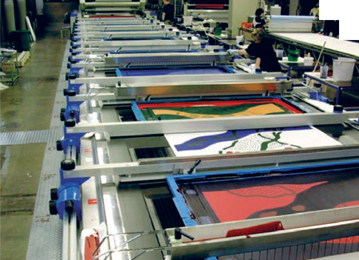
A mechanized flatbed screen printer.
ROTARY SCREEN PRINTING
Rotary screen printing was also developed in the mid-1950s in order to speed up production and is currently the most widely used method of textile printing, now accounting for around 80 percent of printed textile production. Instead of a flat screen, this process uses a cylinder made from a very fine, reinforced metallic mesh. Initially the mesh is blocked, which entails coating the screen with a special emulsion and then burning out the areas to be printed using a computer-controlled laser. These cylindrical screens rotate as the cloth is moved under them at a high speed, and the ink is pushed through the mesh from the inside by a specially designed squeegee. In this way, single colors are laid down successively as the cloth passes under each cylindrical screen to build up the full-color image. The cost of rotary screen printing is significantly less than flatbed silk-screen printing.

A cylindrical rotary screen that is used to print a single "spot" color in the mass-production process.
PHOTOGRAPHIC FULL-COLOR PRINTING
Four-color printing is the most common method used by the reprographic industries in the printing of books and magazines as well as in the heat-transfer method of textile printing. Unlike traditional textile printing technology, where the image is built up using premixed flat or “spot” colors, the photographic or full-color method of printing known as four-color or process printing involves the separation of the original image into the four colors (CMYK) used in the subtractive color model (see page 182). Additionally, in order to prepare the printing plates, a half-toning or screening process is also applied. This may be carried out digitally or by using photographic filters and results in a pattern of colored dots. The spacing of these dots is varied, with some overlapping in order to create the illusion of thousands of colors.
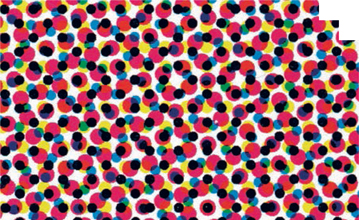
A dot matrix image showing four-color separation.
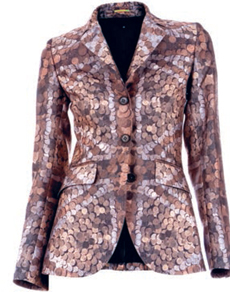
The print for this Paul Smith jacket has been separated using the four-color process, printed onto paper, then heat-transfer printed directly onto the fabric.
HEAT-TRANSFER PRINTING
While it was discovered in the late 1920s, the commercial development of transfer printing occurred during the 1960s. The process involves the printing or painting of transfer inks onto paper which will bond to certain fabrics upon heating. There are several methods of heat transfer but the most commercially viable is sublimation printing. The sublimation process turns a solid into a gas and back into a solid again. The paper can be printed by any paper-printing method, and this has increased the range of imagery that can be printed. It is possible to reproduce photographic images on textiles, though the process is mainly limited to synthetic fabrics.
As well as these industrial applications, transfer inks can be painted with an inklike substance directly onto paper and then heat-transferred onto fabric, allowing a spontaneous approach to be taken.

A highly detailed sublimation printing of photographic imagery onto a polyester shirt. This "Hobie" aloha shirt is typical of the 1970s.
COMMERCIAL VIABILITY OF TRADITIONAL VS DIGITAL PRINTING METHODS
Although digital printing is the fastest-growing method of textile printing, at the time of writing less than 1 percent of the world’s textiles are digitally printed, with silk-screen printing still accounting for 80 percent of the global output of printed textiles. This is because rotary screen-printing technology is more financially viable for the mass-market sector of the industry.
Speed
The industry standard for digital printers at the time of writing is an average of over 220 yards (200 meters) per hour, giving traditional methods the advantage, achieving around 6560 linear yards (6000 linear meters) of fabric per hour. However, while the print time is fast with traditional methods, the lead time needed for a print to get into production is much slower. For example, it can take up to three weeks to get traditional textile prints into mass production, while digital production is almost instantaneous. This is because traditional printing plants require someone to colorseparate the design, manage the repeat pattern, engrave screens, color-match, and print a strike off (sample) for customer approval before proceeding to production. With digital printing the process requires only color matching and printing off for customer approval, reducing the lead time significantly.
Expense
Printing numerous colors has cost implications with rotary screen printing (as a separate screen must be prepared for each color), whereas with digital printing it makes no difference whether you have three or unlimited colors in your design. The cost of dyes and inks can vary significantly with traditional methods, and a lot of research is being carried out in this area. Pigments have many advantages over other dyes: they are more lightfast and retain color better after washing, can be cheaper, can be printed on a broader range of fabrics, and require less intervention in the fixation process.
Versatility
A clear advantage of traditional methods over digital printing is the ability to complete more than one process, such as discharge printing, resist techniques, devoré, flocking, relief techniques, and printing with metallic and pearlescent pigments. Research is being completed into these areas, but currently none are yet commercially available for use in digital printing.
DIGITAL TEXTILE PRINT TECHNOLOGY
“Digital printing” is a generic term used to describe all methods of printing where a digitized image is transferred onto the substrate. Currently there are two different types of digital print technology. The first of these, electrostatic (also known as laser printing), only works with paper and is the technology used in color copying machines and some office printers. The second method, known as inkjet printing, can be divided into two categories: continuous flow and drop on demand (DOD). In turn, DOD technology has two subcategories: thermal and piezoelectric. Piezoelectric DOD inkjet technology is currently the primary method for the digital printing of textiles and is used in printers such as the Mimaki.
Inkjet printing may be defined as a process by which the desired pattern is built up by projecting tiny drops of “ink” of different colors, in predetermined micro-arrays (pixels), onto the substrate surface. The ink is projected onto the surface as a controlled series of drops by using electromagnetic fields to guide electrically charged ink-streams onto the fabric. (“Ink” is the generic term primarily used in conjunction with digital printing and refers to both dyes and pigments.)
The mechanism that is responsible for this is the print head, which is an electromechanical device that contains ink, a feed system, a drop-formation mechanism, nozzles, and usually the ink supply in tanks or cartridges. The print head is moved across the fabric to deposit drops of ink in the correct positions.
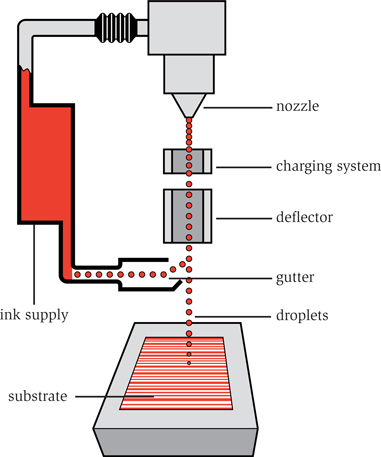
Basic mechanics of the print head used in piezoelectric DOD inkjet technology
THE ADAPTATION OF DIGITAL PRINTING TECHNOLOGY FOR TEXTILES
Technology for the digital printing of textiles developed out of technology initially devised for printing on paper; large-format textile printers are essentially wider versions of smaller desktop printers that have been adapted to handle wide rolls of substrate instead of small sheets of paper. Digital printing is now used for printing onto a wide range of materials, including natural fiberbased substrates such as cotton, silk, and wool cloth as well as polyester-based fabrics, linoleum, and Formica.
There are two methods used for the inkjet printing of textiles: indirect inkjet heat-transfer printing and direct inkjet printing, both of which are examined on the following pages.
The digital printing process for textiles differs from that for paper because of the fixation process necessary to make the fabric washable and colorfast. This means that the printing process is less direct and involves more steps, due to the chemical reaction that must take place between the fabric, the dyes or pigments, and the fixing agents.
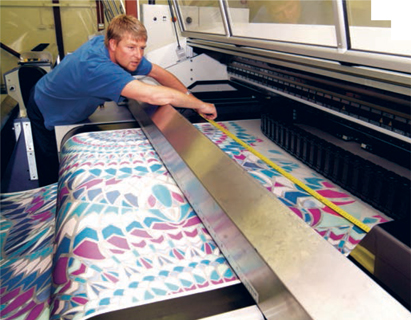
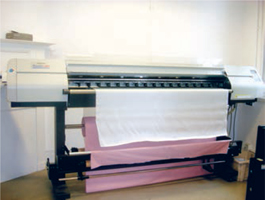
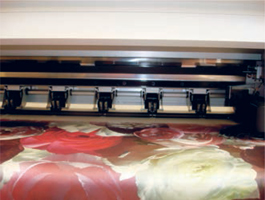
Short-run textile printers such as the Mimaki TX2 (below) became available for general use in 1998 and are widely used in large print houses as well as smaller studios. Mass-production printers such as the Robustelli Monna-Lisa (above) were first introduced in 2003.
INDIRECT INKJET/HEAT-TRANSFER PRINTING
As mentioned earlier in this chapter, the introduction of heat-transfer printing enabled images that could be printed onto paper by any traditional graphic printing method to be transferred onto fabric. This process was commercially exploited in the 1960s and 1970s, but, because the process could only work effectively with synthetic fabrics, its application was limited. The development of large-scale digital printers enabled the production of transfer papers, and the range of fabrics a print can be bonded to has expanded dramatically.
Another application of this process is in the growing arena of individual novelty products, where clients’ photographs are printed onto bags, T-shirts, and even soft furnishings. This can be achieved by photocopying an image or printing it on your home inkjet printer onto specially finished papers.
Large-scale or mass-production heat-transfer printing is accomplished by first printing an image onto paper using a wide-format inkjet printer, and then transferring it onto fabric through the use of a heated roller machine (or calender). Heat transfer via inkjet-printed disperse dyes onto transfer paper is the primary method used in the printing of swimwear and sportswear today.
On a smaller scale in the home or studio, it is possible to buy heat-transfer paper which may be printed with a desktop inkjet printer; the image is then transferred onto cloth with an iron or a small heat press. DIY photographic T-shirt printing works by using the heat from an iron to adhere a digitally printed plastic layer onto the cotton of the shirt. This plastic layer is necessary because dye sublimation does not work with natural fibers.
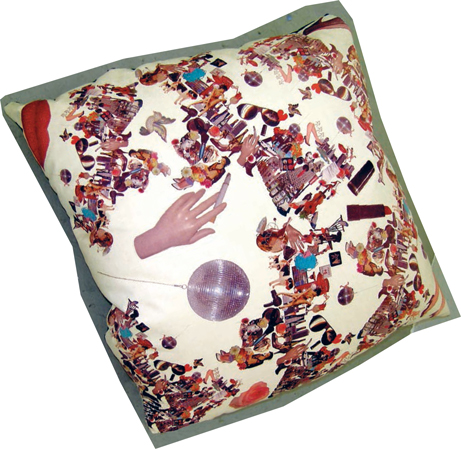
The design on this dynamic cushion by Jemima Gregson was sublimation-printed onto faux suede.
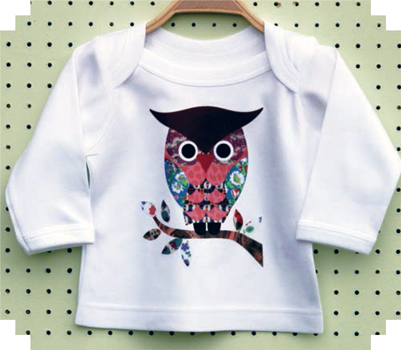
Petra Boase's "Owl" children’s T-shirt was digitally designed and printed on high-quality transfer paper and applied via heat press.
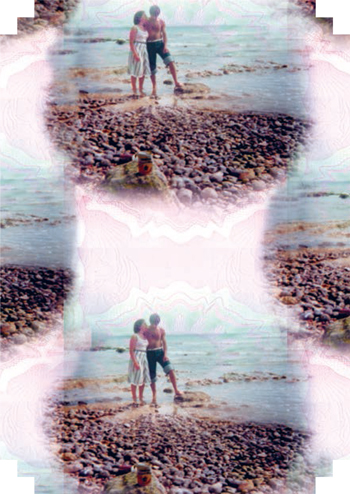
Photini Anastasi achieves soft and subtle photographic effects by sublimation-printing onto polyester chiffon.
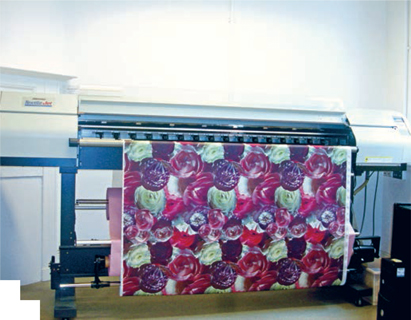
DIRECT INKJET PRINTING PROCESS
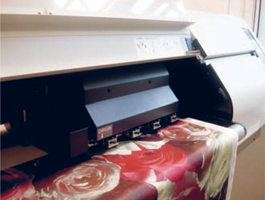
The following sequence demonstrates the process of inkjet textile printing from start to finish, and shows how a detailed and colorful photographic design can be printed onto fabric.

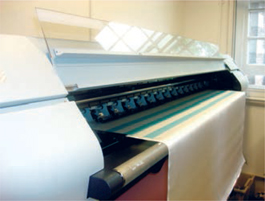
1. The roll of fabric is loaded onto the back of the printer. The fabric is then fed through to the front by passing it under a series of small rollers that run along the width of the printer, ensuring that the fabric will be fed smoothly as the print head runs across it.
2. The fabric is attached to a motorized roller system that automatically winds the fabric forward under the moving print heads once the printer is in action. Careful attention must be paid to ensure that the tension of the length of fabric is correct and that the fabric is straight. In some cases the fabric is interleaved with tissue paper to blot any excess ink during the print run. A bar that runs across the width is clamped down to stop the fabric from crumpling as it passes under the rollers.

3. The height of the print head is then adjusted according to the thickness of the substrate.
4. A series of printer tests are carried out, including a "media compensation" and a nozzle check. The media compensation setting adjusts the speed of the printer according to how much stretch the fabric has and the nozzle test indicates whether all eight print heads are firing correctly.
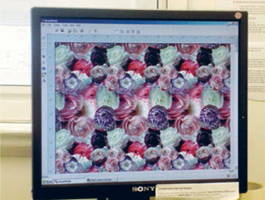
5. The design is opened into the RIP or print-driver software and parameters such as the number of repeats to be tiled out and the length of the print run are entered. The print-driver software is also used to set variables such as print speed, number of passes for the print head, and how much ink will be laid down.
6. The design file is then sent to the printer via the RIP to begin printing. Before proceeding to the final length, samples are printed, steamed, and washed to check color and image quality. Some fabrics require that the ink is left to dry before proceeding to the next step.
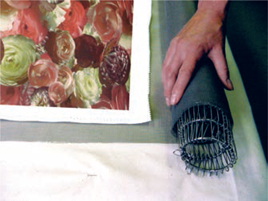
7. There are several ways of preparing cloth for steaming. Cheesecloth, steaming paper, or a fine plastic mesh may be used as a barrier to stop the ink from bleeding onto itself during steaming. In all cases, one of these porous materials is interleaved with the print, forming a protective layer through which the steam can pass.
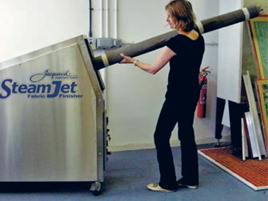
8. The fabric is loaded into a steamer, to be steamed for a specific time to fix the color. If the design has been printed using pigments or disperse dyes, these colorants are fixed via heat rather than steam in a baking oven.
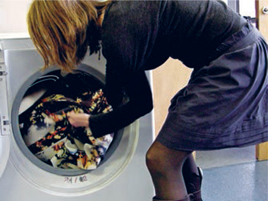
9. The fabric is washed to remove coating and excess colorant, and ironed. It is very important not to overload the washing machine as the image may bleed onto itself.
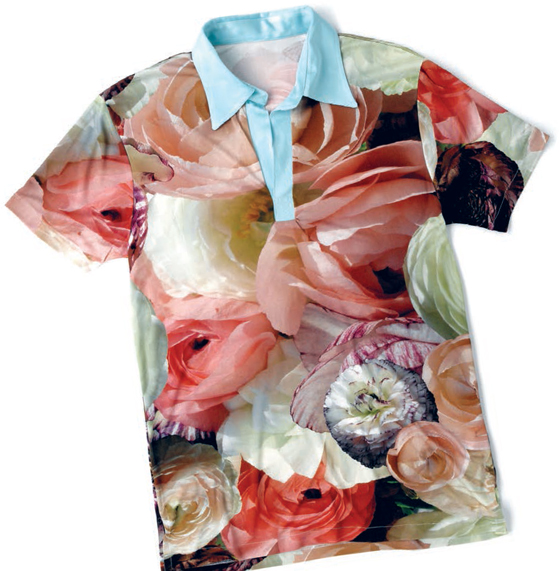
A garment made from the finished fabric featuring a floral print designed by Daisy Butler and printed on the Mimaki TX2.
INKJET PRINTING TIPS
In ensuring the success of any inkjet printing it is important to remember the following:
Never underestimate the importance of sampling.
Remember that colors will brighten after printing (unless pigments have been used), and that the “hand” of the cloth will soften—in other words, if you feel that a fabric you are considering is too stiff, remember that once the coating has been washed out and it has been ironed this will change.
If you print a “sketch” of an initial idea, then in proceeding to a final print it is crucial that no aspects of the final file originating from the sample have changed at all.
Consider setting aside a roll with enough fabric for the final print as a new roll of the same fabric may produce slightly different results.
Protect unprinted fabrics from light.
Keep the printer scrupulously clean.
Don’t allow any water near unsteamed fabric.
Keep the steamer in a separate, well-ventilated room.
CHEMISTRY AND FIXATION OF COLORANTS
In order for cloth to retain its color for a reasonable period of time after repeated washing and exposure to sunlight, a chemical reaction must first take place between the fabric, the dye or pigment, and, in some cases, the fixation agent—a chemical that attaches to receptor sites on the surface of the fibers and makes a chemical bridge between the dyestuff and the fiber. This process is achieved by either steaming or heating the cloth after it has been printed.
PRETREATING FABRIC
Unlike traditional methods of printing, where the fixing agent is mixed into the dye or pigment, in digital textile printing the fixation agent is applied as a special coating onto the fabric before printing. This coating is also designed to ensure that when the droplets of ink hit the surface of the cloth they do not spread, so that the details of a design are maintained and are not blurred. This coating is basically comprised of an alginate thickener for reactive dyes and a carbohydrate-based or synthetic thickener for acid or disperse dyes. The fixing agent used for reactive dyes is alkaline soda ash, whereas a weak acid is used for acid dye. There is no need for a fixative in the case of disperse dyes.
It is possible to experiment with the inkjet printing of certain fabrics by silk screening the coating mixture onto the fabric yourself. However, in the printing of longer lengths it is more practical and will yield better results if you buy rolls of fabric that have been precoated by a specialist company. The chemicals in the coating are specific to the dye that will be used, so it is important to check.
TYPES OF INKJET COLORANT
In order to achieve consistent color and detail it is crucial that the coating has been applied evenly. If there is a significant variation either in the chemistry or the amount of coating that has been applied to two different rolls of the same type of fabric, it is probable that the printed colors will not match. In some cases, if the chemical formula for the coating is not correct then the ink may bleed or not dry properly. The coating may stiffen and in some cases will dull the sheen of certain cloths temporarily. Once it has been washed and steamed, however, it will regain its original sheen, softness, and drape.
There are two categories of colorant used: dyes and pigments. The chemistry of dyes and pigments used in inkjet printing of textiles is based on that used in the traditional dyeing or silk screening of fabrics, with the essential difference that only synthetic dyes and pigments may be used. The viscosity of pigments that have been designed for use in an inkjet textile printer has also been modified so that the print heads do not become blocked. Technological advances in digital printing have also led to improvements in the way that pigment-based inks adhere to the surface of the fabric.
Dyes Specific dyes must be used for different types of fabric. There are three categories of fiber used in the making of textiles: plant (cellulose) based, animal (protein) based, and synthetic based. Acid dyes work only with protein-based materials and nylon, while reactive dyes may be used with both plant-based and animal-based materials. Disperse dyes have been developed for the coloration of synthetic polymer-based materials. The colors that may be achieved vary according to the type of dye used. Acid dyes produce colors that are brighter than those created by reactive dyes. It is not possible, for example, to attain a “neon” green by using a reactive dye. However, disperse dyes also result in very bright colors.
Pigments In contrast to dyes, pigments may be used more universally. Unlike dyes, they do not directly associate with the textile fibers but are fixed to the surface of the cloth with a “binding agent.” Pigments are bonded to the surface of the fabric by heat. The colors that result from printing with pigments are duller than those achieved with dyes.
As pigments sit on the surface of the cloth, fabrics such as silk satin will lose some of their shine after printing and will also become slightly stiffer than they would if printed with dye. Despite these disadvantages pigments are widely used in textile printing as they may be used on all types of fabric and are also intrinsically more colorfast than dyes. They are often less expensive, too. The most significant advantage of using pigments in an inkjet printer is that the fabric does not require pretreatment or coating.
DELIVERY OF INK INTO THE PRINTER
There are two methods of delivering dyes or pigments into a printer. Suppliers of inkjet printing materials sell cartridges that are similar to those used in a desktop photographic printer; however cartridges designed for use in a large-format textile printer contain a larger quantity of ink. “Bulk-feed” systems have also been developed where a separate device is connected to the printer and feeds ink into it from a bottle. Such bulk-feed systems are more economical, as the cost of textile ink cartridges can be prohibitive. It is also possible to use special cartridges designed to be refilled with ink from a bottle using a syringe. This method will also prove more economical than using disposable cartridges. When using either a bulk-feed system or cartridges it is very important to prevent air bubbles from entering the ink-feed lines as these cause the print heads to become blocked.
THE FIXATION PROCESS
Dyes After the fabric has been printed it is rolled up and sandwiched between a layer of special paper, plastic mesh, or hessian cloth, so that ink will not transfer from one side of the cloth to the other. This also facilitates the transfer of steam to the interior of the roll. There are several types of steamers used in the dye-fixation process. Small studios use a simple device consisting of an upright metal cylinder with a removable lid, in which water is heated to boiling point by an electrical element. These steamers are designed so that the fabric rests on a platform at the base of the steamer and the roll is held vertically by a device at the top, ensuring that it does not come in contact either with the water or the condensation that may form on the inside of the cylinder itself. If water does comes into contact with the roll it will cause the ink to bleed, resulting in a blurred image or one that—in severe cases—disappears entirely. Steaming time varies according to the type of steamer as well as the type of dye. If conditions vary within the steamer, or if the vapor is not evenly distributed, then colors will not be consistent. These upright steamers are only capable of steaming around 10 yards (9 meters) of fabric. It is also possible to fix fabric by hanging it in a steam chamber or cabinet.
In a factory setting, industrial-scale steamers are used for mass production. Mid-range equipment capable of accommodating up to 55 yards (50 meters) of fabric is also available, and priced at an affordable level for smaller studios. These devices are more sophisticated than the small steamer described above, making it easier to control temperature and pressure. Timing can be automated, as can the release of steam at the end of the cycle. Steam time is also shorter in an industrial steamer.
It is very important that all steamers are properly ventilated and that, upon release, the steam produced is filtered by an extraction device in order to remove any toxic fumes. Technicians should also wear gas masks.
Pigments Fabrics that have been printed with pigments are fixed by baking them in a special oven or heat press.
Disperse dyes These may be digitally printed directly onto the substrate and then fixed by heating. Alternatively, in the inkjet transfer process, the image may be printed onto special paper and then fixed and transferred simultaneously onto the fabric by passing the substrate through heated rollers or under a heat press. Synthetic fabrics and polyester-coated Formica and ceramics are all fixed in this way.
WASHING
After fixation, the fabric is washed to remove excess dye. Each batch of a longer run must be washed by machine under exactly the same conditions to maintain consistency. The washing machine should not be overloaded because if the cloth is packed too tightly it may become stained. Domestic washing machines usually accommodate around 10 yards (9 meters) of fabric. An industrial washing machine should be used for lengths above this amount. Fabrics should be washed until the water runs as clear of dye as is possible. Stickiness resulting from any residue of the coating may be removed by further washing. Temperature settings are the same as for nondigitally printed fabrics. Once washed, the fabric should not be left crumpled as staining may occur.
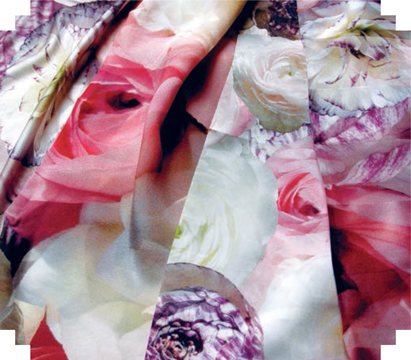
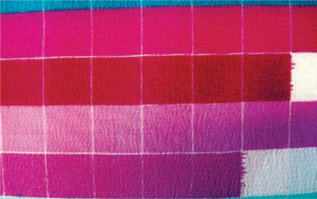
Here, the same design has been printed on a number of different substrates—silk jersey, silk chiffon, and silk satin (left to right)—to test how color and finish differ.
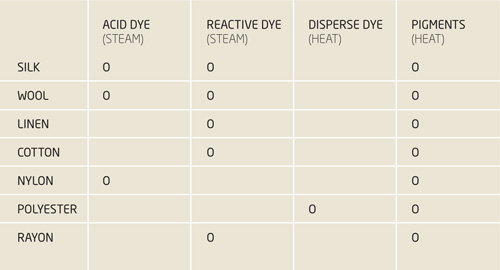
This chart shows the types of colorant, and their corresponding fixation processes, that can be used for different substrates.
ADVANTAGES OF DIGITAL PRINTING
Digital printing, as we outlined in the early section, can have many advantages over traditional printing methods, in speed and efficiency and costs at smaller manufacturing numbers. However, at present it cannot compete with costs at large yardage. With research being carried out into this area it will perhaps be able to compete more directly in time.
These cost and efficiency savings only demonstrate one half of the story: where inkjet printing makes a difference is in lessened environmental impact, and design advantages. From a design perspective, the ability to print full-color, detailed designs using any scale, repeat, or nonrepeating elements and engineered prints opens up a wealth of creative possibilities.
REDUCED ENVIRONMENTAL IMPACT
Inkjet printing has more environmental advantages than conventional printing methods, and a more sustainable future will be possible if this production method is adopted over others. This is primarily due to there being less wastage of dye, as the ink is printed on demand, and fabric can be printed as allover fabric or to specific pattern placements, thereby reducing fabric wastage. Inkjet printing is reported to use 30 percent less water and 45 percent less electricity than conventional printing methods. These savings mean that the process has less impact on the environment than traditional print processes.
RAPID TURNAROUND
Once a design file has been finalized, the technical setup time for an inkjet printer is minimal. In comparison to most traditional print methods—which typically involve several preparatory steps before printing can begin—digital printing is direct, and turnaround time for short runs is fast. A Mimaki TX2 printer, for example, can produce between 3 and 30 linear yards (3 and 28 meters) per hour, depending on image quality, and uses 8 Epson-type print heads that may accommodate 16 channels. As the name implies, short-run printers are capable of producing a smaller quantity of printed goods to be used as prototypes, one-offs, or limited-edition products. However, such printers may also be set up as multiple installations in digital print production facilities in order to print larger volumes.
Printers capable of mass production were first released in 2003 and can typically print around 220 linear yards (200 meters) per hour. The best-known manufacturers are Dupont (Artistry), Reggiani (DReAM), and Robustelli (Monna-Lisa). Osiris has made a full production machine capable of printing 1970 yards (1800 meters) an hour—around 33 yards (30 meters) a minute.
The immediacy and minimal setup time for digital printing also means that fashion and textile houses no longer need to warehouse additional fabric stock in advance of manufacturing the final goods, resulting in less wastage. Print runs can be set up on demand to match orders from retailers as they come in.
This rapid turnaround time is also advantageous for the designer. For most artists and designers the successful realization of an idea usually involves a process of trial, reevaluation, and adaptation. Digital printing is just one step behind the designer’s imagination and facilitates the flow of ideas in design development.
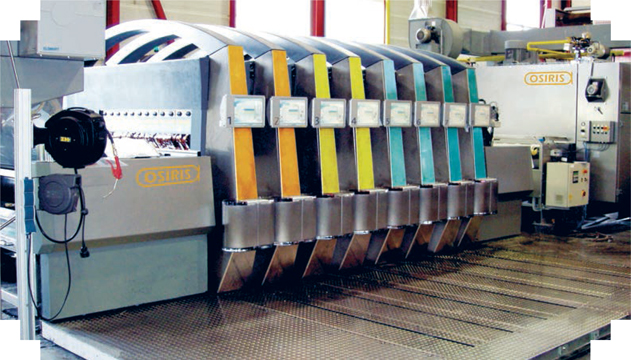
The Dutch company Osiris has developed the Isis printer, which is set to rival the speeds of rotary screen-printing as it is capable of printing 33 linear yards (30 meters) per minute. The Isis uses continuous-flow inkjet technology as well as an unusual principle whereby a fixed row of print heads span the width of the printer.
UNLIMITED COLOR AND DETAIL
There’s virtually no limit to the type of image that may be reproduced using digital inkjet fabric-printing technology as it is based on the CMYK or process-color method for photographic printing. Halftoning of primary CMYK colors means that millions of colors are perceived by the viewer, limited only by the color gamut of the dye in relation to the substrate. Extremely bright colors may be achieved using acid dyes, but neon colors are not yet attainable with the inks currently available. Due to the photographic foundation of this technology, most of the subtleties and nuances of the original image may now be translated in detail onto fabric.
INCREASED SCALE
One of the first reactions from designers upon the introduction of digital print for textiles was excitement at the fact that repeat (of the design unit or croquis) was no longer necessary, as it was suddenly possible to print mural-sized images. Digital printing technology means that the only limit to the size of a design is the software’s capacity to handle large files.
A bigger canvas and the ability to lay out extended placement prints is changing the way designers approach print, although there will always be aesthetic reasons for continuing to use repeated patterns. Facilitated by the possibility of developing software programming for longer design lengths, research has begun into the generation and printing of randomized, continuously changing structures such as those found in biological growth patterns.
ENGINEERING DESIGNS
In general, the mass market utilizes print to “fill in” garment outlines rather than to interact with the garment and body. Print is placed on top of garment shapes rather than being developed in unison. This often creates a clumsy and inappropriate use of print. Inkjet printing engenders a stronger relationship between the product and image. By printing the image to the exact specifications of a garment or product, print designers can more fully engage with the relationship between form and image.

"Branch" (2005), by Hitoshi Ujiie, makes use of two of the most significant advantages that digital design and printing has over traditional methods: the piece is nearly 4 yards (3.5 meters) high and, when viewed more closely, reveals an extraordinarily high level of detail.
DISADVANTAGES OF DIGITAL INKJET PRINTING
The most prohibitive factor in the adoption of digital inkjet technology is that it is still much more expensive than screen-printing and heat-transfer methods. While the costs are coming down, it will take a substantial period of development and integration to begin to compete with rotary printing. Commercially, many digital printers are currently used only for sampling and to create prototypes that will eventually be produced using traditional methods. At the time of writing, 1 percent of the world’s textiles are printed digitally.
In design terms, the advantages of digital fabric printing far outweigh those of traditional methods, but digital printing is not yet capable of some of the decorative effects that are possible with silk screening, such as devoré and flocking. It is also not yet capable of printing metallic inks onto fabric. Research is currently underway into the development of these techniques.
DIGITAL TEXTILE DESIGN AND PRINTING SOFTWARE
Behind digital printing is a range of software that is used in the design process and also in the preparation of the design for print. This only came within the remit of textile designers once the technology for the digital printing of textiles became viable in 1998. The off-the-shelf package Adobe Illustrator was first released in 1987 as a font-development program for graphic designers, and Adobe Photoshop followed in 1990. Although textile designers would have been able to use these tools, they were initially the domain of photographers and graphic designers, as images created through their use could only be realized on paper. Therefore the advertising, publishing, and photographic industries led the way in the development of digital-imaging software and a true digital style for textiles would only emerge 10 years later.
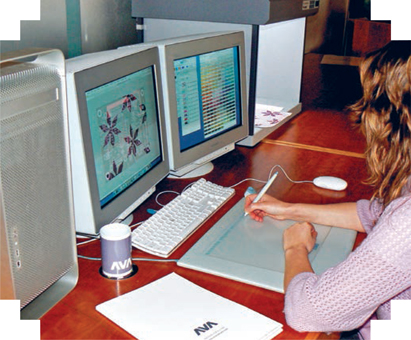
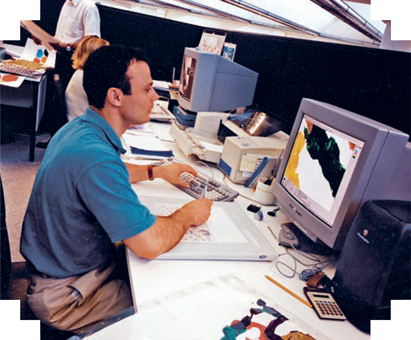
Using a specialist CAD system to set up a design to print. On the right is a light box that is used to match colors within a calibrated system.
USING SPECIALIST CAD SYSTEMS
As well as off-the-shelf imaging software, there is a range of specialist CAD (computer-aided design) systems available to the printed textile industry. These programs are generally designed to be used by companies who will mass-produce their products. In most cases, although the programs are capable of taking in images that contain millions of colors, ultimately their purpose is to systematically reduce these colors down to the number of screens that will be engraved for rotary printing (a process known as color separation). Unlike Photoshop, which was designed primarily for the reprographic industries, specialist CAD programs contain tools that aid in the designcreation aspects that are unique to surface design, including the creation of colorways, the touching-up of a design ready for the engraver, and automatic live time-repeat function. Many also include sophisticated color-management systems. Although it is possible to carry out such operations using off-the-shelf software, specialist CAD programs streamline the process of preparing an image for print. Adobe Photoshop and Illustrator do, however, provide excellent tools for designers who intend to print shorter runs digitally and wish to retain the photographic quality of an image.
Color separation Within the context of the textile industry, color separation, also known as color reduction, is a process that reduces the number of colors in an image down to a finite number of flat or “spot” colors, usually shown as black and white shapes that represent the set of motifs that contain each color (typically less than 10 colors at the lower end of the market and many more for luxury goods). Tonal separations may also be created as grayscales in order to simulate images that contain thousands of colors, though in fact only a limited number of colors are used in the printing process.
These images show the four-color separations that have been creating using a CAD program in order to engrave the four screens required to print this flat color design using traditional methods. Color samples may be printed digitally to replicate final production.
Color separation serves two purposes. The first is to prepare an image for rotary screen printing; each separation is used to create one screen that will be printed in sequence in the mill. The second is that it makes color matching and the creation of colorways much easier. If a design is to be printed digitally then color separation will also mean that it will be easier to “plug in” matching colors across a range of coordinating designs such as borders or matching allover prints.
Color separation can be a highly skilled art, requiring much practice in an industry setting. Companies such as Hermès and Colefax and Fowler rely on separation artists who are masters of their craft. Most of the artwork used by high-end home-furnishing companies is painted by hand, and, although the final design may look deceptively simple, the scan of the original contains thousands of colors and a series of steps must be carried out before the screens can be engraved.
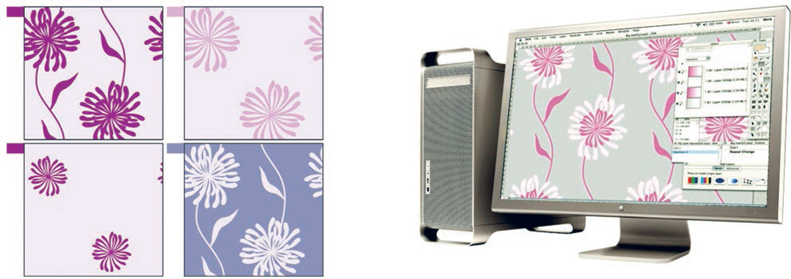
Colorways and color-palette databases “Colorway” is a term used in the textile industry to describe versions of the same design that have been colored differently. Usually, although the colors in each colorway will be different, they follow a set order from light to dark to help organize them for the printing process. Most specialist CAD textile systems also provide color-palette databases that can be organized by collection or season in order to facilitate the transfer of a set of colors automatically into an entire collection.
Live time-repeat Automatic live time-repeat functions work by creating almost instantaneous repeats, including half-drops, and can be extremely useful when preparing a print. As many repeat units as are desired may be viewed or “tiled” across large widths, and when a motif is moved or manipulated, all its copies in the repeat grid change at once. Automatic repeat systems may be more sophisticated in a specialist system; however, add-on software is available at prices aimed at individual designers.
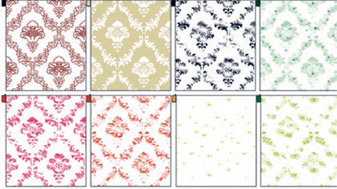
This is an example of a design containing tonal effects. The eight color tonal separations have been created by reducing the millions of colors found in the original scan down to eight screens ready for rotary screen printing.
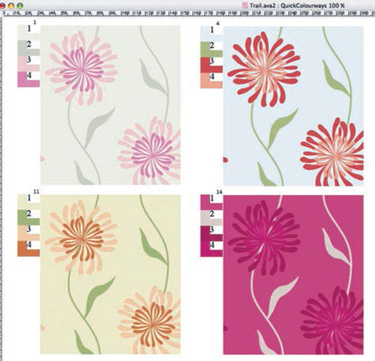
Alternative colorways for a design that are based on the same colorseparation template.
Our perception of color is subjective and this, in part, makes our interpretation and translation of color from one technology to another difficult. Another factor in this difficulty is the difference between additive and subtractive color. Subtractive colors are those that are made from a combination of primaries cyan, magenta, and yellow: these colors absorb light and are the colors we see in printed inks and dyes. In theory, mixing them all together creates black. The colors that we see on a monitor are the result of emitted light and are made by mixing the primary colors red, green, and blue: these are described as additive colors. In the additive model, mixing all three RGB primaries results in white. Digital cameras, scanners, and monitors all use this additive RGB model as a basis for displaying or interpreting color, and prints on paper or textiles use the subtractive model.
THE SCREEN TO PRINT DILEMMA
In digital printing, achieving the colors we desire may be solved in two ways; either by carrying out manual adjustments and color tests or by incorporating separate color-management software into the setup of a digital print studio.
Newcomers to digital textile printing may encounter some difficulties in areas that relate to color and the workflow that is necessary to obtain the desired results. Many of the issues that arise around color and digital printing are often based on the mistaken assumption that the colors viewed on screen will automatically match those in the final print. This is not the case. When finalizing colors for a design that is to be digitally printed it is crucial to understand that what we see on screen is relative and it should not be taken for granted that the colors we have chosen will be reproduced exactly unless color-management software has been used.
There are two reasons for this: firstly, although all monitors and display devices use RGB technology, each individual type of device will display the same color differently unless they have been calibrated. Again, unless calibrated, printers of the same kind also have different “fingerprints” and it is likely they will display the same design differently. Additionally, it is the translation of RGB data into the CYMK data necessary to control a printer that will cause a discrepancy between displayed and printed colors.

Left: RGB additive color model of emitted light used to generate the colors displayed by monitors. Right: CMYK subtractive color model of absorbed light.
LINKING TO THE PRINTER, PRINT DRIVERS, AND RIP SOFTWARE
Most setups for desktop printing incorporate a program known as a print driver or Raster Image Processor—RIP—that is either supplied by the software company, such as Photoshop, or by a printer vendor such as Epson. However, drivers for large-format printers, like the Mimaki, are not built-in and so it is necessary to invest in a specialist print driver as the printer may not be operated without it. In digital textile printing the role that the driver plays in controlling print quality and the smooth running of a studio or “factory” can not be underestimated, and it is vital when setting up a new studio to research and choose the appropriate software carefully.
A RIP is software that rasterizes, or converts, the RGB data from the matrix of pixels (bitmap) in a displayed image into the CMYK information that will “drive” the printer. This software also dictates variables such as print speed and resolution as well as the number of print-head passes and the quantity of ink that will be laid down, thus affecting color. If color management has been incorporated then it is through the print driver that a technician will set the profiles described earlier in order to accommodate each type of fabric. Importantly, textile RIPs will also tile-out a design unit as a repeat as well as automatically incorporating half-drops. Such drivers are also designed specifically to accommodate very large designs as well as the extremely longrun print lengths necessary for mass production.
SPECIALIST COLOR-MANAGEMENT SYSTEMS
A range of specialist color-management technology has been developed for the photographic and reprographic businesses as well as for other industries where color accuracy is vital. The purpose of these systems is to streamline and facilitate the process of handling color as it is translated from one device to another through to the final production. A highly sophisticated textile system is, for example, able to send the color data necessary for dye formulation directly to a mill.
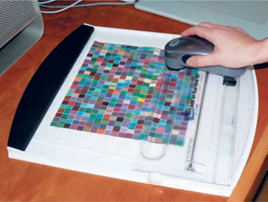
Most color-management systems work by mediating between and coordinating the various input and output devices used in a given workflow environment and managing the way that color data is used and transferred between them. Central to color management is a process known as calibration, which works as a loop and involves a feedback mechanism that begins by printing a set of files using the primary CMYK inks. These colors are analyzed by the technician in order to determine the best printer settings for each individual fabric type—such as how much ink a particular fabric may absorb before the color will bleed. These samples are then read in using a spectrophotometer (an instrument for measuring spectral transmittance or reflectance), and the data is used to generate a series of files—known as printer profiles—that will individualize print controls for each fabric type. Essentially, at this stage, the basic printer controls are being fine-tuned before a greater range of colors are analyzed.
Within a setup that has been calibrated, multiple printers, as well as monitors, may be included within a closed system. These profiles are then applied to a comprehensive set of color samples that have been generated systematically by the software in order to print, comparing them with the corresponding colors from the same file as they appear on the display. A spectrophotometer is again used to read in each color chip in the printed “target” sample for each fabric type once the colorant has been fixed and washed. Similarly, a series of color targets are also measured on screen by placing a spectrophotometer against the monitor. This data is then processed by the software and used to fine-tune the colors as displayed using RGB data in order to match those found in the final print. The spectral difference between the displayed and printed colors is compiled by the software in order to create profiles for each monitor and fabric type.
The advantage of this process is that, when a particular profile is applied to a displayed image, the designer will be able to judge more accurately what the final color results will be and see how they would change if a different dye or pigment were to be used in printing. If it is not possible to obtain, for example, a very bright red using pigments or a certain fabric type then some programs will show the closest match within the color space. Currently, however, there are certain colors that may be displayed on screen that are not possible to reproduce under any circumstances due to the limitations of the dyes and colorants used in textile printing. An achievable color is described as being “in gamut,” whereas any color that may not be displayed or printed is described as being “out of gamut" (see right).
Colors taken from paper or fabric swatches may also be input into a design by using a spectrophotometer to measure them and so automatically generating a match once printed. It is important to take into consideration when using fabric or paper color samples for matching, that the same color will appear to be different depending on whether it is applied to a glossy, matte, or transparent substrate. Similarly, the colors in your print will appear to change if viewed under different conditions, such as daylight or fluorescent light. A specialist piece of equipment known as a light box will facilitate this.
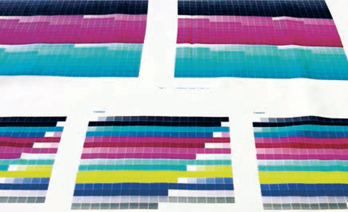
Tests carried out during printer calibration in order to implement ink settings, such as the quantity of ink to be laid down for each fabric type. The above image shows that too much ink has been laid down, causing the dye to bleed.

A set of achievable colors within a 3-D model of a specific color space. Unachievable colors are "out of gamut."
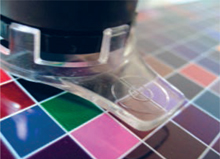
Using a spectrophotometer to read in a color target in order to generate a specific profile containing individual printer settings.
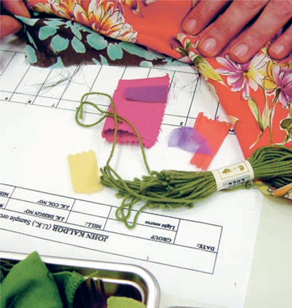
Color matching yarn and fabric swatches.
REVITALIZING THE TEXTILE INDUSTRY
Digital print is revitalizing the textile industry, not only in terms of design, but also production. Many established print companies in Italy and Japan are seeking to maintain their links with their couture clients—who are starting to explore digital design—by introducing digital print technology alongside traditional methods. Companies in China are also making a considerable investment in the new technology, while digital print bureaus are emerging in countries that have largely lost their fabric production to Asia. The relatively low cost of the equipment is also encouraging designers to set up their own print studios.
DIGITAL PRINT HOUSES
Many of the print houses in Como, Italy—such as Mantero and Ratti, who produce some of the world’s most luxurious fabrics, and who are considered by many designers to be centers of excellence for printed textiles—have been using the latest technology alongside traditional methods ever since the first digital textile printers became available. The philosophy behind companies such as Ratti is that the quality of the prints they produce is far more important than quantity or cost. Investing in state-of-the-art technology is crucial to maintaining the competitive edge to the extent that some Como printers do not simply buy this equipment but work hand-in-hand with its developers to constantly improve the technology. Suffice to say, Como textile printing is considered an art.
In Japan the company Seiren was also a pioneer of inkjet textile printing and began testing the viability of this technology as long ago as the early 1980s. By 1991, they had introduced inkjet printing alongside traditional methods; one of their primary markets being the market for custom car interiors. Companies in China such as Huang Wha have also begun to make considerable investments in inkjet textile-printing plants.
Using a CAD system to set up an image to print at the Ratti plant.
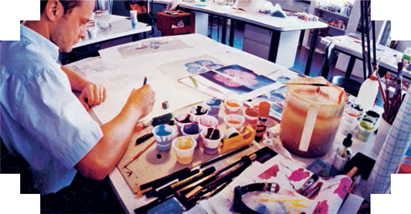
The design studio, where traditional techniques such as hand painting are used alongside digital tools.
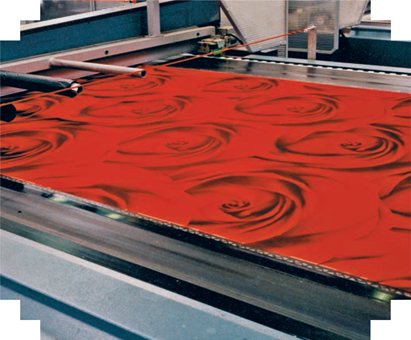
Large-scale digital printing in action.
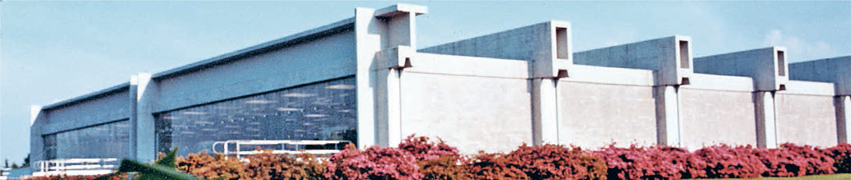
The 50,000 square foot (4,600 square meter) Ratti print facility, situated on a plateau above Como in Italy.
DIGITAL PRINT BUREAUS
As the cost of a large-format inkjet printer is considerably less than the equipment necessary to set up a rotary screen-printing plant, many small digital print bureaus are emerging, specializing in the printing of textiles. Bureau printing services provide an invaluable resource for students, independent designers, and larger commercial companies alike. Some operate out of an artist’s loft, while others are set up like small factories with multiple printers, catering to a growing demand for innovative and unusual products. These small businesses will support the growing demand for designer and customized goods in the future.
Small bureaus allow designers to produce prototype short runs of fabric and have access to face-to-face consultation. Sampling printed cloth in the traditional way can be extremely expensive and time consuming, and this can inhibit designers who want to see printed results fast. Using a bureau, it is possible to see and approve fabric at different stages in the sampling process and try out new ideas during the development process. Dan Locastro of First2Print, a digital bureau in New York, observes that “we can print in a fraction of the time it would take for a fabric manufacturer to get samples ready for showrooms, sales development and photoshoots.”
Students are now using digital print bureaus to implement their designs. Learning to outsource in this way helps to smooth the transition from education to operating as an independent business in terms of gaining experience in budgeting, communication, and management, but it is important that students also maintain a hands-on approach to the digital printing process.
USING A BUREAU
Different digital bureaus use different hardware and software, so it is not really possible to give hard and fast rules as to preparation of files, etc., but J. A. Gilmartin, a London-based digital print bureau, recommends following these basic rules of thumb:
Always build in time for sampling. It cannot be stressed enough what an essential part of the process this is.
Check the shrinkage of the fabric you are printing onto: some fabrics shrink more than others and shrinkage will occur after printing so it’s best to print a larger quantity initially.
Make sure your document is cropped to exactly the size you want, especially repeat units, as the printer will treat any white space as part of the design. If you are printing panels and want to include white space, include crop marks.
Remember that color matching can be time consuming and therefore expensive, as samples may have to be steamed and washed each time in order to properly check color.
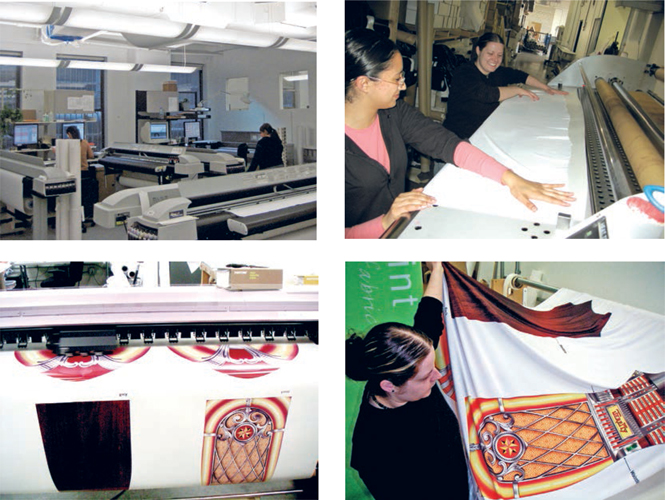
The print process at First2Print, a digital print bureau based in New York.
Printer setup within the design studio; loading the printer; printing in progress; checking and approving the final print.
THE FUTURE OF TEXTILE PRINTING
The technology behind digital printing is advancing rapidly and research is taking place into many potential avenues for its use in textile design and print. Smart colorants, such as thermochromic inks that change color according to the temperature, are currently printed by silk screen but will undoubtedly be adapted for digital printing. Research is also currently underway into the inkjet printing of images onto flexible screens, using display technologies such as Organic Light-Emitting Polymers (OLEPs). It is likely that this will result in fabrics onto which changeable or moving images may be downloaded. As artists such as Maggie Orth (renowned for her work with interactive textiles) collaborate with scientists, the potential outcomes are beyond our imagination.
LED elements are being embedded into a variety of products. Hussein Chalayan used this technology to create a dress for his F/W 07/08 collection (right). Although LEDs are not digitally printed when applied to a garment, they provide a glimpse of what is to come.
Research is also underway into the digital printing of metallic inks—possible on other substrates, though currently not viable on cloth. Once developed, this will enable electric circuits that could double as decorative elements to be printed onto the surface of a garment.
The proportion of digital printing is clearly set to increase in the next decade as we see faster printers with a wider range of print possibilities develop. The range of inks and types of processes that may be possible could lead to new and exciting possibilities through digital mark-making qualities such as relief, burn out, density, and depth of mark. This will require the development of inks and dyes that lie on top of, burn into, or distort the fabric, and also fabric preparations to create effects such as resists and finishes using chemicals to distort or reveal layers of the textile.
Finally, the military, medical, and cosmetic industries are also funding research into the micro-encapsulation of nanoparticles into ink, which could lead to the digital printing of antimicrobial agents on fabrics, including insect repellents, vitamins, skin conditioners, and fragrances. As these technologies—and the means of applying them to substrates through digital design and print—advance, we can only speculate as to the exciting future of textile design.
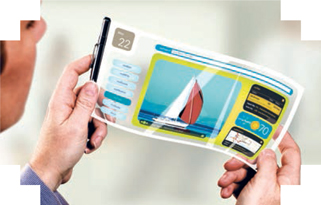
Companies such as the Universal Display Corporation have been carrying out research into the development of flexible screen technology, which will enable moving images to be displayed on flexible substrates. Here is a visualization of one such display, which makes use of organic lightemitting polymer technology.
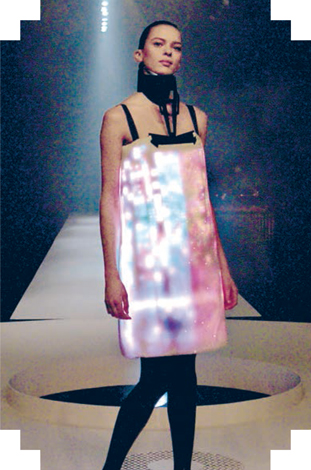
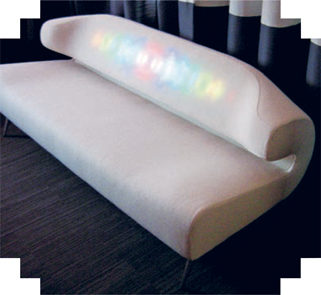
Both Hussein Chalayan (above) and Lumalive by Philips (below) provide a glimpse of what the future may hold with the integration of LED technology into their designs.