4
INTRODUCTION TO ILLUSTRATION
Textile designers need to present their collections, once designed, in a context that enables others to understand them. This usually means depicting the designs on a garment or an interior. This takes the designs to another level by putting them into a realistic environment and giving the collection a sense of place. Lately the industry has seen the arrival of a wealth of exciting new fashion illustration techniques, due partly to advances in digital technology. This has opened up not just a whole new medium, but also a fresh way to approach the subject.
Illustration is no longer a literal interpretation of textile designs. Instead, illustrators are playing with a world of fantasy and illusion, creating a mood and ambience in which viewers can lose themselves. The sensual and decorative approach that a textile designer has to offer is an excellent starting point. By combining drawing, painting, collage, and photography, designers can produce exciting and energetic work that can explore a narrative, giving their design work another dimension.
More often than not the computer is used only as a medium to assemble drawings and design work before collaging them together. The most successful illustrators include some form of personal “handwriting” in their work. The best starting point is often a sketch, painting, or drawing in which the designer experiments with mood and artistic style. Books and magazines can be a great source of inspiration and it is also important for the designer to keep up with trends—not only in fashion but also in graphic styles. Most of your inspiration will tend to come from your original textile collection though, and from this you will probably have established a theme and have already developed an idea of how you want to portray your designs.
Your style of illustration and the media you choose to use will also be influenced by the style of garment for which your designs are intended, as well as the weight of the fabric. If your designs are for heavy wools and knits, for example, then you might consider a collage medium to give a sense of weight. Alternatively, if your designs are intended for lightweight silks or chiffons then you could consider working with transparent paint effects to suggest movement and fluidity.
Finally, if you are designing textiles intended for fashion, you will need to develop a style of figure drawing. Most textile designers who are not fashion designers tend to panic at the thought of figure drawing. But, equipped with their sensual and sensitive drawing skills, they can soon find a confident approach to fashion drawing. A good way to overcome any barriers is through life drawing; developing sketches and line drawings of the figure in various media that can then be drawn upon at a later date. Photography is also a useful medium with which to experiment. Photographs can be traced by hand or digitally and are a helpful way to start an illustration. Tracing should not be considered as cheating, especially for textile designers who are not used to working with the figure. Once you have traced an outline you can apply your own illustrative style as you develop the artwork.
At what stage you apply digital techniques to your illustration is up to you. It may be that you use the computer simply to manipulate and assemble your drawings using Photoshop, or you may wish to give your work the kind of very computerized style that Illustrator can offer.
This chapter includes basic tutorials showing techniques in both Photoshop and Illustrator that you can adapt and develop in your own work to create an individual and personal illustrative style.
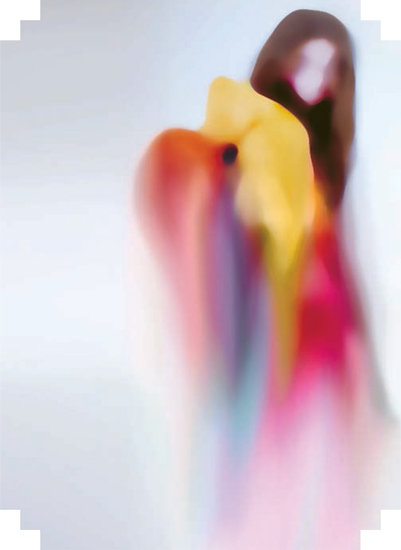
Chae Young Kim used a complex mix of effects to create this stunning fashion illustration, “Kaleidoscope.” The inspiration came from the reflection and distortion of color in glass. She used Photoshop filters to achieve the lighting effects and mood of her original design theme.
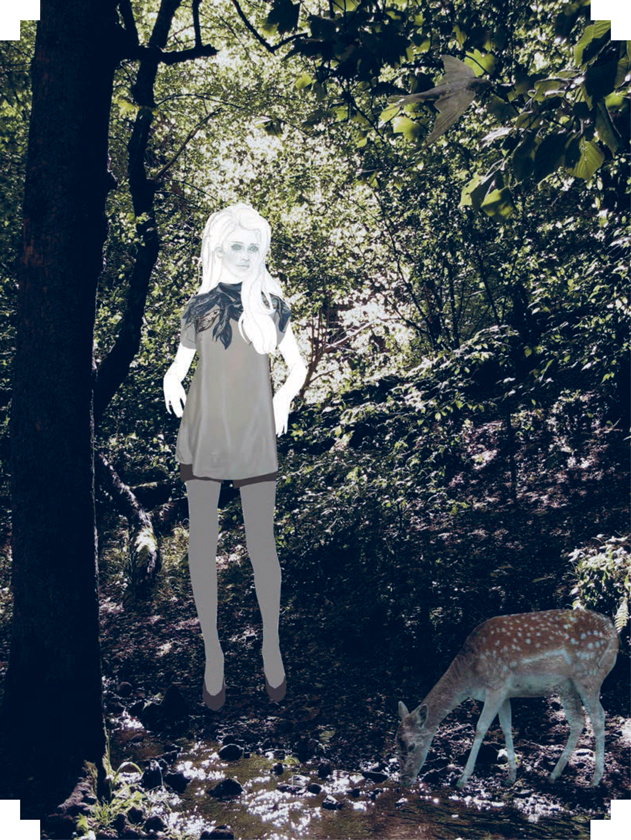
Amy Isla Breckon places her beautiful hand-rendered drawings in a realistic context. Photoshop allows her to mix drawings and photography to blend the real with the unreal. Here, the combination of an elegant hand-drawn figure with the rustic woodland setting of the photograph creates a dark but sophisticated mood and is perfect for showing offher animal-inspired prints.
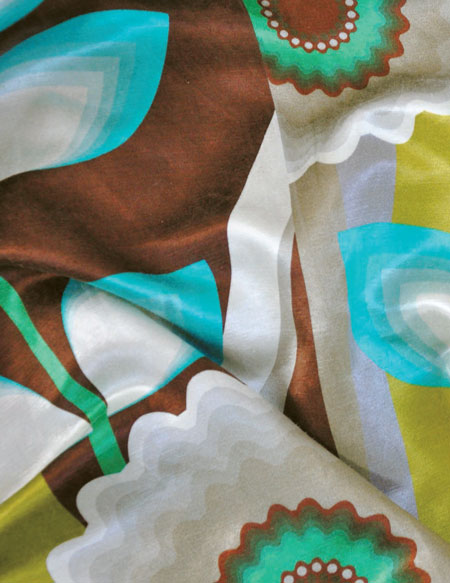
Jennis Li Cheng Tien artistically manipulates and distorts photographs by overlapping filters in Photoshop to create digital paintings such as “es_cape.”
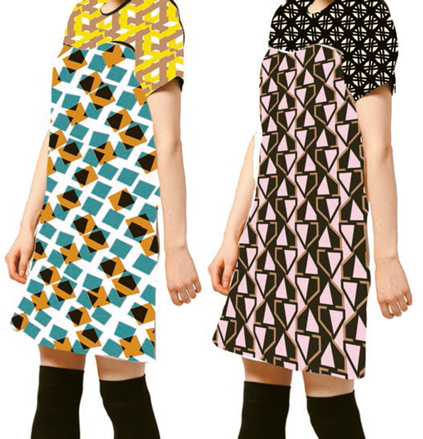
Holly Holmes maps her designs on garment illustrations to coordinate her geometric collection “Repeaticities.”
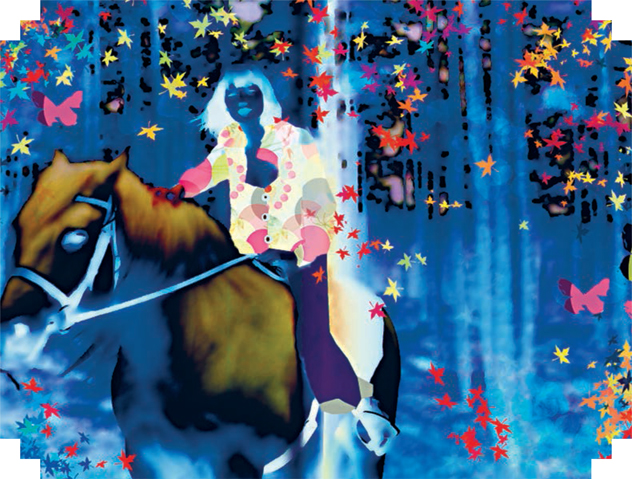
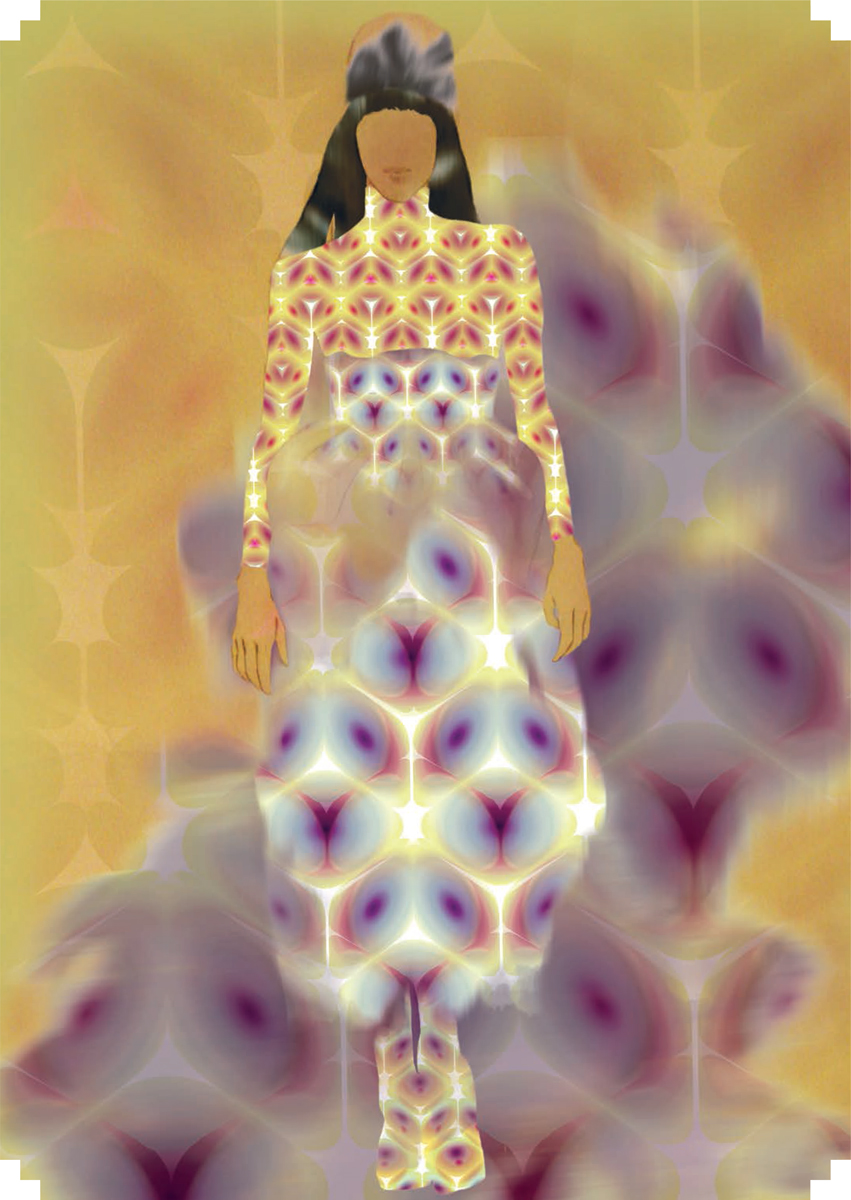
Pauline Fernandez’s rich illustrations evoke the magical and playful mood that she wishes to convey in her designs. Working with a range of photographic imagery, Photoshop allows her to place her designs into a surreal and unusual context. She works with a complex mix of filters and lighting effects to build depth, luminosity, and atmosphere. Although her actual textile designs do not dominate here, it does not seem to matter, as the narrative of her illustration cleverly conjures up the mood of her work. This is perhaps more exciting than a literal interpretation.
DISPLACEMENT MAPS
In this tutorial, we texture map a design onto a garment using the Displacement filter in Photoshop. The Displacement filter will realistically place a design on an irregular surface. For example, a draped pattern can give the illusion of real fabric.
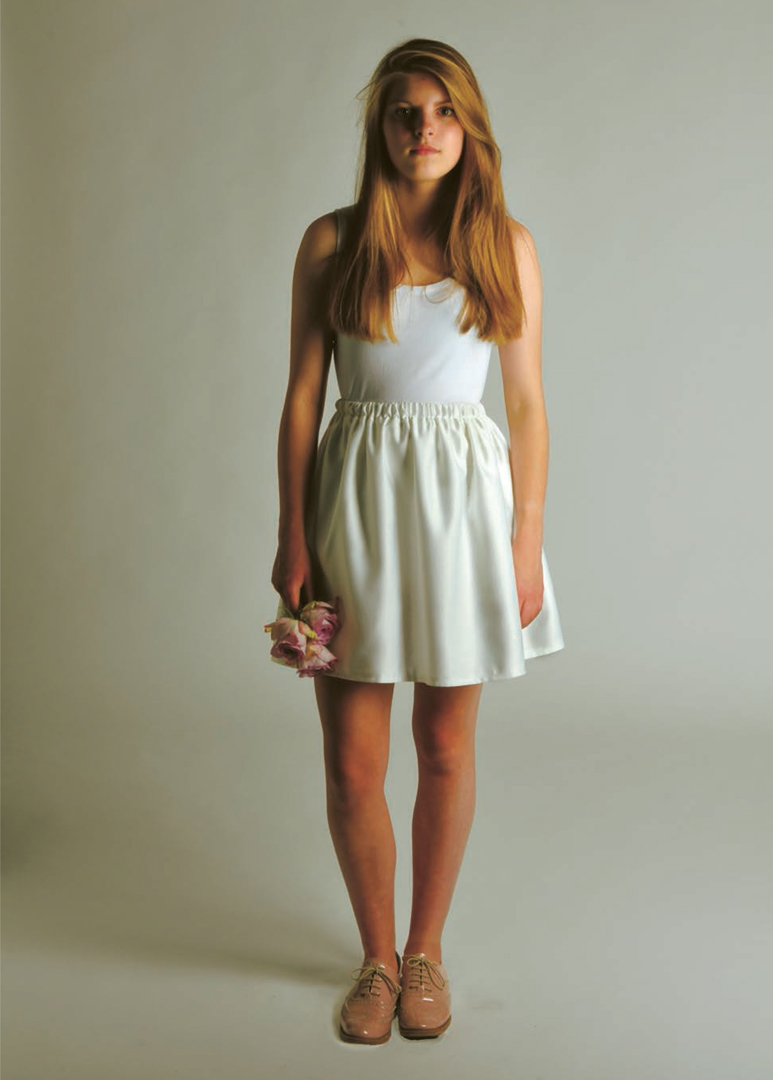
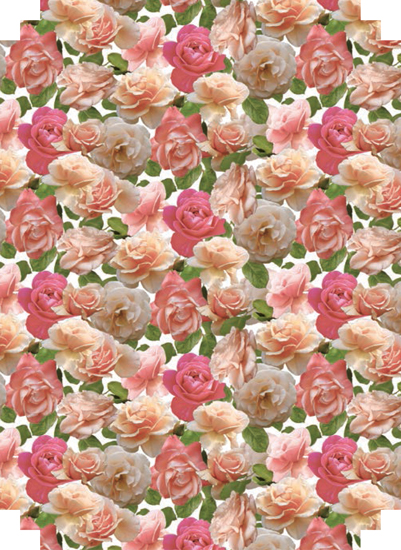
You will need two images: the image you wish to warp (the design) and the image you want to warp onto (in this case, a skirt).
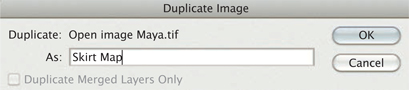
To create the displacement map, duplicate your image.
Image > Duplicate.
Give your duplicate image a different name from your original image.
STEP 2
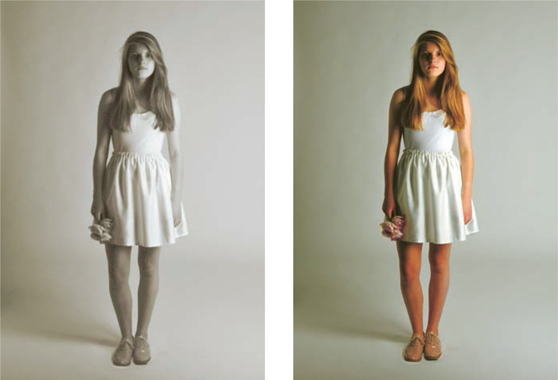
Convert the duplicate image to grayscale.
Image > Mode > Grayscale.
Save the grayscale image in Photoshop (PSD) or TIFF format so Photoshop can identify it and use it as a displacement map.
Return to your original color image.
STEP 3
Use the Pen tool to draw around the skirt and create a path.
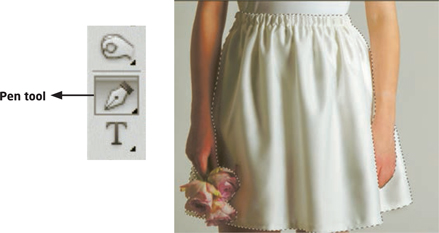
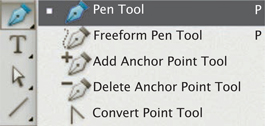
Once you have created the path, you can edit it with other Pen tools, found in the Tool panel. The Pen tool in Photoshop replicates the Pen tool in Illustrator. It can take a bit of getting used to, but it is worth getting to know as it can be an accurate selection tool.
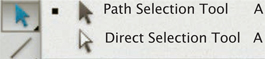
There are also two useful Path tools located in the Selection tool menu: the Path Selection tool enables you to move the whole path; the Direct Selection tool will let you move a single anchor point.
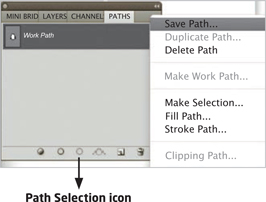
Your path will appear in the Paths panel. Save the path using the Paths panel drop-down menu, then click on the Path Selection icon at the bottom of the panel. This will make the path a live selection.
Open your design; in this case, it is a repeat unit. At this point you can rescale the pattern to the proportions of the image you wish to fill.
Image > Image Size.
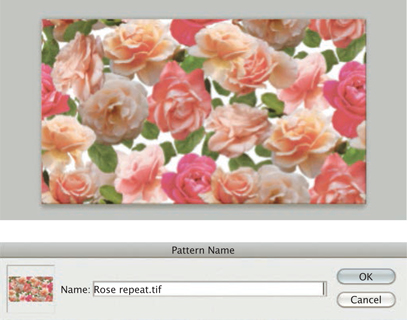
Create a pattern with your unit.
Edit > Define Pattern.
Name your pattern and click OK.
STEP 5
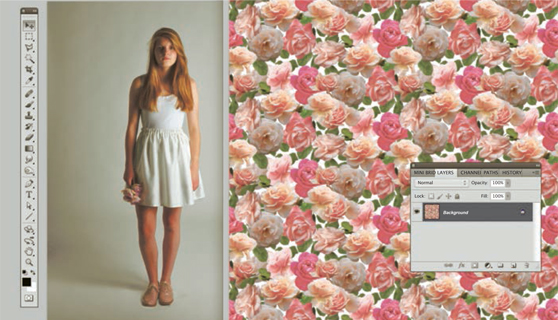
Open a new document and fill with your pattern.
Edit > Fill.
Select Pattern and find your design.
Select > All.
Edit > Copy.
STEP 6
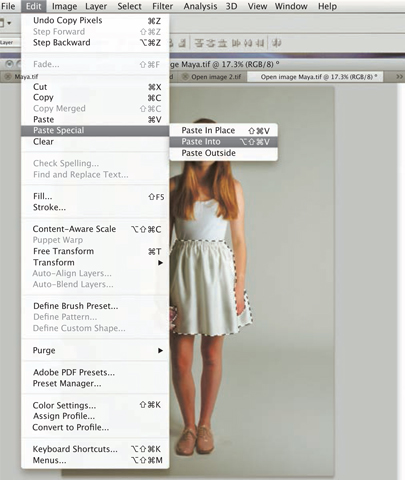
Now go back to your original image and select your path.
Edit > Paste Special > Paste Into.
STEP 7
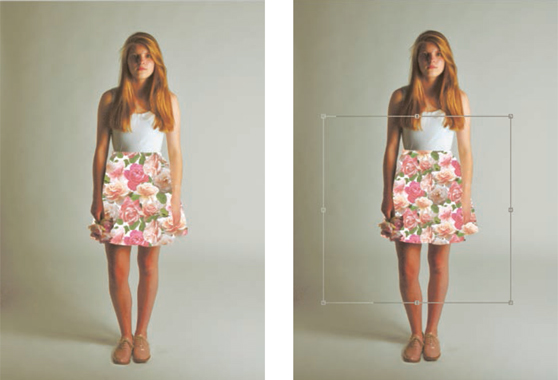
Your pattern is now pasted into your skirt selection. You can still rescale the pattern if you need to. With your new pasted layer selected, choose
Edit > Transform > Scale.
STEP 8
Now it is time to use the displacement map.
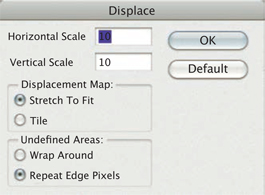
Filter > Distort > Displace.
The Displace dialog box will appear; accept the default options and click OK.
Photoshop will ask which image you wish to use as the Displacement Map.
Select your grayscale image.
You will see the artwork bend slightly, but it will still look flat.
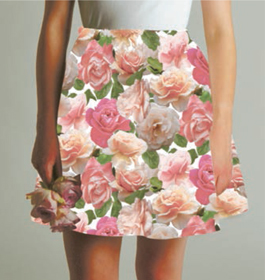
To reveal the folds of the skirt underneath the pattern, go to Multiply in the Layers palette.

TEXTURE MAP AND LINE DRAWING
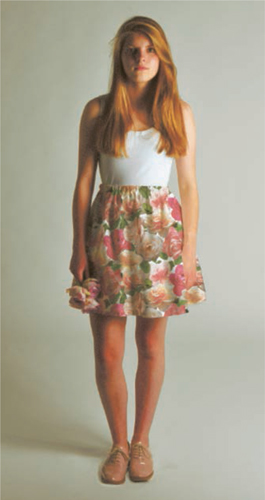
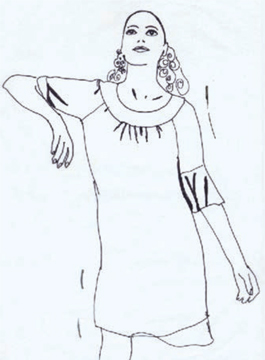
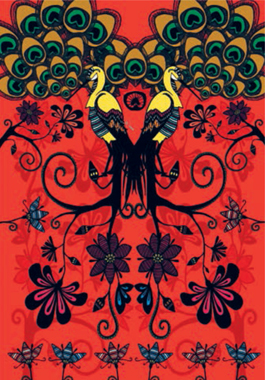
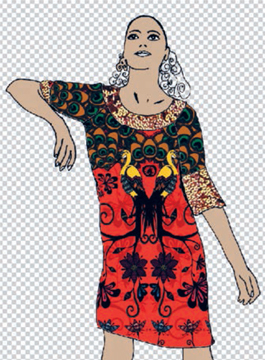
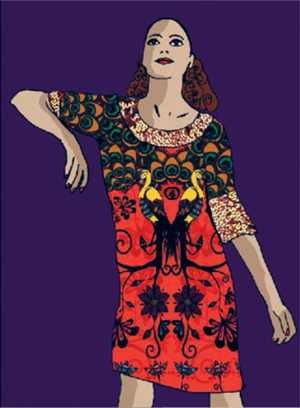
This tutorial demonstrates how to texture map your design onto a fashion illustration using basic Photoshop tools. The key to fashion illustration is to have a strong vision and create an ambience. Here, Katie Hoppe’s design work is inspired by folklore and romantic imagery. Her use of color is rich, evocative, and exotic. She demonstrates how important it is to have a body of original drawings and objects as a palette to work with.
Begin by selecting a fashion image featuring a simple garment that a more complex design can fit into, and create a black line drawing as a template. You can incorporate other drawings and scanned imagery to give the illustration depth and texture.
STEP 1
Scan your line drawing and open it up in Photoshop.
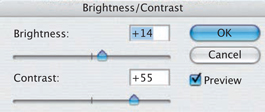
STEP 2
Image > Adjustments > Brightness/Contrast.
Move the sliders to achieve a good definition.
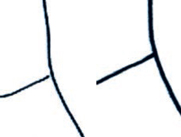
STEP 3
Clean up your image, using the Eraser tool to rub out any stray lines.
Join up any gaps between the outlines in order to make complete shapes to paste your design work into.
STEP 4
Use the Magic Wand tool (tolerance set to 50) to select a section of your black line.
Select > Similar.
Select all the black lines.
STEP 5
Edit > Copy.
Edit > Paste.
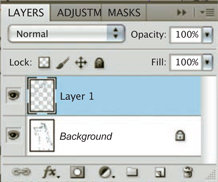
A new layer will appear.
Turn the background layer offto reveal your new layer.
STEP 6
Open up your design work.
Select > All.
Edit > Copy.
STEP 7
Return to your fashion illustration. Use the Magic Wand tool to select the main part of the dress.
Edit > Paste Special > Paste Into.
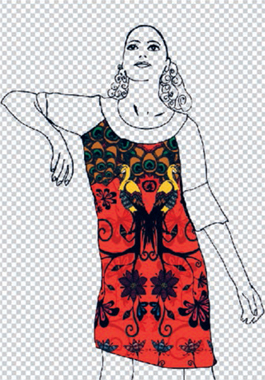
STEP 8
A new layer will appear. Use the Move tool to move the design around.
Edit > Transform.
Scale or rotate the design to fit better within the garment.
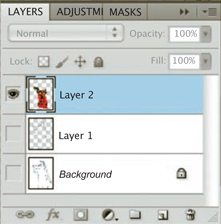
STEP 9
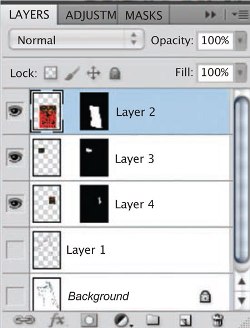
Go back to the original design and select a section to paste into the sleeves using the Paste Into command. It is important at this stage to manage your layers, as you can end up with too many.
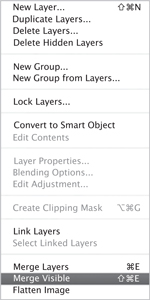
You should have five layers. Turn off the background layer and line-drawing layer. With one of the design layers highlighted, click on the menu button in the top right-hand corner of the Layers palette and a drop-down menu will appear. Select Merge Visible to flatten the layers.
To incorporate added texture, scan in a sequin trim and open it up in Photoshop.
Select > All.
Edit > Copy.
Return to your fashion illustration with the figure drawing layer selected. Use the Magic Wand tool to select the sleeve.
Edit > Paste Special > Paste into.
A new layer will appear.
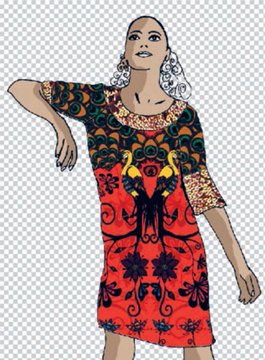
Use the Transform tools to fit your design to the shape of the sleeve. Repeat the process with the other sleeve.
STEP 11
Again, it is important to manage your layers. Turn off the background layer and the line drawing layer. With one of the design layers highlighted, click on the menu button in the top right-hand corner of the Layers palette and select Merge Visible from the drop-down menu to flatten the layers.
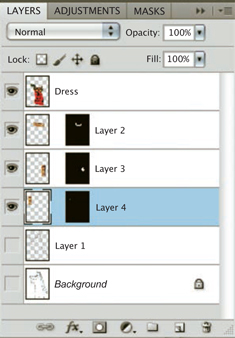
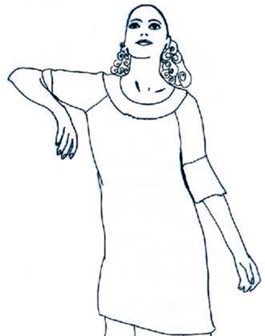
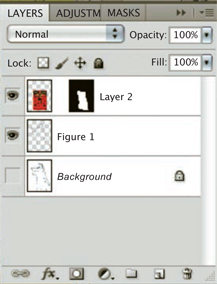
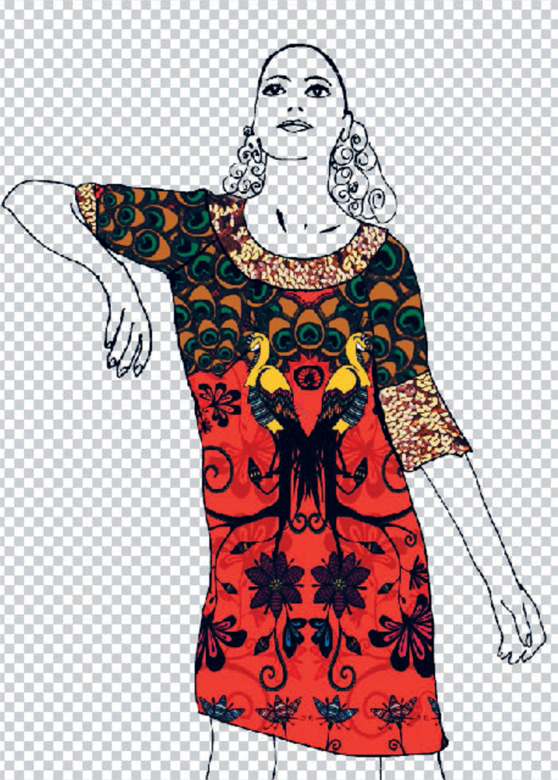
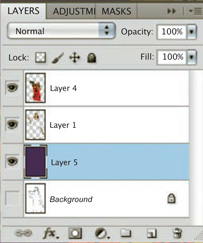
STEP 12
You should now have three layers. With the figure drawing layer selected, paint in the figure by making selections with the Magic Wand tool and filling them with color.
Now the figure is complete. Think about adding a background.
STEP 14
Create a new layer and shift it behind all the other layers.
STEP 15
Edit > Fill > Foreground Color.
Fill with your chosen color.
STEP 16
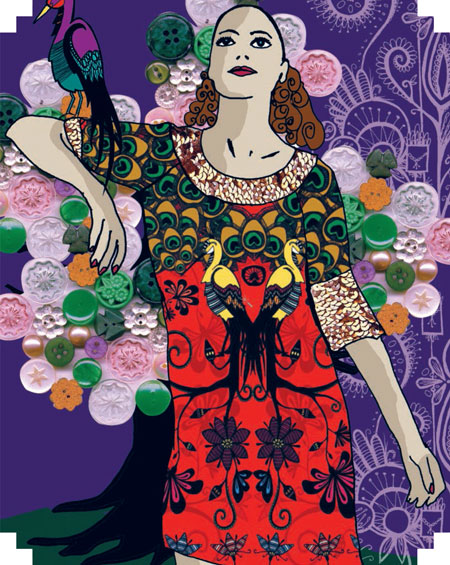
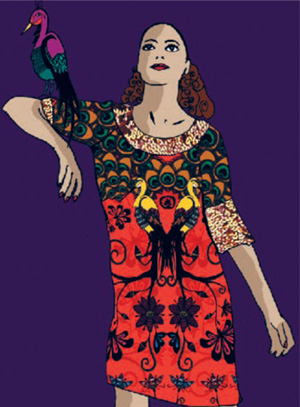
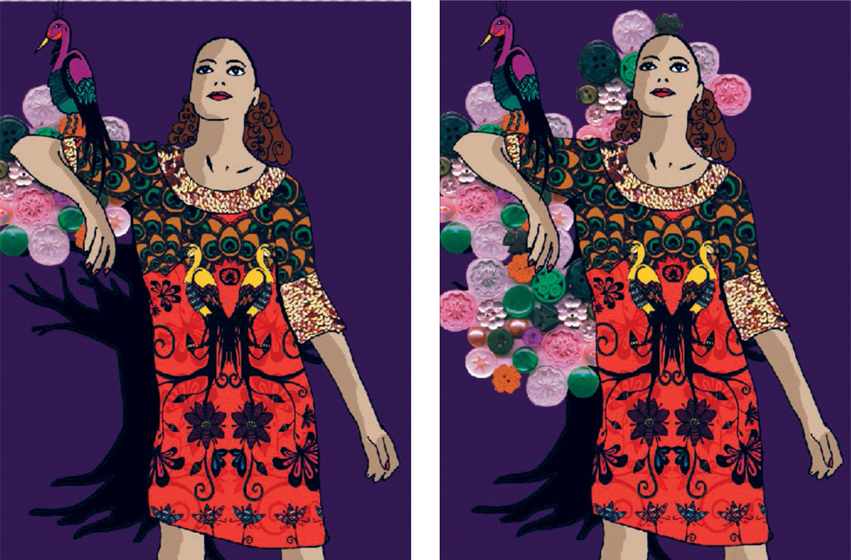
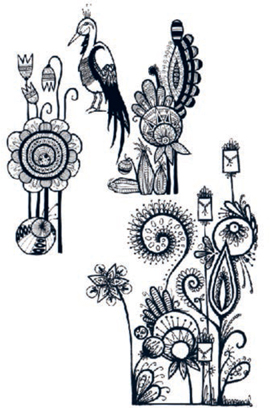
Open up some drawings that you can paste into the background. Here, the bird was selected with the Magic Wand tool and copied and pasted onto the illustration, then colored in.
STEP 17
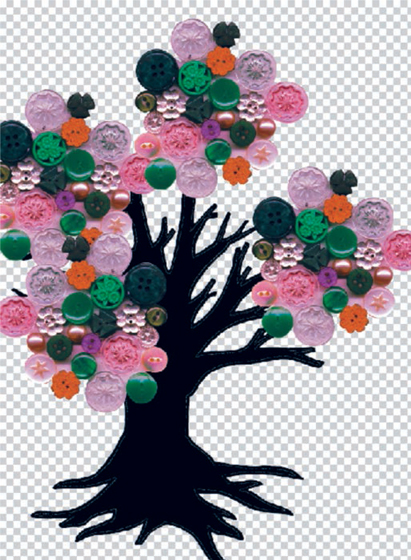
To create the button tree, scan in a tree-trunk silhouette, select it with the Magic Wand tool and paste it into the background.

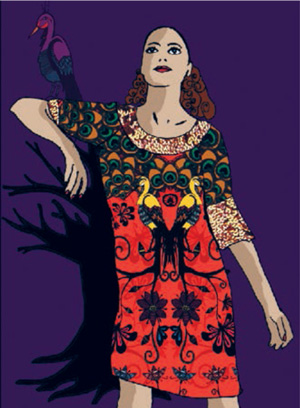
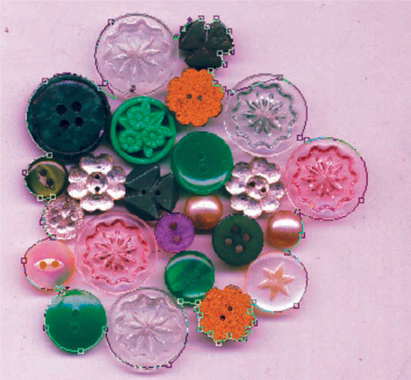
Scan in some buttons. Use the Pen tool to carefully draw around the buttons, creating curves around the edges.
STEP 19
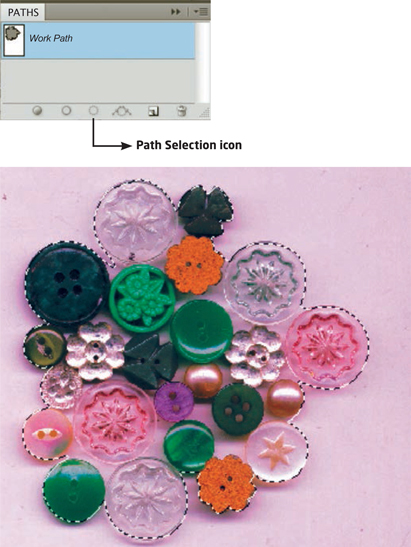
Go into the Paths palette, and make sure the path you have just created is active by clicking on it to highlight it.
Click on the Path Selection icon to make the path into a live selection.
Select > Inverse.
STEP 20
Copy > Paste.
Use the Move tool to arrange the buttons. Duplicate the button layer to build up the button tree.
Merge the button-tree layers to create one layer, as before.
STEP 21
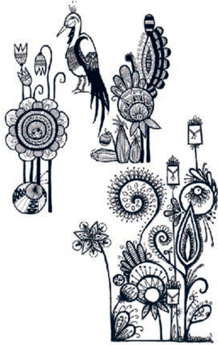
Select and copy some line drawings and paste them into the background. Color them white and lower the Opacity in the Layer palette to add decoration and ornamentation to the fashion illustration.

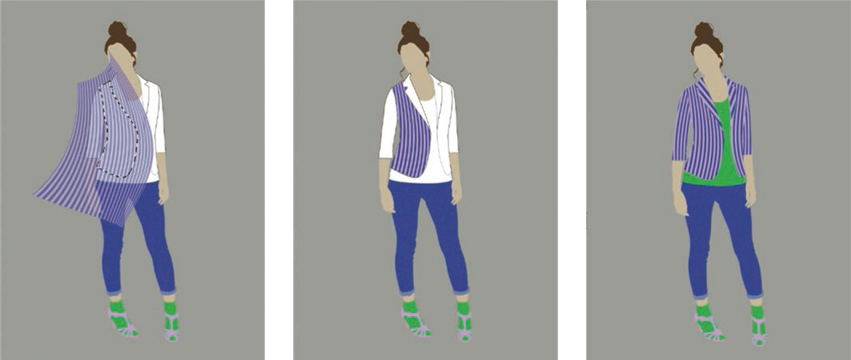
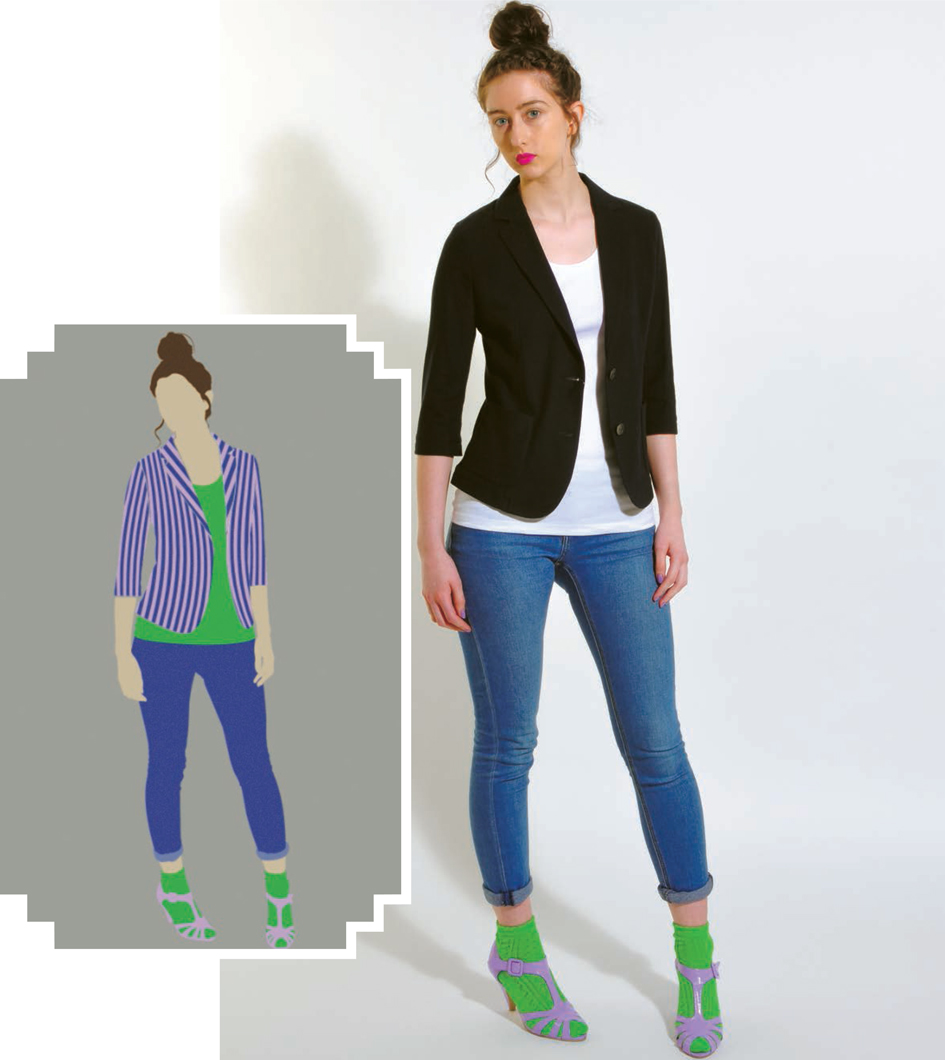
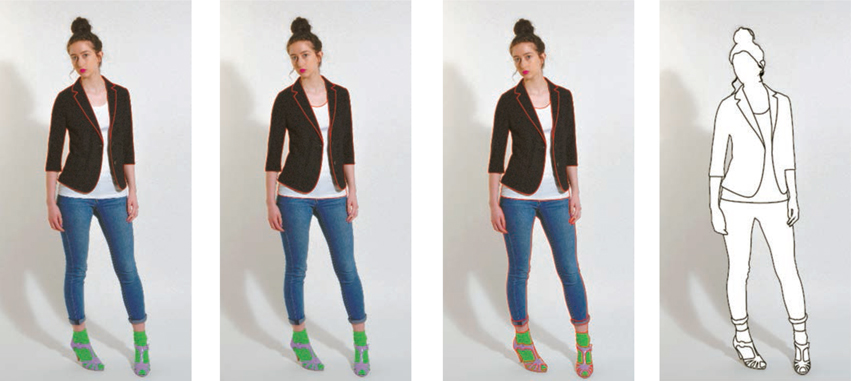
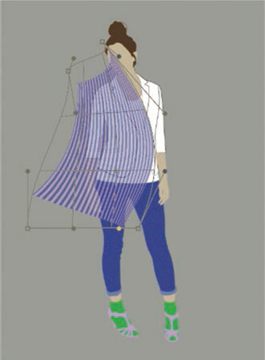
CREATING GRAPHIC SILHOUETTES
This tutorial demonstrates how to place a print design into context for display purposes. The example shows a simple stripe being placed into a basic fashion figure illustration.
The following sequence demonstrates how to create a figure template in Illustrator and then how to place a pattern into the template in Photoshop.
STEP 1
Create a new file in Illustrator.
File > Place.
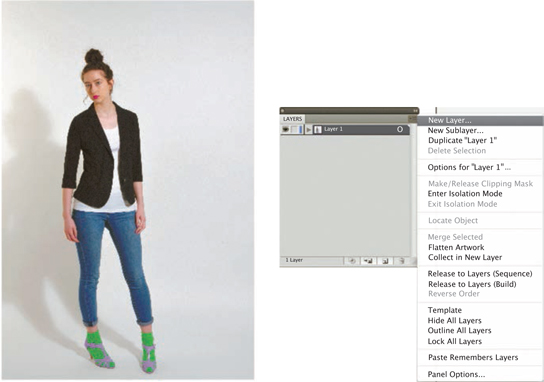
Choose the photograph you wish to trace to create your figure template.
Once the photograph has been placed, open the Layers palette and lock the layer. The will prevent the photograph being moved during tracing.
Open the Layers menu by clicking on the menu icon in the top right-hand corner of the palette. Select New Layer to create a new layer.
STEP 2
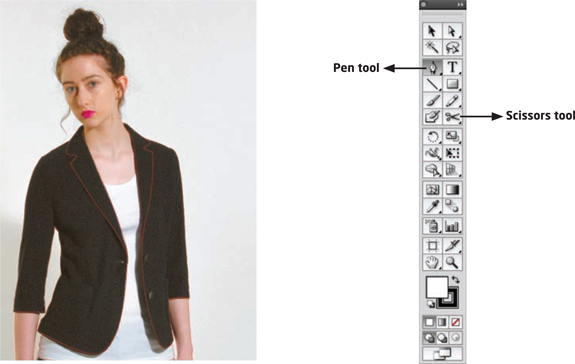
Using the Pen tool, draw around the outline of the figure. You will need some knowledge of the Pen tool to create and control curves. You will also need to know how to cut paths using the Scissors tool and use the Direct Selection tool to join the paths together (this is to separate the drawing into different sections, ensuring that each section is closed so it can be filled with a color).
STEP 3
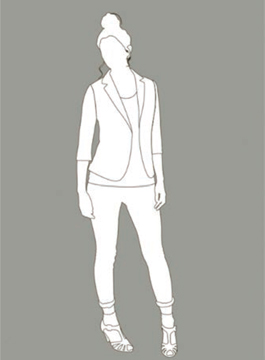
Now create a new layer below the illustration and place a rectangle, filled with a color, to emphasize the illustration.
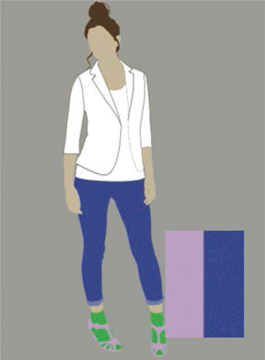
STEP 4
Now working on the figure layer, you can select parts of the garment and figure and fill with color.
STEP 5
Next, open a new Illustrator document and create a simple stripe for your pattern (see Tutorial 16, page 104).
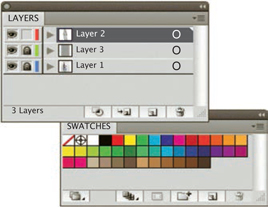
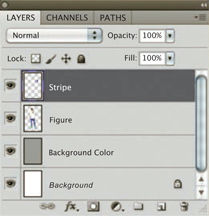
STEP 6
Open Photoshop and create a new Letter-size (A4) document. From your Illustrator document, copy and paste each layer of your illustration into your Photoshop document, as well as your simple stripe pattern. Name your layers (you should have four).
STEP 7
The stripe pattern may appear too large, in which case you can reduce it to the appropriate scale by selecting the stripe layer and choosing Edit > Transform.
STEP 8
To select the area you wish to apply the pattern to, select outside the pattern area with the Magic Wand tool.
Select > Inverse.
To create a pattern swatch, choose Edit > Define Pattern.
Name your pattern and click OK.

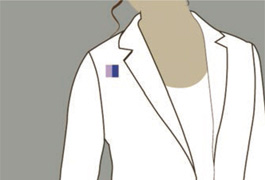
STEP 9
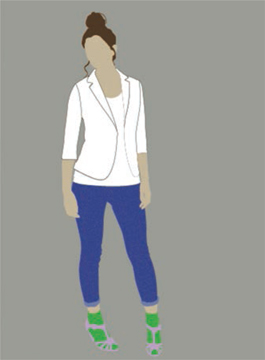
Create a new layer and draw a square marquee over the part of the garment you wish to fill with your stripe.
Edit > Fill > Pattern.
Find your stripe pattern. Reduce the Opacity of the layer to reveal the garment.
STEP 10
Now you need to make your stripe follow the contours of each section of the garment.
To do this, use the Free Transform tools. Choose Edit > Transform > Rotate to rotate your stripe to follow the direction of the garment section. Choosing Edit > Transform > Warp will put a grid around the pattern. You can warp the grid so it bends with the contours of the garment.
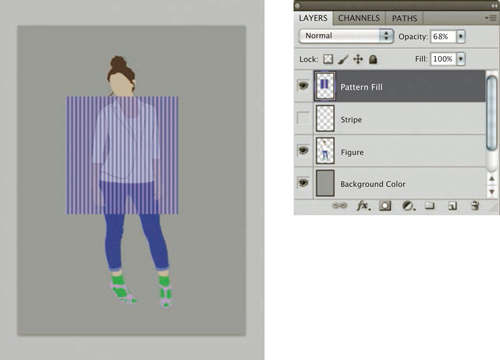
STEP 11
Go to the illustration layer and with the Magic Wand select the part of the jacket you are working on. Now go to the pattern fill layer.
Edit > Copy.
Edit > Paste.
Turn offthe pattern fill layer. Your pattern fill will be now in the jacket section. Repeat steps 8, 9, and 10 on each section of the garment.