
In order to test-launch our first application, we will create a HelloWorld web application using Eclipse. So launch Eclipse and choose to create a new web project using File | New | Dynamic Web Project.
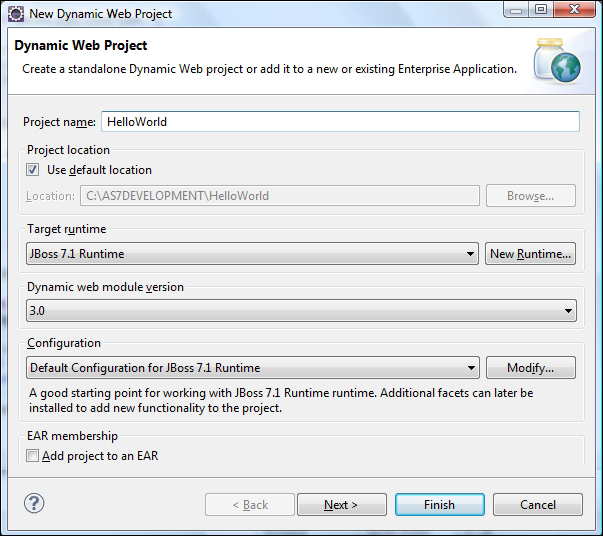
Choose a name for your application and check the Use default location box if you want to create your project within the same location of your Eclipse workspace. If you have correctly configured a new JBoss AS 7.1 server in Eclipse, you should see the JBoss 7.1 Runtime option selected by default and Target Runtime and Default Configuration for JBoss 7.1 Runtime preselected in the Configuration combobox.
Select 3.0 as Dynamic web module version, which buys us ease of development by using the Servlet 3.0 specifications, and also leave the EAR membership checkbox unselected.
Click on Finish to continue.
Now let's add a quintessential servlet to our project that merely dumps a HelloWorld message. From the File menu, select New | Servlet and enter a meaningful name and package for your servlet, such as TestServlet as the name and com.packtpub.as7development.chapter2 as the package name.
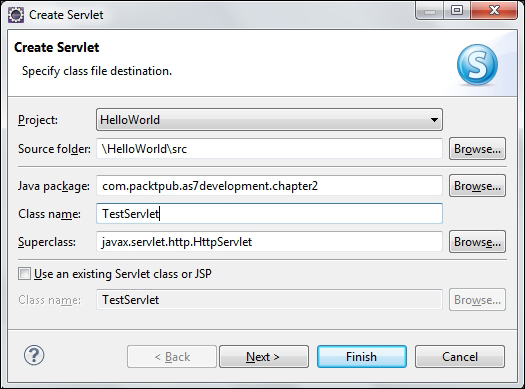
The wizard will serve a basic servlet skeleton that needs to be completed with a minimal set of code lines:
@WebServlet("/test")
public class TestServlet extends HttpServlet {
  protected void doGet(HttpServletRequest request, HttpServletResponse response) throws ServletException, IOException {
    PrintWriter out = response.getWriter();
    out.println("Hello World JBoss AS 7");
    out.close();
  }
  protected void doPost(HttpServletRequest request, HttpServletResponse response) throws ServletException, IOException {
  }
}
Note
Notice that this small class bears the @WebServlet annotation, which has been introduced by the Servlet 3.0 API, and it allows registering a servlet without using the web.xml configuration file. In our example, we have used it to customize the servlet URL binding to use "/test", which would otherwise be defaulted by Eclipse to the class name.
We will complete the application with a JBoss file descriptor named jboss-web.xml; although this not mandatory, it can be used to redefine the context root:
<jboss-web>
    <context-root>/hello</context-root>
</jboss-web>Now we will add the web application to the list of deployed resources by right-clicking on the Eclipse Server tab and selecting Add and Remove:
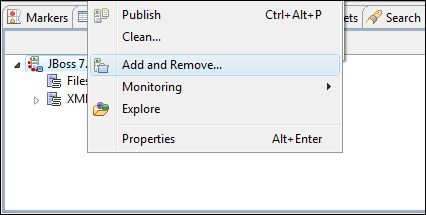
Next, click on Add to add the project to the list of configured resources on the server:
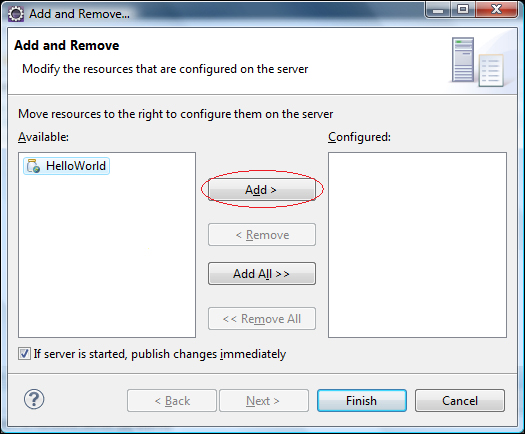
If you have started JBoss AS from inside Eclipse, the resource will be automatically deployed by checking the flag If server is started, publish changes immediately.
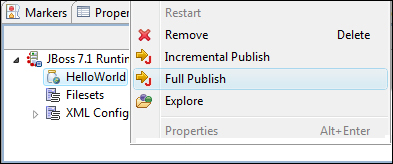
If, on the other hand, you have started the application server externally, then you can fully publish your resource by right-clicking on the application and selecting Full Publish:
Now move to the browser and check that the application responds at the configured URL:
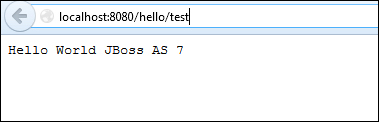
As it is, Eclipse has published a HelloWorld.war folder in JBOSS_HOME/standalone/deployments.
Note
You might have also noticed that Eclipse has also added a marker file named HelloWorld.war.dodeploy. This step is necessary because, by default, exploded deployments in AS 7 aren't automatically deployed but they can be triggered with a marker file named application.[jar/war/ear].dodeploy.
Once the application is deployed, the application server replaces the .dodeploy marker file with a HelloWorld.war.deployed or with a HelloWorld.war.failed file, should the deployment fail.
You can change the default deployment options by double-clicking on JBoss AS 7.1.1 (in the Server tab) and selecting the Deployment tab:
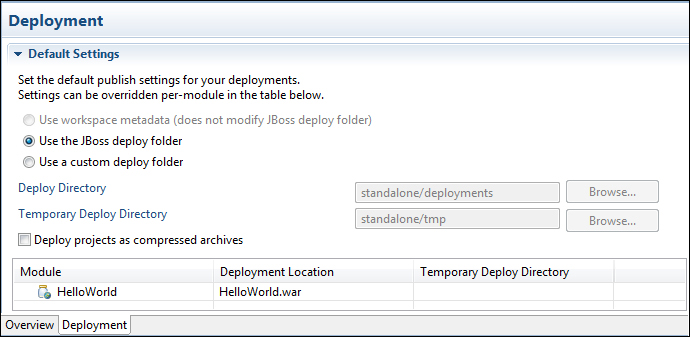
In this tab, you can choose to deploy your application on a custom deploy folder by checking the Use a custom deploy folder option and entering an appropriate value into the corresponding textbox.
Please note that the custom deployment folder needs to be defined as well into JBoss AS 7; check the next section for more information about it.
Also, take note of the option Deploy projects as compressed archives, which can be useful in some circumstances, for example if you are distributing the application via other instruments such as the CLI, which is able to deploy only compressed archives.
Deploying the application using Eclipse is a straightforward task and it is likely to be your option when you are developing apps. We will show here how to use the web console to deploy the application, which can be one more arrow in your quiver.
Start the web console and select the Runtime tab. From the options on the left panel, select Deployments | Manage Deployments as shown in the following screenshot:

In the central panel, we can manage deployments using the Add, Remove, En/Disable, and Update
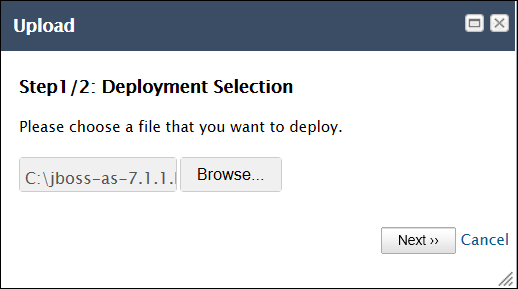
buttons. Select the Add button to add a new deployment unit. In the next screen, pick up the file you want to deploy (for example, the HelloWorld.war artifact) from your local filesystem:
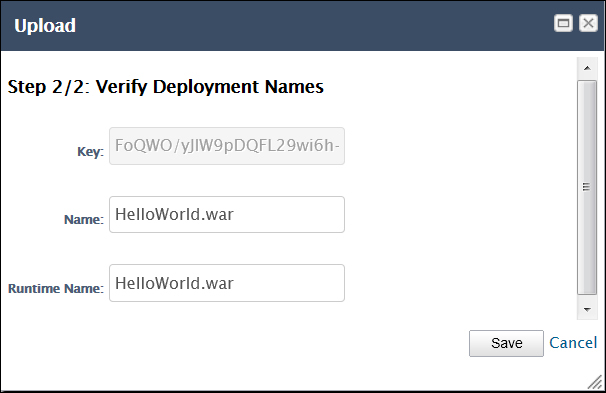
Complete the wizard by verifying the deployment's name and click on Save:
Now the deployment is enlisted into the Deployments table. It is however not enabled by default. Click on the En/Disable button to enable the deployment of the application.

As we have seen before, applications running in the standalone mode are scanned in the deployments folder by default. You can change this behavior (and also the deployment scanner's properties) by navigating to the Profile tab and selecting Core | Deployment Scanners from the left menu:
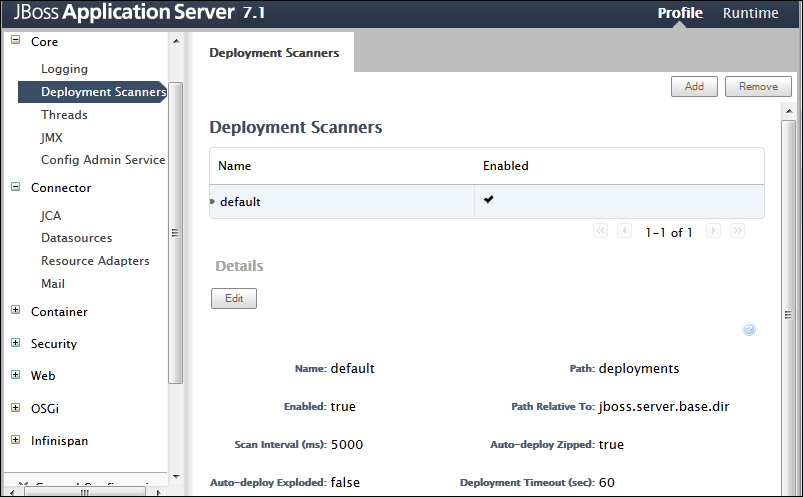
There you can set the core deployment's attributes. You can click on the Edit button to define new values for these properties. Most of them are self-explanatory; however, the following table summarizes them:
|
Attribute |
Description |
|---|---|
|
|
This is the deployment scanner's name. (By default the name |
|
|
This is the absolute path where deployments are scanned. If the attribute |
|
|
This attribute determines if the deployment scanner is enabled or not. |
|
|
If included, this attribute must point to a system path that will be used to build the relative path expression. |
|
|
This is the time frequency (in ms) for which deployments will be scanned. |
|
|
Setting this to |
|
|
Setting this to |
|
|
This is the timeout after which a deployment action will be marked as |
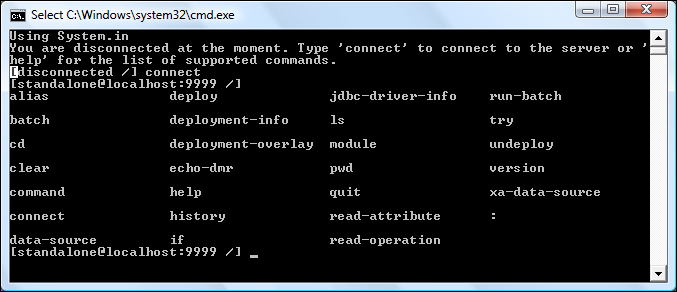
Another way to deploy an application is via the Command Line Interface, which can be started from jboss-cli.bat (or jboss-cli.sh for Linux users). Don't be afraid of using a textual interface to manage your application server; as a matter of fact, the console provides built-in autocomplete features and you can display the available commands at any time by simply hitting the Tab key as shown in the following screenshot:
As you might guess, in order to deploy an application you need to issue the deploy shell command. When used without arguments, the deploy command provides a list of applications that are currently deployed:
[localhost:9999 /] deploy
ExampleApp.war
If you feed a resource archive such as .war to the shell, it will deploy it on the standalone server right away:
[standalone@localhost:9999 /] deploy ../HelloWorld.war
As you can see from the preceding command line, the CLI uses the folder where your deployments were actually launched as its initial location, which is JBOSS_HOME/bin by default You can, however, use absolute paths when specifying the location of your archives; the CLI expansion facility (using the Tab key) makes this option fairly simple:
[standalone@localhost:9999 /] deploy c:deploymentsHelloWorld.war
HelloWorld.war' deployed successfully.
As it is, the application is deployed and activated so that the user can access it. If you want to just perform the deployment of the application and defer the activation to a later time, you have to add the --disabled switch:
[standalone@localhost:9999 /] deploy ../HelloWorld.war --disabled
HelloWorld.war' deployed successfully.
In order to activate the application, simply issue another deploy command without the --disabled switch:
[standalone@localhost:9999 /] deploy -–name= HelloWorld.war
HelloWorld.war' deployed successfully.
Redeploying the application requires an additional flag to the deploy command. Use the -f argument to force the application's redeployment:
[localhost:9999 /] deploy -f ../HelloWorld.war
HelloWorld.war' re-deployed successfully.
Undeploying the application can be done with the undeploy command, which takes as an argument the application that is deployed:
[localhost:9999 /] undeploy HelloWorld.war
HelloWorld.war' undeployed successfully.
Deploying applications when running in the domain mode is slightly different from doing the same in the standalone mode. The difference boils down to the fact that an application can be deployed just to one server group or to all the server groups. As a matter of fact, one reason why you might split your domain into different server groups might be that you are planning to offer different types of services (and hence applications) on each server group.
So, in order to deploy your HelloWorld.war application to all server groups, issue the following command:
[domain@localhost:9999 /] deploy HelloWorld.war --all-server-groups
Successfully deployed HelloWorld.war
If, on the other hand, you want to undeploy an application from all server groups belonging to a domain, you have to issue the undeploy command:
[domain@localhost:9999 /] undeploy HelloWorld.war --all-relevant-server-groups
Successfully undeployed HelloWorld.war
You can also deploy your application just to one server group of your domain by specifying one or more server groups (separated by a comma) with the --server-groups parameter, shown as follows:
[domain@localhost:9999 /] deploy HelloWorld.war --server-groups=main-server-group
Successfully deployed HelloWorld.war
You can use the tab-completion facility in order to complete the value for the list of --server-groups elected for deployment.
Now, suppose we wish to undeploy the application from just one server group. There can be two possible scenarios: if the application is available just on that server group, you will just need to feed the server group to the --server-groups flag, shown as follows:
[domain@localhost:9999 /] undeploy HelloWorld.war --server-groups=main-server-group
Successfully undeployed HelloWorld.war.
On the other hand, if your application is available on other server groups as well, you need to provide the additional --keep-content flag, otherwise the CLI will complain that it cannot delete an application that is referenced by other server groups:
[domain@localhost:9999 /] undeploy HelloWorld.war --server-groups=main-server-group --keep-content