
As the name implies, javax.ejb.Singleton is a session bean that guarantees that there is one instance in the application, at most.
Note
Besides this, singleton EJBs fill up a well-known gap in EJB applications, that is, the ability to have an EJB that is notified when the application starts and also when the application stops. So, you can do all sorts of things with an EJB that you previously could only do with a load-on-startup servlet. It also gives you a place to hold data that pertains to the entire application and all the users using it, without the need for static class fields.
In order to turn your EJB into a singleton, all that is needed is to apply the @ javax.ejb.Singleton annotation on top of it.
Note
A singleton bean is similar to a stateful bean in that state information is maintained across method invocations. However, there is just one singleton bean for each server JVM, and it is shared by all of the EJBs and clients of an application. This type of bean provides a convenient means of maintaining the overall state of an application.
Another annotation that is worth learning is @javax.ejb.Startup that causes the bean to be instantiated by the container when the application starts. This invokes the @javax.annotation.PostConstruct annotation if you have defined one in your EJB.
We now have enough information to understand our first EJB example. There is more than one alternative for creating a Java Enterprise project. In the earlier chapter, we have illustrated how to start from a project based on Eclipse JEE (dynamic web project), binding it later to a JBoss runtime installation. That's obviously the simplest choice, and you can easily run the examples contained in this book using this pattern; however, when it comes to enterprise solutions, it's no surprise that almost every project is now Maven-based. Some of the benefits that you will achieve when turning to Maven projects include a well-defined dependency structure, the enforcement of a project's build best practices, and project modular design, just to mention a few.
Note
In order to integrate Maven with Eclipse, you need to install the Maven Integration for the Eclipse plugin. This can be done in a minute by navigating to Help | Eclipse Market Place and from there search and install the Maven Integration for Eclipse (m2e) plugin which will need restarting Eclipse thereafter.
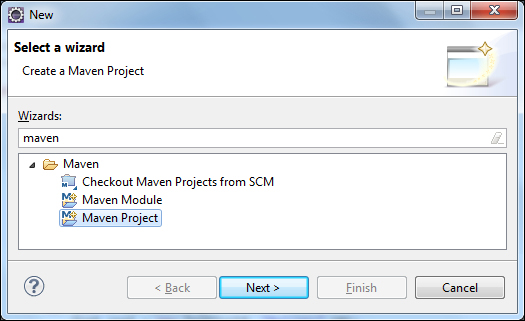
So let's create our first Maven project directly from Eclipse. Navigate to File | New | Other | Maven Project:
Click on Next; you will be taken to the following intermediary screen:
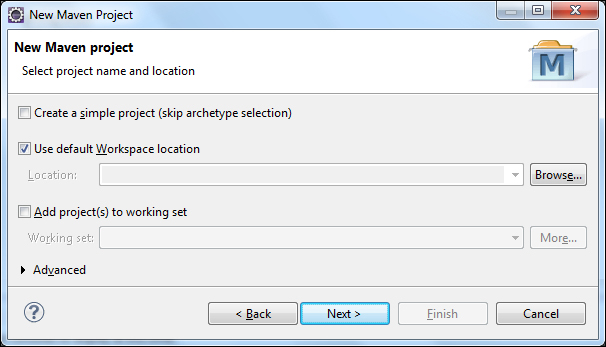
You can leave the default options selected since we would like to use a Maven EJB archetype so as to verify that the Create a simple project checkbox is not selected. In the next screen, we will select the archetype option that will pick up an archetype that is fit for our purpose:
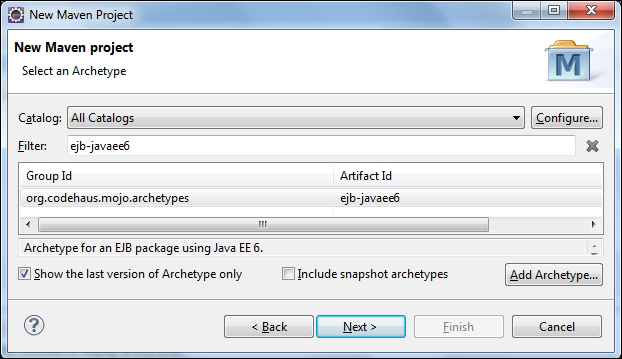
You can enter the archetype name (ejb-javaee6) in the filter box in order to facilitate your selection. Once selected, you can click on Next. You can complete the wizard by entering some package-specific information as shown in the following screenshot:
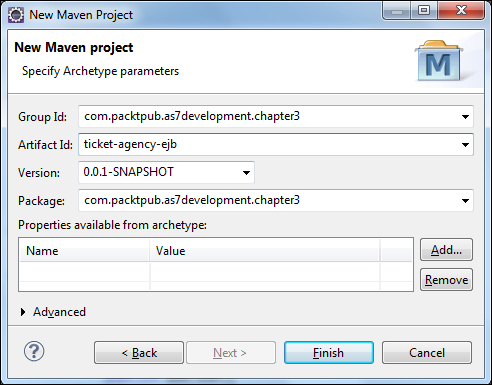
You can enter as Group Id the same package information, which is com.packtpub.as7development.chapter3. The artifact ID that corresponds to our project name will be ticket-agency-ejb and you can leave the default selection for the project's Version field. Click on Finish in order to complete the wizard.
The expected outcome of the Maven wizard should match the following screenshot that has been taken from the Enterprise Explorer view:
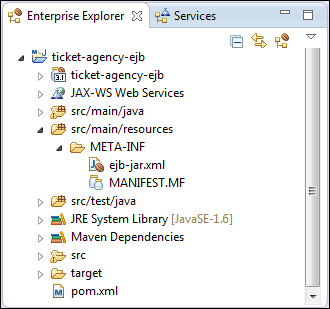
As you can see, the project has been organized as a standard Maven project under src/main/java, where we will add our source code, src/main/resources, for the configuration (containing a bare-bones ejb-jar.xml configuration file), and for src/test/java, which can be used to host the test classes. At the moment, we will concentrate on the main file, pom.xml, which needs to be aware of the JBoss enterprise dependencies.
You need to resist just a few more minutes before digging into the code examples—configuring Maven's pom.xml is your first priority, otherwise you will not even be able to compile a single class for your project.
The pom.xml file is quite verbose, so we will illustrate here just the core elements that are required to understand our example, leaving the full listing to the code example package of this book.
The first thing we are going to add, just after the properties section, is a reference to JBoss' Bill of Material (BOM):
<dependencyManagement>
        <dependencies>
            <dependency>
                <groupId>org.jboss.spec</groupId>
                <artifactId>jboss-javaee-6.0</artifactId>
                <version>3.0.2.Final</version>
                <type>pom</type>
                <scope>import</scope>
            </dependency>
        </dependencies>
 </dependencyManagement>
This dependency will import a project object module that contains a reference to all the libraries that are part of the JBoss Enterprise stack—its most evident advantage is that you will not need to specify the single dependency version but just state which JBoss Enterprise stack version you are going to use (in our example, it is 3.0.2.Final).
Now for the project dependencies. Since we are going to use the EJB 3.1 API with annotations, we would need the Common Annotations API (JSR-250) and the EJB 3.1 API dependencies; so, add the following block just after the BOM section:
<dependencies>

    <dependency>
      <groupId>org.jboss.spec.javax.annotation</groupId>
      <artifactId>jboss-annotations-api_1.1_spec</artifactId>
      <scope>provided</scope>
    </dependency>

    <dependency>
      <groupId>org.jboss.spec.javax.ejb</groupId>
      <artifactId>jboss-ejb-api_3.1_spec</artifactId>
      <scope>provided</scope>
    </dependency>

    <dependency>
      <groupId>org.jboss.logging</groupId>
      <artifactId>jboss-logging</artifactId>
      <version>3.1.3.GA</version>
    </dependency>

</dependencies>
We have also added the JBoss logging API, which is not part of the enterprise bill of material; therefore, a version needs to be specified.
At this point, you will be able to compile your project; so we will start adding classes, but we will return to the pom.xml file when it's time to deploy your artifact.
Creating EJB classes does not require getting mixed up with fancy wizards; all you need to do is add bare Java classes. Therefore, from the File menu go to New | Java Class, and enter TheatreBox as the classname and com.packtpub.as7development.chapter3.ejb as the package name.
We will add the following implementation to the class:
@Singleton
@Startup
public class TheatreBox {
  private ArrayList<Seat> seatList;
  private static final Logger logger =
      Logger.getLogger(TheatreBox.class);

  @PostConstruct
  public void setupTheatre(){
    seatList = new ArrayList<Seat>();
    int id = 0;
    for (int i=0;i<5;i++) {
      Seat seat = new Seat(++id, "Stalls",40);
      seatList.add(seat);
    }
    for (int i=0;i<5;i++) {
      Seat seat = new Seat(++id,"Circle",20);
      seatList.add(seat);
    }
    for (int i=0;i<5;i++) {
      Seat seat = new Seat(++id, "Balcony",10);
      seatList.add(seat);
    }
    logger.info("Seat Map constructed.");
  }

  @Lock(READ)
  public ArrayList<Seat> getSeatList() {
    return seatList;
  }
  @Lock(READ)
  public int getSeatPrice(int id) {

    return getSeatList().get(id).getPrice();
  }

  @Lock(WRITE)
  public void buyTicket(Seat seat)   {
    seat.setBooked(true);
  }
}
Let's see our application code in detail; the void method setupTheatre is invoked as soon as the application is deployed and takes care of assembling the theatre seats, creating a simple list of Seat objects. Each Seat object is constructed using a set of three field constructors that includes the seat ID, its description, and the price:
public class Seat {

  public Seat(int id, String seat, int price) {
    this.id = id;
    this.seatName = seat;
    this.price = price;
  }
// Fields and Getters/Setters omitted for brevity
}
Next, the singleton bean exposes three public methods; the getSeatList method returns a list of Seat objects that will return to the user the information regarding whether they have been reserved or not.
The getSeatPrice method is a utility method that will pick up the seat price and return it as int so it can be used to verify the user is able to afford buying the ticket.
Finally, the buyTicket method is the one that actually buys the ticket and therefore sets up the ticket as booked.
As you might have noticed, the bean includes an @Lock annotation on top of the methods managing our collection of Seat objects. This kind of annotation is used to control the concurrency of the singleton.
Concurrent access to a singleton EJB is, by default, controlled by the container. Read and write access to a singleton is limited to one client at a time. However, it is possible to provide a finer level of concurrency control through the use of annotations. This can be achieved using the @Lock annotation whose arguments determine the type of concurrency access permitted.
By using an @Lock annotation of type javax.ejb.LockType.READ, multithreaded access will be allowed to the bean.
@Lock(READ)
public ArrayList<Seat> getSeatList() {
  return seatList;
}
On the other hand, if we apply javax.ejb.LockType.WRITE, the single-threaded access policy is enforced.
@Lock(WRITE)
public void buyTicket(Seat seat)   {
   seat.setBooked(true);
}
The general idea is to use READ type locks on methods that just read values from the cache and WRITE type locks for methods that change the values of elements contained in the cache.
The other possible option is using a bean-managed concurrency that can be pursued by applying the @javax.ejb.ConcurrencyManagement annotation with an argument of ConcurrencyManagementType.BEAN. This annotation will disable the effect of the @Lock annotation we have used so far, putting the responsibility of ensuring that the singleton cache does not get corrupted on the developer.
So, in order to ensure that our bookings are preserved, we will need to use a well-known synchronized keyword on top of the buyTicket method:
@Singleton
@Startup
@ConcurrencyManagement(ConcurrencyManagementType.BEAN)
public class TheatreBox {
. . . .
  public void buyTicket(Seat seat)   {
      synchronized (this){
         seat.setBooked(true);
      }
}
Since concurrent access is restricted when a thread enters the synchronized block, no other methods are then allowed to access the object while the current thread is in the block.
Our singleton EJB is equipped with the methods for handling our cache of theatre seats. We will now add a couple of session beans to our project for managing the business logic: a stateless session bean that will provide a view of the theatre seats and a stateful bean that will behave as a payment gateway to our system.
So, the first bean we will create is com.packtpub.as7development.chapter3.ejb
TheatreInfoBean that barely contains the logic for looking up the list of theatre seats. In practice, this acts as a façade for our singleton bean.
@Stateless
@Remote(TheatreInfo.class)
public class  TheatreInfoBean implements TheatreInfo  {
  @EJB TheatreBox box;

  @Override
  public String printSeatList() {
    ArrayList<Seat> seats= box.getSeatList();
    StringBuffer sb = new StringBuffer();
    for (Seat seat: seats) {
      sb.append(seat );
      sb.append("
");
    }
    return sb;
  }
}
Since we are planning to invoke this EJB from a remote client, we have provided a remote interface for it with the @Remote(TheatreInfo.class) annotation.
Next, have a look at the @EJB TheatreBox box that can be used to safely inject an EJB into your class without the need of your manually performing a JNDI lookup. This practice can be used to increase the portability of your application between different application servers where different JNDI rules might exist.
The remote interface of your bean will be as simple as this:
public interface TheatreInfo {
   public String printSeatList();

}
Note
If you are planning to expose your EJB to local clients only (for example, to a servlet), you can leave out the remote interface definition and simply annotate your bean with @Stateless. The application server will create a no-interface view of your session bean, which can safely be injected into your local clients such as servlets or other EJBs.
In order to control how much money our customer has got in his pocket, we would need a session-aware component. Turning a Java class into a stateful session bean is just a matter of adding an @Stateful annotation on top of it, as in our example class com.packtpub.as7development.chapter3.ejb.TheatreBooker.
@Stateful
@Remote(TheatreBooker.class)
public class TheatreBookerBean implements TheatreBooker {
   private static final Logger logger =
          Logger.getLogger(TheatreBookerBean.class);

  int money;
  @EJB TheatreBox theatreBox;

  @PostConstruct
  public void createCustomer() {
    this.money=100;
  }
   @Override
  public String bookSeat(int seatId) throws SeatBookedException, NotEnoughMoneyException {

    Seat seat = theatreBox.getSeatList().get(seatId);
                      // Business checks
    if (seat.isBooked()) {
      throw new SeatBookedException("Seat Already booked!");
    }
    if (seat.getPrice() > money) {
      throw new NotEnoughMoneyException("You don't have enough money to buy this ticket!");
    }
    theatreBox.buyTicket(seat);
    money = money - seat.getPrice();
    logger.info("Seat "+seatId+ " booked.");
    return "Seat "+seatId+ " booked.";
  }

}
As you can see, this bean bears an @PostConstruct annotation for initializing a session variable (money) that will be used to check that the customer has enough money to buy the ticket.
Besides this, the ultimate purpose of our SFSB is to contact the buyTicket method of our singleton after having performed some business checks.
If the business checks do not pass, the application will issue some exceptions. This is the case, for example, if the seat has already been booked or if the customer hasn't got enough money to buy the ticket. In order to keep our conversation going, it's important that our exceptions be an extension of the generic Exception class.
public class SeatBookedException extends Exception {
  . . . .
}
If we'd rather use a runtime exception (for example, EJBException), the bean instance will be discarded, resulting in our communication being dropped between the remote client and the server. So, always take care to choose the appropriate type of exception when dealing with EJBs—choose to throw a runtime exception if you are dealing with an unrecoverable scenario (the connection with the enterprise information system is dropped). On the other hand, consider throwing a checked exception (or simply not throwing exceptions at all) if you are dealing with a business kind of exception; for example, if the booked seat is already engaged.