
As we know, applications can make use of the networking services available on an Android device, and many applications are developed as frontends to cloud-based services. What this means is that understanding how it communicates with the Internet services is a very important part of the security risk profile—the collection of risks an application exposes its users and its device to.
In this recipe, I'm going to show you some novel methods that you can use to monitor network traffic directly from an Android device using the ever popular Wireshark.
Before we can get cracking, there are a couple of tools you will need to install both on your local machine and the Android device. Here are the tools you'll need to get:
- Wireshark: It is available for download at the Wireshark site http://www.wireshark.org, Wireshark supports both Linux/Unix and Windows machines. You should make sure this is installed on your host machine before starting. Installing Wireshark is pretty straightforward; the Wireshark folks have even provided some very useful documentation for both Windows and Unix/Linux distributions, which is available at http://www.wireshark.org/docs/wsug_html_chunked/ChapterBuildInstall.html.
- Netcat: It is available for download for Linux/Unix users at http://netcat.sourceforge.net/download.php, and for Windows users at http://joncraton.org/blog/46/netcat-for-windows/. Linux/Unix users may not need to explicitly download Netcat as it comes packaged with many Linux/Unix distributions.
- TCPdump for Android: It is available for download at http://www.strazzere.com/android/tcpdump.
Once you've got all the tools set up and ready to go, you can monitor the traffic of your Android device by performing the following steps:
- Assuming your Android device is rooted, you should create a directory to host your TCPdump binary as follows:
On the Android device, execute the following commands via ADB in the order they appear:
su
mkdir /data/tcpdump/
chmod 755 /data/tcpdump/
And then on the local machine, in the folder where you've downloaded the TCPdump version for Android, execute the following commands:
adb push tcpdump /data/tcpdump/.
adb shell chmod 755 /data/tcpdump/tcpdump
- Once the TCPdump Android version is uploaded to the device and marked as executable. You should make sure Netcat is available on the Android device by trying to run the following command:
nc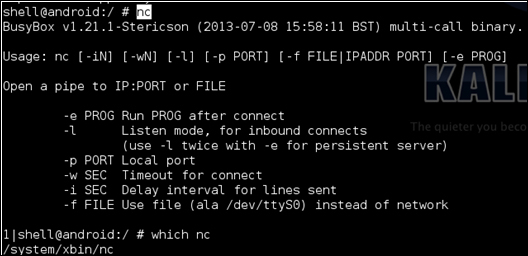
This is merely a sanity check, most Android versions come shipped with Netcat by default. If not, there is an Android version available from the Google Source Android GitHub repository with an NDK Makefile at https://android.googlesource.com/platform/external/netcat/+/master. To find out how to use this Makefile, refer the Cross-compiling native executables recipe in Chapter 8, Native Exploitation and Analysis.
- To make sure that everything works, after you've managed to confirm that both TCPdump and Netcat are installed on your Android device, you can actually dump some network traffic and try executing the following command:
./data/tcpdump/tcpdump –w - | nc –l –p 31337You should see the following appear on your screen if everything is working well:

To see some actual output you might try opening an app that makes requests to the Web or using some networking APIs.
- If everything works fine, you should be able to start feeding the TCPdump output to the Wireshark installed on your local device. To do this, you first need to set up some port forwarding via ADB, which is done by executing the following command:
adb forward tcp:12345 tcp:31337 - Once the port forwarding is set up, you should be able to use Netcat on your local machine by executing the following command:
netcat 127.0.0.1 12345 - This means all the traffic is being forwarded correctly. You should be able to pipe the output into Wireshark, which will interpret it and facilitate deep packet inspection and other useful things. To pipe the output into Wireshark, execute the following command on your local machine:
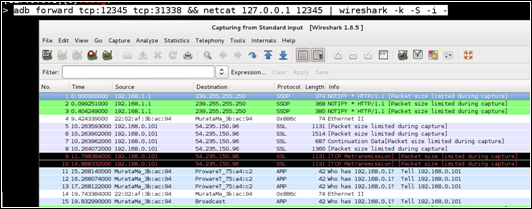
adb forward tcp:12345 tcp:31337 && netcat 127.0.0.1 12345 | wireshark –k –S –i –After a few seconds, if everything works properly, you should see Wireshark launch. The following shows up on your screen:
In this recipe we used Netcat, Wireshark, and TCPdump to extract network traffic directly from an Android device for analysis and deep-packet inspection. Given that very little explanation was given for the command-line arguments and combinations of tools in the walkthrough, this recipe details how and why each one of the actions were performed.
In Step 1, the following commands where executed in order to create a directory to host the TCPdump installation on the Android device:
su; mkdir /data/tcpdump/; chmod 755 /data/tcpdump/
The su command which stands for Substitute User (SU) allows us to assume root privileges—this is the behavior of su when no arguments are supplied. The root privileges we assume using su include being able to modify and view any directory or file on the Android file system. This was needed since we created the tcpdump directory inside the /data/ folder.
After executing su, we executed the mkdir command with an argument of /data/tcpdump/, which created the tcpdump/ directory under the /data/ folder.
Following this is the chmod command—which is an abbreviation of change mode—with an argument of 755. It modifies the access mode for the /data/tcpdump folder and allows users with lower privileges to access the tcpdump path. This is needed because we will be using the adb push command to store the tcpdump binary under this path.
After creating the tcpdump folder, we execute the following commands:
adb push tcpdump /data/tcpdump/.
adb shell chmod 755 /data/tcpdump/tcpdump
These ensure that the tcpdump binary is stored under the tcpdump path. The first command passes the push command to adb with an argument of tcpdump, which is the TCPdump version for Android. You will notice that a dot is supplied as the name for the tcpdump binary under the /data/tcpdump folder; this is a shorthand that ensures whichever file is being copied keeps its filename after being copied. This is evident since we copied a file called tcpdump from the local machine, which also ended up being called tcpdump on the Android device.
Following the
push command is the adb shell command with an argument of chmod 755 /data/tcpdump/tcpdump, which changes the access mode for the tcpdump binary, allowing users with lower privileges to execute it.
In step 2, we used the nc command—which is an abbreviation of Netcat. This tool serves as a Swiss army knife for interacting with networking services. In this recipe, we will use it to read data from and into a network connection. Running nc without any arguments prints the usage specification. This allowed us to make sure nc was running properly and is actually installed on our Android device.
In step 3, we used tcpdump with the argument of –w, which allows us to specify a file to write out to, and the second argument ensures that the output is written to the terminal screen. As part of the command we executed, we also specified the following: | nc –l –p 31337. The | character, which is called a pipe in operating system terminology, feeds the output of the preceding program to the program after the pipe as input. Netcat is invoked using the –l argument which causes Netcat to listen for connections on the port supplied as an argument to the –p command-line switch. In this context, all this means that the raw binary network traffic from tcpdump is fed to Netcat as input; which means it will output this raw traffic from port number 31337.
In step 4, we use ADB's port forwarding feature. It allows us to couple a port on the Android device (supplied as the second argument tcp:12345) with a port on the local machine (supplied as the first argument tcp:31337). You will notice that we couple port 12345 to port 31337 and tell Netcat in the previous step to listen for connection on port 31337. This is so that we can interact with the Netcat instance via port 31337 on our local machines. To summarize in simpler terms, port 31337 on the Android device becomes port 12345 on our local machines.
In step 5, we launched Netcat with the arguments 127.0.0.1, which is the address of our local machine (termed the loopback address), and 12345, which is a port that we forwarded in the previous step. This tells Netcat to connect to port 12345 on our local machine; and since port 12345 is coupled to port 31337 on the Android device, it actually means we are interacting with port 31337 by proxy of port 12345 locally. The result of this is that we can grab the network traffic piped into Netcat on the Android device from our local machines.
In Step 6, we combined all the commands relevant to our local machines in order to ensure that Wireshark gets the raw binary network traffic and interprets it for us. We launched Wireshark with the following arguments:
–k: This argument, according to the Wireshark manual, does the following:- Starts the capture session immediately. If the
-iflag was specified, the capture uses the specified interface. - Otherwise, Wireshark searches the list of interfaces, choosing the first non-loopback interface if there are any non-loopback interfaces and choosing the first loopback interface if there are no non-loopback interfaces.
- If there are no interfaces, Wireshark reports an error and doesn't start the capture.
- Starts the capture session immediately. If the
–S: This argument specifies the snapshot length, which is the number of bytes to capture per packet. If no argument is given as length, the full packet is captured.–i: This argument specifies the input from which to capture packets. Here we supplied the – symbol again, which tells Wireshark to read the input from standard input. We do this because the input for Wireshark is funneled to it via the pipe from Netcat.
For a more interesting use of this idea, you could try building tools that analyze Android traffic for active threats by running an Intrusion Detection System (IDS) or other security-focused network monitoring tools like Snort on some network traffic generated by an Android device. This idea would make for a very interesting malware and vulnerability analysis.
- The Analyzing Android Network Traffic webpage at http://mobile.tutsplus.com/tutorials/android/analyzing-android-network-traffic/
- The Wireshark User's Guide at http://www.wireshark.org/docs/wsug_html_chunked/
- The Wireshark DisplayFilters webpage at http://wiki.wireshark.org/DisplayFilters
- The Wireshark CaptureFilters webpage at http://wiki.wireshark.org/CaptureFilters
- The TCPdump man page at http://www.tcpdump.org/tcpdump_man.html