
Let's start with "why should I use Purchase Orders?" We can list dozens of reasons why you should use them, but we are going to focus on one reason for the purpose of this chapter. Purchase orders make sure you are not unnecessarily losing profit. They ensure you are purchasing only what you need, when you need it. If used properly, Purchase Orders can be set up to have manager approvals for general expenses and products, and even used to create drop ship POs for specific customer orders.
What we will build:
- Purchase orders awaiting approval
- Open purchase orders older than 45 days
With Purchase Order Enhancements in GP, you will require approvals before printing and processing a Purchase Order (PO). This requires POs to be approved before they can be received (and in theory, ordered.) In GP 2013 R2, workflow with approval was added as a new feature. (This is different from the SharePoint dependent-workflow that has been around for a while.) So yes, there are two approval options in GP, and we'll create this report for both options. Before we move ahead, though, let's briefly review the difference between these options.
Purchase Order Approvals using Purchase Order Enhancements is a basic PO approval tool. After you activate approvals, or basically turn it on, there is one simple screen to complete. You highlight a GP user, assign an approval amount for that user, assign another GP user that this user reports to (optional), and define whether this user can approval anyone's PO or just those who report to them—that's it, very straightforward. A PO is entered, it gets approved, and now it is ready for processing.
The new GP feature (GP 2013 R2) allows workflow to be set up for a requisition prior to becoming a PO. So what does this mean? Now, you'll be able to enter requisitions (request for a PO) that become approved. Once approved, the requisition becomes a PO. You start by creating an approval process (workflow) for these requisitions. This approval process defines how a purchase request flows through your company, who approves (using a simple or complex hierarchy of approvers), and what conditions must exist for a document to be approved.
For either of the approval process to be effective, managing what is approved and unapproved is essential.
This report was built for a company that implemented the Purchase Order Processing (POP) module when their auditors realized that employees were not adhering to the purchasing policy outlined by executives. As a method to ensure the policy would be followed, they needed to use not only POP, but PO approvals as well.
Prior to implementing, or rather enforcing a proper Purchase Order system with approvals, the procurement department would simply order everything on POs. Once approvals became necessary, the procurement team needed an easy method to determine the status of a requisition and/or PO. They needed a single source that would display all requests, including where the request is in the approval process.
There are two parts to these steps. The first part is technical, containing steps that involve work on SQL Server. The second part is the actual building of the report. You may choose to obtain assistance with the technical part, especially if you do not have access to SQL Server.
There will be two views listed to create. The first view is ONLY for those using the Purchase Order Enhancements feature for approvals. The second view is ONLY for those using the new (non-SharePoint) feature for approvals with workflow. You only need to create the view for the approval feature you are using.
Create the following view in SQL Server if you use the approval feature in Purchase Order Enhancements:
CREATE VIEW view_BI_POP_Approval AS
SELECT dbo.POP10100.PONUMBER AS PO_Number,
 CASE POP10100.POSTATUS
 WHEN 1 THEN 'New'
 WHEN 2 THEN 'Released'
 WHEN 3 THEN 'Change Order'
 WHEN 4 THEN 'Received'
 WHEN 5 THEN 'Closed'
 WHEN 6 THEN 'Cancelled'
 ELSE 'Other'
 END AS PO_Status,
 CASE POP10100.POTYPE
 WHEN 1 THEN 'Standard'
 WHEN 2 THEN 'Drop Ship'
 WHEN 3 THEN 'Blanket'
 WHEN 4 THEN 'Blanket Drop Ship'
 ELSE 'Other'
 END AS PO_Type,
 dbo.POP10100.DOCDATE AS PO_Date,
 dbo.POP10100.VENDORID AS Vendor_ID,
 dbo.POP10100.VENDNAME AS Vendor_Name,
 CASE POA40003.POA_PO_Approval_Status
 WHEN 1 THEN 'Unapproved'
 WHEN 2 THEN 'Approved'
 ELSE 'Other'
 END AS Approval_Status,
 dbo.POA40003.POA_Created_By AS Created_By,
 dbo.POA40003.POA_Approved_By AS Approved_By,
 CASE POA40003.POA_PO_Approval_Status
 WHEN 2 THEN POA40003.APPRVLDT
 ELSE NULL
 END AS Approved_Date,
 CASE POA40003.POA_PO_Approval_Status
 WHEN 2 THEN POA40003.POA_Approval_Time
 ELSE NULL
 END AS Approved_Time,
 dbo.POP10100.REMSUBTO AS Remaining_SubTotal,
 dbo.POP10100.PRMDATE AS Promised_Date,
 CASE POP10100.PRMSHPDTE
 WHEN POP10100.DOCDATE THEN NULL
 ELSE POP10100.PRMSHPDTE
 END AS Promised_Shipped_Date,
 CASE POP10100.REQDATE
 WHEN POP10100.DOCDATE THEN NULL
 ELSE POP10100.REQDATE
 END AS Required_Date,
 CASE POP10100.HOLD
 WHEN 0 THEN NULL
 ELSE 'On Hold'
 END AS Hold_Status,
 CASE POP10100.HOLD
 WHEN 0 THEN NULL
 ELSE POP10100.ONHOLDDATE
 END AS On_Hold_Date,
 dbo.POP10100.ONHOLDBY AS On_Hold_By,
 dbo.PurchaseOrders.[PO Number For Drillback]
FROM dbo.POP10100
INNER JOIN dbo.POA40003 ON dbo.POP10100.PONUMBER = dbo.POA40003.PONUMBER
AND dbo.POP10100.VENDORID = dbo.POA40003.VENDORID
INNER JOIN dbo.PurchaseOrders ON dbo.POA40003.PONUMBER = dbo.PurchaseOrders.[PO Number]
GO
GRANT SELECT ON view_BI_POP_Approval TO DYNGRP
Create the following view in SQL Server if you use the new purchasing (non-SharePoint) workflow (available in GP2013R2 and higher.)
CREATE VIEW view_BI_POP_WorkflowApproval AS
SELECT dbo.POP10100.PONUMBER AS PO_Number,
 CASE POP10100.POSTATUS
 WHEN 1 THEN 'New'
 WHEN 2 THEN 'Released'
 WHEN 3 THEN 'Change Order'
 WHEN 4 THEN 'Received'
 WHEN 5 THEN 'Closed'
 WHEN 6 THEN 'Cancelled'
 ELSE 'Other'
 END AS PO_Status,
 CASE POP10100.POTYPE
 WHEN 1 THEN 'Standard'
 WHEN 2 THEN 'Drop Ship'
 WHEN 3 THEN 'Blanket'
 WHEN 4 THEN 'Blanket Drop Ship'
 ELSE 'Other'
 END AS PO_Type,
 dbo.POP10100.DOCDATE AS PO_Date,
 dbo.POP10100.VENDORID AS Vendor_ID,
 dbo.POP10100.VENDNAME AS Vendor_Name,
 dbo.POP10100.REMSUBTO AS Remaining_SubTotal,
 dbo.POP10100.PRMDATE AS Promised_Date,
 CASE POP10100.PRMSHPDTE
 WHEN POP10100.DOCDATE THEN NULL
 ELSE POP10100.PRMSHPDTE
 END AS Promised_Shipped_Date,
 CASE POP10100.REQDATE
 WHEN POP10100.DOCDATE THEN NULL
 ELSE POP10100.REQDATE
 END AS Required_Date,
 CASE POP10100.HOLD
 WHEN 0 THEN NULL
 ELSE 'On Hold'
 END AS Hold_Status,
 CASE POP10100.HOLD
 WHEN 0 THEN NULL
 ELSE POP10100.ONHOLDDATE
 END AS On_Hold_Date,
 dbo.POP10100.ONHOLDBY AS On_Hold_By,
 CASE POP10100.Workflow_Approval_Status
 WHEN 1 THEN 'Not Submitted'
 WHEN 2 THEN 'Submitted'
 WHEN 3 THEN 'Not Needed'
 WHEN 4 THEN 'Pending Approval'
 WHEN 5 THEN 'Pending Changes'
 WHEN 6 THEN 'Approved'
 WHEN 7 THEN 'Rejected'
 WHEN 8 THEN 'Ended'
 WHEN 9 THEN 'Not Activated'
 WHEN 10 THEN 'Deactivated'
 ELSE 'Other'
 END AS Approval_Status,
 CASE POP10100.Workflow_Priority
 WHEN 1 THEN 'Low'
 WHEN 2 THEN 'Normal'
 WHEN 3 THEN 'High'
 ELSE NULL
 END AS Workflow_Priority,
 CASE POP10100.Workflow_Status
 WHEN 1 THEN 'Not Submitted'
 WHEN 2 THEN 'Submitted'
 WHEN 3 THEN 'No Action Needed'
 WHEN 4 THEN 'Pending User Action'
 WHEN 5 THEN 'Recalled'
 WHEN 6 THEN 'Completed'
 WHEN 7 THEN 'Rejected'
 WHEN 8 THEN 'Workflow Ended'
 WHEN 9 THEN 'Not Activated'
 WHEN 10 THEN 'Deactivated'
 ELSE 'Other'
 END AS Workflow_Status,
 dbo.PurchaseOrders.[PO Number For Drillback]
FROM dbo.POP10100
INNER JOIN dbo.PurchaseOrders ON dbo.POP10100.PONUMBER = dbo.PurchaseOrders.[PO Number]
GO
GRANT SELECT ON view_BI_POP_WorkflowApproval TO DYNGRP
Even though we are building a report that displays two separate views that will pull data from two separate sets SQL tables, the steps will be the same. When there is a variation between the two approval processes/views, we will point it out.
Let's begin.
Requirements? Procurement wants to know where every order stands, so they can place the order when approved. Anything else?
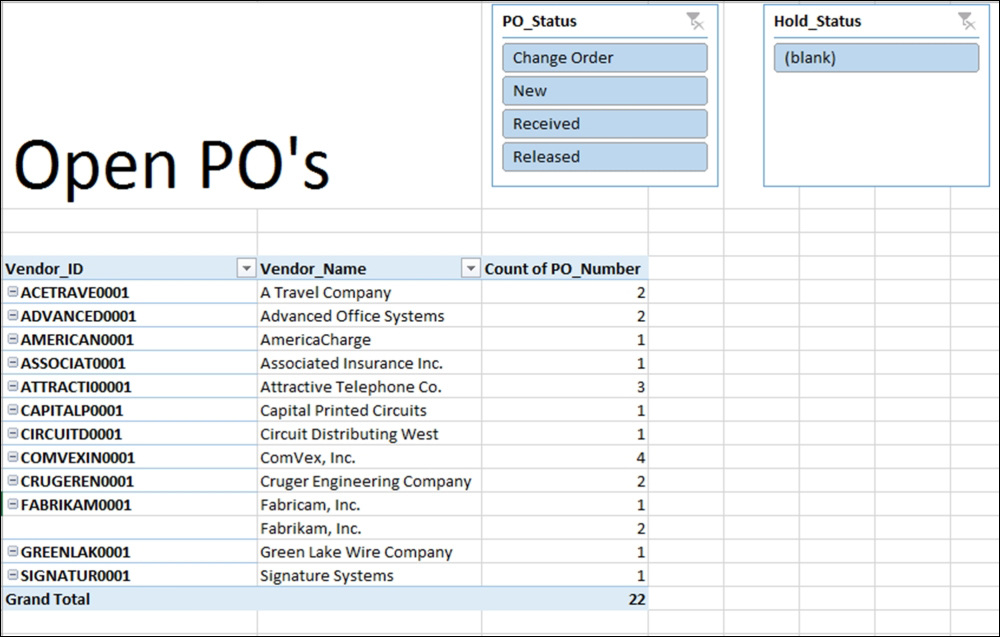
Here is the screenshot of the desired results for the Approval feature in Purchase Order Enhancements:
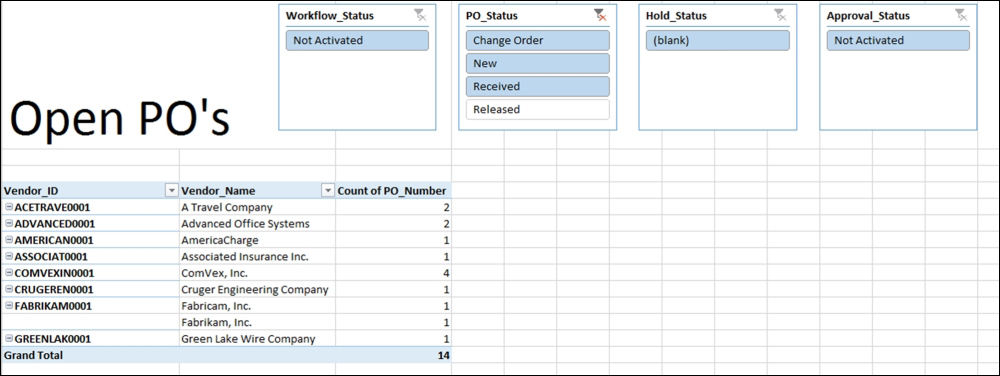
The following is the screenshot of what the desired results for the Approval feature in the new Purchasing Workflow looks like:
Let's make a connection to the GP data:
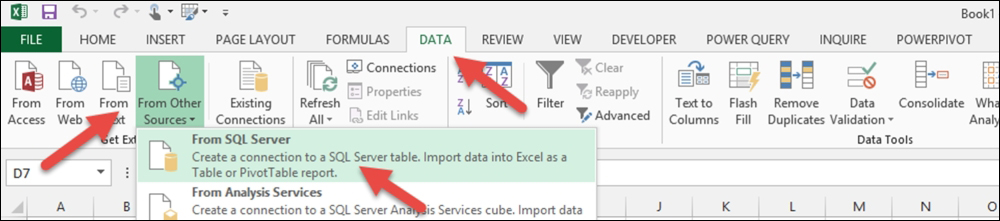
- Open a blank workbook in Excel and, from the menu bar, choose DATA. In the Get External Data portion of the ribbon, choose From Other Sources. Then choose From SQL Server as the source:
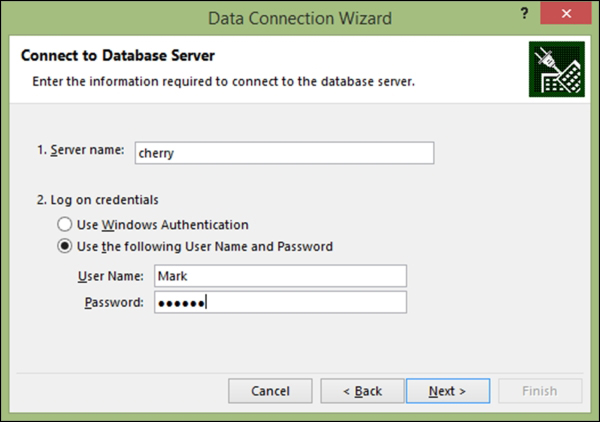
- Enter your Server name and network or AD login credentials. Then click on Next:
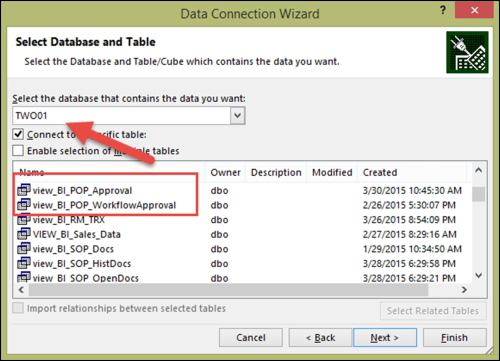
- Select your database from the drop-down list.
- If using the Purchase Order Enhancement approval, select view_BI_POP_Approval
- If using the new Workflow approval, select BI_POP_WorkflowApproval
- Click on Finish:
- On the Import Data window, select PivotTable Report. Make sure that you are putting the data in the Existing worksheet option in the =$A$1 cell. Then, click on OK. The PivotTable canvas will appear.
Let's start the PivotTable report:
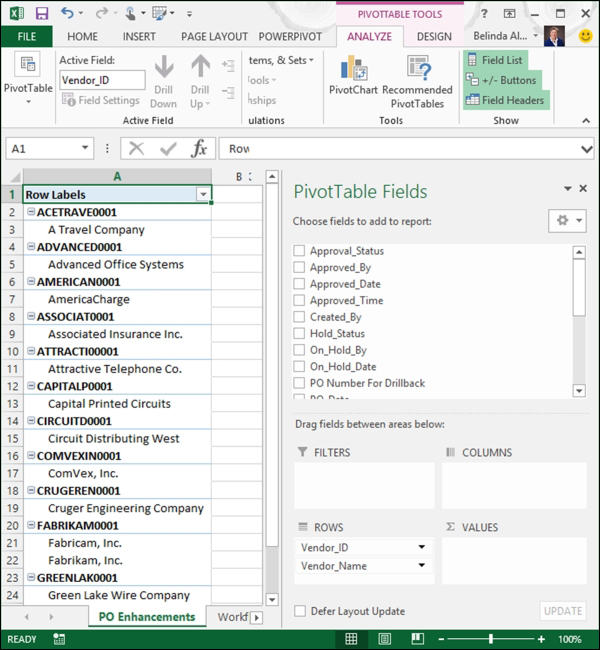
- In the PivotTable Fields list on the right-hand side, drag the Vendor_ID and Vendor_Name fields down to the ROWS area:
- Click anywhere on the PivotTable and new menu options will appear called PIVOTTABLE TOOLS. On the DESIGN tab under PIVOTTABLE TOOLS, choose Report Layout in the Layout section of the ribbon. Then, select Show in Tabular Form:

- On the DESIGN tab under PIVOTTABLE TOOLS, choose Subtotals in the Layout section of the ribbon. Then, select Do Not Show Subtotals:

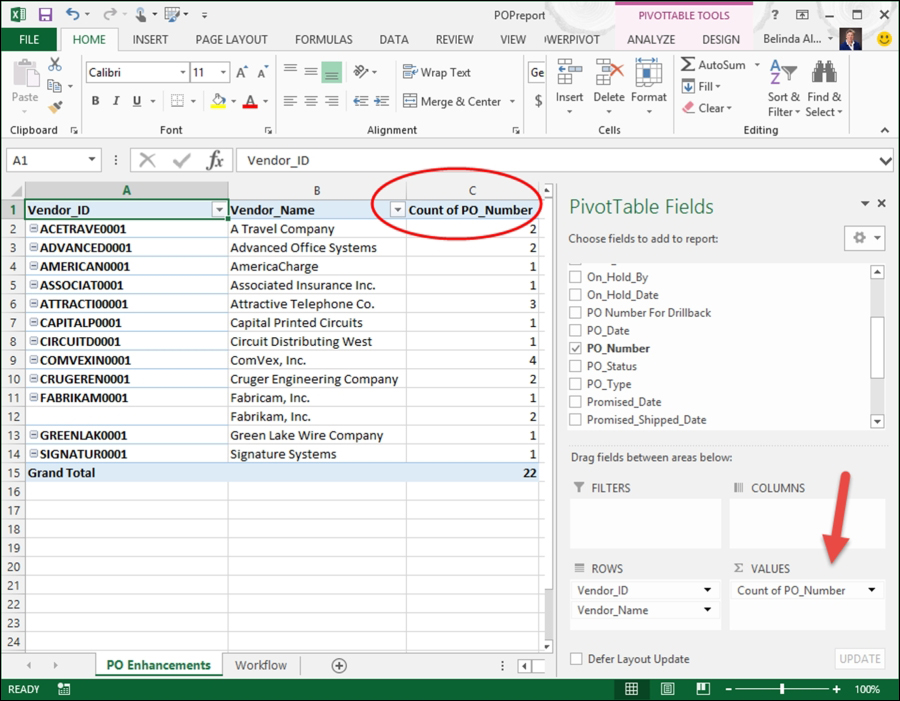
- In the PivotTable Fields list on the right-hand side, drag the PO_Number field down to the VALUES area:
- In the PivotTable Fields list on the right-hand side, drag the PO_Status field down to the COLUMNS area.
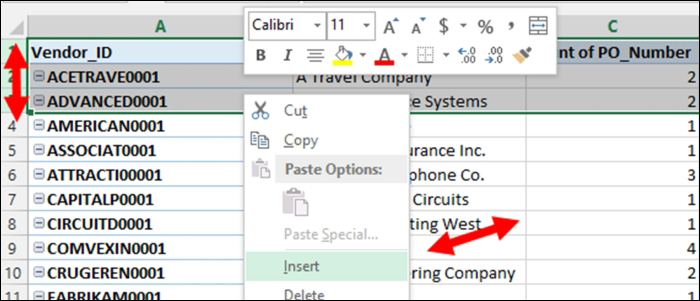
- Insert three blank lines at the top of the report, so we can place slicers above the PivotTable:
- On the ANALYZE tab under PIVOTTABLE TOOLS, choose Insert Slicer in the Filter section of the ribbon:

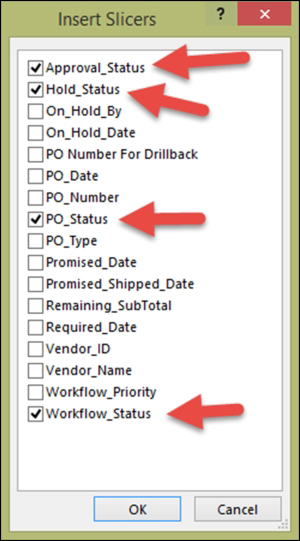
- If you are using the Purchase Order Enhancement approval (and not Workflow), in the Insert Slicers window, select the check boxes for the following: Hold_Status and PO_Status. Then click on OK. (If you are using Workflow, go to the next step.):

- If you are using the new Workflow approval (and not Purchase Order Enhancements), in the Insert Slicers window, select the check boxes for the following: Approval_Status, Hold_Status, PO_Status, and Workflow_Status. Then, click on OK. (If you are using Purchase Order Enhancements, go to the next step.):
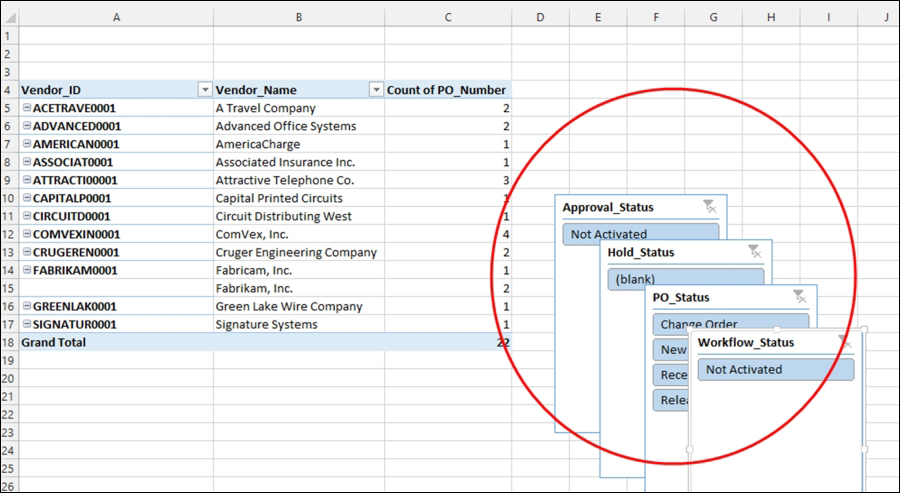
- You'll find that all the slicers you select will appear on the PivotTable in cascading tiles. The following screenshot shows the slicers from the Workflow approval, but the Purchase Order Enhancement approval works the same way:
- Move the slicers to row 1. Change the height of row 1 so the slicers will fit entirely in this row.
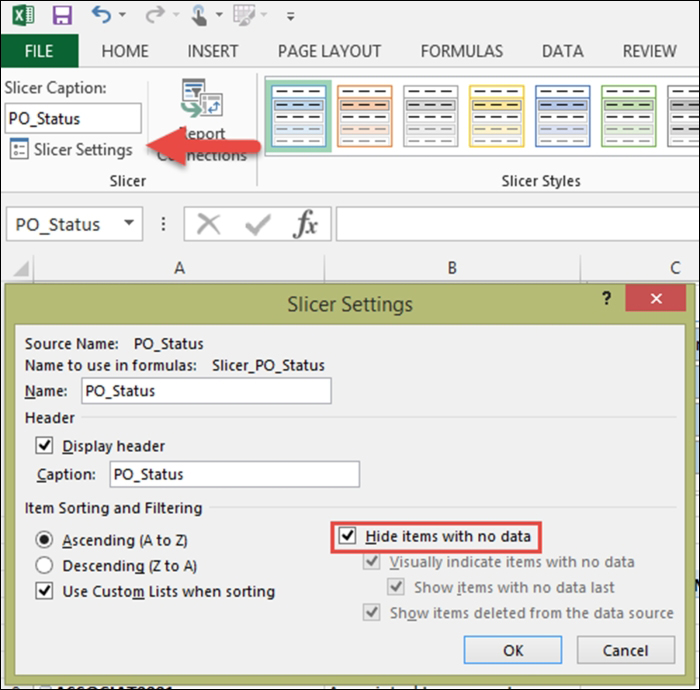
- Now let's clean up each slicer. Click on the first slicer and you'll notice you have a Slicer Tools option on your menu and a new Options tab for the slicer. Click on this new Options tab.
- With the slicer still selected, in the Slicer area of the ribbon, select Slicer Settings and the Slicer Settings window will open. Check the Hide items with no data box, so old unused options will not appear, and then click on OK. This reduces the number of buttons that display, making the slicers easier to use:
- Repeat each of these steps for all the slicers.
- Once each slicer is set up, we'll probably need to reposition them. Do not worry, we do not have to do each one at a time, we can do them all together. Select one slicer, press the Ctrl key on your board and keep it held down until all slicers have been selected. Click on each slicer one at a time. You'll see that each slicer will have handles around it, and then you can let go of the Ctrl key.
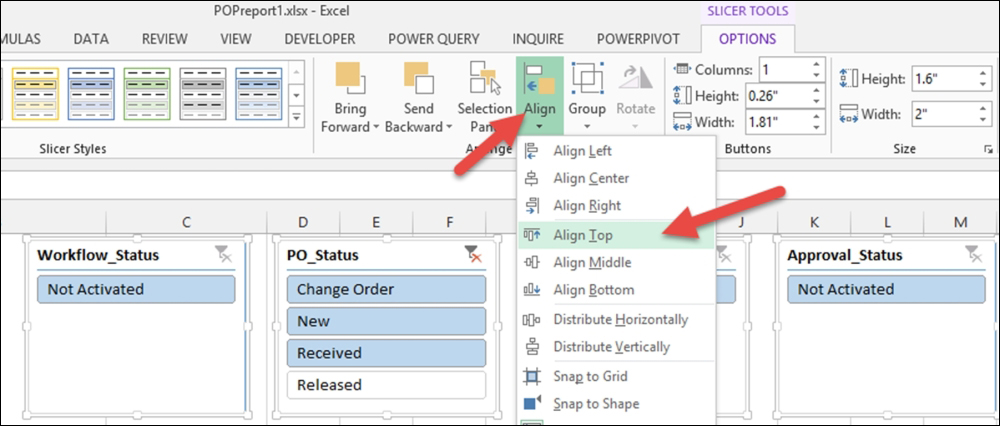
- In the SLICER TOOLS | OPTIONS tab, in the Arrange area of the ribbon, click on Align. From the drop-down list, select Align_Top, which will make all the slicers align with the highest slicer.
- With all the slicers still selected, on the SLICER TOOLS | OPTIONS tab in the Arrange area of the ribbon, click on Align. From the drop-down list, select Distribute_Horizontally, which will make all the slicers align evenly across the space:
- Using some of the formatting lessons from previous chapters, feel free to change the color of the PivotTables and/or slicers and add a title.
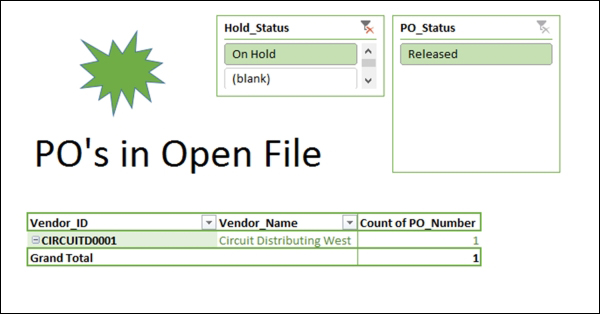
- The following screenshot shows the Workflow Approval final report:

- The following screenshot shows the Purchase Order Enhancement approval report:
By using this report you can quickly and easily review the status of each PO, including additional fields. For example, between the two Approval options, you can see POs that are on hold, who created the PO, Approval date, and so on. To remove POs from this list, simply run the remove completed Purchase Orders routine.