
React AI doesn't come equipped with a patrol script, so we provided one. We'll start with this behavior tree script and look at how it works and how to use it. Here are the steps to reproduce it:
- Create a patrol script.
- Create a patrol AI.
- Set up the NPC patrol.
To start with, we've provided a script for you to use. In it, I started with the last script for pathfinding, and then I extended it to use a similar configuration to the patrol path in Quick Path's patrol script. Here are a couple of key points about this script:
- It is based on the
FollowThePlayerscript from the previous chapter. - You can find the code in the book's contents at
ScriptsReact AIPatrol.cs. - It stores a public array of
Vector3, so the Inspector UI can allow designers to set the waypoints. - Instead of the target being a player, it is set to the next waypoint in the list. Once we are close enough, it selects the next waypoint. Close Enough is the float field that allows the inspector to find it.
- If there are no waypoints left to select, it starts over at the first waypoint.
However, now we need to create the user endpoint. Right-click on a folder in the Project tab and choose Create | Reactable. Name the reactable PatrolAI. In its Inspector UI, add the patrol script as one of the behaviors. Next, right-click on the PatrolAI asset and select Edit Reactable.
In the reactable, right-click on the root element and select AddBranch | Sequence. A sequence repeats all the steps in an order. Under the Sequence option, right-click and navigate to Add | Leaf | Action. Assuming that you only added the patrol script to its behaviors, it should automatically select Patrol.Go as its action. You can add notes to each step to help write a better story of what the AI is doing. When it is this simple, it does not matter so much, but many AIs will become more complex.
Next, the NPC needs to be set up to use this new patrol AI. Find the NPC in the previous chapter's React AI project. You'll need to remove the following AI that was on the NPC before, or create a new NPC. If you create a new NPC, do not forget to add the NavMesh agent so that it can navigate.
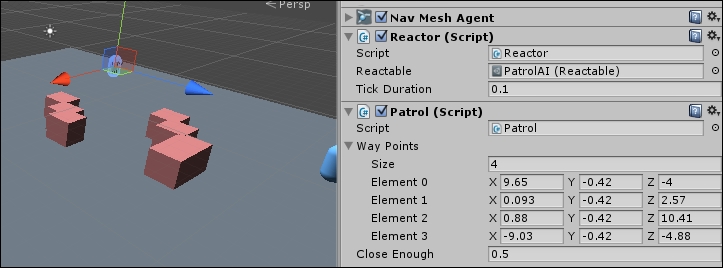
Add two components to the NPC: Reactor and Patrol. In the Reactor component, you will need to set the Reactable value to the Patrol AI asset that we created earlier. Then, in the patrol script, add some waypoints. Like we did for the Quick Path patrol script, we need to set the Vector locations for each of the waypoints.
Now your game should have a character who patrols from point to point.