
RAIN has this section put together pretty well. In reality, we only have one small section to change from the pathfinding demo, especially because the pathfinding demo had actually turned off the patrol feature.
Start with the project for RAIN AI from Chapter 1, Pathfinding. From the menu, navigate to RAIN | Behavior Tree Editor. From the editor, select FollowGreenRoad. Under Sequence is a patrol route node called waypointpatrol; select it. Finally, we have a property called Loop Type. Presently, it is on One Way, which stops at the last waypoint. You can switch it to Ping Pong or Loop, as shown in the following screenshot:
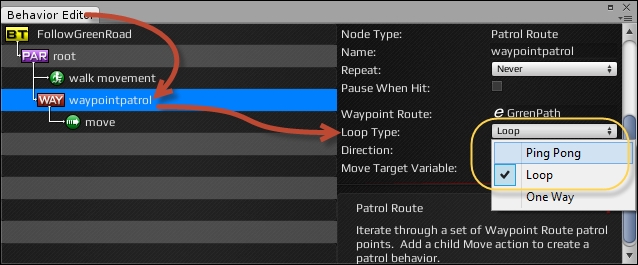
Ping Pong bounces you back and forth on the path, while Loop connects the last waypoint to the first to start over.
This works when creating a typical patrolling behavior, where a character loops along a path. However, what if we want to have a character patrol an area by walking around back and forth to different points without always following the same route? In RAIN AI, we can do this by using a waypoint network instead of a waypoint graph and updating our behavior tree to randomly pick different points in the level to go to.
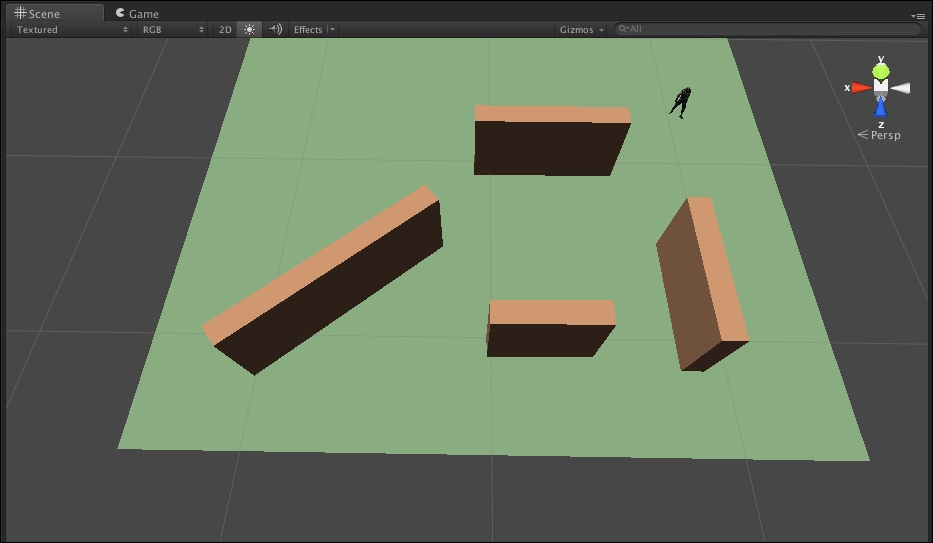
To illustrate this, create a new scene, and like in our current patrol example, add a character and some blocks and create a navigation mesh. Separate the blocks a bit so that we can add different paths in between them. You can refer to the next screenshot to view this setup:
In this demo, we will have the character walk to different points outside the walls, but when patrolling, the character won't go in a circle outside the walls; instead, it will always walk through the middle. To do this, we will need a waypoint network similar to the one shown in the following screenshot:
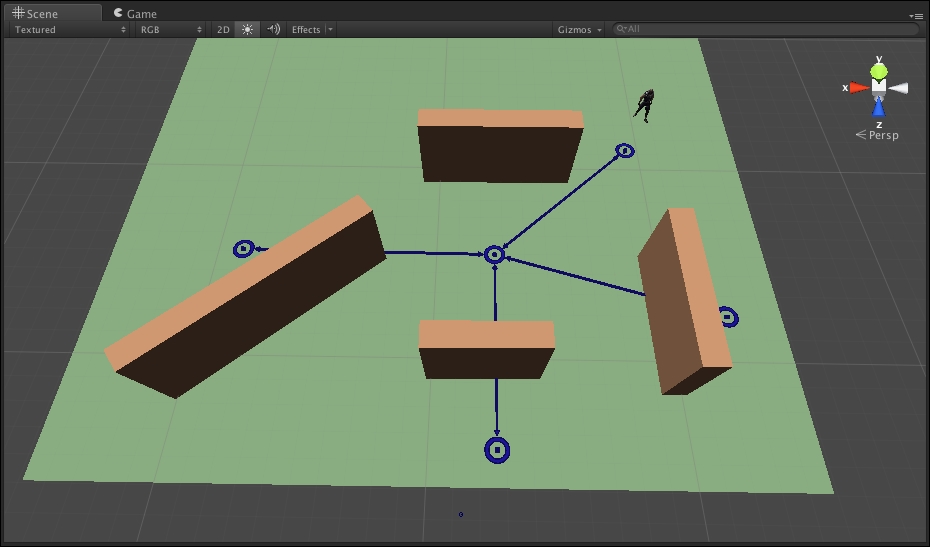
To add a waypoint, navigate to RAIN | Create Waypoint Network. Then, set up the network similar to how you set up a waypoint route, by creating different points. However, unlike a waypoint route, with a waypoint network you can also connect different points. To connect two waypoints, select them by pressing Ctrl + Shift and left-clicking the mouse and then click on Connect in the RAIN Waypoint Network component menu. Connect the points in a plus sign shape as illustrated in the previous screenshot. With this network, to walk from the side of one wall to another, the character will always need to walk through the middle of the scene.
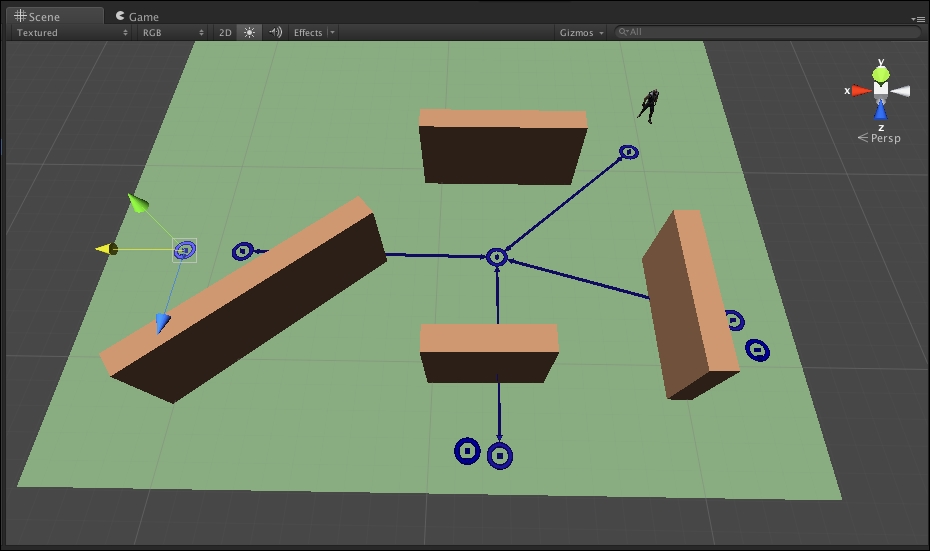
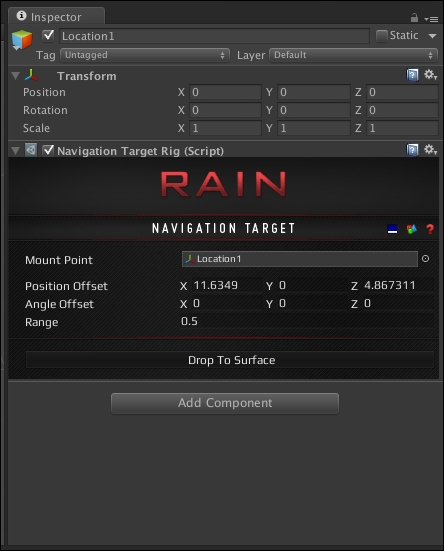
The network waypoint describes how a character should walk to different spots on a level, but it actually doesn't contain the different points we can tell the AI character to go to. If we want to tell our character to go to a specific location, we need what RAIN calls a navigation target. A navigation target is just an object that contains a point in the scene that we can use with the rest of the AI system. You can create navigation targets by navigating to RAIN | Create Navigation Target and place them like you would place a waypoint. Create three navigation targets and place them on the side of three walls. We will follow a convention used in other RAIN examples and name the navigation targets Location1, Location2, and Location3, as shown in the following screenshot:
The Inspector panel should look like the following screenshot:
This is all of the scene setup that we need to specify routes and locations for the character to walk. However, we will need to customize the behavior tree to randomly choose different points to patrol to.
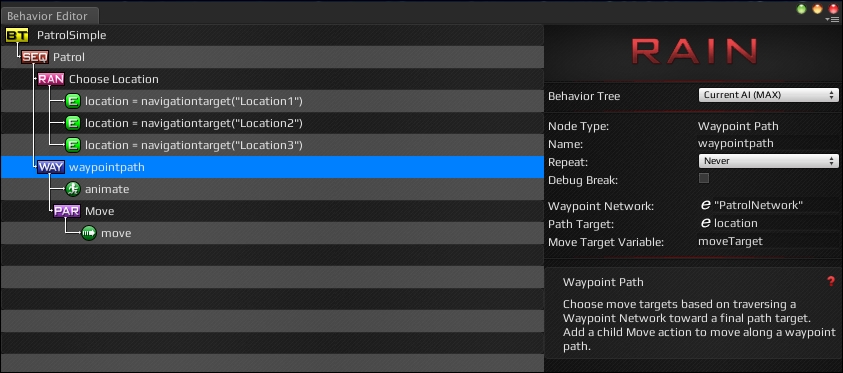
Create a new behavior tree for our character and call it Patrol. Open the behavior tree editor, and below the new root node, create a Random node by right-clicking on the root and navigating to Create | Decisions | Random. This creates a node that randomly selects one of its children to execute. Don't worry too much about how the different nodes work in the RAIN behavior tree for now; we will go into more detail about them in the next chapter. For now, create three expression nodes as children of the Random node by right-clicking on Random and navigating to Create | Actions | Expression. An expression node allows us to execute a single statement, which is called an expression in RAIN. Rename the expression nodes Choose Location 1, Choose Location 2, Choose Location 3. Then, in the expression field for the nodes, set the first to location = navigationtarget(Location1), and do the same for the other location expression nodes, using numbers 2 and 3. These expression nodes create a variable location that is a randomly determined navigation target that we can use as a target to walk to. The setup should look like this:

All that is left is to add nodes to walk to the target. Right-click on the root node and navigate to Create | Decisions | Waypoint Path (not waypoint patrol like last time). In the waypoint path node, set the Waypoint Network field to PatrolNetwork (with quotes) to tell it which network to use. Set the Path Target field to location (without quotes), which is the variable we stored our random target to walk to. Finally, set up the rest of the tree as shown earlier, with an animation node and a child Move node. The final setup should look as shown in the following screenshot:
If you run the project now, the character will randomly patrol the area of the level by randomly walking from one navigation target location to the next and always walking through the middle of the level.