
Our AI enemy will just keep attacking the player as long as it is close enough to the ship. However, this isn't very realistic; we'd like the enemy ship to attack for a little bit but then duck and head for cover. We could have this hiding behavior be based on a response to the player fighting back, but for this demo, we will make it a constant value of 5 seconds; after attacking the player for 5 seconds, it will hide.
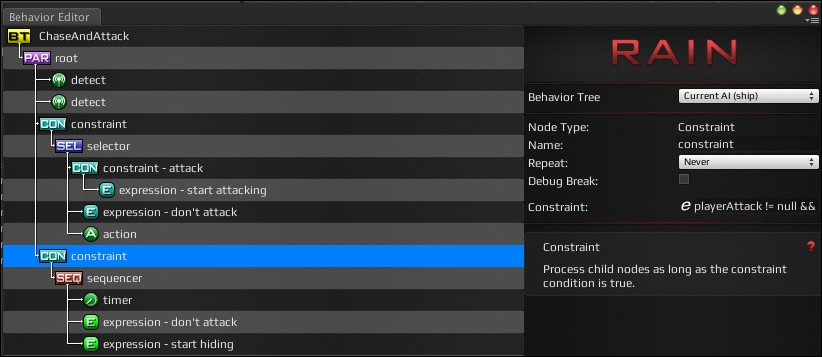
To set this up, first we'll add an isHidingbool variable to our behavior tree that is set to true after 5 seconds of attacking. Create a new constraint node under the root parallel node with the playerAttack != null && isHiding == false expression. This node's children start when playerAttack is valid and we are not already hiding from the player. Add a sequencer node under this constraint so it will go through all of its children. The first child needs to be a new timer node with the Seconds value of 5 and Returns set to Success. Next, copy the don't attack node and add it below the timer so that the enemy won't attack as it's running to hide.
Then, add another expression node to set isHiding to true; its expression value should be isHiding = true. The behavior tree should be like the following screenshot:
Finally, we need to have hiding spots to go to. These are often predefined; in shooting games, hiding spots are defined based on paths the player is expected to take. To do this, create a few navigation targets by going to RAIN | Create Navigation Target and add them to some good cover spots for the enemy. Here's how they can be arranged:
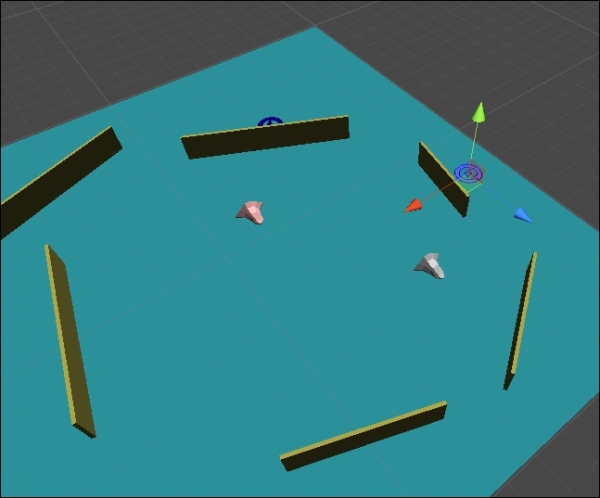
This is how we set up navigation targets for hiding spots.
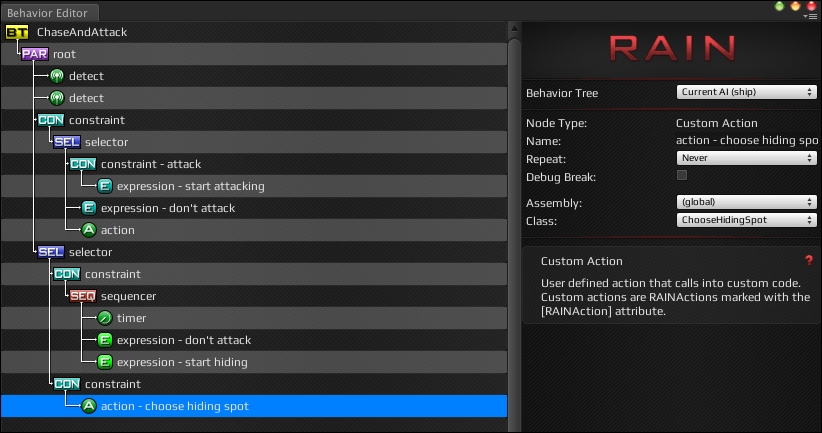
Next, we need to have the AI choose a point to take cover. Lastly, we need to select and move to a hiding spot. To organize the tree better, add a selector node above the hiding constraint node. Then, add another constraint node below the selector node and create a custom action node with a new ChooseHidingSpot class.
The tree should look like the following screenshot:
The following is the code for our action to choose a hiding spot:
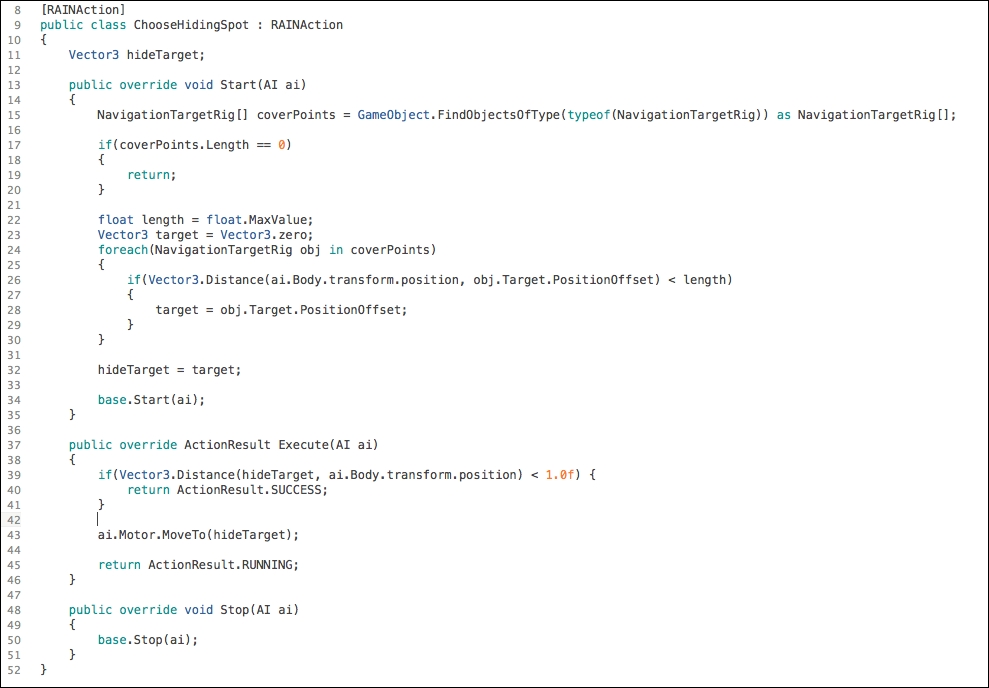
Here, when we start the action, we find all the NavigationTargetRig objects and store them in the coverPoints array. Then, we go through each target and find the one closest to the enemy. Once we have the closest target, we store it in hideTarget and start moving to it.
As an addition to this, we can have the enemy start attacking again after hiding. Add the following line right before ActionResult.SUCCESS is returned:
ai.WorkingMemory.SetItem("isHiding", false);This just updates the memory to set the hiding value to false and the attack will restart. This is a simple extension and the attack can be easily extended to better attack behaviors.