
Now that we know how navigation mesh generations works, let's look at the different parameters you can set to generate them in more detail.
We'll look at how to do these parameters with RAIN using the following steps:
- Open one of our previous scenes or create a new one with a floor and some blocks for walls.
- Then, go to RAIN | Create NavMesh. Also, right-click on the RAIN menu and choose Show Advanced Settings. The setup should look something like the following screenshot:
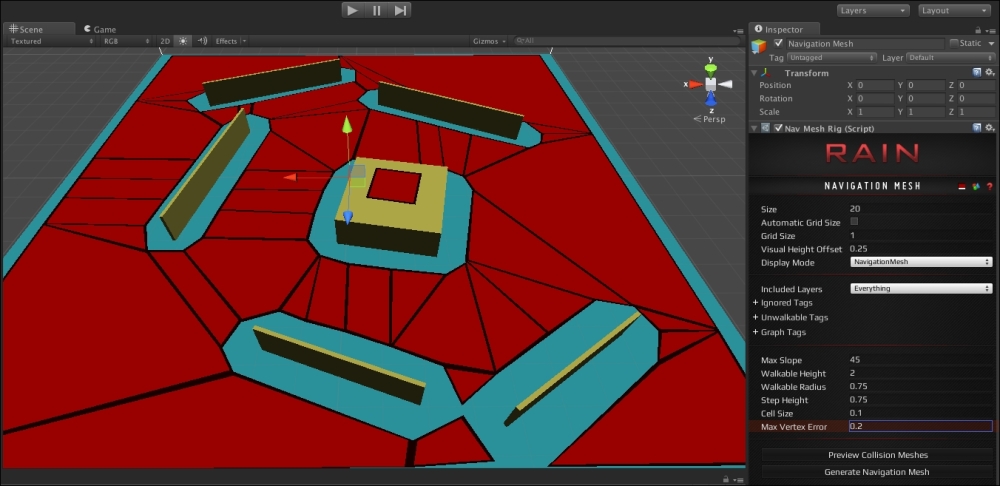
The NavMesh setup
Now let's look at some of the important parameters:
- Size: This is the overall size of the navigation mesh. You'll want the navigation mesh to cover your entire level and use this parameter instead of trying to scale up the navigation mesh through the Scale transform in the Inspector window. For our demo here, set the Size parameter to 20.
- Walkable Radius: This is an important parameter to define the character size of the mesh. Remember, each mesh will be matched to the size of a particular character, and this is the radius of the character. You can visualize the radius for a character by adding a Unity Sphere Collider script to your object (by going to Component | Physics | Sphere Collider) and adjusting the radius of the collider.
- Cell Size: This is also a very important parameter. During the voxel step of the Recast algorithm, this sets the size of the cubes to inspect the geometry. The smaller the size, the more detailed and finer the mesh, but the longer the processing time for Recast. A large cell size makes computation fast but loses detail.
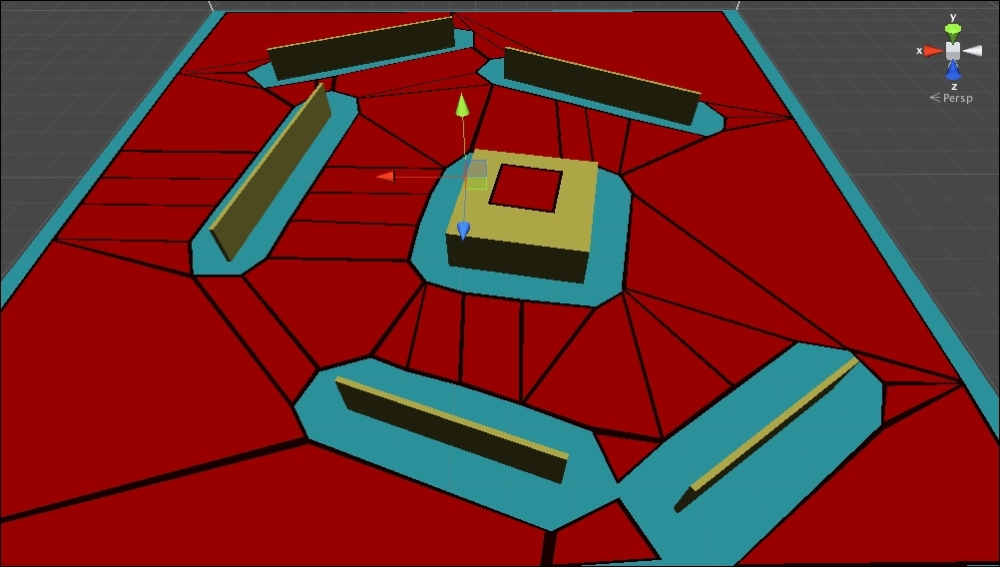
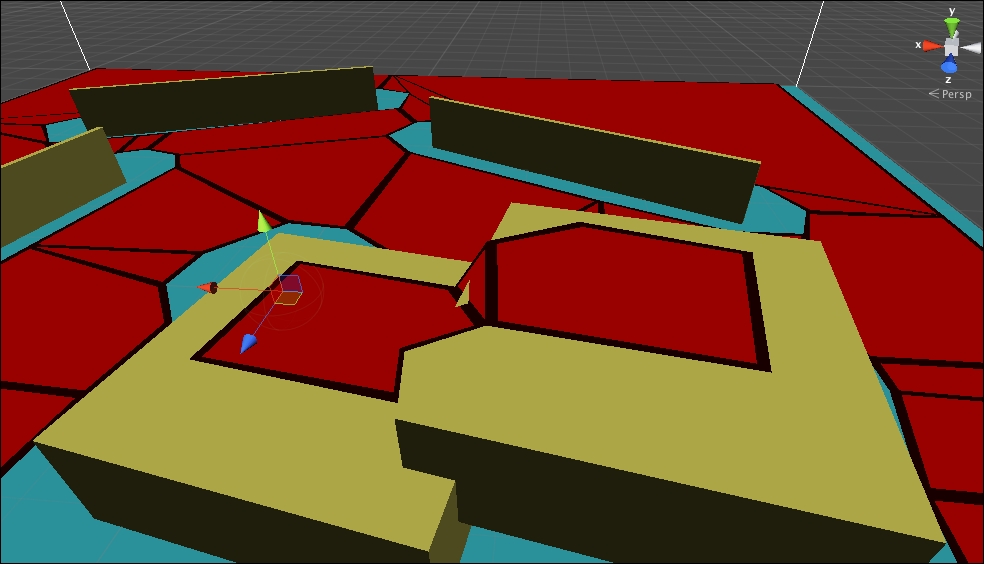
For example, here is a NavMesh from our demo with a cell size of 0.01:

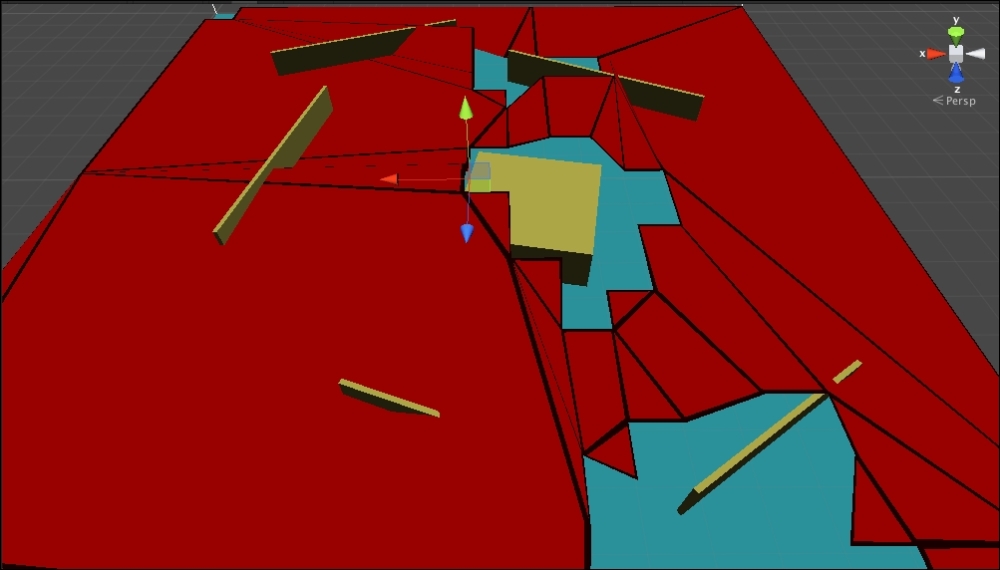
You can see the finer detail here. The following is the navigation mesh generated with a cell size of 0.1:
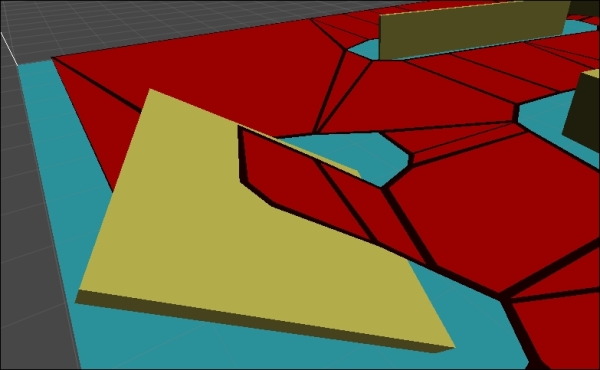
Note the difference between the two screenshots. In the former, walking through the two walls lower down in our picture is possible, but in the latter with a larger cell size, there is no path even though the character radius is the same. Problems like this become greater with larger cell sizes. The following is a navigation mesh with a cell size of 1:
As you can see, the detail becomes jumbled and the mesh itself becomes unusable. With such differing results, the big question is how large should a cell size be for a level? The answer is that it depends on the required result. However, one important consideration is that as the processing time to generate one is done during development and not at runtime, even if it takes several minutes to generate a good mesh then it can be worth it to get a good result in the game.
The Size, Walkable Radius, and Cell Size parameters are the most important parameters when generating the navigation mesh, but there are more that are used to customize the mesh further:
- Max Slope: This is the largest slope that a character can walk on. This is how much a piece of geometry that is tilted can still be walked on. If you take the wall and rotate it, you can see it is walkable:
The preceding is a screenshot of a walkable object with a slope.
- Step Height: This is how high a character can step from one object to another. For example, if you have steps between two blocks, as shown in the following screenshot, this would define how far in height the blocks can be apart and whether the area is still considered walkable:
This is a screenshot of the navigation mesh with the step height set to connect adjacent blocks.
- Walkable Height: This is the vertical height that is needed for the character to walk. For example, in the previous screenshot, the second block is not walkable underneath because of the walkable height. If you raise it to at least one unit off the ground and set the walkable height to 1, the area underneath would become walkable:
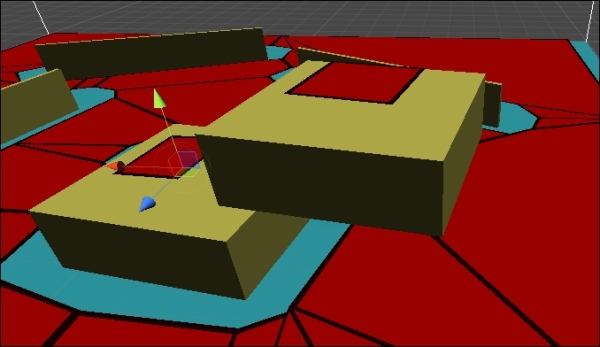
You can see a screenshot of the navigation mesh with the walkable height set to allow going under the higher block.
These are the most important parameters. There are some other parameters related to the visualization and to cull objects. We will look at culling more in the next section.